Introduction
This document describes implementing multitenancy (multi-domain) within the Cisco FMC while leveraging Cisco ISE for centralized RADIUS authentication.
Prerequisites
Requirements
It is recommended to have knowledge of these topics:
- Cisco Secure Firewall Management Center initial configuration via GUI and/or shell.
- Full Admin privileges in the Global domain of the FMC to create subdomains and external authentication objects.
- Configuring authentication and authorization policies on ISE.
- Basic RADIUS knowledge
Components Used
- Cisco Secure FMC: vFMC 7.4.2 (or later recommended for multidomain stability)
- Domain Structure: A three-level hierarchy (Global > Second-Level Subdomains).
- Cisco Identity Services Engine: ISE 3.3
The information in this document was created from the devices in a specific lab environment. All of the devices used in this document started with a cleared (default) configuration. If your network is live, ensure that you understand the potential impact of any command.
Background Information
In large-scale enterprise environments or Managed Security Service Provider (MSSP) scenarios, it is often necessary to segment network management into distinct administrative boundaries. This document describes how to configure the FMC to support multiple domains—specifically for a real-world example where an MSSP manages two clients: Retail-A and Finance-B. By using external RADIUS authentication via Cisco ISE, administrators can ensure that users are automatically granted access only to their respective user domains based on their centralized credentials.
The Cisco Secure Firewall system uses Domains to implement multitenancy.
- Domain Hierarchy: The hierarchy starts at the Global domain. You can create up to 100 subdomains in a two or three-level structure.
- Leaf Domains: These are domains at the bottom of the hierarchy with no further subdomains. Crucially, each managed FTD device must be associated with exactly one leaf domain.
- RADIUS Class Attribute (Attribute 25): In a multidomain setup, the FMC uses the RADIUS Class attribute returned by ISE to map an authenticated user to a specific Domain and User Role. This allows a single RADIUS server to dynamically assign users to different user segments (example, Retail-A vs. Finance-B) upon login.
Configuration
ISE Configuration
Add your Network Devices
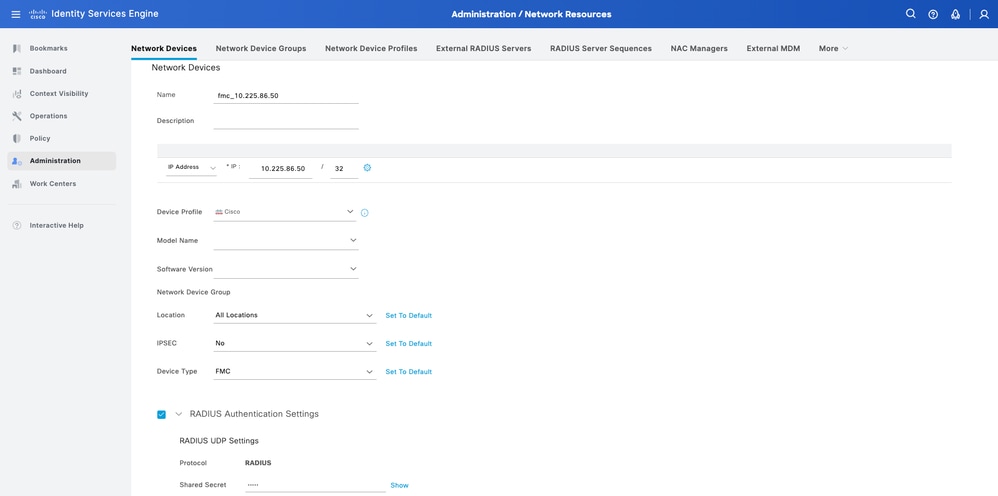
Step 1. Navigate to Administration > Network Resources > Network Devices > Add.

Step 2. Assign a Name to the network device object and insert the FMC IP address.
Check the RADIUS checkbox and define a Shared Secret. The same key must be used later to configure the FMC. Once done, click Save.
Create the Local User Identity Groups and Users
Step 3. Create the required User Identity Groups. Navigate to Administration > Identity Management > Groups > User Identity Groups > Add.
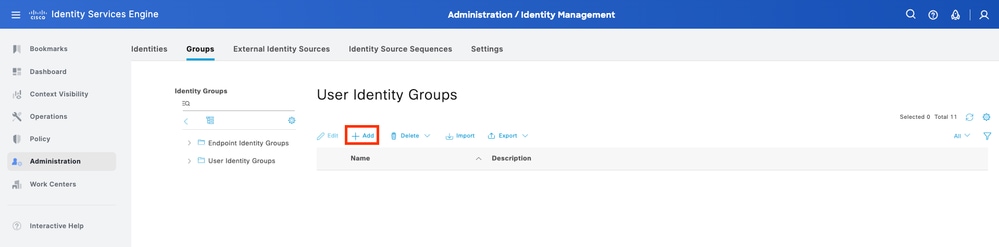
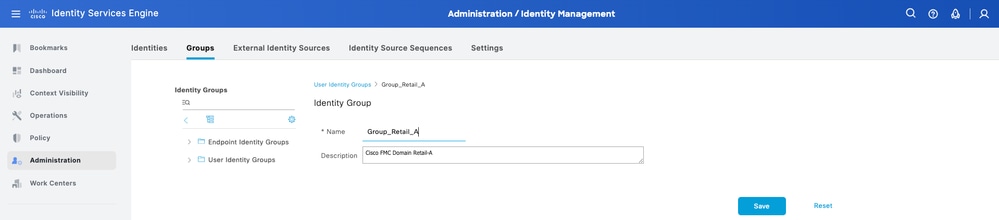
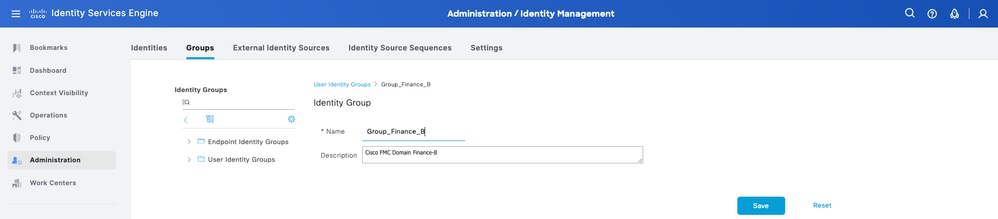
Step 4. Give each group a name and Save individually. In this example, you are creating a group for Administrator users. Create two groups: Group_Retail_A and Group_Finance_B.
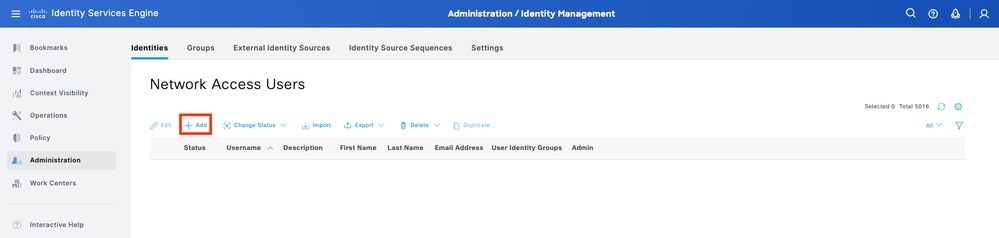
Step 5. Create the local users and add them to their correspondent group. Navigate to Administration > Identity Management > Identities > Add.
Step 5.1. First create the user with Administrator rights. Assign a name to it admin_retail, password and the group Group_Retail_A.
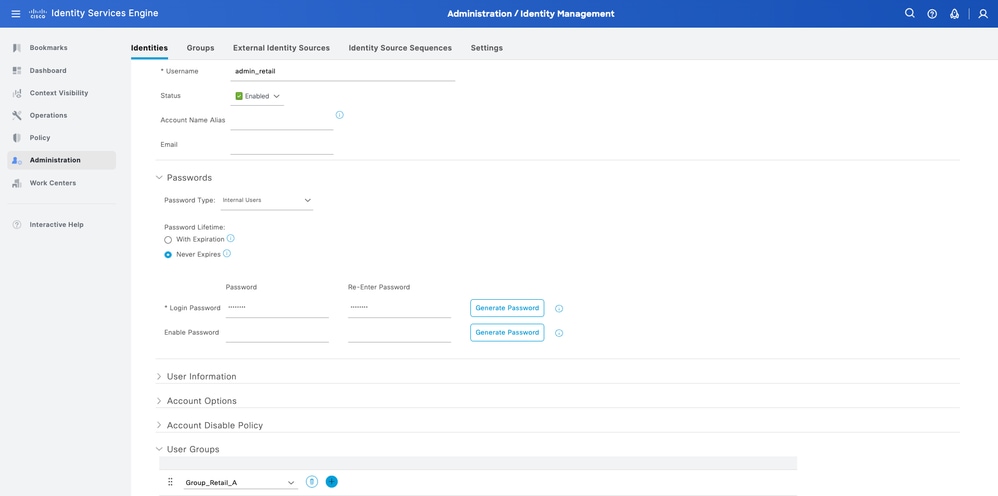
Step 5.2. First create the user with Administrator rights. Assign a name to it admin_finance, password and the group Group_Finance_B.

Create the Authorization Profiles
Step 6. Create the Authorization Profile for the FMC Web Interface Admin user. Navigate to Policy > Policy Elements > Results > Authorization > Authorization Profiles > Add.

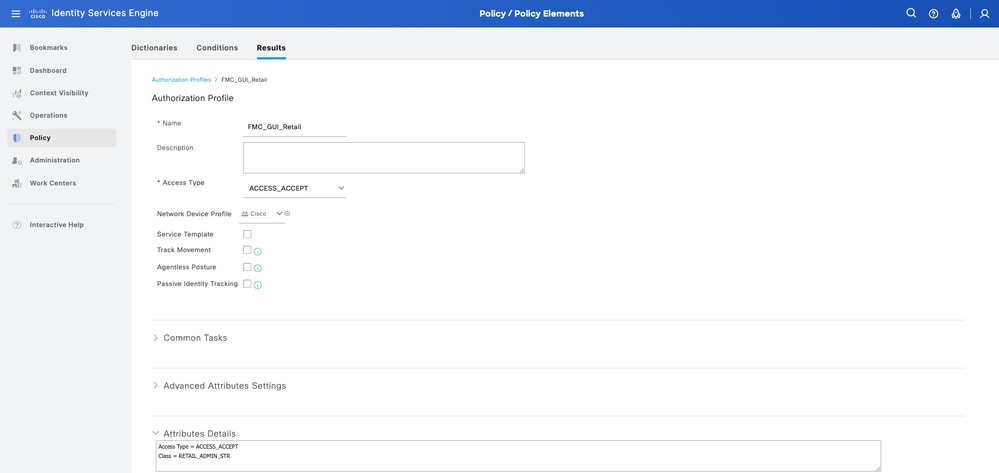
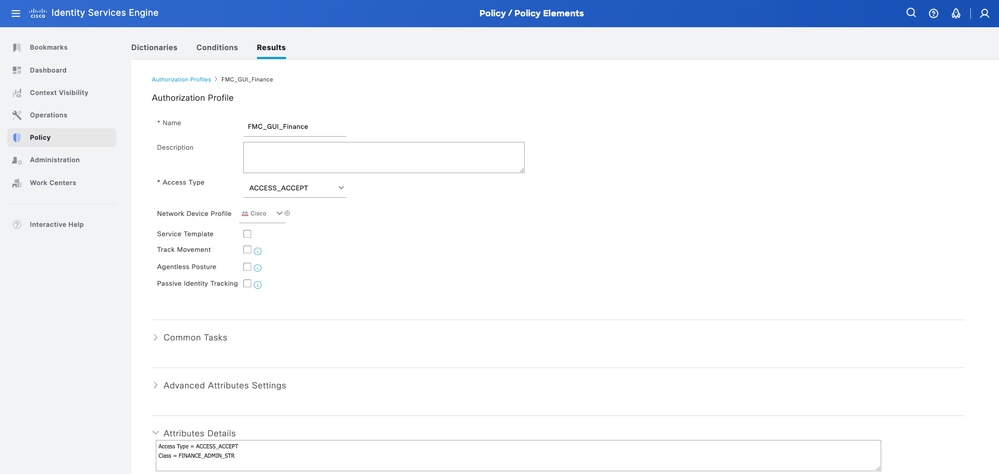
Define a name for the Authorization Profile, leave Access Type as ACCESS_ACCEPT.
Under Advanced Attributes Settings add a Radius > Class--[25] with the value and click Submit.
Step 6.1. Profile Retail: Under Advanced Attributes Settings, add Radius:Class with the value RETAIL_ADMIN_STR.

Tip: Here RETAIL_ADMIN_STR can be anything; make sure same value needs is put on FMC side as well.
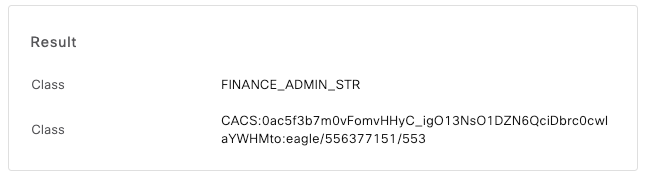
Step 6.2. Profile Finance: Under Advanced Attributes Settings, add Radius:Class with the value FINANCE_ADMIN_STR.
Tip: Here FINANCE_ADMIN_STR can be anything; make sure same value is put on FMC side as well.
Add a New Policy Set
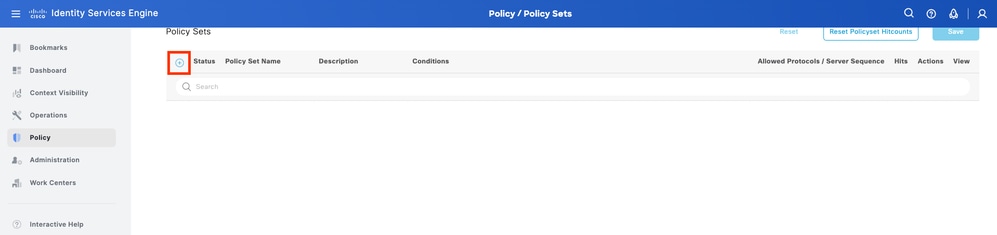
Step 7. Create a Policy Set matching the FMC IP address. This is to prevent other devices from granting access to the users. Navigate to Policy > Policy Sets > Plus sign icon placed at the upper left corner.
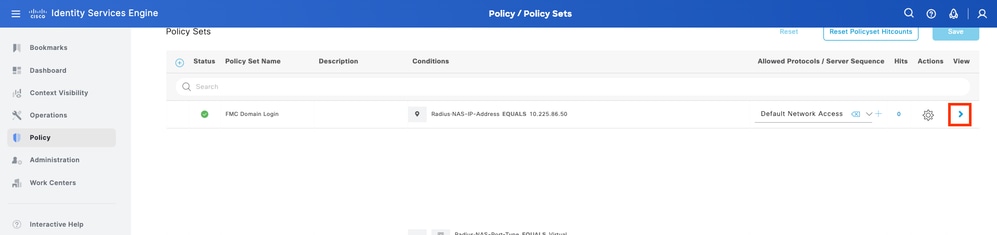
Step 8.1. A new line is placed at the top of your Policy Sets.
Name the new policy and add a top condition for RADIUS NAS-IP-Address attribute matching the FMC IP address. Click Use to keep the changes and exit the editor.

Step 8.2. Once completed, hit Save.
Step 9. View the new Policy Set by hitting the set icon placed at the end of the row.
Expand the Authorization Policy menu and push the Plus sign icon to add a new rule to allow the access to the user with admin rights. Give it a name.
Set the conditions to match the Dictionary Identity Group with Attribute Name Equals and choose User Identity Groups. Under the Authorization Policy, create rules:
- Rule 1: If User Identity Group equals Group_Retail_A, assign the Profile Retail.
- Rule 2: If User Identity Group equals Group_Finance_B, assign the Profile Finance.
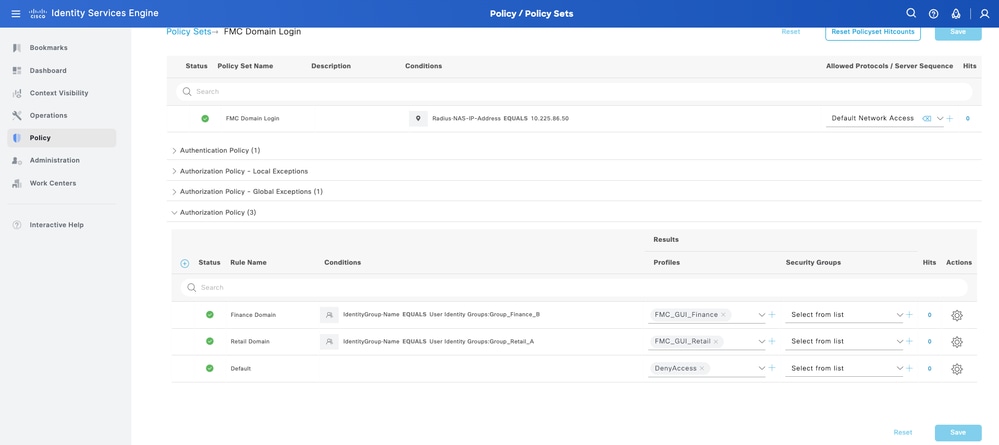
Step 10. Set the Authorization Profiles respectively for each rule and hit Save.
FMC Configuration
Add your ISE RADIUS Server for FMC Authentication
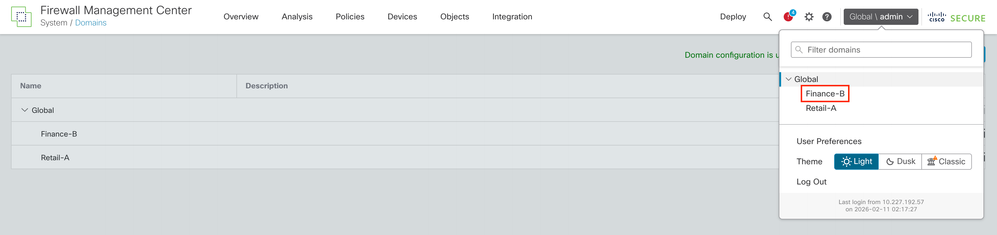
Step 1. Establish the Domain Structure:
- Log into the FMC Global domain.
- Navigate to Administration > Domains.
- Click Add Domain to create Retail-A and Finance-B as subdomains of Global.

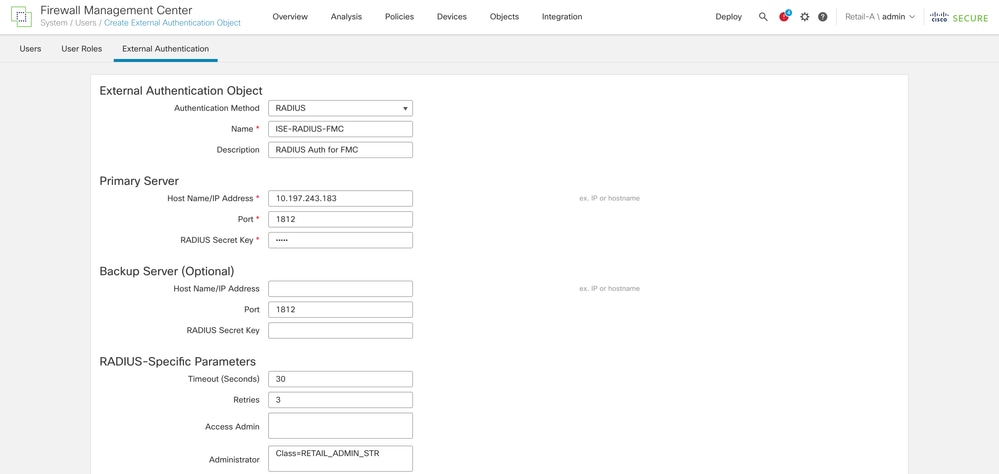
Step 2.1. Configure the External Authentication Object under Domain to Retail-A
- Switch Domain to Retail-A.
- Navigate to System > Users > External Authentication.
- Select Add External Authentication Object and choose RADIUS.
- Enter the ISE IP address and the Shared Secret configured earlier.
- Enter the RADIUS-Specific Parameters > Administrator > class=RETAIL_ADMIN_STR
Tip: Use the same value for class as configured under Authorization Profiles of ISE.
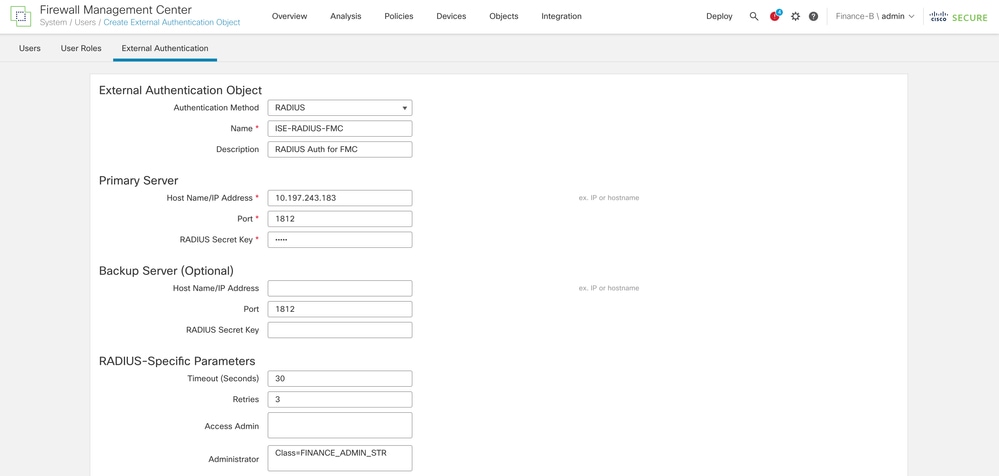
Step 2.2. Configure the External Authentication Object under Domain to Finance-B
- Switch Domain to Finance-B.
- Navigate to System > Users > External Authentication.
- Select Add External Authentication Object and choose RADIUS.
- Enter the ISE IP address and the Shared Secret configured earlier.
- Enter the RADIUS-Specific Parameters > Administrator > class=FINANCE_ADMIN_STR
Tip: Use the same value for class as configured under Authorization Profiles of ISE.
Step 3. Activate Authentication: Enable the object and set it as the Shell Authentication method. Click Save and Apply.
Verification
Cross-Domain Login Test
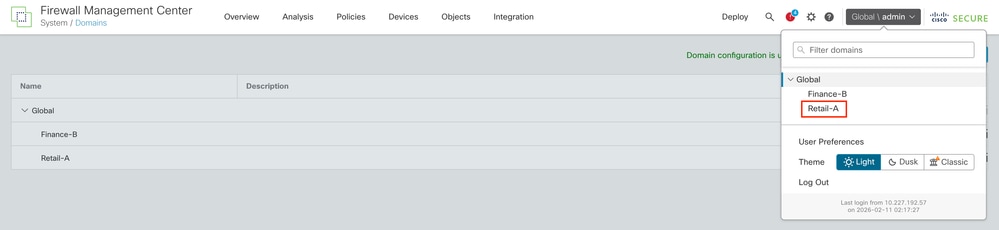
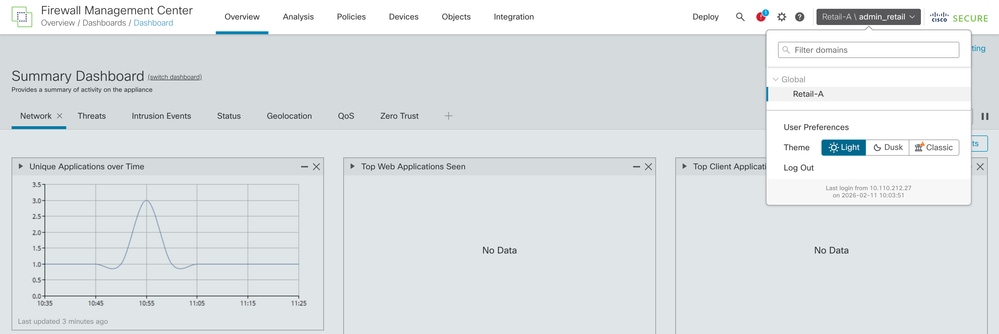
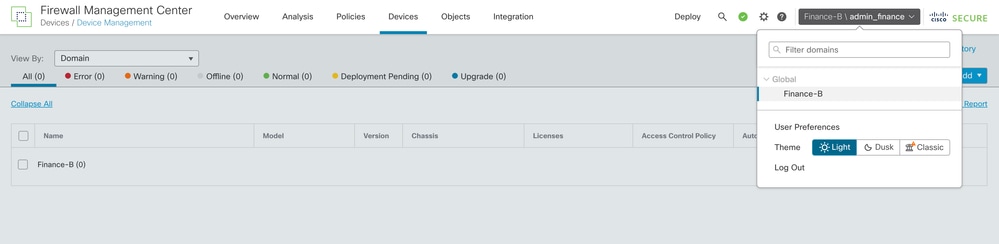
- Attempt to log into the FMC web interface using admin_retail. Verify that the Current Domain displayed at the top right of the UI is Retail-A.
Tip: When logging in to a specific domain, use the username format domain_name\radius_user_mapped_with_that_domain.
For example, if the Retail admin user needs to log in, the username must be Retail-A\admin_retail and the corresponding password.
- Log out and log in as admin_finance. Verify the user is restricted to the Finance-B domain and cannot see Retail-A devices.
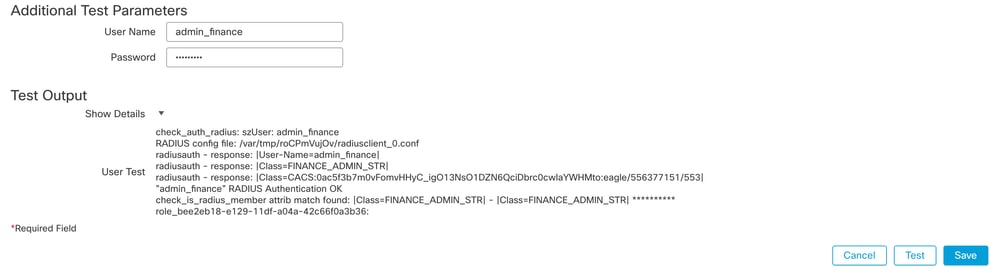
FMC Internal Testing
Navigate to the RADIUS server settings in the FMC. Use the Additional Test Parameters section to enter a test username and password. A successful test must show a green Success message.
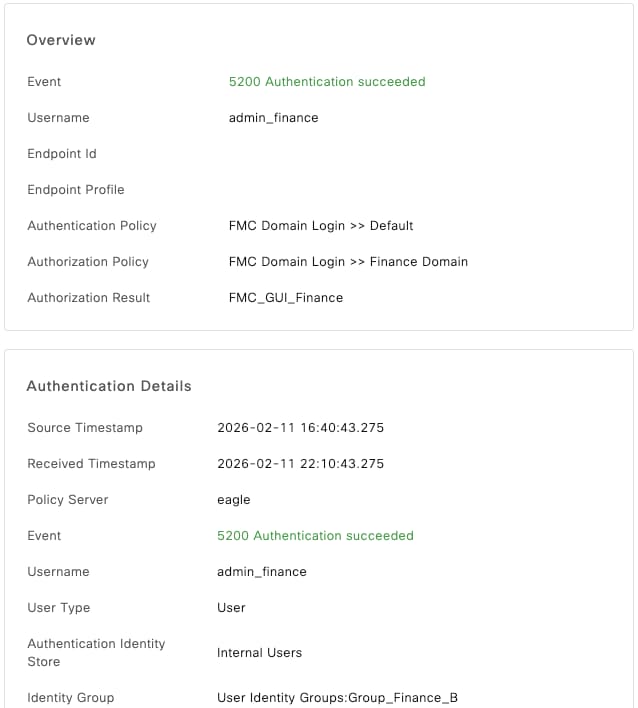
ISE Live Logs
- In Cisco ISE, navigate to Operations > RADIUS > Live Logs.
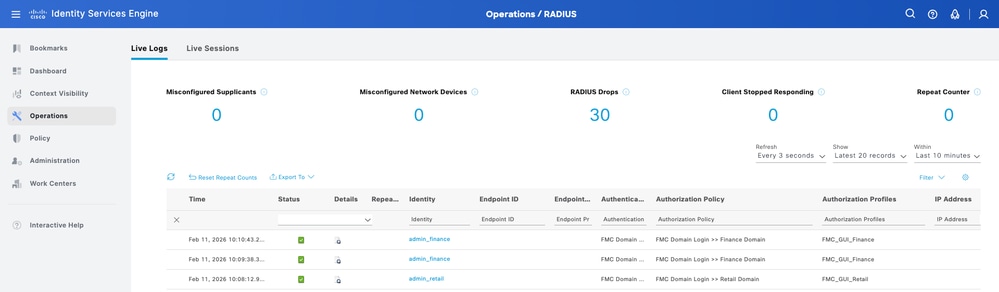
- Confirm that the authentication requests show a Pass status and that the correct Authorization Profile (and associated Class string) was sent in the RADIUS Access-Accept packet.
Related Information
Configure FMC and FTD External Authentication with ISE as a RADIUS Server
 Feedback