Configure SAML SSO External Authentication with AD FS for ESA and SMA
Available Languages
Contents
Introduction
This document describes how to configure Active Directory Federation Services as SAML identity provider for external authentication on Cisco ESA and SMA.
Prerequisites
This document provides a view of the third-party application that engineers cannot otherwise see.
- Configuration steps for Security Assertion Markup Language (SAML) external authentication with Active Directory Federation Services (AD FS) 2012 and 2016 for Cisco Email Security Appliance (ESA) and Security Management Appliance (SMA) latest versions.
- Basic lab-based steps that do not include specialized deployment-specific configurations.
- A working example from a lab environment that can differ from a production deployment.
Requirements
- Microsoft Active Directory Federation Services (AD FS) 2012 or 2016
- Cisco Email Security Appliance (ESA) and Security Management Appliance (SMA) latest version.
Components Used
The information in this document was created from the devices in a specific lab environment. All of the devices used in this document started with a cleared (default) configuration. If your network is live, ensure that you understand the potential impact of any command.
Steps for ADFS IDP Configuration for SAML
Configure the Relying Party Trust
Use one of two options to create the relying party trust in AD FS.
Method A: Create the Relying Party Trust by Importing SP Metadata
- Open the AD FS Management console from Administrative Tools.
- In the AD FS Management console, expand Trusted Relationships, right-click Relying Party Trusts, then select Add Relying Party Trust.
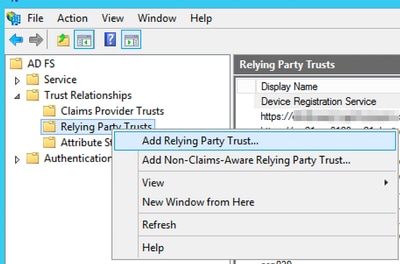 Add Relying Party Trust
Proceed using one of two options:
- Option A: Import data about the relying party from a file. Upload the ESA or SMA service provider (SP) metadata.xml file.
- Option B: Enter data about the relying party manually. This option guides you through the manual configuration.
Option A: Import data about the relying party from a file. Upload the ESA or SMA service provider (SP) metadata.xml file.
- Select the option to import data about the relying party from a file, and then select Next.
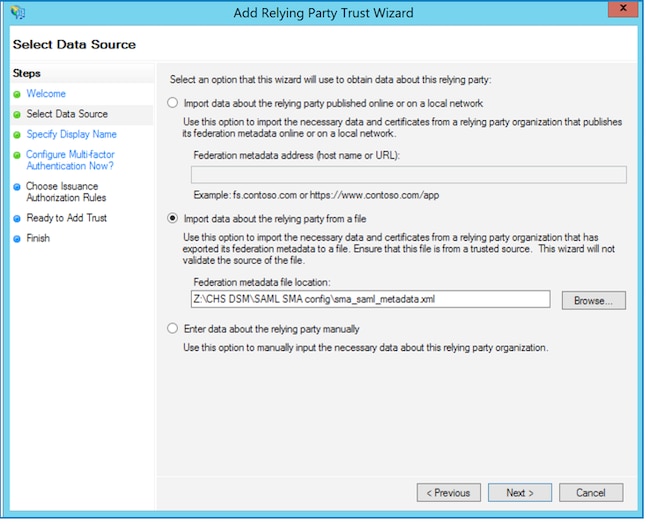 Import the ESA/SMA Metadata File
 - Specify a display name to identify this relying party trust, and then select Next twice.
- For issuance authorization rules, select Permit all users, then select Next.
- On the Ready to Add Trust page, accept the default settings, then select Next.
- Select Finish. This opens the Edit Claim Rules dialog for the relying party trust, which is covered in Issuance Transform Rules - Claims.
Relying Party Trust Properties - Endpoints
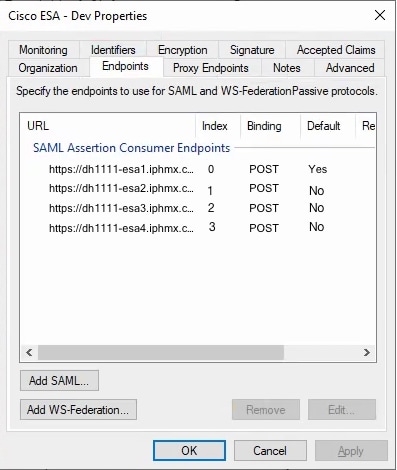
Perform these steps only if multiple ESAs are present in a cluster.
- Open Relying Party Trust Properties > Endpoints.
- Add each ESA reachable URL address, and then select OK.
- The index values count from 0, that is, 0, 1, 2, and 3.
- Set only one entry to Default = Yes.
- Set the remaining entries to Default = No.
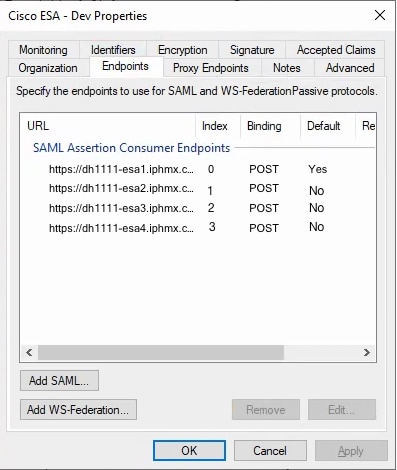 Relying Party Trust Properties - Endpoints
Option B: Enter data about the relying party manually. This option guides you through the manual configuration.
- Select Enter data about the relying party manually.
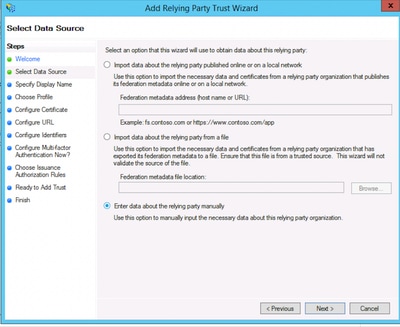 Add Relying Party Manually
 - Enter a display name for the service provider, for example, ESA_SP.
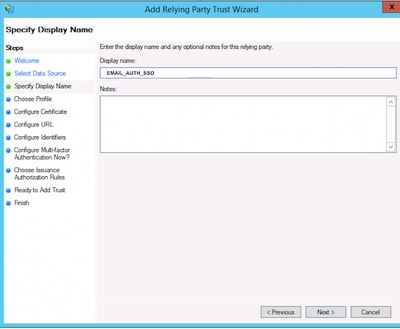 Create a name for the Service Provider Profile
 - Choose the profile option AD FS profile.
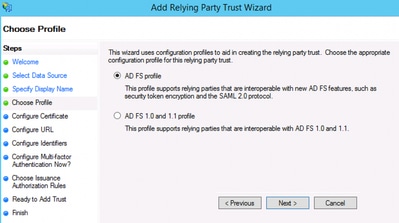 AD FS Profile Option to Utilize SAML 2.0
 - Load the public certificate from the ESA service provider (SP) configuration.
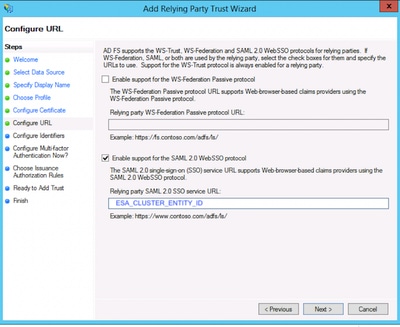
- For Configure URL, choose Enable support for the SAML 2.0 single-sign-on (SSO).
- Enter the Relying Party SAML 2.0 SSO service URL with the SP profile Entity ID value.
 Issuance Authorization Rules - -Permit All Users
 - For issuance authorization rules, choose Permit all users to access this relying party.
 Choose Issuance Authorization Rules
 - Select Next to move to the Finish page.
Configure Relying Party Trust Endpoints (Clusters Only)
Perform this step only if multiple ESAs are present in a cluster.
- Open Relying Party Trust Properties > Endpoints.
- Add each ESA reachable URL address, and then click OK.
- Set endpoint index values starting at 0 (for example, 0, 1, 2, 3).
- Set only one endpoint to Default = Yes. Set the remaining endpoints to Default = No.
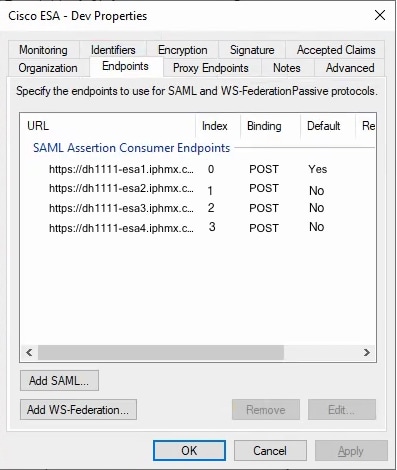 Issuance Authorization Rules - Permit All Users
The final step initiates the Edit Claim Rules dialog for the relying party trust, covered in Issuance Transform Rules.
Issuance Transform Rules - Claims
- Select Edit Claims Issuance Policy.
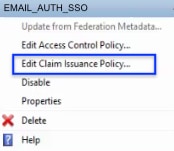 Edit Claims Issuance Policy
 - Select Add Rule.
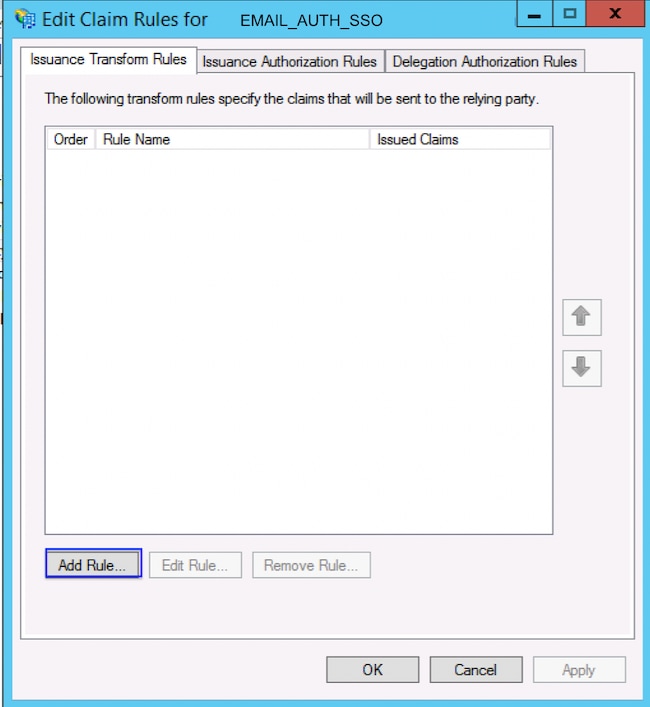 Add Issuance Transform Rule
The values shown here are common values that allow ESA to populate group names in the external authentication settings. - Select Finish.
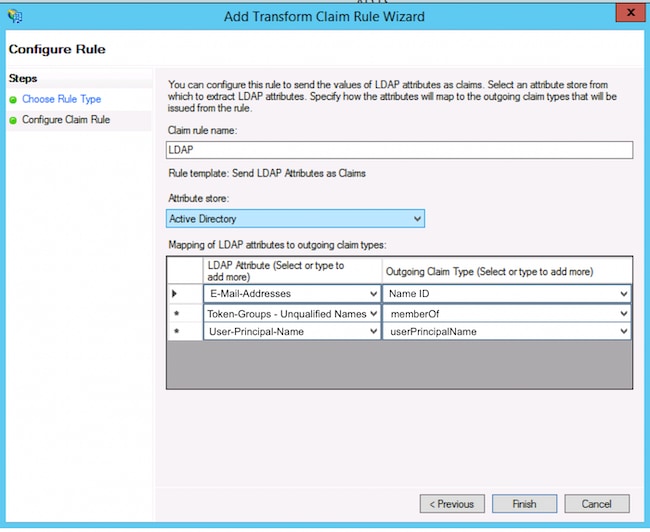 Transform Claim Rule
Download IdP Metadata and Upload It to ESA
After you complete the relying party trust and claim rule configuration, export the identity provider (IdP) metadata and upload it to ESA.
- Restart the AD FS service if required.
- Run these commands:
net stop adfssrv
net start adfssrv
- Finish and return to the ESA cluster.
Verify
- In ESA or SMA, confirm that the IdP metadata import completes successfully.
- Test an administrative log in by using SAML single sign-on (SSO).
- Verify that the expected group claims are received and that role mapping populates as expected in the external authentication configuration.
Related Information
-
- Cisco Email Security Appliance - End-User Guides
- Cisco Content Security Management Appliance - End-User Guides
Revision History
| Revision | Publish Date | Comments |
|---|---|---|
1.0 |
09-Jul-2026
|
Initial Release |

 Feedback
Contact Cisco
- Open a Support Case

- (Requires a Cisco Service Contract)