Introduction
This document describes how to configure Secure Access with FTD via IPsec for Secure Private Access with Dynamic Routing.
Prerequisites
Requirements
- Cisco Secure Access knowledge
- Cisco Secure Access dashboard/tenant
- Secure Firewall Threat Defense and Firewall Management Center knowledge
- IPsec knowledge
- Dynamic Routing knowledge
Components Used
- Secure Firewall Running 7.7.10 code
- Cloud-Delivered Firewall Management Center. Configuration also applies for typical virtual FMC
- Cisco Secure Access dashboard
The information in this document was created from the devices in a specific lab environment. All of the devices used in this document started with a cleared (default) configuration. If your network is live, ensure that you understand the potential impact of any command.
Background Information
Network tunnels in Secure Access can be used for two primary purposes: Secure Internet Access and Secure Private Access.
For Secure Private Access, organizations can leverage Zero Trust Access (ZTA) and/or VPN as a Service (VPNaaS) to connect users to private resources such as internal applications or data centers. IPsec tunnels play a key role in this architecture by securely encrypting network traffic between users and private resources, ensuring that sensitive data remains protected as it traverses untrusted networks. By integrating IPsec tunnels with ZTA or VPNaaS, organizations can provide seamless and secure access to internal resources while maintaining robust security controls and visibility.
This document describes how to configure Secure Access with Secure Firewall Threat Defense (FTD) via IPsec for Secure Private Access.
Additionally, this guide provides steps for configuring dynamic routing with BGP.
While this document covers the configuration of IPsec tunnels for Secure Private Access, the setup of Zero Trust Access (ZTA) or VPN as a Service (VPNaaS) for accessing private applications is outside the scope of this guide.
Configure
Secure Access Configuration
Network Tunnel Group Configuration
1. Navigate to the admin panel of Secure Access.
 CSA Dashboard2. Add a Network Tunnel Group.
- Click on
Connect > Network Connections
- Under
Network Tunnel Groups click on > Add
 Check NTG
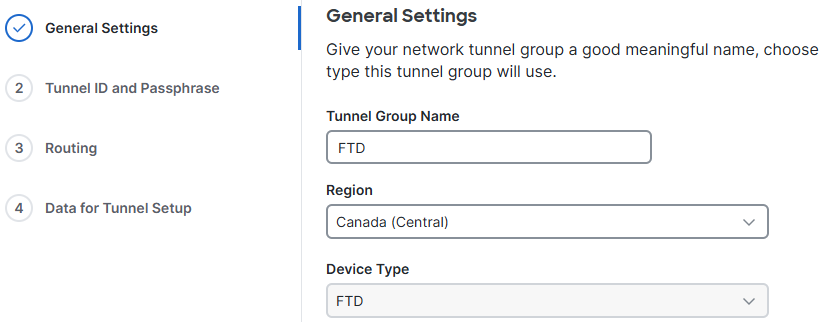
3. General Settings Configuration.
- Configure the
Tunnel Group Name, Region and Device Type
- Click
Next
 General Settings
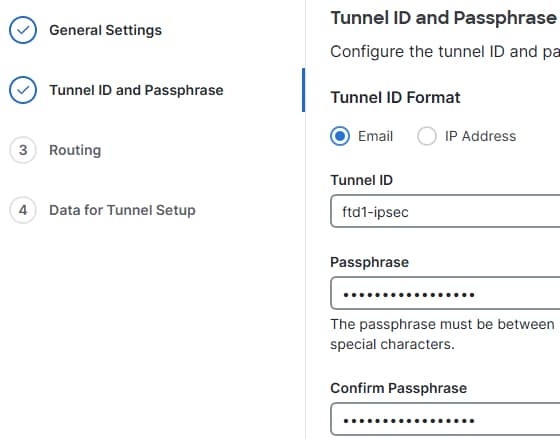
4. Configure the Tunnel IDand Passphrase. This ID is important, as it is required for the FTD configuration
-
Click on Next
 ID and PSK
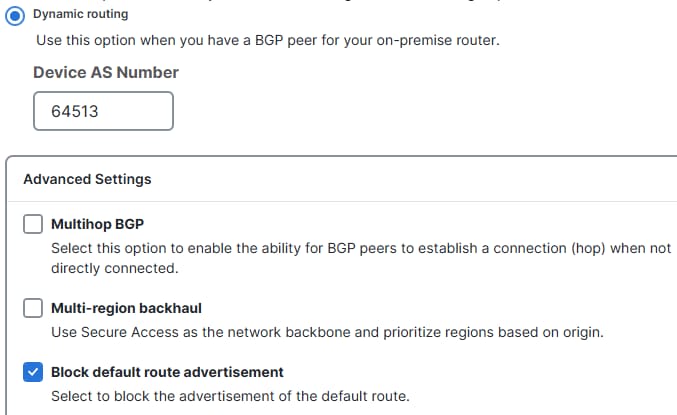
5. Configure Dynamic Routing.
Secure Access Routing
Dynamic Routing (BGP)
- Specify the BGP Autonomous System (AS) number of the FTD when configuring the BGP peer in Secure Access.
- Click on
Routing> Dynamic routing
- Click on
Device AS Number and add the FTDs BGP ASN
- Check the
Block default route advertisementcheck box
- Click on
Save
 CSA BGP Config

Note: Routes advertised by Secure Access prepend the original AS path to include: 1 for primary tunnels and 2 for secondary tunnels. Multi-Region Backhaul Scenarios are supported. For more information click .
Save Network Tunnel Group Configuration
Download and save the tunnel setup data, as it is needed for the FTD configuration.
- Click on
Download CSV
- Click on
Done
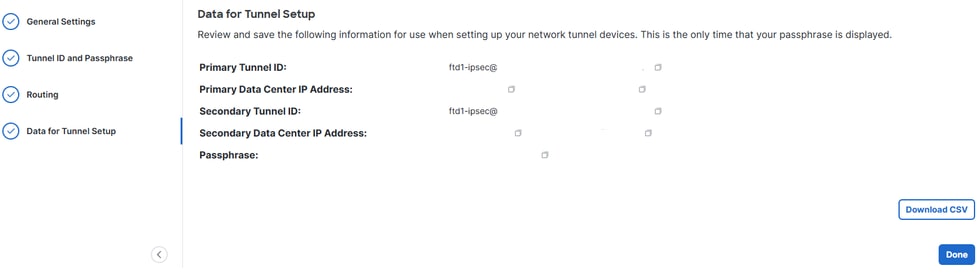 NTG Data
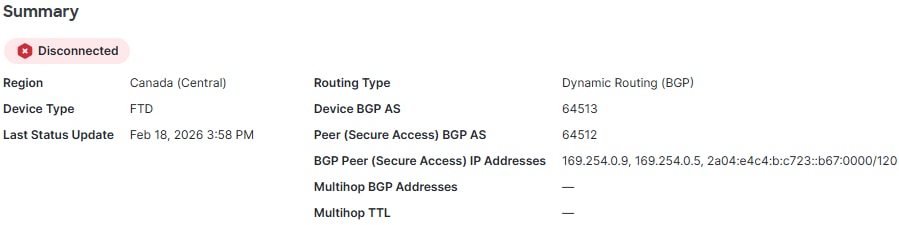 BGP Settings
Note: Click on the Network Tunnel Group to view the BGP AS number and BGP peer IP addresses, which are later configured on the FTD side.
Create a Private Resource
Private resources are internal applications, networks, or subnets hosted in your data center or private cloud environment. These resources are not publicly accessible and are protected behind your organization’s infrastructure.
By defining them as Private Resources in Secure Access, you can enable controlled access through solutions like Zero Trust Access (ZTA) or VPN as a Service (VPNaaS). This ensures users can securely connect to internal systems based on identity, device posture, and access policies, without exposing the resources directly to the internet.
Navigate to Resources > Private Resources> click on Add.
 PR
PR
- Specify the
Private Resource Name, Internally reachable address, Protocol, Port/Ranges. Specify ports and protocols, and add additional private resources as needed
- Select the desired
Connection Method based on your need, example Zero-trust connections and/or VPN Connections, according to your requirements
- Click on
Save
 Private Resource
Create an Access Policy Rule
Private access rules define how users can securely connect to internal resources and applications that are not publicly accessible.
These rules enforce security by controlling who can access specific private resources based on factors such as user identity, group membership, device posture, location, or other policy conditions. This ensures that sensitive internal systems remain protected from general public access while still being securely available to authorized users through ZTA or VPNaaS.
Navigate to Secure>Access Policy
 ACP
ACP
- Click on
Add Rule
- Click on
Private Access
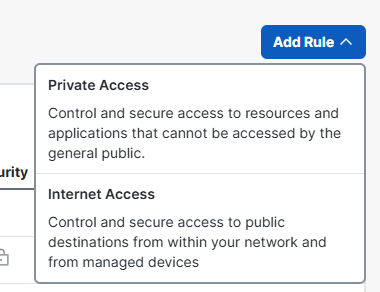 Add ACP
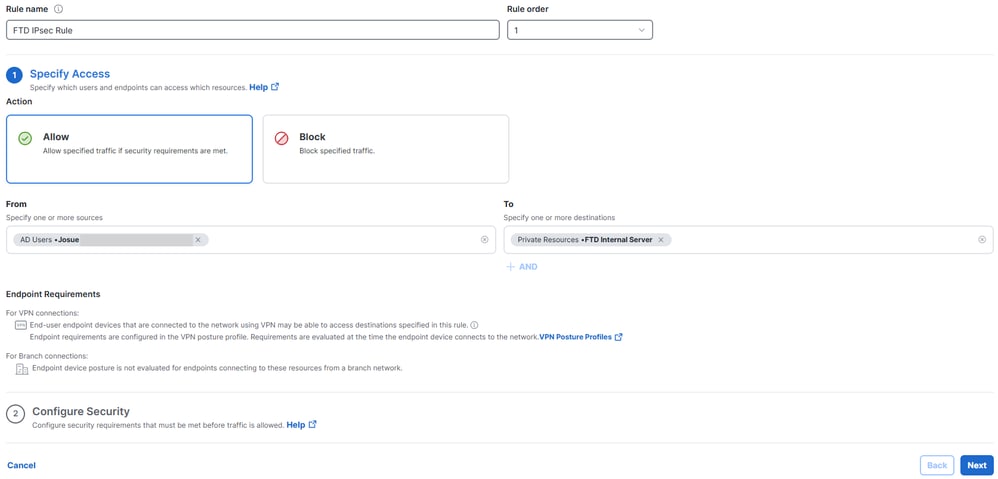
- Click on
Rule Name and give it a name
- Click on
Action, select Allowto permit this traffic
- Click on
Fromand specify the users who are grated permission
- Click on
Toand specify the access those users have based on this rule
- Click on
Next, and then Savein the next page
 ACP config
Secure Firewall Threat Defense (FTD) Configuration
Virtual Tunnel Interfaces Configuration
A Virtual Tunnel Interface (VTI) on FTD is a logical Layer 3 interface used to configure route-based IPsec VPN tunnels.
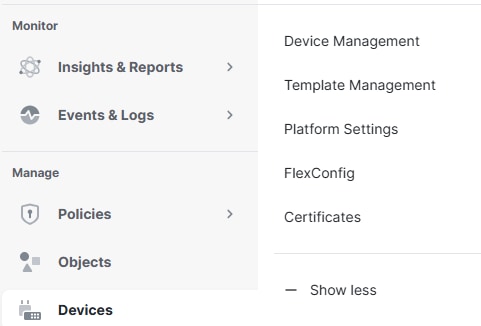
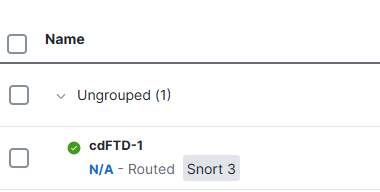
1. Navigate to Devices> Device Management.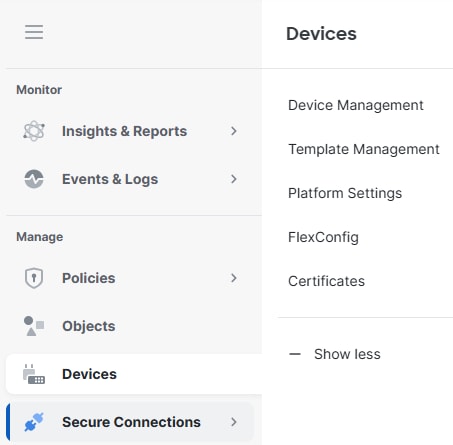 FTD Devices
- Click on the FTD Device,
Interfaces
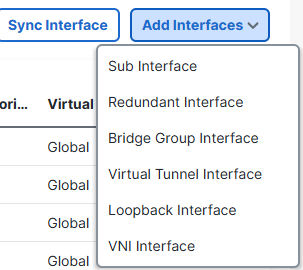
- Click on
Add Interfaces
- Click on
Virtual Tunnel Interface
- Create two Virtual Tunnel Interfaces, one for the Primary Secure Access Hub and another one for the Secondary Secure Access Hub
 Add VTIs
Virtual Tunnel Interface 1:
- Give it a name, click on
Enable
- Select or create a
Security Zone
- Click on
Tunnel ID and give it a value.
- Click on
Tunnel Source and specify the WAN Interface the tunnel is going to be establish from
- Click on
IPsec Tunnel Mode, selectIPv4
- Click on
IP Address and configure the IP address for the VTI
Click onOK
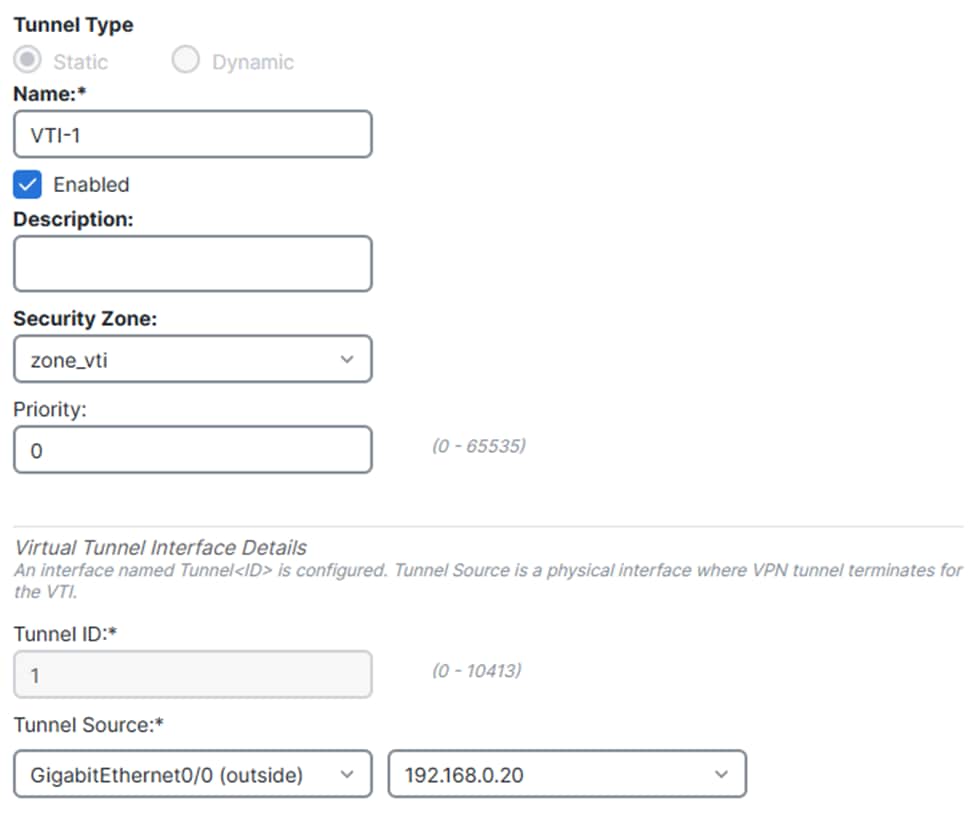 VTI1.1
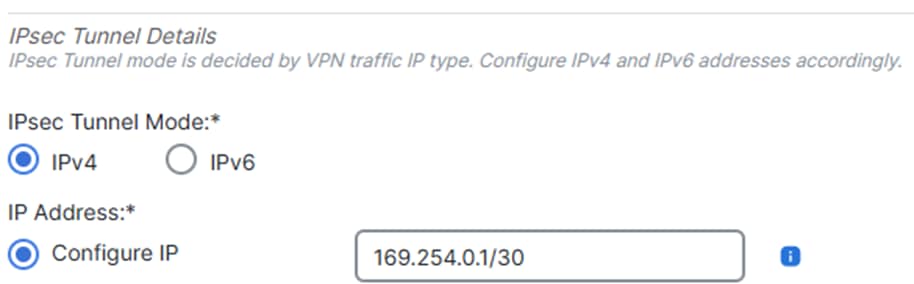 VTI1.2
Virtual Tunnel Interface 2:
- Give it a name, click on
Enable
- Select or create a
Security Zone
- Click on
Tunnel ID and give it a value
- Click on
Tunnel Source and specify the WAN Interface the tunnel is going to be establish from
- Click on
IPsec Tunnel Mode, selectIPv4
- Click on
IP Address and configure the IP address for the VTI
- Click on
OK
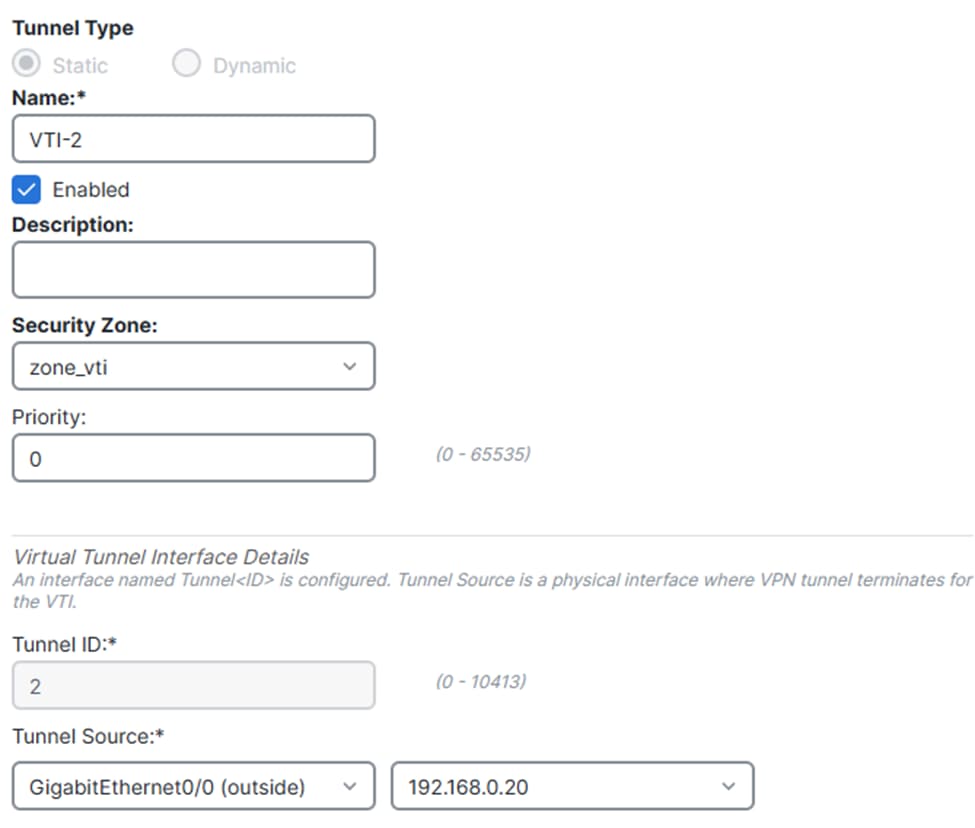 VTI2.1
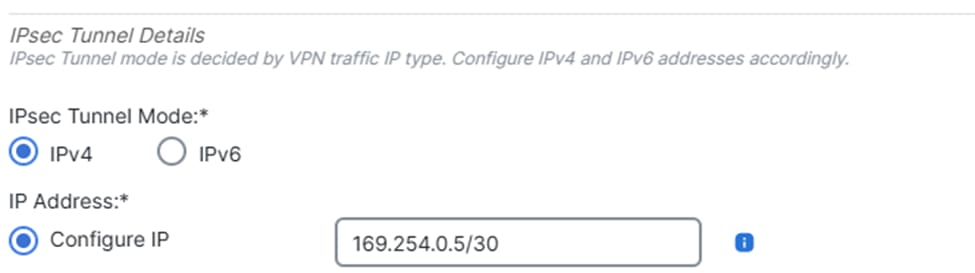 VTI2.2
Click on Save.
 Save VTI Changes
IPsec Tunnel Configuration
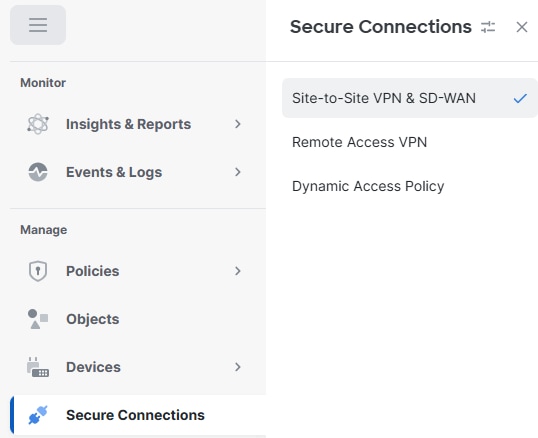
Navigate to your cdFMC dashboard.
- Click on
Secure Connection> Site-to-Site VPN & SD-WAN
 S2S
S2S
- Click on
Add
- Click on
Route-Based VPN
- Click on
Peer to Peer
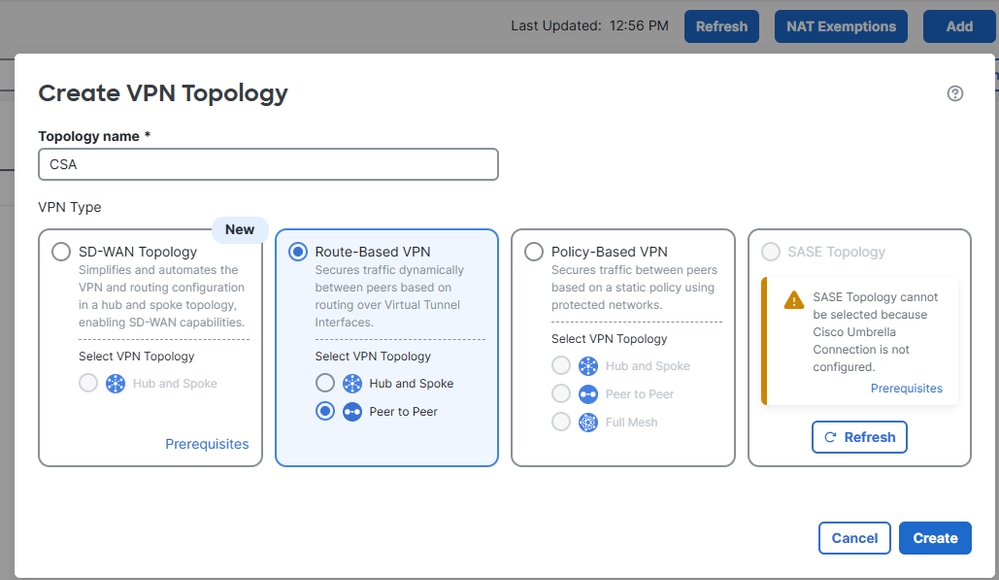 Add VPN
- From step 5 of the Secure Access configuration, obtain the tunnel IDs and IP addresses for the primary and secondary data centers
- Click on
Endpoints
- Under
Node A, click onDeviceand select Extranet
- Click on
Device Nameand give it a name
- Click on
Enpoint IP Addresses and enter the Secure Access Primary and Secondary IP Addresses separated by a comma (from "Save Network Tunnel Group Configuration" under the Secure Access
Configuration)
- Under
Node B, click on Device and select your FTD device
- Click on
Virtual Tunnel Interface and select the first VTI interface created in the previous step
- Click on
Send Local Identity to Peers option and select Email ID, enter the primary tunnel ID (from "Save Network Tunnel Group Configuration" under the Secure Access Configuration)
- Click on
Add Backup VTI
- Click on
Virtual Tunnel Interface and select the second VTI interface created in the previous step
- Click on
Send Local Identity to Peersoption and select Email ID, enter the secondary tunnel ID (from "Save Network Tunnel Group Configuration" under the Secure Access Configuration)
- Click on Save
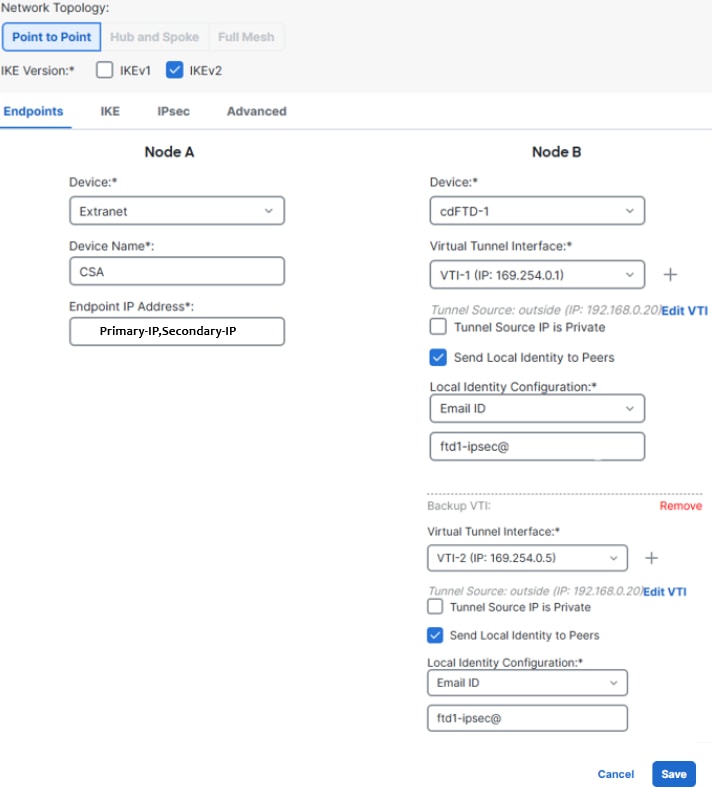 FTD VTI Configuration
- Click on
IKE
- Click on
IKEv2 Settings > Policies
- Select the
Umbrella-AES-GCM-256 option
Click on OK
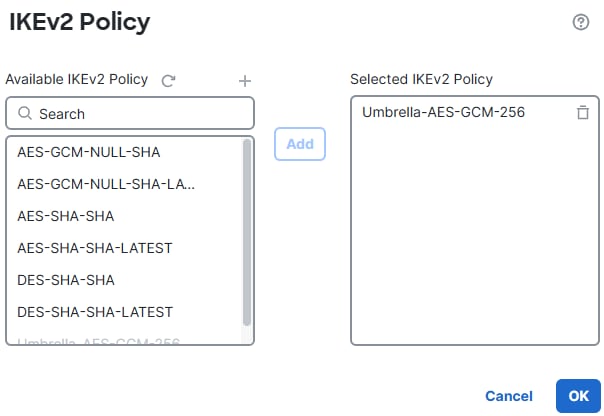 IKEv2 Policy
- Click on
Authentication Type and selectPre Shared Manual Key, enter the PSK configured in Secure Access (passphrase)
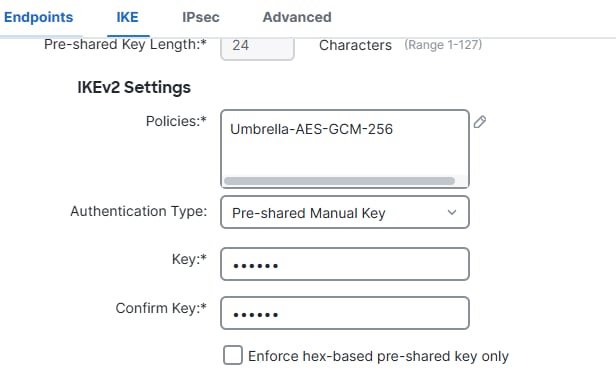 IKE
IKE
- Click on
IPSEC
- Click on
IKEv2 Proposals
- Select
Umbrella-AES-GCM-256
- Click on
OK
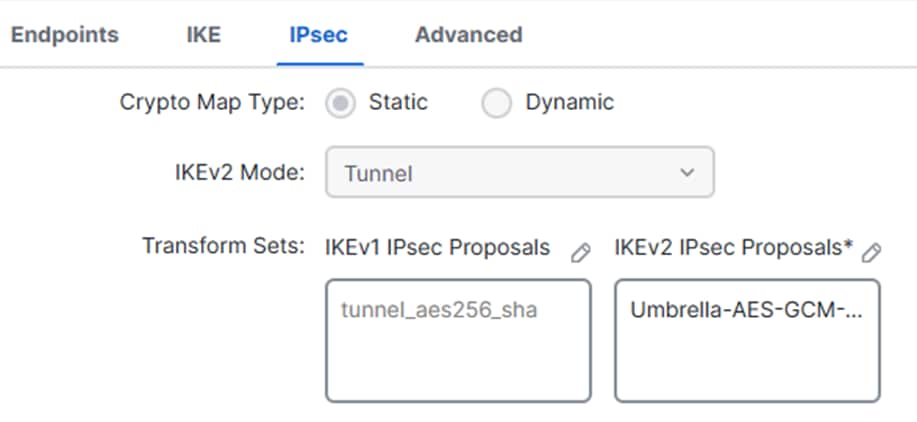 IPsec
IPsec
 Save IKEv2 Proposals
FTD Routing Configuration
Dynamic Routing (BGP)
Border Gateway Protocol (BGP) is a dynamic routing protocol that automates the exchange of routing information between autonomous systems (AS). It determines the best available path for data traffic based on attributes and policies, rather than relying on static routes.
By dynamically learning and updating routes, BGP improves scalability, optimizes path selection, and provides automatic failover in the event of link or network changes.
Navigate to your cdFMC dashboard.
- Click on
Devices> Device Management
 Device
- Click on the FTD
 FTD Device
- Click on
Routing > BGP > IPv4 > Enable IPv4
- Click on
Neighbor, and specify the BGP Autonomous System (AS) number for Secure Access, along with the neighbor IP addresses
Refer to the Note under the Secure Access Configuration, where all relevant configuration details are provided for this process.
- Click on
Save
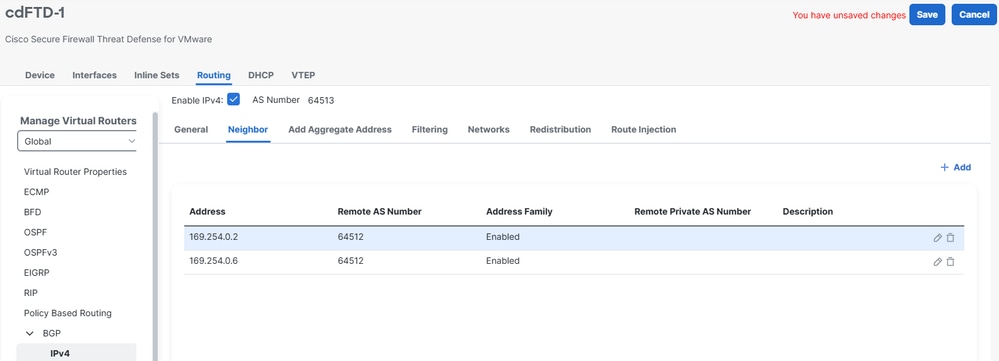 BGP neighbor
Note: starting November 2025, all newly created Secure Access organizations use the public ASN 32644 by default for BGP peering in network tunnel groups. Existing organizations established prior to November 2025 continue to use the private ASN 64512 that was previously reserved for Secure Access BGP peers.
- Click on
Networks, and add the network(s) you want to advertise over to Secure Access
- Click on
Save
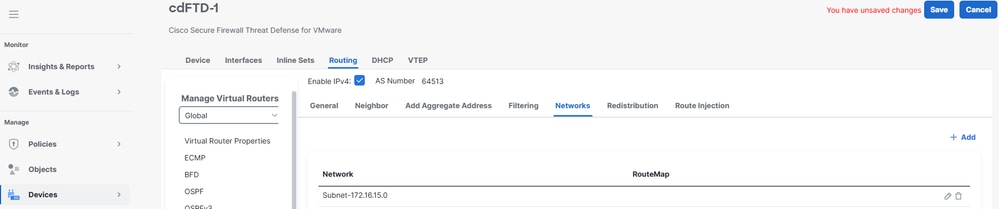 Add Network
Access Policy Configuration
To allow traffic on an Cisco Firepower Threat Defense (FTD) and enable access to private resources, traffic must first pass through the initial stage of access control known as Prefiltering.
Prefiltering is processed before deeper inspection occurs and is designed to be simple and fast. It evaluates traffic using basic outer-header criteria (such as source and destination IP addresses and ports) to quickly allow, block, or bypass traffic. When traffic is allowed at this stage, it can skip more resource-intensive inspections like deep packet inspection or intrusion policies, improving performance while still maintaining security control.
Navigate to Policies> Prefilter
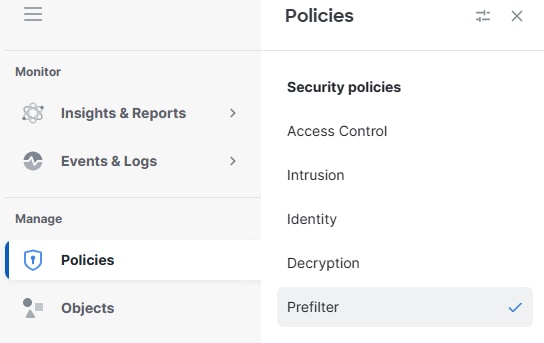 Prefilter
- Click on edit the Prefilter poilcy being used by your Access Policy
 click on prefilter
- Click on
Add Tunnel Rule
- Add and permit the traffic from the VPNaaS network and/or the ZTA Subnet to your Private Resources
- Click on
Save
 Save Rule
At this point, once the configuration on the FTD has been completed and verified, you can proceed with the deployment. After deployment, both the IPsec tunnels and BGP neighbor sessions come up successfully, confirming that connectivity and dynamic routing are operating as expected.
Verify
Verify in FTD
Tunnel Status in FTD
You can view the tunnel’s current status, including whether it is up or down. This helps verify that the IPsec tunnel is properly established.
- Click on Secure Connections
- Click on Site-to-Site VPN & SD-WAN
- Click on the Topology Name
 FTD Tunnel Status
Tunnel Status in Secure Access
You can view the tunnel’s current status, including whether it is Disconnected, Warnning or Connected. This helps verify that the IPsec tunnel is properly established.
- Click on Connect > Network Connections
- Click on Network Tunnel Groups
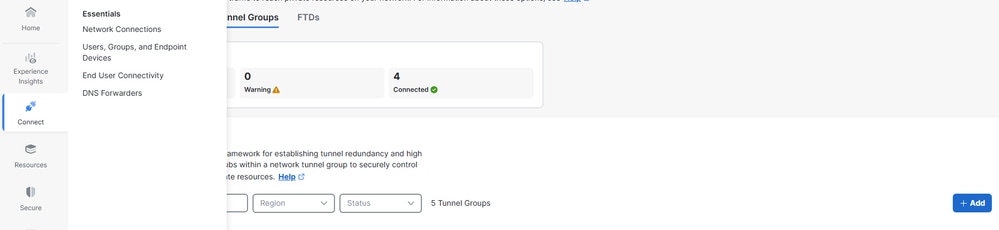 Check NTG
- Click on the Network Tunnel Group
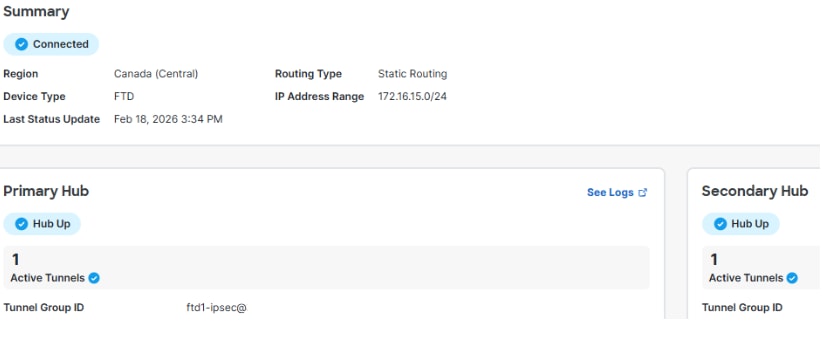 CSA Tunnel Status
Events in Secure Access
You can view Tunnel and BGP events and confirm if the status of the IPsec tunnels is up and stable, and whether BGP sessions are established.
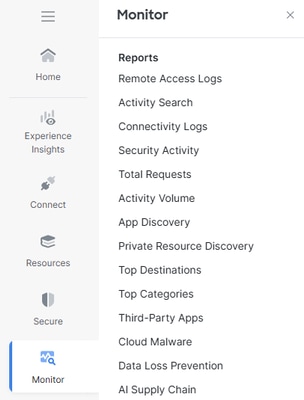
Click on Monitor > Network Connectivity.
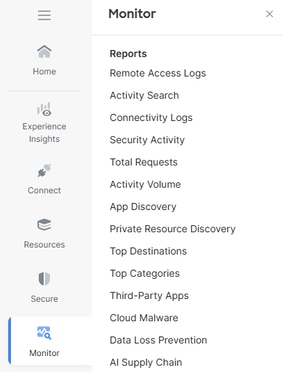 Monitor Conn Logs
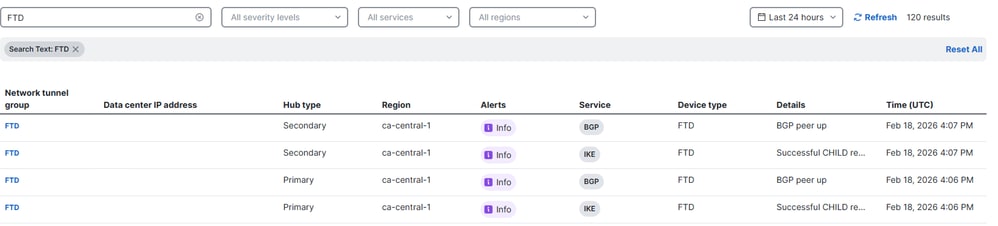 NTG Logs
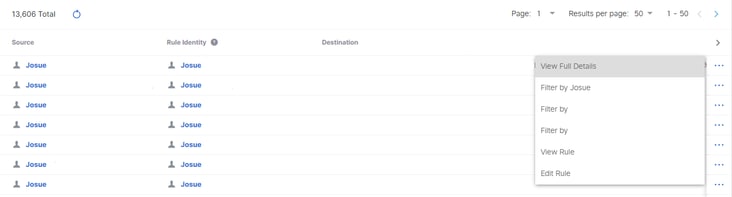
Navigate to Monitor > Activity Search.
 Monitor Conn Logs
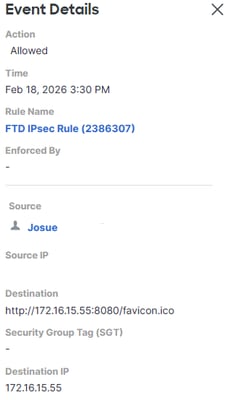
On any of the related events, click on View Full Details.
 Full Details
 Activity Search
Related Information
 Feedback