Configure Secure Access with Palo Alto Firewall
Available Languages
Introduction
This document describes how to configure Secure Access with Palo Alto Firewall.
Prerequisites
- Configure User Provisioning
- ZTNA SSO Authentication Configuration
- Configure Remote Access VPN Secure Access
Requirements
Cisco recommends that you have knowledge of these topics:
- Secure Access
- Clientless ZTNA
- Cisco Secure Client - VPN
- Cisco Secure Client - ZTNA
- Palo Alto 11.x Version Firewall
Components Used
The information in this document is based on:
- Secure Access
- Cisco Secure Client - VPN
- Cisco Secure Client - ZTNA
- Palo Alto 11.x Version Firewall
The information in this document was created from the devices in a specific lab environment. All of the devices used in this document started with a cleared (default) configuration. If your network is live, ensure that you understand the potential impact of any command.
Background Information
 Secure Access - Palo Alto
Cisco has designed Secure Access to protect and provide access to private applications, both on-premise and cloud-based. It also safeguards the connection from the network to the internet. This is achieved through the implementation of multiple security methods and layers, all aimed at preserving the information as they access it via the cloud.
Configure
Configure the VPN on Secure Access
1. Navigate to the admin panel of Secure Access.
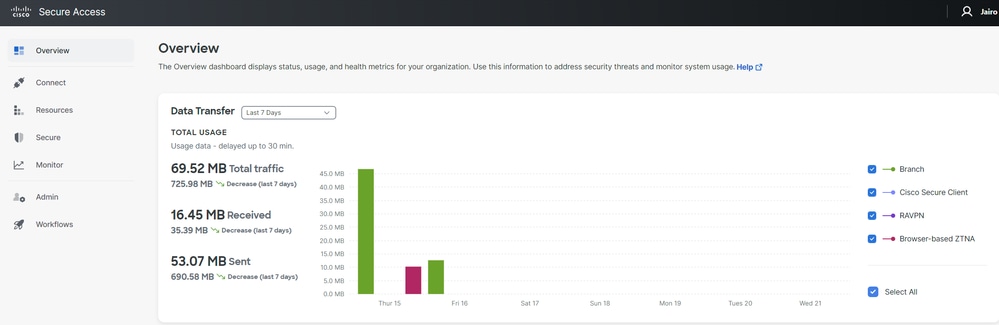 Secure Access - Main Page
2. Click Connect > Network Connections.
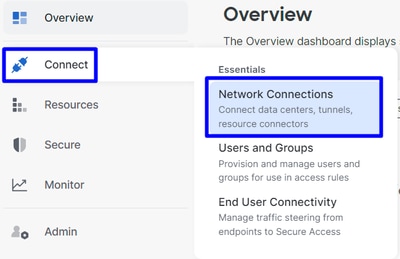 Secure Access - Network Connections
3. Under Network Tunnel Groups click +Add.
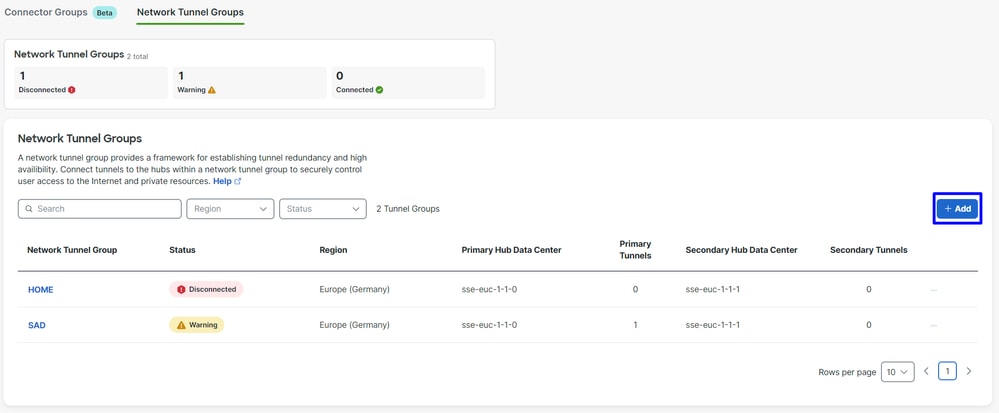 Secure Access - Network Tunnel Groups
4. Configure the Tunnel Group Name, Region and Device Type.
5. Click Next.
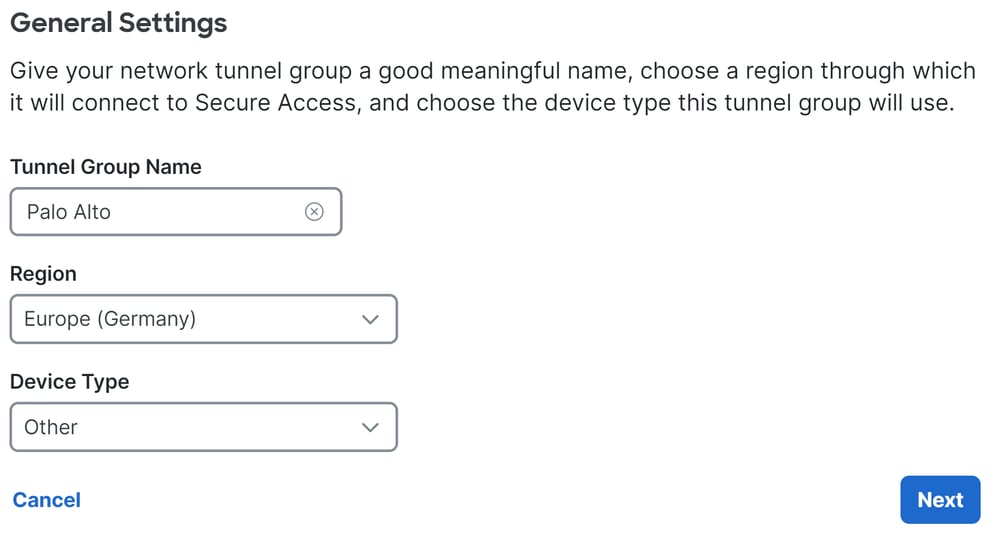

Note: Choose the region nearest to the location of your firewall.
6. Configure the Tunnel ID Format and Passphrase.
7. Click Next.

8. Configure the IP address ranges or hosts you configured on your network and want to pass the traffic through Secure Access.
9. Click Save.
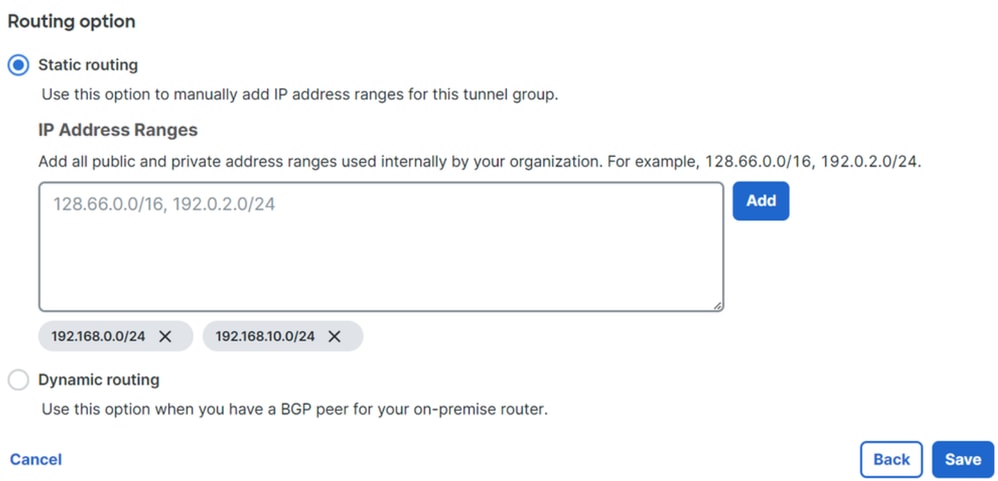 Secure Access - Tunnel Groups - Routing Options
10. After you click Save, the information on the tunnel is displayed, please save this information for the next step; Configure the tunnel on Palo Alto.
Tunnel Data
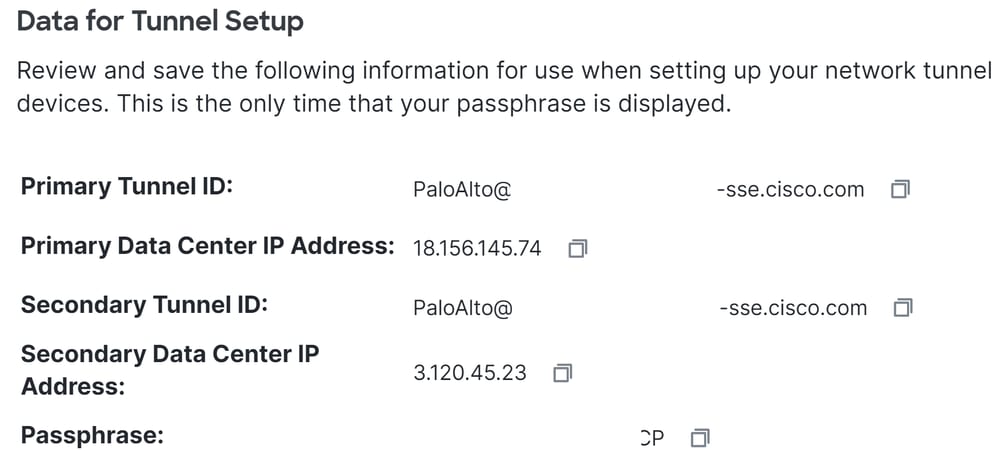
Configure the Tunnel on Palo Alto
Configure the Tunnel Interface
Navigate to the Palo Alto Dashboard.
1. Network > Interfaces > Tunnel.
2. Click Add.

3. Under the Config menu, configure the Virtual Router, Security Zone, and assign a Suffix Number.
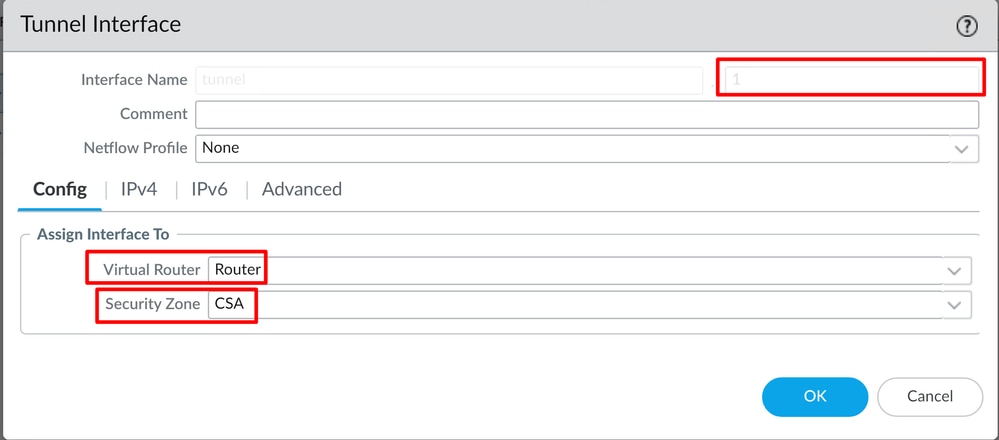
4. Under IPv4, configure a non-routable IP. For example, you can use 169.254.0.1/30.
5. Click OK.

6. After that, you can have something like this configured:
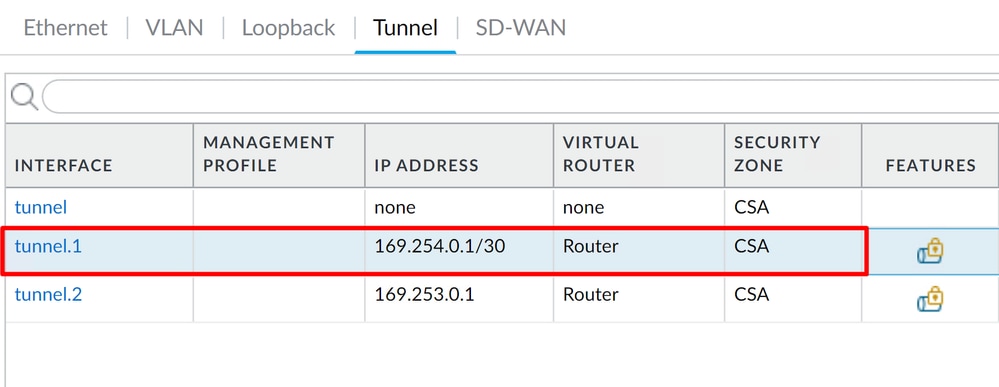
7. If you have it configured like this, click on Commit to save your configuration and continue with the next step; Configure IKE Crypto Profile.
Configure IKE Crypto Profile
To configure the crypto profile, navigate to:
1. Network > Network Profile > IKE Crypto.
2. Click Add.

3. Configure the next parameters:
- Name: Configure a name to identify the profile.
- DH GROUP: group19
- AUTHENTICATION: non-auth
- ENCRYPTION: aes-256-gcm
- Timers:
- Key Lifetime: 8 Hours
- IKEv2 Authentication: 0
4. After everything is configured, click OK.
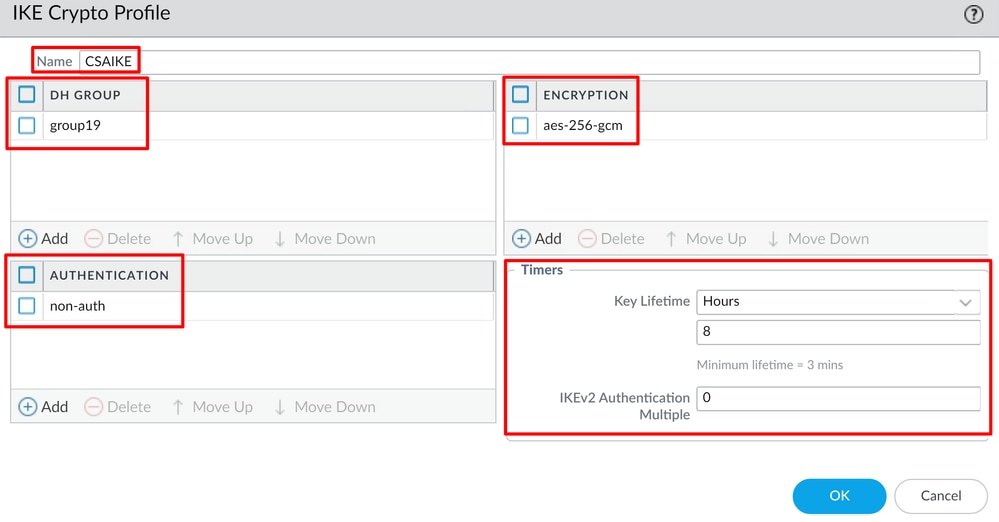
5. If you have it configured like this, click Commit to save your configuration and continue with the next step; Configure IKE Gateways.
Configure IKE Gateways
To configure IKE Gateways
1. Network > Network Profile > IKE Gateways.
2. Click Add.
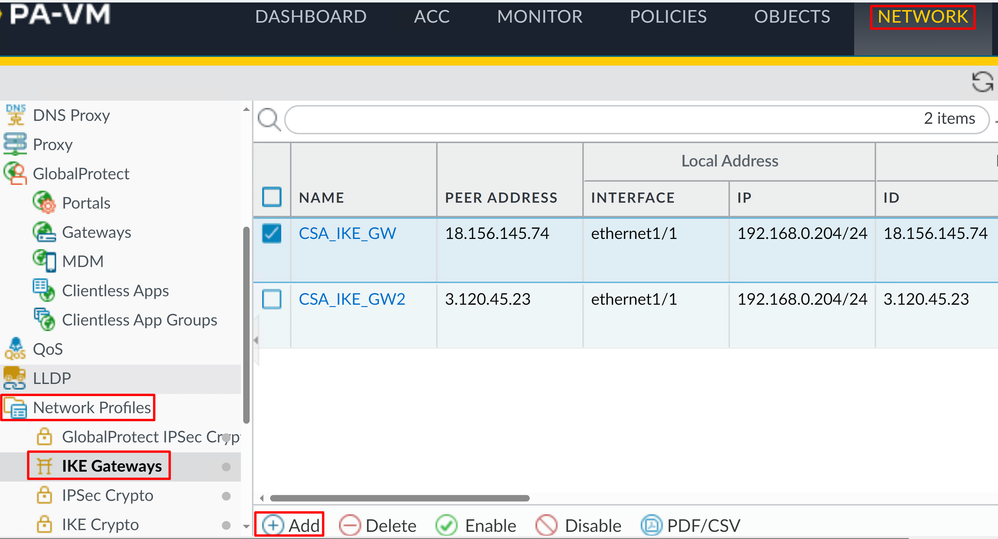
3. Configure the next parameters:
- Name: Configure a name to identify the Ike Gateways
- Version: IKEv2 only mode
- Address Type: IPv4
- Interface: Select your internet WAN interface
- Local IP Address: Select the IP of your internet WAN Interface
- Peer IP Address Type: IP
- Peer Address: Use the IP of Primary IP Datacenter IP Address, given in the step Tunnel Data
- Authentication: Pre-Shared Key
- Pre-Shared Key: Use the passphrase given in the step Tunnel Data
- Confirm Pre-shared Key: Use the passphrase given in the step Tunnel Data
- Local Identification: Choose User FQDN (Email address) and use the Primary Tunnel ID given in the step, Tunnel Data
- Peer Identification: Choose IP Address and use the Primary IP Datacenter IP Address

4. Click Advanced Options.
- Enable NAT Traversal
- Select the IKE Crypto Profile created in step, Configure IKE Crypto Profile
- Mark the checkbox for Liveness Check
5. Click OK.

6. If you have it configured like this, click Commit to save your configuration and continue with the next ste, Configure IPSEC Crypto Profile.
Configure IPSEC Crypto Profile
1. To configure IKE Gateways, Navigate to Network > Network Profile > IPSEC Crypto.
2. Click Add.
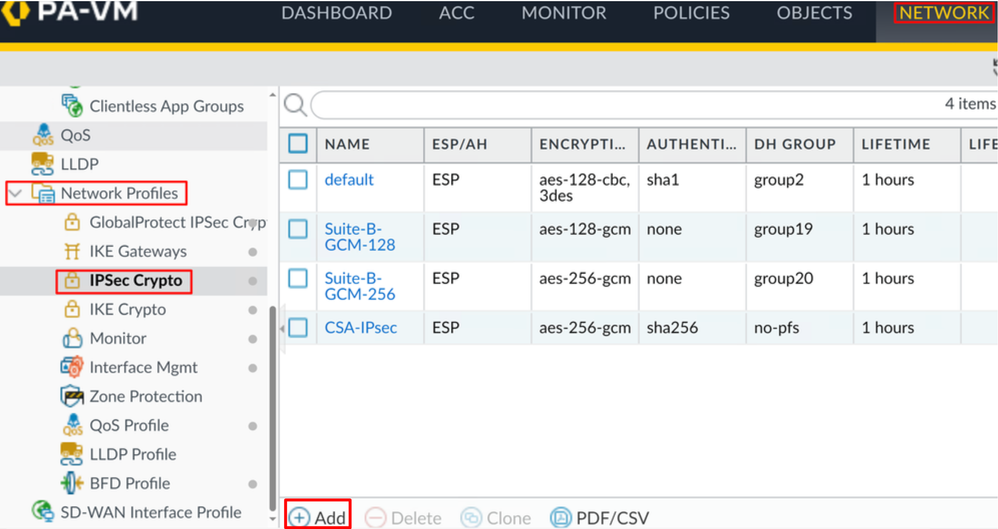
3. Configure the next parameters:
- Name: Use a name to identify the Secure Access IPsec Profile
- IPSec Protocol: ESP
- ENCRYPTION: aes-256-gcm
- DH Group: no-pfs, 1 Hour
4. Click OK.
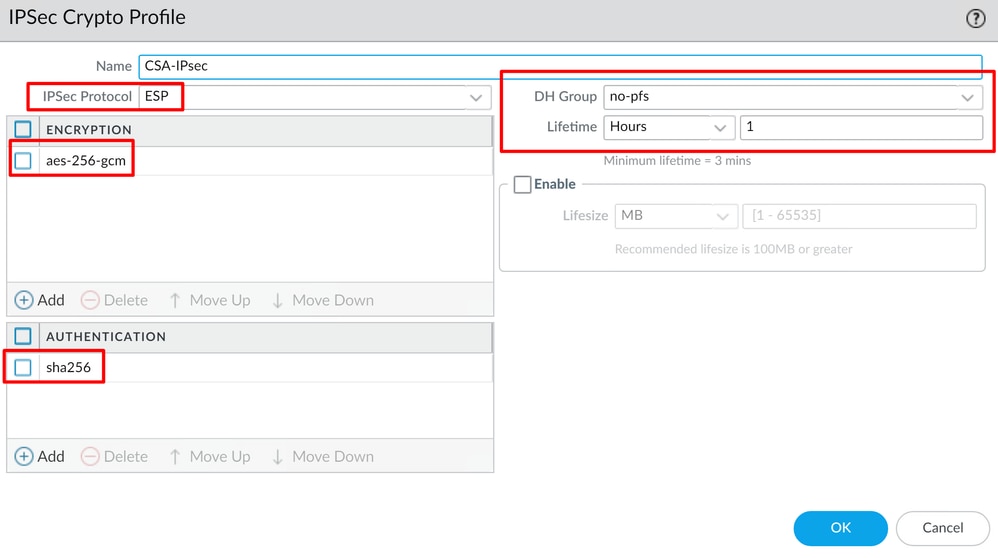
5. If you have it configured like this, click Commit to save your configuration and continue with the next step; Configure IPSec Tunnels.
Configure IPSec Tunnels
1. To configure IPSec Tunnels, navigate to Network > IPSec Tunnels.
2. Click Add.

3. Configure the next parameters:
- Name: Use a name to identify the Secure Access tunnel
- Tunnel Interface: Choose the tunnel interface configured on the step, Configure the tunnel interface
- Type: Auto Key
- Address Type: IPv4
- IKE Gateways: Choose the IKE Gateways configured on the step, Configure IKE Gateways
- IPsec Crypto Profile: Choose the IKE Gateways configured on the step, Configure IPSEC Crypto Profile
- Mark the checkbox for Advanced Options
- IPSec Mode Tunnel: Choose Tunnel
4. Click OK.


Caution: Proxy IDs are not supported, avoid any configurations with a Proxy ID in Palo Alto IPSEC Tunnels with Secure Access.
Now your VPN is successfully created, you can proceed with the step; Configure Policy Based Forwarding.
Configure Policy Based Forwarding
1. To configure Policy Based Forwarding, navigate to Policies > Policy Based Forwarding.
2. Click Add.
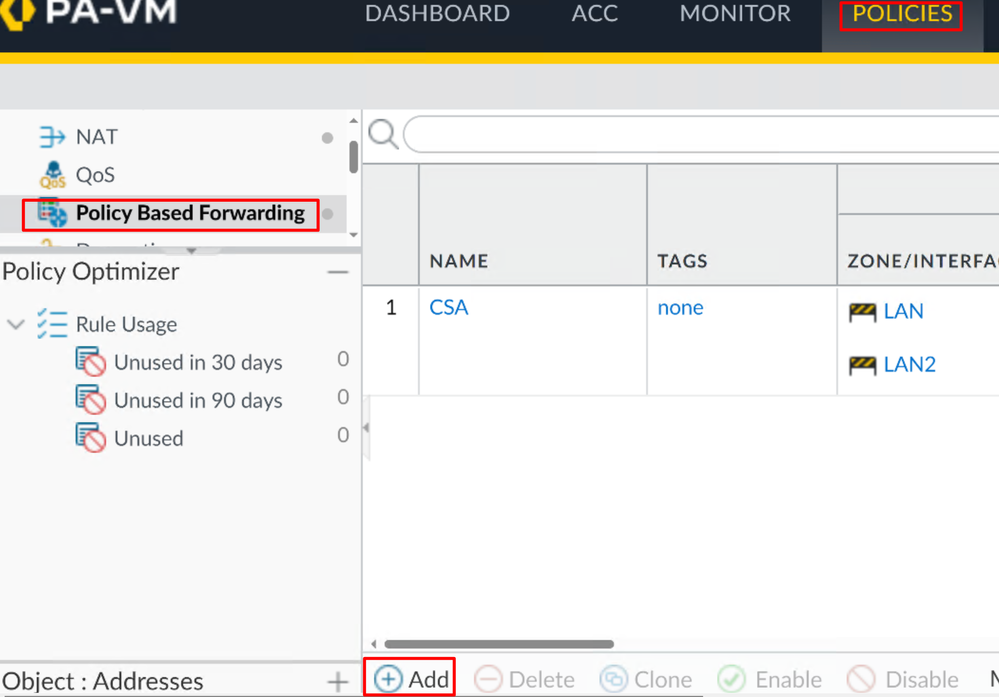
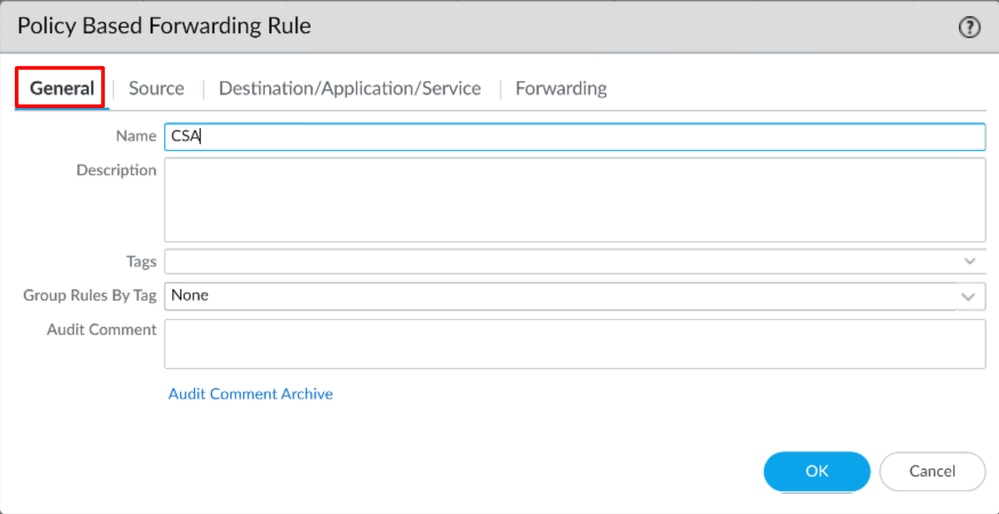
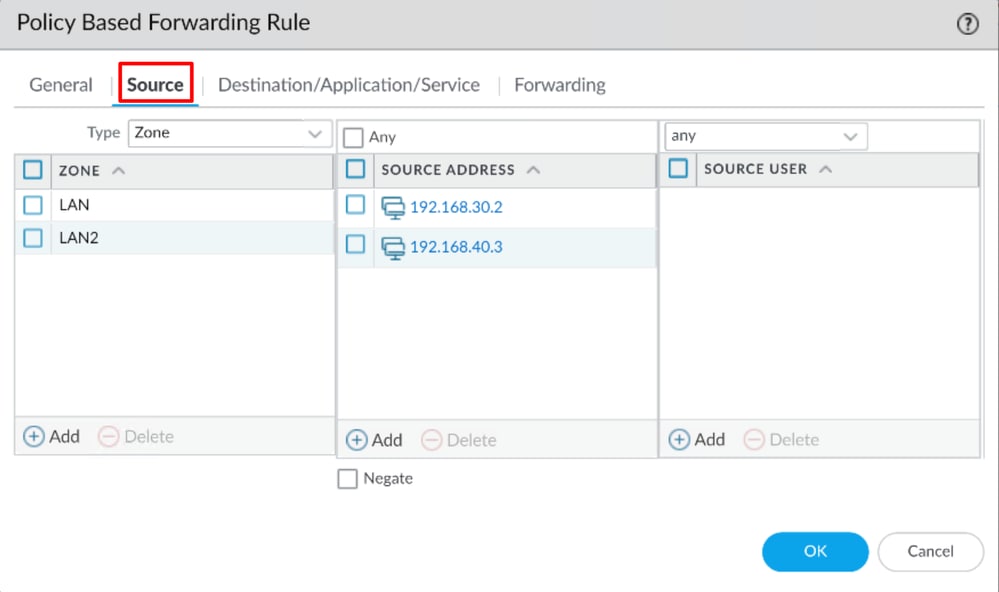
3. Configure the next parameters:
- General
- Name: Use a name to identify the Secure Access and Policy Base Forwarding (Routing by Origin)
- Source
- Zone(s): Select the Zone(s) where you plan to route traffic based on the origin
- Source Address: Configure the host or networks you want to use as a source
- Source Users: Configure the users you want to route traffic to (if applicable)
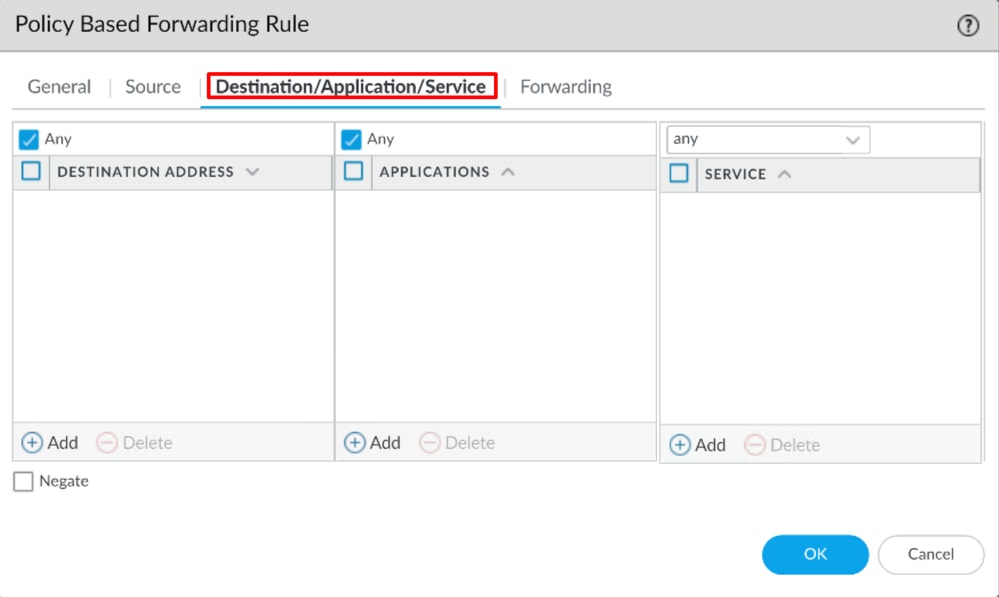
- Destination/Application/Service
- Destination Address: You can leave as Any, or specify the ranges of addresses of Secure Access (100.64.0.0/10)
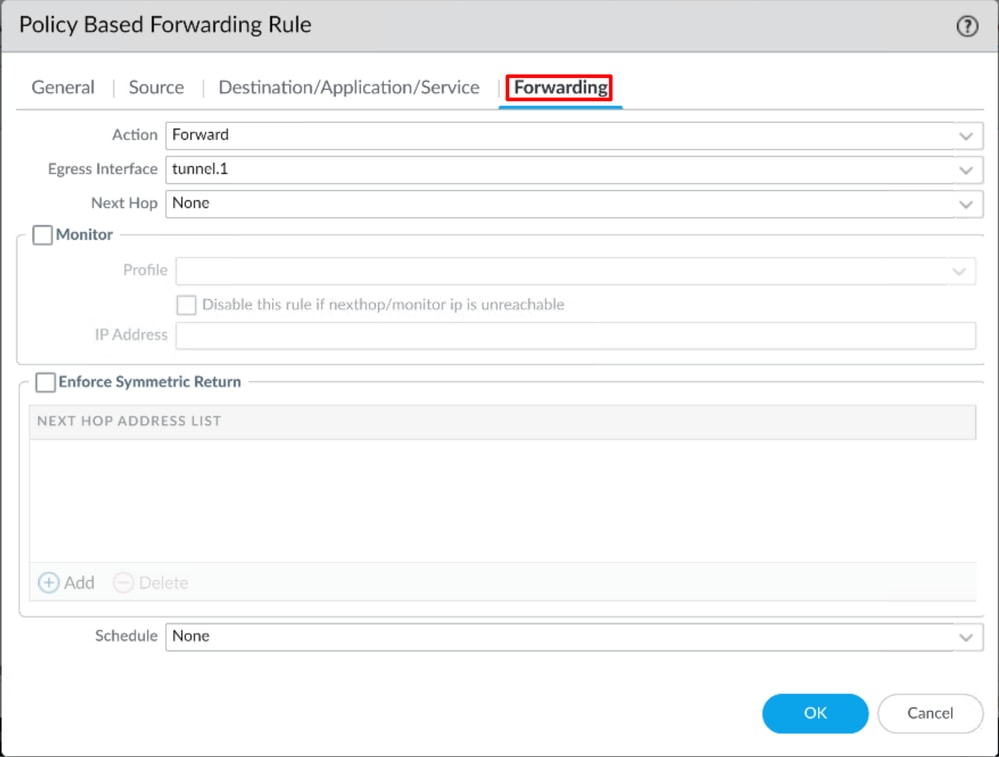
- Forwarding
- Action: Forward
- Egress Interface: Choose the tunnel interface configured on the step, Configure the tunnel interface.
- Next Hop: None
4. Click OK and Commit.
Now everything is configured on Palo Alto. After you configure the route, the tunnel can be established. Continue configuring the RA-VPN, Browser-Based ZTA, or Client Base ZTA on Secure Access Dashboard.
Revision History
| Revision | Publish Date | Comments |
|---|---|---|
2.0 |
09-Jul-2026
|
Updated spelling, grammar, spacing, added lines to separate sections for readability, and updated links for open in new page. |
1.0 |
31-Jan-2024
|
Initial Release |

 Feedback
Contact Cisco
- Open a Support Case

- (Requires a Cisco Service Contract)