Configure Secure Email Encryption Service SAML SSO with Duo
Available Languages
Introduction
This document describes how to integrate Cisco Secure Email Encryption Service (formerly Cisco Registered Envelope Service [CRES]) with Duo for Security Assertion Markup Language (SAML) single sign-on (SSO).
Prerequisites
Requirements
Cisco recommends that you have knowledge of these topics:
- Administrative access to the Cisco Secure Email Encryption Service administration portal.
- Administrative access to the Duo Admin Panel.
- Administrative access to the Microsoft Azure portal.
- Enroll users in the Duo Admin Panel as described in Duo user enrollment documentation.
Components Used
The information in this document is based on SAML 2.0.
The information in this document was created from the devices in a specific lab environment. All of the devices used in this document started with a cleared (default) configuration. If your network is live, ensure that you understand the potential impact of any command.
Configure
Use this procedure in order to configure SAML SSO between Cisco Secure Email Encryption Service, Duo, and Microsoft Azure Active Directory. After the configuration is complete, users assigned to the enterprise application can authenticate to the Cisco Secure Email Encryption Service portal with Duo.
Step 1. Log in to the Duo Admin Panel.
Step 2. Navigate to Applications.
Step 3. Choose Protect an Application.
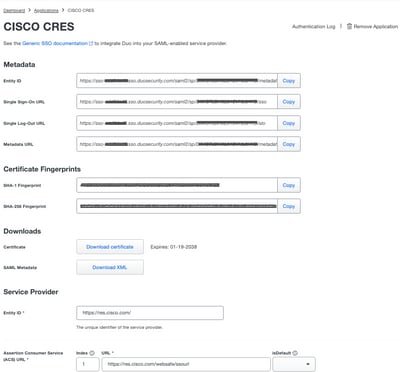
Step 4. Choose Generic SAML Service Provider, and then click Protect.
Step 5. Copy the Single Sign-On URL.
Step 6. Choose Download Certificate.
Step 7. Choose Download XML.
Step 8. In Service Provider > Entity ID *, enter Cisco Secure Email Encryption Service entity ID.
Step 9. In Service Provider > Assertion Consumer Service (ACS) URL *, enter Cisco Secure Email Encryption Service ACS URL.
Step 10. In Settings > Name, enter a name for the new application, and then choose Save, as shown in the image:
Step 11. Log in to the Cisco Secure Email Encryption Service administration portal.
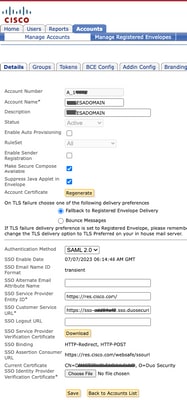
Step 12. Navigate to Accounts, and then choose the hyperlink for the Account Number.
Step 13. In the Details tab, set Authentication Method to SAML 2.0.
Step 14. Leave SSO Alternate Email Attribute Name blank.
Step 15. In SSO Service Provider Entity ID, enter Cisco Secure Email Encryption Service entity ID.
Step 16. In SSO Customer Service URL, enter the URL copied in Step 5.
Step 17. Leave SSO Logout URL blank.
Step 18. In Current Certificate SSO Identity Provider Verification Certificate, click Choose File, and then upload the certificate downloaded in Step 6., as shown in the image:
Step 19. Log in to the Microsoft Azure portal.
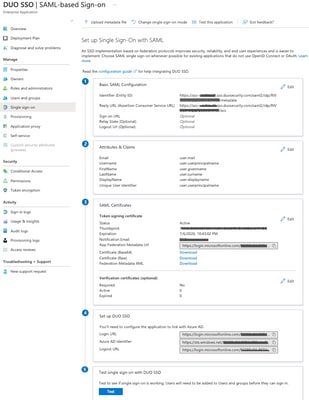
Step 20. Navigate to Azure Active Directory > Enterprise Applications > New application > Create your own application.
Step 21. Enter an application name, choose Integrate any other application you don't find in the gallery (Non-gallery), and then click Create.
Step 22. Choose Assign users and groups, add the users that require access to Cisco Secure Email Encryption Service, and then click Assign.
Step 23. Choose Single sign-on > SAML > Upload metadata file, and then choose the file downloaded in Step 7., as shown in the image:
Verify
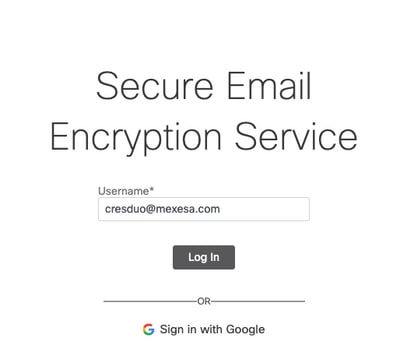
Verify that the SAML SSO configuration works as expected by confirming that an assigned user is redirected to Duo for authentication and then returned to the Cisco Secure Email Encryption Service portal after successful authentication.
Step 1. Log in to the Cisco Secure Email Encryption Service portal, as shown in the image:
Step 2. Complete Duo passkey authentication, as shown in the image:
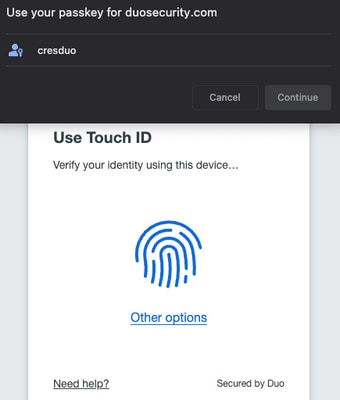
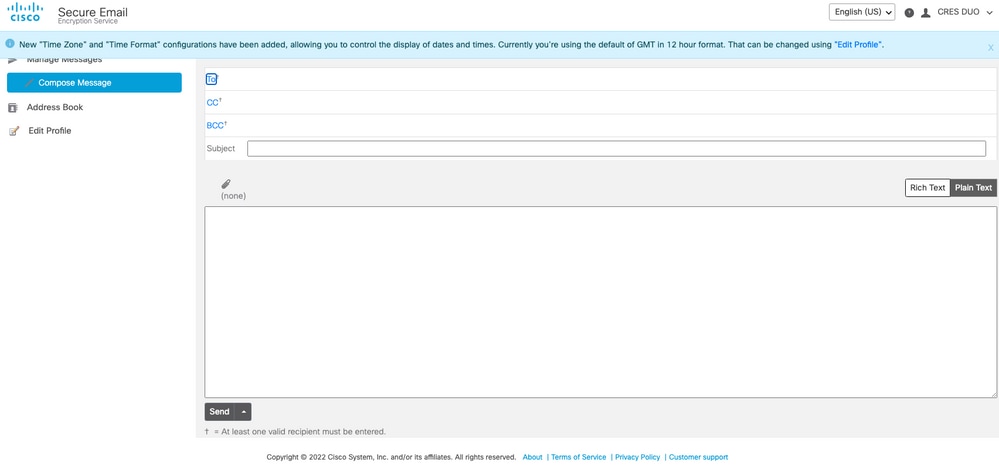
Step 3. After the correct passkey is entered, confirm that the user can log in to the Cisco Secure Email Encryption Service portal successfully, as shown in the image:
Common Errors
Review these common errors if SAML SSO to Cisco Secure Email Encryption Service does not complete successfully.
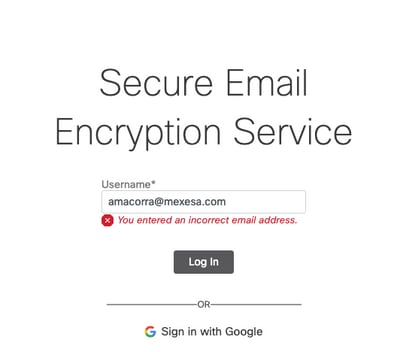
1. If the user is not assigned under Users and Groups in the Enterprise Application, this error appears, as shown in the image: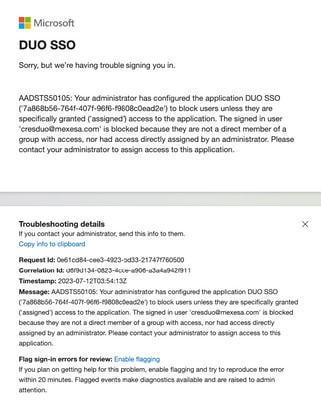
2. If the user is removed from Users in the Duo Admin Panel, this error appears, as shown in the image: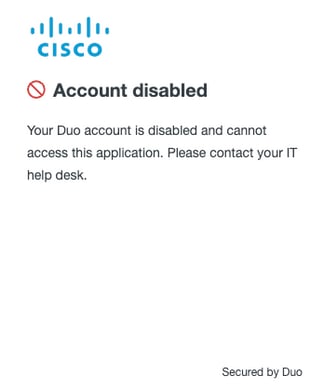
3. If the user is not enrolled in the Duo Admin Panel, this error appears, as shown in the image:
Related Information
Refer to the following resources for additional configuration details and product documentation:
- Cisco Secure Email Encryption Service administration portal
- Duo Admin Panel
- Microsoft Azure portal
- Duo user enrollment documentation
- Cisco Technical Support & Downloads
Revision History
| Revision | Publish Date | Comments |
|---|---|---|
1.0 |
20-Jul-2023
|
Initial Release |

 Feedback
Contact Cisco
- Open a Support Case

- (Requires a Cisco Service Contract)