Troubleshoot False Positive File Analysis Events in Secure Endpoint
Available Languages
Contents
Introduction
This document describes how to collect a False Positive file analysis in Cisco Secure Endpoint.
Prerequisites
Requirements
Cisco recommends that you have knowledge of the Secure Endpoint Console dashboard.
Components Used
The information in this document is based on Secure Endpoint version 8.x.x and later.
The information in this document was created from the devices in a specific lab environment. All of the devices used in this document started with a cleared (default) configuration. If your network is live, ensure that you understand the potential impact of any command.
Background Information
Secure Endpoints can generate excessive alerts on a certain file/process/script/Secure Hash Algorithm (SHA) 256. If you suspect any False Positive detections in your network, you can contact the Cisco TAC, and the Diagnostic Team proceeds to perform a deeper file analysis. When you contact Cisco TAC, you must provide this information:
• File SHA 256 hash
• File sample copy
• Alert Event capture from Secure Endpoint Console
• JSON Event Details captured from Secure Endpoint Console
• Information about the file (where it came from and why it must be in the environment)
• Explain why you believe the file/process can be a False Positive
Cisco always strives to improve and expand the threat intelligence for Secure Endpoint technology, however, if your Secure Endpoint solution triggers an alert erroneously, you can take some actions in order to prevent any further impact to your environment. This document provides a guideline to get all required details in order to open a case with Cisco TAC with regards to a False Positive issue. Based on the Diagnostic Team file analysis, the file disposition can change to stop the Alert Events triggered on Secure Endpoint Console or Cisco TAC can provide the proper fix to let run the file/process without issues in your environment.
Troubleshoot False Positive File Analysis in Secure Endpoint
This section provides the information you can use to get all details needed to open a False Positive ticket with Cisco TAC.
File SHA 256 Hash
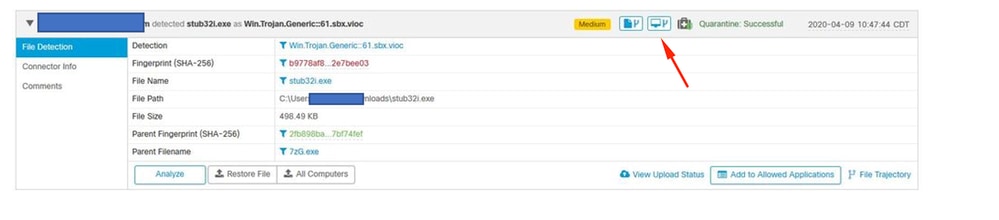
Step 1. In order to get the SHA 256 hash, navigate to Secure Endpoint Console > Dashboard > Events.
Step 2. Choose the Alert Eventandclick the SHA256 and choose Copy as shown in the image.
File Sample Copy
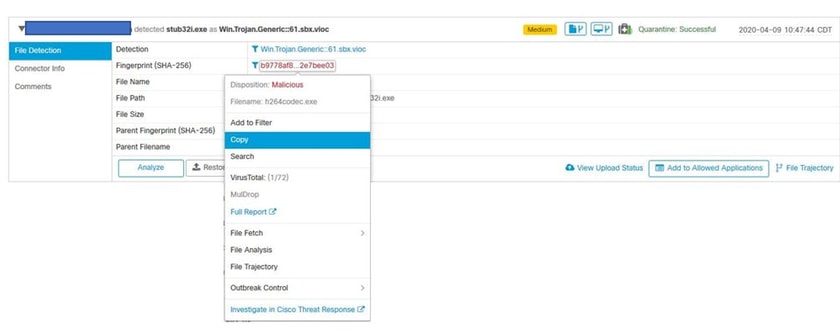
Step 1. You can get the file sample from Secure Endpoint Console, navigate to Secure Endpoint Console > Dashboard > Events.
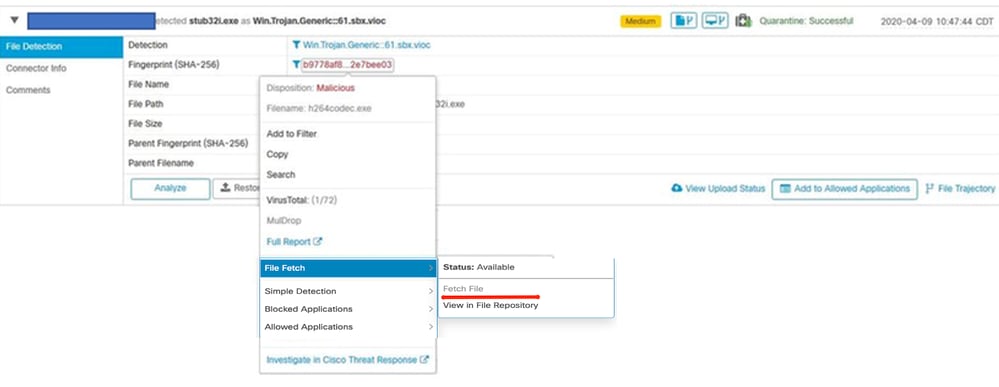
Step 2. Choose the Alert Event, click the SHA256 and navigate to File Fetch > Fetch File as shown in the image.
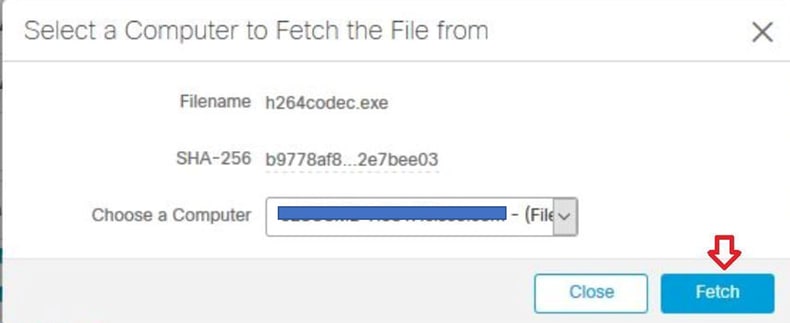
Step 3. Choose the device where the file was detected and click Fetch as shown in the image.
Step 4. You receive the notificationas shown in the image.
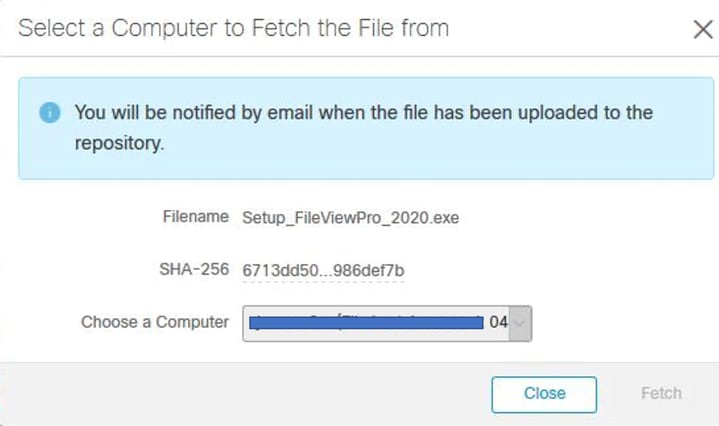
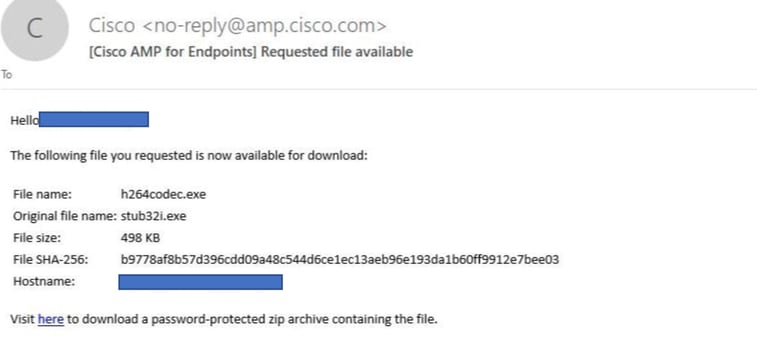
After a few minutes, you receive an email notification when the file is available to download as shown in the image.
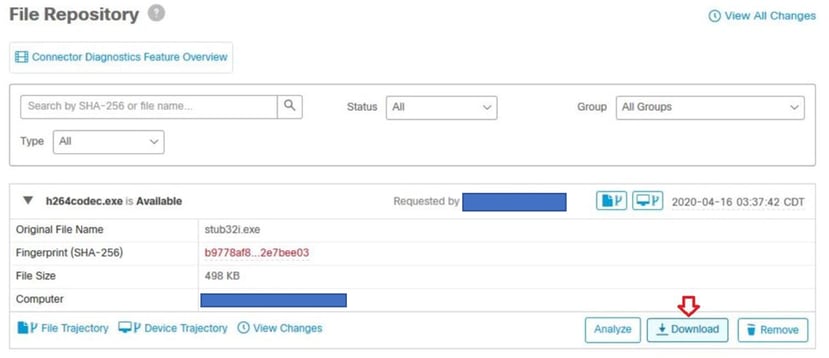
Step 5. Navigate to Secure Endpoint Console > Analysis > File Repository and choose Download as shown in the image.
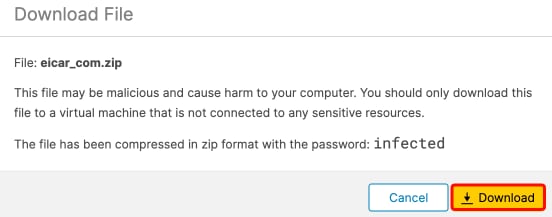
Step 6. A notification box appears, click Download, as shown in the image, and the file is downloaded as a ZIP file.
Alert Event Capture from Secure Endpoint Console
Step 1. Navigate to Secure Endpoint Console > Dashboard > Events.
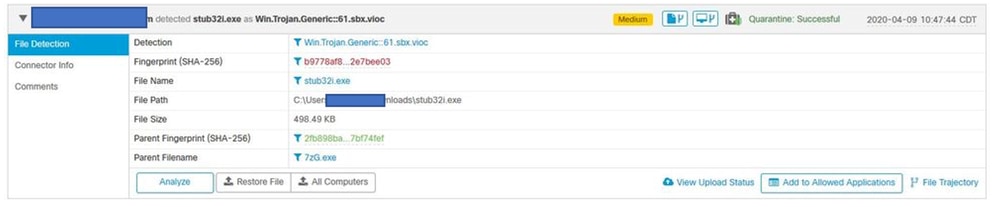
Step 2. Choose the Alert Event and take the capture as shown in the image.
JSON Event Details from Secure Endpoint Console
Step 1. Navigate to Secure Endpoint Console > Dashboard > Events.
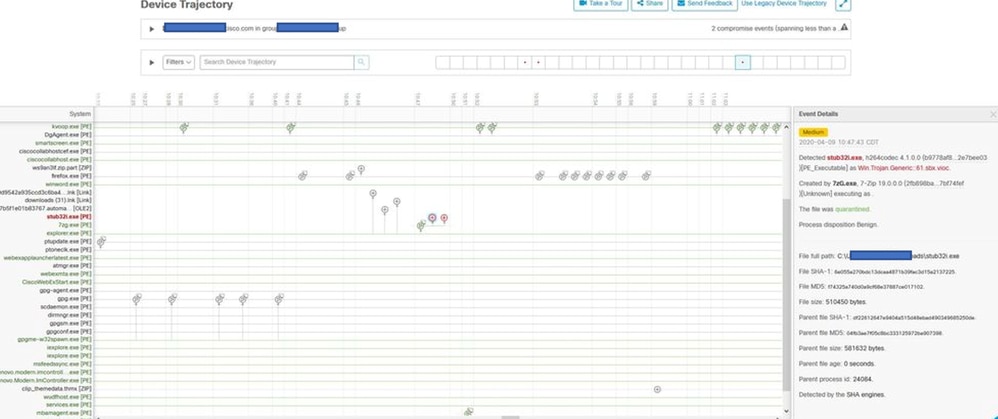
Step 2. Choose the Alert Event and click View, next to the JSON option as shown in the image.
It opens JSON details as shown in the image. Click Download in order to save the content.
Information About the File
- Information about where the file came from.
- If the file comes from a website, share the web URL.
- Share a little file description and explain the file function.
Explanation
- Why do you believe that the file process can be a False Positive?
- Share the reasons you trust the file.
Provide Information
- Once you collect all details, log in and upload all the information requested to your Cisco case.
- Ensure that you reference the Service Request (SR) number.
Revision History
| Revision | Publish Date | Comments |
|---|---|---|
4.0 |
24-Apr-2026
|
Recertification and reformatting of headers, links. |
3.0 |
26-Mar-2026
|
Version 8.x.x |
1.0 |
02-Sep-2020
|
Initial Release |
 Feedback
Contact Cisco
- Open a Support Case

- (Requires a Cisco Service Contract)