How to Configure Splunk Forwarding to Use Your Own Certificate
Available Languages
Applicability
Splunk Enterprise Universal ForwarderDescription
Default certificates are not considered highly secure. Anyone who has downloaded Splunk Enterprise has server certificates signed by the same root certificate and are able to authenticate to your certificates. To ensure that no one can easily snoop on your traffic or wrongly send data to your indexers, we recommend that you replace them with signed certificates.Important: The default certificates are set to expire three years after they are generated and new certificates must be created and configured at that time.
Resolution
Set up the indexer to use the default server certificate:
1. In $SPLUNK_HOME/etc/system/local/inputs.conf (or the appropriate directory of any app you are using to distribute your forwarding configuration), set up the following stanzas: 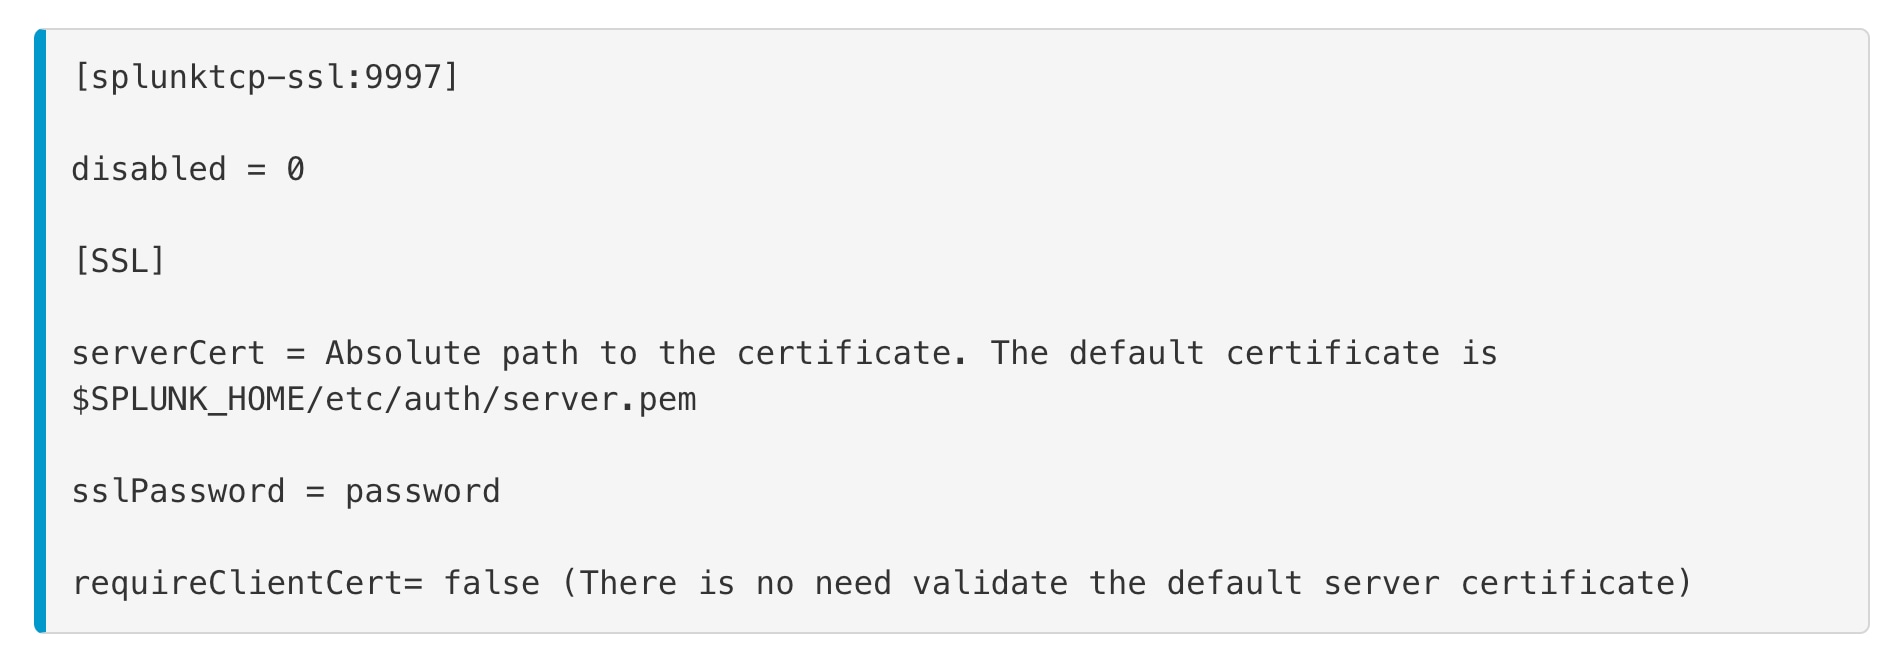
2. Your $SPLUNK_HOME/etc/system/local/server.conf should also have the following: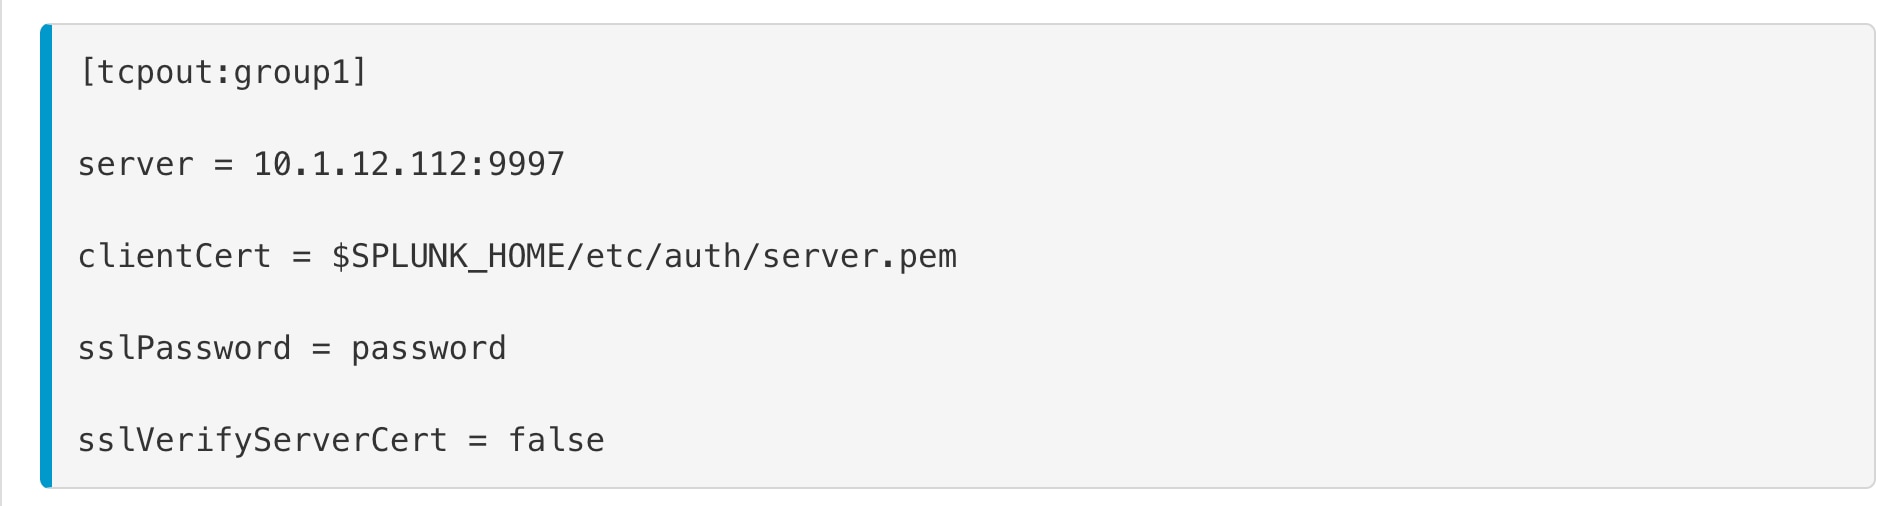
Configure the forwarder:
Set up your forwarder to use the same default certificates as your indexer and configure the forwarder to send data to the configured listening port
1. Define the following stanzas in $SPLUNK_HOME/etc/system/local/outputs.conf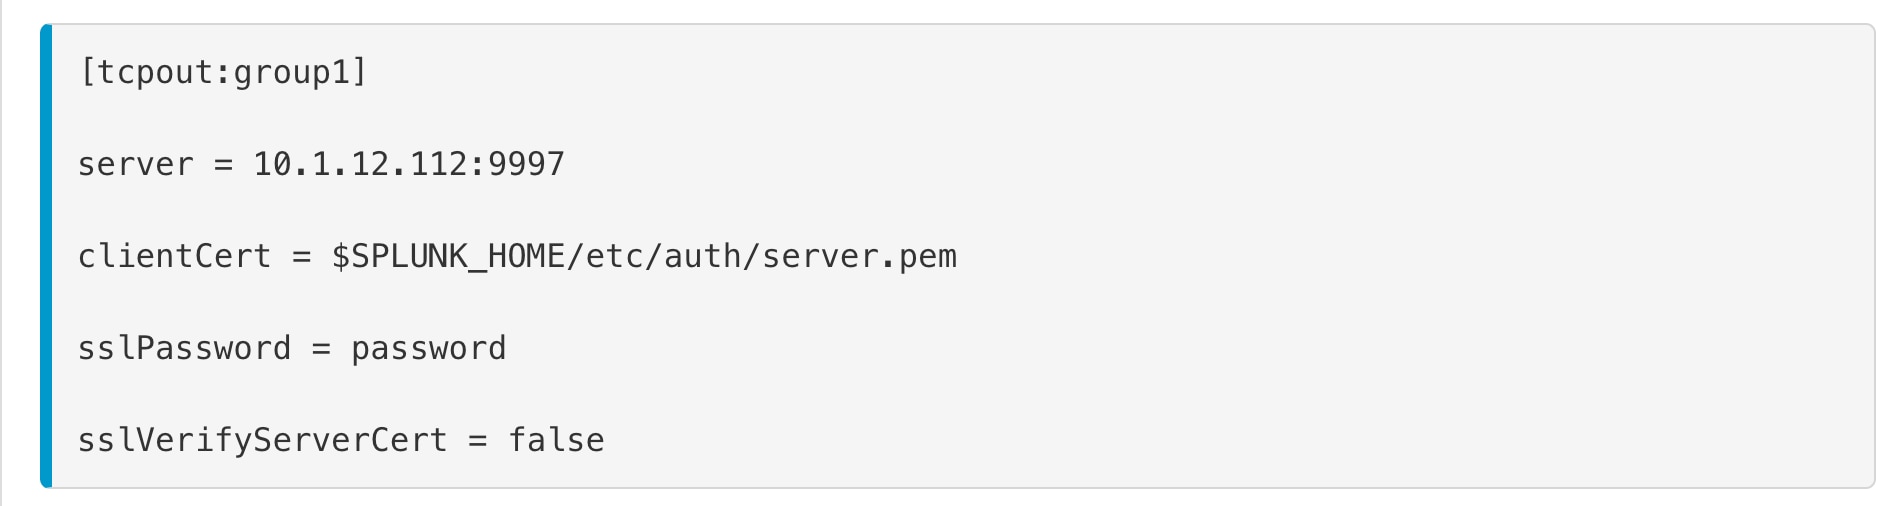
2. Your forwarder’s $SPLUNK_HOME/etc/system/local/server.conf should also have the following:
Configure Splunk forwarding to use your own certificate
You can send data from your forwarders to your indexers using your own certificates. You can self-sign these certificates, or use a third party to sign them.
Prerequisites:
Before you can secure communication between Splunk indexers and forwarders, you must procure and prepare the certificates. You must satisfy the following conditions:
The certificates that you procure and Privacy-Enhanced Mail (.pem) files, and the format of those files conform with the x.509 public key certificate standard.
The certificate key must be in RSA security format.
You can also create multiple certificates that are signed by the same Certificate Authority(CA) with different common names, and distribute those to your indexers for added security. When you give the forwarder the CA public key, the forwarder trusts the CA, verifies the certificate of the CA, and matches one of the SSL common names or alternative names (as configured by either the sslCommonNameToCheck or sslAltNameToCheck settings in forwarder configuration file.
1. Copy your server certificate and CA public certificate into an accessible folder on the indexer you want to configure. For example, you can use a destination folder of $SPLUNK_HOME/etc/auth/mycerts/
2. Configure inputs.conf on the indexer to use the new server certificate. Add the following stanzas to $SPLUNK_HOME/etc/system/local/inputs.conf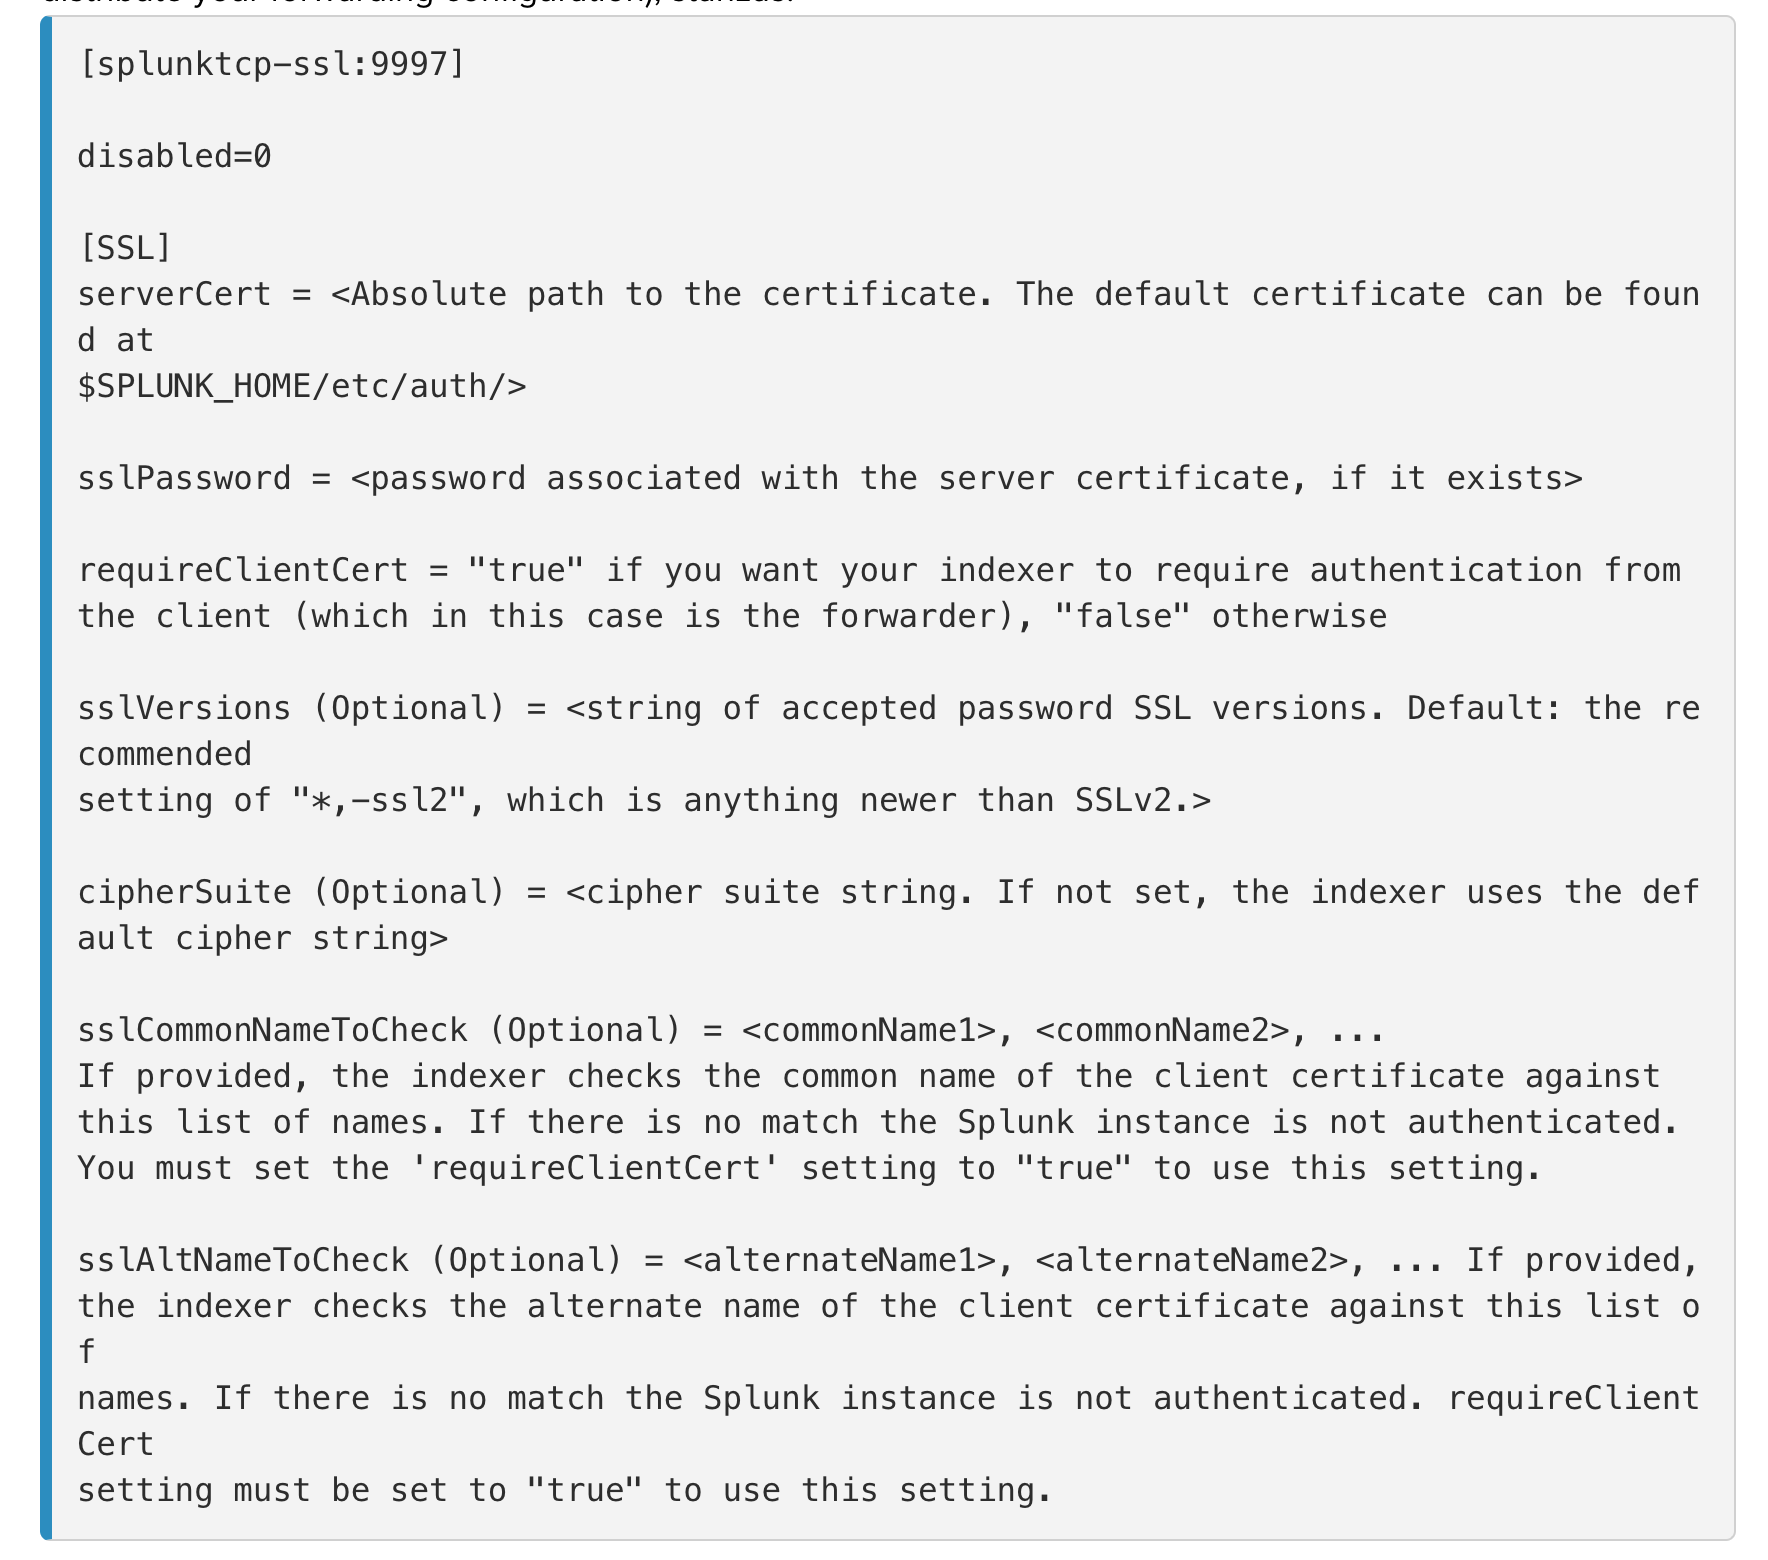
When you edit the file in $SPLUNK_HOME/etc/system/local/inputs.conf, the indexer encrypts the password and overwrites the clear-text server certificate password that you provide when you restarted Splunk Enterprise.
3. On indexers configure $SPLUNK_HOME/etc/system/local/server.conf and add the following:
Configure your forwarders to use your certificates
1. Generate a new certificate (for example, client.pem)
2. Copy the new certificates and the CA publich certificate myCACertificate.pem into an accessible folder on the forwarders you want to configure. For example, you can use a destination folder of $SPLUNK_HOME/etc/auth/mycerts
3. Define the [SSL] stanza in $SPLUNK_HOME/etc/system/local/outputs.conf (or in the appropriate directory of any app you use to distribute your forwarding configuration):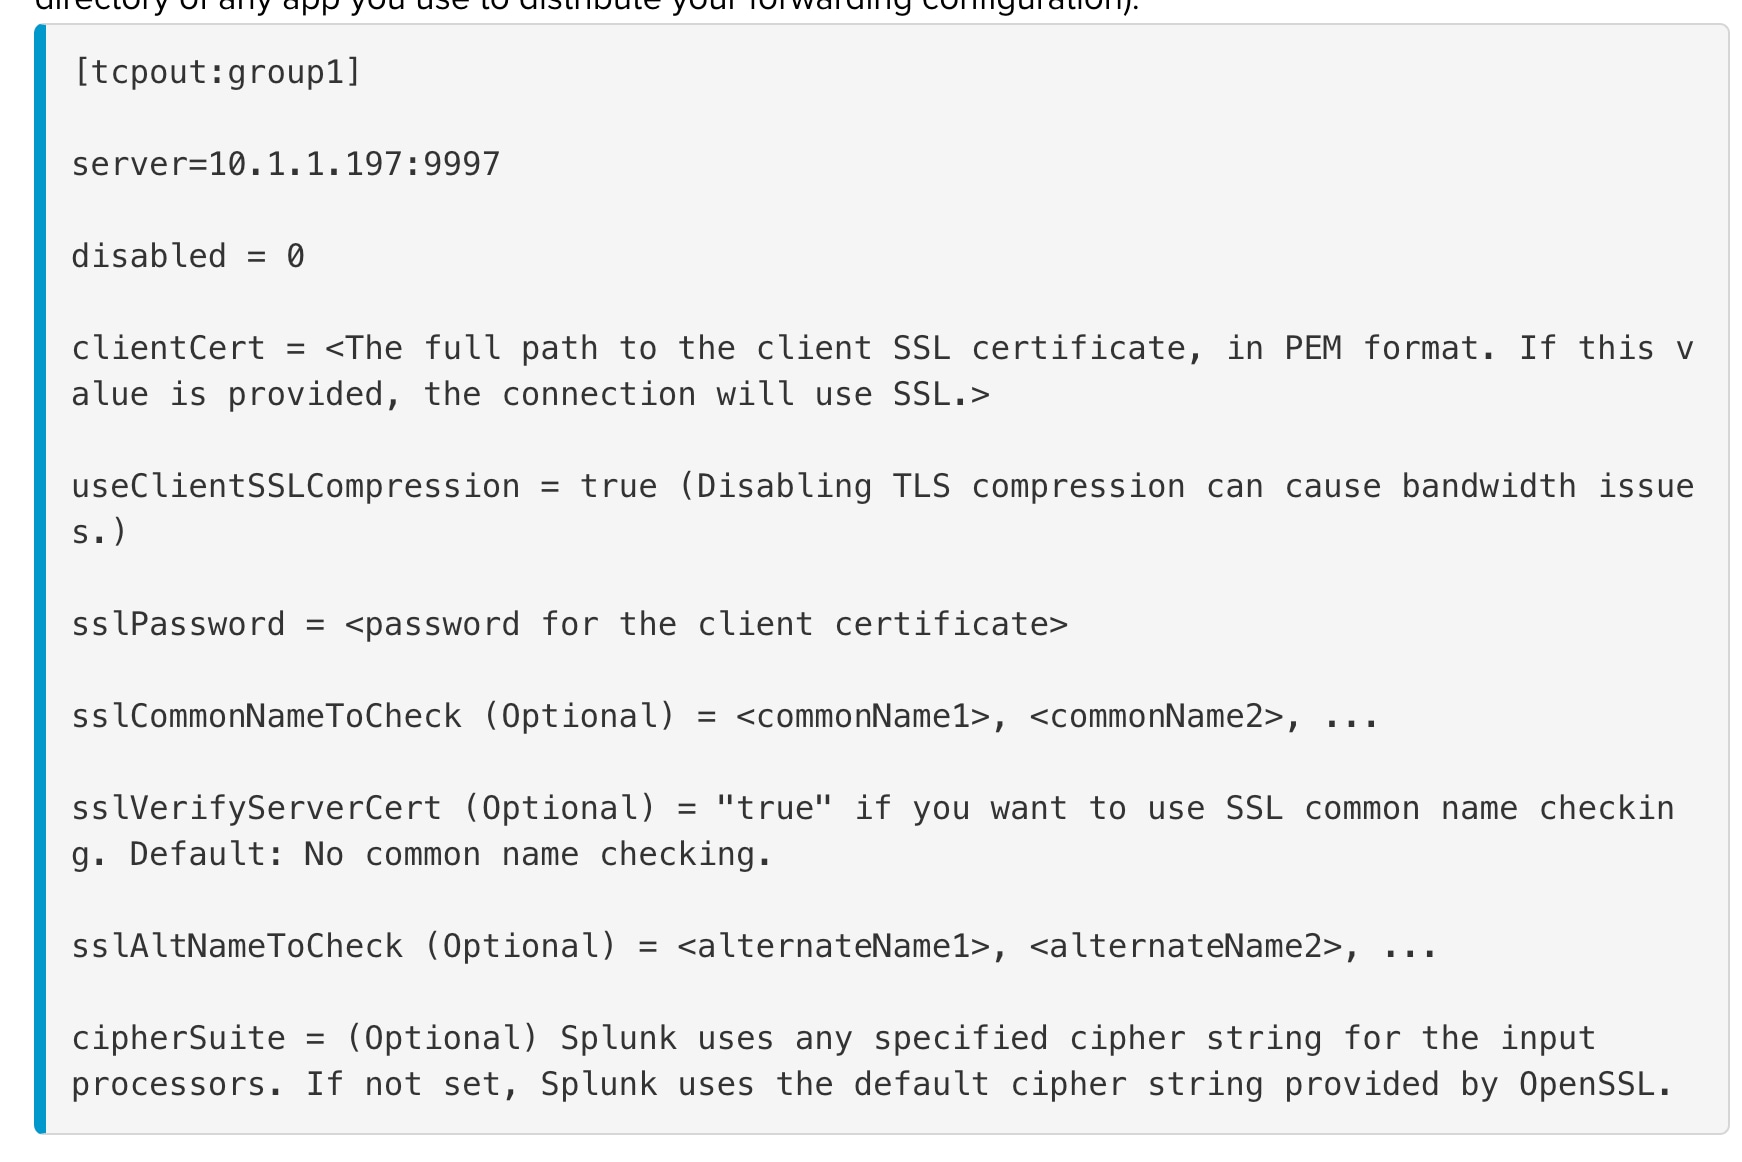
When you save the file in $SPLUNK_HOME/etc/system/local/outputs.conf, Splunk Enterprise encrypts and overwrites the clear-text server certificate password on start.
4. On forwarders that do not run on Windows, configure $SPLUNK_HOME/etc/system/local/server.conf and add the following: 
Summary/Gotcha about the above implementation steps:
1. By default, the SSL encryption is not enabled for splunktcp
2. We need to specify the password in outputs.conf and inputs.conf, otherwise the SSL connection cannot be setup correctly
3. Need to decide whether setup as:
$SPLUNK_HOME/etc/system/local/outputs.conf
[tcpout]
sslVerifyServerCert = true/false
$SPLUNK_HOME/etc/system/local/inputs.conf
[SSL]
requireClientCert = true/false
4. When configuring the password using the base app, the password won't be encrypted, it will stay as plain text in outputs.conf/inputs.conf
5. Some useful commands to verify the SSL certificates:
openssl s_client -showcerts -connect 10.10.10.10:9997
openssl x509 -noout -in server.pem -text
Related Links
For further details on configuring Certificates in Splunk please refer to the Steps to Securing Splunk with TLSRevision History
| Revision | Publish Date | Comments |
|---|---|---|
1.0 |
29-Sep-2026
|
Initial Release |
 Feedback
Contact Cisco
- Open a Support Case

- (Requires a Cisco Service Contract)