Configure SSO on CCX and Prem Contact Center Solutions with Okta IDP
Available Languages
Introduction
This document describes the Single Sign On (SSO) configuration with OKTA for various Cisco On Prem Contact Center Solutions.
Prerequisites
Requirements
Cisco recommends that you have knowledge of these topics:
- Cisco Unified Contact Center Express, Cisco Unified Contact Center Enterprise (UCCE), or Packaged Contact Center Enterprise (PCCE)
- Security Assertion Markup Language
- OKTA
Components Used
The information in this document is based on these software and hardware versions:
- Unified contact center express (UCCX) 15.0
- OKTA
The information in this document was created from the devices in a specific lab environment. All of the devices used in this document started with a cleared (default) configuration. If your network is live, ensure that you understand the potential impact of any command.
Configuration on IDS/Cisco Side
1. Run the command utils ids set_property IS_IdP_OKTA true on CLI and restart the Identity Service (IDS) service.
2. If High Availability (HA) then run this command on both nodes and restart IDS service.
3. Login to UCCX Cisco IDS admin interface https://<UCCX server address>:8553/idsadmin on PUB node.
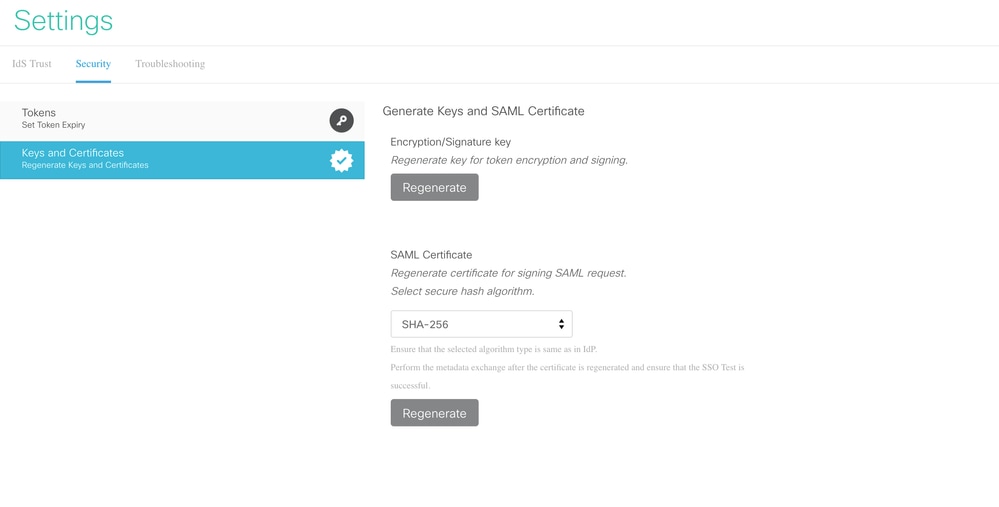
4. Navigate to Settings > Security > Keys and Certificates.
5. Regenerate Security Assertion Markup Language (SAML) Certificate.
6. From IDS Trust tab, download SAML SP metadata XML.
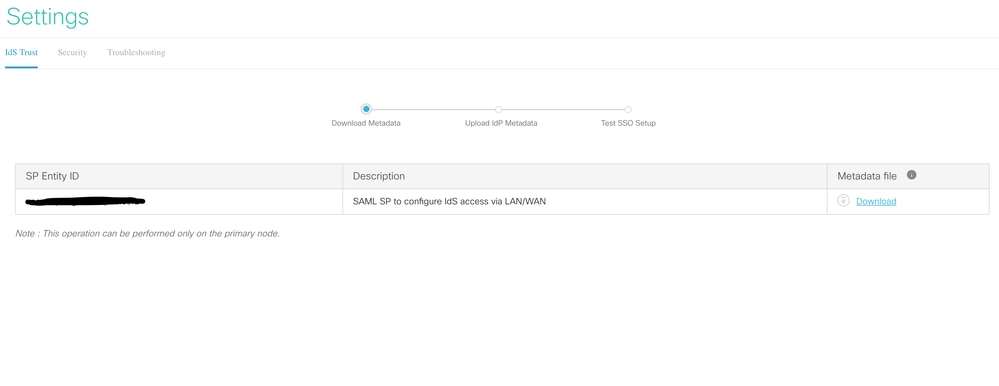
7. Open Service Provider (SP) metadata XML and make a note of the 'Location' attribute value for Publisher and Subscriber IDS within 'AssertionConsumerService' tag. The AssertionConsumerServiceURL in SAML metadata now includes metaAlias as part of the SAML response URL instead of the query parameter for PUB.
8. For Subscriber, it shows with query parameter and can be ignored.

Configuration on OKTA IDP Side
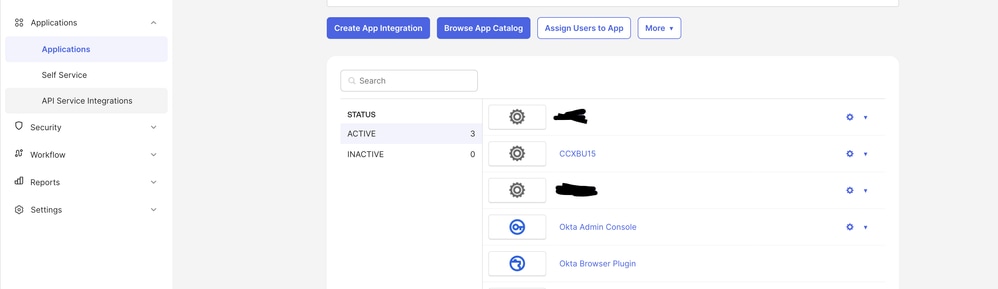
1. Under Applications, click Create App Integration.
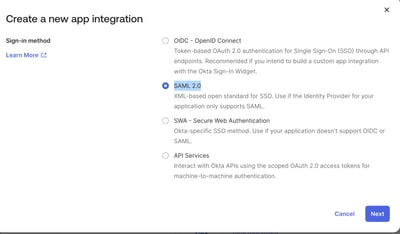
2. Choose the SAML2.0 option.
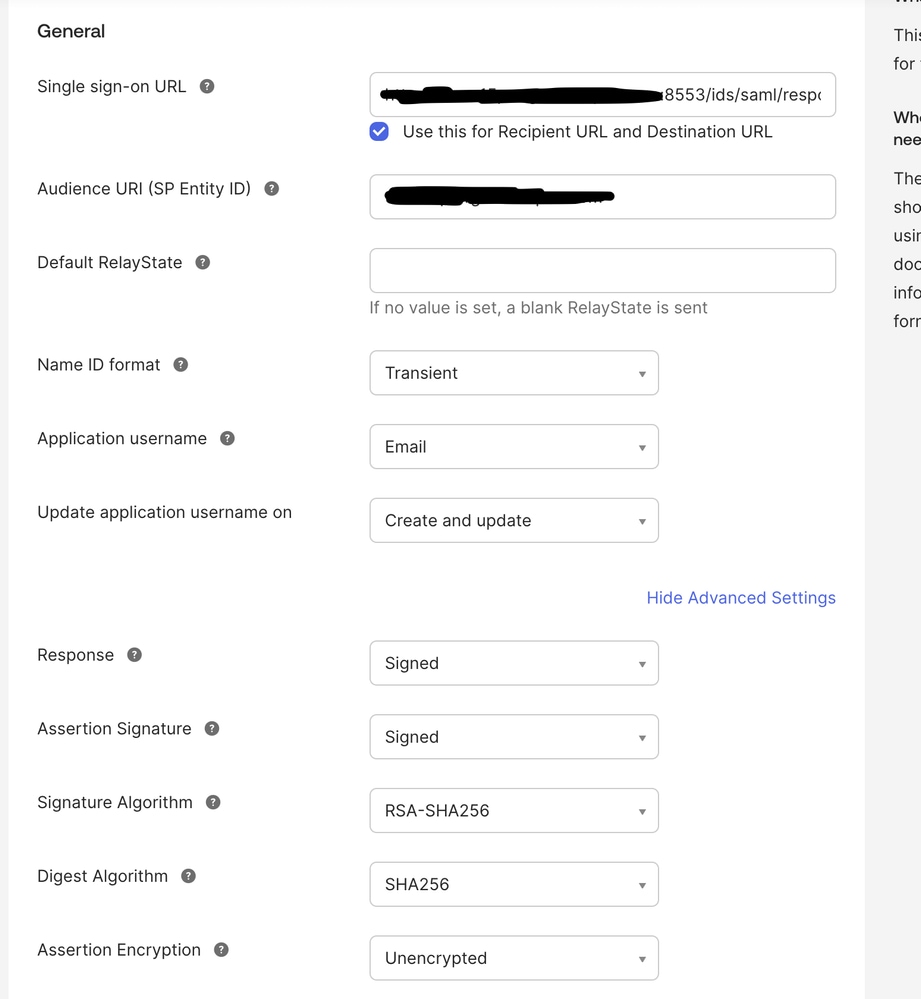
3. On the SAML setting SSO URL, provide the SSO URL of the PUB that was copied in Step 7. under 'Configuration on IDS/Cisco Side' in this document. In the Audience Uniform resource identitfier (URI) (SP Entity ID) paste the SP entity under IDS trust tab on settings in the Identity service management.
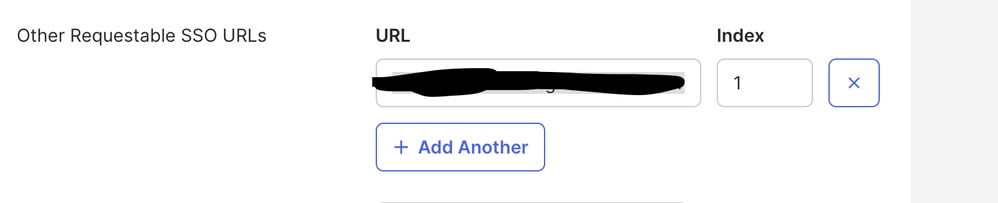
4. Under the 'Other Requestable SSO URLs', enter the URL of SUB https://<SUBFQDN>:8553/ids/saml/response/metaAlias/sp in the given format with index value as 1.
5. Click Next and Finish to complete the application configuration.
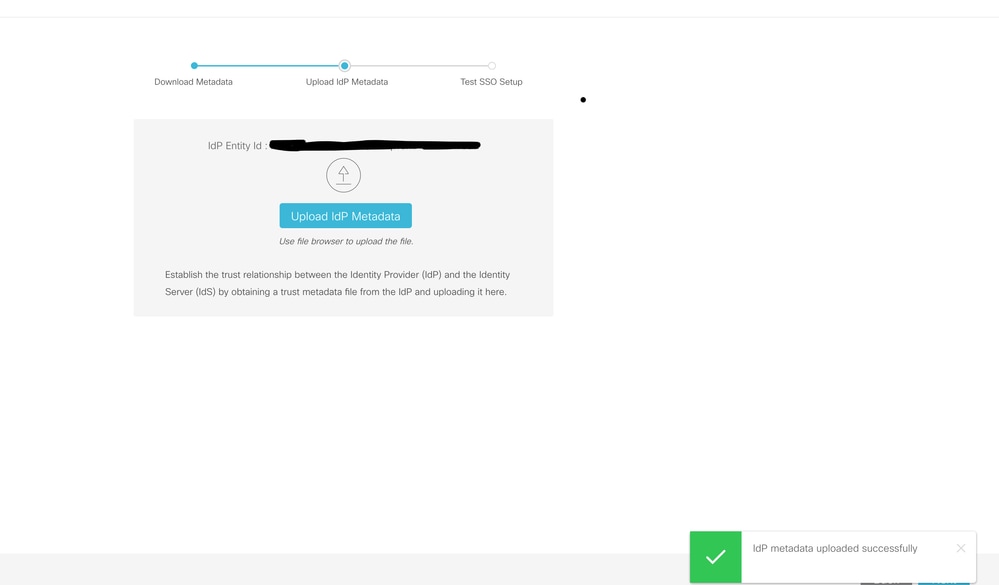
6. Copy the Metadata from Sign On tab using the URL and save it as xml.
7. Upload the Metadata from Step 6. on Identity service management webpage on CCX side.
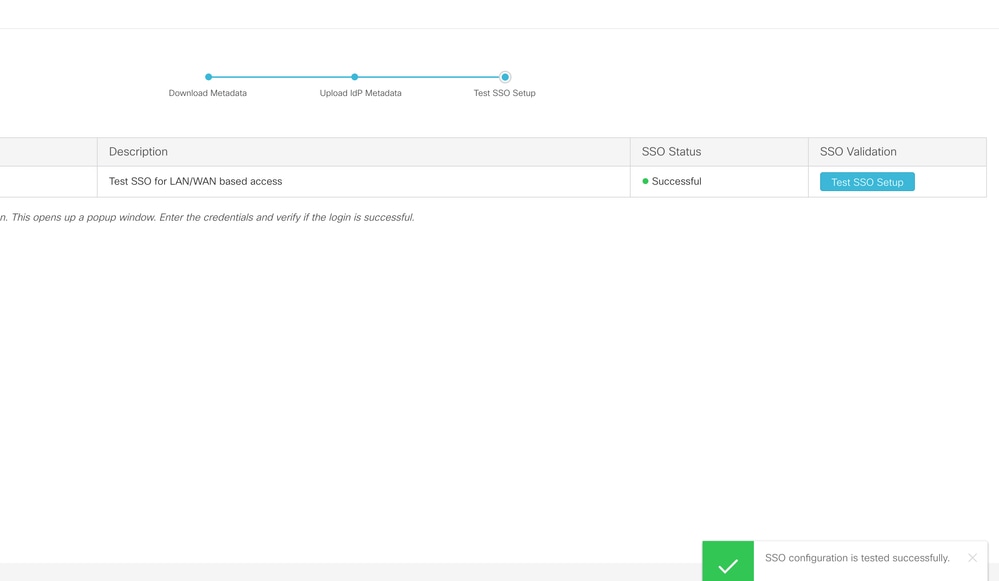
8. Run a TEST SSO setup and it must be successful.
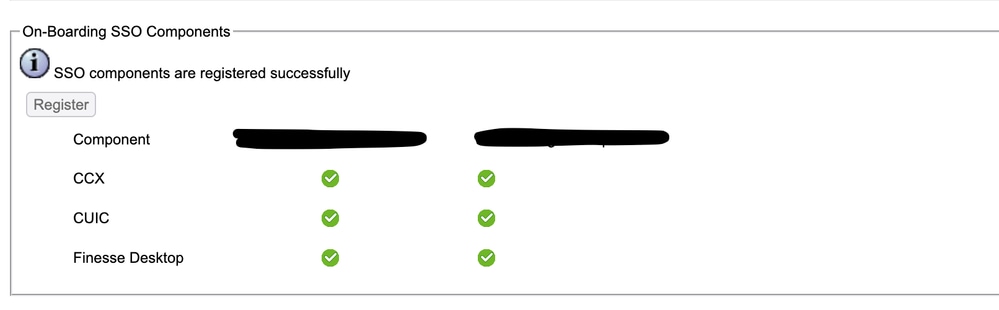
9. Login into the admin webpage on CCX with admin user and navigate to System > Single Sign On.
10. Click the Register button to on board the components.
11. Assigned reporting capability to Cisco Unified CCX Administrator (assigned in Administrator Capability view) and execute CLI command utils cuic user make-admin CCX\<Admin User Id> to provide administrator rights in Cisco Unified Intelligence Center. Use the configured user with administrator rights for the SSO Test operation.
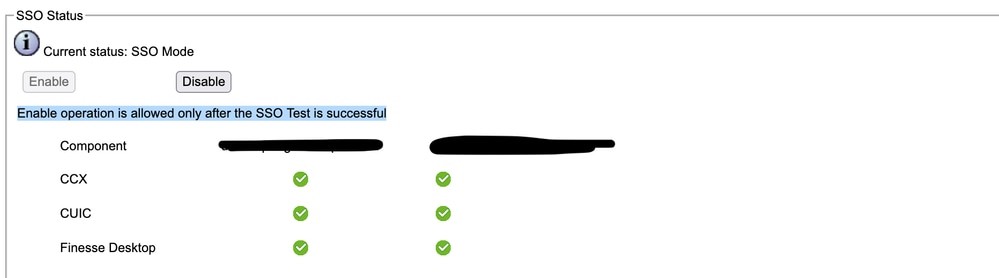
12. Run the SSO Test opertation.
13. After the SSO Test is successful, the enable operation is allowed.
Verify
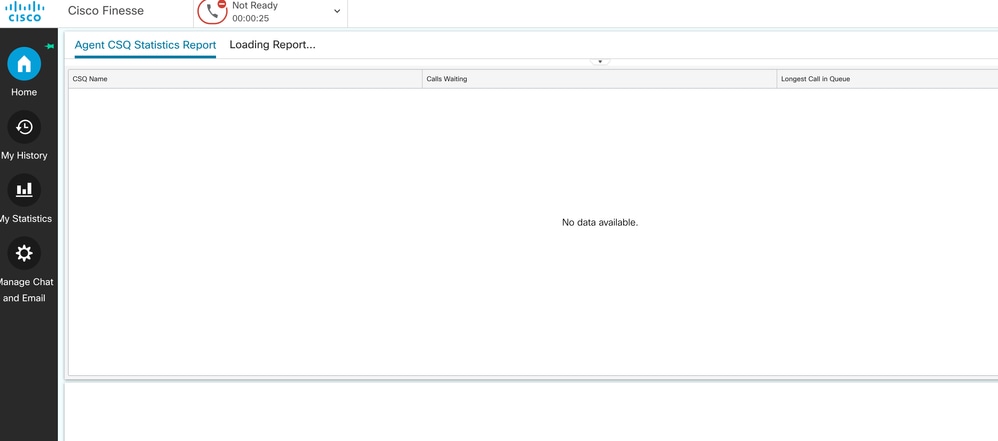
Check for login operations with agent and administrators on CCX, Cisco Unified Intelligence Center (CUIC), and Finesse. They must be successful.
When logging in agent on finesse it redirects to OKTA page.
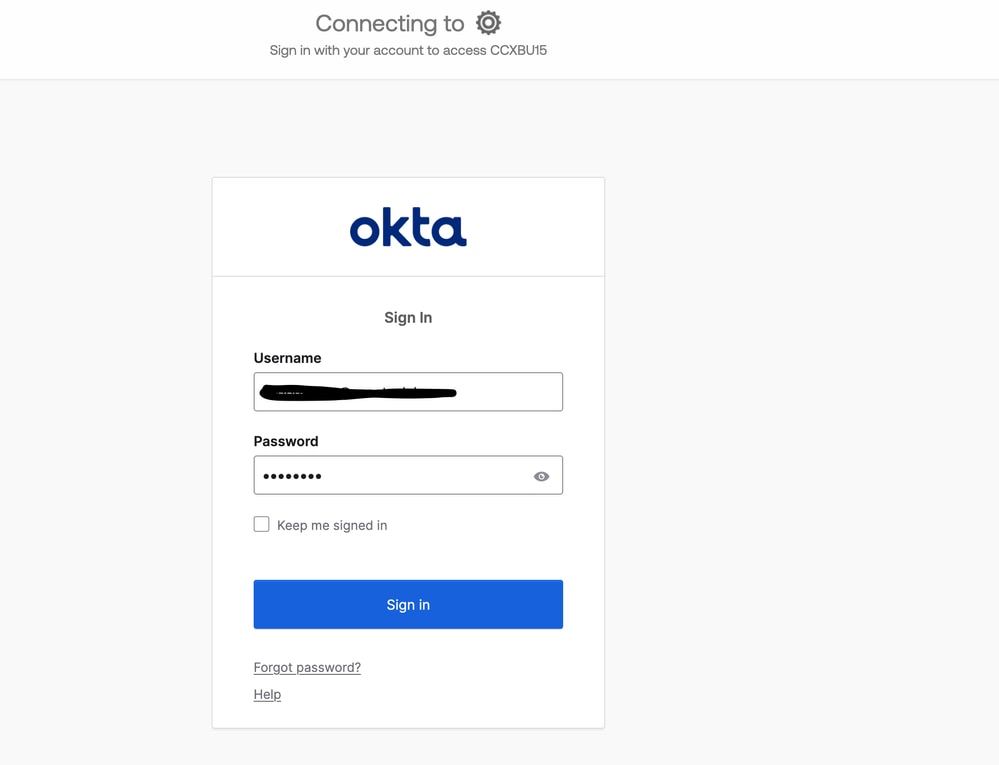
After putting in the credentials, it asks for only the extension now on the finesse login page.
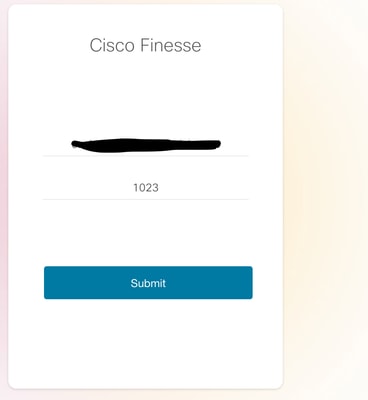
After this is entered, the login must be successful and all live reports must be loading fine.
Revision History
| Revision | Publish Date | Comments |
|---|---|---|
1.0 |
27-Apr-2026
|
Initial Release |
 Feedback
Contact Cisco
- Open a Support Case

- (Requires a Cisco Service Contract)