Set-up a Room Navigator
Available Languages
Introduction
This document describes how to set up the two versions of Cisco Room Navigator: Wall Mount and Table Stand versions.
Prerequisites
Requirements
Cisco recommends that you have knowledge of these topics:
- Software releases CE9.14+
- Supported Cisco Endpoints: Webex Room Series, Webex Board 55 G1.5, Webex Board 70 G1.5, Webex Board 85
Components Used
The information in this document is based on these software and hardware versions:
- Cisco Room Navigator – Wall mount version (CS-T10-WM-K9=)
- Cisco Room Navigator – Table stand version (CS-T10-TS-K9=)
- Webex Room Kit Plus
The information in this document was created from the devices in a specific lab environment. All of the devices used in this document started with a cleared (default) configuration. If your network is live, ensure that you understand the potential impact of any command.
Configure
This section describes the main features and initial setup for both Cisco Room Navigators: wall mount and table stand versions.
Cisco Room Navigator – Wall Mount Version Setup
- In order to pair the Cisco Room Navigator to the Cisco Endpoint through the network, the Ethernet cable with Power over Ethernet (PoE) must be connected from a Local Area Network (LAN) switch. It powers on and starts the boot-up process showing the Cisco logo.
- The first time the Cisco Room Navigator boots up (as it is not connected directly to the Cisco Endpoint), it shows the Welcome screen and two buttons, ChangeLanguage and Start.
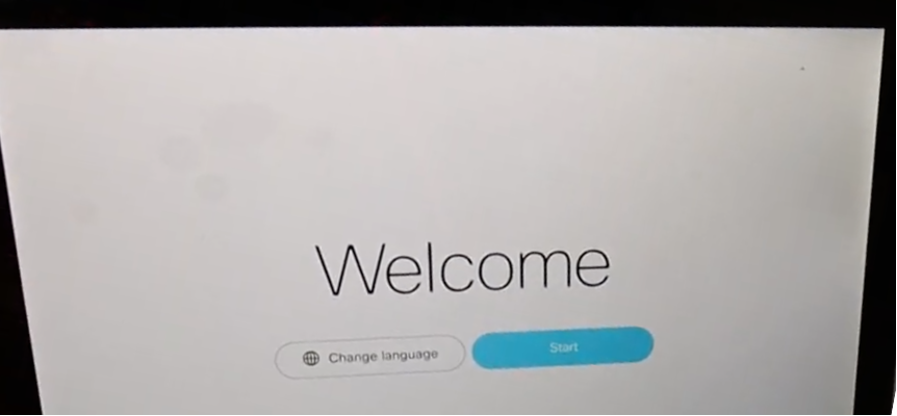
- Upon clicking Start, the wizard prompts you to enter the Internet Protocol (IP) address of the room device.
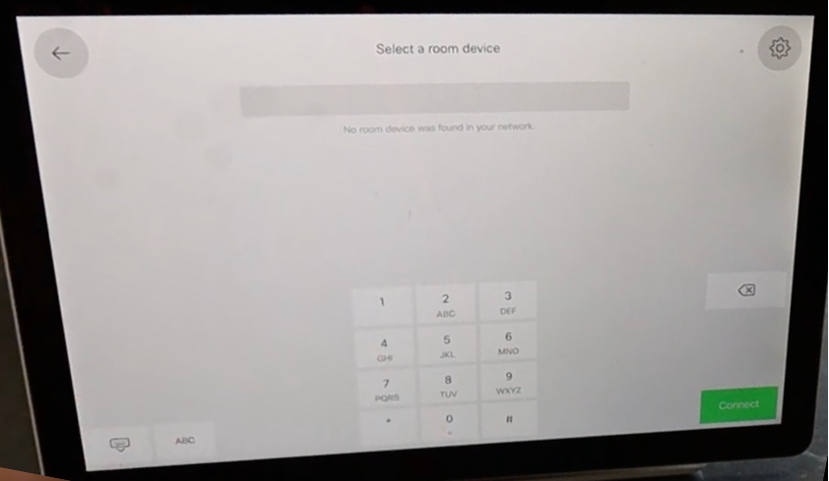
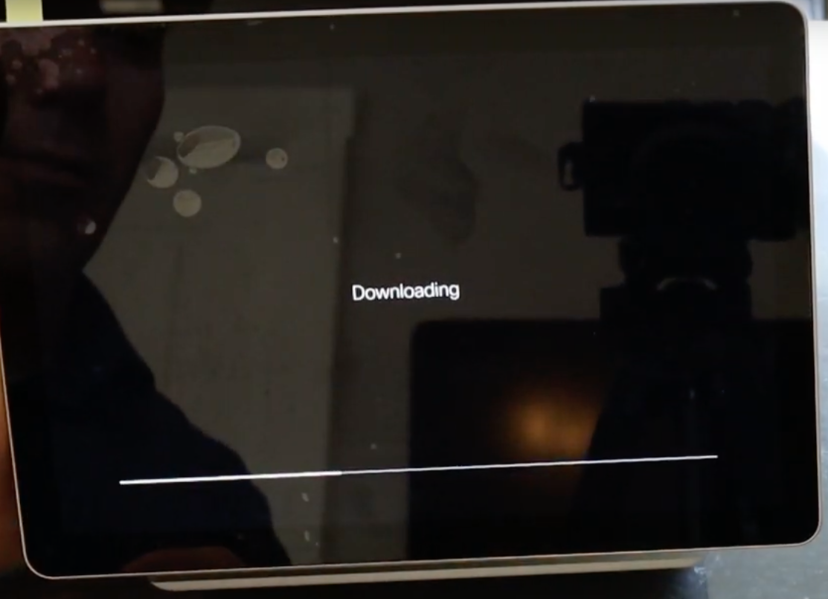
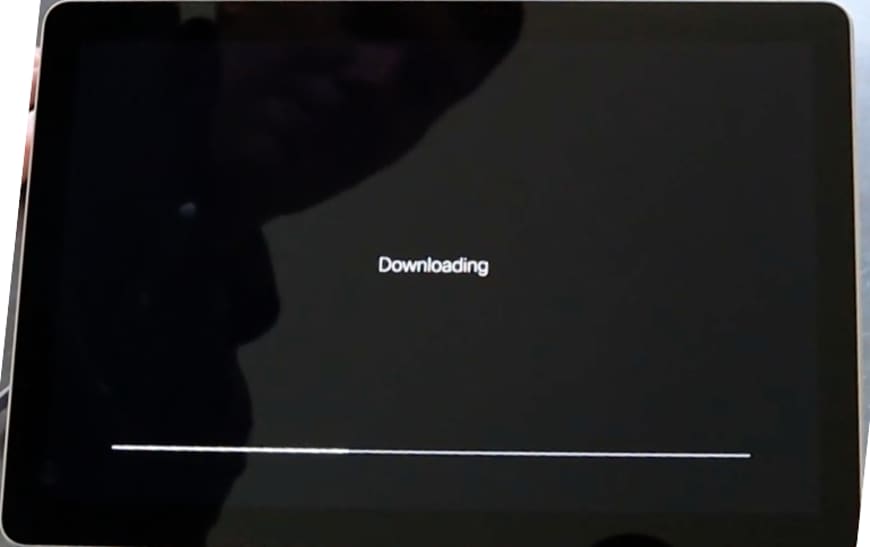
- When the Cisco Endpoint IP address is configured, the Cisco Room Navigator contacts and downloads the software image from the room device.
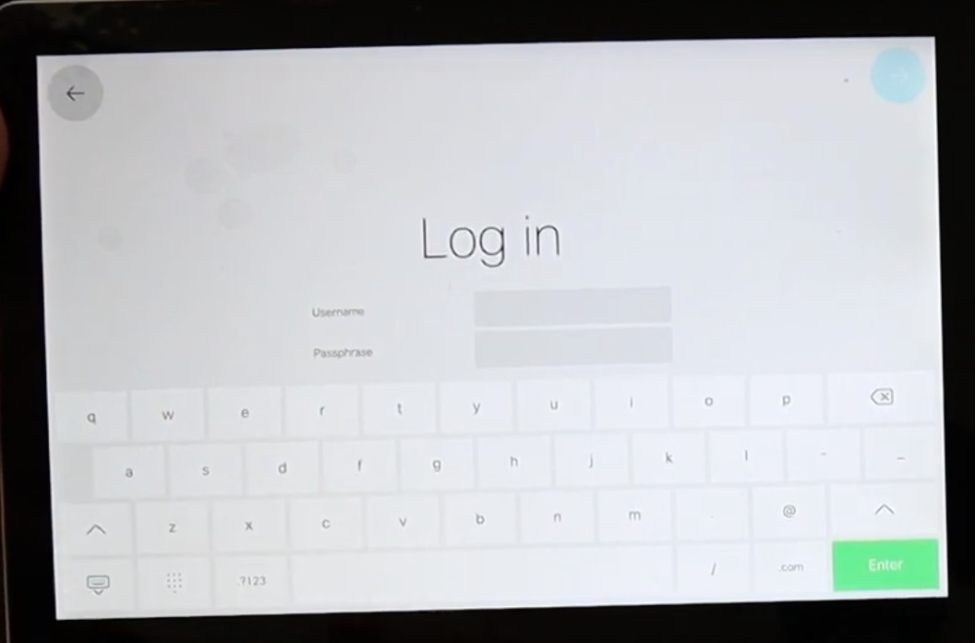
- Once the download process ends, the wizard asks for the Cisco Endpoint credentials to complete the authentication and pairing process.
- A local account is required to pair the Cisco Room Navigator once it is connected through the network.
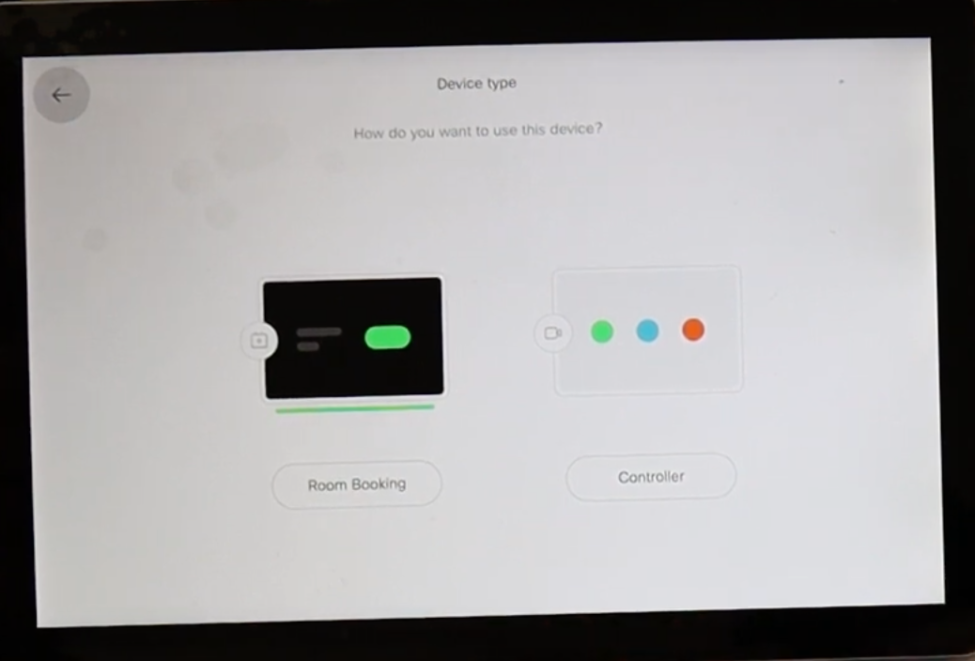
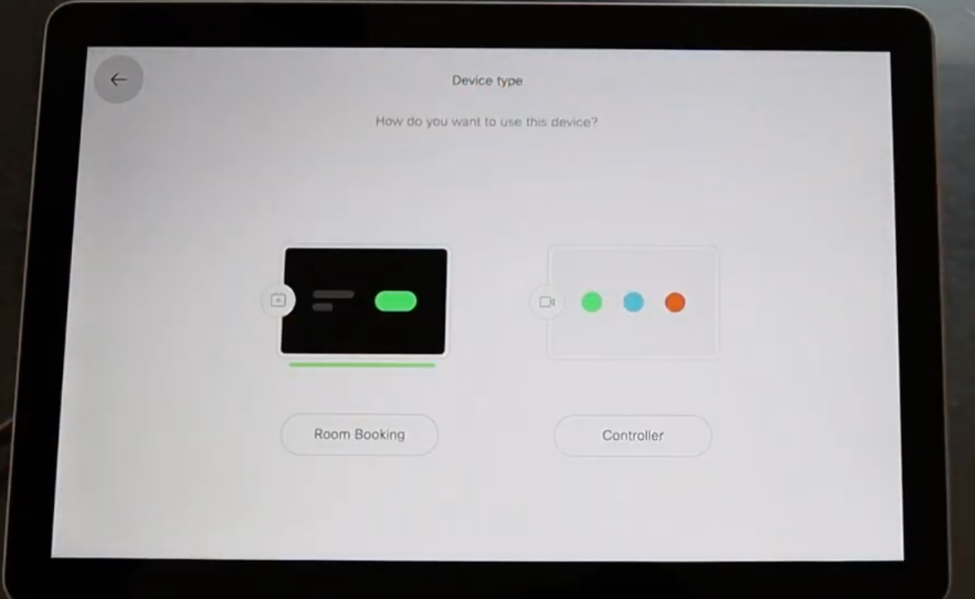
- Configure the Device Type from any of the two available modes; Room Booking or Controller.
- For this scenario, the Room Booking option is used.
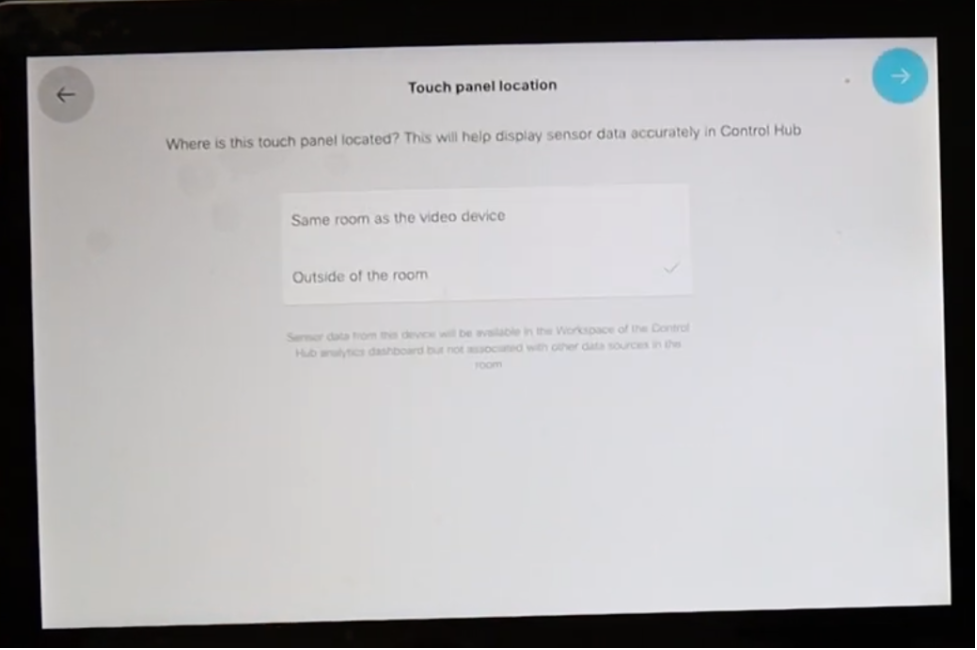
- When the Room Booking mode for the Cisco Room Navigator is selected, the wizard asks for the Touch Panel Location.
- You can select two options; Same room as the Video Device or Outside of the Room.
- By default, Outside of the room is selected.
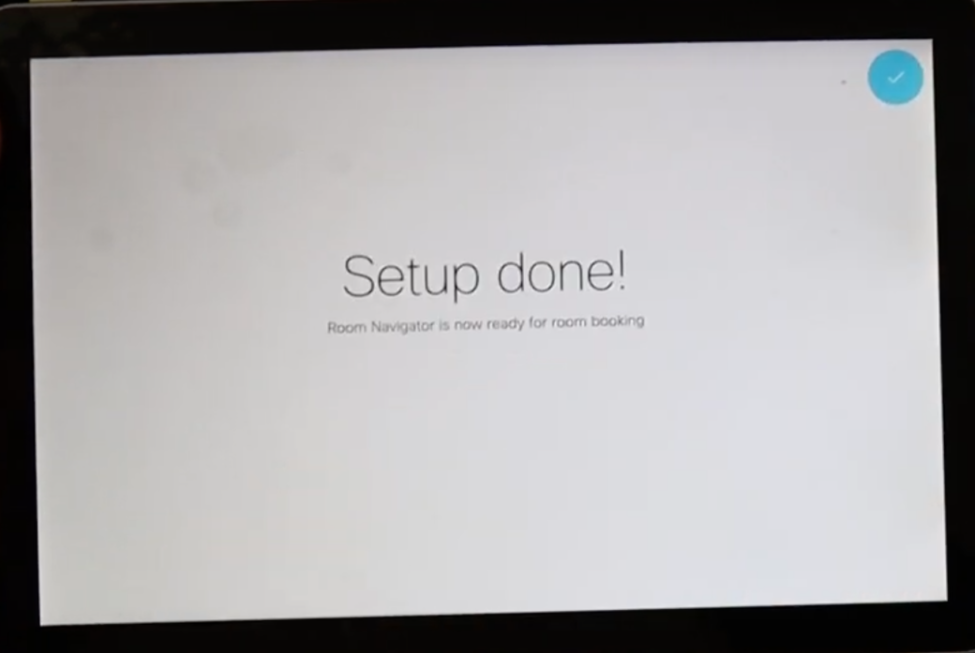
- Select the blue check mark to complete the setup.
- The main menu displays the Cisco Room Navigator for a brief moment. It shows a black screen for several seconds and a message: Touch panel out of service.

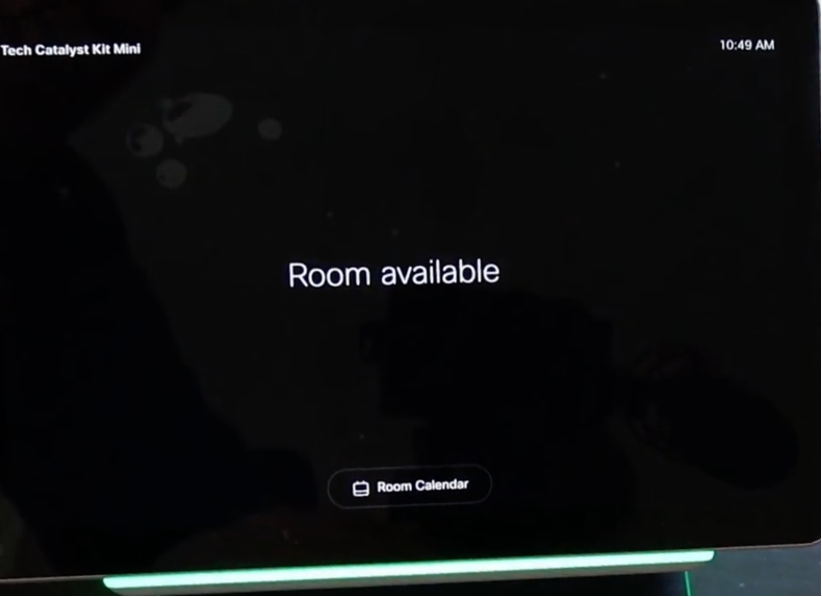
Note: The thin bar under the screen is lit in green because the room calendar is not yet configured.
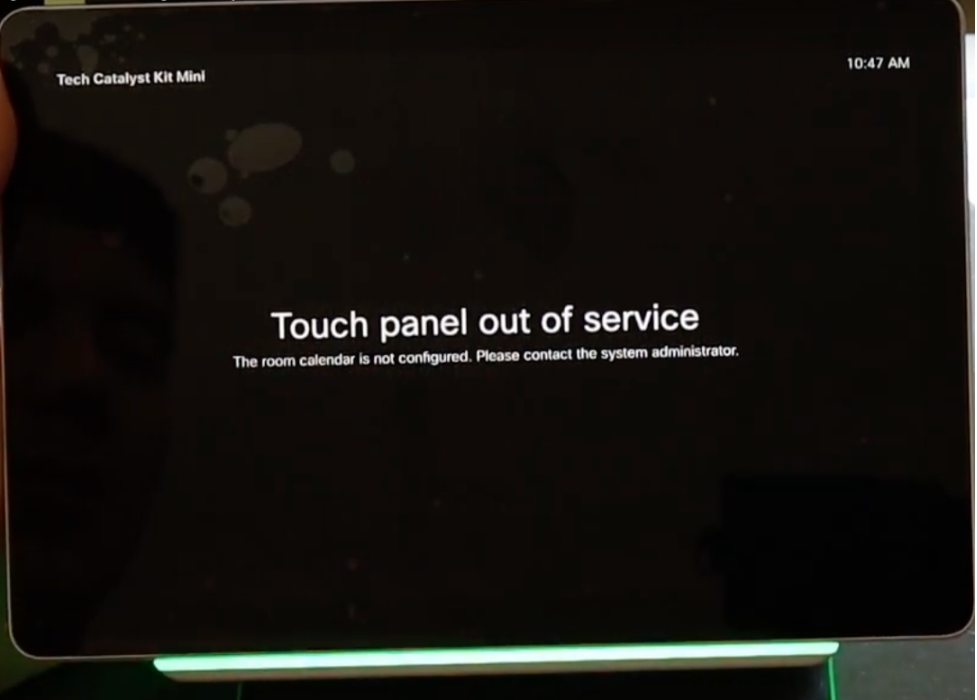
- Once you configure the room calendar, the message Room available is displayed.
Cisco Room Navigator – Table Stand Version Setup
After the Ethernet cable with PoE is directly connected from a supported Cisco Endpoint, the Cisco Room Navigator powers on and starts the boot up process and the Cisco logo is displayed.
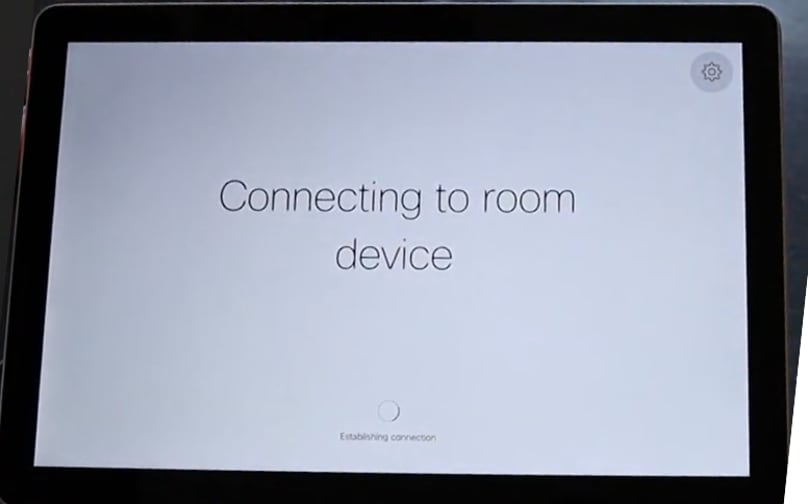
The message Connecting to room device is shown, while the communication with the room device is properly established.
When the Webex Room Navigator first boots up, it contacts and downloads the software image from the room device.
- Configure the Device Type from any of the two available modes Room Booking orController.
- For this scenario, the Controller option is used.
- When the Controller mode for this Webex Room Navigator is selected, the wizard asks for the Touch panel location.
- You can select two options Same room as the video device or Outside of the room.
- By default, the Same room as the video device is selected.
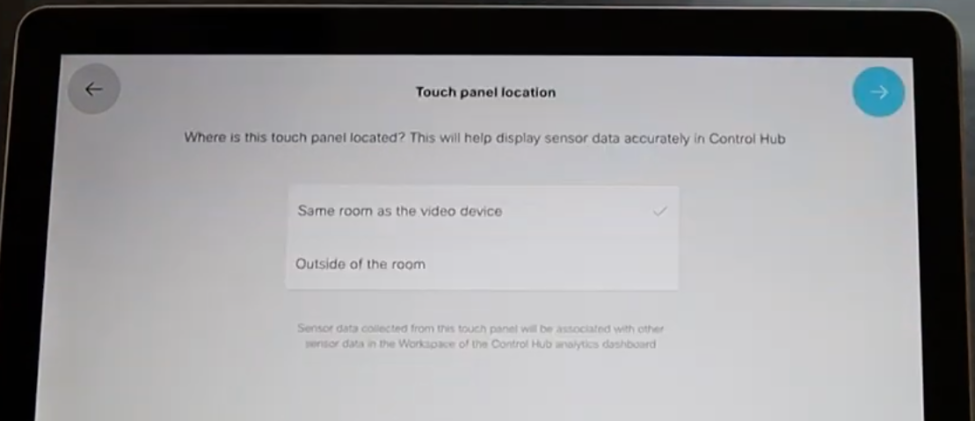
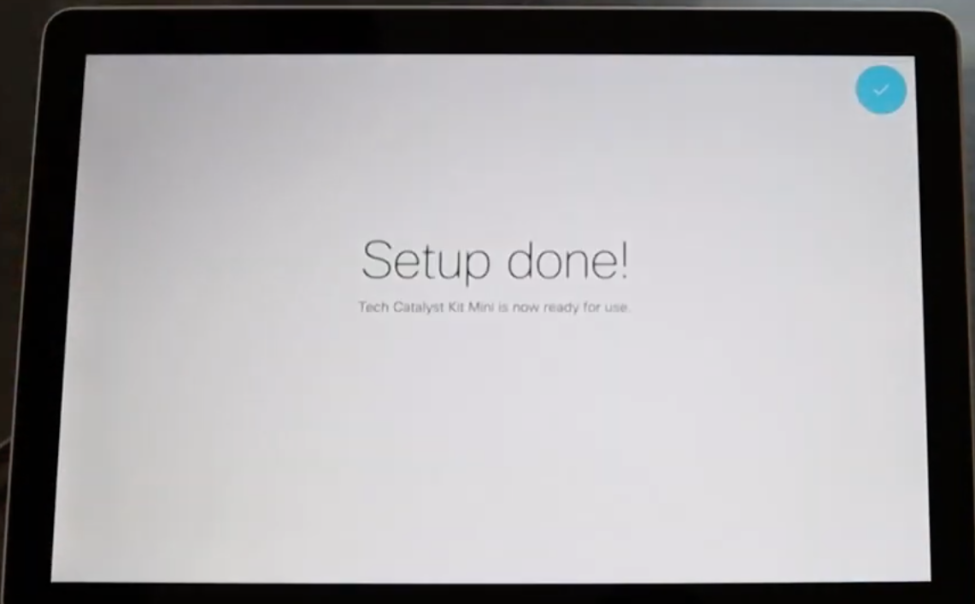
- Select the blue check mark to complete the setup.
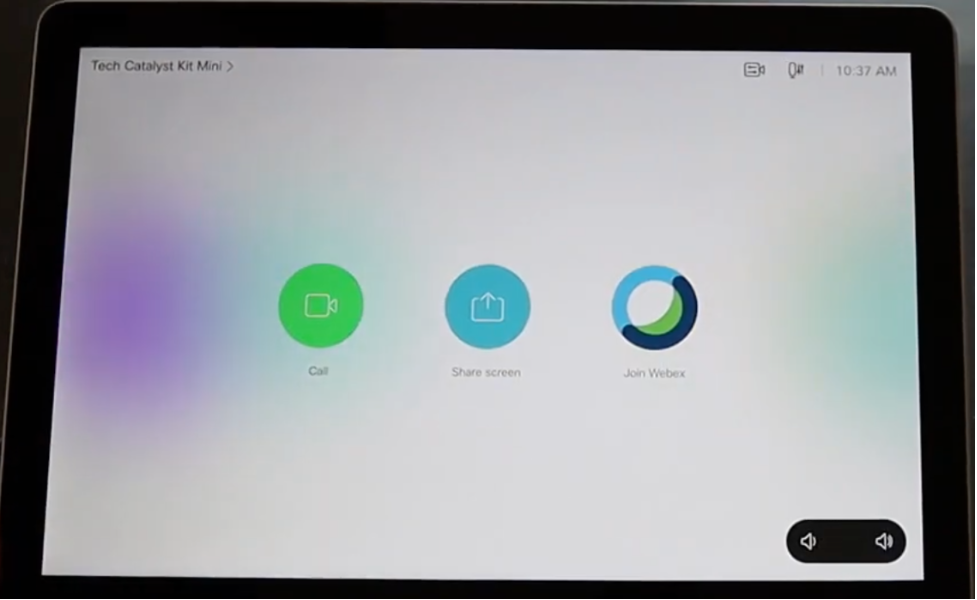
Now, the main menu is displayed on the Cisco Room Navigator screen, with the three classic well-known buttons: Call, Share screen, and Join Webex.
Related Information
For detailed installation instructions, refer to these guides:
Revision History
| Revision | Publish Date | Comments |
|---|---|---|
4.0 |
02-Jun-2026
|
Updated article title (from Setup to Set-up), spelling, spacing, updated spacing for Notes, etc. |
3.0 |
25-Apr-2024
|
Updated Title, Alt Text, Style Requirements, and Formatting. |
1.0 |
22-Jul-2021
|
Initial Release |
 Feedback
Contact Cisco
- Open a Support Case

- (Requires a Cisco Service Contract)