Cisco VG Series Gateways
| Overview | Product Overview |
|---|---|
| Product Type | Communications Gateways |
| Status | Available Order |
| Series Release Date | 13-SEP-2001 |
| Diagram | Visio Stencil (2 MB .zip file) |


- US/Canada 800-553-2447
- Worldwide Support Phone Numbers
- All Tools
 Feedback
 Feedback
-
Top Search Results
Key Information
Customers Also Viewed
Saved Content
-
You can now save documents for easier access and future use. Saved documents for this product will be listed here, or visit the My Saved Content page to view and manage all saved content from across Cisco.com.
Log in to see your Saved Content.
Recent Security Notices
- 20-Jan-2026
- 20-Dec-2024
Document Categories
-
Data Sheets and Product Information
Data Sheets
-
English
- End-of-Sale and End-of-Life Announcement for the Cisco VG450
- End-of-Sale and End-of-Life Announcement for the Cisco VG310/320
- End-of-Sale and End-of-Life Announcement for the Cisco Select Cisco VG and Unified Communications Products
- End-of-Sale and End-of-Life Announcement for the Cisco VG202XM and VG204XM Analog Voice Gateway
- End-of-Sale and End-of-Life Announcement for the Cisco Select VG350 Software Licenses
- End-of-Sale and End-of-Life Announcement for the Cisco Voice Gateway VG320-EM and VG310-EM
- End-of-Sale and End-of-Life Announcement for the Cisco Select VG350 series
- End-of-Sale and End-of-Life Announcement for the Cisco Selected VG350, Voice Interface Cards and SM PIDs
- End-of-Sale and End-of-Life Announcement for the Cisco VG224 Analog Voice Gateway
- End-of-Sale and End-of-Life Announcement for the Cisco Euro-ISDN Media Gateway VG-2BRI
- End-of-Sale and End-of-Life Announcement for the Cisco VG248 Analog Phone Gateway
- End-of-Sale and End-of-Life Announcement for the Cisco VG202 and VG204 Analog Voice Gateways
- End-of-Sale and End-of-Life Announcement for the Cisco 112-FXS Bundle
End-of-Life and End-of-Sale Notices
-
Security Notices
-
Applicable to Multiple Models
- Field Notice: FN72510 - Cisco IOS XE Software: Weak Cryptographic Algorithms Are Not Allowed by Default for IPsec Configuration in Certain Cisco IOS XE Software Releases - Configuration Change Recommended
- Field Notice: FN - 72570 - Weak Cryptographic Algorithms Are Not Allowed by Default for OSPF IPsec Configuration in Cisco IOS XE Release 17.11.1 and Later - Configuration Change Recommended
- Field Notice: FN - 72511 - RSA Keys Less Than 2048 Bits Are Not Supported for SSH in Cisco IOS XE Release 17.11.1 and Later - Workaround Provided
-
Cisco VG450 Analog Voice Gateway
-
Cisco VG420 Analog Voice Gateway
-
Cisco VG3X0 Analog Voice Gateway
- Field Notice: VG248 Upgrade Required For Use With Cisco CallManager 4.0(1)
Field Notices
-
-
Release and Compatibility
-
Reference
-
Cisco VG450 Analog Voice Gateway
Licensing Information
-
-
Install and Upgrade
-
Cisco VG450 Analog Voice Gateway
-
Cisco VG420 Analog Voice Gateway
- Regulatory Compliance and Safety Information - Regulatory Compliance and safety Information - Cisco VG420 Voice Gateway Information sur la réglementation de la conformité et de sécurité-Regulatory Compliance and safety Information - Cisco VG420 Voice Gateway (PDF - 3 MB)
- Cisco VG420 Voice Gateway Hardware Installation Guide
-
Cisco VG410 Analog Voice Gateway
-
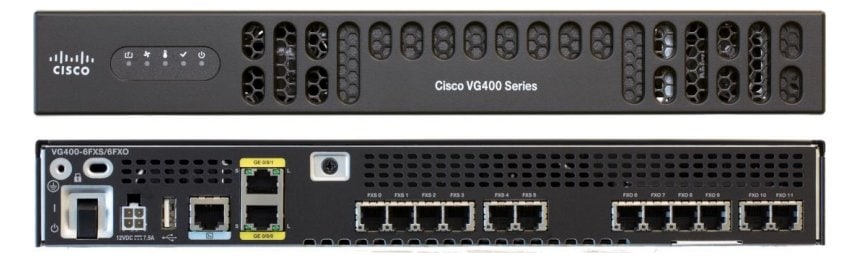
Cisco VG400 Analog Voice Gateway
-
Cisco VG248 48-Port Analog Voice Gateway
-
Cisco VG350 Gateway
Install and Upgrade Guides
-
-
Configuration
- Analog FXS Port SIP Registration with CUCM (PDF - 758 KB)
- Configure VG224 SCCP Secure Encrypted
- Cisco Analog Gateways Network Survivability Deployment Options (PDF - 1 MB)
Configuration Examples and TechNotes
-
Cisco VG420 Analog Voice Gateway
-
Cisco VG410 Analog Voice Gateway
-
Cisco VG400 Analog Voice Gateway
- Cisco VG310 and Cisco VG320 Voice Gateways Hardware Installation Guide
- Software Configuration Guide (Version 1.1)
- Software Configuration Guide (Version 1.0)
Configuration Guides
-
Troubleshooting
- Cisco VG248 - PBX Interoperability: Digital Sound Voice Server 2110 with Cisco CallManager (PDF - 1 MB)
Troubleshooting Guides
-
Literature
-
Log in to see available downloads.
-
-
Below are the models within the Cisco VG Series Gateways:
Unless specified, documentation for the Cisco VG Series Gateways is applicable to all models.
- Cisco VG202XM Analog Voice Gateway - End-of-Support: 30 April 2027
- Cisco VG204XM Analog Voice Gateway - End-of-Support: 30 April 2027
- Cisco VG3X0 Analog Voice Gateway - End-of-Support: 31 October 2029
- Cisco VG400 Analog Voice Gateway
- Cisco VG410 Analog Voice Gateway
- Cisco VG420 Analog Voice Gateway - End-of-Support: 31 October 2030
- Cisco VG450 Analog Voice Gateway
