- Preface
- Getting Started
- The Cisco CMX Detect and Locate Service
- The Cisco CMX Analytics Service
- The Cisco CMX Connect Service
- The Cisco CMX Presence Analytics Service
- Managing Cisco CMX Configuration
- Managing Cisco CMX System Settings
- Performing Administrative Tasks
- Guidelines for Managing Zones in Cisco CMX
- Cisco CMX Alerts
- Cisco CMX Network Protocols and Port Matrix
- Index
Guidelines for
Managing Maps in Cisco CMX
-
Map uploads into Cisco CMX are best performed outside of business hours (or when Cisco CMX system activity is low), after 9PM is recommended. There are no hard and fast rules though. Maps import involves significant amount of processing to update the Database and processing floor images based on the size of floor image.
-
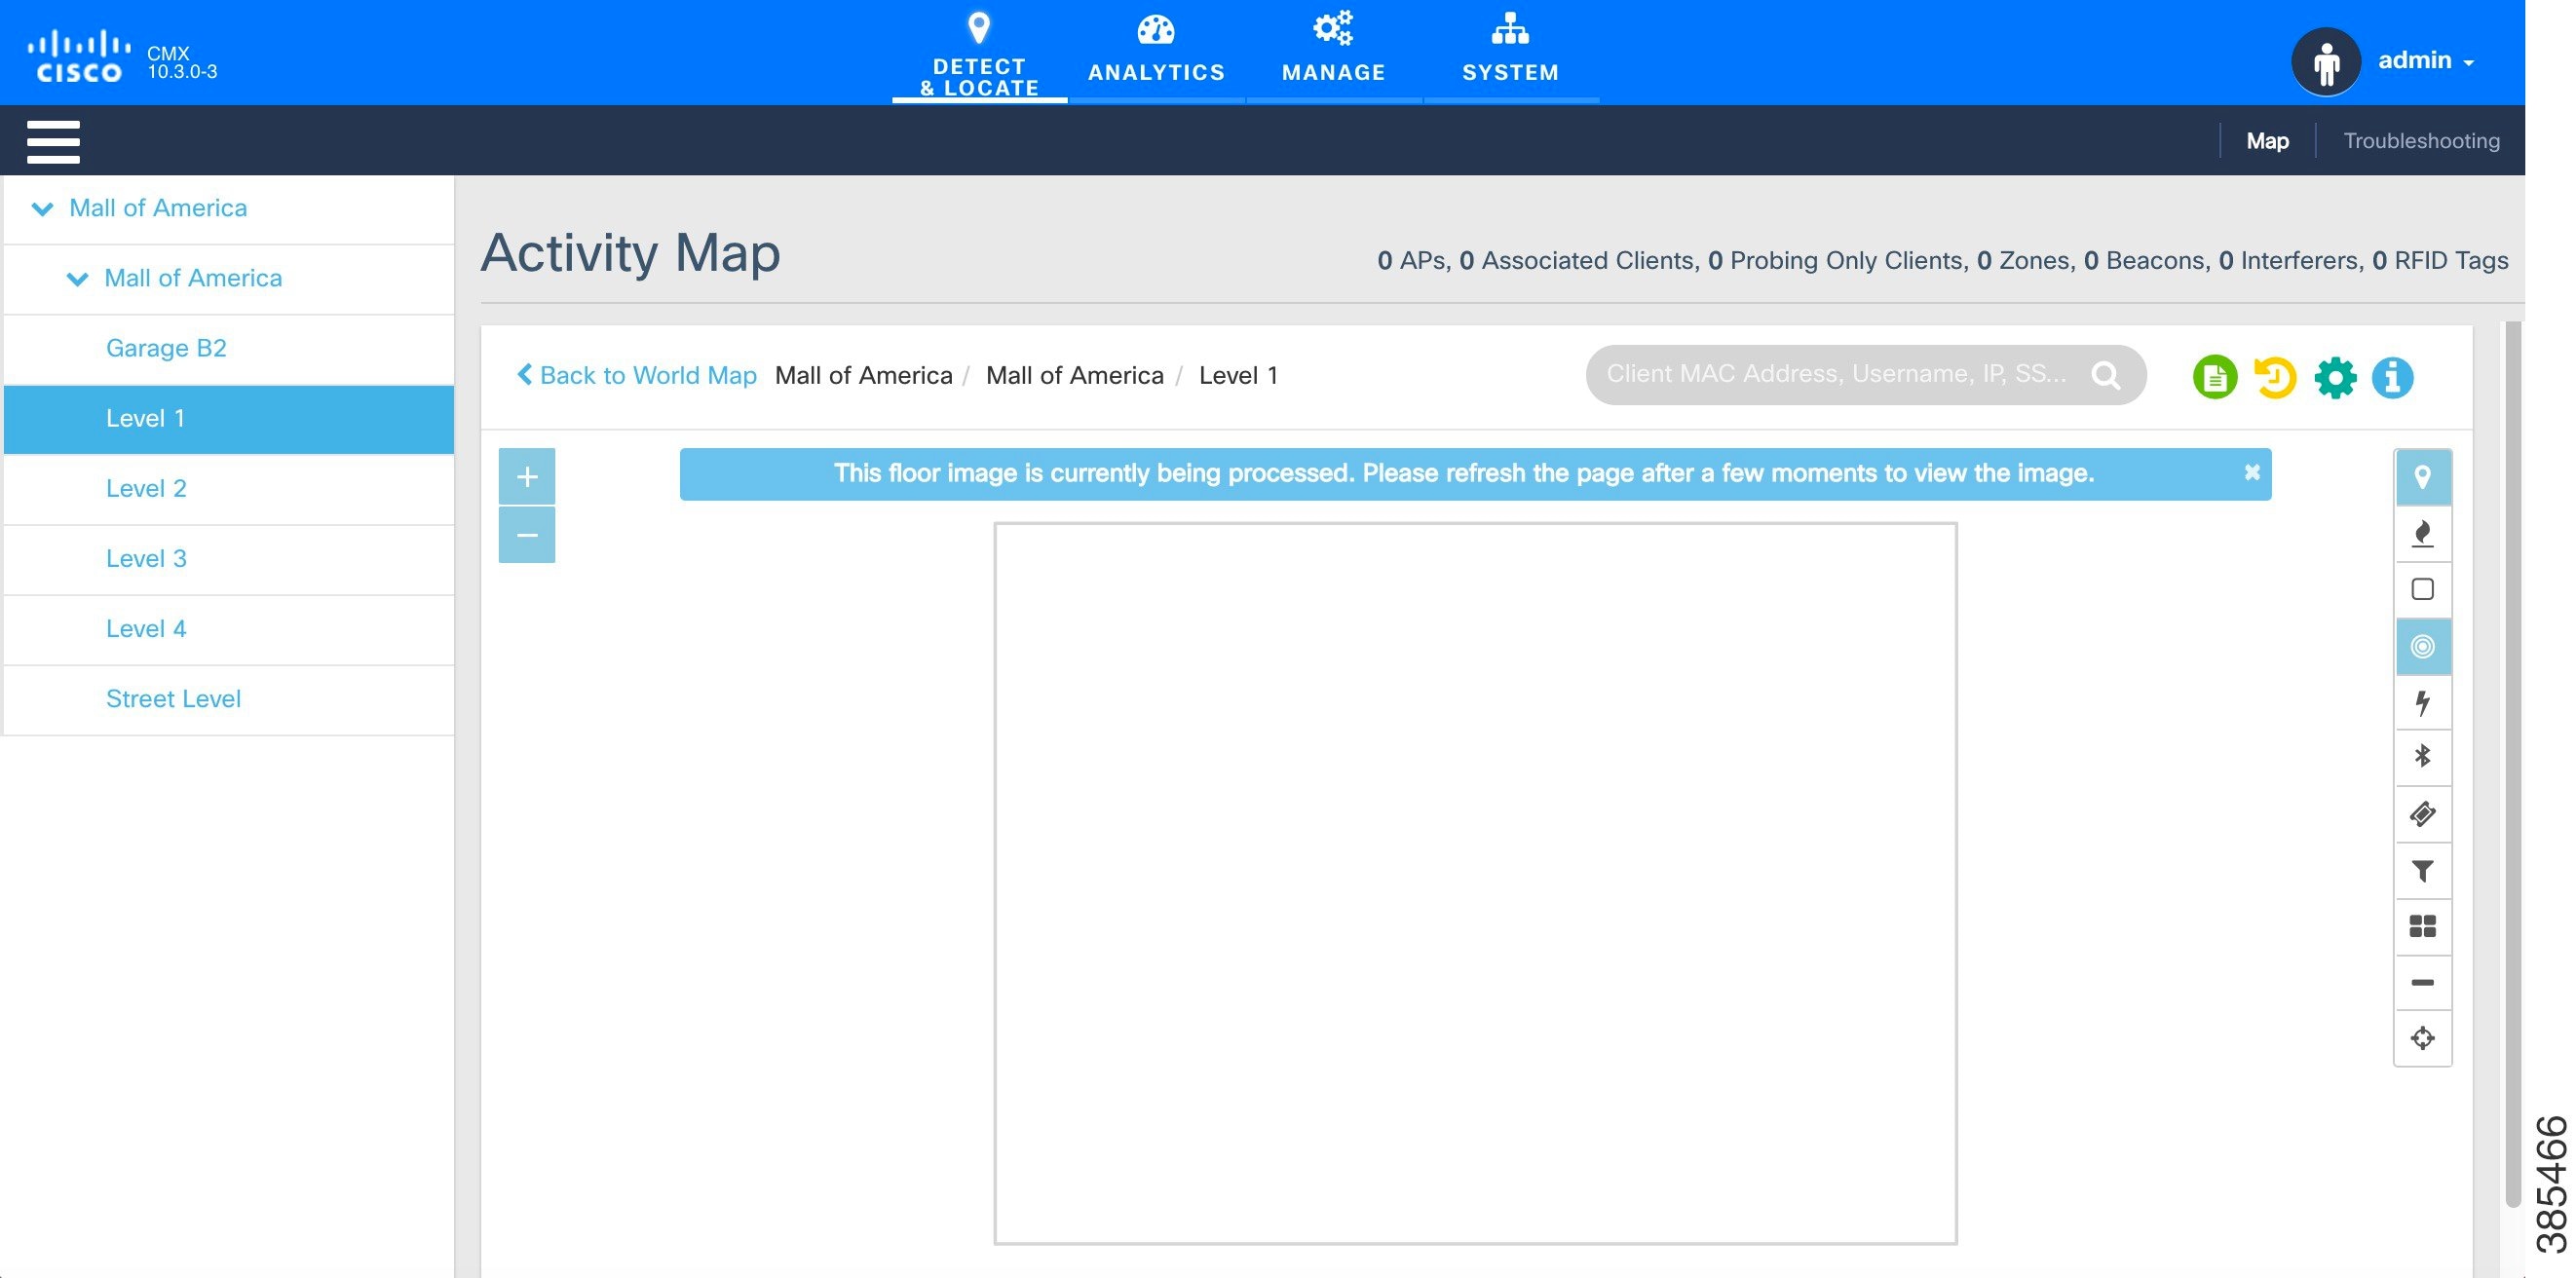
Decide on an update window of 30 minutes for uploading maps to Cisco CMX. For a typical floor image, Cisco CMX can take up to 15 seconds per image to complete processing and show the floor image on Cisco CMX GUI. A typical map of a Campus with 100 floors may take up to 30 minutes to complete image processing background jobs. If the image processing in progress, The GUI will show an information message saying 'This floor image is currently being processed. Please refresh the page after a few moments to view the image'.
-
Create and update the zones using Cisco CMX GUI map editor. All other map edit operations are to be performed using Prime Infrastructure.
-
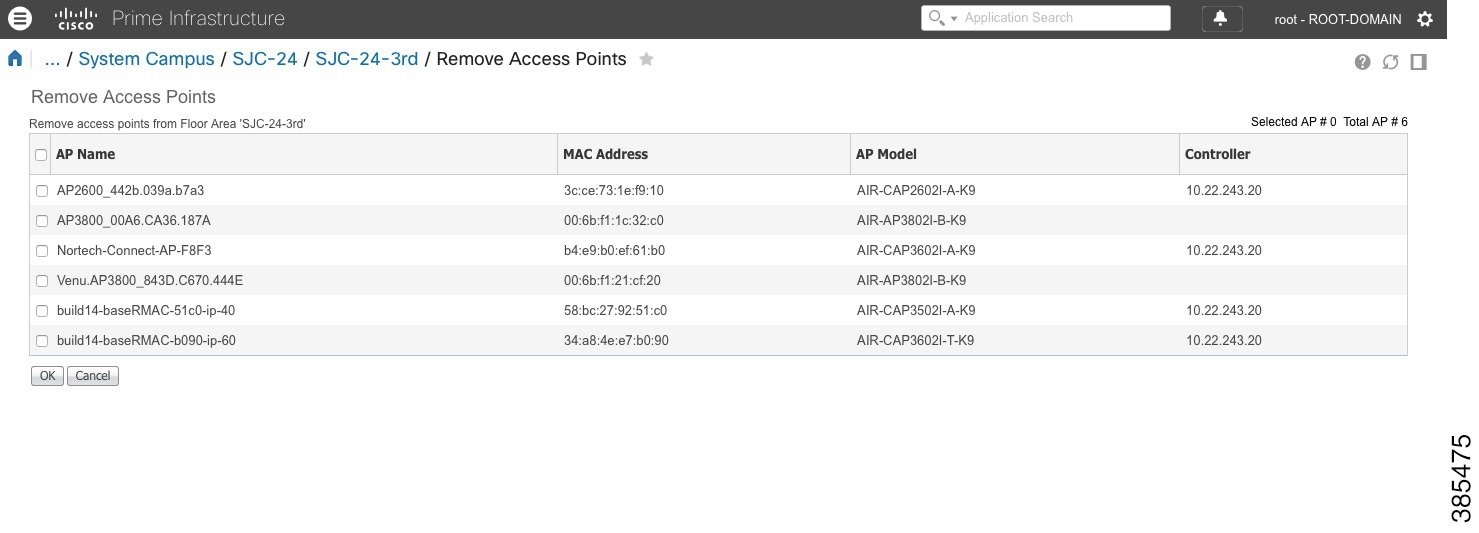
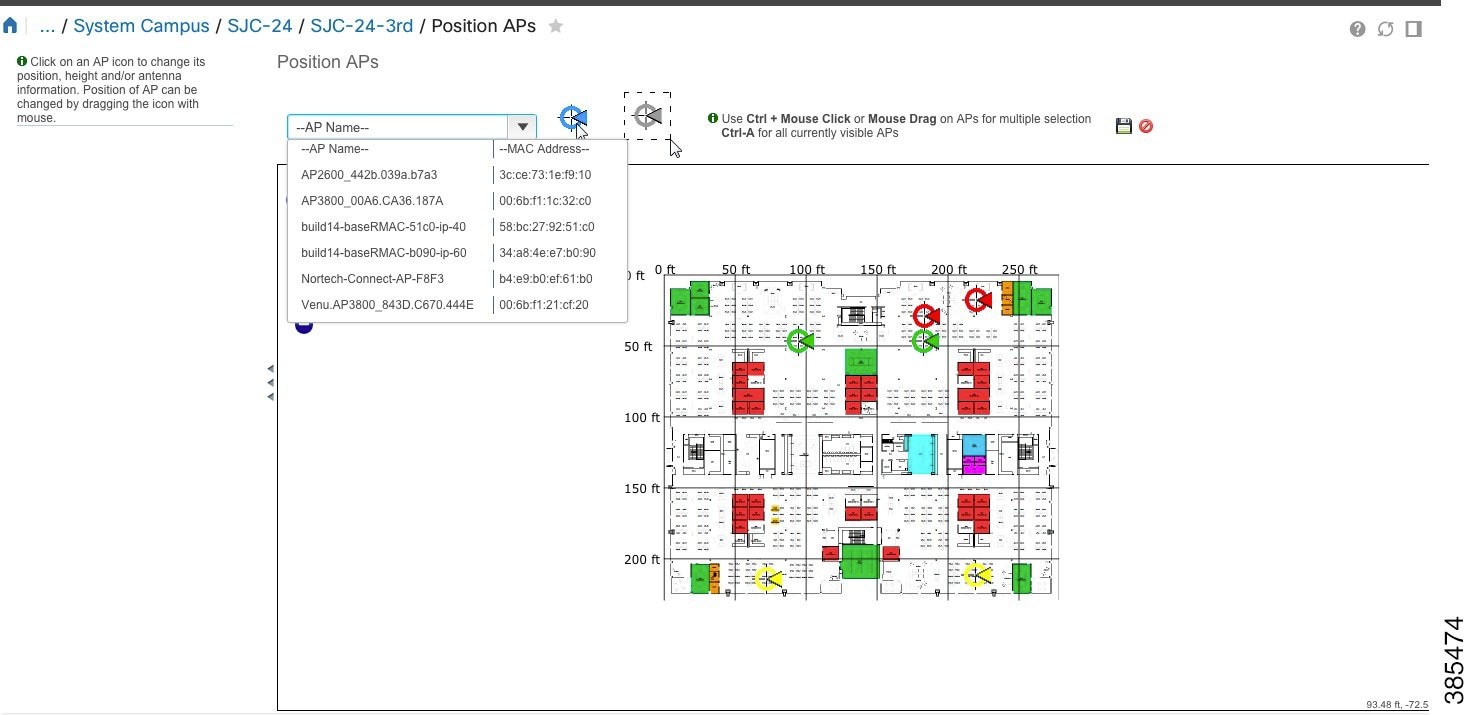
An AP can only be associated with a single floor map in Prime. If you are planning to move APs from one floor to another, you want to disassociate them from existing floor-map in Prime so that they can be associated to new floor-map in Prime. (Please refer to 'Typical map import issues: Case 2' for troubleshooting steps.)
-
To expand a map to cover a larger area, create a new map in Prime and move APs to the new map from older map. You also want to make sure that the older floor is deleted from Prime and Cisco CMX before the new floor map is imported on Cisco CMX.
-
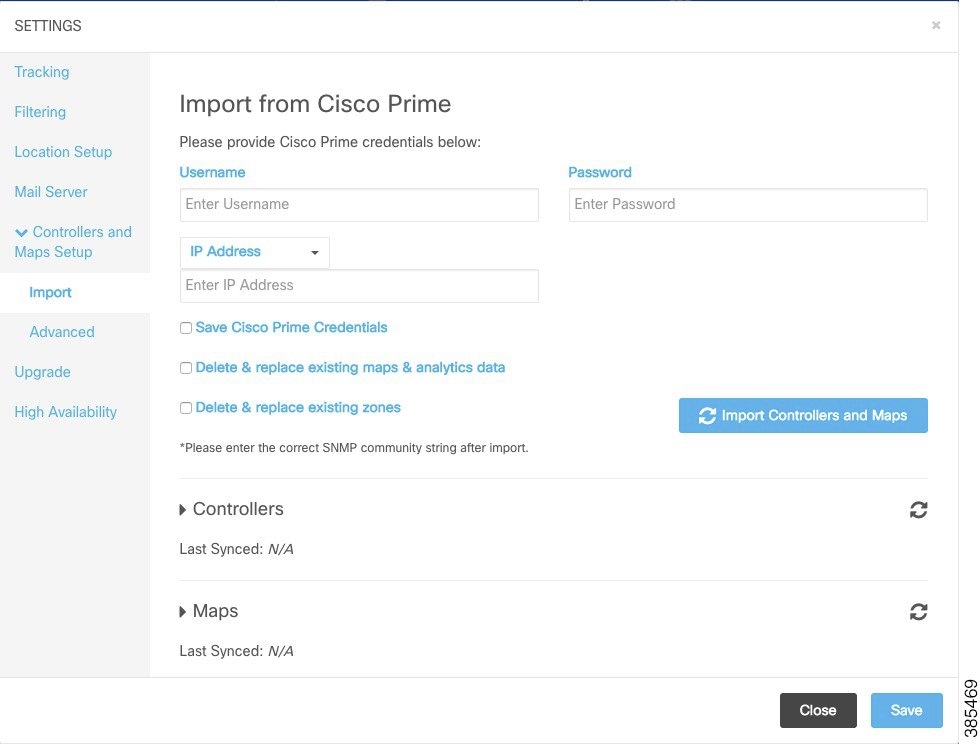
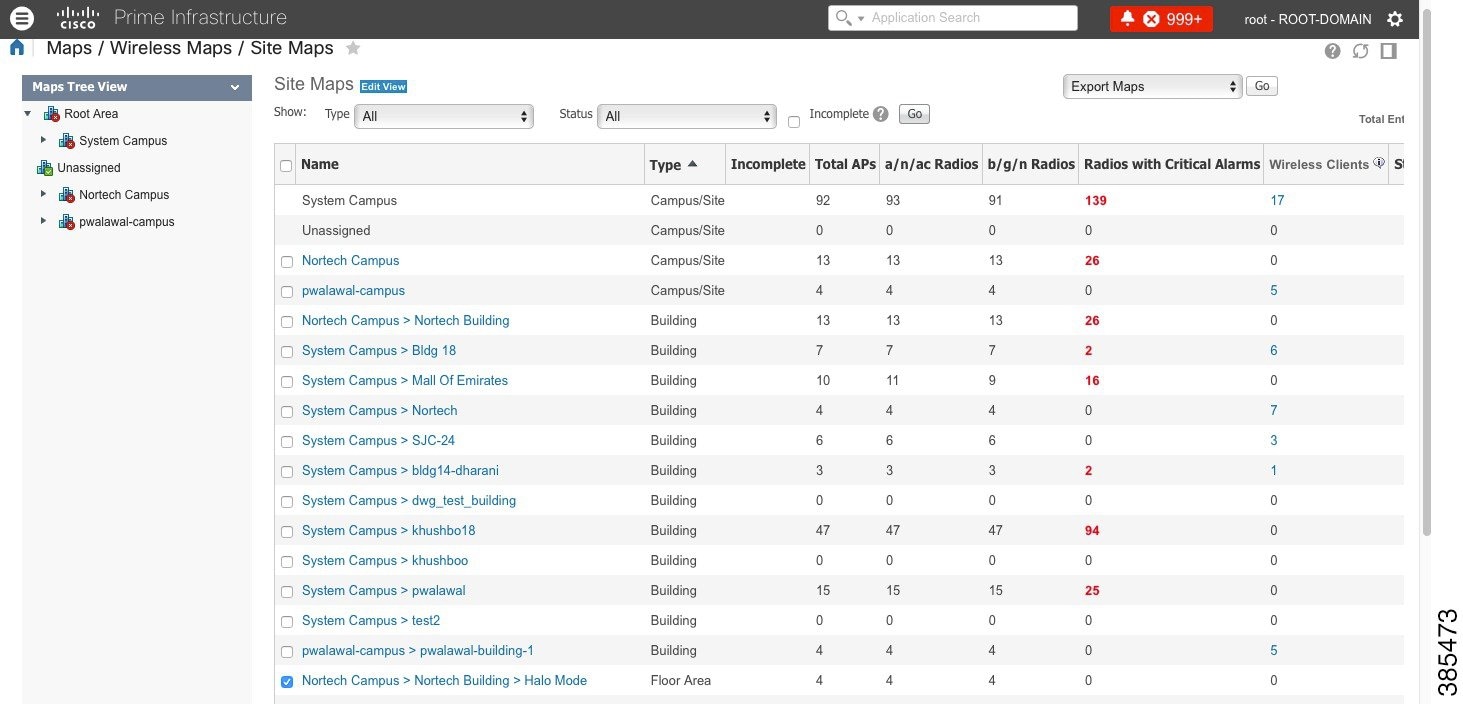
Avoid doing bulk map import/exports. Export individual maps changes from Prime Infrastructure and import into Cisco CMX. For large set of maps, Its not recommended to use 'Import from Cisco Prime' option (shown in the picture) as this will sync all maps from Prime to Cisco CMX that may put significant amount of load on the system.
Create a Map Using Cisco Prime Infrastructure
To create a map using Cisco Prime Infrastructure, see the "Using Wireless Maps" chapter in the Cisco Prime Infrastructure 3.1 User Guide.
Delete a Map Using Cisco Prime Infrastructure
Move an Access Point Between Maps Using Cisco Prime Infrastructure

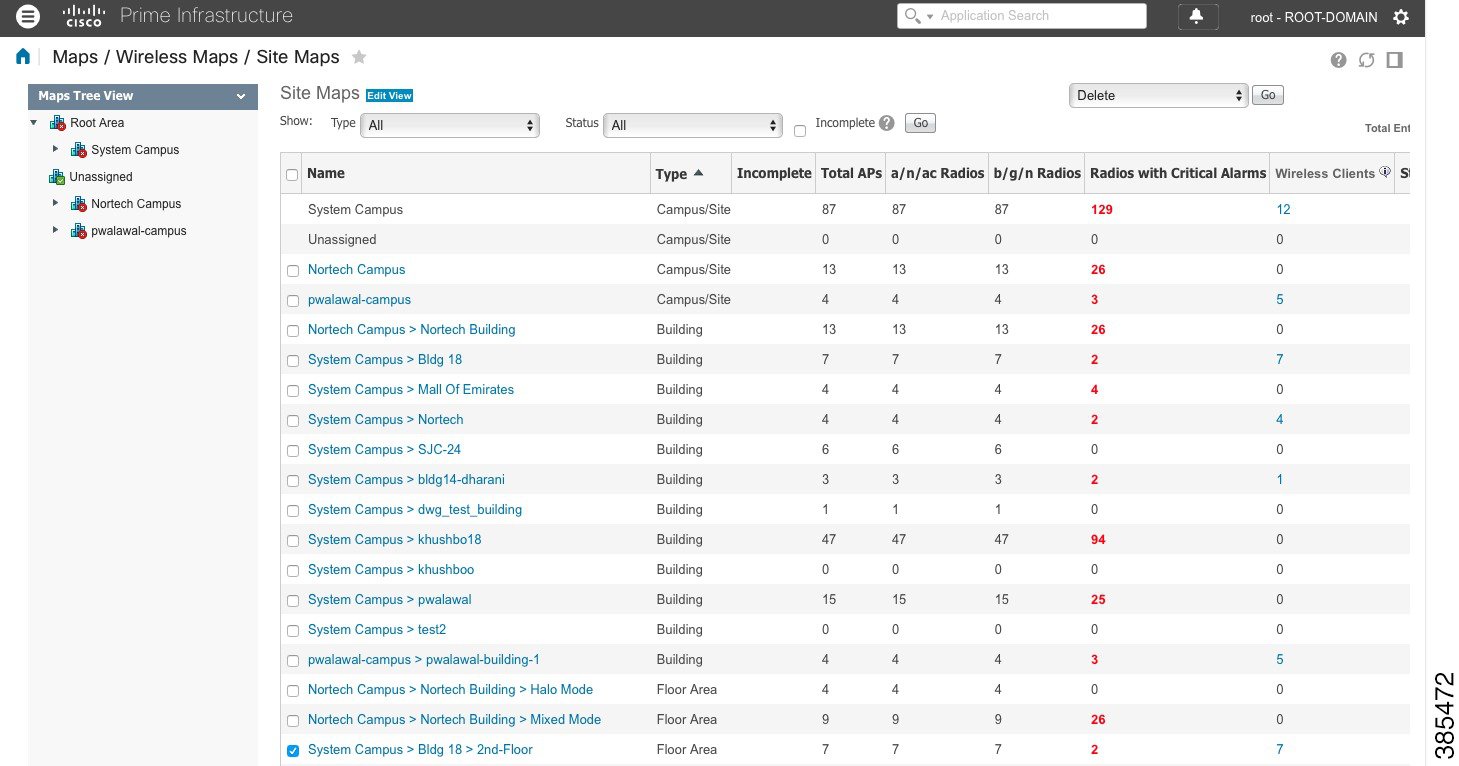
Export a Map Using Cisco Prime Infrastructure
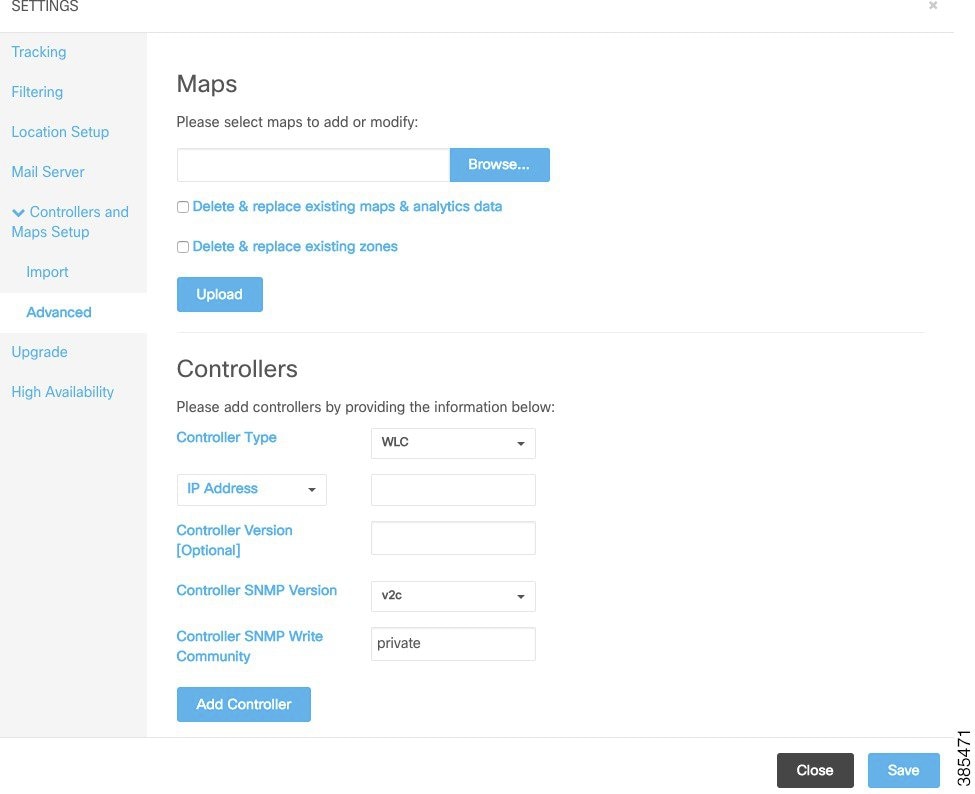
Import New and Modified Maps to Cisco CMX
Navigate to Cisco CMX UI Advanced import option below (select System - Settings - Controllers and Maps Setup - Advanced), leave both checkboxes unchecked shown below. Browse to the maps file to be imported, select Upload.
 Feedback