SNMP
Simple Network Management Protocol is a protocol for network management. It is used for collecting information from, and configuring, managing all the devices in the network.
Cisco Mobility Express supports SNMP Version 2 and SNMP Version 3. Both SNMP v2c and v3 are enabled by default. SNMP Version 1 is also supported on Mobility Express but enabling and disabling on SNMP Version 1 is available in CLI only.
Managing SNMP Version 2c
Procedure
| Step 1 |
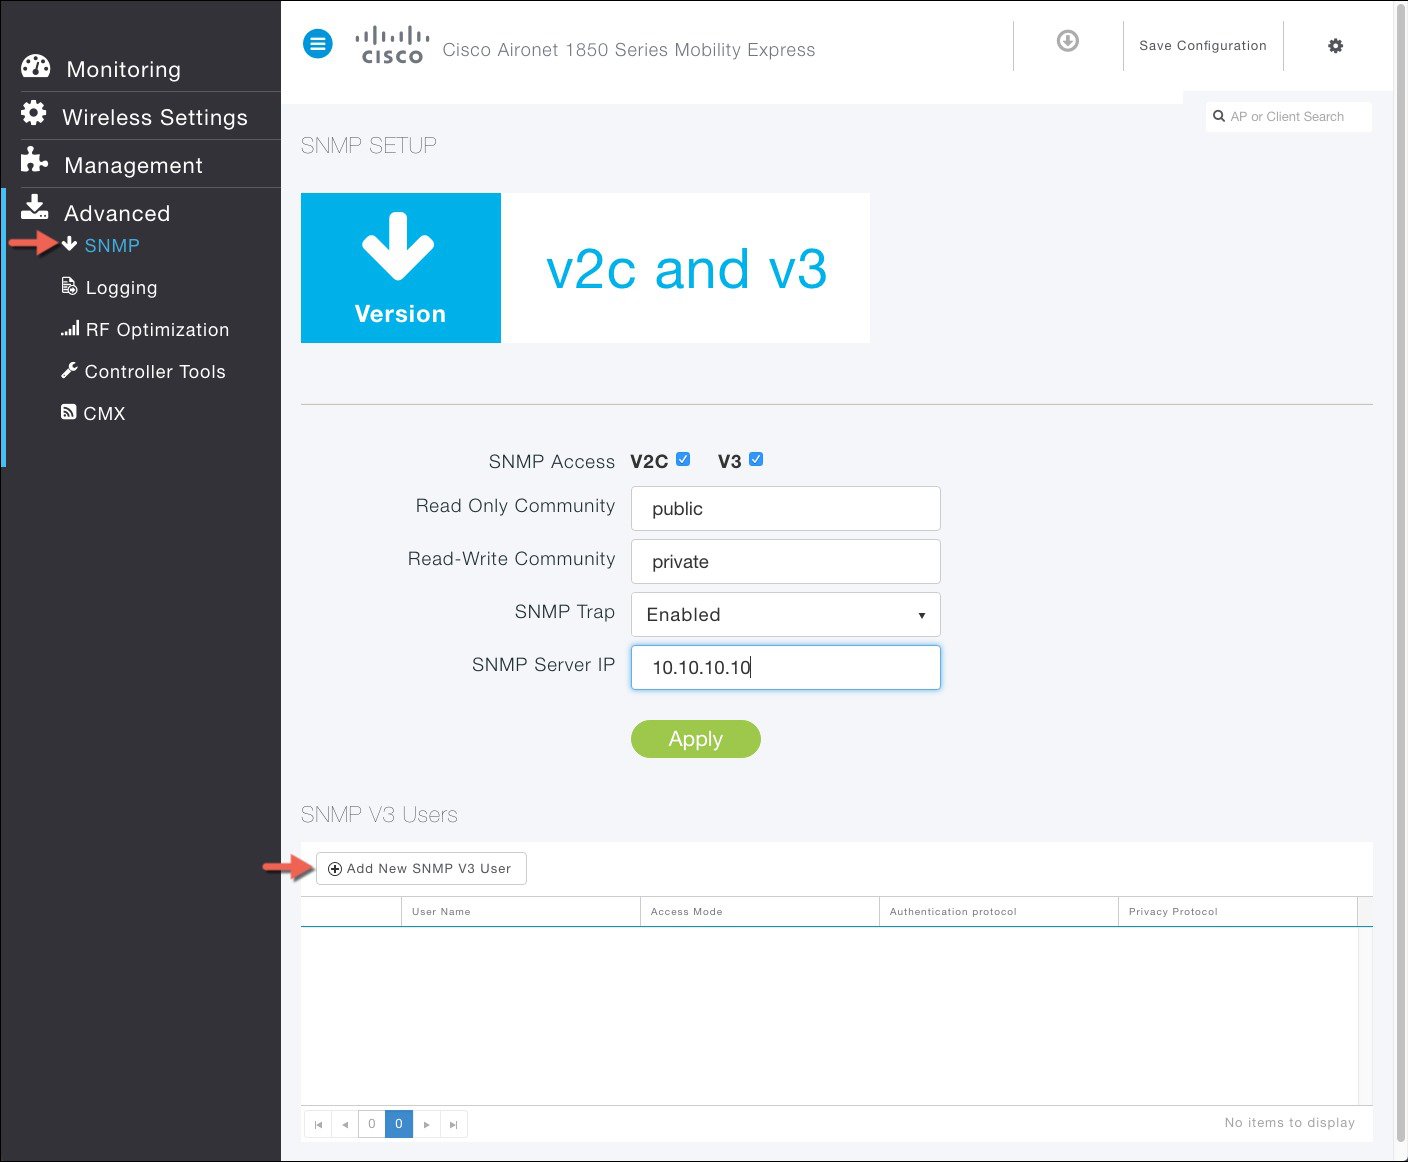
Navigate to Advanced>SNMP. The SNMP Setup screen will be displayed supported version. |
| Step 2 |
SNMPv2 Access - To enable, choose Enabled from the drop-down list. The default is Disabled. |
| Step 3 |
Read-Only Community - To configure the SNMP community with read-only privileges, in the Read -Only Community field enter a name for the community. The default is public. |
| Step 4 |
Read-Write Community - To configure an SNMP community with read-write privileges, in the Read -Write Community field enter a name for the community. The default is private. |
| Step 5 |
SNMP Trap - To enable the SNMP Trap Receiver tool, which receives, logs, and displays SNMP traps sent from network, choose Enabled from the SNMP Trap drop-down list. The default is Disabled |
| Step 6 |
SNMP Server IP - To connect to an SNMP server, enter the IP address of the server in the SNMP Server IP field. |
| Step 7 |
Click the
Apply button
to submit the changes.
|

Managing SNMP Version 3 users
Procedure
| Step 1 |
Navigate to Advanced>SNMP. The SNMP Setup screen will be displayed supported version. |
| Step 2 |
Click on
Add New SNMP V3
User button.
|
| Step 3 |
Enter the following parameters for the user: A. Username B. Access Mode C. Authentication Protocol D. Authentication Password and Confirm Authentication Password E. Privacy Protocol F. Privacy Password and Confirm Privacy Password 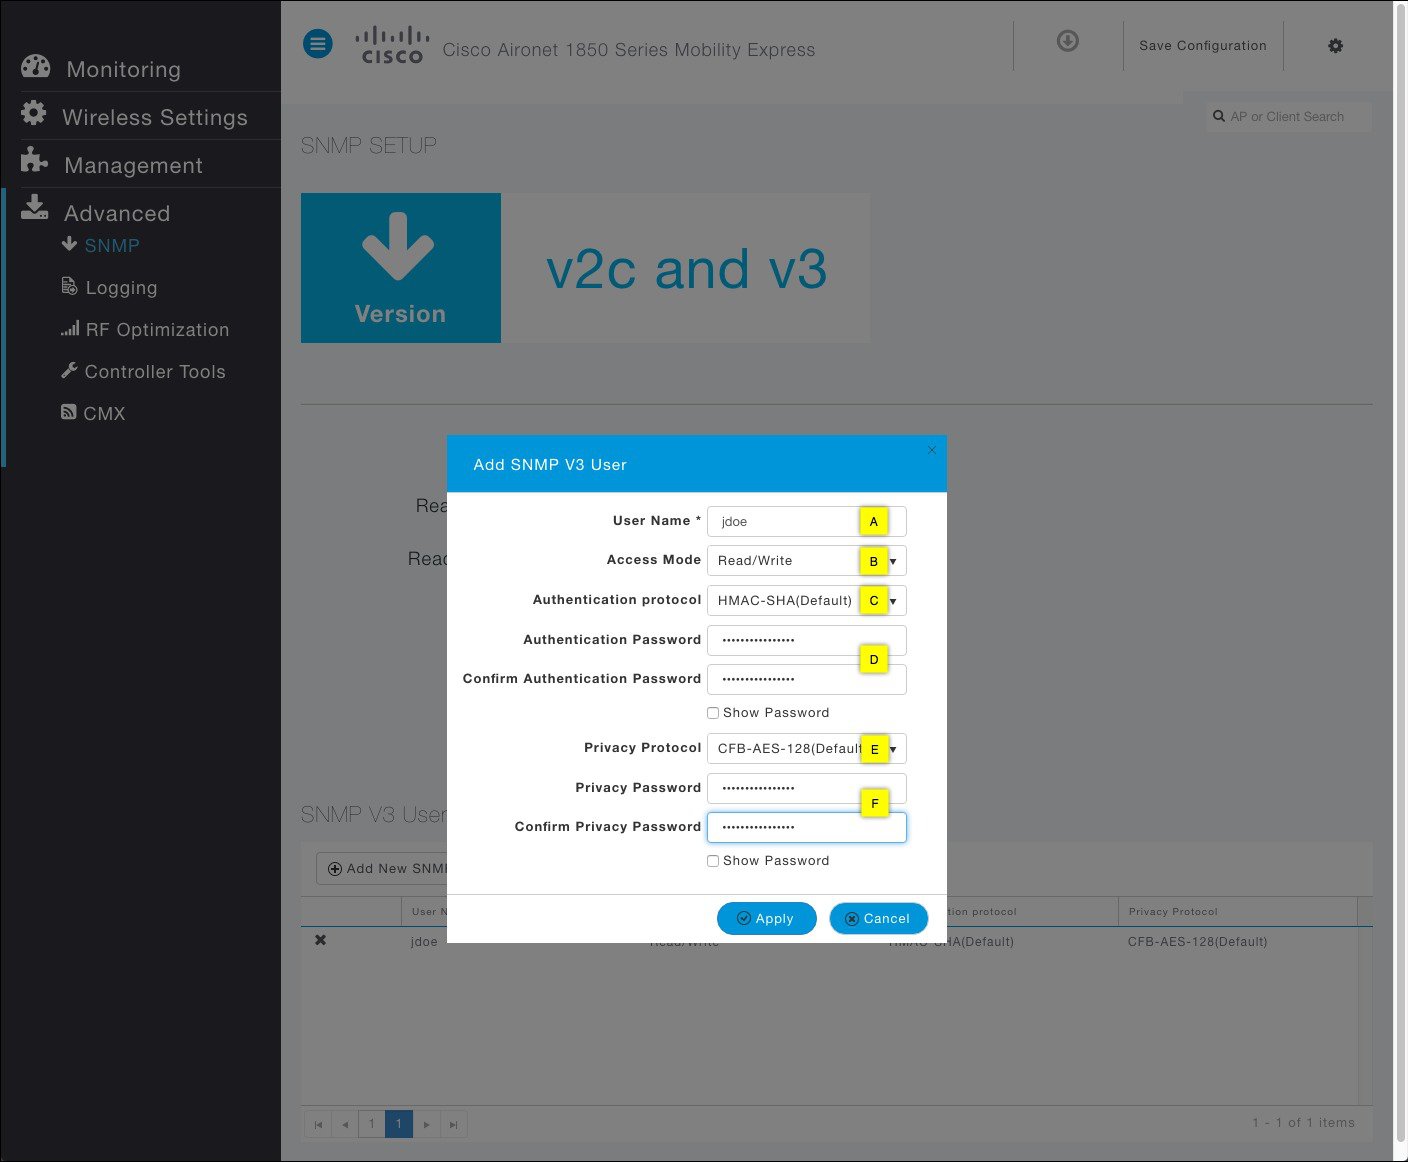 |
| Step 4 |
Click on the Apply button and save the configuration. |

 Feedback