- Preface
- Product Overview
- Getting Started
- Deploying Cisco Mobility Express Solution
- Creating DHCP Scopes for Wireless Networks
- Configuring Mobility Express for Site Survey
- Creating Wireless Networks
- Managing WLAN Users
- Managing Access Points
- Managing the Mobility Express Network
- Using Advanced Settings
- Primary AP Failover and Electing a New Primary
- Cisco Mobility Express with Cisco CMX Cloud
- Managing Mobility Express Deployments from Cisco Prime Infrastructure
Managing Access
Points
Mobility Express supports a maximum of 25 Access points in a Mobility Express deployment.
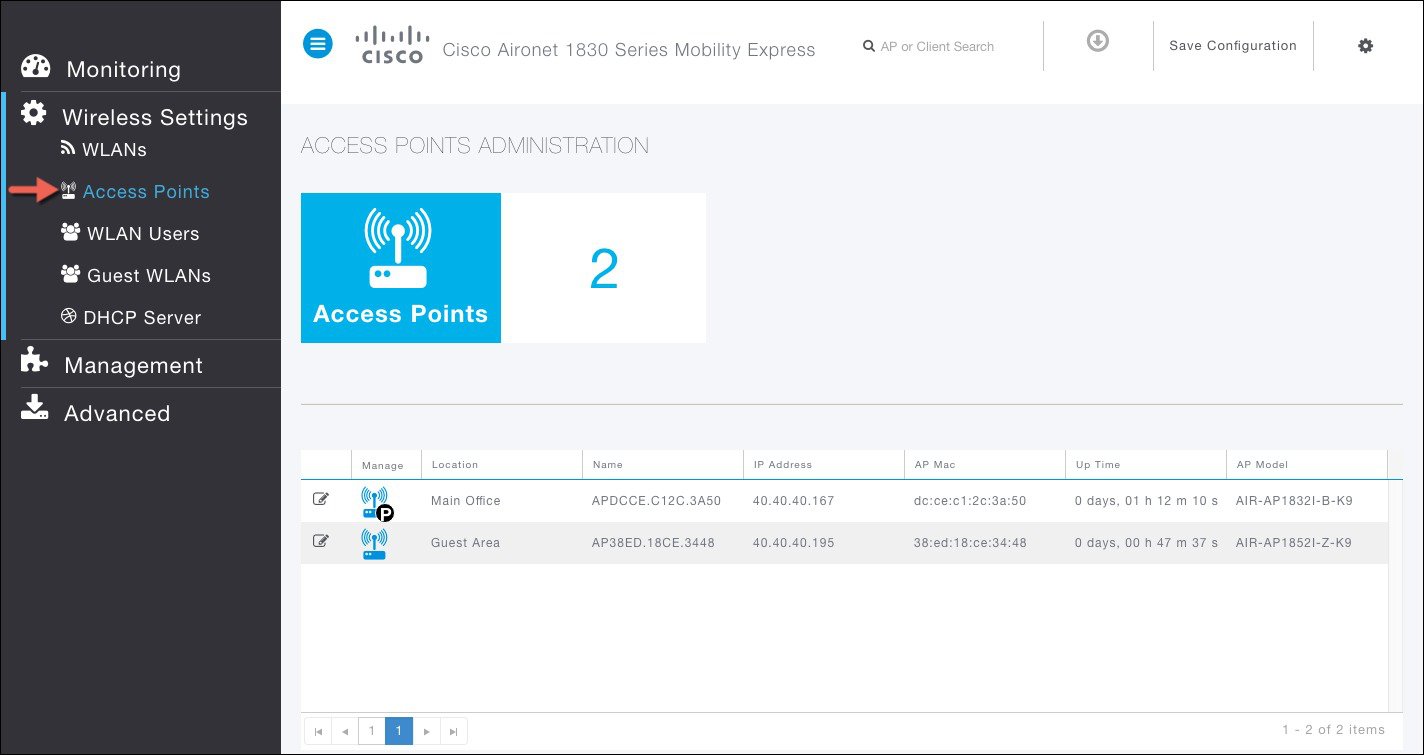
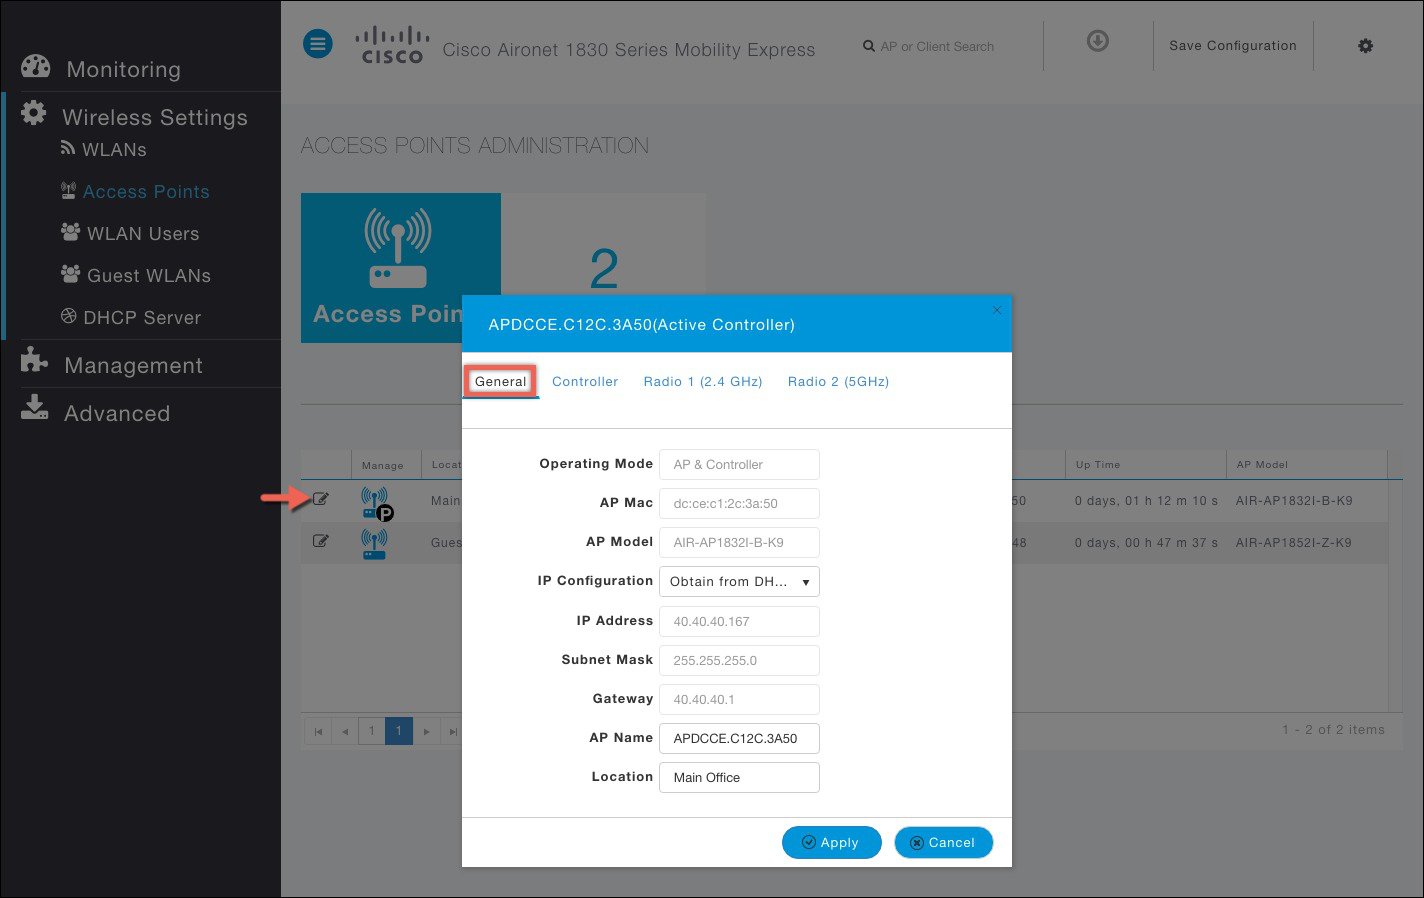
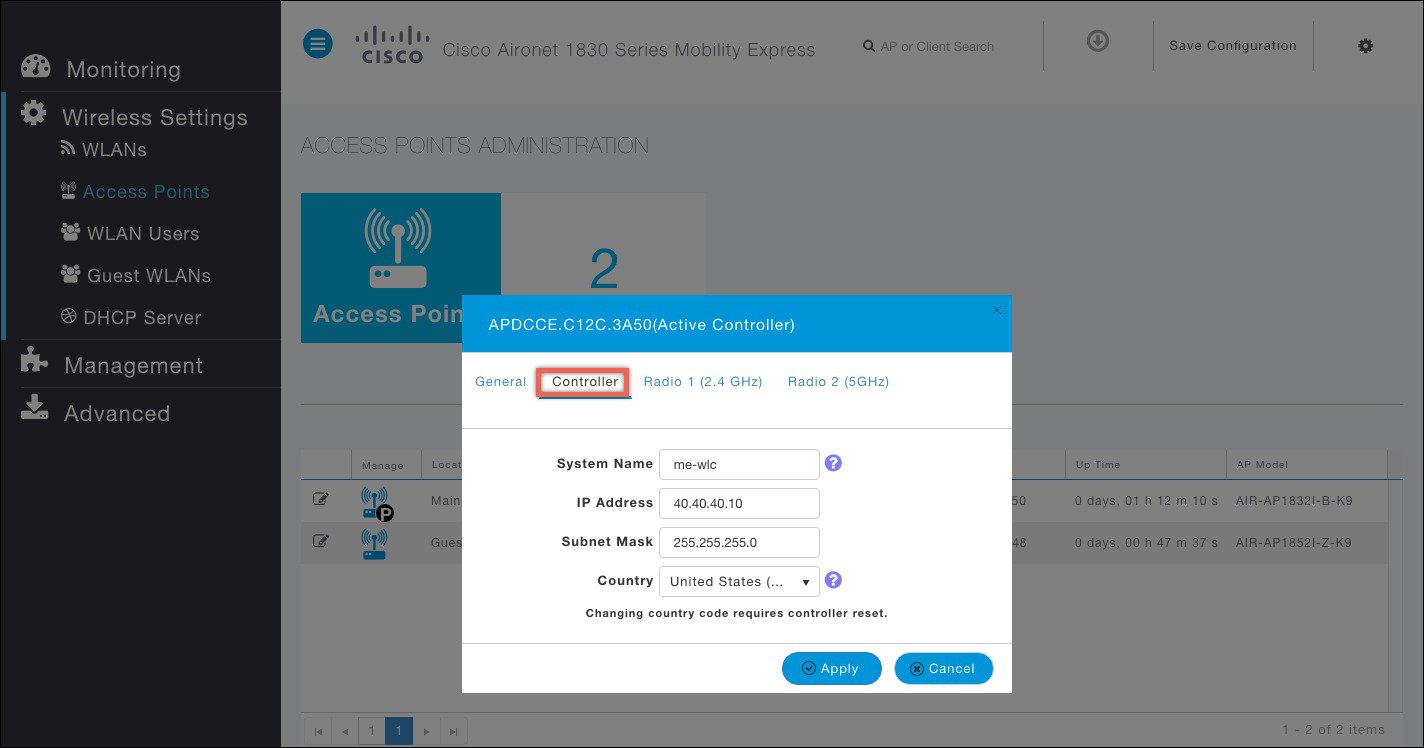
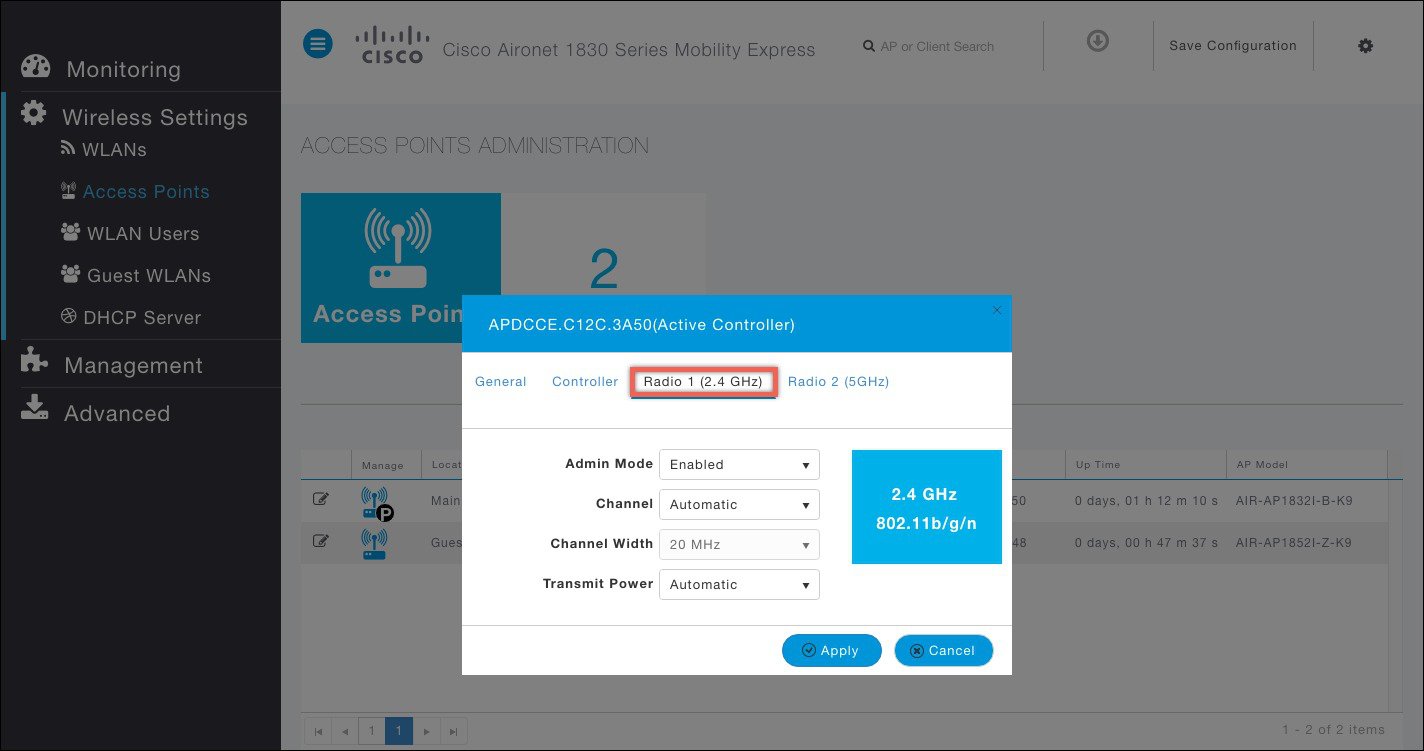
Managing Access Points
To view the list or modify Access Points associated with the Mobility Express controller, follow the steps below.
Adding an Access Point to Mobility Express Network
When adding an access point to the Mobility Express network, the following have to be considered:
-
Software Version on the Access Point - If the software version of the access point, which is being added, is different than what is on the Master AP, a software download of the code running on the Master AP has to happen on the Access Point being added. For the new AP to download the code that is running on the Master AP, one of the following has to be configured:
-
TFTP server and the AP file path information has to be configured on the Software Update page.
-
If the Master AP has 8.3.102.0 or later code, one can configure the Cisco.com login credentials on the Software Update page and the code on the new AP will be automatically downloaded from cisco.com when an AP joins.

Note
For Software download to take place directly from Cisco.com, the Master AP should be the one with the SMARTNet Contract.
-
-
Is Access Point being added an 11ac Wave 2 or not?
If the Access Point being added is an 11ac Wave 2 access point and is running Mobility Express image, it can be added to the Mobility Express network. If a software version is different, it will download the software version running on the Master AP either from a configured TFTP server or directly from cisco.com. This AP will be capable of running the controller function if the Master AP fails.
If the Access Point being added is an 11ac Wave 2 Access point and is running CAPWAP image, it can be added to the Mobility Express network. If a software version is different, it will download the software version running on the Master AP either from a configured TFTP server or directly from cisco.com. This AP will not be configured to run the controller function unless configured explicitly.
If the Access Point being added is a non-11ac Wave 2 Access point, it can be added to the Mobility Express network as long as it is one of the supported AP for Mobility Express. If the software version is different, AP will download the software version running on the Master AP either from a configured TFTP server or directly from cisco.com. This AP is not capable of running the controller function.
Note
The master AP facilitates transfer of image from TFTP or Cisco.com to the new AP which is added.
| Step 1 | Configure
Cisco.com Login Credentials on the Master AP, which has the SMARTNet Contract
on
Software
Update (Management
> Software Update) page.
OR Download the ap_bundle zip file from cisco.com on a TFTP server. The bundle version must be the same as the one running on the Master AP. Unzip the file to extract the AP images. Configure TFTP Parameters on the Software Update (Management > Software Update) page. | ||
| Step 2 | Connect the AP
to the network. When the AP boots up, it obtains an IP address from the DHCP
server. If the AP version matches the one on Master AP, it joins. However, if
the version on the AP being added is different than then one on the Master AP,
it starts to download the image from either the configured TFTP server or
cisco.com. After the image download is complete, the AP will reboot and join
the Master AP.
|
 Feedback