- Preface
- Product Overview
- Getting Started
- Deploying Cisco Mobility Express Solution
- Creating DHCP Scopes for Wireless Networks
- Configuring Mobility Express for Site Survey
- Creating Wireless Networks
- Managing WLAN Users
- Managing Access Points
- Managing the Mobility Express Network
- Using Advanced Settings
- Primary AP Failover and Electing a New Primary
- Cisco Mobility Express with Cisco CMX Cloud
- Managing Mobility Express Deployments from Cisco Prime Infrastructure
Cisco Mobility
Express with Cisco CMX Cloud
Cisco CMX Cloud
Cisco® Connected Mobile Experiences Cloud (Cisco CMX Cloud) is an simple and scalable offering which enables delivery of wireless guest access and in-venue analytics, integrating seamlessly with Cisco wireless infrastructure.
This cloud-delivered Software-as-a-Service (SaaS) offering is quick to deploy and intuitive to use. It is based on CMX 10.x code and is compatible with Cisco Mobility Express Release 8.3. It offers the following services:
-
Connect for Guest Access–Providing an easy-to-use guest-access solution for visitors through a custom portal using various authentication methods including social, self-registration, and Short Message Service (SMS).
-
Presence Analytics–Detecting all Wi-Fi devices (the “devices”) in the venue and providing analytics on their presence, including dwell times, new vs. repeat visitors, and peak time.
Cisco CMX Cloud Solution Compatibility Matrix
Minimum requirements for CMX Cloud deployment
Below are the minimum requirements for CMX Cloud deployment:
-
Verify Cisco CMX Cloud Solution Compatibility Matrix above.
-
Recommended browser is Chrome 45 or later
-
Signup to https://cmxcisco.com for 60 day trial or go to Cisco Commerce Workspace (CCW) and purchase license for your choice of CMX Cloud service. Refer to CMX Cloud Ordering information.
After sign-up, start using Connect or Connect and Presence Analytics.
CMX Cloud Trial Sign-Up and Sign-In
Sign-Up
To sign-up for a trial account, perform the following steps:
| Step 1 | Browse to
https://cmxcisco.com and sign-up for a 60-Day
trial.
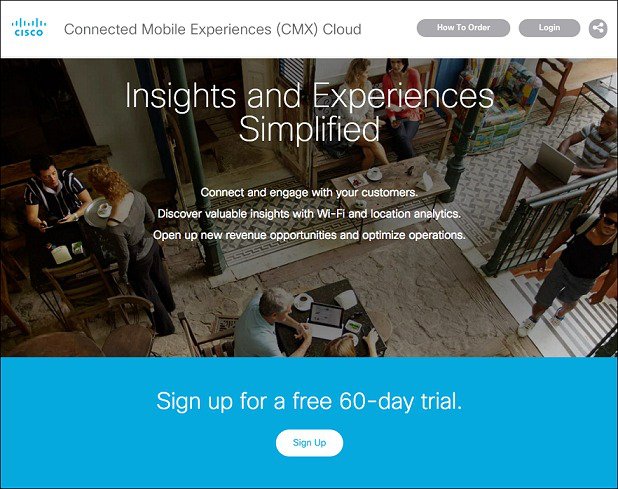
|
| Step 2 | Enter the
following details:
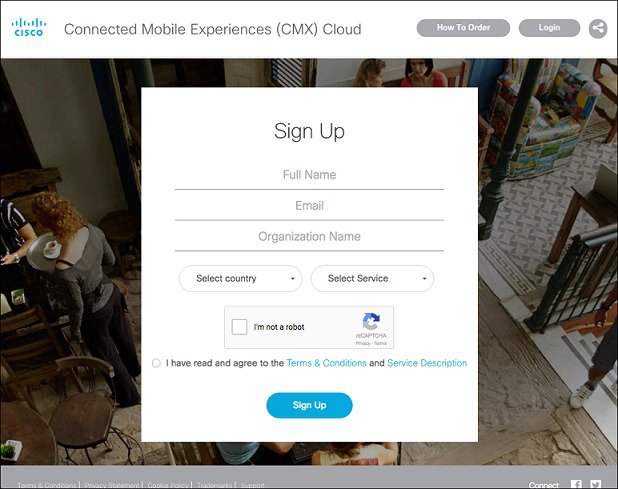 After your account is created and Site is provisioned, an email will be sent to you with the following: |
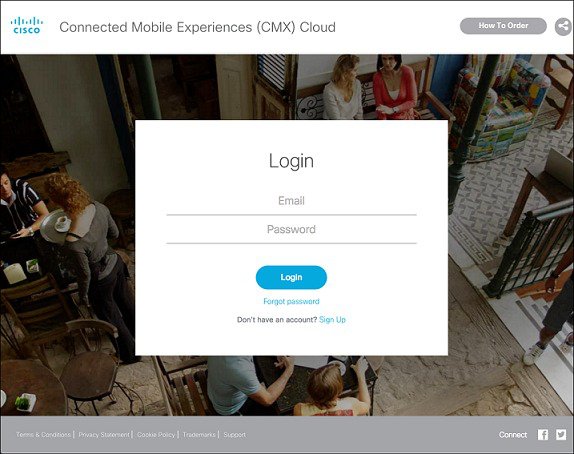
Sign In
To sign-in, perform the following steps:
| Step 1 | Browse to https://cmxcisco.com |
| Step 2 | Click Login on the top right and enter the email address which was used to create the account and password. |
| Step 3 | Click Login
to get redirected to you CMX Cloud site.
 |
Configuring Cisco Mobility Express to send data to CMX Cloud for Presence Analytics
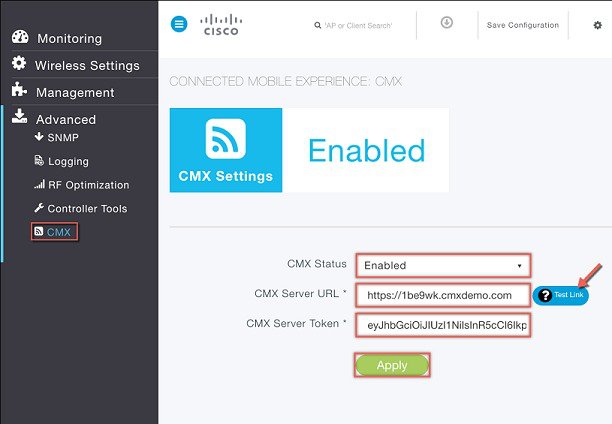
Enabling CMX Cloud Service on Master Access Point
After CMX Cloud Account is created and CMX Site provisioned, next step is to configure and enable the CMX Cloud Service on Master Access Point so that it can send data to the CMX Cloud.
 Note | Master Access Point should be able to talk to the CMX Cloud. |
To configure, perform the following steps:
Collecting Base MAC Address of Access Points to add them to the Site in CMX Cloud
In AireOS release 8.3, Access Points, which are part of the Cisco Mobility Express deployment, are not discovered automatically in the CMX Cloud when the CMX Could Service is started on the Master Access Point. Access Points have to be manually added to the site in CMX Cloud. To obtain the Base MAC address, execute the following command in the Controller CLI.
(Cisco Controller) >show ap join stats summary all

Number of APs.............................................. 3

Base Mac             AP EthernetMac       AP Name                 IP Address         Status
38:ed:18:ca:8b:00    38:ed:18:ca:09:28    AP38ED.18CA.0928        172.20.229.60      Joined
38:ed:18:cb:60:60    38:ed:18:ca:3d:10    AP38ED.18CA.3D10        172.20.229.21      Joined
38:ed:18:cd:31:80    38:ed:18:cc:32:c0    AP38ED.18CC.32C0        172.20.229.61      Joined
Creating a Site and Adding Access Points to Site in CMX Cloud for Presence Analytics
To create a site and add Access Points to the site in CMX Cloud for Presence Analytics, perform the following steps:
| Step 1 | Login to CMX Cloud account at https://cmscisco.com/ |
| Step 2 | Navigate to
Manage >
Cloud Enabled WLC and verify that the IP address of the WLC shows up on the
list.
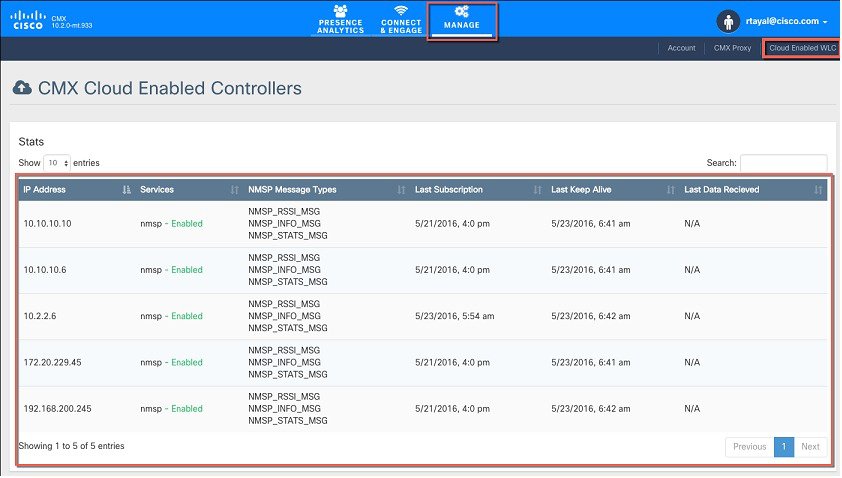 |
| Step 3 | Navigate to
PRESENCE
ANALYTICS > Manage. Click
Add Site
to create a Site and add Access points to the Site.
 |
| Step 4 | In the New
Site window, enter the following dertails:
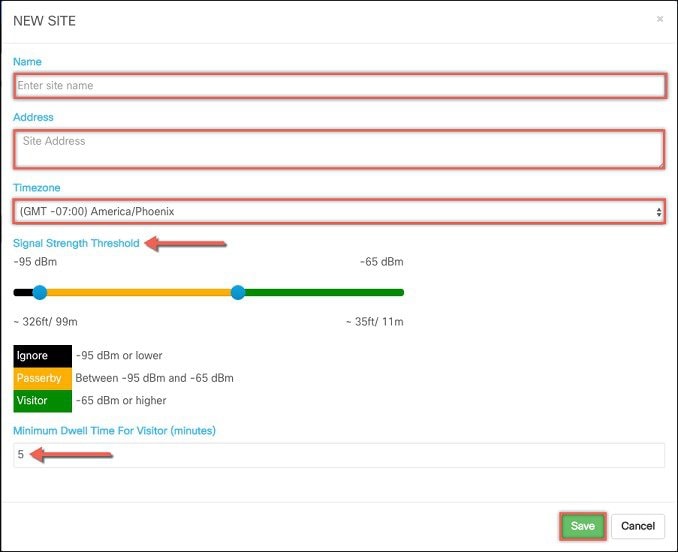
|
| Step 5 | Click Save to create the Site.
The site gets created. |
| Step 6 | Click Site
Name and then click the Details link next to the AP Count as shown in the Site
window.
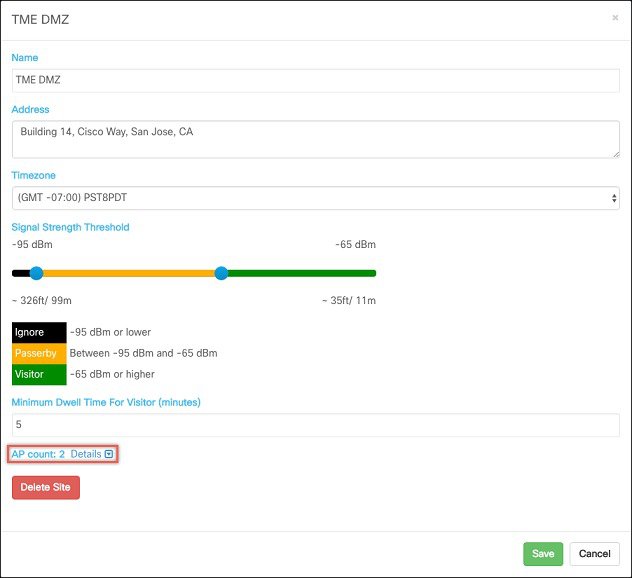 |
| Step 7 | The window
will expand and
Add new
AP field will be displayed. Enter the Base MAC Address of the Access point
and click
Add.
When finished with adding Base MAC of AP to the sites, click on the
Save.
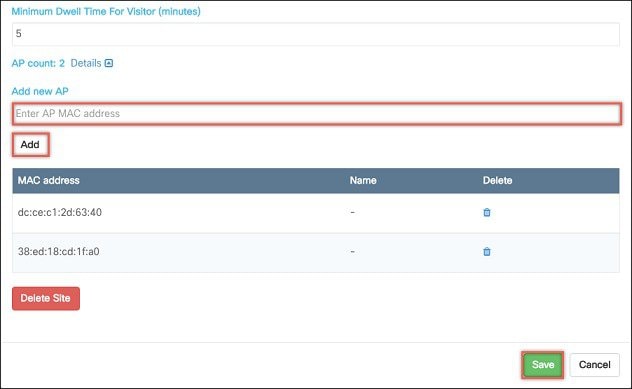 |
Understanding Data on the CMX Cloud for Presence Analytics Dashboard
After the Sites have been created and Access Points have been added to the sites, data will begin to appear on the Presence Analytics dashboard. To understand the Data represented on this dashboard, please visit the following site:
 Feedback