Contents
- Voicemail
- Voicemail
- Change Your Voicemail Settings
- Alternate Numbers and Notification Devices
- Manage Alternate Numbers and Notification Devices
- Caller Input
- Manage Caller Input Keys
Voicemail
Voicemail
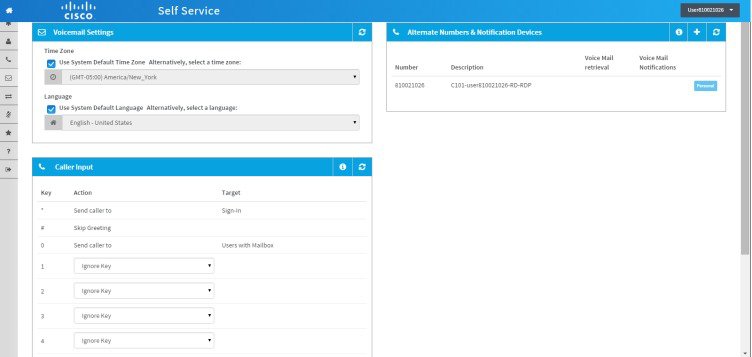
This screen is only visible if your administrator has allocated a Voice mailbox to you.
If you have a Voice mailbox, you can edit certain Voicemail settings from within Self Service, including Time Zone and Language settings as shown in the following figure.
Change Your Voicemail Settings
If you have a Voicemail box you can modify certain Voicemail settings:
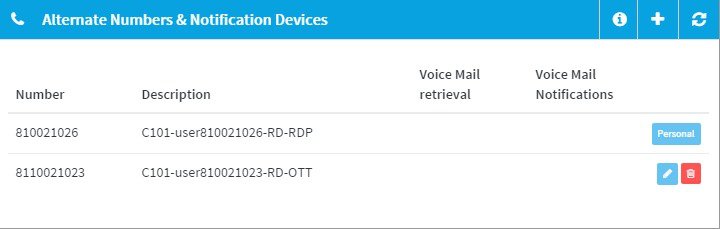
Alternate Numbers and Notification Devices
Alternate numbers are used to provide users with alternate access points to their Voicemail boxes. You can only add the amount of alternate extensions that have been allocated to you by your administrator.
Notifications are used to notify you when you have a new Voicemail message. For example, you can configure the system to send you notification using the phone, SMS, or email when you receive a new Voicemail message. You can only add the type and quantity of notifications that have been allocated to you by your administrator.
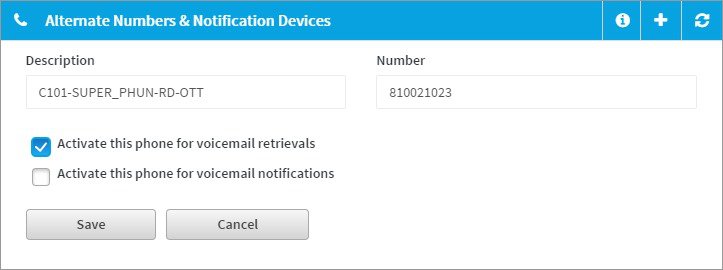
Manage Alternate Numbers and Notification Devices
To add a new phone number to act as an alternative number or notification device from which you can retrieve Voicemail or Voicemail notifications respectively:
What to Do Next
To remove a number click the Remove (trashcan) icon on the Alternate Numbers & Notification Devicesscreen, next to the number you want to remove and then click Save. Alternatively, you can click the required Edit (pen) icon, enter a new number and description in the relevant field, and click Save. This effectively removes the old number and description and adds the new number and description in one step.
To change the status of a check box only, simply check or uncheck the box as required and click Save.
Caller Input
You can only see the caller input keys that have been allocated to you by your administrator.
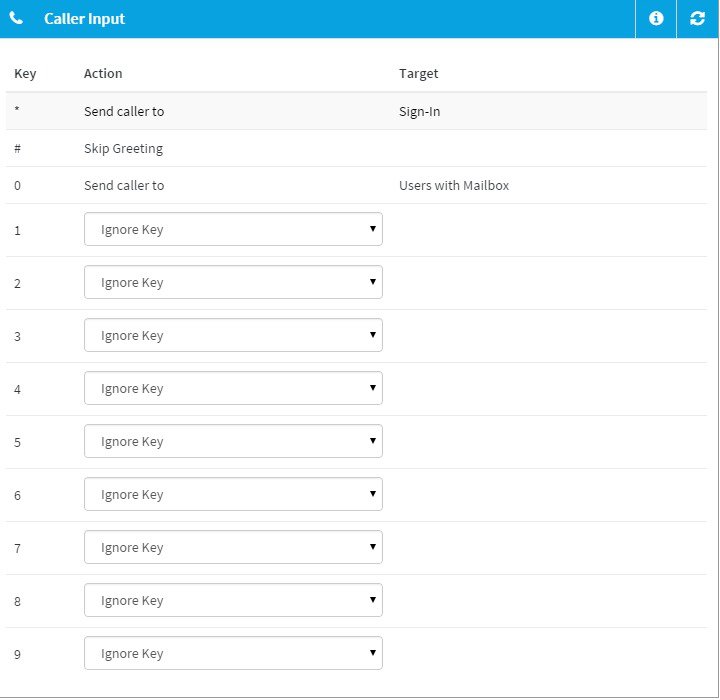
Manage Caller Input Keys
What to Do Next
Edit a caller input key if required by choosing a different Action for the key from the relevant dropdown list or by changing the target number (as applicable). Click Save when compete.