Cisco IP Phone 6800 Series Multiplatform Phones
The Cisco IP Phone 6800 Series Multiplatform Phones comprises a set of full-featured VoIP (Voice-over-Internet Protocol) phones that provide voice communication over an IP network. The phones provide all the features of traditional business phones, such as call forwarding, redialing, speed dialing, transferring calls, and conference calling. The Cisco IP Phone 6800 Series Multiplatform Phones is targeted for solutions that are centered on third-party SIP-based IP PBX.
 Note |
This document doesn't include the DECT phones. |
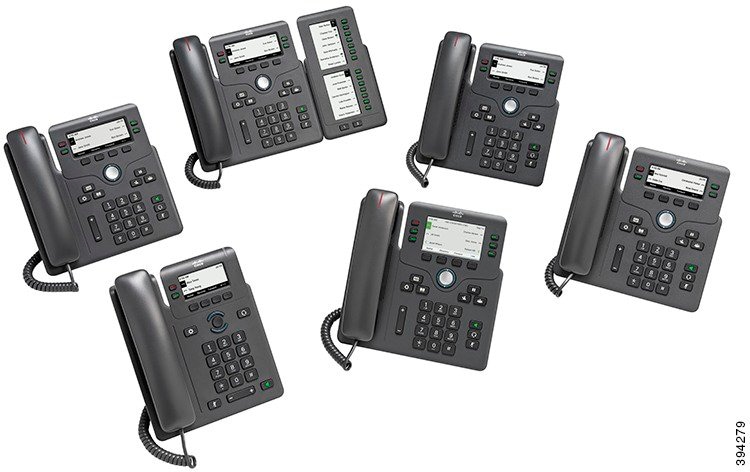
The Cisco IP Phone 6800 Series Multiplatform Phones deliver easy-to-use, highly-secure voice communications. In the following figure, you see (Clockwise from the top left):
-
Cisco IP Phone 6841 Multiplatform Phone
-
Cisco IP Phone 6851 Multiplatform Phone with Key Expansion Module
-
Cisco IP Phone 6851 Multiplatform Phone
-
Cisco IP Phone 6861 Multiplatform Phone
-
Cisco IP Phone 6871 Multiplatform Phone
-
Cisco IP Phone 6821 Multiplatform Phone
Note |
In this document, the terms Cisco IP Phone, phone, or device mean Cisco IP Phone 6800 Series Multiplatform Phones. |
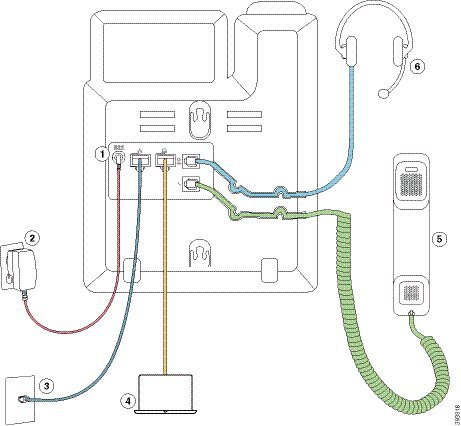
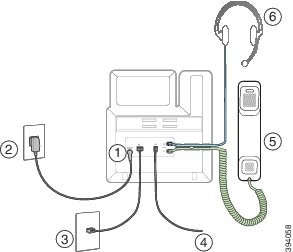
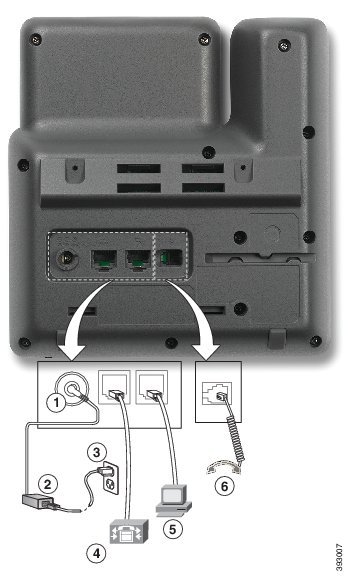
Cisco IP Phone 6821 Multiplatform Phones Connections
Connect your phone to your LAN with an Ethernet cable to enable full functionality of your phone. If your Ethernet port is equipped with Power over Ethernet (PoE), you can power the phone through the LAN port. If you don't have PoE available, then you need to use a power adapter to power the phone. Do not extend the Ethernet cable outside the building. For your phone to work, it must be connected to the IP telephony network.
|
1 |
DC adapter port (optional) |
4 |
Access port (10/100 PC) connection (optional) |
|
2 |
Power adapter (optional) |
5 |
Handset connection |
|
3 |
Network port (10/100 SW) connection; IEEE 802.3af power enabled |
6 |
Analog headset connection (optional) |
Note |
In the EU and UK, your phone is shipped with a power switch cable that is required in order to provide power to your phone when using an AC-to-DC power supply. Connect the power cord to the power switch cable and then connect the other end of the power switch cable to the DC adapter port. |
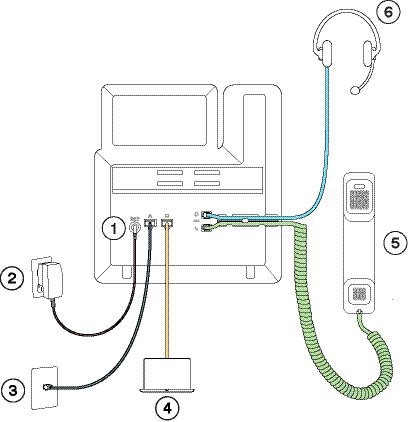
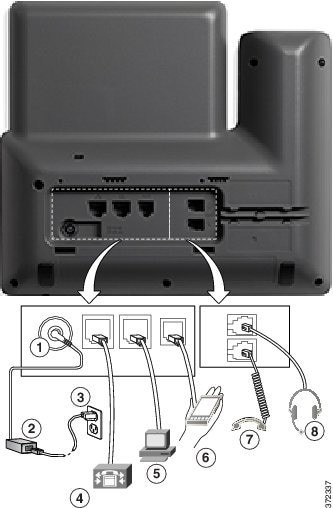
Cisco IP Phone 6841 Multiplatform Phones Connections
Connect your phone to your LAN with an Ethernet cable to enable full functionality of your phone. You need to use a power adapter to power the phone. Do not extend the LAN Ethernet cable outside the building. For your phone to work, it must be connected to the IP telephony network.
|
1 |
DC adapter port |
4 |
Access port (10/100/1000 PC) connection (optional) |
|
2 |
Power adapter |
5 |
Handset connection |
|
3 |
Network port (10/100/1000 SW) connection |
6 |
Analog headset connection (optional) |
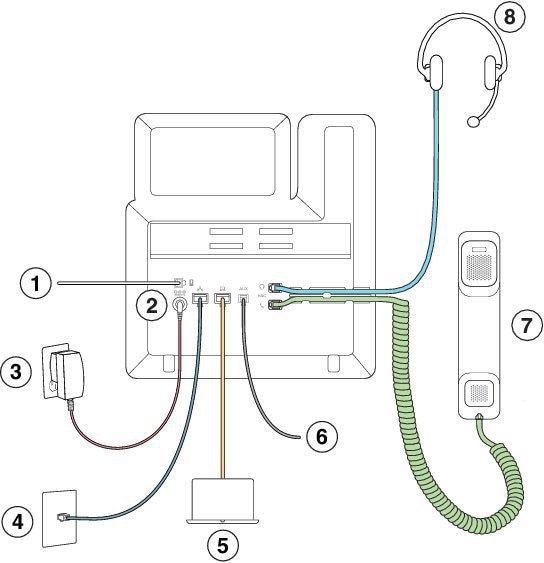
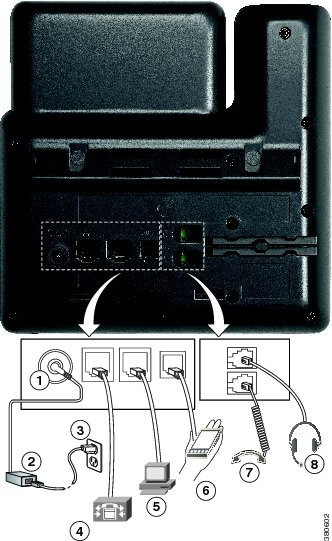
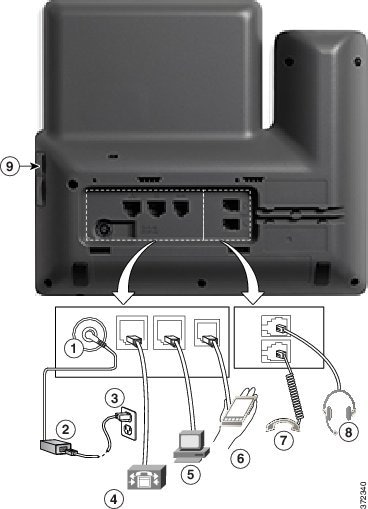
Cisco IP Phone 6851 Multiplatform Phones Connections
Connect your phone to your LAN with an Ethernet cable to enable full functionality of your phone. If your Ethernet port is equipped with Power over Ethernet (PoE), you can power the phone through the LAN port. If you don't have PoE available, then you need to use a power adapter to power the phone. Do not extend the LAN Ethernet cable outside the building. For your phone to work, it must be connected to the IP telephony network.
|
1 |
Key Expansion Module port |
5 |
Access port (10/100/1000 PC) connection (optional) |
|
2 |
DC adapter port (optional) |
6 |
Auxiliary port (optional) |
|
3 |
Power adapter (optional) |
7 |
Handset connection |
|
4 |
Network port (10/100/1000 SW) connection; IEEE 802.3af power enabled |
8 |
Analog headset connection (optional) |
Cisco IP Phone 6861 Multiplatform Phones Connections
Connect your phone to your LAN with an Ethernet cable or with Wi-Fi to enable full functionality of your phone. You need to use a power adapter to power the phone. If you connect your phone to a wired network, do not extend the LAN Ethernet cable outside the building. For your phone to work, it must be connected to the IP telephony network.
|
1 |
DC adapter port |
4 |
Auxiliary port (optional) |
|
2 |
Power adapter |
5 |
Handset connection |
|
3 |
Network port (10/100 SW) connection |
6 |
Analog headset connection (optional) |
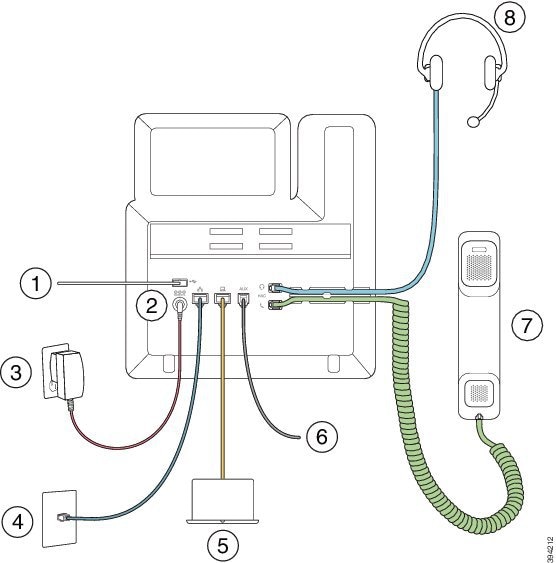
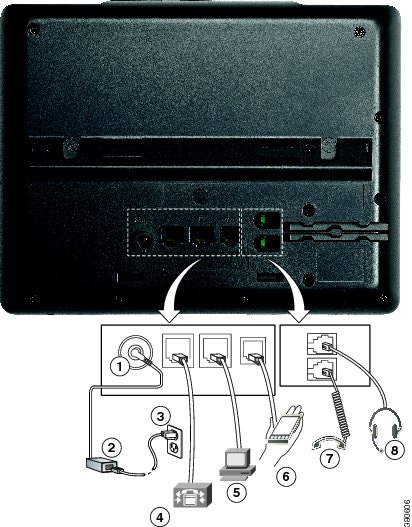
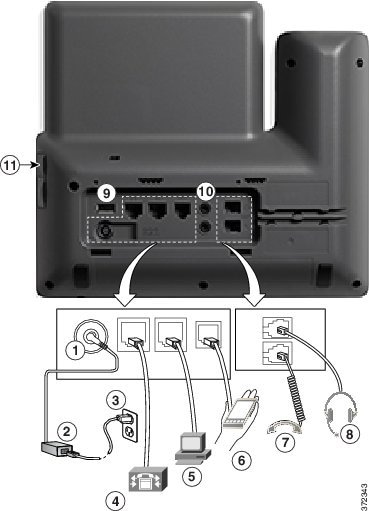
Cisco IP Phone 6871 Multiplatform Phones Connections
Connect your phone to your LAN with an Ethernet cable to enable full functionality of your phone. If your Ethernet port is equipped with Power over Ethernet (PoE), you can power the phone through the LAN port. If you don't have PoE available, then you need to use a power adapter to power the phone. Do not extend the LAN Ethernet cable outside the building. For your phone to work, it must be connected to the IP telephony network.
|
1 |
USB Headsets |
5 |
Access port (10/100/1000 PC) connection (optional) |
|
2 |
DC adapter port (optional) |
6 |
Auxiliary port (optional) |
|
3 |
Power adapter (optional) |
7 |
Handset connection |
|
4 |
Network port (10/100/1000 SW) connection; IEEE 802.3af power enabled |
8 |
Analog headset connection (optional) |
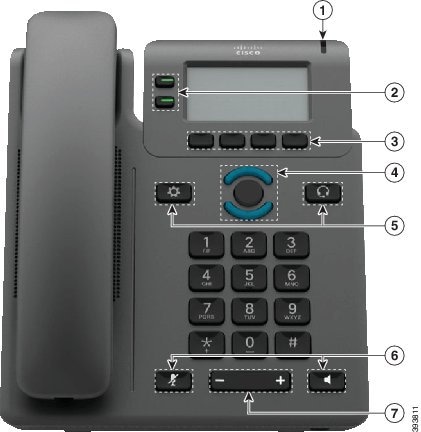
Cisco IP Phone 6821 Multiplatform Phones Buttons and Hardware
The following figure shows the Cisco IP Phone 6821 Multiplatform Phones.
|
1 |
Light strip |
Indicates whether you have an incoming call (flashing red) or a new voice message (steady red). |
|
2 |
Programmable feature buttons and line buttons |
|
|
3 |
Softkey buttons |
|
|
4 |
Navigation cluster |
Navigation ring and Select button. Scroll through menus, highlight items, and select the highlighted item. |
|
5 |
Applications and Headset |
Applications Headset |
|
6 |
Mute and Speakerphone |
Mute Speakerphone |
|
7 |
Volume button |
Adjust the handset, headset, and speakerphone volume (off hook) and the ringer volume (on hook). |
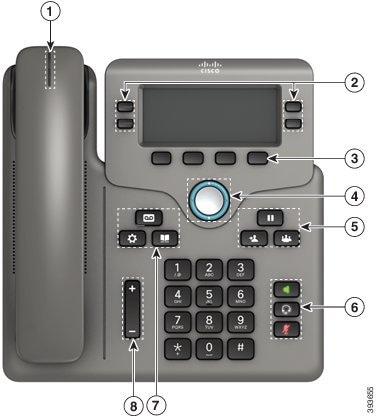
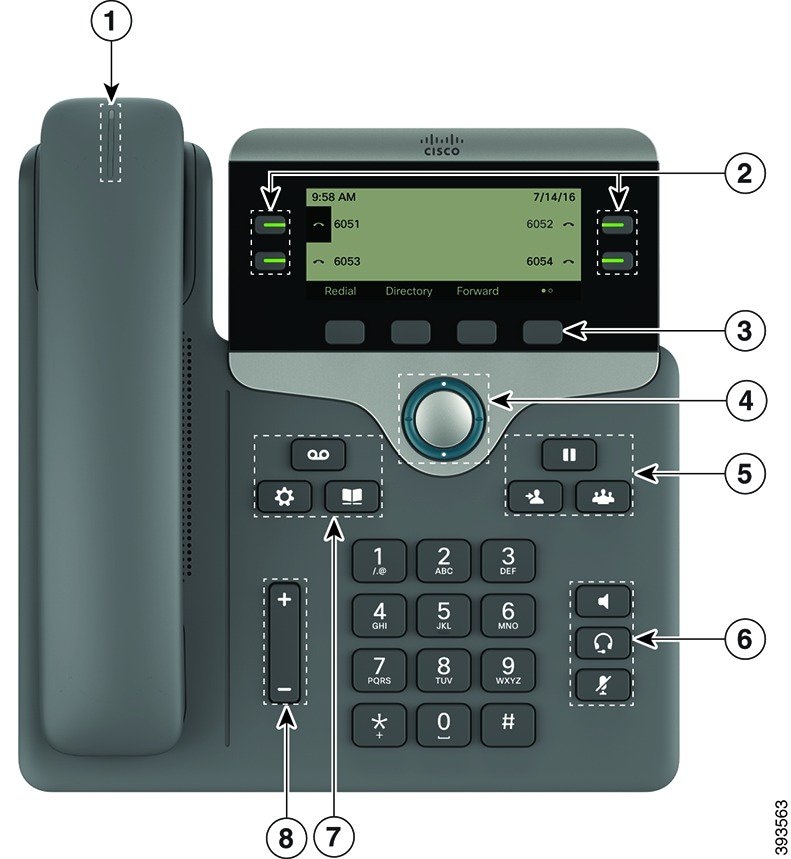
Cisco IP Phone 6841, 6851, and 6861 Multiplatform Phones Buttons and Hardware
The following figure shows the Cisco IP Phone 6841.
|
1 |
Handset and Handset light strip |
Indicates whether you have an incoming call (flashing red) or a new voice message (steady red). |
|
2 |
Programmable feature buttons and line buttons |
|
|
3 |
Softkey buttons |
|
|
4 |
Navigation cluster |
Navigation ring and Select
|
|
5 |
Hold/Resume, Conference, and Transfer |
Hold/Resume Conference Transfer |
|
6 |
Speakerphone, Mute, and Headset |
Speakerphone Mute Headset |
|
7 |
Contacts, Applications, and Messages |
Contacts Applications Messages |
|
8 |
Volume button |
Adjust the handset, headset, and speakerphone volume (off hook) and the ringer volume (on hook). |
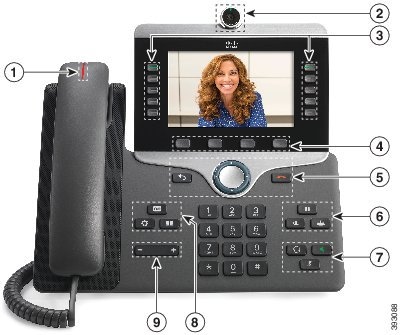
Cisco IP Phone 6871 Multiplatform Phones Buttons and Hardware
The following figure shows the Cisco IP Phone 6871.

|
1 |
Handset and Handset light strip |
Indicates whether you have an incoming call (flashing red) or a new voice message (steady red). |
|
2 |
Programmable feature buttons and line buttons |
For more information, see Softkey, Line, and Feature Buttons. |
|
3 |
Softkey buttons |
For more information, see Softkey, Line, and Feature Buttons. |
|
4 |
Navigation cluster |
Navigation ring and Select
|
|
5 |
Hold/Resume, Conference, and Transfer |
Hold/Resume Conference Transfer |
|
6 |
Speakerphone, Mute, and Headset |
Speakerphone Mute Headset |
|
7 |
Contacts, Applications, and Messages |
Contacts Applications Messages |
|
8 |
Volume button |
Adjust the handset, headset, and speakerphone volume (off hook) and the ringer volume (on hook). |


 Feedback