Overview of the TelePresence Management Suite integration
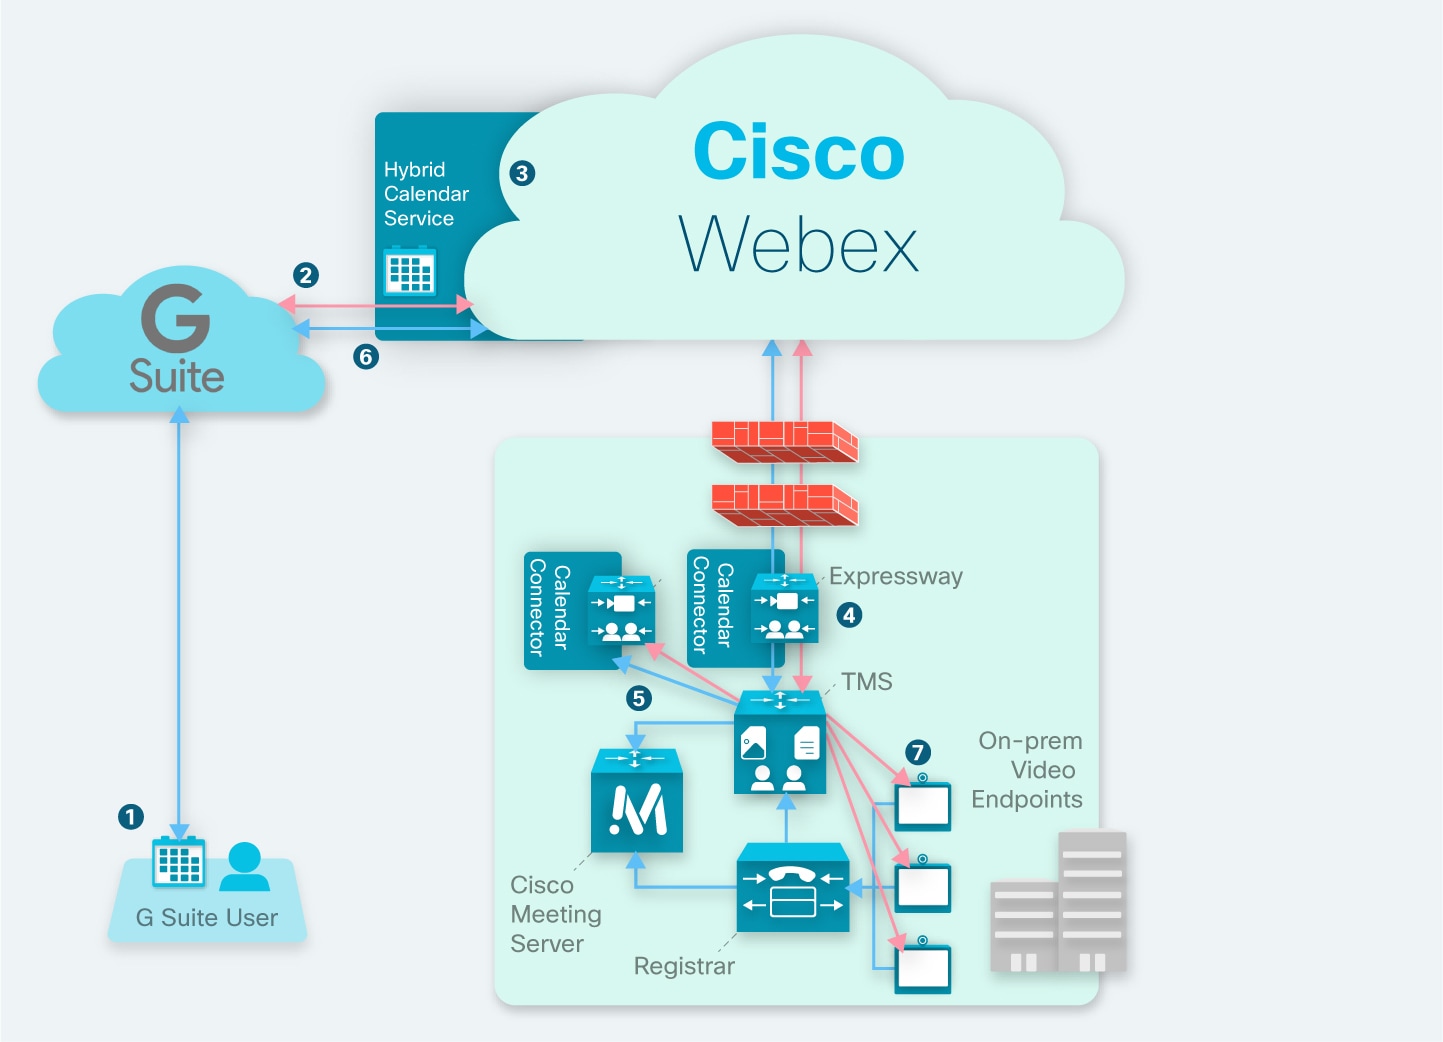
The TelePresence Management Suite (TMS) scheduling option allows the Hybrid Calendar to leverage your on-premises resource management and conference hosting environment for simplified meeting scheduling. This integration also extends the meeting join button to a wide range of video devices.
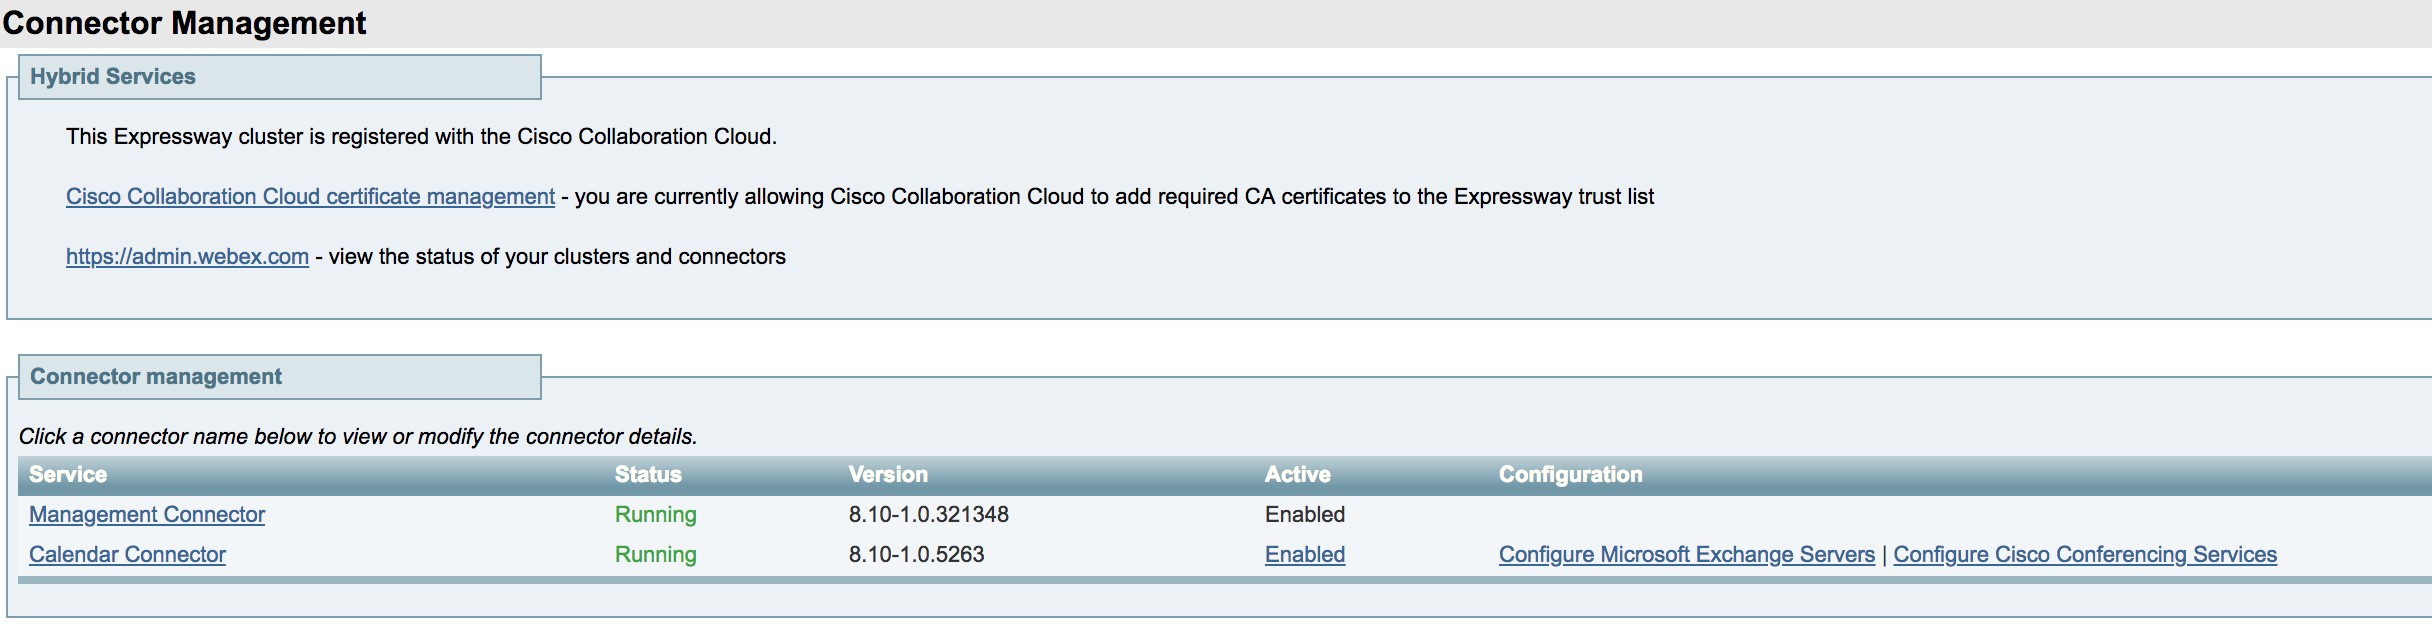
The integration currently works with the cloud-based Hybrid Calendar for Office 365 or the cloud-based Hybrid Calendar for Google Calendar. To deploy the integration, you first set up the cloud-based service. Then you install the calendar connector on your on-premises Expressway-C and configure the connector for the TMS scheduling option.
 Note |
You can't deploy the TMS scheduling option if your Webex organization already has the calendar connector configured for the Hybrid Calendar. The TMS integration must be the only calendar connector in the organization. |
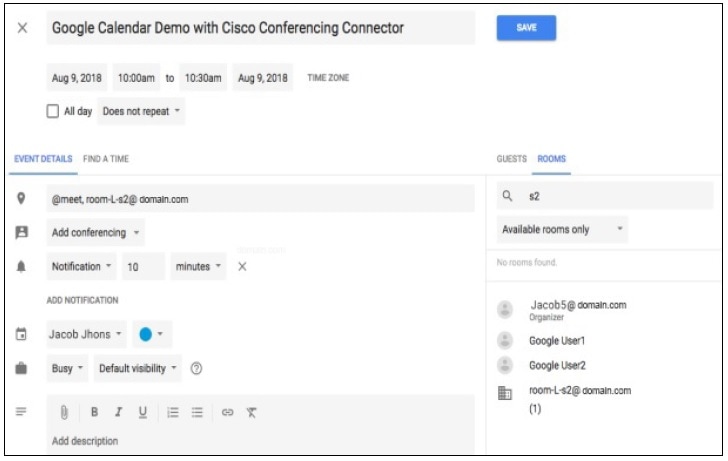
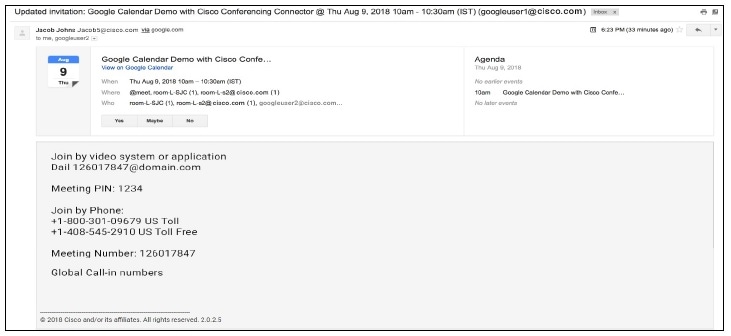
To simplify meeting scheduling, users can type @meet in the location field of their calendar invitation. In Control Hub you can configure the action that the Hybrid Calendar takes for the @meet keyword:
|
You choose this option for @meet in Control Hub |
How the connector schedules in response to @meet |
How the connector handles the join button with the TMS integration |
||||
|---|---|---|---|---|---|---|
|
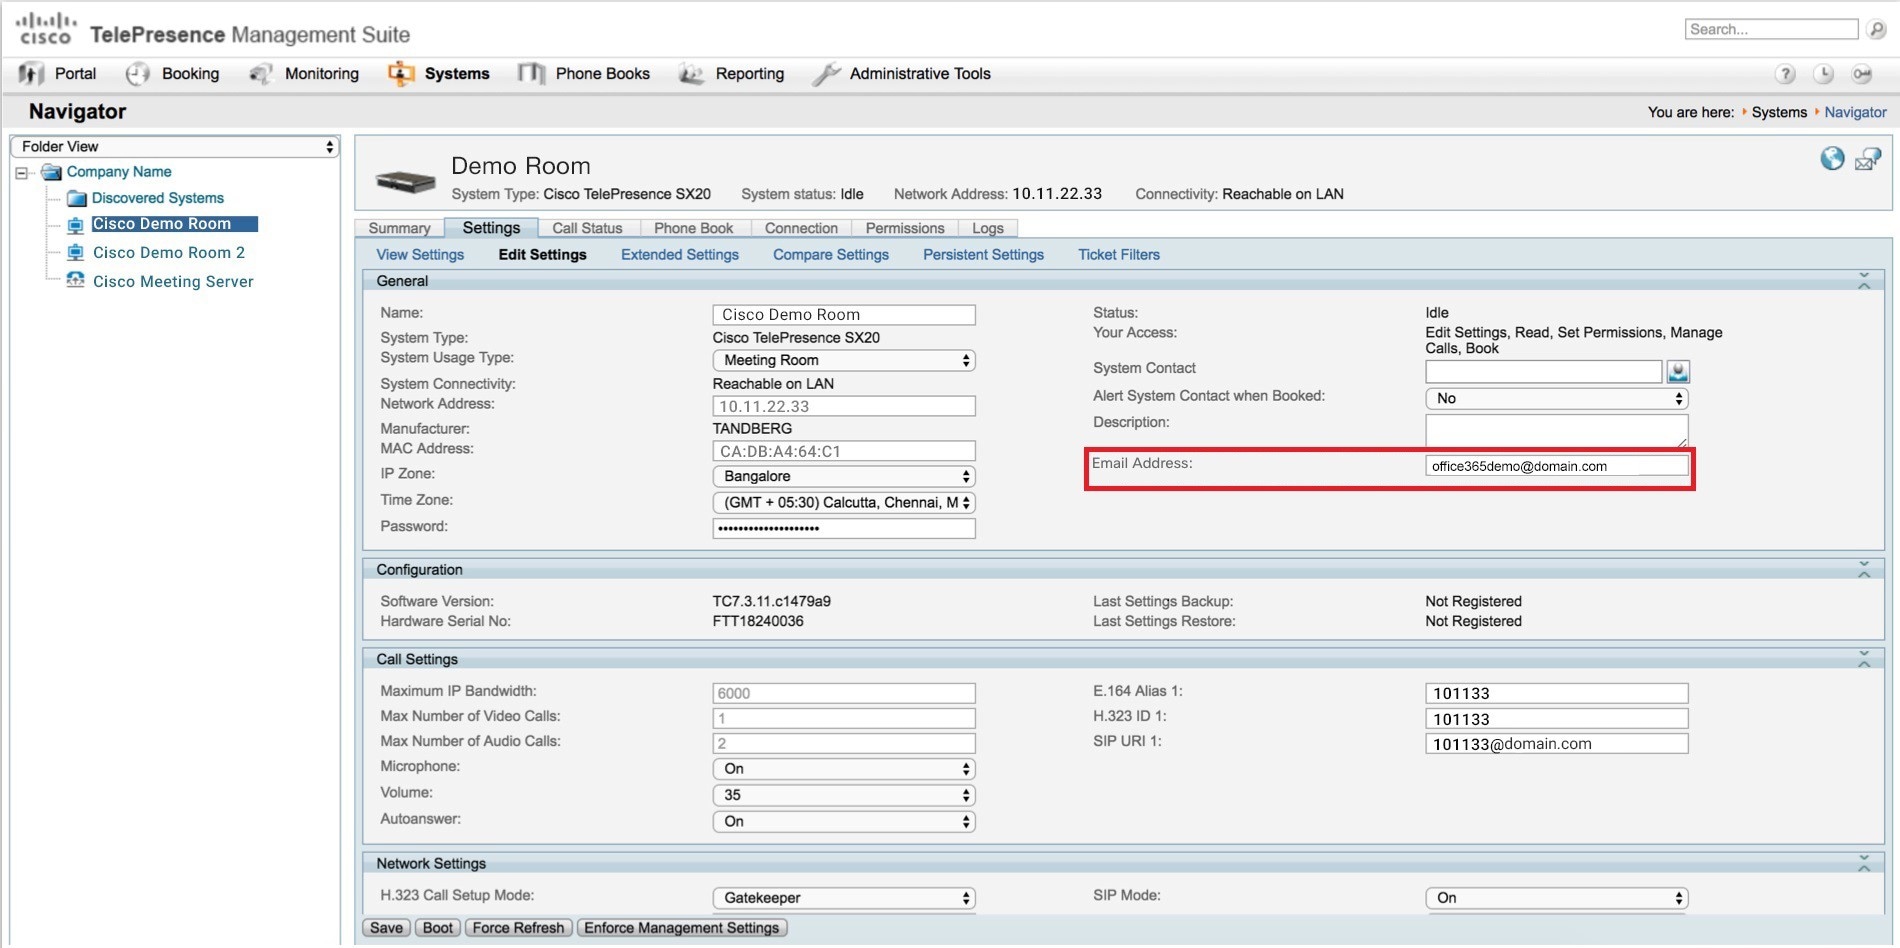
TelePresence Management Suite
|
Schedules the meeting using TMS, and adds join details for a meeting hosted with on-premises conference bridge resources. This option provides unique, meeting-specific meeting IDs. |
Just before the meeting starts, TMS provides the join button for invited video devices that are registered on-premises.
The join button is also available in Webex Teams and on cloud-registered Webex room and desk devices. |
||||
|
Webex App space (or @meet:space)
|
Creates a space in Webex App and adds join details for it. TMS is not required or used. |
The join button is available in Webex Teams and on cloud-registered Webex room and desk devices. |
||||
|
Personal Room (or @meet:myroom)
|
Schedules the meeting using the organizer's personal room join details. TMS is not required or used. |
The join button is available in Webex App and on cloud-registered Webex room and desk devices. |
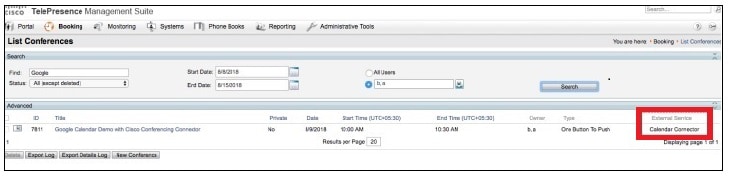
When you configure your video devices with room mailboxes in Google Calendar, users can invite the devices to meetings and the Cisco TMS ensures that the devices receive the green Join button. OBTP is sent to these types of devices:
-
Video devices that are registered to on-premises Unified Communications Manager.
-
Video devices that are registered to on-premises VCS or Expressway.
-
Cloud-registered Webex room and desk devices that are configured as places in Control Hub.


 Feedback