Maintenance
How to get firmware information
To retrieve firmware information, you can use the IPMI command. This command allows you to obtain component firmware version in your system, such as the BMC, BIOS, FPGA, and RoT.
IPMI Command
Command Format
Ipmitool raw 0x30 0x20Request Data
Not required.
Response Data
| Byte | Data Field |
|---|---|
| 1 | Completion Code |
| 2:3 |
BMC Firmware Revision Byte 2: Major Revision Byte 3: Minor Revision |
| 4:6 |
BIOS Firmware Revision Byte 4: Major Revision Byte 5: Minor Revision Byte 6: Iteration Revision |
| 7:8 |
DC-SCM FPGA Firmware Revision Byte 7: Major Revision Byte 8: Minor Revision |
| 9:10 |
HPM FPGA Firmware Revision Byte 9: Major Revision Byte 10: Minor Revision |
| 11:12 |
HIB FPGA Firmware Revision Byte 11: Major Revision Byte 12: Minor Revision |
| 13:14 |
RoT Firmware Revision Byte 13: Major Revision Byte 14: Minor Revision |
Example: Obtain firmware version using IPMI Command

Redfish
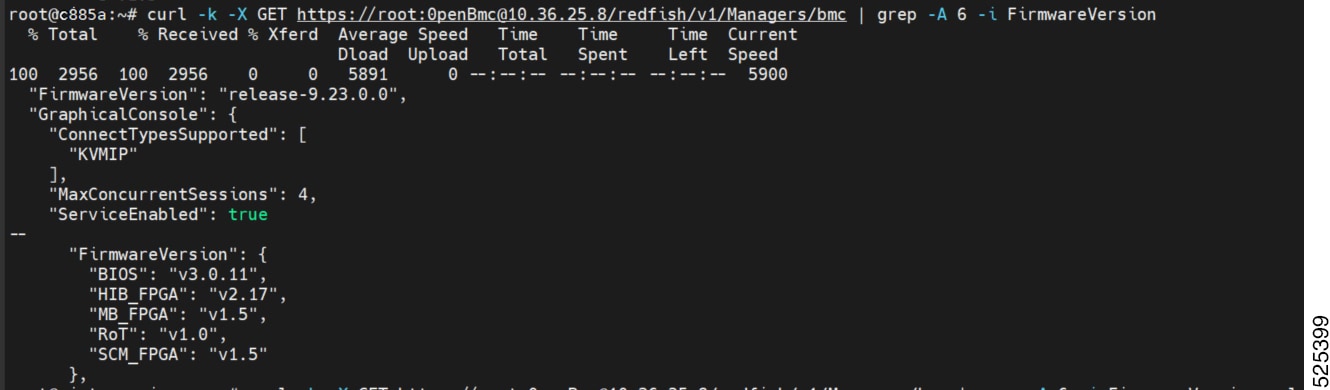
After using the command, you can find the firmware version in the red box.
Command format:
curl -k -X GET
https://<username>:<password>@<BMC
IP>/redfish/v1/Managers/bmc | grep -A 6 -i
FirmwareVersion
Example: Obtain firmware version via Redfish
How to do BMC firmware update
To ensure the proper functioning of the system, please follow the steps below to update the BMC firmware using the WEB GUI.
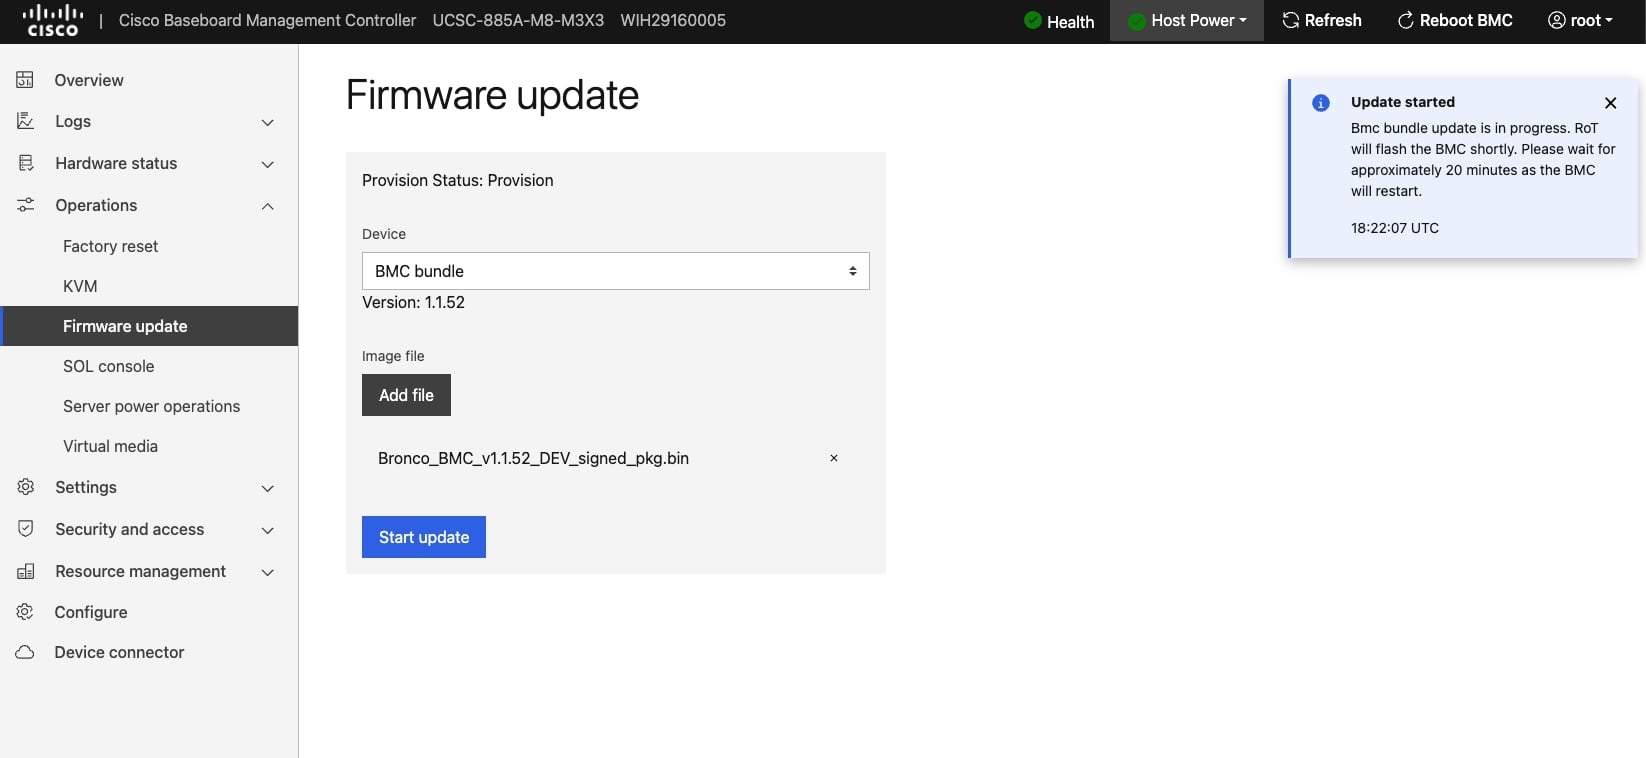
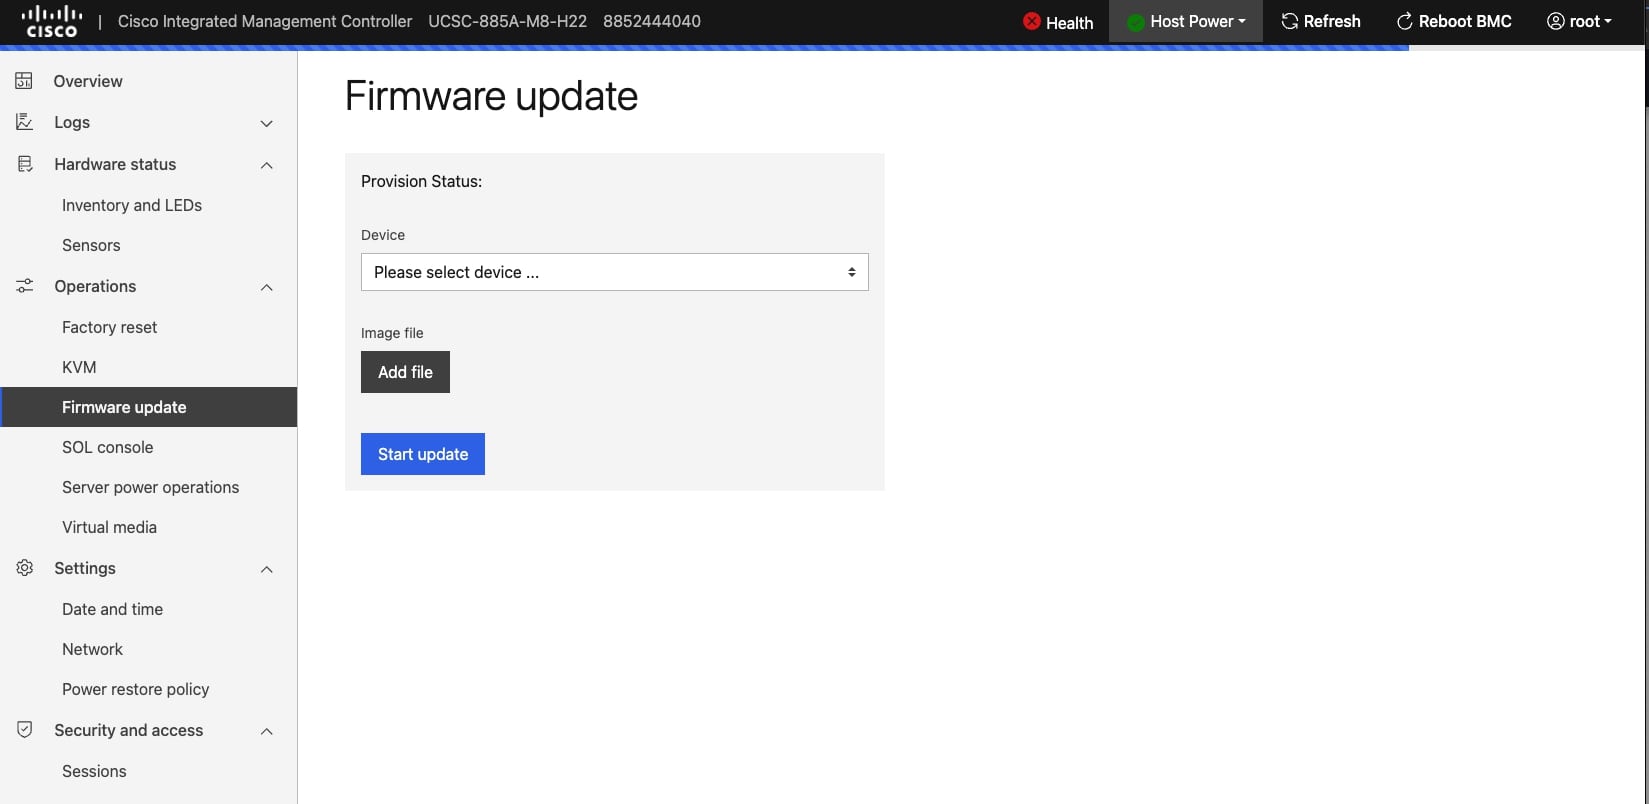
To open Firmware Update page, click Operations > Firmware from the menu bar. A sample screenshot of the Firmware Update Page is displayed.

Add File: Choose BMC firmware image.
Start update: Choose Start update in the pop menu.
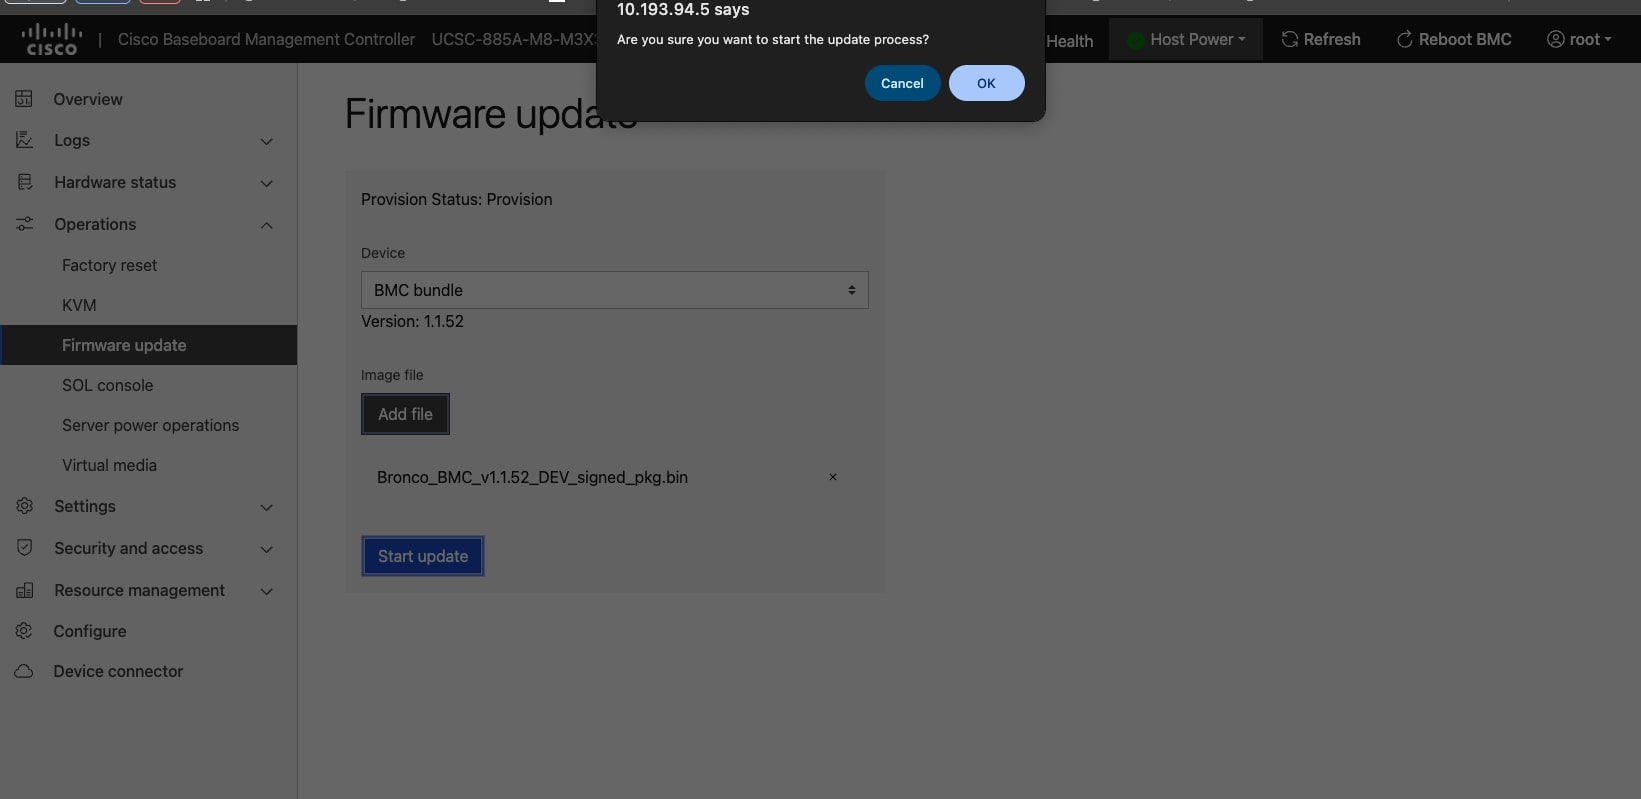
Pop Menu: Choose Start update in the pop menu.
The update procedure will be triggered as displayed.
To ensure proper functioning of the system, perform the following to update the BMC firmware through Redfish:
-
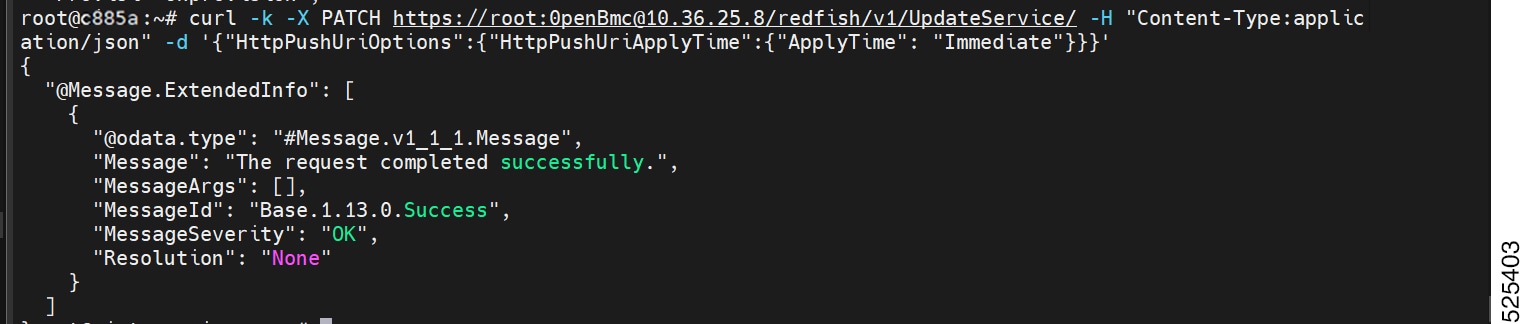
Configure when the new BMC firmware image should be applied.
Command format:
curl -k -X PATCH
https://<username>:<password>@<BMC
IP>/redfish/v1/UpdateService/ -H "Content-Type:application/json"
-d '{"HttpPushUriOptions":{"HttpPushUriApplyTime":{"ApplyTime":
"Immediate"}}}'
Example: Configure the new BMC firmware image apply time
-
Check whether the system is in provision or unprovision mode.
Command format: curl -k -X GET https://<username>:<password>@<BMC IP>/redfish/v1/Managers/bmc | grep ProvisionStatusExample: Check Provision Status

-
Request BMC to download the BMC firmware image and update the BMC firmware. Once the command is executed successfully, BMC takes 10 to 12 minutes to update the firmware and wait for 3 to 5 minutes to boot up.
Command format: curl -k -X POST https://<username>:<password>@<BMC IP>/redfish/v1/UpdateService/ -H "Content-Type:application/octet-stream" --data-binary @<BMC firmware image name>
Note
If system is unprovisioned, use xxxx.tar for the BMC firmware update. If system is provisioned, use capsule for the BMC firmware update.
How to do BIOS firmware update
To ensure the proper functioning of the system, perform the following to update the BIOS firmware through the WEB GUI:
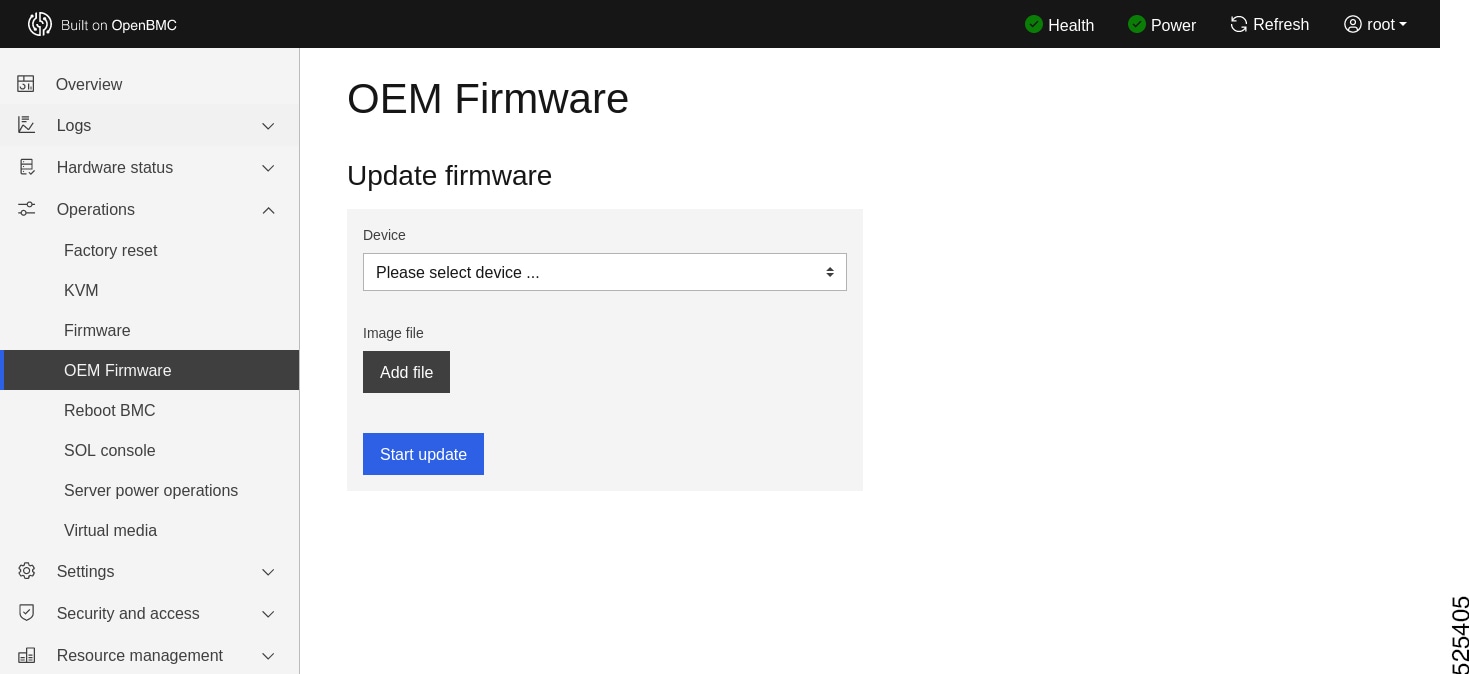
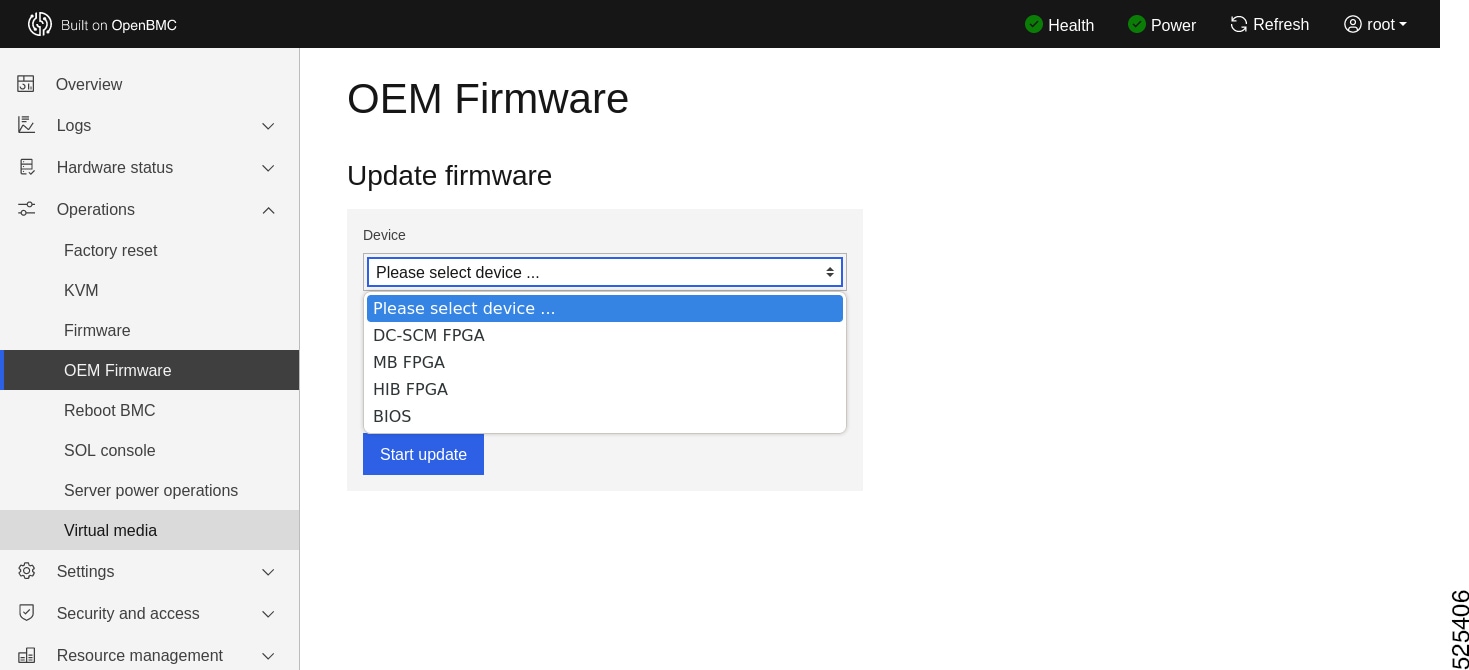
To open Firmware Update page, click Operations > OEM Firmware from the menu bar. A sample screenshot of the Firmware Update Page is displayed.
Note: Please confirm that the host power is turned off.
To select BIOS for firmware update.
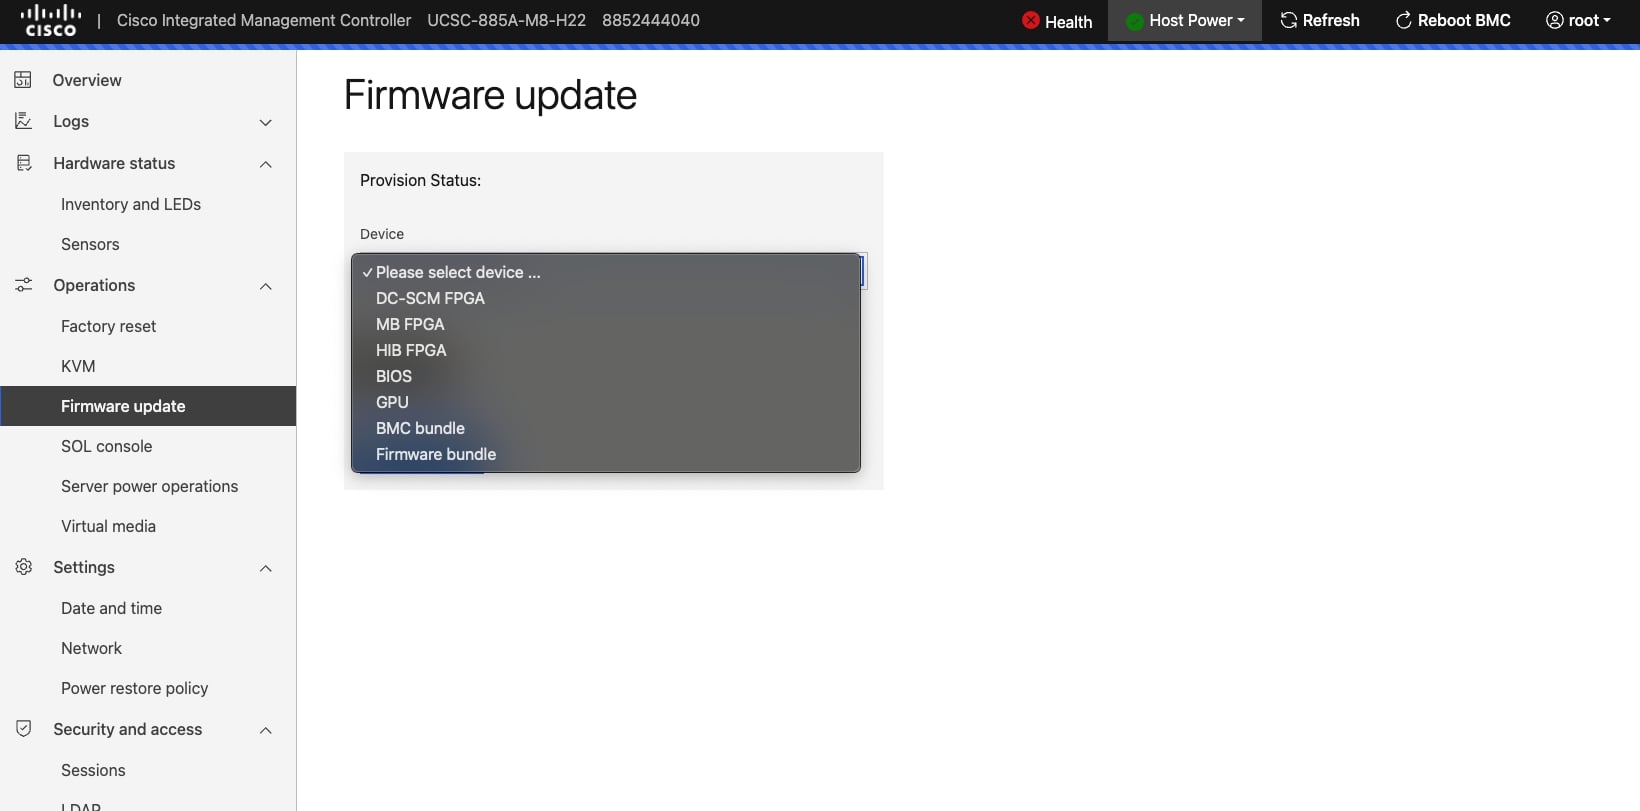
Add File: Choose DC-SCM FPGA, MB FPGA or HIB FPGA firmware image.
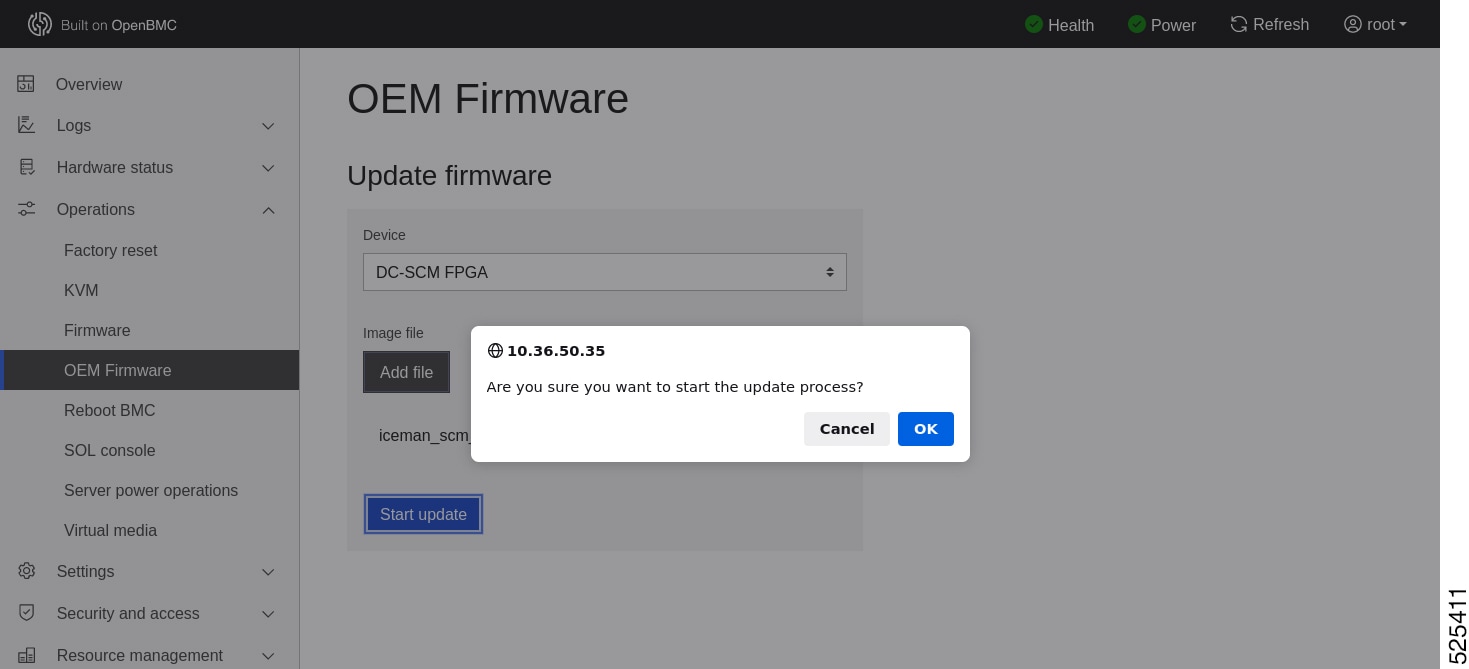
Start update: Choose Start update in the pop menu.
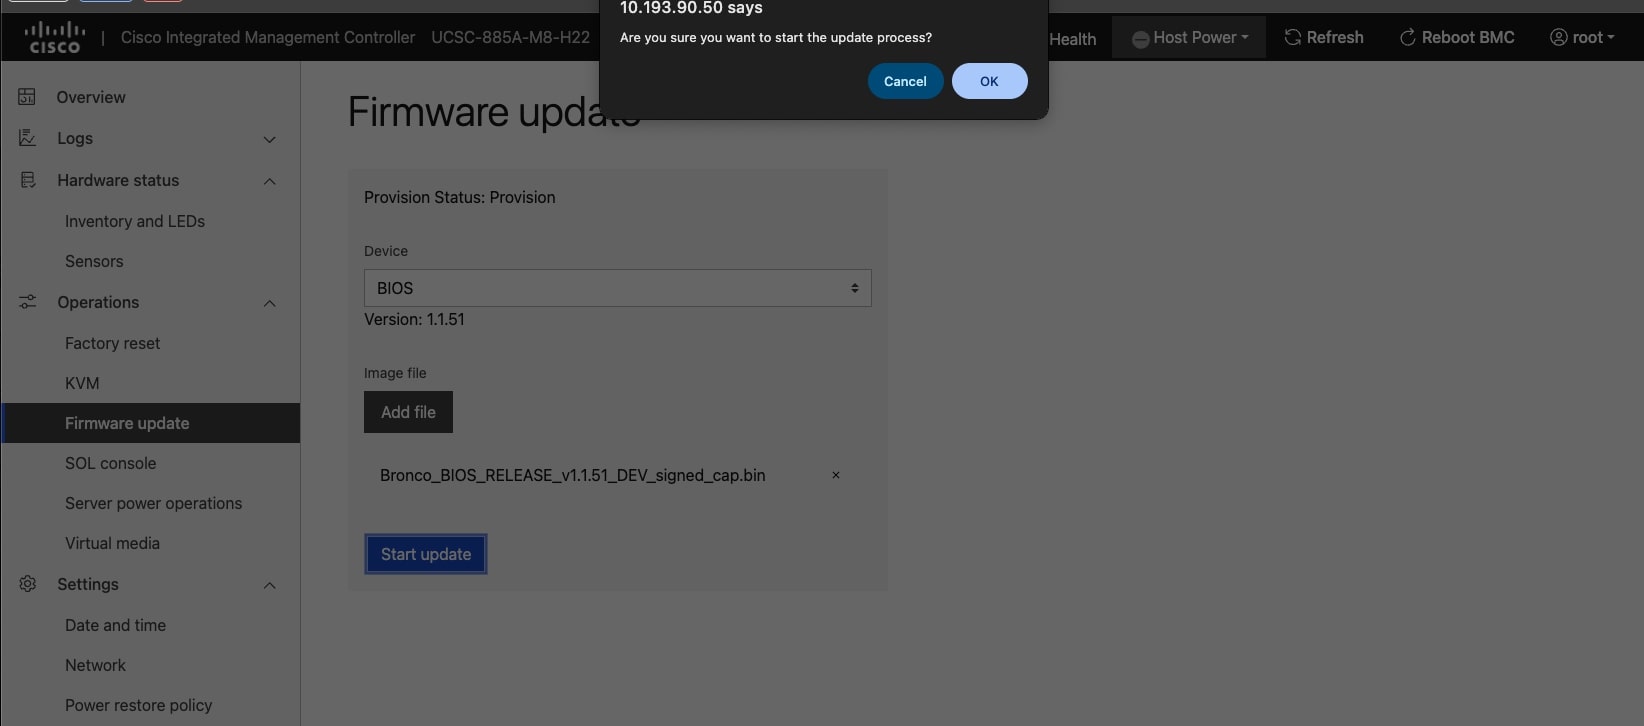
Pop Menu: Choose OK in the pop menu.
The update procedure will be triggered as displayed.

To ensure the proper functioning of the system, perform the following to update the BIOS firmware through Redfish:
-
Request the BMC to download the BIOS firmware image.
-
Command format:
curl -k -X POST https://<username>:<password>@<BMC IP>/redfish/v1/Managers/c885a/UploadFile -H "Content-Type:application/octet-stream" -H "Filename:oem.bin" --data-binary @<BIOS firmware image name> -
Example: Request BMC to download the BIOS firmware image

-
-
Request the BMC to update the BIOS firmware.
-
Command format:
curl -k -X POST
https://<username>:<password>@<BMC
IP>/redfish/v1/Managers/c885a/OEMUpdate -d '{"updateDevice":
"bios"}'
Note
Use this command to get the updated status.
-
Command format:
curl -k -X GET
https://<username>:<password>@<BMC
IP>/redfish/v1/Managers/c885a/OEMUpdate/CheckStatus
Note
-
If the update is in progress, you will not receive any response.
-
If the update is successful, the result will be success.
Example: Get BIOS update status

-
-
How to do FPGA firmware update
To ensure the proper functioning of the system, perform the following to update the FPGA firmware through the WEB GUI:
To open Firmware Update page, click Operations > OEM Firmware from the menu bar. A sample screenshot of Firmware Update Page is displayed.
To select the DC-SCM FPGA, MB FPGA or HIB FPGA for firmware update.
Add File: Choose DC-SCM FPGA, MB FPGA or HIB FPGA firmware image.
Note |
The FPGA firmware image should be .rpd file. |
Start update: Choose Start update in the pop menu.
Pop Menu: Choose OK in the pop menu.
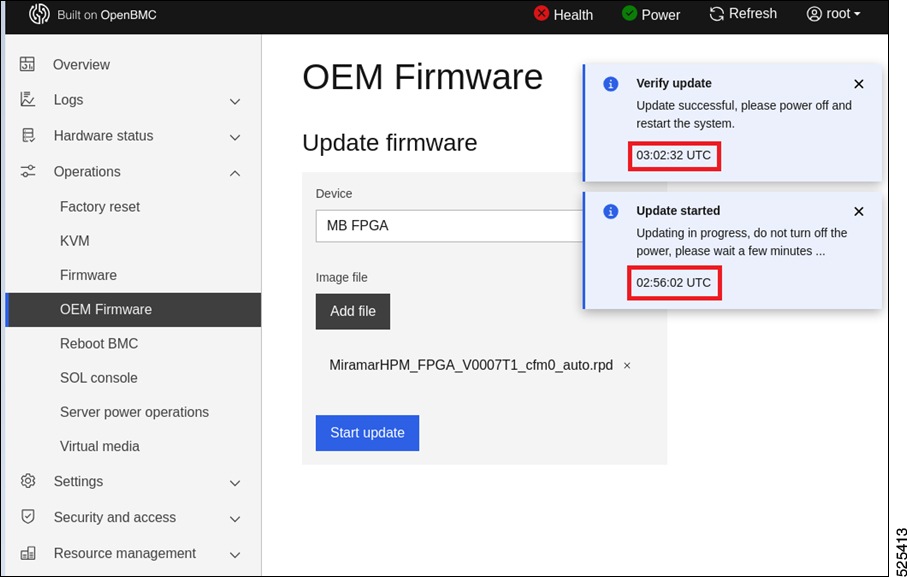
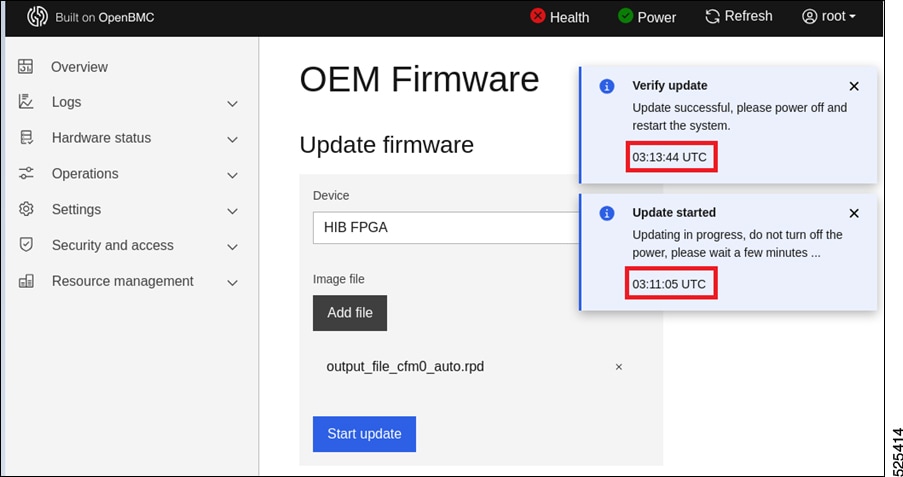
The update procedure will be triggered as displayed.
-
DC-SCM FPGA Firmware Update

-
MB FPGA Firmware Update
-
HIB FPGA Firmware Update
Redfish
To ensure the proper functioning of the system, perform the following to update the FPGA firmware through Redfish.
-
Request BMC to download the FPGA firmware image using the following image:
curl -k -X POST https://<username>:<password>@<BMC IP>/redfish/v1/Managers/c885a/UploadFile -H "Content-Type:application/octet-stream" -H "Filename:oem.bin" --data-binary @<FPGA firmware image name> -
Request BMC to update DC-SCM FPGA firmware, MB FPGA firmware or HIB FPGA firmware using the following commands:
DC-SCM FPGA:
curl -k -X POST
https://<username>:<password>@<BMC
IP>/redfish/v1/Managers/c885a/OEMUpdate -d '{"updateDevice":
"dcscm-fpga"}'
MB FPGA:
curl -k -X POST
https://<username>:<password>@<BMC
IP>/redfish/v1/Managers/c885a/OEMUpdate -d '{"updateDevice":
"mb-fpga"}'
HIB FPGA:
curl -k -X POST https://<username>:<password>@<BMC IP>/redfish/v1/Managers/c885a/OEMUpdate -d '{"updateDevice": "hib-fpga"}' -
Verify the updated status using the following command:
curl -k -X GET
https://<username>:<password>@<BMC
IP>/redfish/v1/Managers/c885a/OEMUpdate/CheckStatus
Note
-
If the update is in the progress, you will not receive any response.
-
If the update is successful, the Result will be success.
-
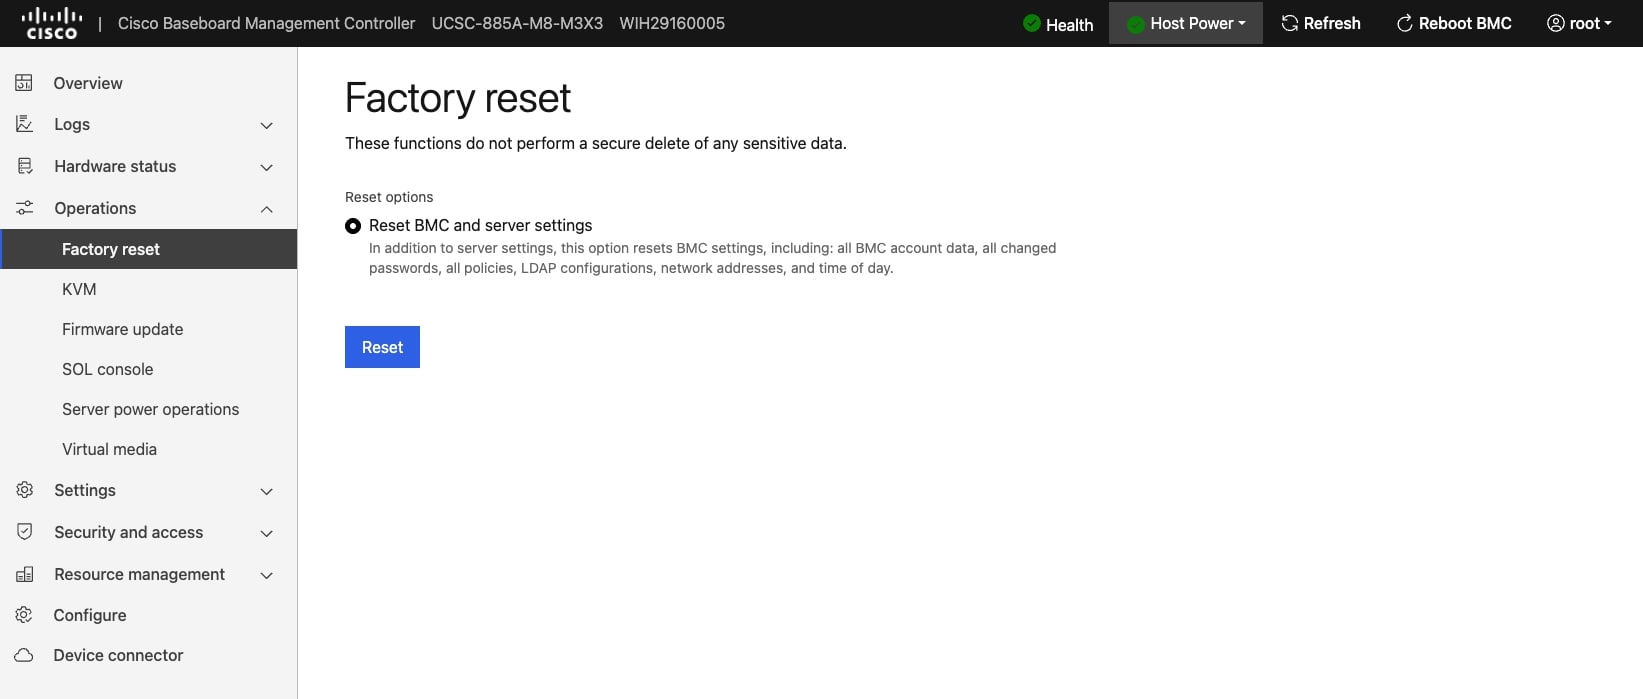
How to do factory reset
To perform a factory reset on your system, you can use the BMC Web UI. This method allows you to easily reset your system's configuration to its original factory settings.
IPMI Command
ipmitool raw 0x30 0x41
Example: Factory reset using IPMI command

BMC Web UI
To open the Factory reset page, click Operations > Factory reset from the menu bar. A sample screenshot of Factory reset Page is displayed.
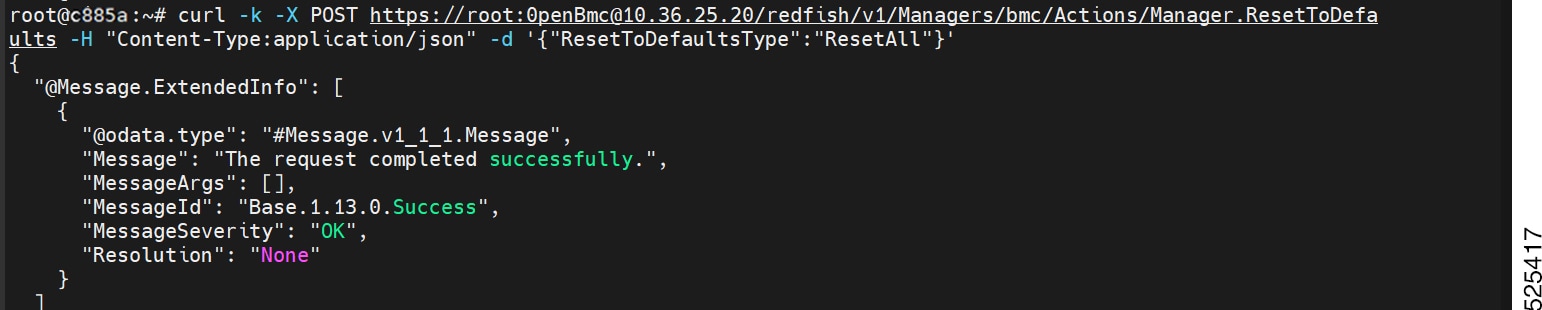
Redfish
Command format:
curl -k -X POST
https://<username>:<password>@<BMC
IP>/redfish/v1/Managers/bmc/Actions/Manager.ResetToDefaults -H
"Content-Type:application/json" -d
'{"ResetToDefaultsType":"ResetAll"}'
Note |
After entering the command, the status ok is returned, and the factory reset starts. At this time, you still need to wait for a while. |
Example: Factory reset using Redfish
Platform Management
How to check sensor status and value
To check the sensor status and values of your system, you can use either the IPMI command or the BMC Web UI. Both methods provide you with information about the various sensors in your system, such as temperature, voltage, fan speed, and power supply status.
IPMI Command
ipmitool sensor listExample: Get sensor list using the IPMI command

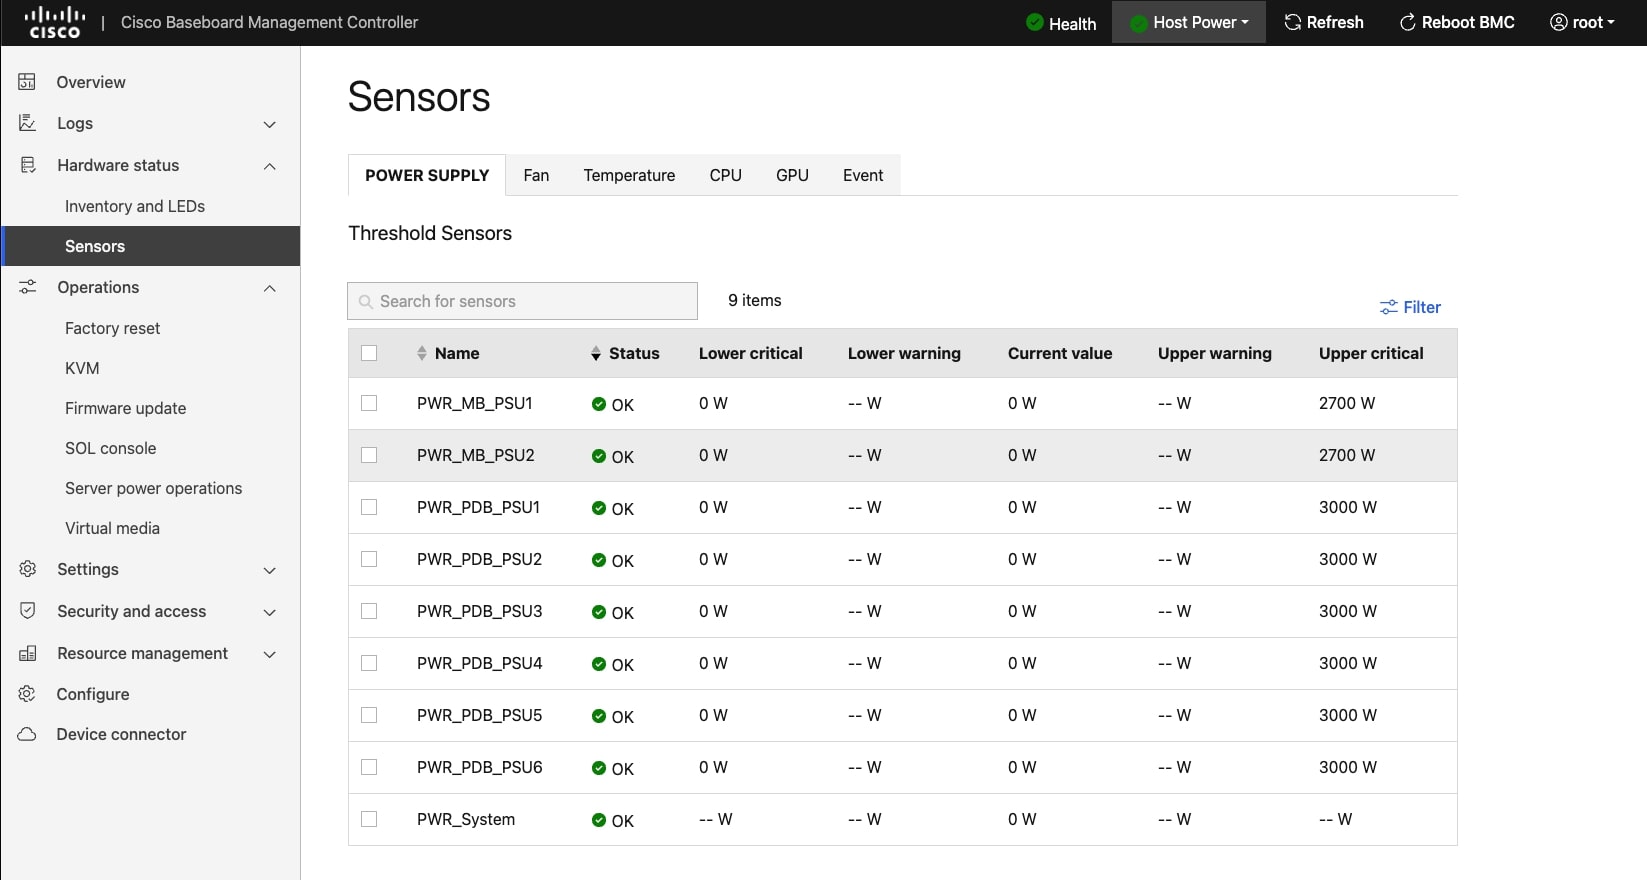
BMC Web UI
-
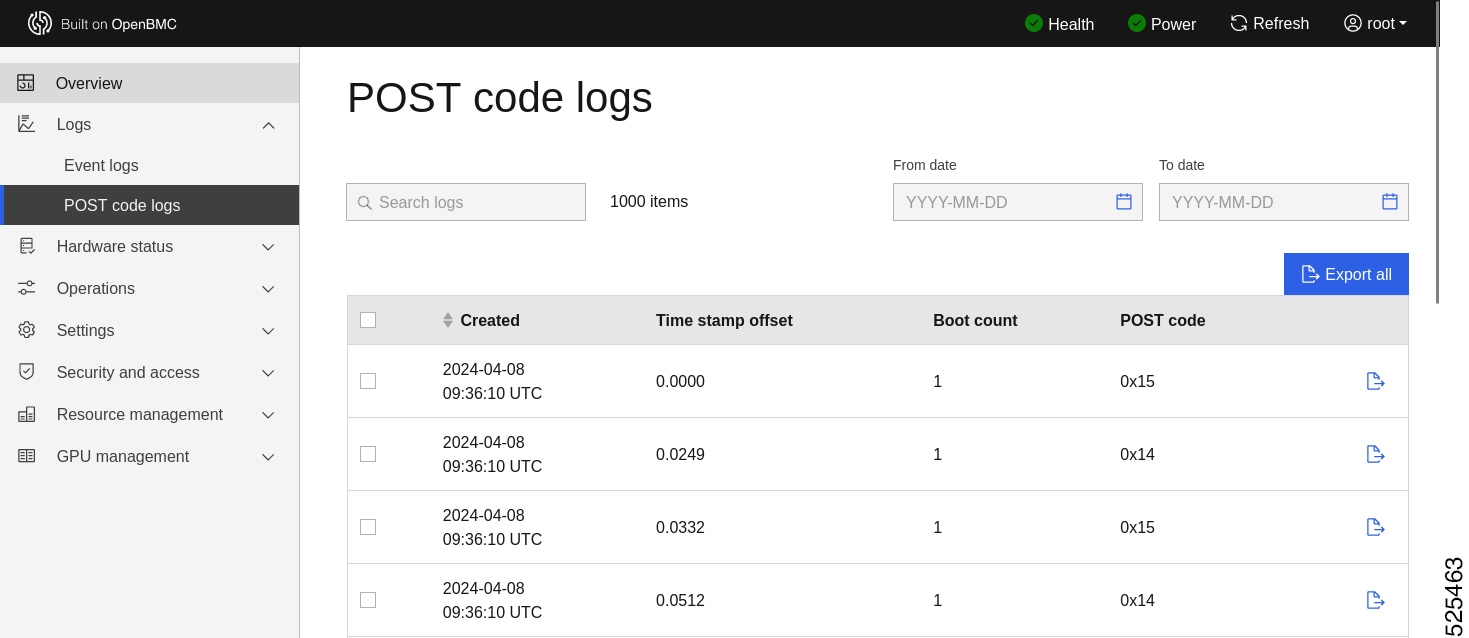
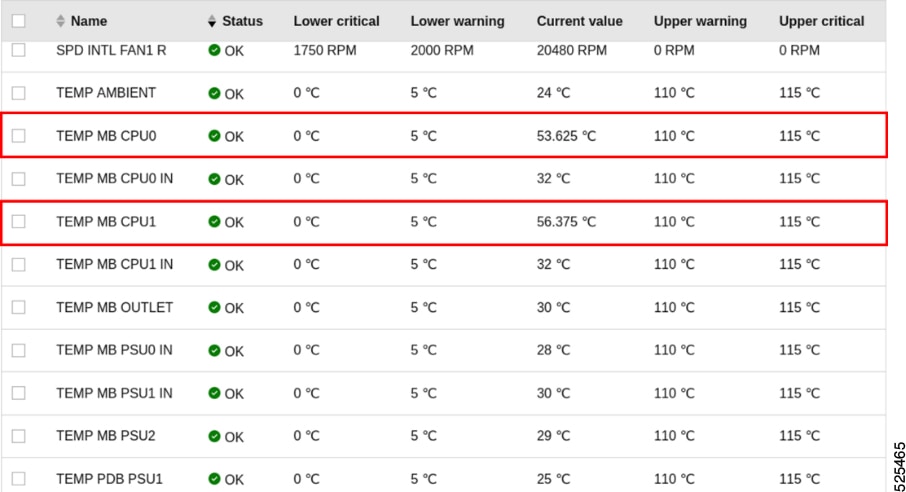
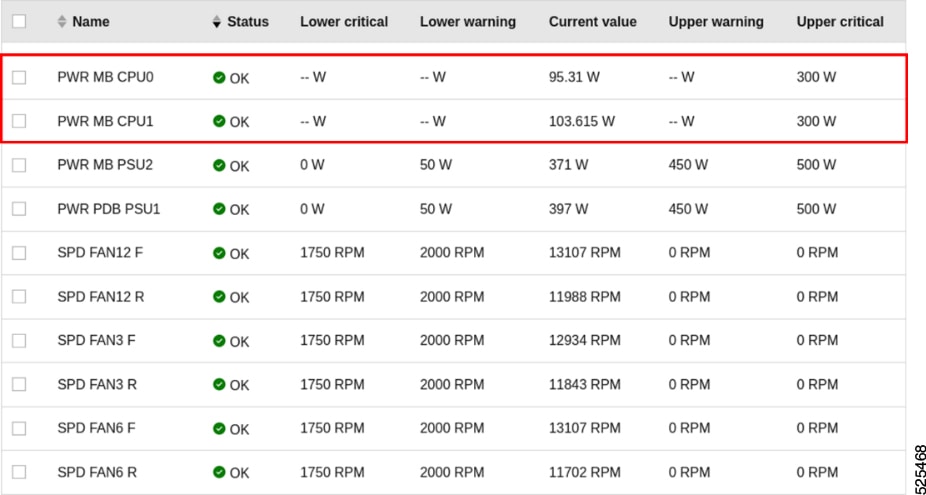
To open the Sensors page, click Hardware status > Sensors from the menu bar. The Sensors page displays all the sensor related information.
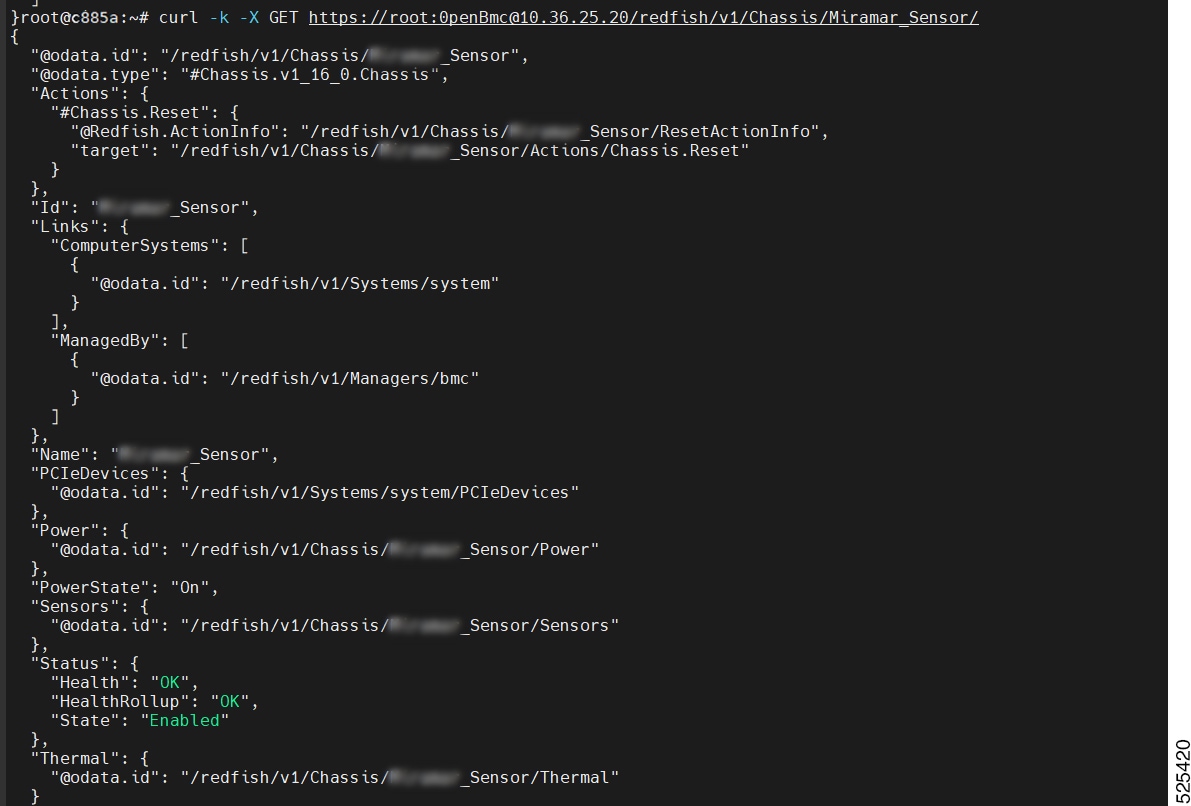
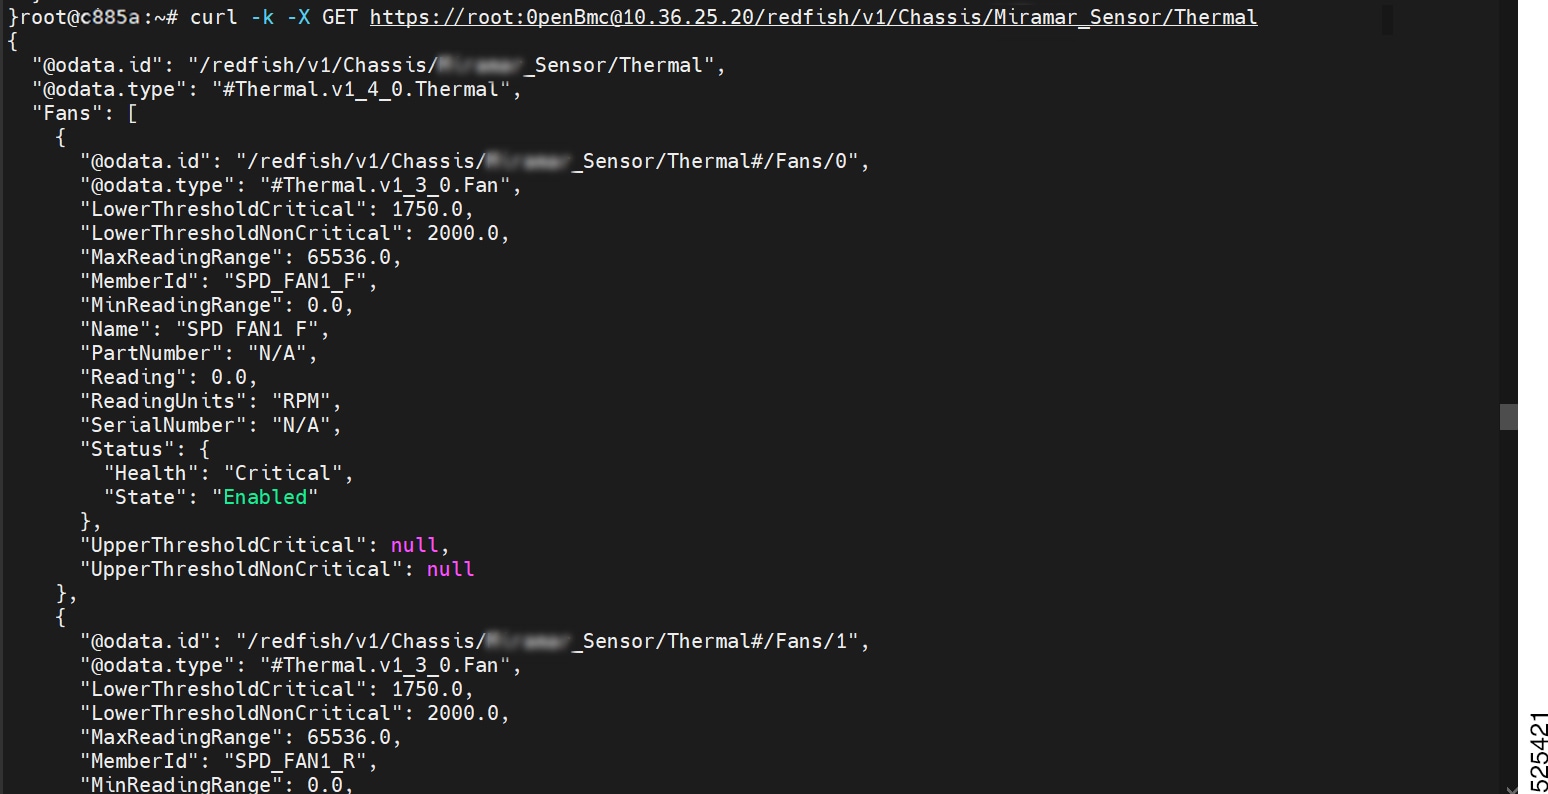
Redfish
-
Command format
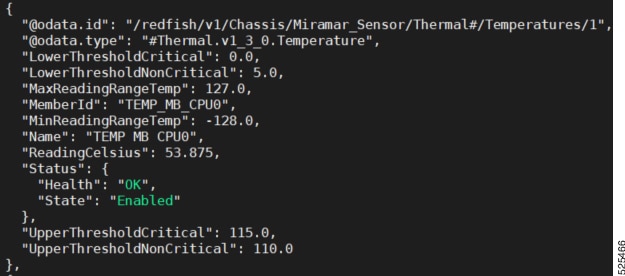
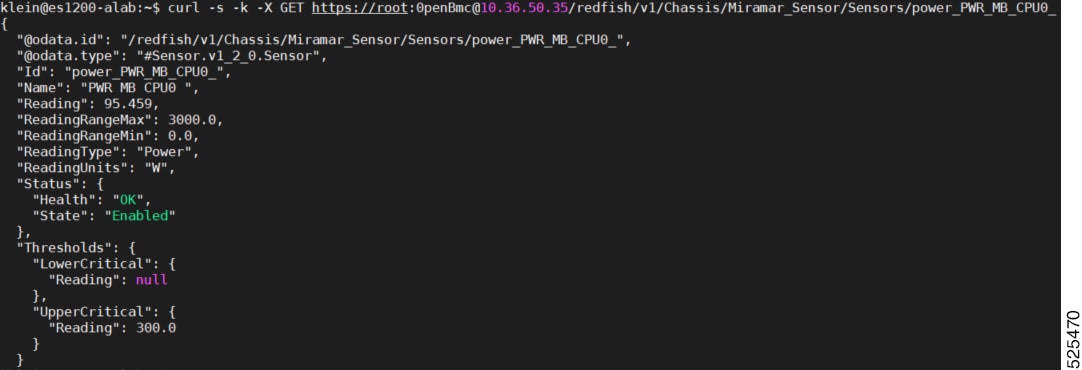
curl -k -X GET
https://<username>:<password>@<BMC
IP>/redfish/v1/Chassis/c885a_Sensor/<sensor type>
Note
The <sensor type> refers to the following:
-
Sensors: Contains the wattage of the power and status of the sensor.
-
Thermal: Contains the sensor temperature and fan speed.
-
-
Example: Get sensor list using Redfish
How to set or get fan speed control
This procedure explains how to set and retrieve the fan speed control parameters in your system by IPMI command.
IPMI Command
Set fan speed control
Command format
ipmitool 0x30 0x21 <control mode> <PWM>
Request Data
| Byte | Data Field |
|---|---|
| 1 |
Control Mode 01h = Manually Control. 00h = Auto Control (follow fan control algorithm) |
| 2 |
Fan PWM Duty Cycle 00h ~ 64h for 0% ~ 100% PWM duty cycle. This field is valid only if the request data byte #1 equals to 01h. |
Response Data
| Byte | Data Field |
|---|---|
| 1 | Completion Code |
Get fan speed control
Command format
ipmitool 0x30 0x22Request Data
Not required.
Response Data
| Byte | Data Field |
|---|---|
| 1 | Completion Code |
| 2 |
Control Mode 01h = Manually Control 00h = Auto Control (Default, follow fan control algorithm) |
| 3 |
Fan PWM Duty Cycle 00h ~ 64h for 0% ~ 100% PWM duty cycle |
How to get power state
This procedure explains how to retrieve the power state of the system, indicating whether it is powered up or powered down.
IPMI Command
-
Command format:
ipmitool power status -
The system power state is powered up.

-
The system power state is powered down.

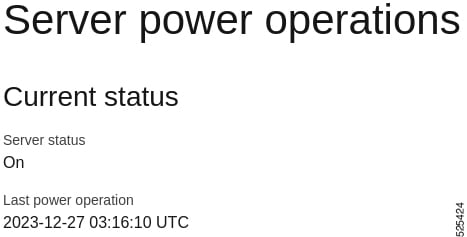
BMC Web UI
-
The system power state is powered up.
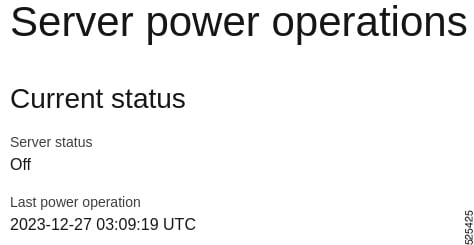
-
The system power state is powered down.
Redfish
-
Command format:
curl -s -k -X GET https://<username>:<password>@<BMC IP>/redfish/v1/Systems/system | grep -i powerstate -
The system power state is powered up.

-
The system power state is powered down.

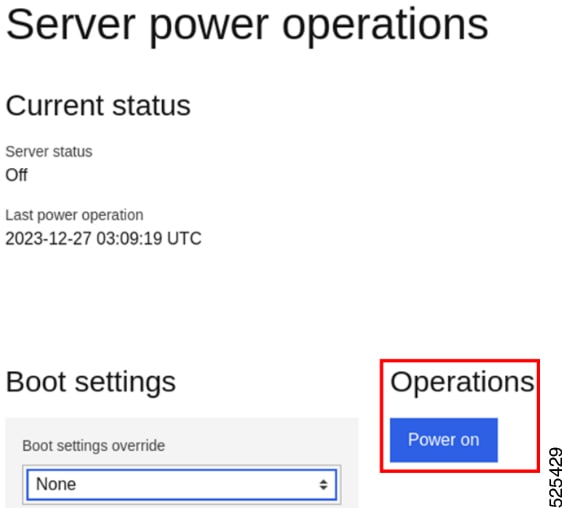
How to do power on
The power on action is used to start up a system and bring it to an operational state. This procedure provides instructions on how to perform a power on action.
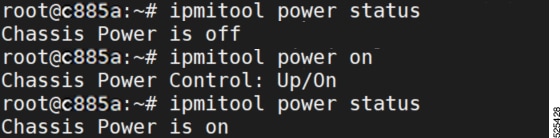
IPMI Command
-
Command format:
ipmitool power on -
Example: Power on using the IPMI command
BMC Web UI
-
Example:
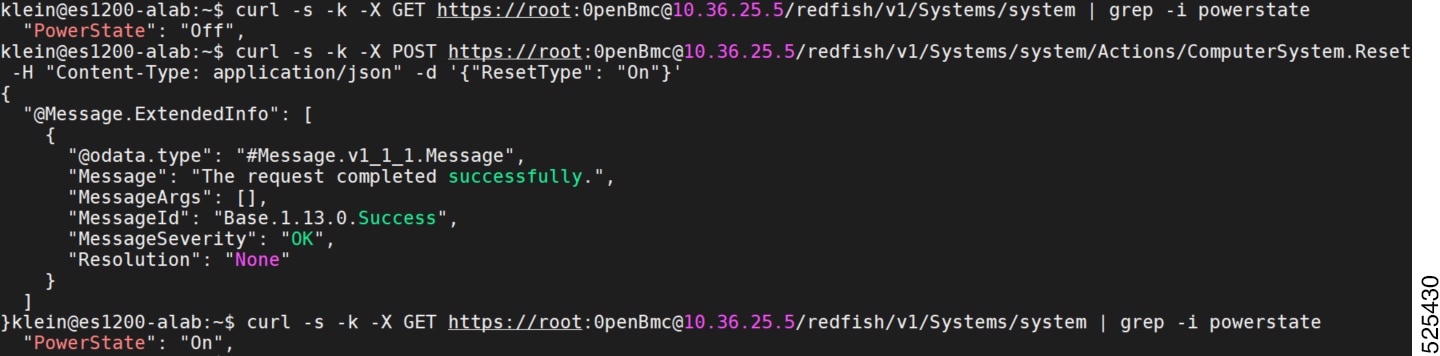
Redfish
-
Redfish
curl -s -k -X POST https://<username>:<password>@<BMC IP>/redfish/v1/Systems/system/Actions/ComputerSystem.Reset -H "Content-Type: application/json" -d '{"ResetType": "On"}' -
Example: Power on using Redfish
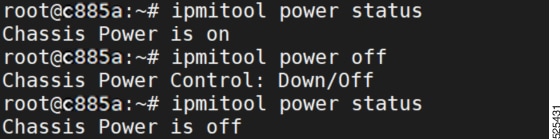
How to do power off
The power off action is used to shut down a system. This procedure provides instructions on how to perform a power off action.
IPMI Command
-
Command format:
ipmitool power off -
Example: Power off using IPMI command
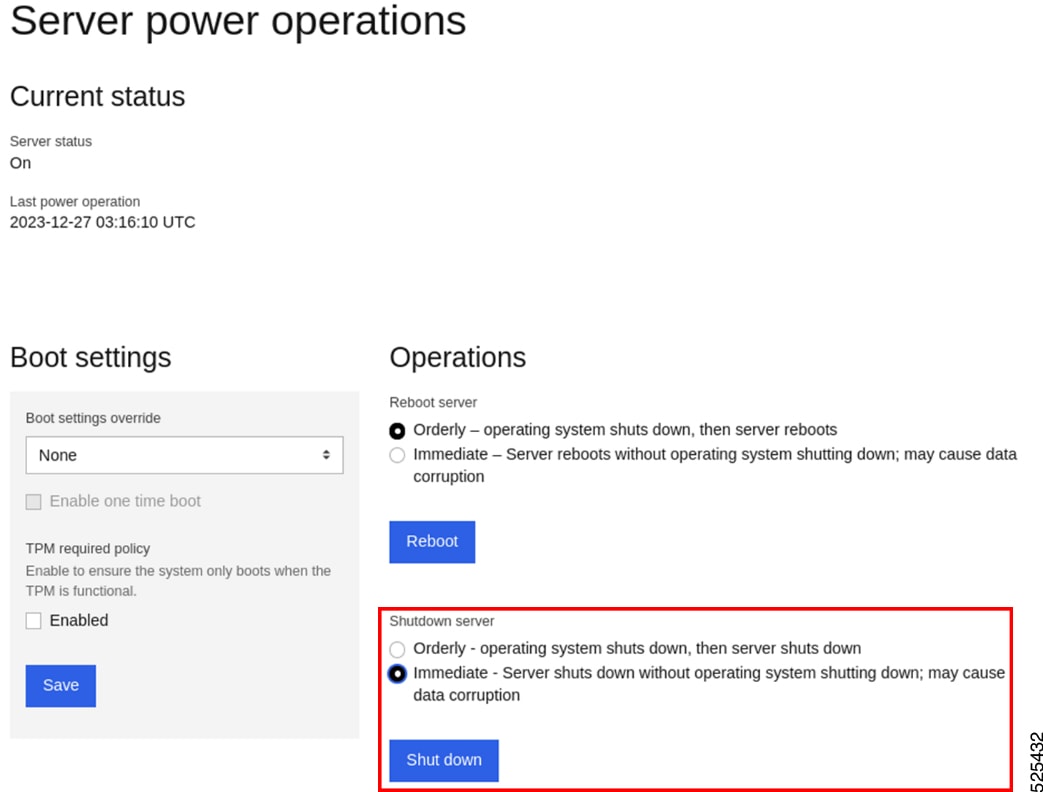
BMC Web UI
Redfish
-
Command format:
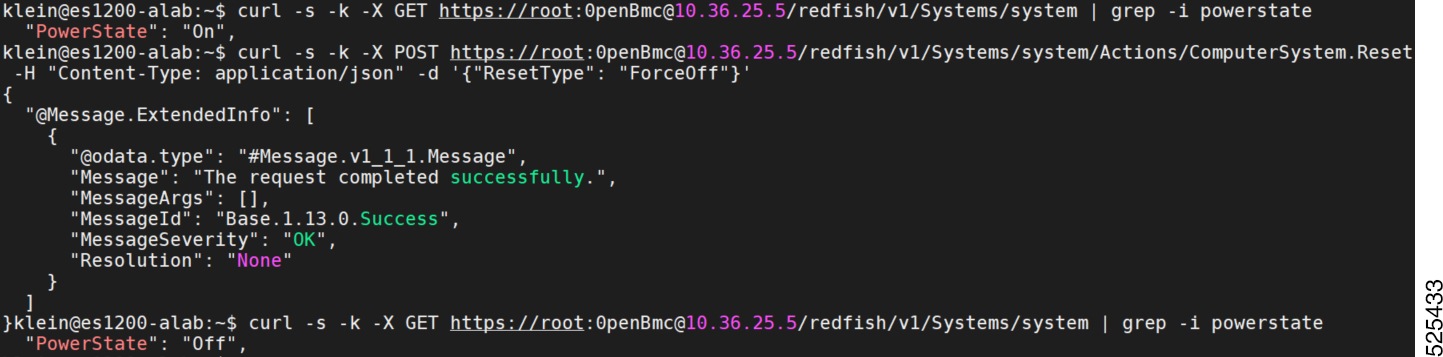
curl -s -k -X POST https://<username>:<password>@<BMC IP>/redfish/v1/Systems/system/Actions/ComputerSystem.Reset -H "Content-Type: application/json" -d '{"ResetType": "ForceOff"}' -
Example: Power off using Redfish
This procedure provides instructions on how to perform a power cycle on a system.
IPMI Command
-
Command format:
ipmitool power cycle -
Example: Power cycle using IPMI command

Redfish
-
Command format:
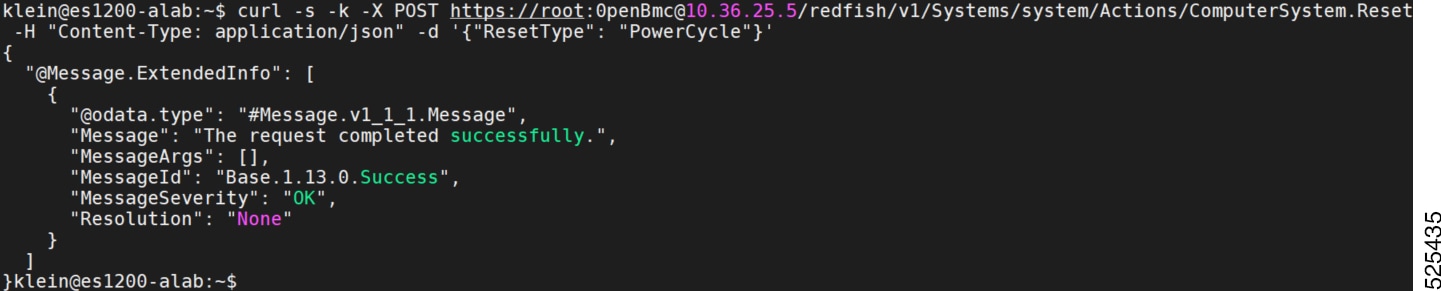
curl -s -k -X POST https://<username>:<password>@<BMC IP>/redfish/v1/Systems/system/Actions/ComputerSystem.Reset -H "Content-Type: application/json" -d '{"ResetType": "PowerCycle"}' -
Example: Power cycle using Redfish
The BMC facilitates a range of LED functionalities, succinctly presented in the following Table:
| LED Name | Description | State | Color | Control command |
|---|---|---|---|---|
| ID LED | Unit identified | Solid On or Blinking | Blue | IPMI “Chassis Identify” |
| Deactivated | Off | None | ||
| Healthy LED | System power on and healthy | Solid On | Green | None |
| BMC not ready | Fast Blinking (2Hz) | Green | None | |
| System power off and healthy | Slow Blinking (0.5Hz) | Green | None | |
| System fault | Solid On | Amber | None | |
| Fan Fail LED | Fan failure | Solid On | Amber | None |
| Fan healthy | Off | None | None |
The following are the System Fault conditions:
-
Fan Failure.
-
The component temperature reading exceeds the threshold.
-
PSU not detected.
-
PSU Failure.
The following are the Fan Failure conditions:
-
Fan not detected.
-
BMC unable to reading fan speed.
-
Fan speed reading is 0.
-
Fan speed below the threshold.
OpenBMC provides diverse interface, including Web GUI, Redfish, and IPMI commands, to facilitate users in the comprehensive management of the BMC's network.
Network configuration encompasses a multitude of facets, encompassing tasks such as configuring IP addresses, IP addresses source, gateways, and other pivotal elements.
The following are some fundamental network configuration features:
-
IP Addresses Source
-
IP Address
-
Gateways
IPMI Command
-
Set IP address source command format:
Ipmitool lan <channel> set ipsrc
<source>channel:eth0 = 1Note: Here,
<source> refers to the following:static = address manually
configured to be staticdhcp = address obtained by BMC running
DHCP-
Set channel IP address command format:
Ipmitool lan <channel> set ipaddr
<x.x.x.x>-
Set channel IP netmask command format:
Ipmitool lan <channel> set netmask
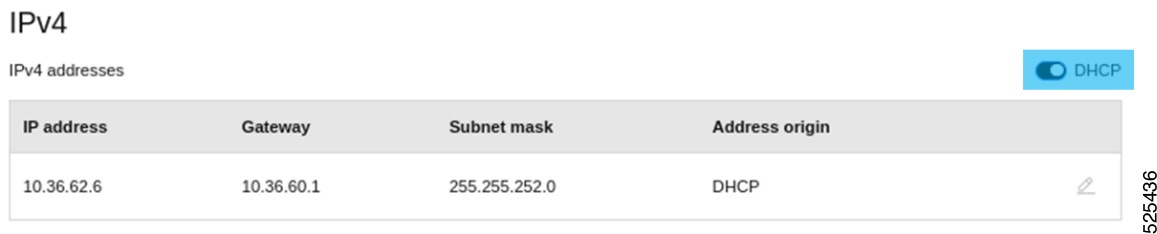
<x.x.x.x>BMC Web GUI
Toggle DHCP button to enable or disable DHCP. After enabling DHCP, the IPv4 address will be automatically configured. When disabling DHCP, the IPv4 address will be manually configured.
After disabling DHCP, it pops the “Add Static IPv4 address” window to configure the IPv4 address. In the "Add Static IPv4 Address" window, enter the IP address, gateway, and subnet mask. Click “Add” button to add the static IPV4 address.
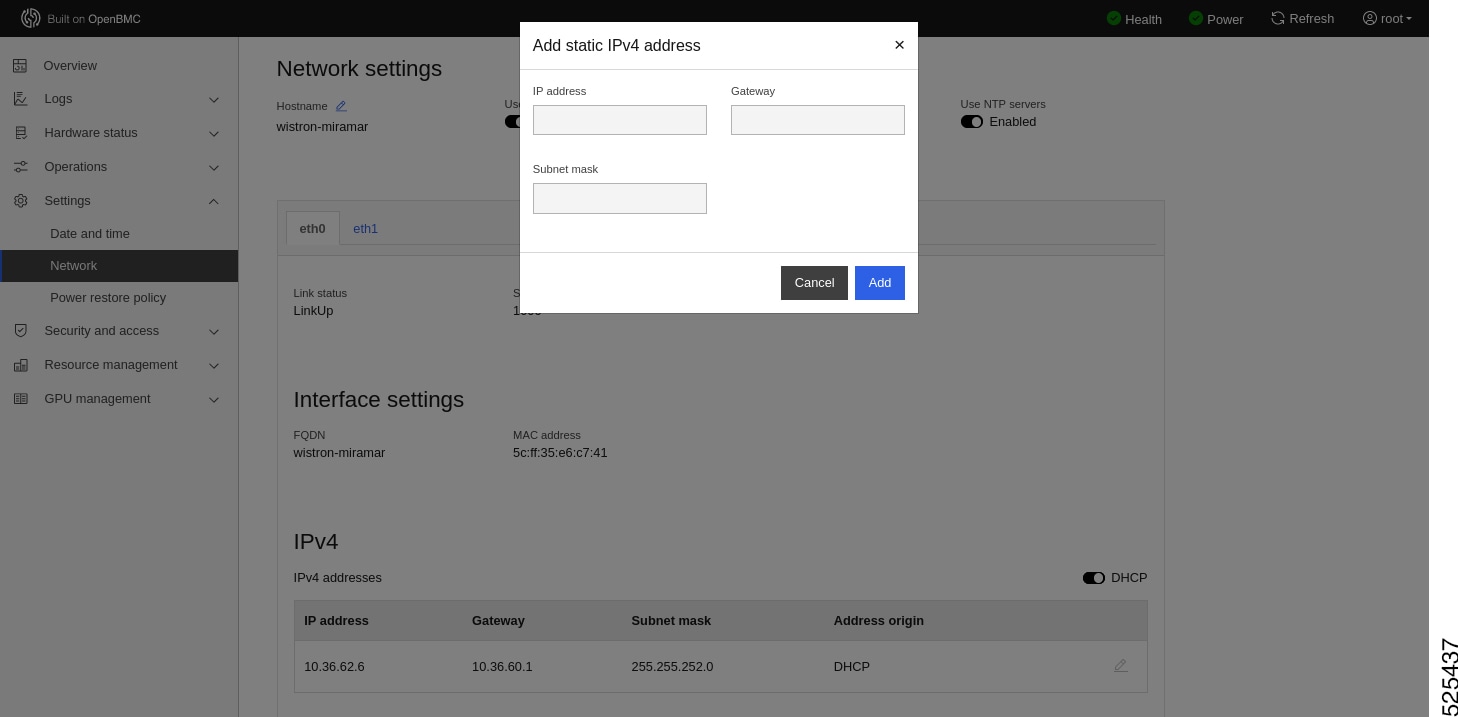
Click the "OK" button to apply the static IPv4 address configuration.
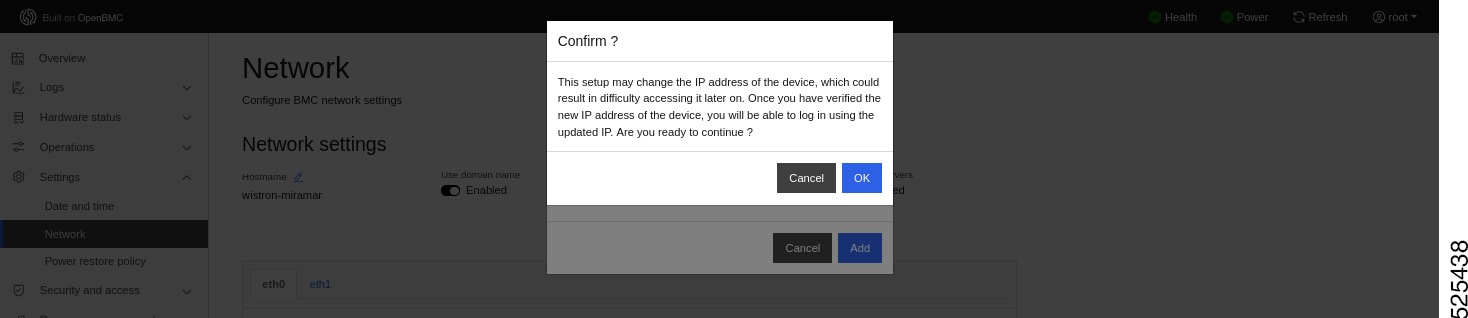
It will pop up an "Information" window, notifying the user to login to the BMC Web GUI using the new IP.

Redfish
-
Command format:
curl -k -X PATCH
https://<username>:<password>@<BMC
IP>/redfish/v1/Managers/bmc/EthernetInterfaces/eth0 -H
"Content-Type:application/json" -d
'{"DHCPv4":{"DHCPEnabled":false},"IPv4StaticAddresses":[{"Address":"<ipaddr>","SubnetMask":"<subnetmask>","Gateway":"<gateway>"}]}'
Note |
If you want to set the network to DHCP, please set the DHCPEnabled field to true, or if you want to set the network to static, please set the DHCPEnabled field to false, and fill in ip address subnet mask and gateway in order. |
-
Example:

This procedure explains how to retrieve the BMC time, which provides the date and time information of the BMC.
IPMI Command
ipmitool sel time getExample: Get BMC time
using IPMI command
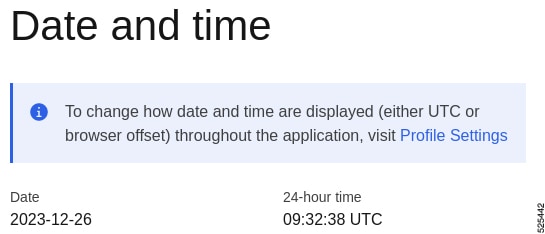
BMC Web UI
Example:
Redfish
-
Command format:
curl -s -k -X GET https://<username>:<password>@<BMC IP>/redfish/v1/Managers/bmc | grep -i "DateTime" -
Example: Get BMC time using Redfish

How to set BMC time
This procedure explains how to set the BMC time, which allows you to synchronize the BMC's date and time with the desired values.
IPMI Command
-
Disable NTP
ipmitool raw 0x30 0x42 0x00 -
Wait for NTP to be closed, about 15 seconds
-
Set BMC time
ipmitool sel time set “mm/dd/yyyy
hh:mm:ss”
Example: Set BMC time using IPMI

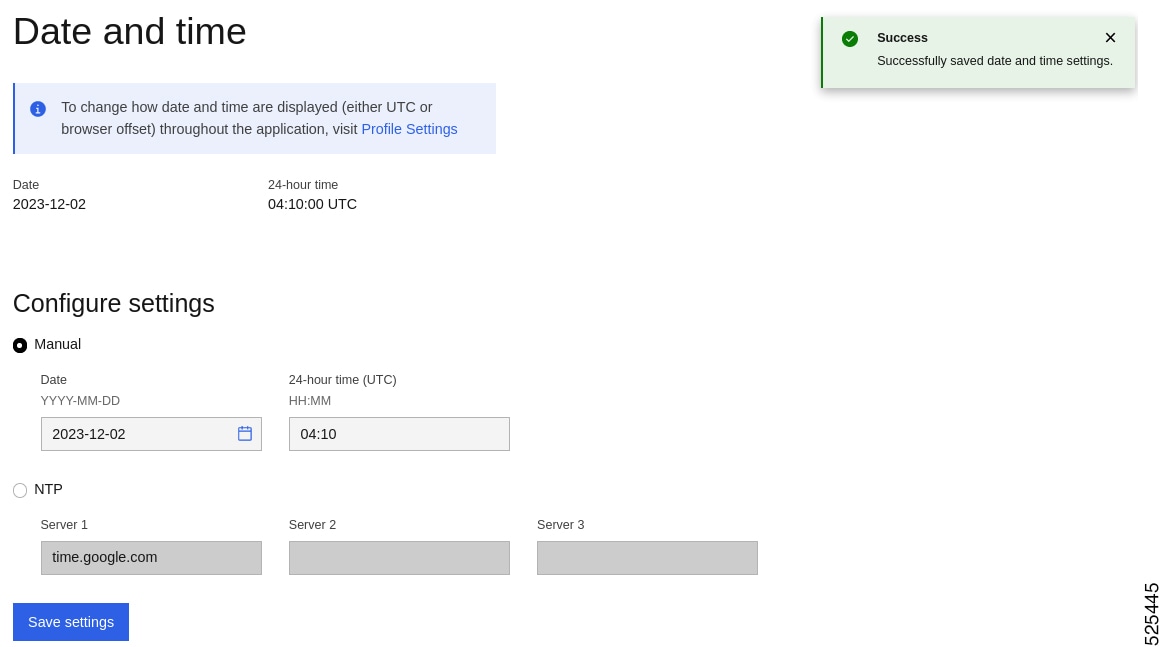
BMC Web UI:
-
Example: Set BMC time using Web UI
Please look for setting in the left column of the Web UI, click it and select date and time.
Redfish:
Command:
-
Disable NTP.
curl -k -X PATCH https://<username>:<password>@<BMC IP>/redfish/v1/Managers/bmc/NetworkProtocol -H "Content-Type:application/json" -d '{"NTP":{"ProtocolEnabled":false}}' -
Wait for NTP to be closed, about 15 seconds.
-
Set BMC time.
curl -k -X PATCH
https://<username>:<password>@<BMC
IP>/redfish/v1/Managers/bmc/ -H "Content-Type:application/json"
-d '{"DateTime":"<yy-mm-dd hh:mm:ss>"}'
Example: Set BMC time using Redfish

This procedure provides instructions on how to enable NTP time synchronization on the BMC.
IPMI Command
ipmitool raw 0x30 0x42 0x01
Example: Enable NTP using IPMI

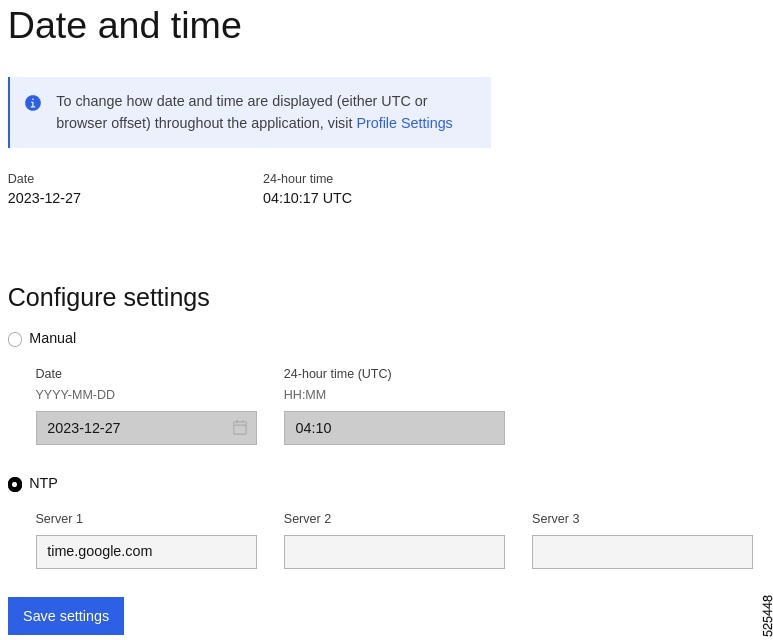
BMC Web UI
-
Example: Enable NTP using Web UI
The Manual option is set to the specified time, and the NTP option is to select the NTP server to automatically update the time.
Redfish
-
Command format:
curl -k -X PATCH https://<username>:<password>@<BMC IP>/redfish/v1/Managers/bmc/NetworkProtocol -H "Content-Type:application/json" -d '{"NTP":{"ProtocolEnabled":true,"NTPServers":["NTP Server Adderss"]}}' -
Example: Enable NTP using Redfish

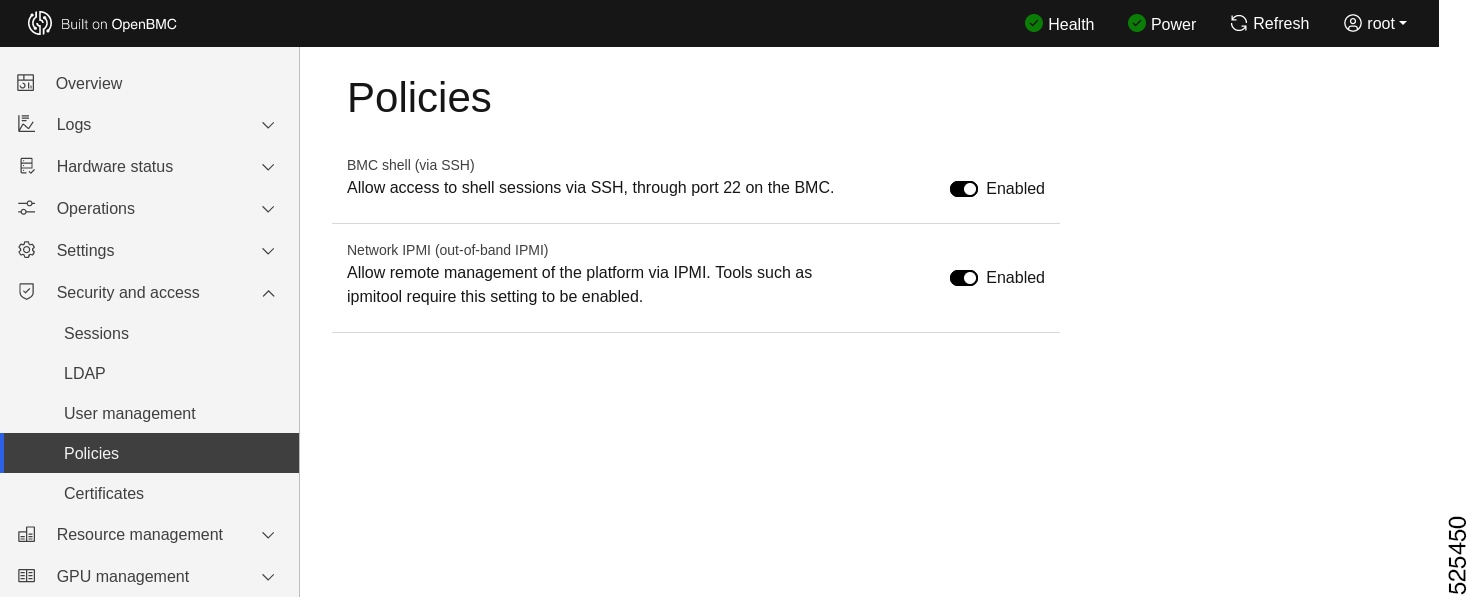
How to enable/disable ssh/ipmi function
This procedure explains how to enable or disable the SSH (Secure Shell) and IPMI (Intelligent Platform Management Interface) functions within your system. By enabling these functions, you can gain remote access and management capabilities. Disabling them can help enhance security by limiting remote connectivity.
BMC Web UI


 Feedback