Switch Mounting
Mounting the Switch

– Top and bottom: 2.0 in. (50.8 mm)
– Exposed side (not connected to the module): 2.0 in. (50.8 mm)
– Front: 2.0 in. (50.8 mm)
Installing the Switch on the Wall
To attach the switch to a wall or a panel, follow these steps.

Warning![]() To prevent bodily injury when mounting or servicing this unit in a rack, you must take special precautions to ensure that the system remains stable. The following guidelines are provided to ensure your safety:
To prevent bodily injury when mounting or servicing this unit in a rack, you must take special precautions to ensure that the system remains stable. The following guidelines are provided to ensure your safety:
- This unit should be mounted at the bottom of the rack if it is the only unit in the rack.
- When mounting this unit in a partially filled rack, load the rack from the bottom to the top with the heaviest component at the bottom of the rack.
If the rack is provided with stabilizing devices, install the stabilizers before mounting or servicing the unit in the rack. Statement 1006
Step 1![]() Position the rear panel of the switch against the wall or a panel in the desired location. See Figure 3-1.
Position the rear panel of the switch against the wall or a panel in the desired location. See Figure 3-1.
Figure 3-1 Mounting the Switch on the Wall
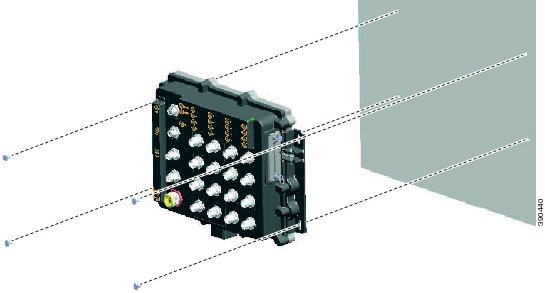
Step 2![]() Place a number-10 screw that you provide through each mounting ear, and screw them into the wall.
Place a number-10 screw that you provide through each mounting ear, and screw them into the wall.
|
|
After the switch is mounted on the wall or panel, connect the power and alarm wires, as described in the “Connecting Alarm Circuits” section.
 Feedback