Configure Secure Access

The final step in configuring universal ZTNA is to configure access policies, private resources, and the devices that are responsible for protecting the resources.

Configure Private Resources

Perform these steps to create the private resources in your organization.

Procedure


Step 1

In Cisco Security Cloud Control, click Products > Secure Access.

The Secure Access product menu appears in the left navigation bar.

Step 2

Click Resources > Destinations > Private Resources.

Step 3

Click +Add.

Step 4

Provide a meaningful name for the resource in the Define a Private Resource section.

Step 5

To define how Secure Access can communicate with the resource, provide the network address or the fully qualified domain name (FQDN) of the resource.
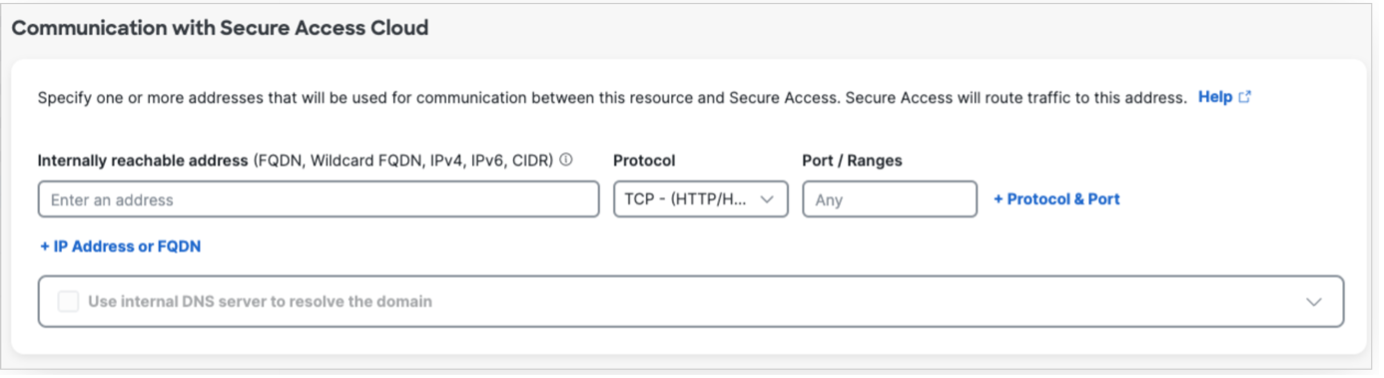
Step 6

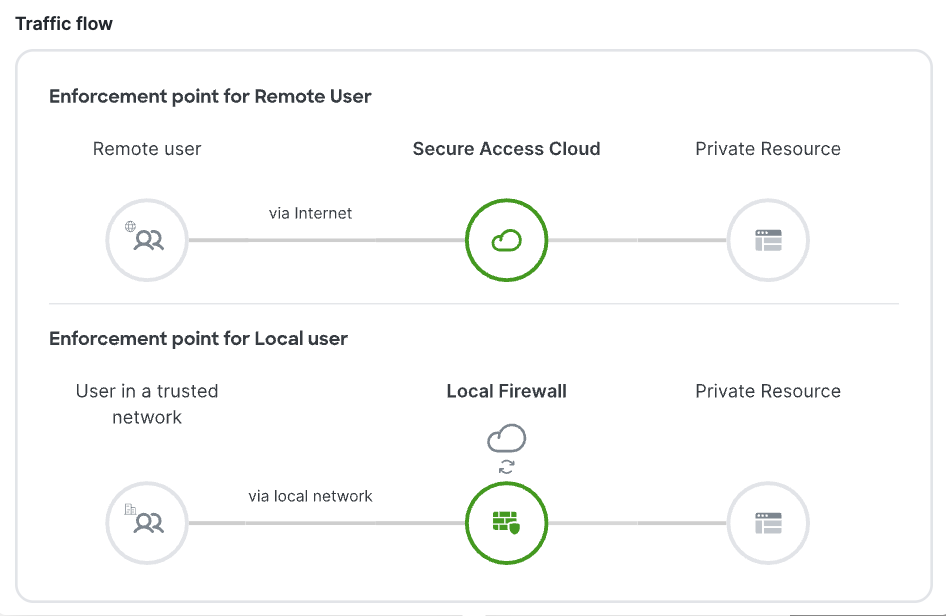
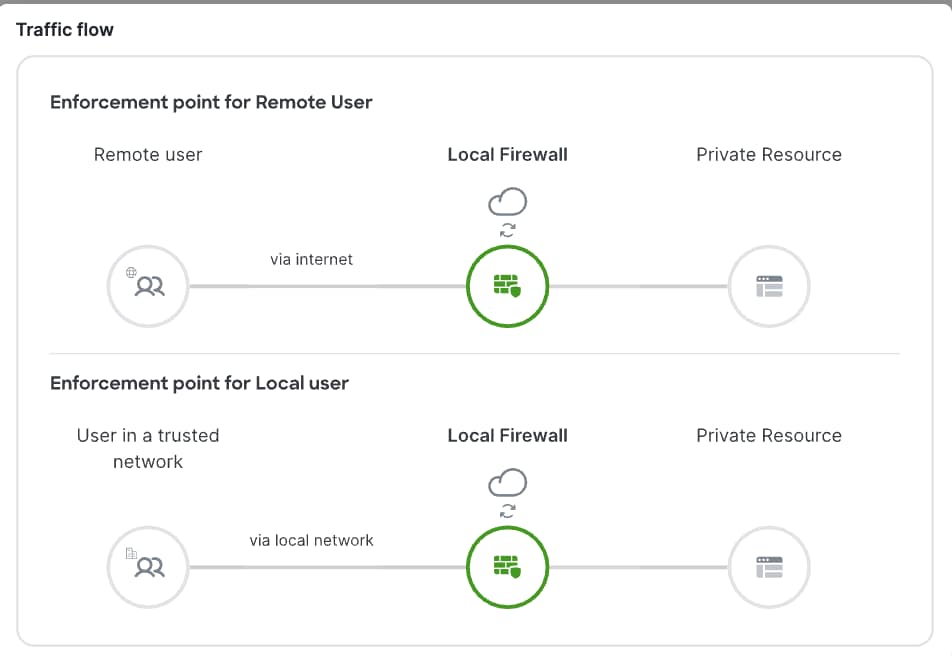
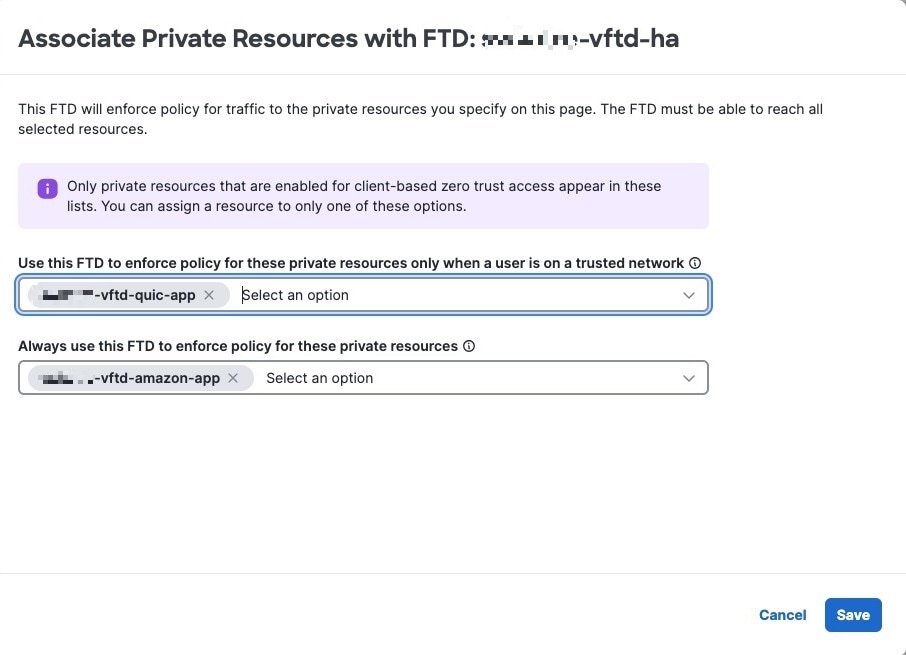
Under Endpoint Connection Methods, choose Zero-trust connections > Client-based connections. This selection allows endpoints with Secure Client to communicate with Secure Access.

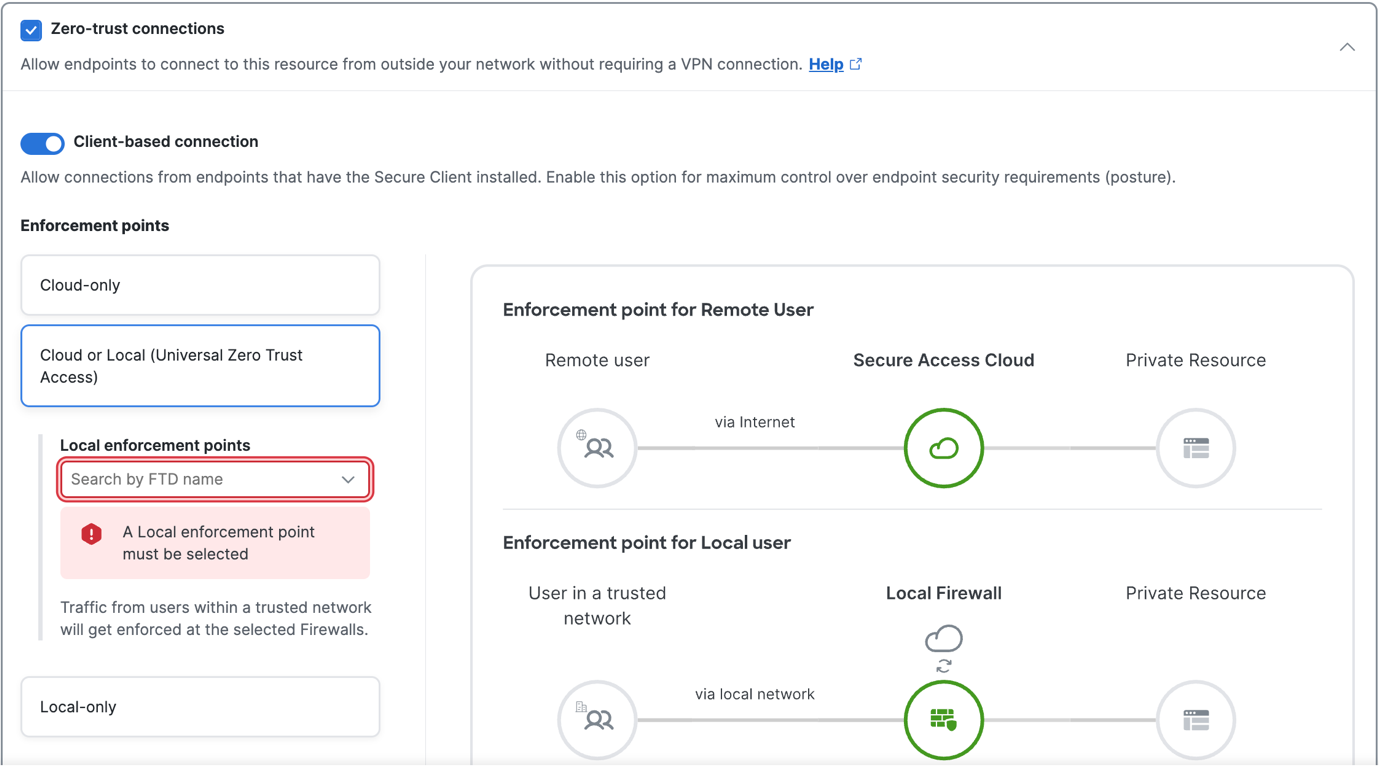
Depending on how you want to enforce traffic flow, choose an appropriate enforcement point.

  • Choose Cloud or Local to steer the traffic dynamically based on its origin.

    If the user is in a trusted network, a local Firewall performs the traffic inspection. If the user is outside the trusted network, Secure Access (cloud) performs the traffic inspection.

  • The enforcement point must be set to Local only for sensitive applications. This choice ensures that traffic inspection occurs only at the on-premises Firewall, regardless of the location of the user.

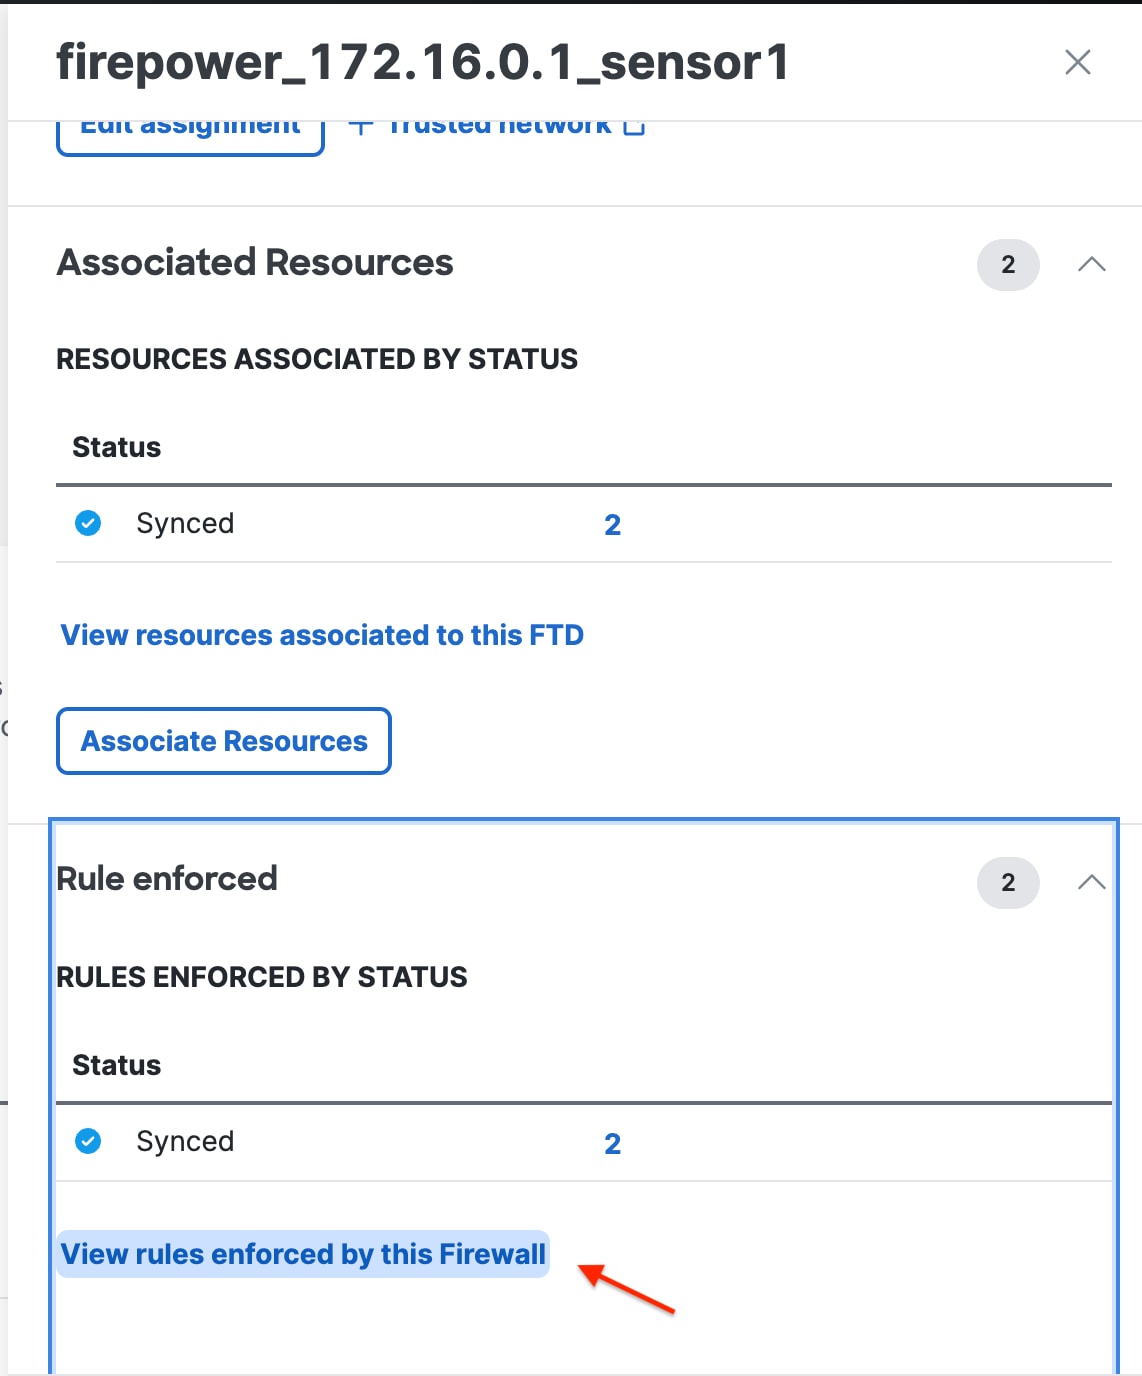
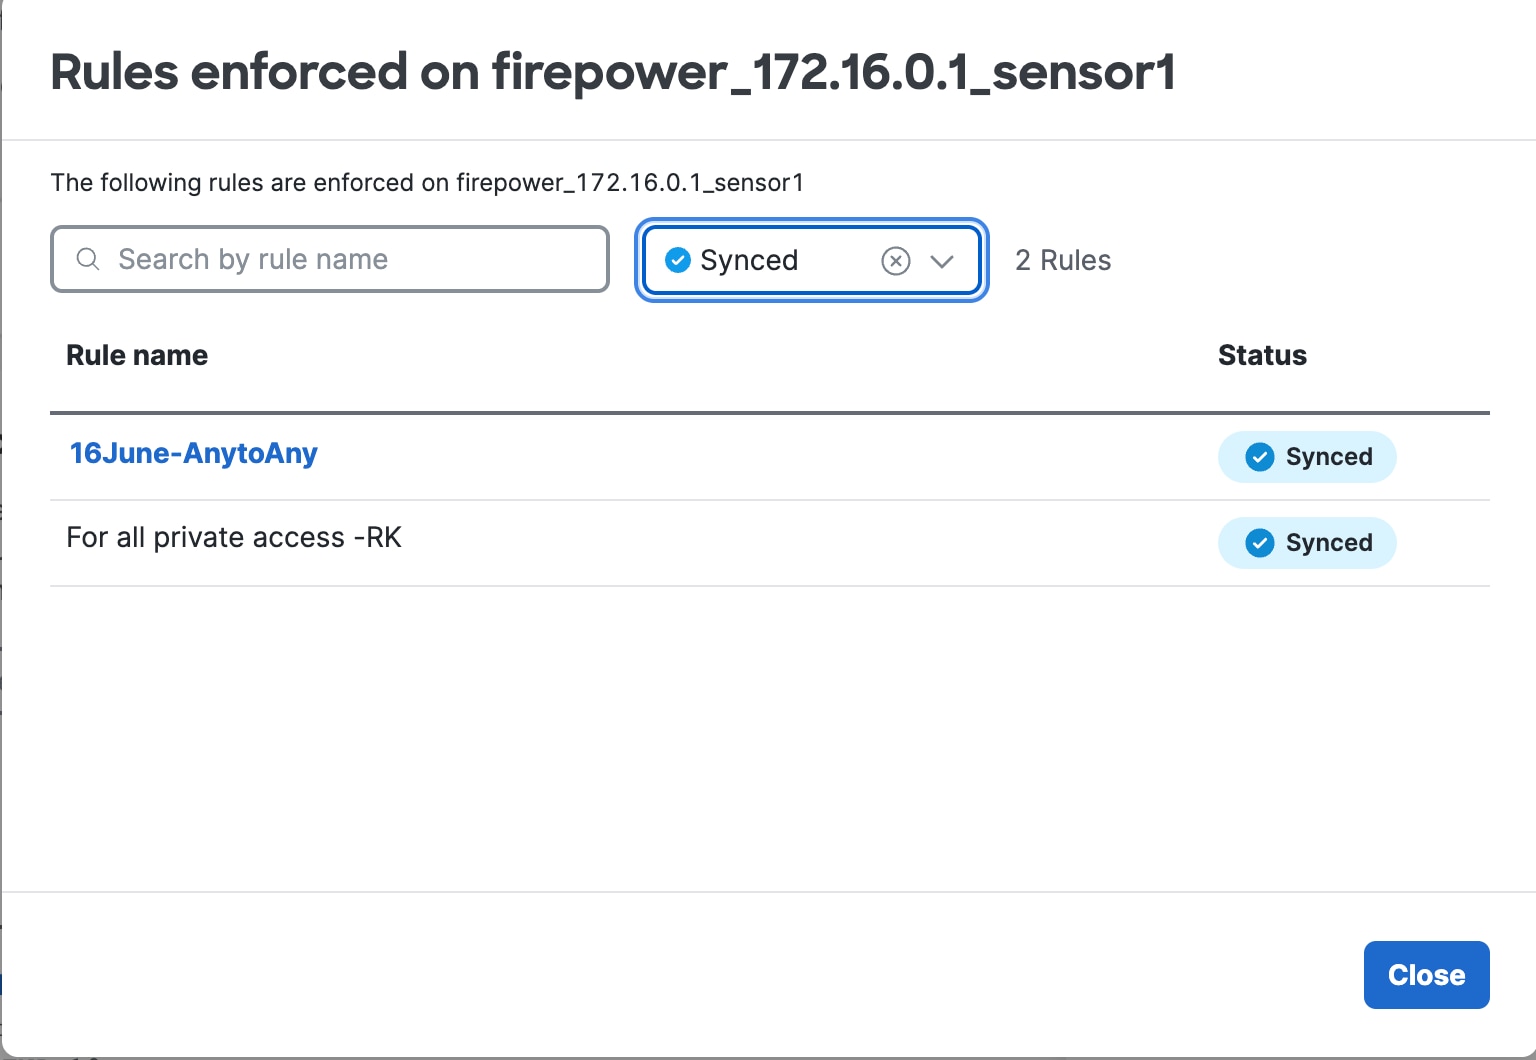
Choose a Threat Defense device from the Local enforcement points drop-down list. All devices that share the same FQDN as the selected device act as the enforcement points.

Step 7

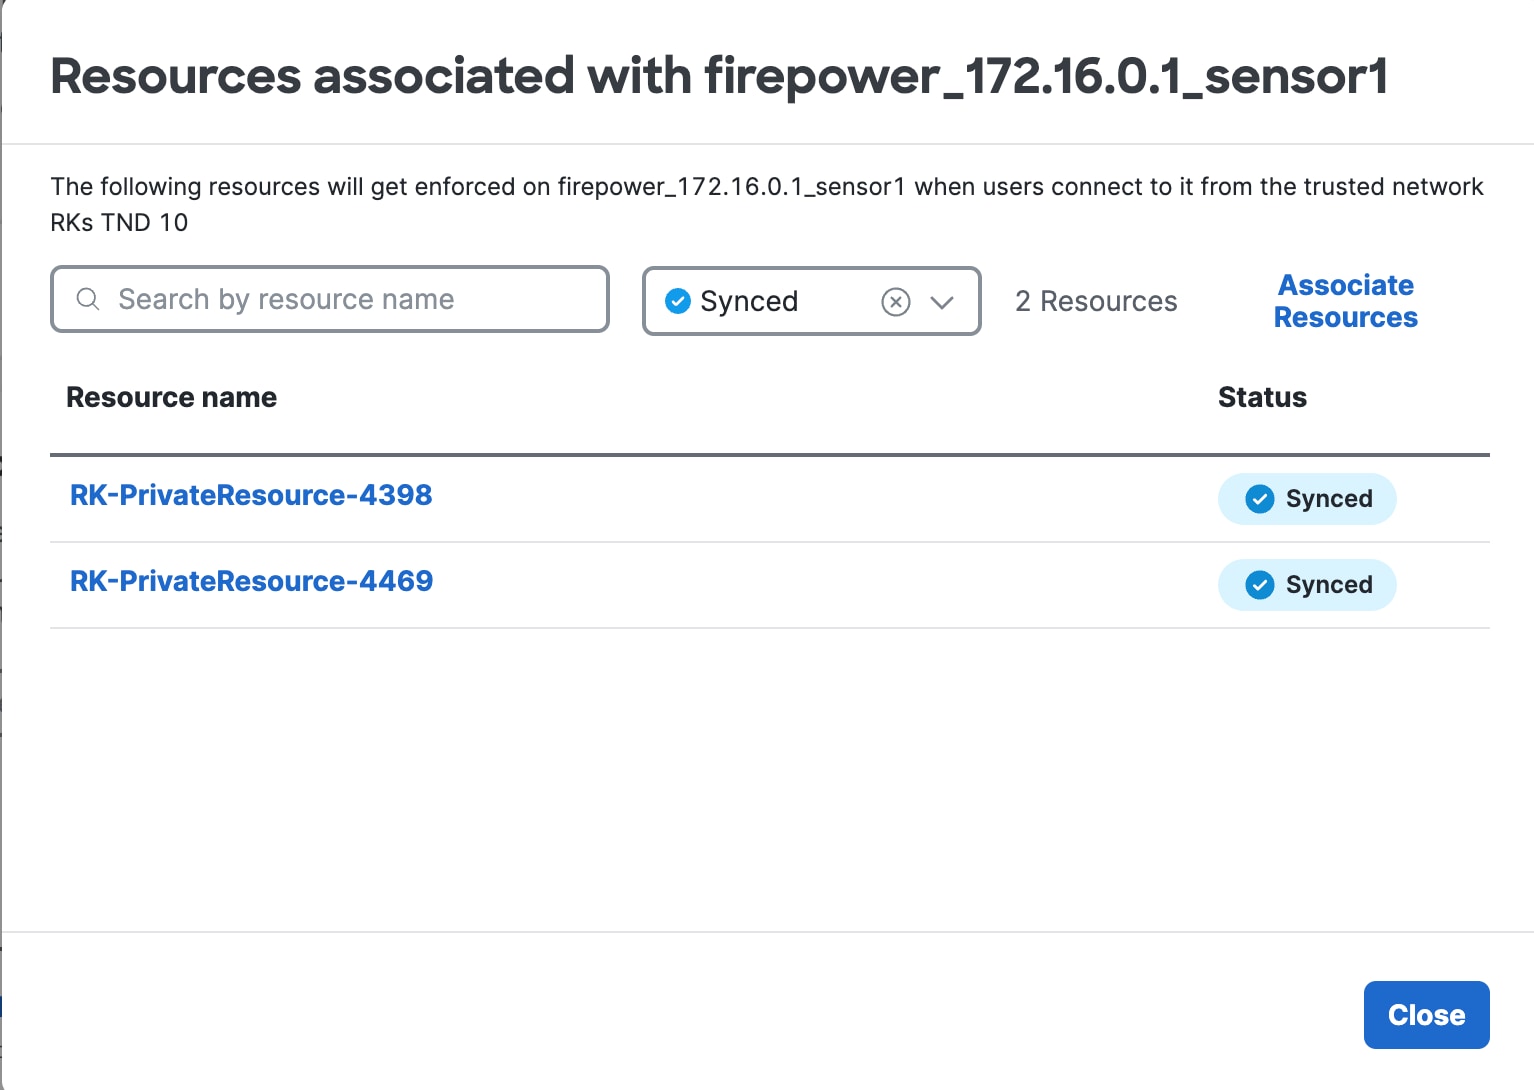
Click Save to save the configuration.

Private resources are now added to the network.

For more information on managing private resources, refer to Managing Private Resources in the Secure Access documentation.


Configure Universal ZTNA Access Policies

Create a rule to control and secure the access to specified private resources.

An access rule consists of sources, destinations, endpoint profiles, and security controls. Sources specify the origin of the network traffic. Destinations specify the endpoint of the network traffic.

Endpoint profiles describe the requirements for a rule to match the traffic. For universal ZTNA, use the Client-based Zero Trust profile.

Procedure


Step 1

In Cisco Security Cloud Control, click Products > Secure Access.

Secure Access product menu displays in the left navigation bar.

Step 2

Click Secure > Access Policy .

Step 3

Click Add Rule and choose Private Access.

Step 4

Add a rule name and specify the order in which the rule must be executed.

Step 5

Under Specify Access, specify one or more sources (users or devices) that can access a destination (private resource).

The Summary pane at the beginning of the page shows the rule that you have specified.

Step 6

(Optional) Under Configure Security:

  • Define the Intrusion Prevention (IPS) method. Traffic is decrypted and inspected based on this IPS profile.

  • Define the security profile to protect the resources from malicious files.

Step 7

Save the configurations.

To understand more about private access policies in Secure Access, refer to Get Started With Private Access Rules.


Trusted Network Detection

Trusted network detection (TND) identifies if a user or device is connected to a trusted internal network, such as a corporate LAN, or to an untrusted external network, such as public Wi-Fi. TND determines the network context of a user or device before granting access to applications or resources.

By defining trusted networks, enabling TND, and integrating it with access policies, universal ZTNA enforces granular security controls. It ensures that access privileges are granted based not only on user identity but also on the security posture of the network connection.

To configure TND, add a trusted network and map it to a Threat Defense device.

Add a Trusted Network

Define a trusted network by specifying a set of criteria such as DNS Servers, DNS Domains, and trusted servers. Secure Client uses these criteria to determine if an endpoint device is connected to the trusted network and routes the user's traffic accordingly.

Perform these steps to create a trusted network.

Before you begin

Procedure


Step 1

In Cisco Security Cloud Control, click Products > Secure Access.

The Secure Access product menu appears in the left navigation bar.

Step 2

Click Connect > End User Connectivity .

Step 3

Under the Zero Trust Access tab, click Manage Trusted Networks.

Step 4

Click +Add.

Step 5

On the Add Trusted Networks page, enter a name for the network. Then, define the criteria for the trusted network.

(Optional) To set this network as the default trusted network, check the Set as default Trusted Network for UZTA check box.

You can choose one or more criteria for a trusted network.

  • DNS Servers: Enter all DNS server addresses for the trusted network in the DNS Servers field, separated by commas. Secure Client treats a network as trusted if it matches any of these addresses.

  • DNS Domain: Enter all DNS domain suffixes for the trusted network in the DNS Domains field, separated by commas. Secure Client treats a network as trusted if it matches any of these DNS domain suffixes.

  • Trusted Servers: Enter a trusted server address in the Trusted Servers field. A DNS server that you specify in this profile must translate the domain name of the server to its IP address and provide a TLS certificate.

    (Optional) In the Certificate Hash field, enter the hash of the public key of this certificate.

(Optional) Click +Add Trusted Server to add up to 10 trusted servers.

Step 6

Click Save.

A trusted network is created.


What to do next

Assign this trusted network to a Threat Defense device.

Map a Trusted Network to a Threat Defense Device

If a default trusted network exists when a Threat Defense is added to the network, this default network is automatically mapped to the Threat Defense device.

If a default trusted network does not exist, map a trusted network to a device by performing the following steps.

Procedure


Step 1

In Cisco Security Cloud Control, click Products > Secure Access.

The Secure Access product menu appears in the left navigation bar.

Step 2

Click Connect > Network Connections > FTD.

Step 3

Click the three dots (…) next to a Threat Defense device and select Assign a Trusted Network from the drop-down menu.

Step 4

From the Trusted Networks drop-down list, select a trusted network to map to the device and click Save.

The trusted network is now associated with the Threat Defense device.

Note

 
  • If this Threat Defense device shares its fully qualified domain name (FQDN) with other devices, the trusted network is also mapped to those devices.

  • A Threat Defense device can be associated with only one trusted network.


Associate Private Resources with Firewall Threat Defense

Before you begin

You must have created the private resources on Secure Access.

Procedure


Step 1

In Cisco Security Cloud Control, click Products > Secure Access.

Secure Access product menu displays in the left navigation bar.

Step 2

Click Connect > Network Connections.

Step 3

Click the FTDs tab.

The available Secure Firewall Threat Defense devices that are configured for universal zero trust network access are displayed.

Ensure that the device is associated with a trusted network to enforce policies on traffic originating from the trusted network before proceeding to the next step.

After a Threat Defense device is onboarded, it is automatically associated with a default trusted network if one exists. Otherwise, you must create a trusted network and associate it with the Threat Defense device.

Step 4

Click the name of a Threat Defense device to configure.

Step 5

In the right pane, click Associate Resources.

Note

 
  • Only those resources that are enabled for zero trust access may associate with a Threat Defense device.

  • A Threat Defense device must reach the associated private resources.

  • Resources associated with a Threat Defense device are shared with other devices with the same FQDN.

Step 6

In the Associate Private Resources dialog box, make the following selections to specify the access policy enforcement and traffic flow for a user:

  • Use Threat Defense device to enforce policy only for on-premises users: From the Use this FTD to enforce policy drop-down list, select the private resources, which a user should be able to access only from an on-premises location.

  • Use Threat Defense device to enforce policy for both on-premises and remote users: From the Always use this FTD to enforce policy drop-down list, select the private resources for which the selected Threat Defense device always enforces policy, regardless of whether the user is located on-premises or is remote.

The following figure shows an example of using a Threat Defense device to enforce access rules for the vftd-quic-app for on-premises users and vftd-amazon-app for all users, whether on-premises or remote.

Step 7

Click Save.

The configurations are applied to the device, and the UZTA Configuration status column for the device displays Synced.

The following figure shows an example.

Configuration status can also be:

  • Syncing—updates to the Threat Defense device are ongoing.

  • Out of sync—modifications to Secure Access configurations are pending update to the Threat Defense device.

  • Failed to sync—configurations were not updated on the Threat Defense device.

To view a detailed and granular status for each resource and rule associated with a Threat Defense device, perform the actions outlined:

  1. Click the numeral in the Associated Resources column.

    In the slide-in pane, under the Associated Resources section, click View resources associated with this FTD.

    The configuration status of each resource is displayed.

  2. Similarly, to check the configuration status of each rule that is enforced by the Threat Defense device, click the numeral in the Rules Enforced column.

    In the slide-in pane, under the Rules Enforced section, click View rules enforced by this Firewall.

    The configuration status of each rule that is enforced is displayed.

Universal ZTNA is now set up for your clients to securely access the private resources in your network.