Migrate from the Cisco API Update App to the Cisco APIC Integration with ASA

The following topics discuss the Cisco API Update App to the Cisco APIC Integration with ASA.

About the Migration

This chapter discusses how to migrate your configuration and objects from the Cisco ACI Endpoint Update App to the Cisco APIC integration with ASA. Among the reasons to migrate:

  • The Cisco APIC integration with ASA uses the Cisco Secure Dynamic Attributes Connector, which retrieves dynamic objects (that is, network object groups) from Cisco APIC and sends them to ASA.

  • You can add more Cisco APIC-ASA integrations to the dynamic attributes connector at any time.


Note


As an alternative to this migration, you can use the Standalone ACI-Endpoint-Update-App.


To migrate, perform the following tasks:

  1. Install the dynamic attributes connector and make sure it, Cisco APIC, and ASA can communicate with each other over the network. The dynamic attributes connector retrieves network object groups from Cisco APIC and pushes them to ASA so all systems must be able to communicate.

    See Migration Step 1: Set up the Cisco Secure Dynamic Attributes Connector

  2. On Cisco APIC, get the site prefix and update interval from the Cisco ACI Endpoint Update App, disable learning, and choose a user with the appropriate privilege level.

    See Migration Step 2: Prepare Cisco APIC

  3. On the dynamic attributes connector, create a Cisco APIC connector an ASAadapter.

    See Migration Step 3: Configure the Cisco Secure Dynamic Attributes Connector

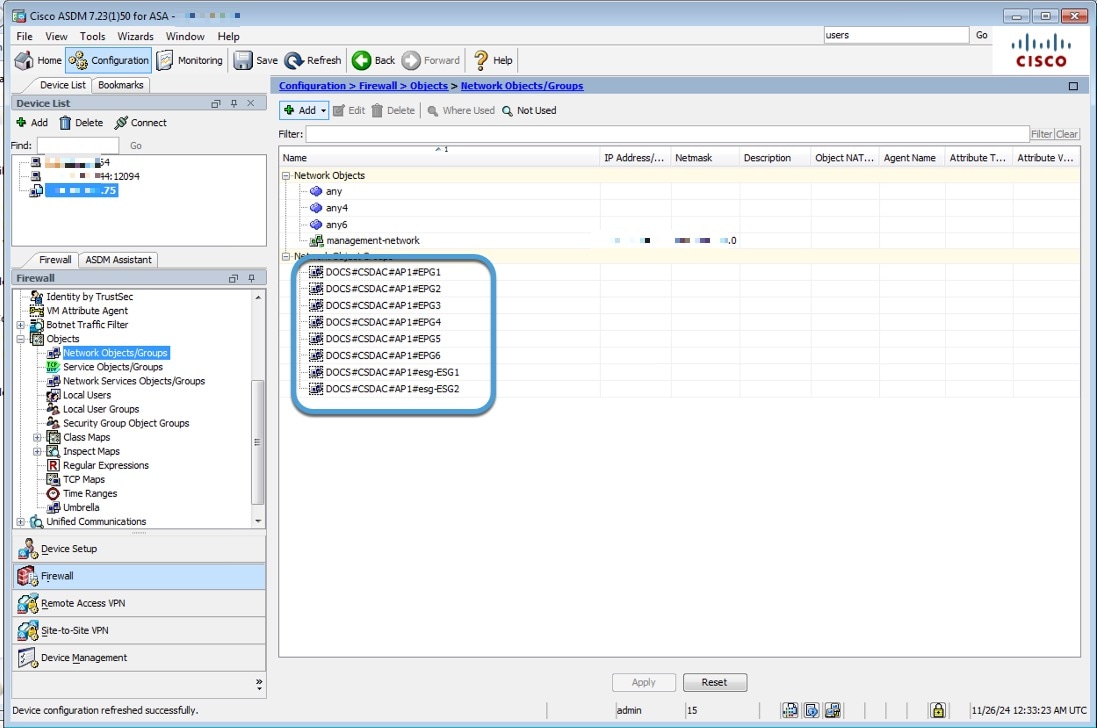
  4. As a final verification step, make sure you see network group objects on the ASA.

    See Migration Final Step: Verify Network Object Groups in ASDM

Migration Step 1: Set up the Cisco Secure Dynamic Attributes Connector

To use the integration, you must install the Cisco Secure Dynamic Attributes Connector on a Ubuntu or Red Hat Enterprise Linux virtual machine and verify it can communicate both with Cisco APIC and ASA.

Following are the minimum requirements for your system:

  • Ubuntu 18.04 to 22.04.2

  • Red Hat Enterprise Linux (RHEL) 7 or 8

  • Python 3.6.x or later

  • Ansible 2.9 or later

For more information, SOLUTION GUIDE LINKING

Procedure


Step 1

Set up a virtual machine with the hardware and software prerequisites discussed in Supported Operating Systems and Third-Party Software.

Step 2

Get the dynamic attributes connector software as discussed in Install Prerequisite Software.

Step 3

Install the dynamic attributes connector as discussed in Install the Cisco Secure Dynamic Attributes Connector.


What to do next

See Migration Step 2: Prepare Cisco APIC.

Migration Step 2: Prepare Cisco APIC

Get required information

To migrate to the Cisco APIC integration with ASA, you must get all of the following information:

  • Cisco ACI Endpoint Update App site prefix and update interval

  • Cisco APIC tenant name

  • Cisco APIC application profile name

  • EPG name

  • User with at least the read-all role with readPriv access and the tenant-admin role with writePriv access for the security domain that contains the network object groups to send to ASA.

For more information, see Get Required Information for the Cisco APIC Integration with ASA.

Disable learning for the Cisco ACI Endpoint Update App

To prevent the Cisco ACI Endpoint Update App from communicating with TBD, you must disable learning.

  1. Log in to Cisco APIC as a user with the tenant-admin role with writePriv access.

  2. Click Apps.

  3. Under ACI Endpoint Update app, click Open.

  4. Select the check box next to one or more tenants you're integrating with ASA.

  5. On the right side of the page, click .

  6. From the list, click Disable Learning.

  7. Select the checkbox to optionally erase all existing learning objects on the Cisco APIC device with which the Cisco ACI Endpoint Update App was previously associated.

  8. Click Submit.

Migration Final Step: Verify Network Object Groups in ASDM

To make sure the integration is working, you can optionally view network object groups retrieved from Cisco APIC in ASDM.

Before you begin

Complete the tasks discussed in Migration Step 3: Configure the Cisco Secure Dynamic Attributes Connector.

Procedure


Step 1

Log in to ASDM as a user with at least privilege level 15 (administrator).

For more information about starting ASDM, see Start ASDM.

For more information about permissions, see Configure Management Remote Access.

Step 2

Click Configuration > Firewall > Objects > Network Objects/Groups.

The network object groups are displayed in the right pane as the following figure shows.

Network object groups are named as follows: SiteName#TenantName#ProfileName#EPGName