Web User Interface Management

You can access your router using a web user interface which allows you to monitor the performance of the router using an easy-to-read graphical interface.


Note


To manage and configure crypto map tunnels, use the CLI. You can also configure the tunnels with Virtual Tunnel Interface (VTI) and then create the tunnels either by using the CLI or the GUI.


You can configure a router by performing the steps in one of the following tasks:

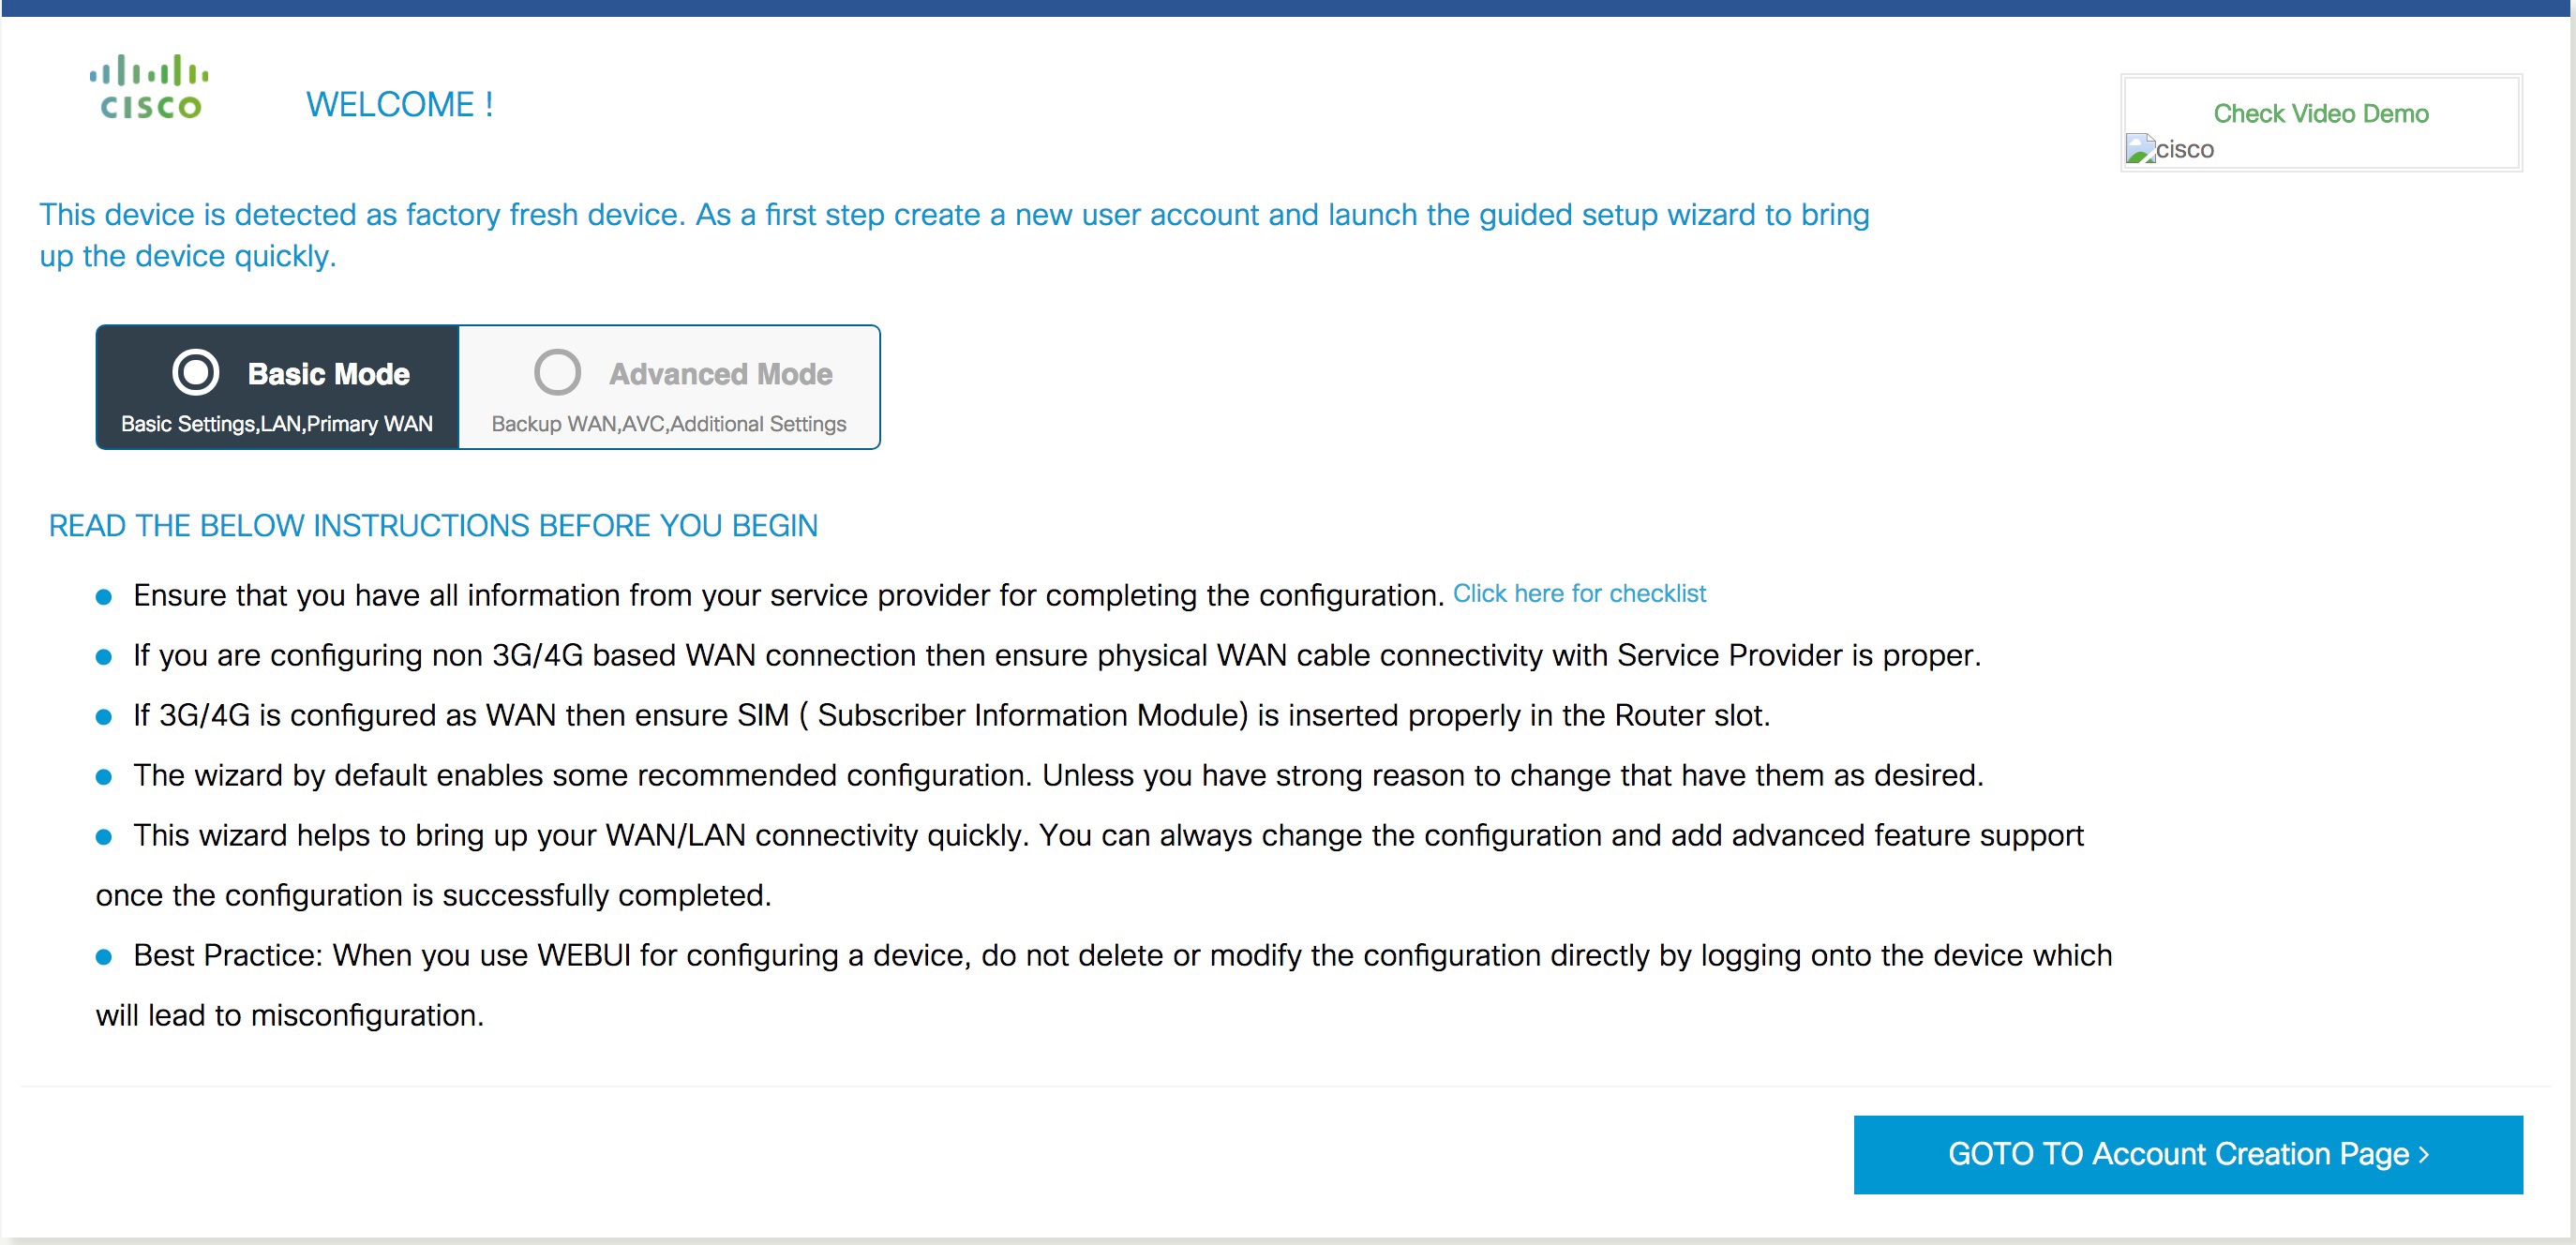
Setting Up Factory Default Device Using WebUI

Quick Setup Wizard allows you to perform the basic router configuration. To configure the router:

Before you begin

  • Before you access the WebUI, you need to have the basic configuration on the device.

Procedure


Step 1

Connect the RJ-45 end of a serial cable to the RJ-45 console port on the router.

Step 2

After the device initial configuration wizard appears, enter No to get into the device prompt when the following system message appears on the router.

Would you like to enter the initial configuration dialog? [yes/no]: no

Step 3

From the configuration mode, enter the following configuration parameters.

!
ip dhcp pool WEBUIPool
network 192.168.1.0 255.255.255.0
default-router 192.168.1.1
username webui privilege 15 password cisco
!
interface gig 0/0/1
ip address 192.168.1.1 255.255.255.0
!

Step 4

Connect your device to the router using an Ethernet cable to the gig 0/0/1 interface.

Step 5

Set up your system as a DHCP client to obtain the IP address of the router automatically.

Step 6

Launch the browser and enter the device IP address in your browser’s address line. For a secure connection, type https://192.168.1.1/#/dayZeroRouting. For a less secure connection, enter http://192.168.1.1/#/dayZeroRouting.

Step 7

Enter the default username (webui) and default password (cisco).


Using Basic or Advanced Mode Setup Wizard

To configure the router using the basic or advanced mode setup:

Procedure


Step 1

Choose the Basic Mode or Advanced Mode and click Go To Account Creation Page.

Step 2

Enter the username and password. Reenter the password to confirm.

Step 3

Click Create and Launch Wizard.

Step 4

Enter the device name and domain name.

Step 5

Select the appropriate time zone from the Time Zone drop-down list.

Step 6

Select the appropriate date and time mode from the Date and Time drop-down list.

Step 7

Click LAN Settings.

Steps to use the Basic or Advanced Mode Setup Wizard


Configure LAN Settings

Procedure


Step 1

Choose the Web DHCP Pool/DHCP Pool name or the Create and Associate Access VLAN option.

  1. If you choose the Web DHCP Pool, specify the following:

    Pool Name—Enter the DHCP Pool Name. Network—Enter network address and the subnet mask.
  2. If you choose the Create and Associate Access VLAN option, specify the following:

    Access VLAN—Enter the Access VLAN identification number. The range is from 1 to 4094. Network—Enter the IP address of the VLAN. Management Interfaces—Select the interface and move to the selected list box using the right and left arrows. You can also double click or drag and drop to move the interface to the selected list box.

Step 2

Click Primary WAN Settings.

Steps to configure LAN settings

Configure Primary WAN Settings

Procedure


Step 1

Select the primary WAN type. You can configure Serial, 3G/4G, Ethernet, or Broadband (xDSL) as primary WAN depending on the WAN types supported by the router.

Step 2

Select the interface from the drop-down list.

Step 3

Check the Get DNS Server info directly from ISP check box to get the DNS server information directly from the service provider. You can also manually enter the Primary DNS and Secondary DNS.

Step 4

Check the Get IP automatically from ISP check box to get the IP address information directly from the service provider. You can also manually enter the IP address and subnet mask.

Step 5

Check the Enable NAT check box to enable NAT. It is recommended to enable NAT.

Step 6

Check the Enable PPPOE check box to enable PPPoE. If you have enabled PPPoE, select the required authentication mode. The options are: PAP and CHAP.

Step 7

Enter the username and password provided by the service provider.

Step 8

Click Security / APP Visibility WAN Settings.


Configure Secondary WAN Settings

For advanced configuration, you should configure the secondary WAN connection.

Procedure


Step 1

Select the secondary WAN type. You can configure Serial, 3G/4G, Ethernet, or Broadband (xDSL) as a secondary WAN depending on the WAN types supported by the router.

Step 2

Select the interface from the drop-down list.

Step 3

Check the Get DNS Server info directly from ISP check box to get the DNS server information directly from the service provider. You can also manually enter the Primary DNS and Secondary DNS.

Step 4

Check the Get IP automatically from ISP check box to get the IP address information directly from the service provider. You can also manually enter the IP address and subnet mask.

Step 5

Check the Enable NAT check box to enable NAT. It is recommended to enable NAT.

Step 6

Check the Enable PPPOE check box to enable PPPoE. If you have enabled PPPoE, select the required authentication mode. The options are PAP and CHAP.

Step 7

Enter the username and password provided by the service provider.

Step 8

Click Security / APP Visibility WAN Settings.


Configure Security Settings

Procedure


Step 1

Check the Enable Cisco Recommended Security Settings check box to ensure that all passwords are not shown in plain text. The passwords are encrypted.

Step 2

Click Day 0 Config Summary.

Step 3

To preview the configuration, click CLI Preview to preview the configuration.

Step 4

Click Finish to complete the Day Zero setup.