Operations
With regard to local TV control and ordering, once the services have been implemented, the operation is largely performed by the end user. This chapter provides information about how to use the Cisco IP Phone to access the Cisco Vision Director services. For information about how to use a third-party device (such as AMX or Crestron), or devices using the User Control API, please contact the third-party integrator.
When guests arrive at their luxury suite in a venue, they should see a welcome message on one of the TVs (similar to that shown in Figure 6). We recommend that the welcome screen instruct them to use the Cisco IP Phone to control the TVs located in their suite.
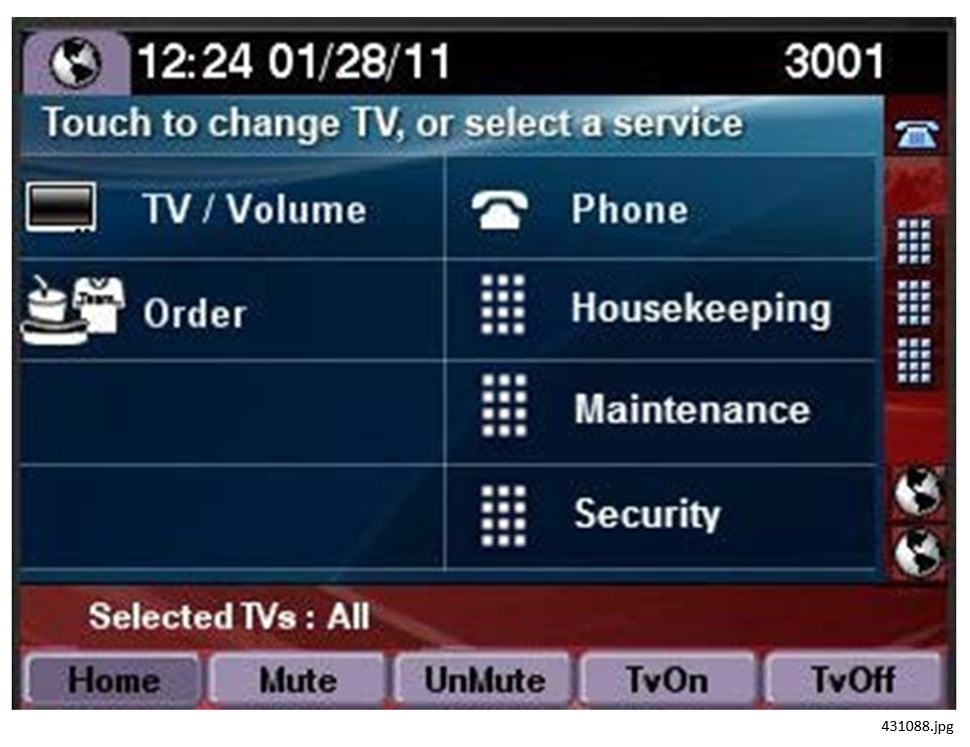
Initially, the Cisco IP Phone will display the “home” screen (as configured using the CUCM idle parameters).
Note that the following Cisco Vision Director service configurations are the default. If the customer is using “Alternative Softkey Mapping” the screens may appear different on the phone than they do in this chapter. Refer to Alternative Softkey Mapping for more detail on the alternate mappings.
The Using the Cisco Unified IP Phone 7975 with Cisco Vision Director: a TV Control quick start guide can be distributed to users for explanation of TV Control details.
TV Control
In a luxury suite, the Cisco Unified IP Phone 7975 can be used to control the TVs and to place calls. It has a touch screen, softkeys (which change depending on the screen contents), a navigation pad, and a phone keypad (Figure 1).
Note: The color of the softkey buttons displayed in the following graphics appears different in the document than on the actual phone display. The softkey color displayed on the phones is a light blue as shown here:
The softkey colors cannot be changed. See Table 1 for IP Phone functions.


Controlling TVs
To control the TVs, touch TV/Volume.
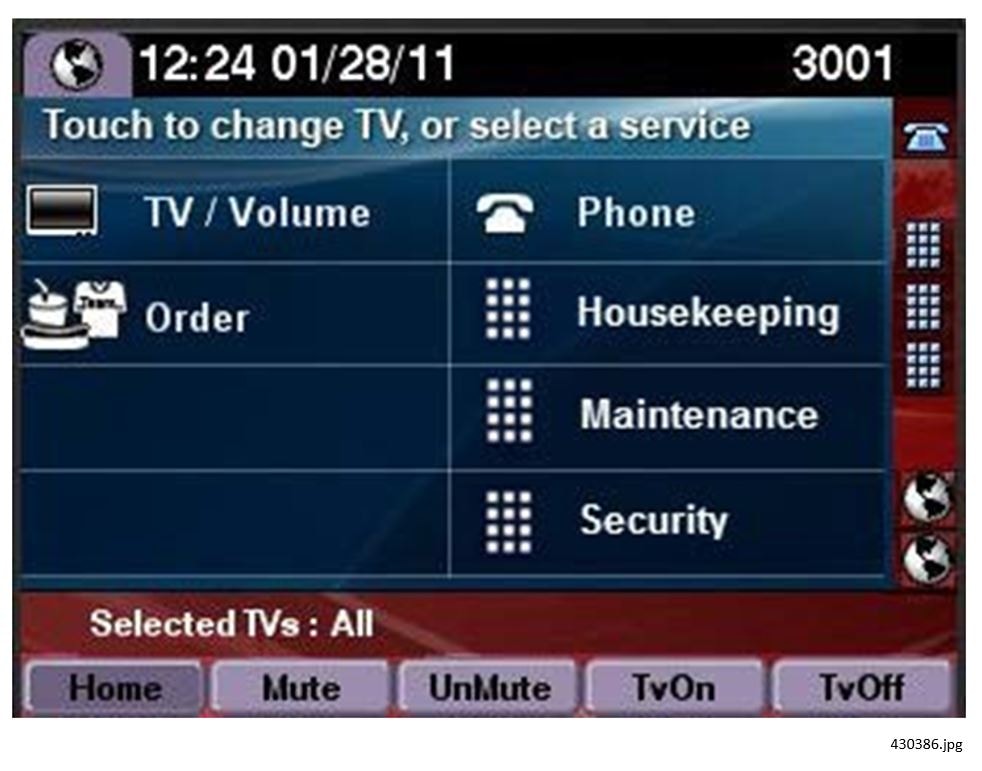
■![]() If the phone has been configured through Cisco Vision Director for the “Luxury Suite” service type, the Services page will show both options for TV/Volume control and for Ordering. If the phone has been configured for the “AdminOffice” service type, only the TV/Volume control option will display.
If the phone has been configured through Cisco Vision Director for the “Luxury Suite” service type, the Services page will show both options for TV/Volume control and for Ordering. If the phone has been configured for the “AdminOffice” service type, only the TV/Volume control option will display.
■![]() The first three speed dials configured in CUCM will appear on the Services page.
The first three speed dials configured in CUCM will appear on the Services page.
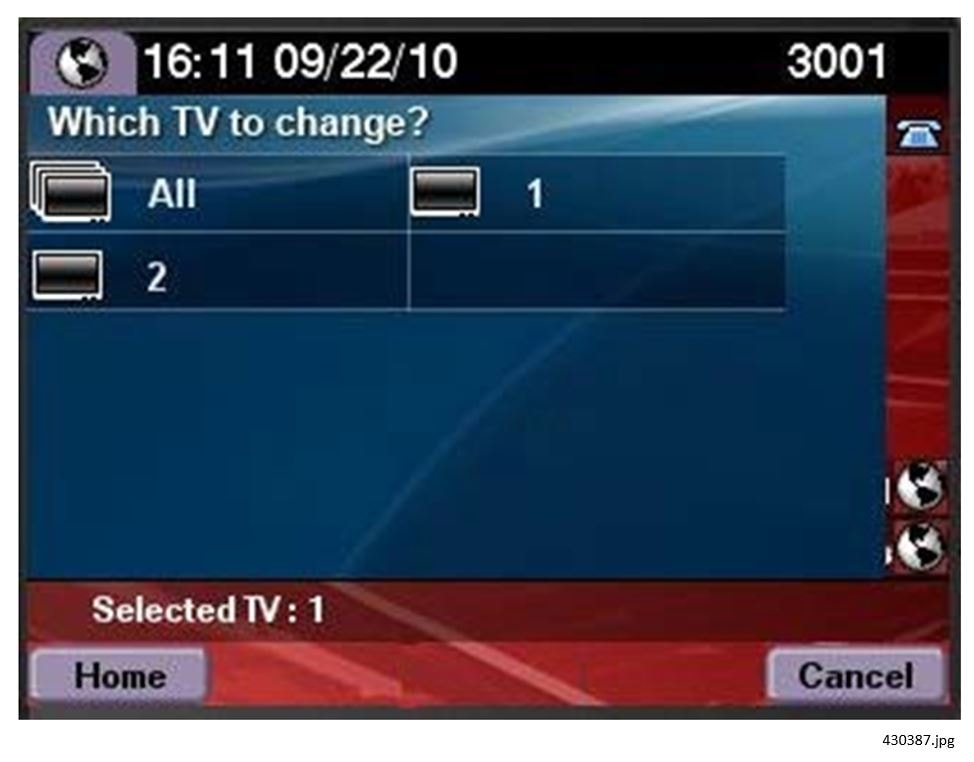
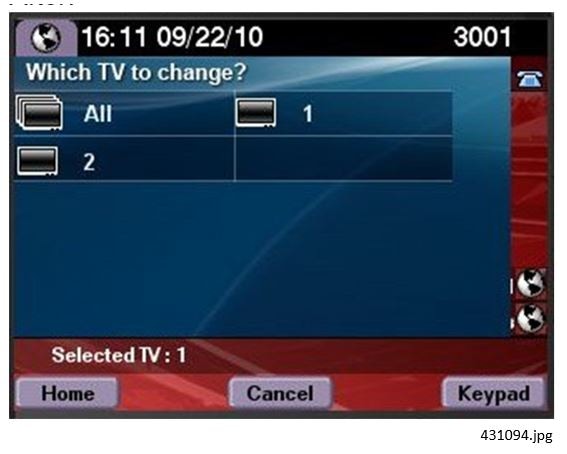
Selecting a Display
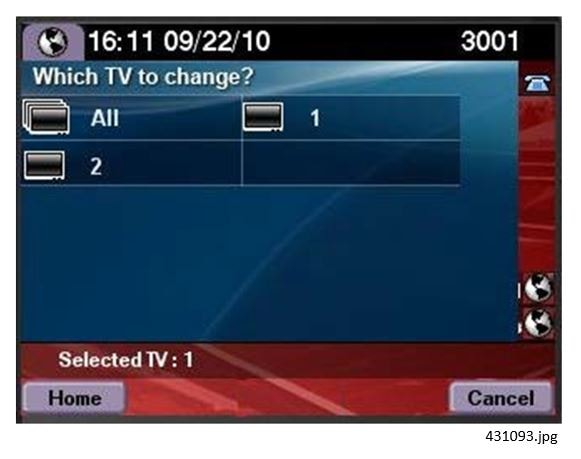
The TVs are typically identified by location. The labels are assigned in Cisco Vision Director. Touch the label of the TV you want to control or touch All.
To configure the labels of the TVs in Cisco Vision Director:
1.![]() Go to Tools > Control Panel > Setup > Suites > Location Assignment.
Go to Tools > Control Panel > Setup > Suites > Location Assignment.
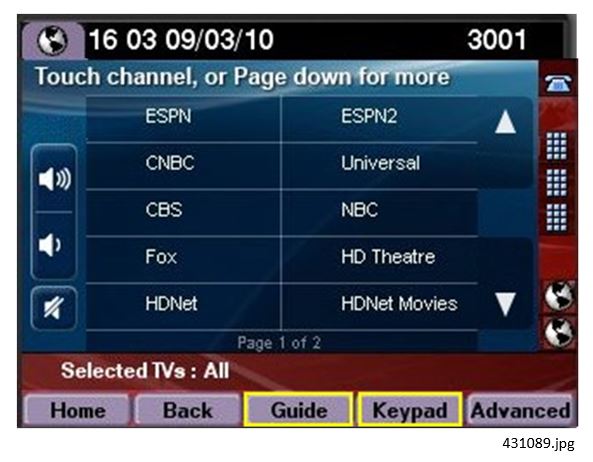
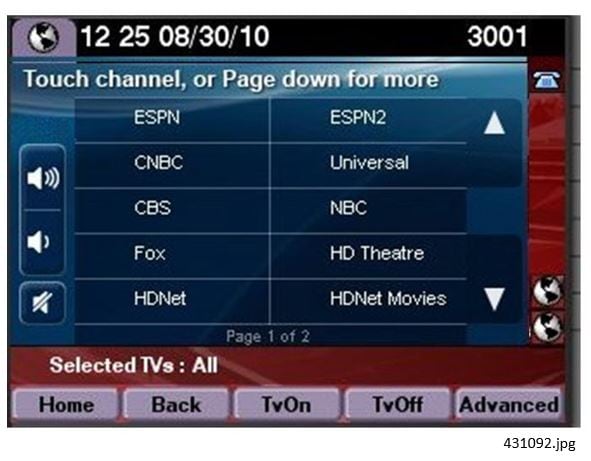
Selecting a Channel
Touch desired channel or touch Page Up or Page Down to see additional channels.

The channels are listed in the order in which they are configured in Cisco Vision Director on Tools > Control Panel > Setup > Channels page. Channel icons can be included, but are not shown here due to licensing restrictions.
By default, the channel guide is displayed on the selected TVs. If this feature has been disabled (through the Cisco Vision Director Management Dashboard, the “Guide” softkey will be displayed (as shown above). You can touch Guide to view the channel guide on the associated TV. If you know the number of the channel that you wish to select, simply touch the Keypad softkey to enter it.
Adjusting the Volume
|
|
|
|---|---|

|
|

|
|

|
Album Control
Album Control allows you to control specific content that has been published to the DMPs. This can include sponsored messaging, personal videos and graphics, static menus, schedules, and more. This content is only published to specific DMPs, so the options (albums) available for display depend on which DMPs are selected from your control device.
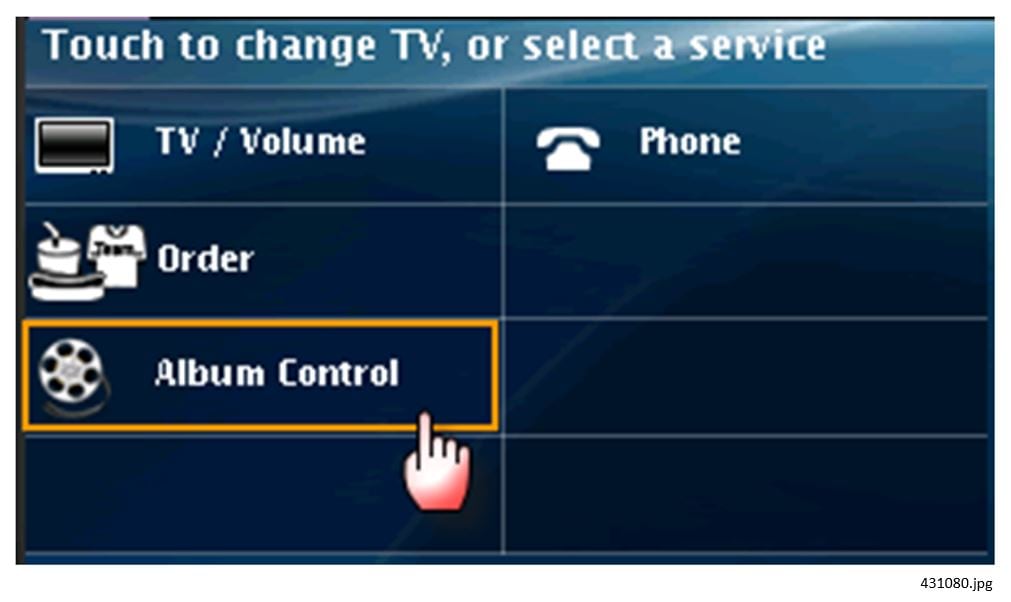
Selecting the displays works just like choosing a channel. Select a display; the available albums from that DMP appear.

The Self-Service Content user defines the names of the album. Touch the album to display VCR-like controls. As Album content is on-demand, you can start/stop and advance a slideshow of static graphics, or a set of videos.

You can set the duration in seconds for each image before auto advancing to the next one, as seen below.
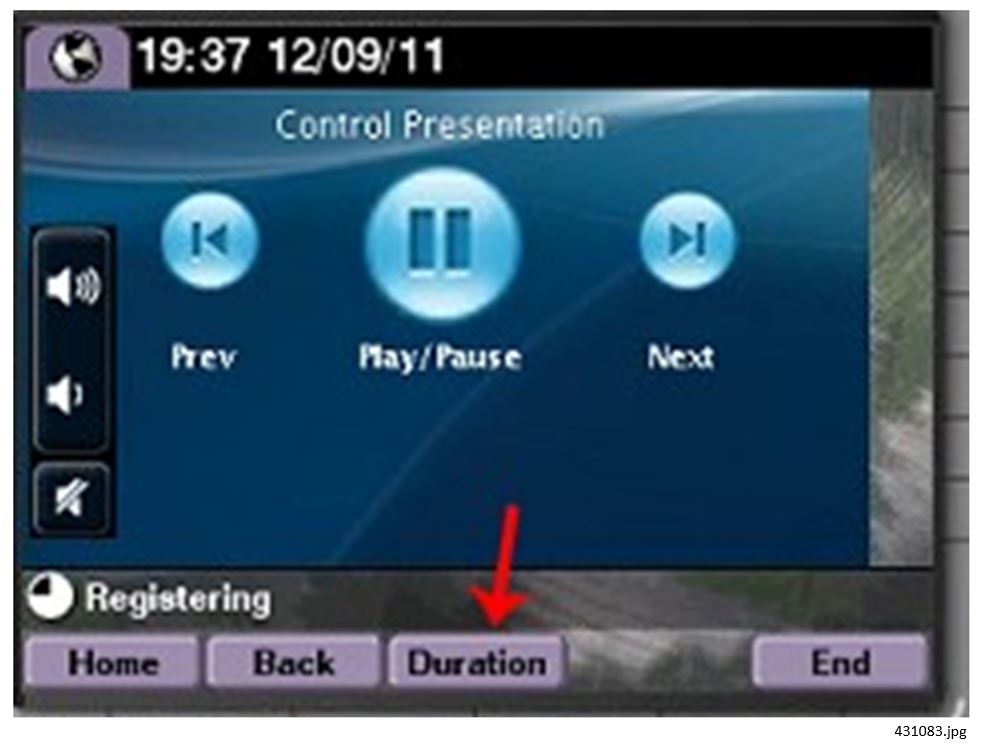
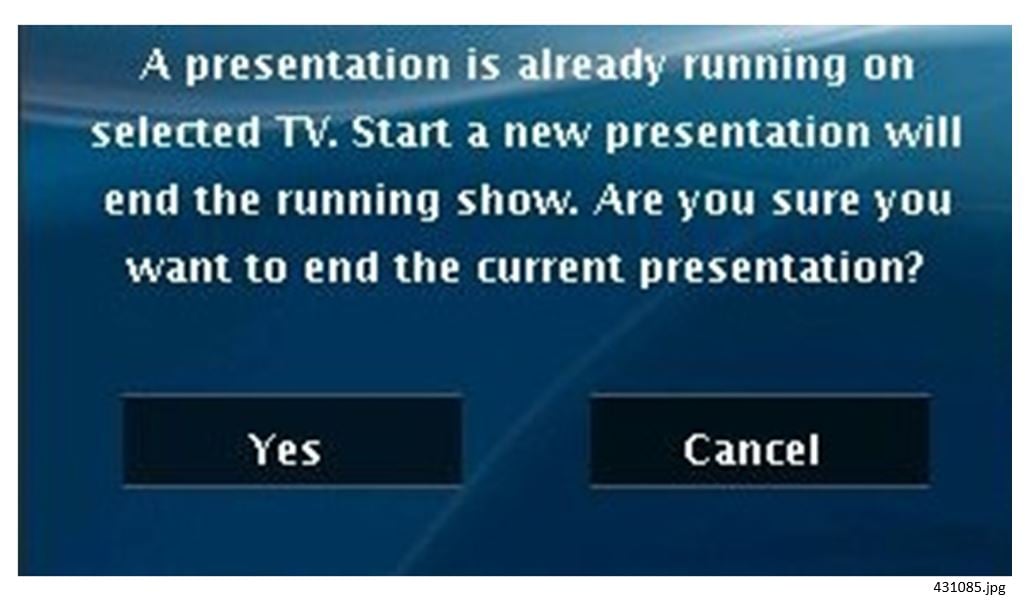
If a presentation is playing on a DMP(s) and you start a new presentation, a message appears asking if you want to cancel the current presentation.
For more information about SSC configuration and working with albums in Cisco Vision Director, see Cisco UCS Director Self-Service Portal Guide.
Using Advanced Functions
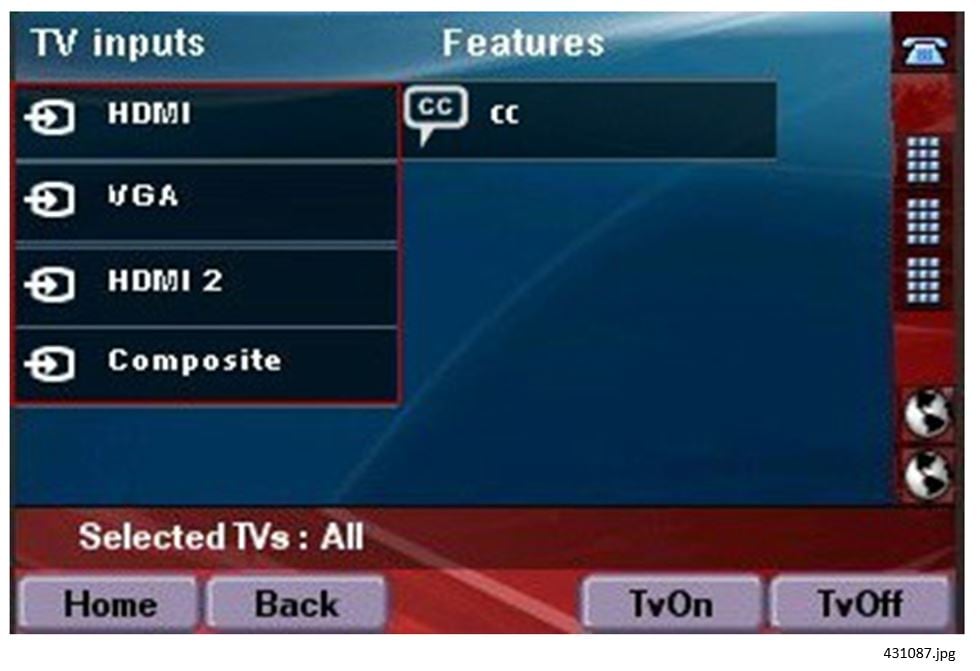
In addition to channel selection and volume, use the Cisco IP Phone to access advanced functions provided by Cisco Vision Director. The resulting page can vary by deployment and may contain some or all of the following:
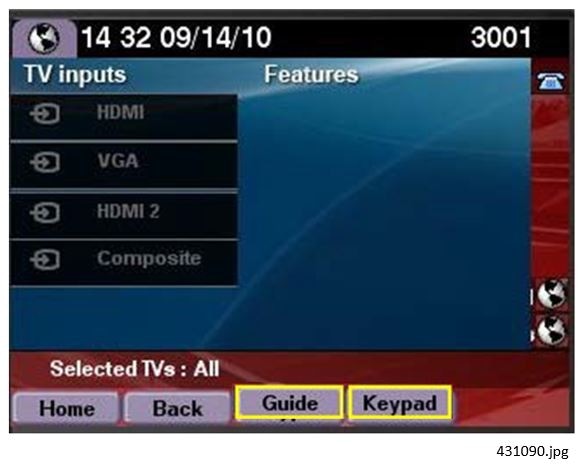
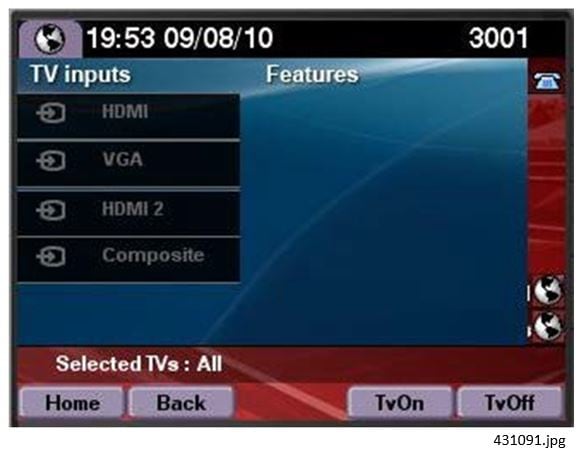
■![]() External Device Input—In luxury suites, TVs may need to accept input from an external device, such as a PC or DVD player. Only the available inputs are shown.
External Device Input—In luxury suites, TVs may need to accept input from an external device, such as a PC or DVD player. Only the available inputs are shown.
■![]() Closed Caption—If the video feed includes closed captions, guests in the luxury suite can turn the display of these captions on or off using their Cisco IP Phone (and the IR Remote).
Closed Caption—If the video feed includes closed captions, guests in the luxury suite can turn the display of these captions on or off using their Cisco IP Phone (and the IR Remote).
■![]() Information—Reserved for future use.
Information—Reserved for future use.
To access advanced functions such as controls for external inputs and closed captioning, touch Advanced.
Making a Phone Call
To place a call, pick up the handset and dial the number. Alternatively, you can:
■![]() Touch the Phone symbol on the touch screen and dial the number on the displayed touch panel.
Touch the Phone symbol on the touch screen and dial the number on the displayed touch panel.
■![]() Touch the desired speed dial (availability may vary).
Touch the desired speed dial (availability may vary).
If the suite is equipped with multiple phone lines and you wish to make a call on a line other than the primary line, touch the line button associated with the desired line and dial the number using the keypad.
Using Softkeys
The softkeys on the phone are located at the bottom of the touch screen and provide access to functions (Table 3), which vary depending on the screen currently being displayed.
Access the advanced features (external input, closed captioning) for the selected TV. |
|
If the ExplicitTVPower (in the Cisco Vision Director registry) is set to 1, the “TV Power” soft key will be replaced with “TV Off” and “TV On” soft keys.
Alternative Softkey Mapping
When an IP Phone subscribes to Cisco Vision Director services, various softkey definitions are provided by default. As an alternative, the following softkey mappings can be made available (Table 4).
Note: When adding the Keypad to the Display selection page, the Keypad will no longer be available to single TV locations.
The alternative softkey mapping is implemented using SQL scripts. To obtain and deploy these scripts, contact your Cisco Systems account team. For further information, see the Cisco Vision Dynamic Signage Director Release Notes.
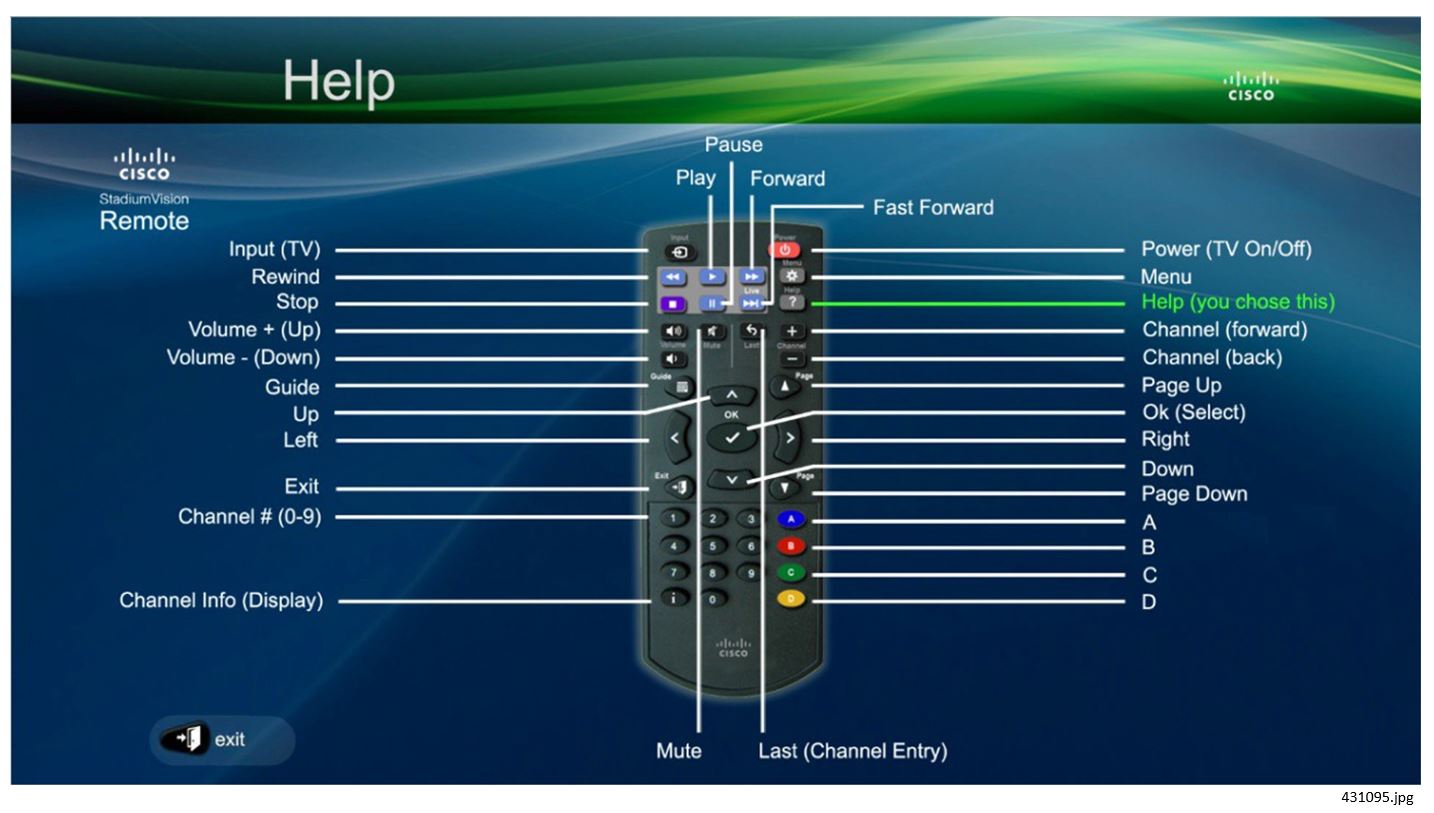
IR Remote
The IR remote can also be used to control the TV, similar to the TV remote in your home. The remote is designed to provide access to the same TV control functions as the IP phone.
To see a diagram of the available functions on the remote, press the Help button. The following displays on the associated TV.
Disabling the IR Remote:
The following steps are high-level and require one to be familiar with Cisco Vision Director content. For details on Cisco Vision Director content and how to retrieve content, please refer to Release 6.1: Cisco Vision Dynamic Signage Director Operation Guide.
1.![]() Retrieve the IRdisable.swf from the Cisco Vision Director content Library.
Retrieve the IRdisable.swf from the Cisco Vision Director content Library.
2.![]() Load it into a playlist associated with the script state in which you want to disable the IR functionality.
Load it into a playlist associated with the script state in which you want to disable the IR functionality.
3.![]() When the IRdisable.swf loads on the DMP, it will disable the IR remote for that DMP.
When the IRdisable.swf loads on the DMP, it will disable the IR remote for that DMP.
Note: The IP phone or other third-party control device will still control the DMP.
To re-enable the IR, load the IRenable.swf file on the DMP following the same steps as above.
 Feedback