
Cisco Nexus Hyperfabric — Configure BGP
Border Gateway Protocol (BGP)
BGP is a dynamic routing protocol for routing traffic between different autonomous systems (AS) on the internet. BGP exchanges full routing information when a peer connection is first established and only sends updates for routes that have changed. BGP is highly scalable and can adapt to changes in the network topology, making it suitable for large, complex networks.
For medium to large networks, BGP is a better routing solution than static routing, which is simpler and requires less overhead than BGP but lacks the scalability and adaptability of BGP. With static routing, routes are fixed and do not change unless manually updated by a network administrator.
BGP Policy
BGP import and export policies are sets of rules and configurations that control the selection, advertisement, and acceptance of routing information between BGP peers.
BGP import policy is used for the routes imported from the external BGP peers and BGP export policy is used for the routes exported to the external BGP peers.
-
Default import and export policies are predefined and not configurable. The default policy is a template containing rules.
-
If you use both default import and export policies, these routes are not advertised to the external peer.
-
Externally learned routes
-
Default route
-
Internal endpoint IP addresses
-
To view the default import or export policies, navigate to the Fabrics page. In the Attachments area, choose or .

Default import policy
|
Match |
Set |
Action |
|---|---|---|
|
All |
Community 64511:99 |
Permit |
Default export Policy
|
Match |
Set |
Action |
|---|---|---|
|
Community 64511:99 |
- |
Deny |
|
Route tag Black |
- |
Deny |
|
IPv4 Prefix 0.0.0.0/0 (Exact) |
- |
Deny |
|
IPv6 Prefix ::/0 (Exact) |
- |
Deny |
|
Community 64510:* |
- |
Permit |
|
IPv4 Prefix 0.0.0.0/0 (Exact or longer) 32 |
- |
Deny |
|
IPv6 Prefix ::/0 (Exact or longer) 128 |
- |
Deny |
|
All All conditions are matched |
- |
Permit |
-
When you add a static route, the Discard option in the Add Static Route page, matches Match Route tag Black, Deny rule in the default export policy. See Add a static route.
-
The rule Community: 64510:* is used to advertise one or more static routes to an external network.
-
In the default export policy, these rules are used to prevent advertising the default route and internal endpoint IP addresses (host routes) to the external network.
-
Match 0.0.0.0/0 (Exact), Deny
-
Match ::/0 (Exact), Deny
-
Match 0.0.0.0/0 (Exact or longer) 32, Deny
-
Match ::/0 (Exact or longer) 128, Deny
-
-
Because the route imported from the external BGP peer has the rule Community: 64511:99 set by the default import policy, the route is not exported to a BGP peer because of the Deny rule in the default export policy.
Guidelines
-
For BGP peers that support both IPv4 and IPv6, you must create a separate BGP peer configuration for each address family.
-
BGP peering requires a routed interface or routed sub-interface. An SVI cannot be used.
-
When configuring a BGP peer, your selection of available interfaces in the VRF depends on your chosen time to live (TTL) value.
-
With TTL set to 1, you are presented with only the IP interface that is in the same subnet as the BGP peer.
-
With TTL set to greater than 1, you are shown only the routed or routed sub-interface IP interfaces in the VRF.
-
Create a BGP peer
Create a BGP peer, also known as a BGP neighbor, to establish a BGP session with another switch to exchange routing information. Follow these steps to create a BGP peer.
Step 1 | Choose Fabrics. |
Step 2 | On the Fabrics page, click the fabric you want to configure. |
Step 3 | In the Logical Networks area, click Route tables (VRF). 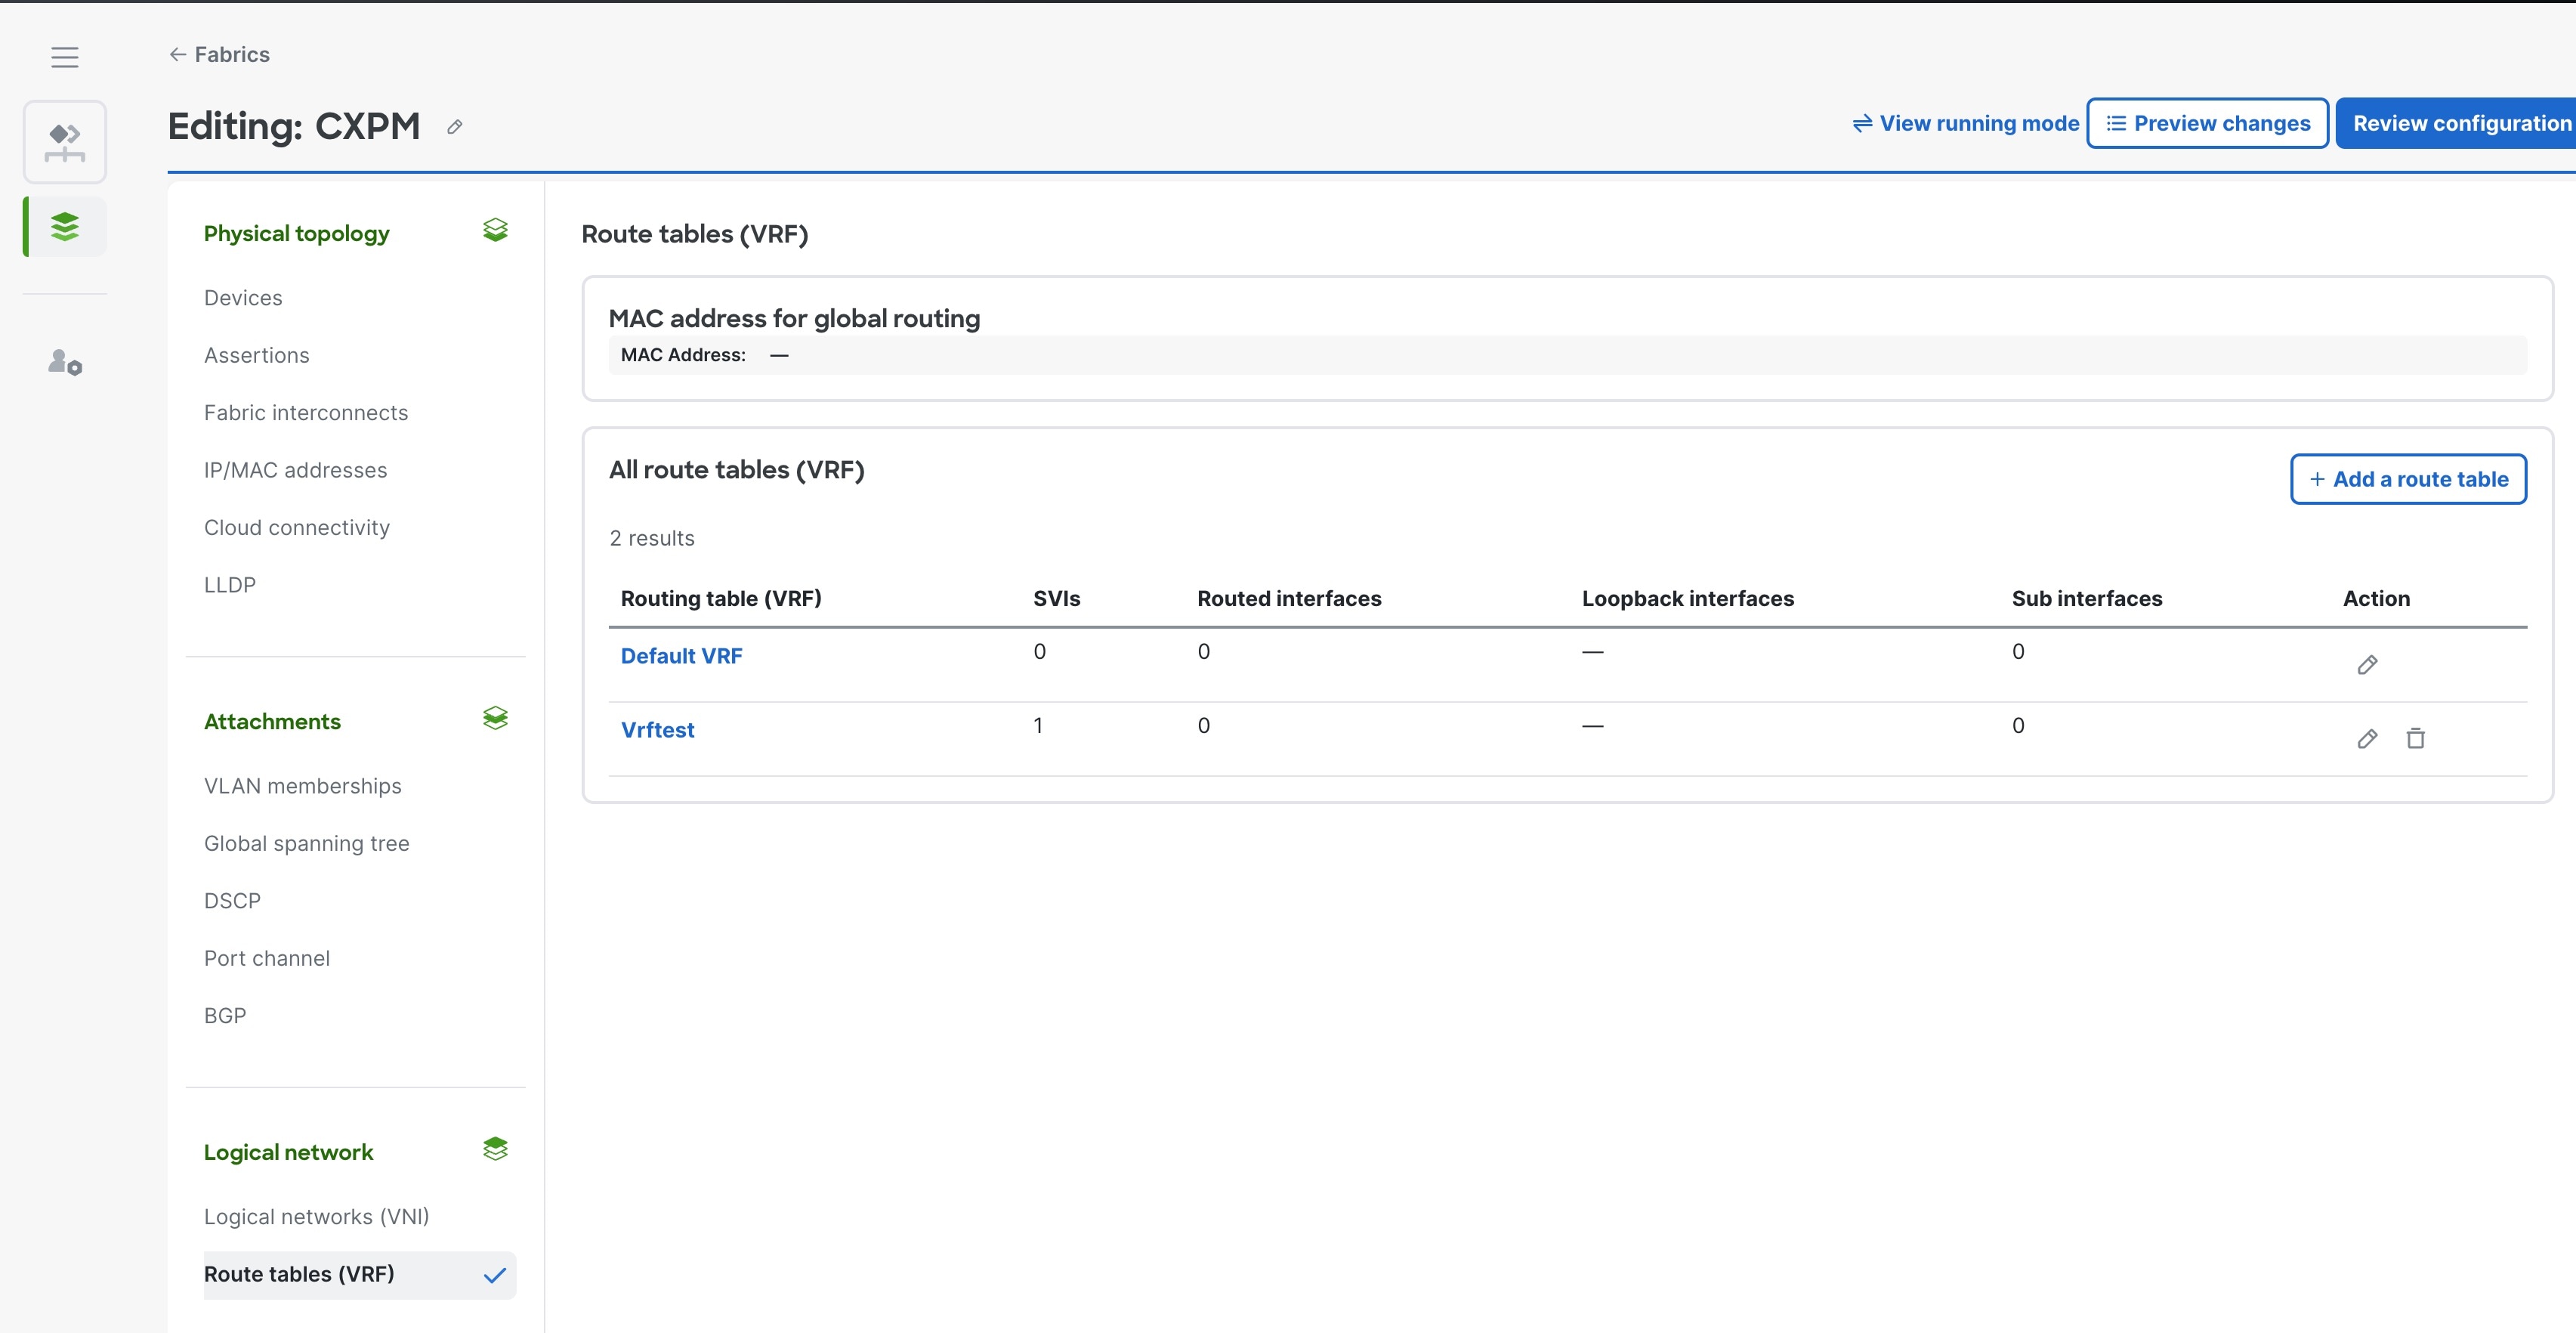 |
Step 4 | In the All route tables (VRFs), click the route table name where you will add a BGP peer. |
Step 5 | In the Configurations area, click BGP peers. If BGP peers have already been created in this VRF, a list of existing peers is displayed. |
Step 6 | In the BGP peers area, click the pencil icon and enter the VRF Local AS. Click Save. By default, the VRF Local AS will be used in the BGP peer unless a new value is provided in the Local AS override. See 8.e. 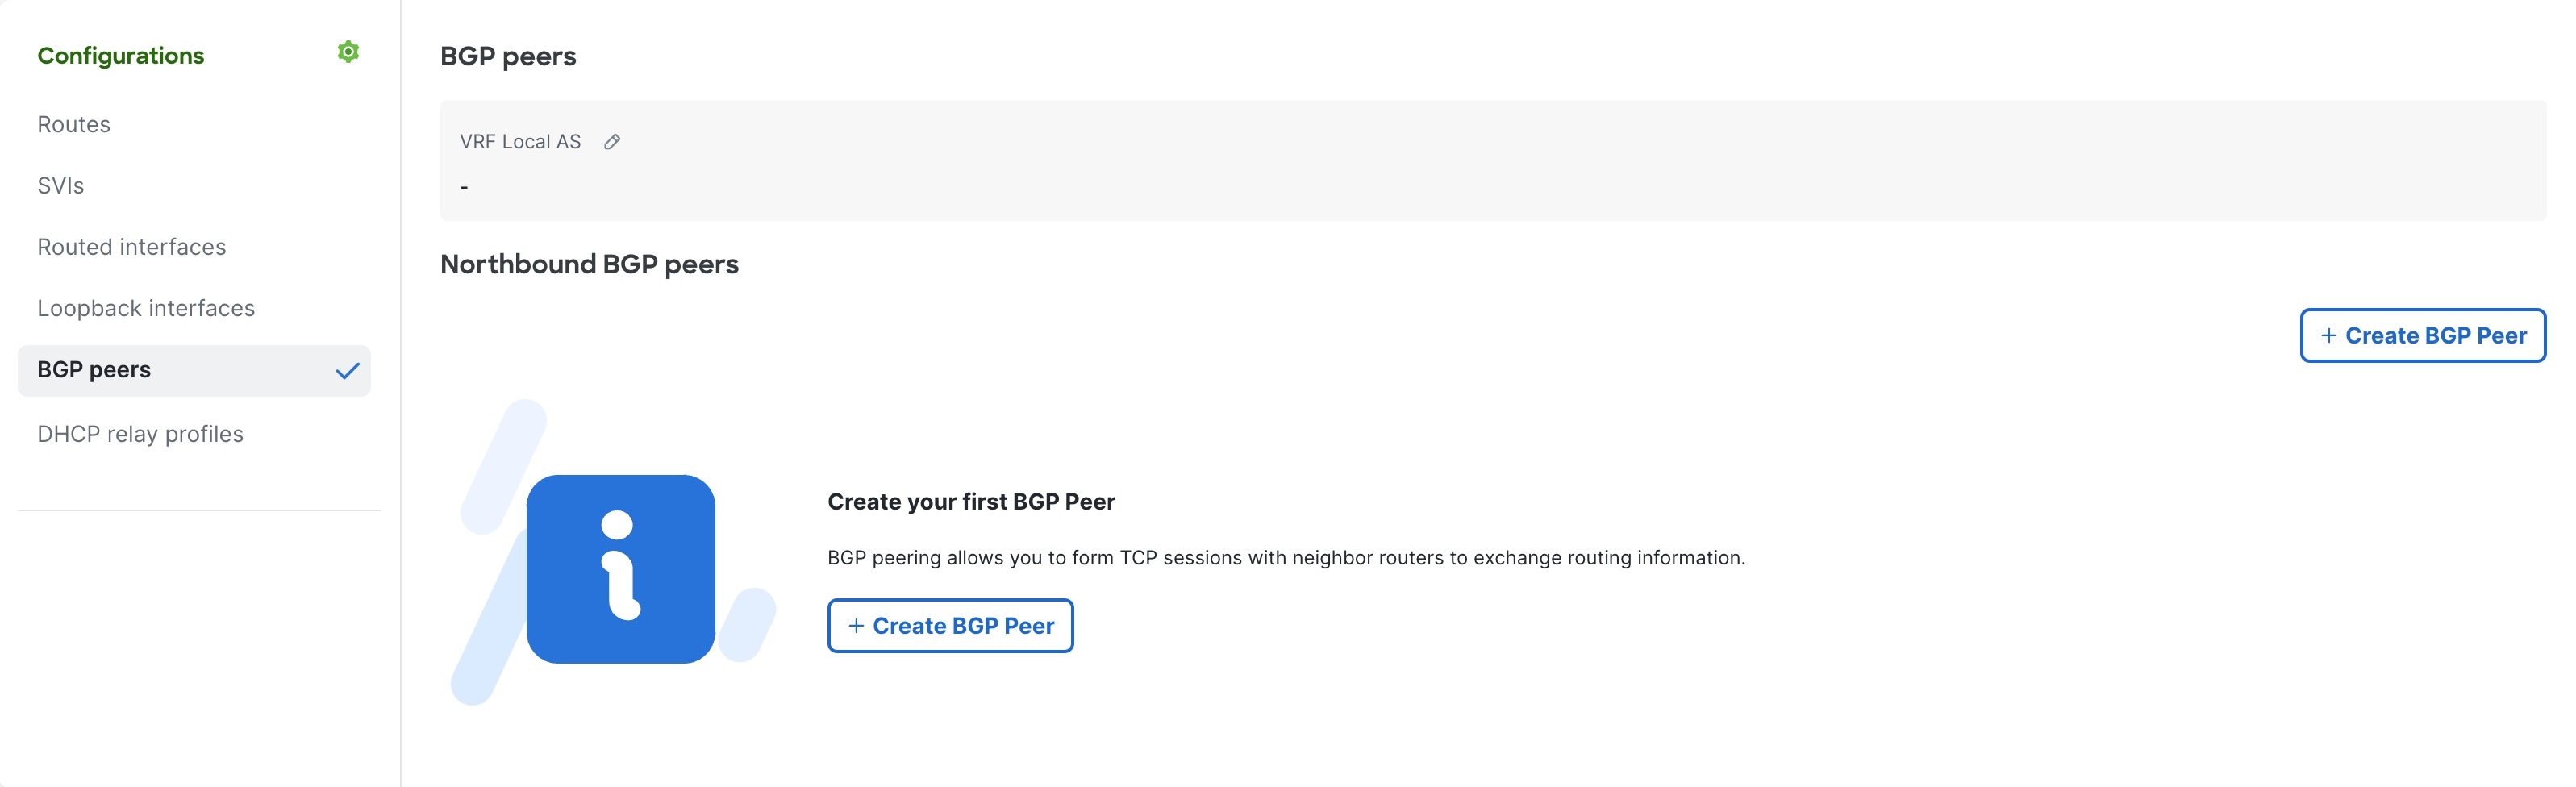 |
Step 7 | Click Create BGP peer. |
Step 8 | Complete the following fields for Create BGP peer. 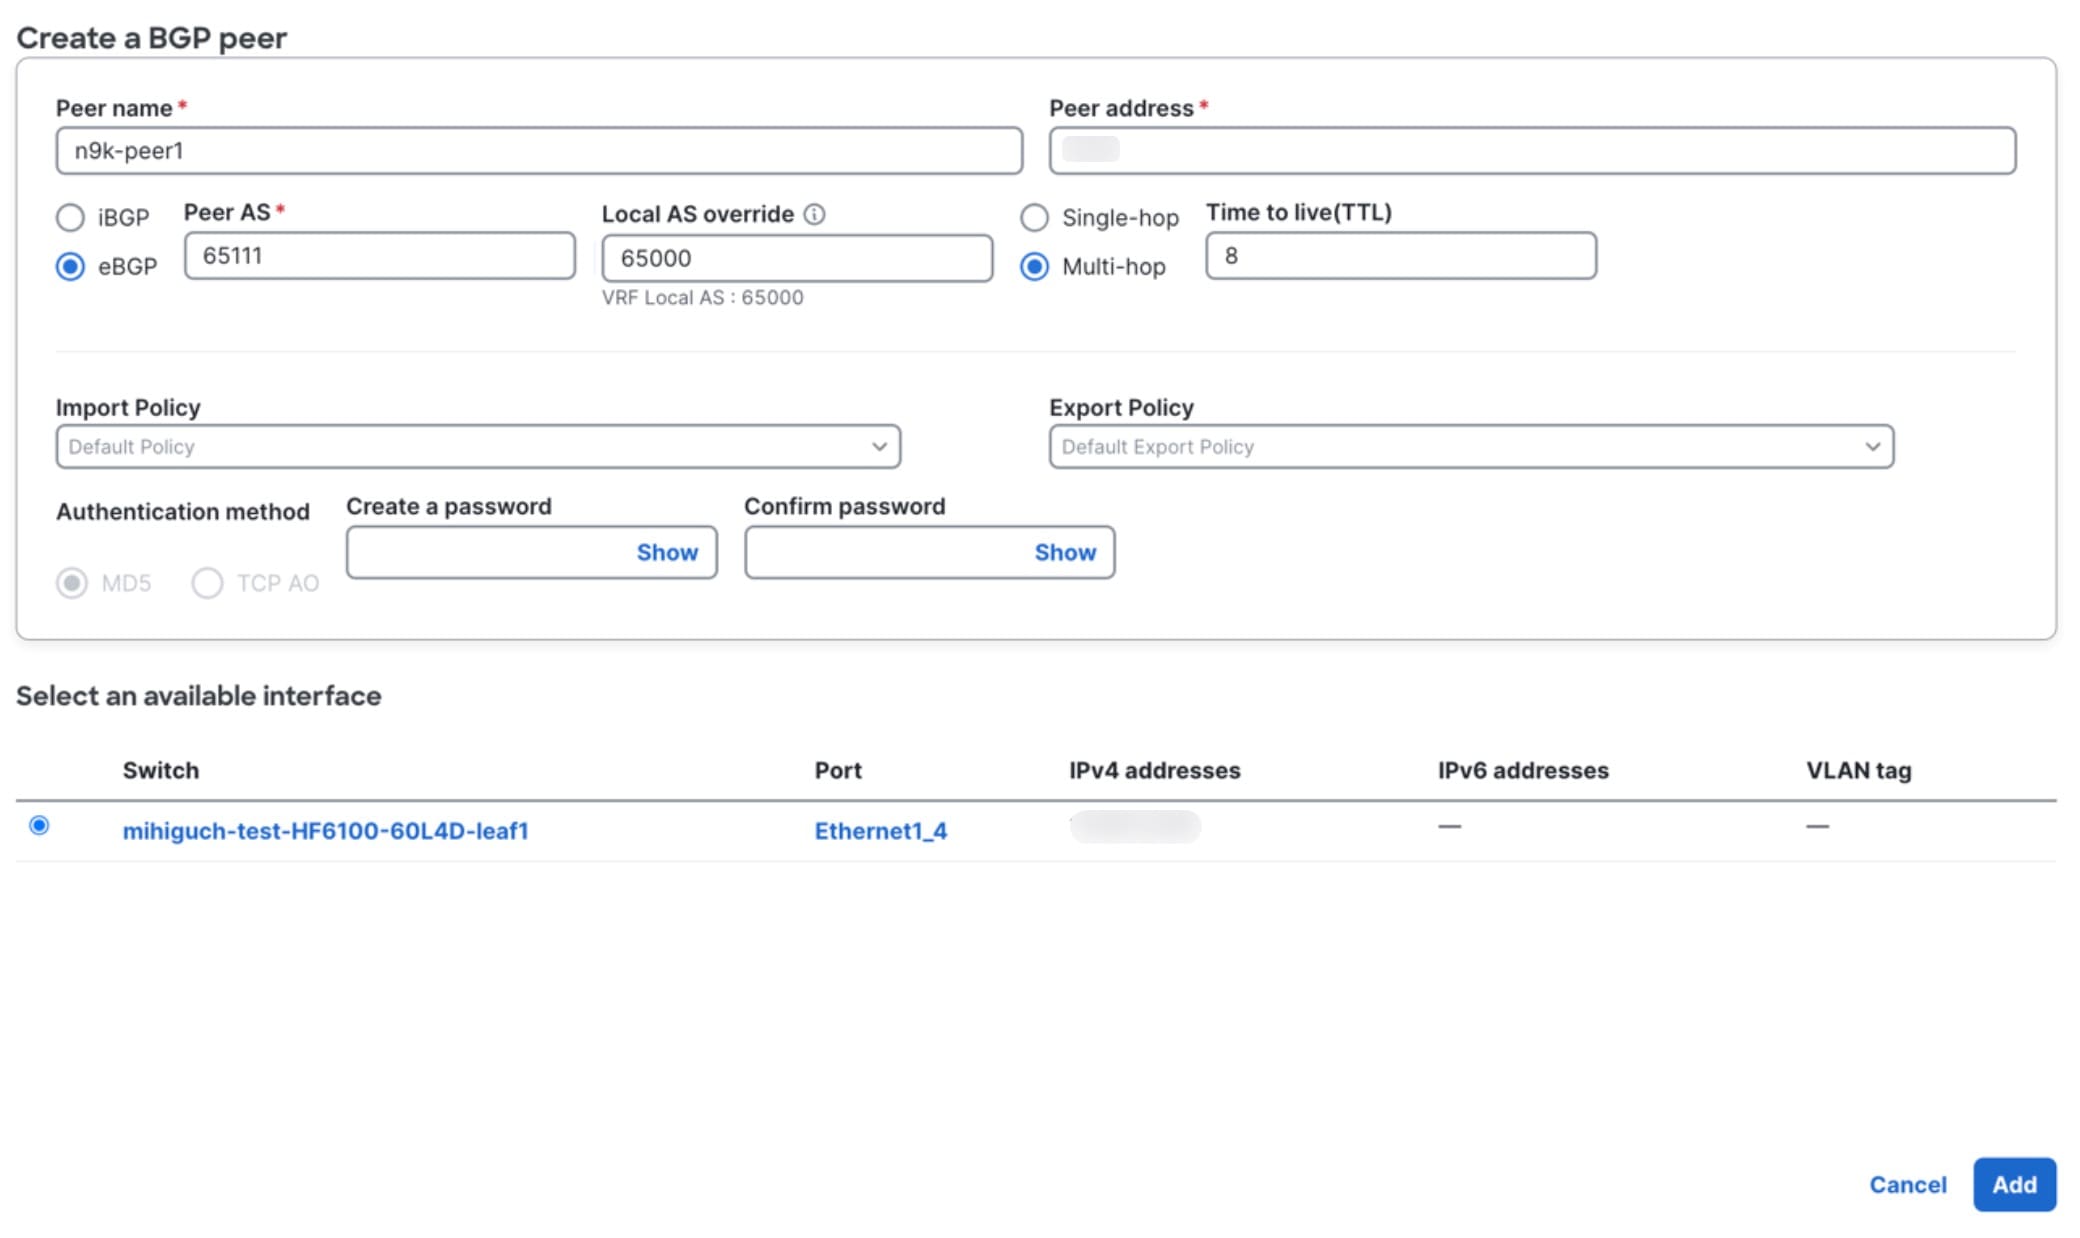
|
Step 9 | Select an available interface. In the case of a local BGP peer, the available interfaces based on peer address are displayed. |
Step 10 | Click Save. |
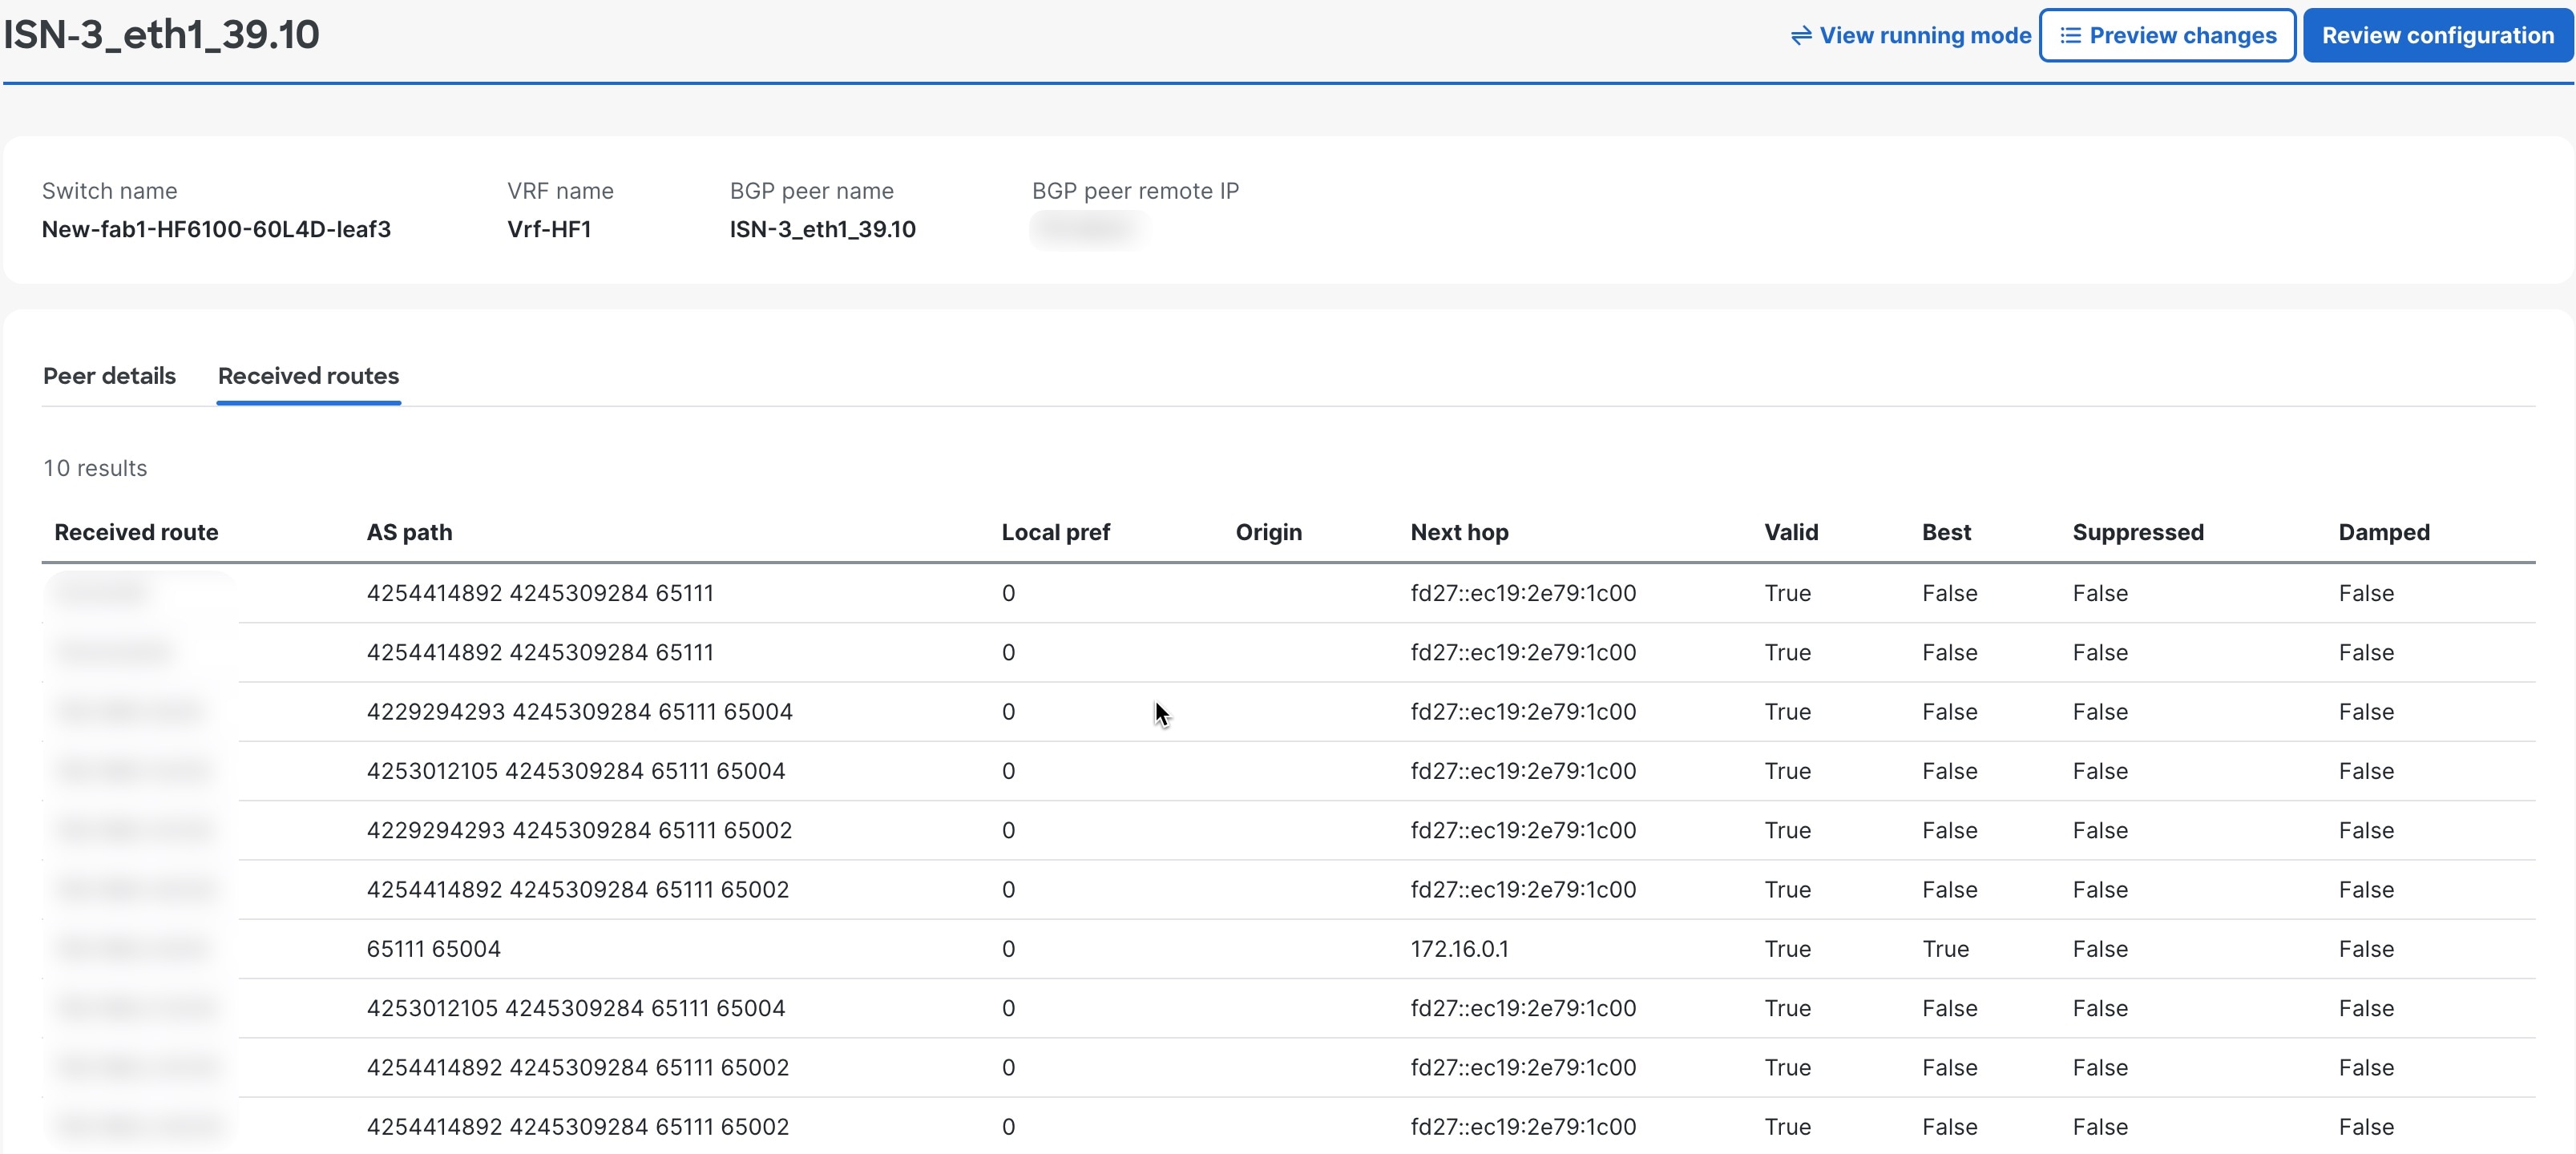
View BGP peer details
Follow these steps to view BGP peer details.
Step 1 | Choose Fabrics. |
Step 2 | On the Fabrics page, click the fabric you want to configure. |
Step 3 | In the Attachments area, choose .
|
Step 4 | You can also access the BGP peer details from the VRF page. In the Logical Networks area, click Route tables (VRF).
|
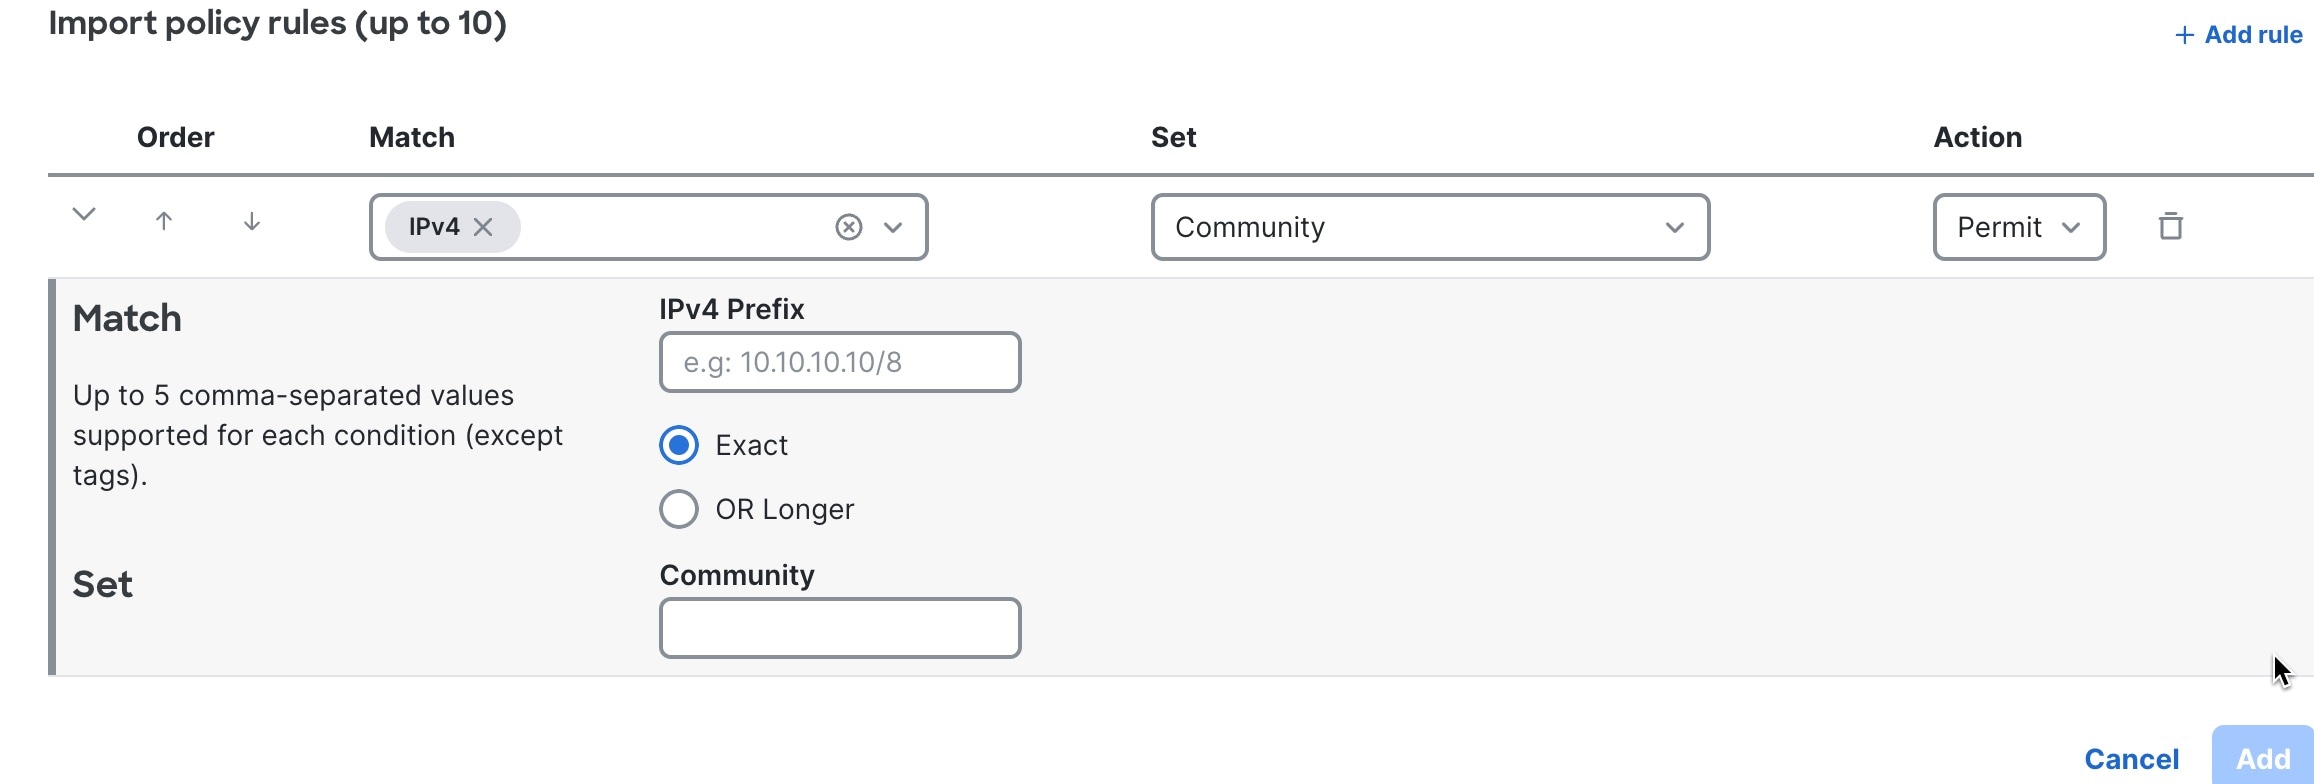
Create a BGP import policy
Follow these steps to create a BGP import policy.
Step 1 | Choose Fabrics. |
Step 2 | On the Fabrics page, click the fabric you want to configure. |
Step 3 | In the Attachments area, choose . A list of BGP import policies appears. If no policies have been added, the list contains only the Default import policy. |
Step 4 | Click + New Policy. 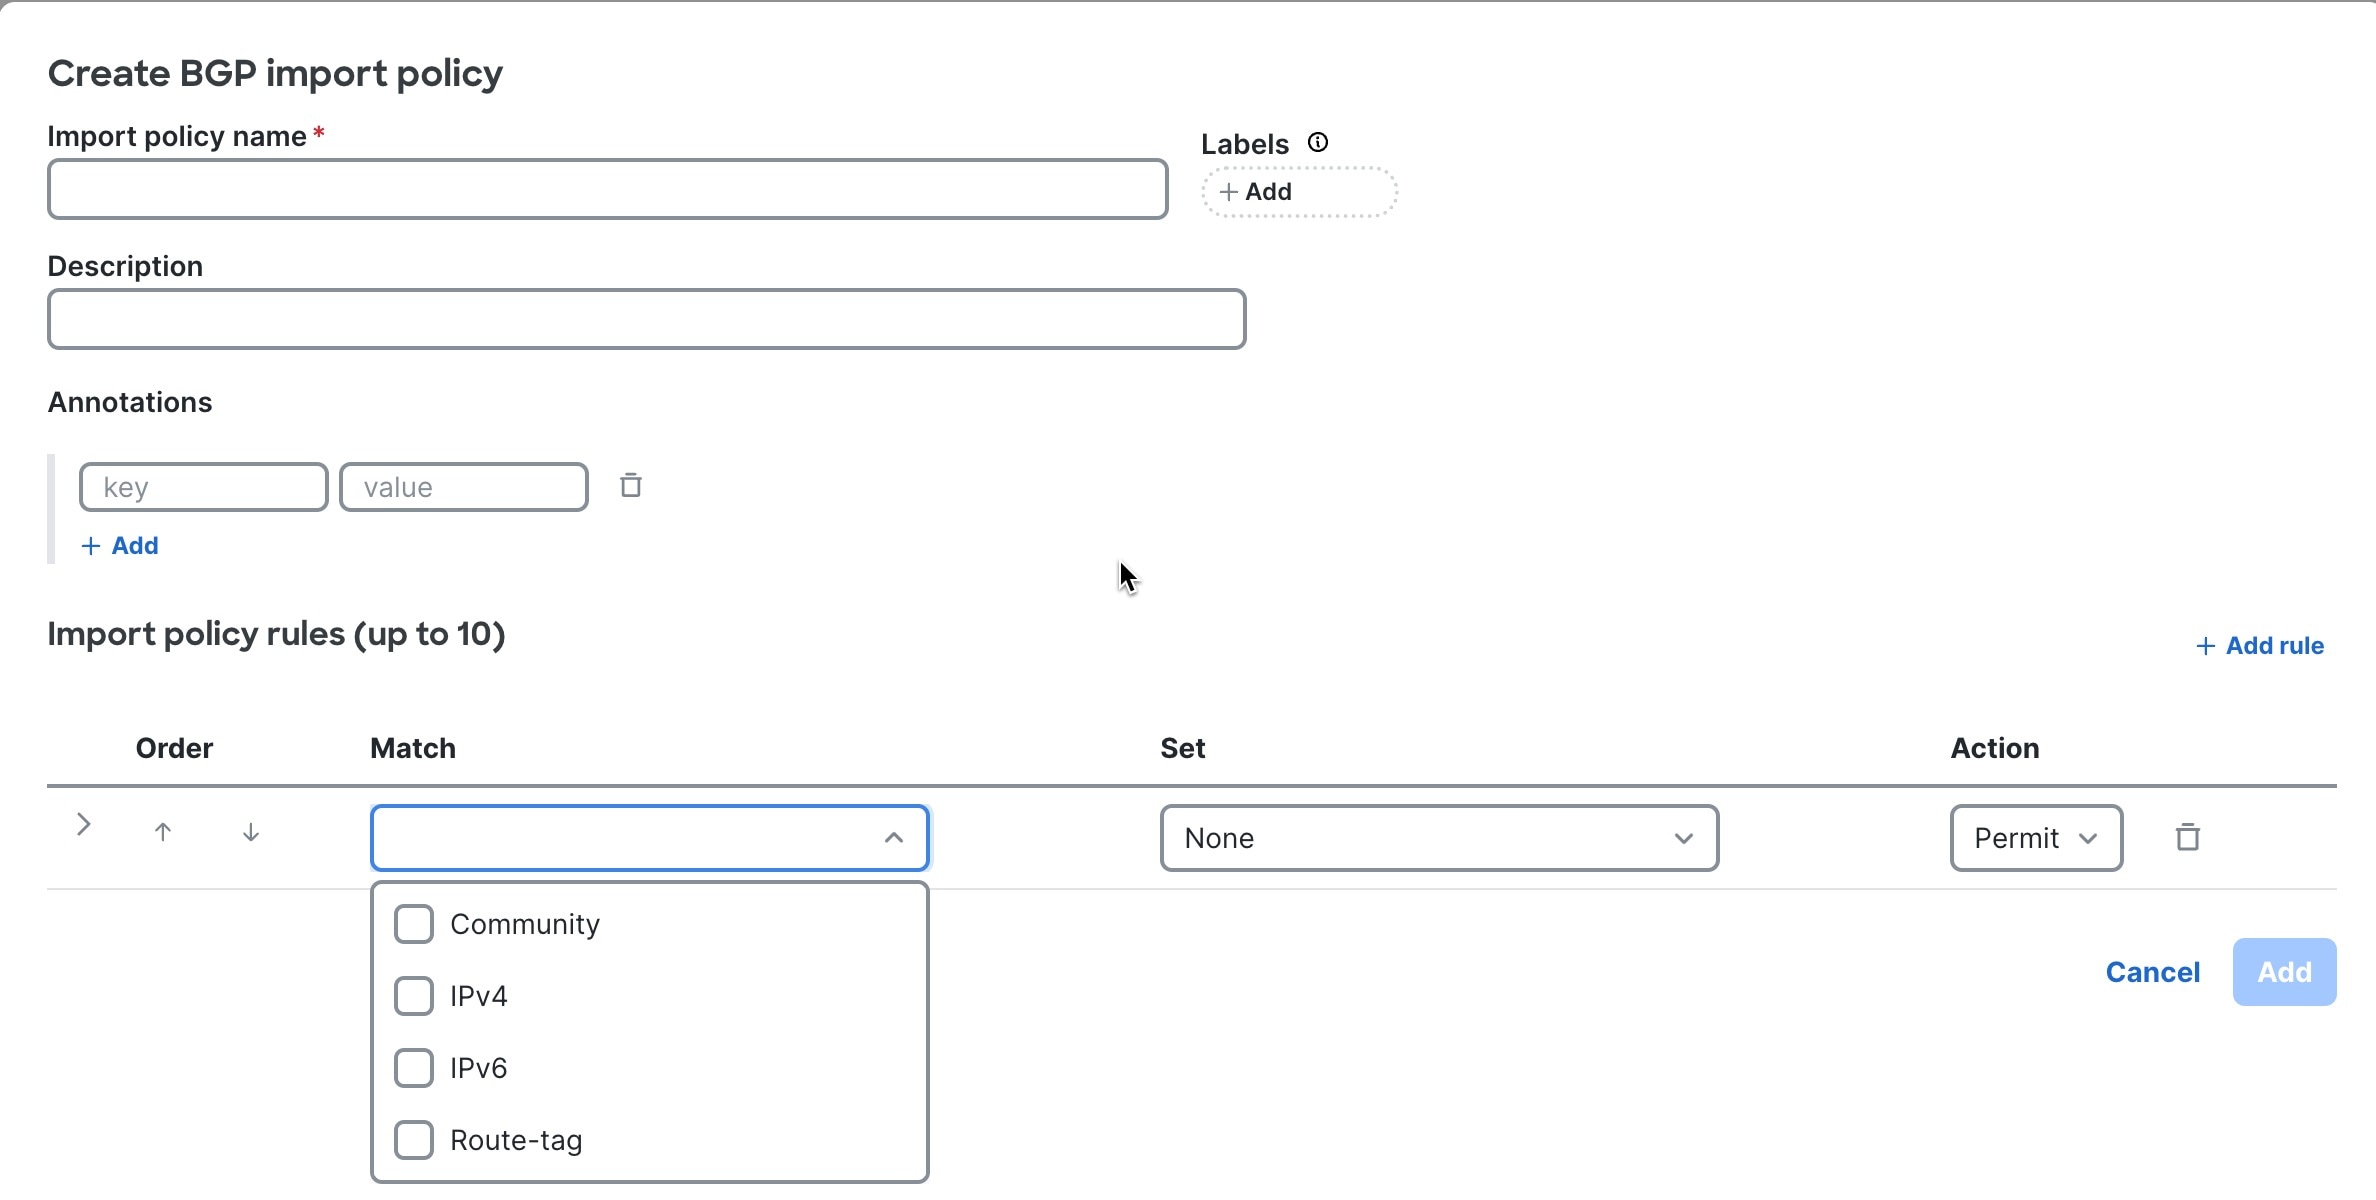 |
Step 5 | Follow these substeps to create a BGP import policy.
|
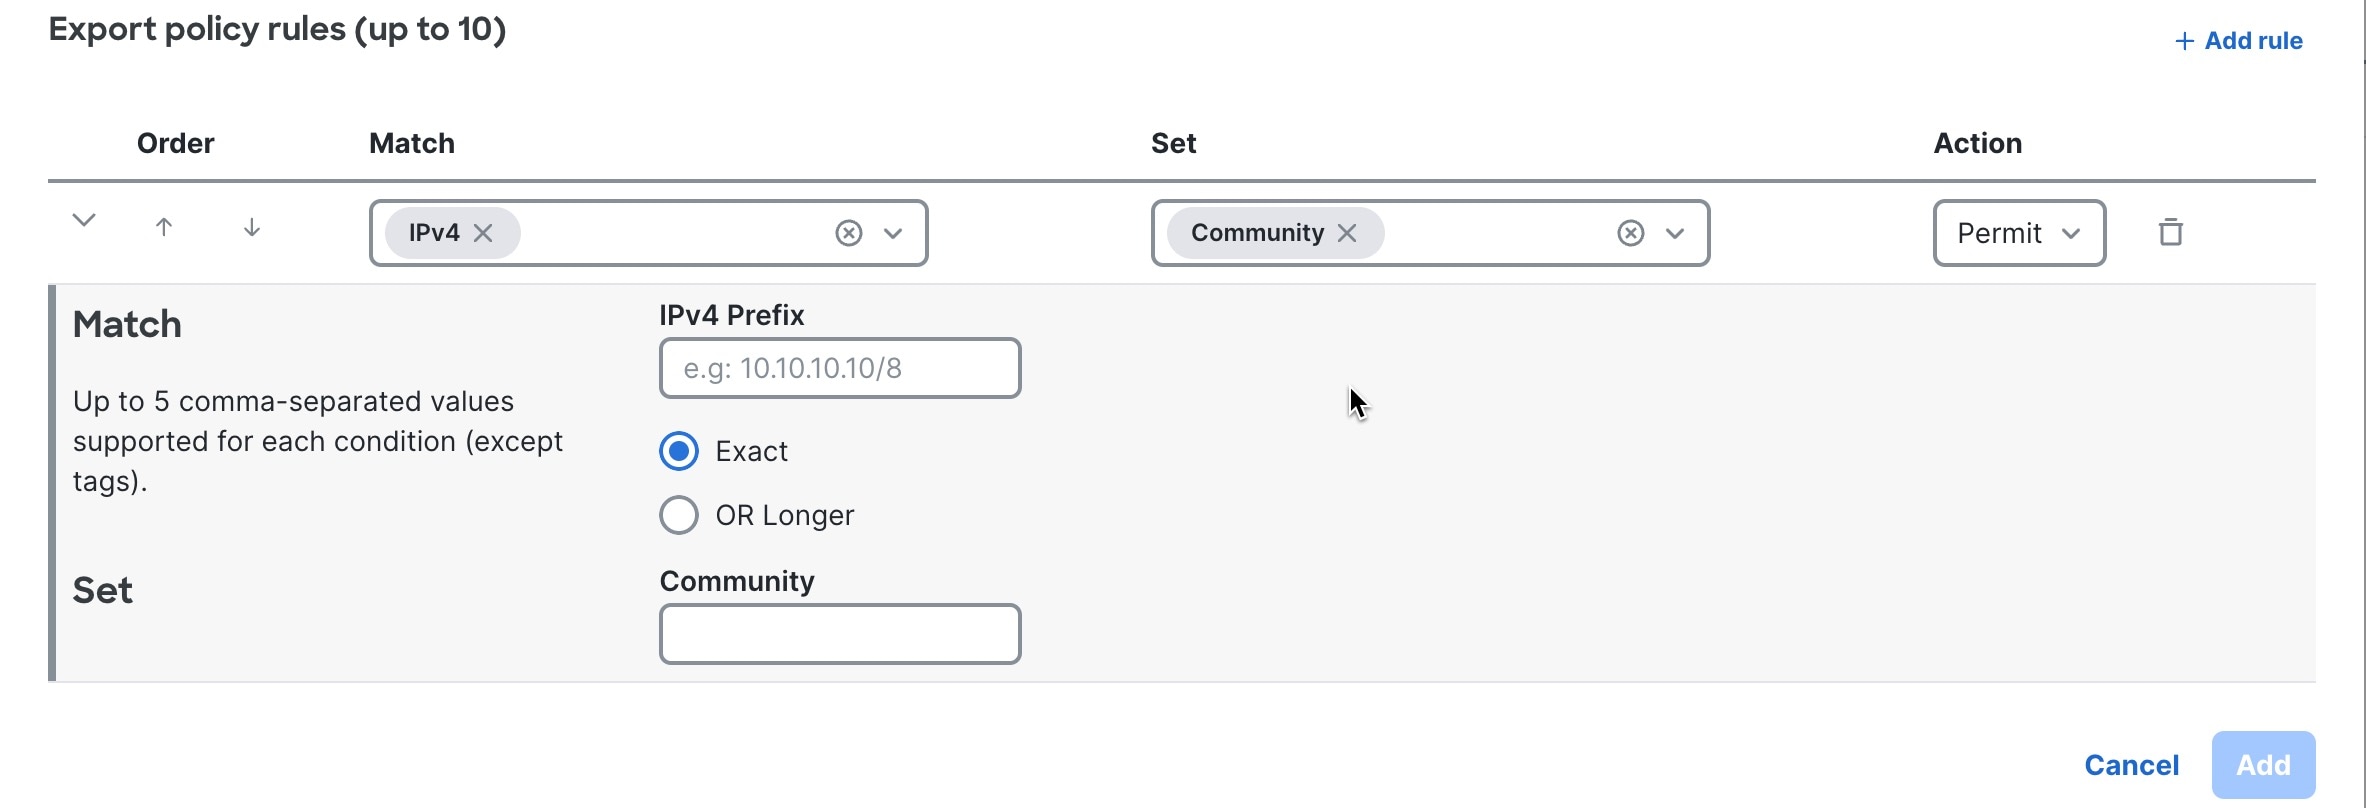
Create a BGP export policy
Follow these steps to create a BGP export policy.
Step 1 | Choose Fabrics. |
Step 2 | On the Fabrics page, click the fabric you want to configure. |
Step 3 | In the Attachments area, choose . A list of BGP export policies appears. If no policies have been added, the list contains only the Default export policy. |
Step 4 | Click + New Policy. 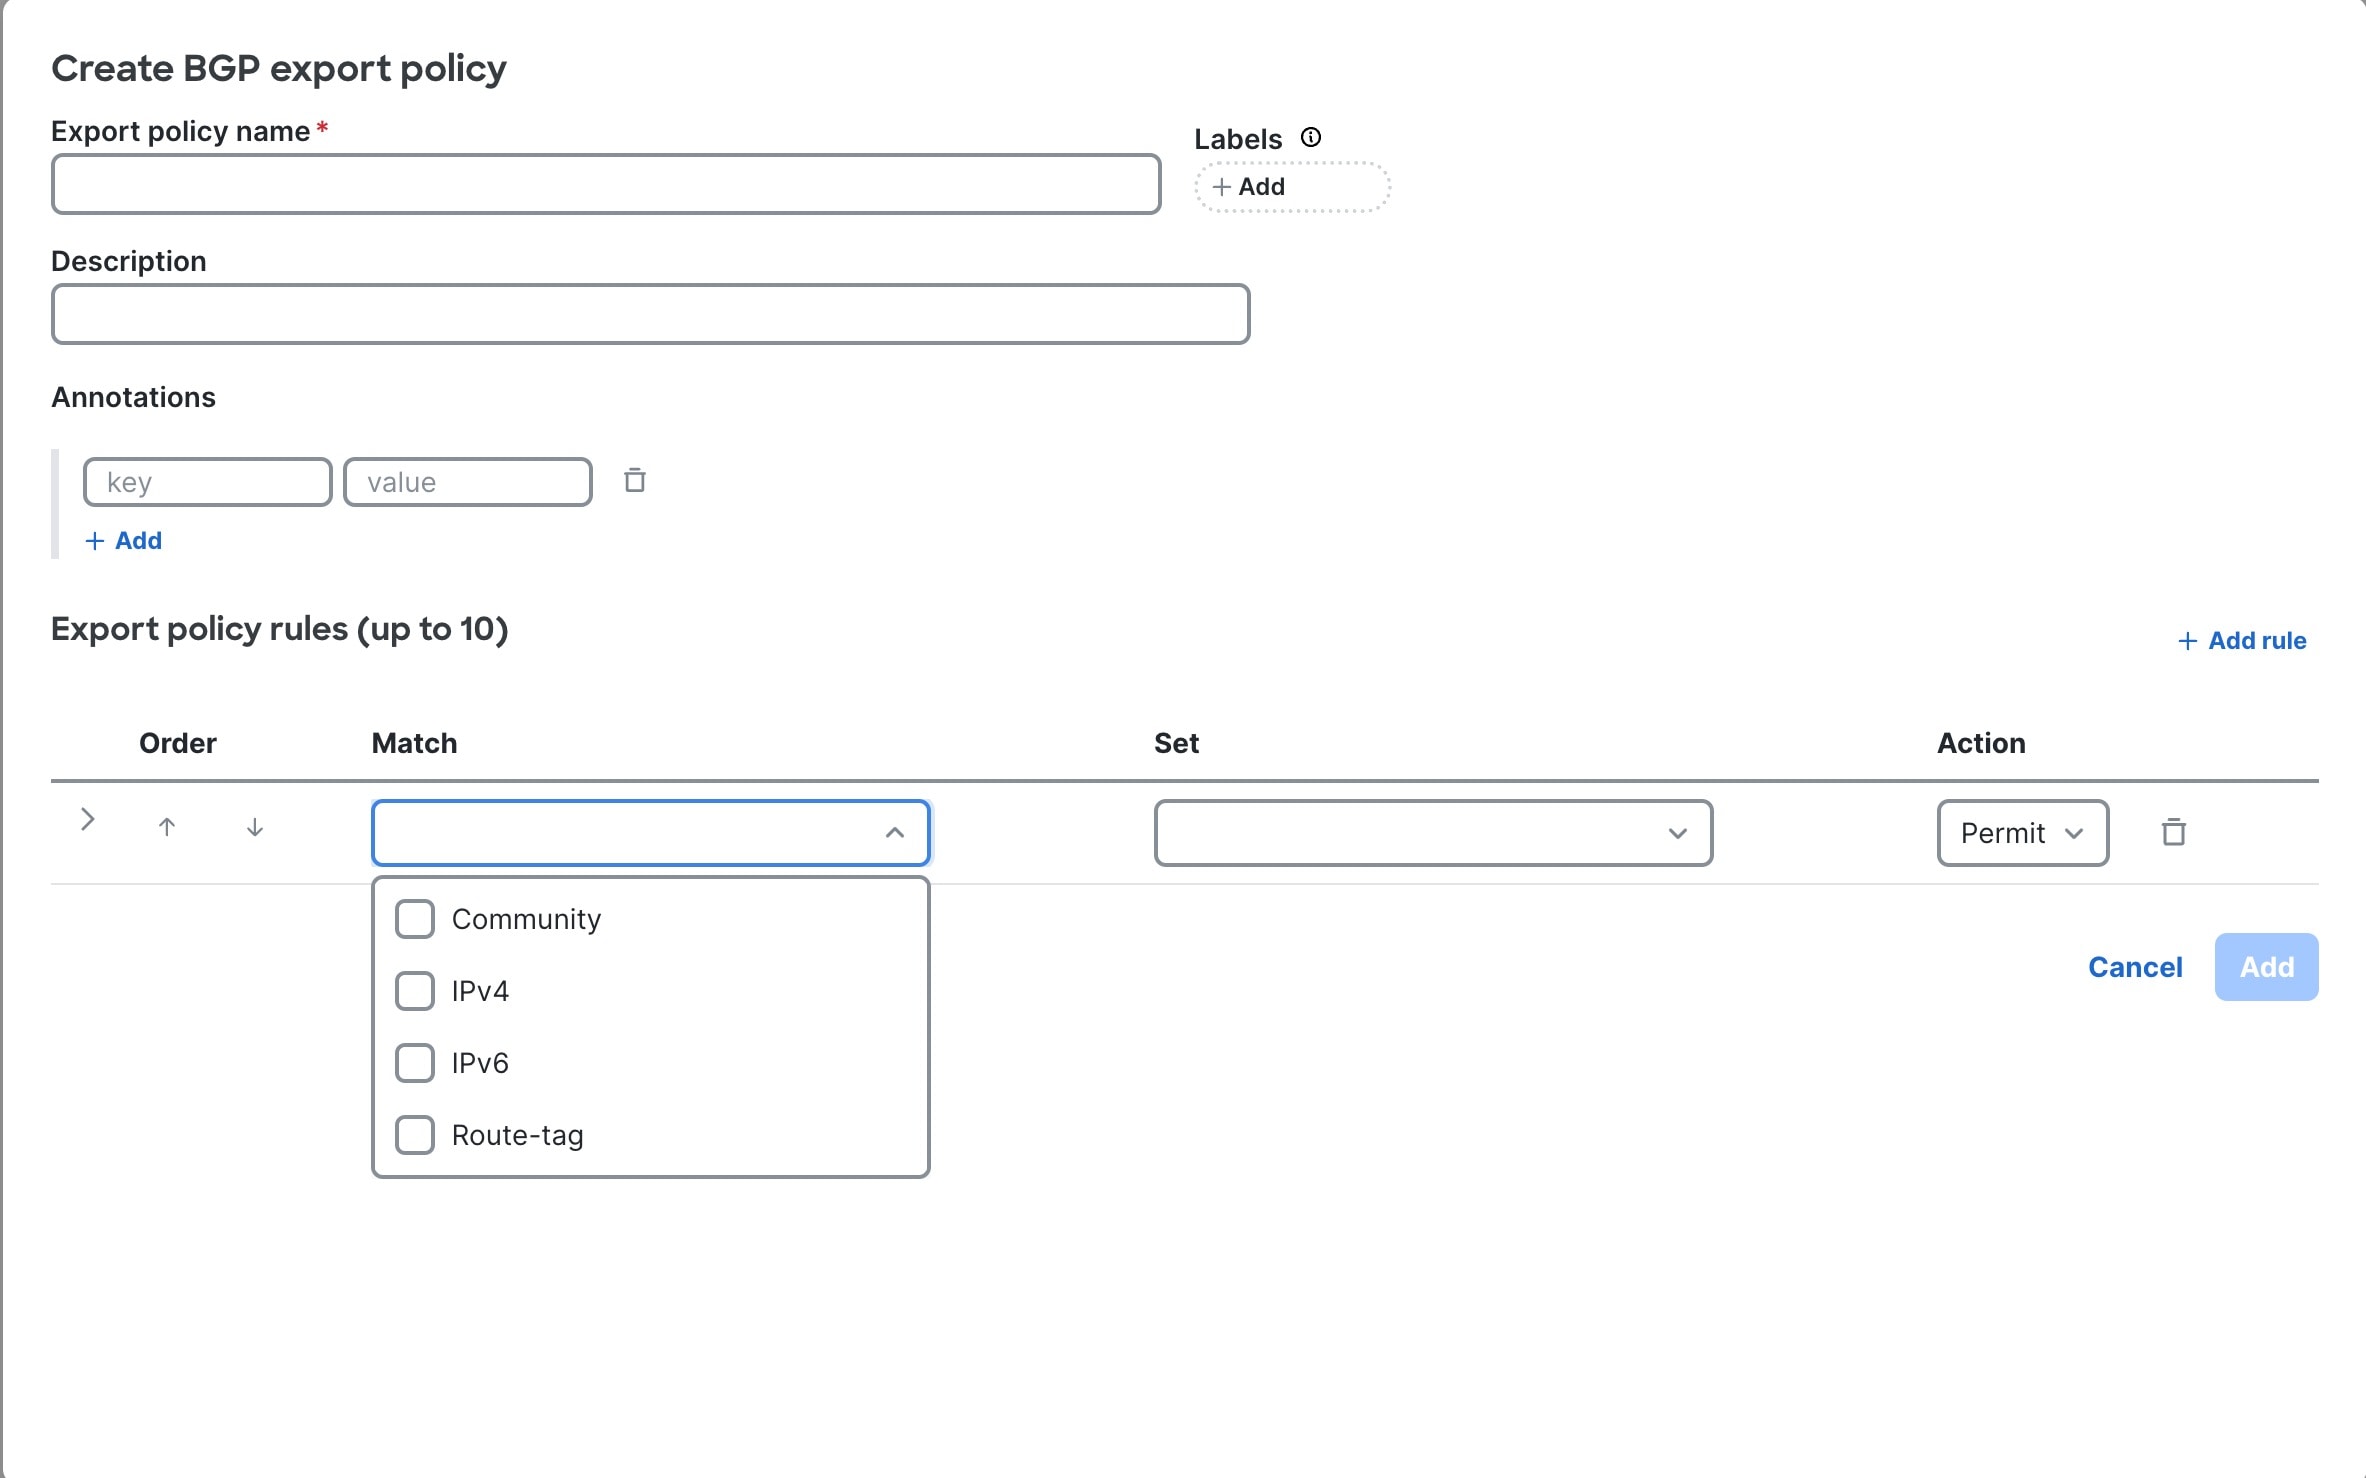 |
Step 5 | Follow these substeps to create a BGP export policy.
|
Finish and commit your changes
Your changes are not applied to the fabric until you review, commit, and push them.
 Note
NoteFor a more detailed description of this procedure, see "Workflow for making changes to the fabric" in Cisco Nexus Hyperfabric—Getting Started.
Follow these steps to finish and commit your changes.
Step 1 | Click Review configuration  |
Step 2 | Verify your changes in the review list. |
Step 3 | Click Comment and push. |
Step 4 | In the Comment before pushing configuration dialog box, enter the reason for the change. |
Step 5 | Click Push configuration. |