デバイスに基本ネットワーク設定を行い、に登録できるように、手動プロビジョニング用の Cisco Secure Firewall 1210/20 初期セットアップを完了する方法。
Cisco Secure Firewall Device Manager または CLI を使用して、ファイアウォールの初期設定を実行します。
Cisco Secure Firewall 1210/20 Threat Defense スタートアップガイド:ローカル管理ネットワーク上の Firewall Management Center
デバイスに基本ネットワーク設定を行い、に登録できるように、手動プロビジョニング用の Cisco Secure Firewall 1210/20 初期セットアップを完了する方法。
Cisco Secure Firewall Device Manager または CLI を使用して、ファイアウォールの初期設定を実行します。
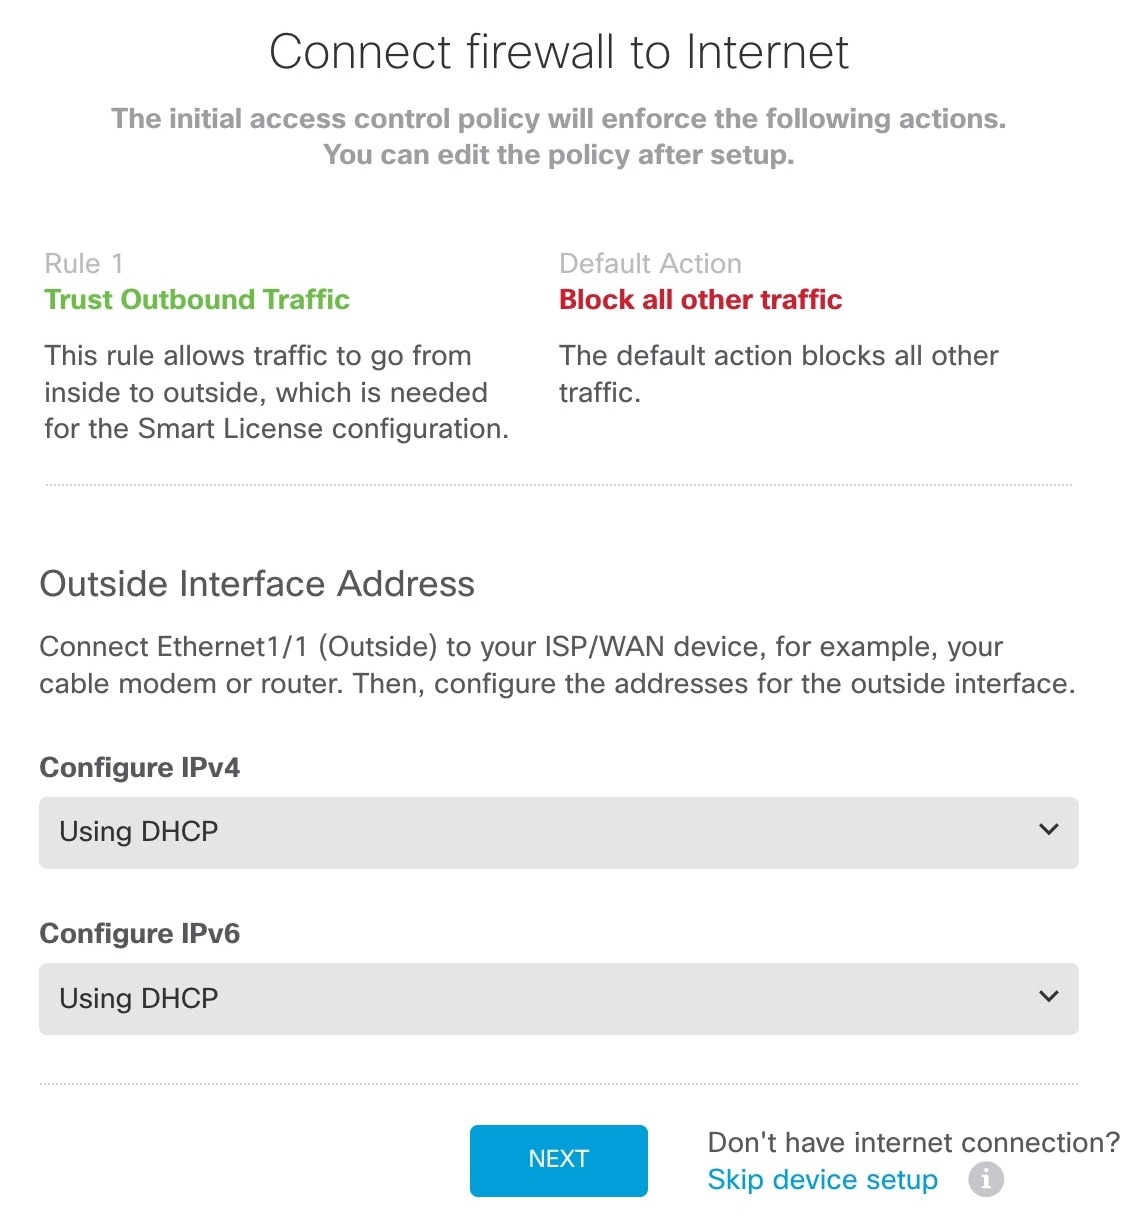
この方法を使用すると、ファイアウォールを登録した後、管理インターフェイスに加えて次のインターフェイスが事前設定されます。
イーサネット 1/1:「外部」、DHCP からの IP アドレス、IPv6 自動設定
VLAN1:「内部」、192.168.95.1/24
デフォルトルート:外部インターフェイスで DHCP を介して取得
追加インターフェイス:Firewall Device Manager からのインターフェイス設定はすべて保持されます。
他の設定(内部の DHCP サーバー、アクセス コントロール ポリシー、セキュリティゾーンなど)は保持されません。
| 1. | コンピュータを内部インターフェイス(Ethernet 1/2 ~ 1/8 または Cisco Secure Firewall 1220 の場合は 1/2 ~ 1/10)に接続します。 |
|
| 2. | Firewall Device Manager にログインします。
|
|
| 3. | セットアップウィザードを使用します。 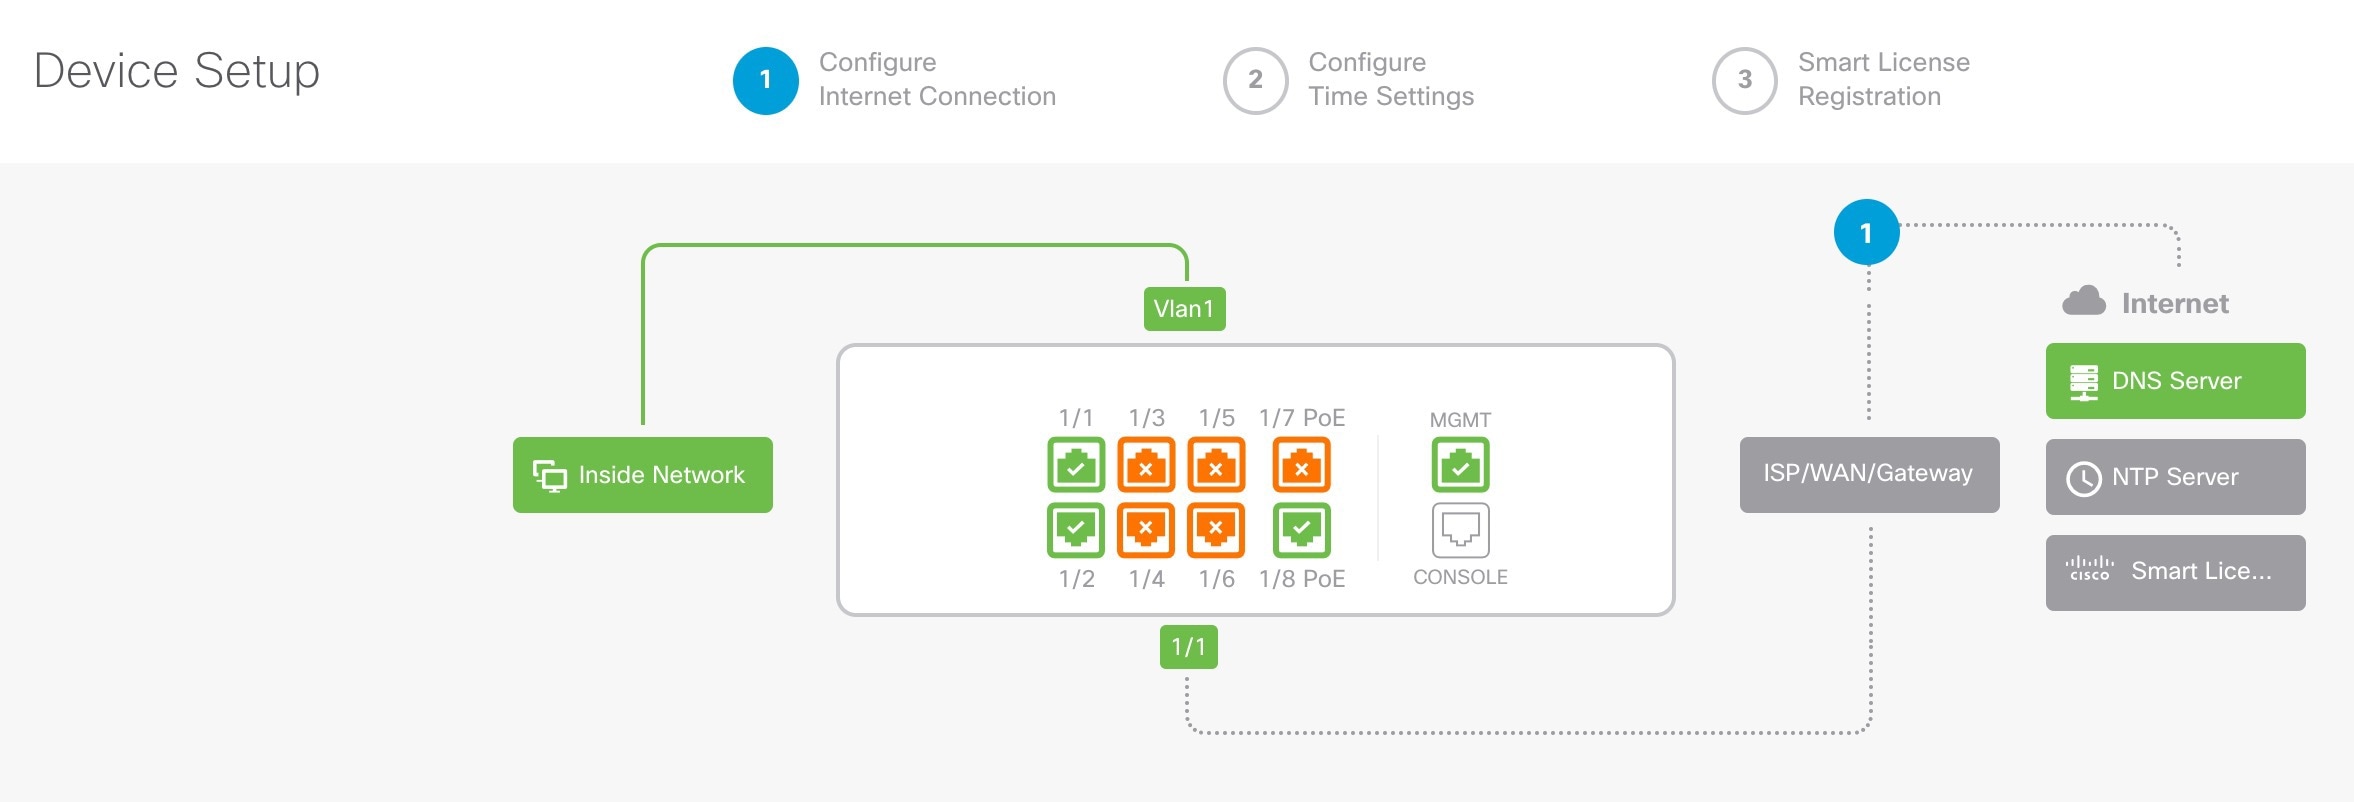
|
|
| 4. | (任意) 管理インターフェイスに静的 IP アドレスを設定します。[デバイス(Device)] > [インターフェイス(Interfaces)] の管理インターフェイスを参照してください。 |
|
| 5. | 追加のインターフェイスを設定する場合は、[デバイス(Device)] を選択し、[インターフェイス(Interface)] のサマリーにあるリンクをクリックします。 |
|
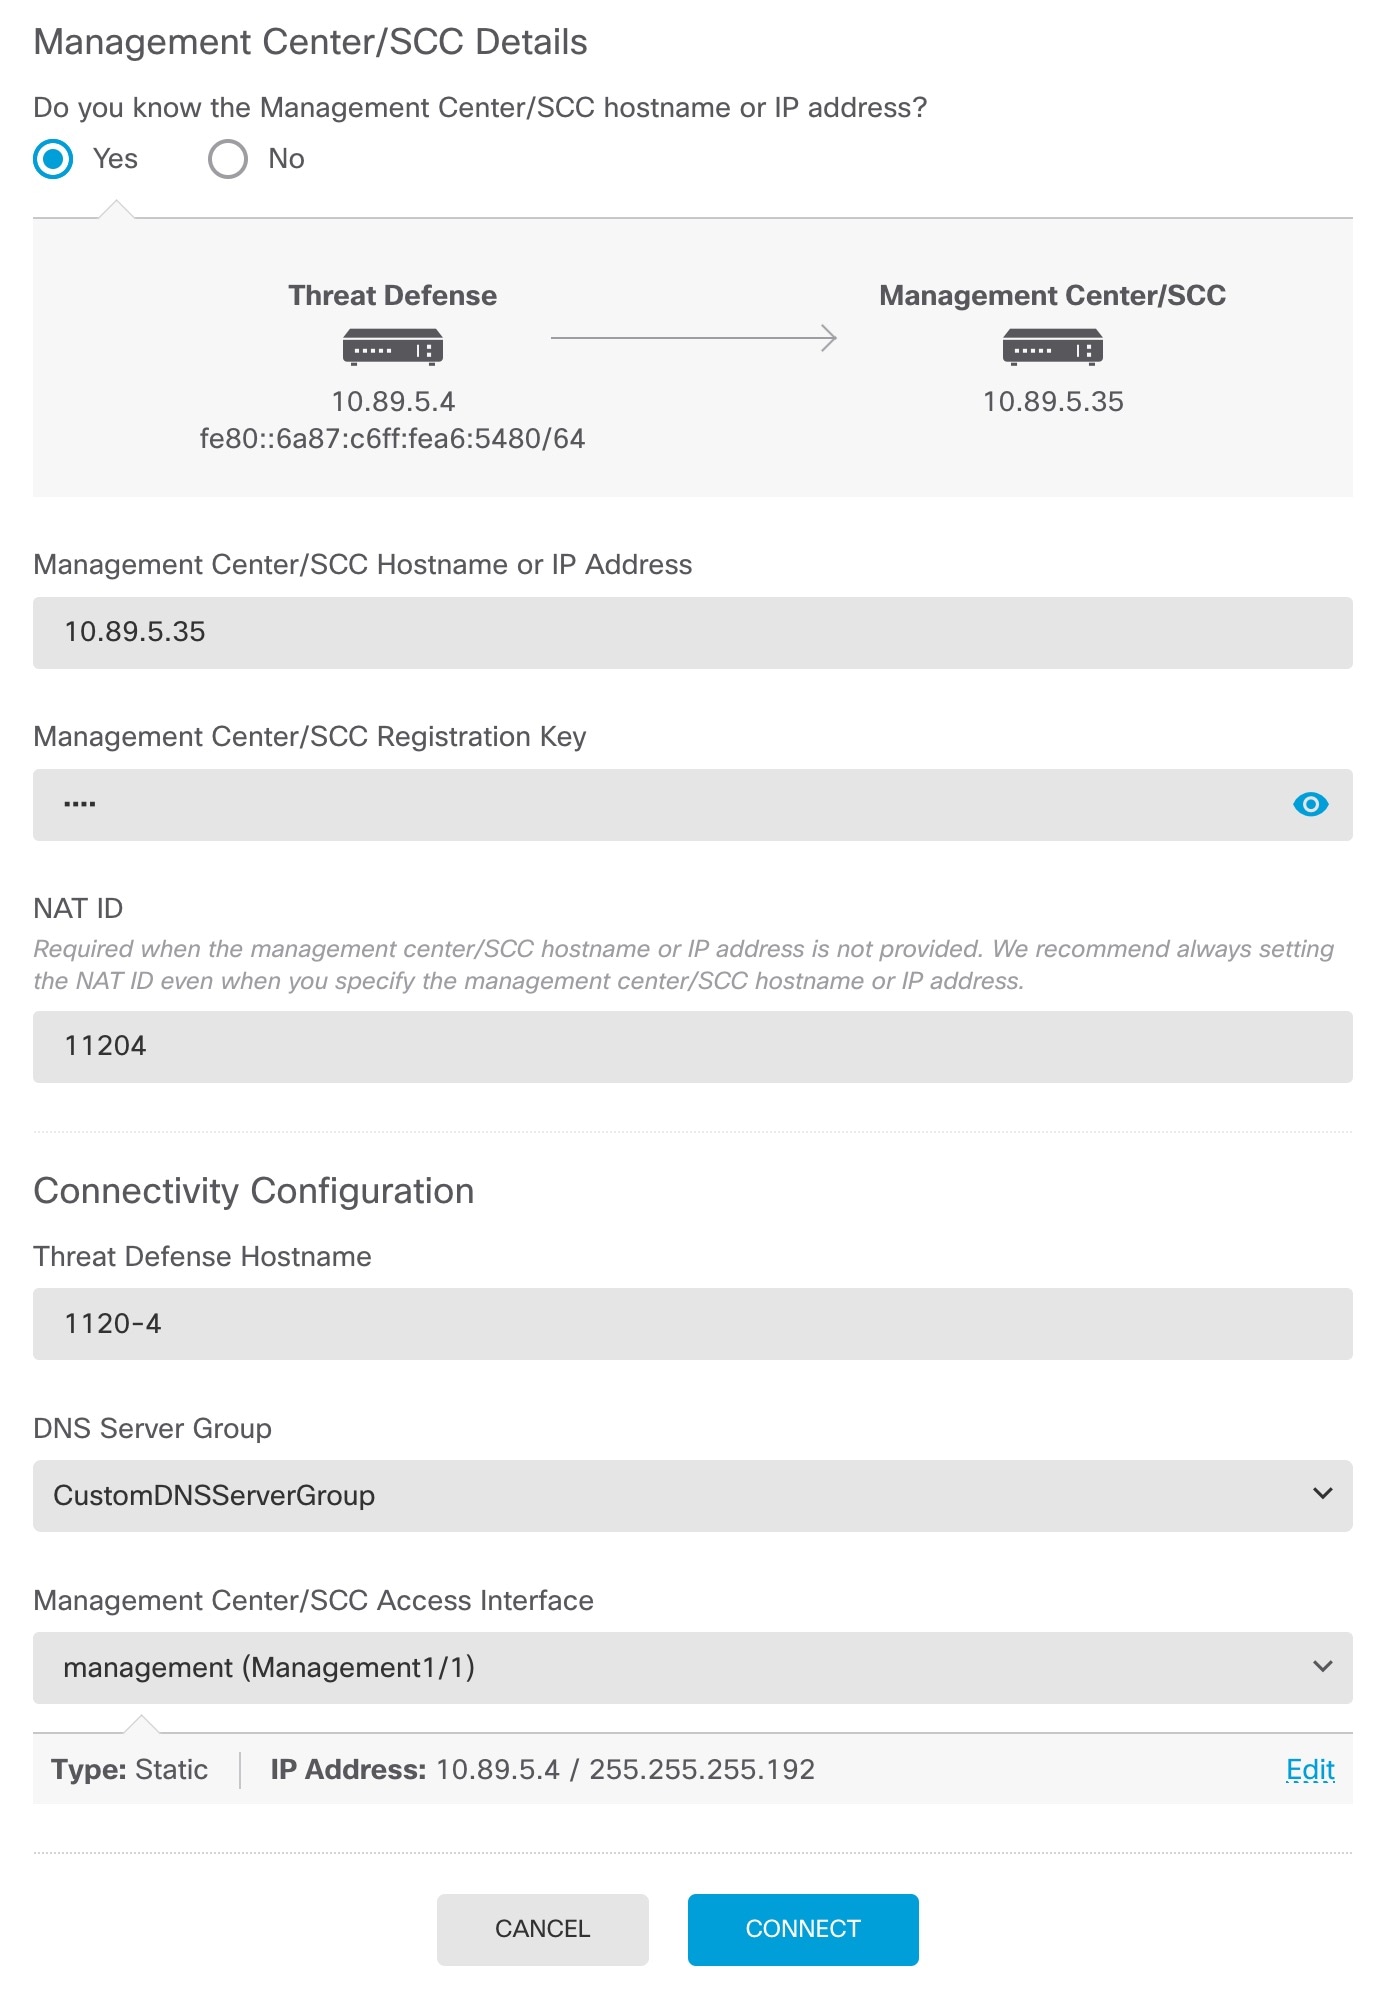
| 6. | の順に選択し、[続行(Proceed)] をクリックして Security Cloud Control に登録します。 [Management Center/SCC/Details] を設定します。
|
|
| 7. | [接続の設定(Connectivity Configuration)] を設定します。 |
|
| 8. | [接続(Connect)] をクリックします。 [登録ステータス(Registration Status)] ダイアログボックスに、Security Cloud Control 登録の現在のステータスが表示されます。 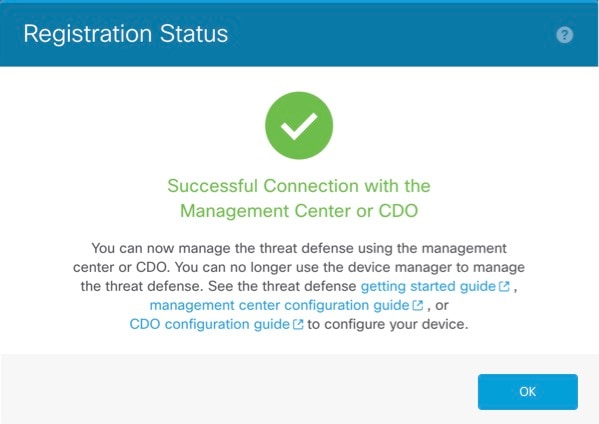
|
|
| 9. | ステータス画面で [Saving Management Center/ Registration Settings] の手順を実行したら Security Cloud Control に移動し、ファイアウォールを追加します。を参照してくださいFirewall Management Center でのファイアウォールの登録。 |
CLI セットアップスクリプトを使用して、専用の管理 IP アドレス、ゲートウェイ、およびその他の基本ネットワーク設定を行います。
| 1. | コンソールポートに接続して Firewall Threat Defense CLI にアクセスします。Firewall Threat Defense CLI へのアクセスを参照してください。 |
|
| 2. | 管理インターフェイスの設定用の CLI セットアップスクリプトを完了します。
ガイダンス:これらのタイプのアドレスの少なくとも 1 つについて y を入力します。 ガイダンス:no と入力して を使用します。 |
|
| 3. | を指定します。 configure manager add {hostname | IPv4_address | IPv6_address | DONTRESOLVE} reg_key nat_id
例: |