Cisco Application Policy Infrastructure Controller エンタープライズ モジュール ハードウェア インストレーション ガイド
偏向のない言語
この製品のマニュアルセットは、偏向のない言語を使用するように配慮されています。このマニュアルセットでの偏向のない言語とは、年齢、障害、性別、人種的アイデンティティ、民族的アイデンティティ、性的指向、社会経済的地位、およびインターセクショナリティに基づく差別を意味しない言語として定義されています。製品ソフトウェアのユーザーインターフェイスにハードコードされている言語、RFP のドキュメントに基づいて使用されている言語、または参照されているサードパーティ製品で使用されている言語によりドキュメントに例外が存在する場合があります。シスコのインクルーシブランゲージに対する取り組みの詳細は、こちらをご覧ください。
翻訳について
このドキュメントは、米国シスコ発行ドキュメントの参考和訳です。リンク情報につきましては、日本語版掲載時点で、英語版にアップデートがあり、リンク先のページが移動/変更されている場合がありますことをご了承ください。あくまでも参考和訳となりますので、正式な内容については米国サイトのドキュメントを参照ください。
- Updated:
- 2017年6月27日
章のタイトル: Cisco APIC-EM アプライアンスの設置および設定
この章では、Cisco APIC-EM ISO イメージをアプライアンスにインストールして設定する方法について説明します。
- ラックへの Cisco APIC-EM シリーズ アプライアンスの設置
- Cisco APIC-EM リリース 1.1.x ISO イメージのダウンロード
- Cisco APIC-EM シリーズ アプライアンスへのリリース 1.1.x ソフトウェアのインストール
- Cisco APIC-EM シリーズ アプライアンスの設定の前提条件
- Cisco APIC-EM の設定ウィザード パラメータ
- CIMC を使用した Cisco APIC-EM シリーズ アプライアンスでのリリース 1.1.x の設定
ラックへの Cisco APIC-EM シリーズ アプライアンスの設置
安全に関する注意事項、設置場所の要件、および Cisco APIC-EM シリーズ アプライアンスを設置する前に確認する必要があるガイドラインについては、ラックへの Cisco APIC-EM シリーズ アプライアンスの設置を参照してください。
Cisco APIC-EM リリース 1.1.x ISO イメージのダウンロード
Cisco APIC-EM リリース 1.1.x ISO イメージは Cisco.com からダウンロードすることができます。
| ステップ 1 |
次の URL アドレスにアクセスします。 このリンクにアクセスするには、有効な Cisco.com ログイン クレデンシャルが事前に必要です。 |
| ステップ 2 |
[この製品のソフトウェアのダウンロード(Download Software for this Product)] をクリックします。 ネットワークの安全な場所に ISO ファイルをダウンロードする手順に進みます。 |
Cisco APIC-EM シリーズ アプライアンスへのリリース 1.1.x ソフトウェアのインストール
ISO イメージをダウンロードした後、次のいずれかの方法を使用して Cisco APIC-EM シリーズ アプライアンスでリリース 1.1.x の新規インストールを実行できます。
-
CIMC リモート管理ユーティリティを使用して ISO イメージをインストールします。
このリモート インストールを行うには、CIMC を設定する必要があります。
-
USB フラッシュ ドライブを使用して ISO イメージをインストールします。
-
USB ポートと外付けの DVD ドライブを使用して ISO をインストールします。
 (注) |
Cisco APIC-EM シリーズ アプライアンスが以前のバージョンのコントローラ ソフトウェアを実行している場合は、『Release Notes for the Cisco Application Policy Infrastructure Controller Enterprise Module』で説明されているように、GUI を使用した次のアップグレード手順に従ってリリース 1.1.x にアップグレードできます。特定のリリース バージョンの Cisco APIC-EM を他のバージョンにアップグレードする場合、この手順のみがサポートされています。既存の Cisco APIC-EM シリーズ アプライアンスのイメージを再作成してリリース 1.1.x へのアップグレードを実行する方法は、現在サポートされていません。 |
(注) |
USB フラッシュ デバイスを使用するか、USB ポートで外付けの DVD を使用してリリース 1.1.x をインストールする場合、CIMC の設定は任意です。リモート インストールを行わない場合は、これらのオプションのいずれかを選択します。 |
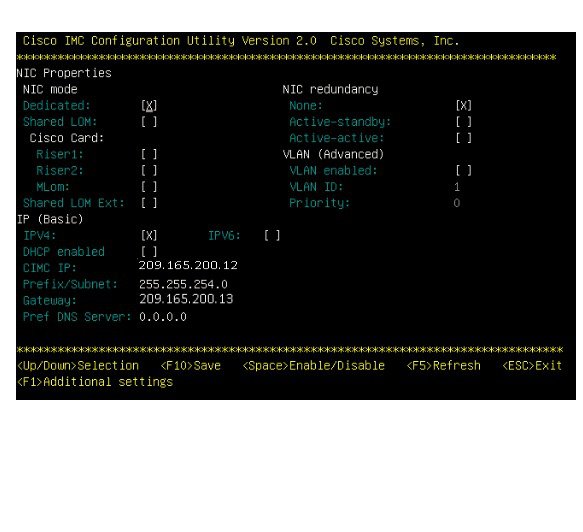
CIMC の設定
CIMC を使用して、Cisco APIC-EM シリーズ アプライアンスに対するすべての操作を実行できます。これを行うには、最初に Web ベースのブラウザから CIMC にアクセスするための IP アドレスと IP ゲートウェイを設定する必要があります。
次の作業
CIMC を使用して、Cisco APIC-EM シリーズ アプライアンスに Cisco APIC-EM リリース 1.1.x をインストールします。この手順の詳細については、CIMC を使用した Cisco APIC-EM シリーズ アプライアンスでのリリース 1.1.x の設定を参照してください。
ブート可能な USB ドライブの作成
Cisco APIC-EM アプライアンスのブート可能な USB ドライブを作成するには、次の手順に従います。
(注) |
例として、この手順では Rufus フリーウェア ユーティリティ(バージョン 2.6.818)を使用してブート可能な USB ドライブを作成します。Rufus フリーウェア ユーティリティをダウンロードするための URL は次の場所にあります: https://rufus.akeo.ie/ |
ブート可能な USB ドライブには少なくとも 8 GB の最小容量が必要です。
次の作業
コントローラをインストールするサーバまたはアプライアンスに、ブート可能な USB ドライブを挿入します。
Cisco APIC-EM シリーズ アプライアンスの設定の前提条件
Cisco APIC-EM シリーズ アプライアンスには、最新の Cisco APIC-EM ソフトウェアが事前インストールされています。
手順を進める前に、導入環境に関する以下のすべての構成設定が分かっていることを確認します。
-
ホストネーム
-
ギガビット イーサネット 0(eth0)インターフェイスの IP アドレス
-
ネットマスク
-
デフォルト ゲートウェイ
-
ドメイン ネーム システム(DNS)ドメイン
-
プライマリ ネーム サーバ(Primary name server)
-
プライマリ ネットワーク タイム プロトコル(NTP)サーバ
(注)
導入に 3 台の NTP サーバを使用することを推奨します。
-
HTTPS プロキシ サーバ(HTTPS proxy server)
-
コントローラ GUI ユーザ名
-
コントローラ GUI パスワード
-
Linux(Grapevine)ユーザ名
-
Linux(Grapevine)パスワード
(注) |
コントローラ(GUI)管理ユーザと Linux(Grapevine)管理ユーザの違いについては、管理ユーザ権限の違いを参照してください。 |
Cisco APIC-EM の設定ウィザード パラメータ
Cisco APIC-EM ソフトウェアの設定が開始されると、インタラクティブな設定ウィザードにより、コントローラの設定に必要なパラメータを入力するよう要求されます。
(注) |
設定ウィザードの実行前、および導入環境で Cisco APIC-EM ホストがリブートされたときは、DNS および NTP サーバが到達可能であることを確認してください。 |
| 設定ウィザードのプロンプト |
説明 |
例 |
||
|---|---|---|---|---|
| ホスト IP アドレス(Host IP address) |
ホストの有効な IPv4 アドレスでなければなりません。 この IP アドレスはホスト上のネットワーク アダプタ(eth0)に対して使用され、外部ネットワークに接続します。ネットワーク アダプタが複数ある場合は、複数の IP アドレスを利用できます。 |
10.0.0.12 |
||
| (任意)仮想 IP アドレス((Optional) Virtual IP address) |
有効な IPv4 アドレスでなければなりません。 この仮想 IP アドレスは、ホスト上のネットワーク アダプタ(eth0)に対して使用されます。マルチホスト導入を設定する場合は、仮想 IP アドレスのみを設定する必要があります。 |
10.12.13.14 |
||
| ネットマスク IP アドレス(Netmask IP address) |
有効な IPv4 ネットマスクでなければなりません。 |
255.255.255.0 |
||
| デフォルトのゲートウェイ IP アドレス(Default Gateway IP address) |
デフォルト ゲートウェイの有効な IPv4 アドレスでなければなりません。 |
10.12.13.1 |
||
| プライマリ サーバ(Primary server) |
プライマリ サーバの有効な IPv4 アドレスでなければなりません。 |
10.15.20.25
|
||
| プライマリ NTP サーバ(Primary NTP server) |
ネットワーク タイム プロトコル(NTP)サーバの有効な IPv4 アドレスまたはホスト名である必要があります。 |
10.12.13.10 単一の NTP プライマリ サーバの 1 つの IP アドレスを入力するか、複数の NTP サーバの複数の IP アドレスをスペースで区切って入力します。導入には 3 台の NTP サーバを設定することを推奨します。 |
||
| 別の NTP サーバの追加/編集(Add/Edit another NTP server) |
有効な NTP ドメインでなければなりません。 |
10.12.13.11 複数の NTP サーバを設定できます。
|
||
| HTTPS プロキシ サーバ(HTTPS proxy server) |
ポート番号を持つ HTTPS プロキシの有効な IPv4 アドレスでなければなりません。 |
https://209.165.200.11:3128 |
||
| 管理者ユーザ名(Admin Username) |
Cisco APIC-EM コントローラへの GUI アクセスに使用される管理者ユーザ名を特定します。 3 ~ 8 文字の長さで、有効な英数字(A ~ Z、a ~ z、または 0 ~ 9)で構成されたユーザ名が推奨されます。 |
admin2780 |
||
| 管理者パスワード(Admin Password) |
Cisco APIC-EM コントローラへの GUI アクセスに使用される管理者パスワードを特定します。このパスワードにはデフォルトがないため、作成する必要があります。パスワードは次の要件を満たす必要があります。 |
MyIseYPass2 |
||
| Linux ユーザ名(Linux Username) |
Grapevine root およびクライアントへの CLI アクセスに使用される Linux(Grapevine)ユーザ名を特定します。 |
デフォルトは「grapevine」で、変更できません。 |
||
| Linux パスワード(Linux Password) |
Grapevine root およびクライアントへの CLI アクセスに使用される Linux(Grapevine)パスワードを特定します。このパスワードにはデフォルトがないため、作成する必要があります。パスワードは次の要件を満たす必要があります。 |
MyGVPass01 |
CIMC を使用した Cisco APIC-EM シリーズ アプライアンスでのリリース 1.1.x の設定
アプライアンスの CIMC を設定したら、CIMC を使用して、Cisco APIC-EM シリーズ アプライアンスを管理できます。CIMC を使用して、BIOS の設定を含むすべての操作を実行できます。
このマニュアルで推奨されている手順に従って、アプライアンスを接続および電源投入していることを確認します。
アプライアンスで CIMC を設定したことを確認します。この手順の詳細については、CIMC の設定 を参照してください。
CIMC にアクセスするクライアント マシンに Cisco APIC-EM リリース 1.1.x ISO イメージがあること、または、インストールのイメージがあるブート可能な USB があることを確認します。
Cisco APIC-EM プログラム パラメータ情報が利用可能で、導入の要件(NTP サーバなど)が満たされていることを確認します。
| ステップ 1 |
アプライアンス管理用の CIMC に接続します。 ネットワーク インターフェイス カード(NIC)モードの設定で選択されたポートを使用して LAN からアプライアンスにイーサネット ケーブルを接続します。[アクティブ-アクティブ(active-active)] および [アクティブ-パッシブ(active-passive)] の [NIC 冗長化(NIC redundancy)] 設定では、2 つのポートに接続する必要があります。 |
| ステップ 2 |
ブラウザと CIMC の IP アドレスを使用して CIMC セットアップ ユーティリティにログインします。 IP アドレスは、事前に行った CIMC 設定に基づきます。 サーバのデフォルトのユーザ名は admin です。デフォルト パスワードは password です。 |
| ステップ 3 | CIMC GUI で [KVM コンソールの起動(Launch KVM Console)] をクリックします。 |
| ステップ 4 | CIMC クレデンシャルを使用して KVM コンソールにログインします。 |
| ステップ 5 | [KVM コンソール(KVM Console)] メニュー バーの [仮想メディア(Virtual Media)] をクリックします。 |
| ステップ 6 | [仮想メディア(Virtual Media)] ドロップダウン メニューで [仮想デバイスのアクティブ化(Activate Virtual Devices)] をクリックします。 |
| ステップ 7 | [仮想メディア - CD/DVD のマップ(Virtual Media - Map CD/DVD)] ウィンドウで Cisco APIC-EM ISO イメージを参照します。 |
| ステップ 8 |
[ドライブ/イメージ ファイル(Drive/Image File)] フィールドに Cisco APIC-EM ISO イメージが表示されたら、[デバイスのマップ(Map Device)] ボタンをクリックします。 このウィンドウで [読み取り専用(Read Only)] チェックボックスをオンにする必要があります。 |
| ステップ 9 |
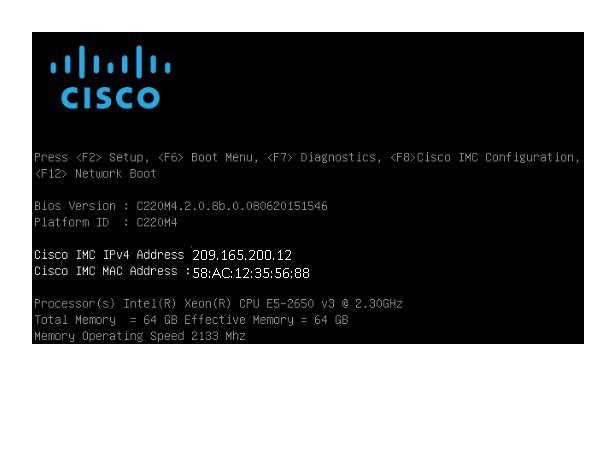
[マクロ(Macros)] > [静的マクロ(Static Macros)] > [Ctrl-Alt-Del] を選択し、ISO イメージを使用して Cisco APIC-EM シリーズ アプライアンスを起動します。次の図に示すような画面が表示されます。
|
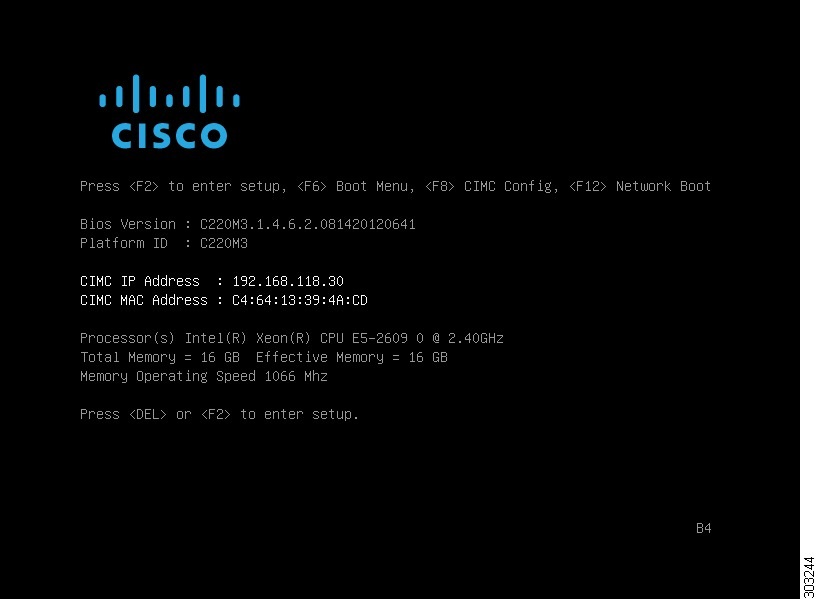
| ステップ 10 |
F6 を押して、[Boot] メニューを起動します。次のような画面が表示されます。
|
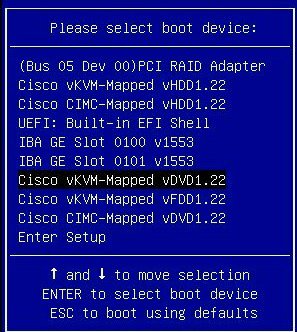
| ステップ 11 |
マッピングした DVD を選択して、Enter を押します。 Enter を押すと、Cisco APIC-EM ISO ソフトウェアおよびファイルがアプライアンスにインストールされます。 これらのファイルがインストールされると、Ubuntu の画面が短時間表示されます。次に、Cisco APIC-EM 設定ウィザードが起動します。 |
| ステップ 12 |
ウィザードを使用して Cisco APIC-EM の設定を進めます。 設定ウィザードが起動しない場合は、config_wizard コマンドを入力して設定プロセスを開始します。 設定ウィザードのプロセスの詳細については、『Cisco Application Policy Infrastructure Controller Enterprise Module Deployment Guide, Release 1.1. x』の「Configuring Cisco APIC-EM as a Single Host Using the Wizard」の項を参照してください。 設定ウィザードによる作業を完了してリブートすると、Cisco APIC-EM GUI の [ログイン(Login)] ウィンドウが表示されます。これで Cisco APIC-EM を使用することができます。 |
次の作業
Cisco APIC-EM GUI の [ログイン(Login)] ウィンドウで、Cisco APIC-EM ユーザ インターフェイスにアクセスするための Web ベースの管理ログイン クレデンシャル(ユーザ名およびパスワード)を求めるプロンプトが表示されます。Web インターフェイスへの最初のアクセスでは、セットアップ プロセスで定義した GUI 管理ユーザのユーザ名とパスワードを使用できます。
Cisco APIC-EM ユーザ インターフェイスにログインしたら、ディスカバリ クレデンシャル、SNMP 値、および証明書などのコントローラ設定を行うことができます。コントローラの設定については、『Cisco Application Policy Infrastructure Controller Enterprise Module Deployment Guide, Release 1.1. x』の「Configuring the Cisco APIC-EM Settings」の章を参照してください。
 フィードバック