Manage Desktop Layout

You can define the layout of the Finesse desktop on the Desktop Layout tab.


Important


Requirements, such as processor speed and RAM, for clients that access the Finesse desktop can vary. Desktops that receive events for more than one agent (such as agent and supervisor desktops running Live Data reports that contain information about other agents and skill groups) require more processing power than desktops that receive events for a single agent.

Factors that determine how much power is required for the client include, but are not limited to, the following:

  • Contact center traffic

  • Additional integrated gadgets in the desktop (such as Live Data reports or third-party gadgets)

  • Other applications that run on the client and share resources with the Finesse desktop


Gadgets and Components

Gadgets

Cisco Finesse is an OpenSocial gadget, which is an XML document that defines metadata for an OpenSocial Gadget container. The gadgets are applications that are placed within the Cisco Finesse desktop. This helps administrator to provide access to the contact center agents for all the applications that is required to service calls inside a single application.

Cisco Finesse comes with default gadgets such as, the team performance gadget, call control gadget, and call popover. JavaScript library is available for any customers with specific requirements that are not available out of the box.

Gadgets are listed in the desktop layout using the <gadget> tag.


Note


Finesse Desktop is tested to perform well with an average of 20 gadgets per Desktop (across all tabs), over a sign in period of 8 minutes for 2000 users (agents and supervisors). When you increase the total number of gadgets that are configured on the Desktop, the CPU consumption marginally increases during users sign in. When all the configured gadgets are enabled for all the users, it impacts the Finesse server. Higher number of gadgets will also need more browser memory and network bandwidth.

If considerably larger number of gadgets are configured or if more users sign in (more than the tested number of users) in a short time frame, you must monitor the CPU consumption and network bandwidth during users sign in and ensure that the end-point devices have enough memory.

Failover uses optimization to sign in the users quickly and is not considered the same as a new browser sign in.


Third-party gadgets are hosted on the Cisco Finesse server using the 3rdpartygadget web application or on an external web server. Gadgets can make REST requests to services hosted on external servers using the Cisco Finesse JavaScript Library API. To avoid browser cross-origin issues, REST requests are proxied through the backend Shindig web application. Third-party gadgets must implement their own authentication mechanisms for third-party REST services.

For more information about gadgets, see https://developer.cisco.com/docs/finesse/.

Components

Components are simple scripts that are loaded into the desktop directly at predefined positions as directed by the layout, without an enclosing frame and its document.

Components are introduced in the desktop to overcome a few rendering limitations and performance considerations inherent to gadgets.

The <component> tag lists the components in the desktop layout. Currently, the layout validations prevent creating custom components. Hence, default components are allowed in the desktop layouts. The default desktop functionalities are currently registered as components to provide flexibility and to reduce the load on the server.
Finesse Desktop Layout XML

The Finesse Layout XML defines the layout of the Finesse desktop, and the gadgets and components displayed on the desktop.

Use the Manage Desktop Layout gadget to upload an XML layout file to define the layout of the Finesse desktop for agents and supervisors.

Actions on the Manage Desktop Layout gadget are as follows.

  • Edit the code using any of the following editors:

    • Text Editor

    • XML Editor

  • View Default Layout - Displays the Cisco Finesse default layout.

  • Restore Default Layout - Restores the Cisco Finesse desktop to the default layout.

  • Save - Saves your configuration changes.

  • Revert - Retrieves and applies the most recently saved desktop layout.

Default Layout XML

The Manage Desktop Layout supports the following types of editors:
  • Text Editor—A plain text editor. It is the default editor. You can use the Expand All option to see all the code details and Search text box to refine your search results.

  • XML Editor—An XML editor.


    Note


    • You cannot add or edit comments (<!-- and -->) in the XML Editor.

    • In this document, all the examples that are related to desktop layout are applicable for text editor.


Both the editors support the following features:

  • Expand and collapse option.

  • Syntax highlights and color code for the visual indication.

  • Auto-complete suggestions and hints for valid elements in the tags.

The Cisco Finesse default desktop layout XML for Unified CCE and Packaged CCE contains optional gadgets and notes. The notes describe how to modify the layout for your deployment type.

Optional Live Data gadgets in the layout XML are commented out. After you install and configure Live Data, remove the comment tags from the reports that you want to appear on the desktop.

Following are the updates available in the default layout XML for Cisco Finesse desktop:

  • Sample configurations for customizing desktop properties are added to the default layout (Desktop Layout) and team-specific layout (Team Resources > Desktop Layout).

    For upgraded layouts, sample configurations for customizing desktop properties do not appear by default. The administrator must copy the XML from the View Default Layout and add to the respective custom layouts.

  • Horizontal Header is available in the layout configuration and the Header can be customized.

  • Title and Logo of Cisco Finesse desktop can be customized.

  • Desktop Chat, TeamMessage, Dialer, Agent Identity, and Non-Voice State Control are added as part of the header component.

    For upgraded layouts, TeamMessage and Desktop Chat will not appear by default. The XML must be copied from the default layout and added to the respective custom layouts. See Cisco Cisco Finesse Installation & Upgrade Guide.

  • Vertical tabs in Cisco Finesse desktop are moved to collapsible left navigation bar for which the icons can be customized.

  • Support for inbuilt java script components has been added.

  • The ID attribute (optional) is the ID of the HTML DOM element used to display the gadget or component. The ID should start with an alphabet and can contain alphanumeric characters along with hyphen(-) and underscore(_). It can be set through the Cisco Finesse Administrative portal and has to be unique across components and gadgets.

  • The managedBy attribute (optional) for Live Data gadgets defines the gadgets which manage these Live Data gadgets. The value of managedBy attribute for Live Data gadgets is team-performance. This means that the rendering of the gadget is managed by the Team Performance gadget. These gadgets are not rendered by default, but will be rendered when the options Show State History and Show Call History are selected in the Team Performance gadget.

    For upgraded layouts, the managedBy attribute will be introduced, and will have the value of the ID of the Team Performance gadget in the same tab. If there are multiple instances of Team Performance gadgets and Live Data gadget pairs, they will be associated in that order. If the ID of the Team Performance gadget is changed, the value of the managedBy attribute should also be updated to reflect the same ID for the Live Data gadgets. Otherwise, the Team Performance gadget instance will not show its respective Live Data gadgets.

  • The Hidden attribute (optional) is used to support headless gadgets. When an attribute is set to hidden="true", then the gadget is loaded by the container, but will not be displayed. The default value set for the attribute is "false".

  • maxRows is changed from being a query parameter to an attribute.

    Example of maxRows being a query parameter:
    <gadget id="team-performance">/desktop/scripts/js/teamPerformance.js?maxRows=5</gadget>
    Example of maxRows being an attribute:
    <gadget id="team-performance" maxRows="5">/desktop/scripts/js/teamPerformance.js</gadget>

    During an upgrade it will be removed from the URL of the team performance gadget and added as an attribute. The maxRows attribute (optional) is used to adjust the height of the Team Performance gadget. If there are multiple instances of the Team Performance gadget, each instance height can be set by using this attribute. During an upgrade the height of the team performance gadget will be retained. By default the maxRows attribute value is set to 10 rows.

If any changes are made to the component IDs or URLs in the default XML layout, the following features may not work as expected.

Note that the components can be rearranged in any order to show on the Cisco Finesse desktop.

Feature

Component ID

URL

Title and Logo

cd-logo

<url>/desktop/scripts/js/logo.js</url>

Voice State Control

agent-voice-state

<url>/desktop/scripts/js/agentvoicestate.component.js</url>

Non-voice state control

nonvoice-state-menu

<url>/desktop/scripts/js/nonvoice-state-menu.component.js</url>

TeamMessage

broadcastmessagepopover

<url>/desktop/scripts/js/teammessage.component.js</url>

Desktop Chat

chat

<url>/desktop/scripts/js/chat.component.js</url>

Dialer

make-new-call-component

<url>/desktop/scripts/js/makenewcall.component.js</url>

Agent identity

identity-component

<url>/desktop/scripts/js/identity-component.js</url>

Update Default Desktop Layout

When you modify the layout of the Finesse desktop, the changes you make take effect on the desktop after 3 seconds. However, agents who are signed in when the changes are made must sign out and sign in again to see those changes reflect on the desktop.


Note


The call control gadget is only supported at the page level. You must ensure that the call control gadget (<gadget>/desktop/scripts/js/callcontrol.js</gadget>) is placed within the <page></page> tag for it to work correctly. Don't place this gadget within a <tab></tab> tag.

The version tag of Desktop Layout XML can’t be edited.

For the changes to take effect, refresh the page, or sign out and sign in again into Cisco Finesse.


Procedure


Step 1

Click Desktop Layout.

Step 2

Select from the following editors:

  • Text Editor
  • XML Editor

Step 3

Make changes to the XML as required.

Example:

If you want to add a new tab called Reports, add the following XML within the tabs tags under the <role>Agent</role> tag:

<tab>
   <id>reports</id>
   <icon>Reports</icon>
   <label>Reports</label>
</tab>

If you want to add this tab to the supervisor desktop, add the XML within the tabs tags under the <role>Supervisor</role> tag.

To add a gadget to a tab, add the XML for the gadget within the gadgets tag for that tab.


<gadgets>
<gadget>https://<ipAddress>/gadgets/<gadgetname>.xml</gadget>
</gadgets>

Replace <ipAddress> with the IP address of the server where the gadget resides.

If you want to add multiple columns to a tab on the Finesse desktop, add the gadgets for each column within the columns tags for that tab. You can have up to four columns on a tab.

<tabs>
    <tab>
        <id>home</id>
        <icon>home</icon>
        <label>finesse.container.tabs.agent.homeLabel</label>
        <columns>
            <column>
                <gadgets>
                    <gadget>/desktop/scripts/js/queueStatistics.js</gadget>
                </gadgets>
            </column>
        </columns>
    </tab>
    <tab>
        <id>myHistory</id>
        <icon>history</icon>
        <label>finesse.container.tabs.agent.myHistoryLabel</label>
        <columns>
            <column>
                <!-- The following gadgets are used for viewing the call history 
and state history of an agent. -->
            </column>
        </columns>
    </tab>
    

Step 4

Click Save.

Finesse validates the XML file to ensure that it’s valid XML syntax and conforms to the Finesse schema.

Step 5

After you save your changes, if you want to revert to the last saved desktop layout, click Revert. If you want to revert to the default desktop layout, click Restore Default Layout.

Note


During upgrade, any changes made to the Cisco Finesse Default Layout won’t be updated. Click on Restore Default Layout to get the latest changes.


The Finesse default XML layout is as follows:


<finesseLayout xmlns="http://www.cisco.com/vtg/finesse">
    <!--  DO NOT EDIT. The version number for the layout XML. -->
    <version>1250.03</version>
    <configs>
        <!-- The Title for the application which can be customized. -->
        <config key="title" value="Cisco Finesse"/>
        <!-- The following entries are examples of changing defaults for desktop properties.
        To change any property, uncomment the respective line and set the appropriate value.
        For more details on the properties that can be customized, refer to the Cisco Finesse Administration Guide.
        Note: The customized properties can only be set in the configs section and are not role-specific. -->
        <!-- <config key="enableDragDropAndResizeGadget" value="false"/> -->
        <!-- <config key="wrapUpCountDown" value="true"/> -->
        <!-- <config key="desktopChatAttachmentEnabled" value="true"/> -->
        <!-- <config key="forceWrapUp" value="true"/> -->
        <!-- Possible Values: supervisor_only, conference_controller_and_supervisor, all -->
        <!-- <config key="enableDropParticipantFor" value="supervisor_only"/> -->
        <!-- Possible Values: agents, all -->
        <!-- <config key="dropParticipant" value="agents"/> -->
        <!-- The logo file for the application -->
        <!-- For detailed instructions on using custom icons for logos and tabs,
        please refer to the section "Customize Title and Logo in the Header"
        in the Finesse Administration Guide. -->
        <!-- <config key="logo" value="/3rdpartygadget/files/cisco_finext_logo.png"/>  -->
    </configs>
    <header>
        <!--  Please ensure that at least one gadget/component is present within every headercolumn tag -->
		<leftAlignedColumns>
			<headercolumn width="300px">
				<component id="cd-logo">
					<url>/desktop/scripts/js/logo.js</url>
				</component>
			</headercolumn>
			<headercolumn width="230px">
				<component id="agent-voice-state">
					<url>/desktop/scripts/js/agentvoicestate.component.js</url>
				</component>
			</headercolumn>
			<headercolumn width="251px">
				<component id="nonvoice-state-menu">
					<url>/desktop/scripts/js/nonvoice-state-menu.component.js</url>
				</component>
			</headercolumn>

		</leftAlignedColumns>
		<rightAlignedColumns>
			<headercolumn width="50px">
                <component id="broadcastmessagepopover">
                    <url>/desktop/scripts/js/teammessage.component.js</url>
                </component>
            </headercolumn>
			<headercolumn width="50px">
                <component id="chat">
                    <url>/desktop/scripts/js/chat.component.js</url>
                </component>
            </headercolumn>
			<headercolumn width="50px">
				<component id="make-new-call-component">
					<url>/desktop/scripts/js/makenewcall.component.js</url>
				</component>
			</headercolumn>
			<headercolumn width="72px">
				<component id="identity-component">
					<url>/desktop/scripts/js/identity-component.js</url>
				</component>
			</headercolumn>
		</rightAlignedColumns>
	</header>
    <layout>
        <role>Agent</role>
        <page>
            <gadget>/desktop/scripts/js/callcontrol.js</gadget>

            <!-- The following gadget is for WXM Customer Experience Journey. 
            If WXM is onboarded successfully with all configurations, then replace the url 
            with the actual url obtained by exporting the Cisco Finesse gadget from WXM -->
            <!-- <gadget>/3rdpartygadget/files/CXService/CiscoCXJourneyGadget.xml</gadget> -->
        </page>
        <tabs>
            <tab>
                <id>home</id>
                <icon>home</icon>
                <label>finesse.container.tabs.agent.homeLabel</label>
                <columns>
                    <column>
                        <gadgets>
                            <!-- The following gadget is for recording and displaying Call Transcripts. 
                            If Voicea is onboarded successfully and all configuration done correctly then uncomment this gadget-->
                            <!-- <gadget>/3rdpartygadget/files/calltranscript/CallTranscriptGadget.xml</gadget> -->

                            <!-- The following gadget is for WXM Customer Experience Analytics. 
                            If WXM is onboarded successfully with all configurations, then replace the url 
                            with the actual url obtained by exporting the Cisco Finesse gadget from WXM -->
                            <!-- <gadget>/3rdpartygadget/files/CXService/CiscoCXAnalyticsGadget.xml</gadget> -->

                            <gadget>/desktop/scripts/js/queueStatistics.js</gadget>
							
                            <!--
                The following Gadgets are for LiveData.
                If you wish to show LiveData Reports, then do the following:
                    1) Uncomment each Gadget you wish to show.
                    2) Replace all instances of "my-cuic-server.com" with the Fully Qualified Domain Name of your Intelligence Center Server.
                    3) [OPTIONAL] Adjust the height of the gadget by changing the "gadgetHeight" parameter.
                IMPORTANT NOTES:
                    - In order for these Gadgets to work, you must have performed all documented pre-requisite steps.
                    - Do *NOT* change the viewId (unless you have built a custom report and know what you are doing).
                    - The "teamName" will be automatically replaced with the Team Name of the User logged into Finesse (for Team-specific layouts).
-->
                            <!-- HTTPS Version of LiveData Gadgets -->
                            <!-- TEAM STATUS REPORTS: 1. Agent Default view (default), 2. Agent Skill Group Default view -->
                            <!-- <gadget>https://my-cuic-server.com:8444/cuic/gadget/LiveData/LiveDataGadget.jsp?gadgetHeight=310&amp;
                           viewId_1=99E6C8E210000141000000D80A0006C4&amp;filterId_1=agent.id=CL%20teamName&amp;viewId_2=9AB7848B10000141000001C50A0006C4&amp;
                           filterId_2=agent.id=CL%20teamName</gadget> -->
                            <!-- QUEUE STATUS REPORTS: 1. Skill Group Default view (default), 2. Skill Group Utilization view, 3. Precision Queue Default view, 4. Precision Queue Utilization view -->
                            <!-- <gadget>https://my-cuic-server.com:8444/cuic/gadget/LiveData/LiveDataGadget.jsp?gadgetHeight=310&amp;
                         viewId_1=B7371BE210000144000002870A0007C5&amp;filterId_1=skillGroup.id=CL%20teamName&amp;
                         viewId_2=9E760C8B1000014B0000005A0A0006C4&amp;filterId_2=skillGroup.id=CL%20teamName&amp;
                         viewId_3=B71A630C10000144000002480A0007C5&amp;filterId_3=precisionQueue.id=CL%20teamName&amp;
                         viewId_4=286B86F01000014C000005330A0006C4&amp;filterId_4=precisionQueue.id=CL%20teamName</gadget> -->
                        </gadgets>
                    </column>
                </columns>
            </tab>
            <tab>
                <id>myStatistics</id>
                <icon>column-chart</icon>
                <label>finesse.container.tabs.agent.myStatisticsLabel</label>
                <columns>
                    <column>
                        <gadgets>
                            <gadget>https://my-cuic-server.com:8444/cuic/gadget/LiveData/LiveDataGadget.jsp?gadgetHeight=150&amp;
                             viewId=0B8D11317ED54A80B64F3AE28C5139E5&amp;filterId=agentStats.id=CL%20teamName</gadget>
                        </gadgets>
                    </column>
                </columns>
            </tab>
            <tab>
                <id>myHistory</id>
                <icon>history</icon>
                <label>finesse.container.tabs.agent.myHistoryLabel</label>
                <columns>
                    <column>
                        <!-- The following gadgets are used for viewing the call history and state history of an agent. -->
                        <gadgets>
                            <gadget>https://my-cuic-server.com:8444/cuic/gadget/LiveData/LiveDataGadget.jsp?gadgetHeight=280&amp;
                            viewId=5FA44C6F930C4A64A6775B21A17EED6A&amp;filterId=agentTaskLog.id=CL%20teamName</gadget>
                            <gadget>https://my-cuic-server.com:8444/cuic/gadget/LiveData/LiveDataGadget.jsp?gadgetHeight=280&amp;
                            viewId=56BC5CCE8C37467EA4D4EFA8371258BC&amp;filterId=agentStateLog.id=CL%20teamName</gadget>
                        </gadgets>
                    </column>
                </columns>
            </tab>
            <!--
The following Gadgets are for LiveData.
If you wish to show More LiveData Reports, then do the following:
    1) Uncomment each Gadget you wish to show.
    2) Replace all instances of "my-cuic-server.com" with the Fully Qualified Domain Name of your Intelligence Center Server.
    3) [OPTIONAL] Adjust the height of the gadget by changing the "gadgetHeight" parameter.
IMPORTANT NOTES:
    - In order for these Gadgets to work, you must have performed all documented pre-requisite steps.
    - Do *NOT* change the viewId (unless you have built a custom report and know what you are doing).
    - The "teamName" will be automatically replaced with the Team Name of the User logged into Finesse (for Team-specific layouts).
-->
            <!-- If you are showing the "More Live Data Reports" tab, then also uncomment this section.
            <tab>
                <id>moreLiveDataReports</id>
                <icon>reports-more</icon>
                <label>finesse.container.tabs.agent.moreLiveDataReportsLabel</label>
                <gadgets>
-->
            <!-- HTTPS Version of LiveData Gadgets -->
            <!-- AGENT REPORTS: 1. Agent Default view (default) -->
            <!-- <gadget>https://my-cuic-server.com:8444/cuic/gadget/LiveData/LiveDataGadget.jsp?gadgetHeight=310&amp;
            viewId_1=99E6C8E210000141000000D80A0006C4&amp;filterId_1=agent.id=CL%20teamName</gadget>-->
            <!-- AGENT SKILL GROUP REPORTS: 1. Agent Skill Group Default view (default) -->
            <!-- <gadget>https://my-cuic-server.com:8444/cuic/gadget/LiveData/LiveDataGadget.jsp?gadgetHeight=310&amp;
            viewId_1=9AB7848B10000141000001C50A0006C4&amp;filterId_1=agent.id=CL%20teamName</gadget>-->
            <!-- QUEUE STATUS SKILL GROUP REPORTS: 1. Skill Group Default view (default), 2. Skill Group Utilization view -->
            <!-- <gadget>https://my-cuic-server.com:8444/cuic/gadget/LiveData/LiveDataGadget.jsp?gadgetHeight=310&amp;
            viewId_1=B7371BE210000144000002870A0007C5&amp;filterId_1=skillGroup.id=CL%20teamName&amp;
             viewId_2=9E760C8B1000014B0000005A0A0006C4&amp;filterId_2=skillGroup.id=CL%20teamName</gadget>-->
            <!-- QUEUE STATUS PRECISION QUEUE REPORTS: 1. Precision Queue Default view (default), 2. Precision Queue Utilization view -->
            <!-- <gadget>https://my-cuic-server.com:8444/cuic/gadget/LiveData/LiveDataGadget.jsp?gadgetHeight=310&amp;
           viewId_1=B71A630C10000144000002480A0007C5&amp;filterId_1=precisionQueue.id=CL%20teamName&amp;
           viewId_2=286B86F01000014C000005330A0006C4&amp;filterId_2=precisionQueue.id=CL%20teamName</gadget>-->
            <!-- If you are showing the "more reports" tab, then uncomment this section too.
                </gadgets>
            </tab>
            -->
        </tabs>
    </layout>
    <layout>
        <role>Supervisor</role>
        <page>
            <gadget>/desktop/scripts/js/callcontrol.js</gadget>

            <!-- The following gadget is for WXM Customer Experience Journey. 
            If WXM is onboarded successfully with all configurations, then replace the url 
            with the actual url obtained by exporting the Cisco Finesse gadget from WXM -->
            <!-- <gadget>/3rdpartygadget/files/CXService/CiscoCXJourneyGadget.xml</gadget> -->
        </page>
        <tabs>
            <tab>
                <id>home</id>
                <icon>home</icon>
                <label>finesse.container.tabs.supervisor.homeLabel</label>
                <columns>
                    <column>
                        <gadgets>
                           <!-- The following gadget is for recording and displaying Call Transcripts. 
                            If Voicea is onboarded successfully and all configuration done correctly then uncomment this gadget-->
                            <!-- <gadget>/3rdpartygadget/files/calltranscript/CallTranscriptGadget.xml</gadget> -->

                            <!-- The following gadget is for WXM Customer Experience Analytics. 
                            If WXM is onboarded successfully with all configurations, then replace the url 
                            with the actual url obtained by exporting the Cisco Finesse gadget from WXM -->
                            <!-- <gadget>/3rdpartygadget/files/CXService/CiscoCXAnalyticsGadget.xml</gadget> -->

                            <gadget id="team-performance">/desktop/scripts/js/teamPerformance.js</gadget>
                            <!-- The following gadgets are used for viewing the call history and state history of an agent selected in the Team Performance Gadget. -->
                            <!-- The following gadgets are managed(loaded and displayed) by the team performance gadget (associated with id "team-performance").
                                 This association is done using the mapping of managedBy attribute of the managed gadgets, to the id of managing gadget.
                                 If the id for team performance gadget is changed, the values for the associated managedBy attribute
                                 for the managed gadgets, also need to be updated with the new id.
                                 These managed gadgets are not displayed by default, but would be displayed when the option 
                                 "view history" is selected, for an agent, in the team performance gadget.
                                 Note: As managed gadgets are not displayed by default, placing managed gadgets alone on
                                 separate columns of their own, would display blank space in that area.
                                 For more details on managed gadgets and managedBy attribute, please refer to Finesse Administration Guide. 
                            -->
                            <gadget managedBy="team-performance">https://my-cuic-server.com:8444/cuic/gadget/LiveData/LiveDataGadget.jsp?gadgetHeight=275&amp;
                            viewId=630CB4C96B0045D9BFF295A49A0BA45E&amp;filterId=agentTaskLog.id=AgentEvent:Id&amp;type=dynamic&amp;maxRows=20</gadget>
                            <gadget managedBy="team-performance">https://my-cuic-server.com:8444/cuic/gadget/LiveData/LiveDataGadget.jsp?gadgetHeight=275&amp;
                            viewId=56BC5CCE8C37467EA4D4EFA8371258BC&amp;filterId=agentStateLog.id=AgentEvent:Id&amp;type=dynamic&amp;maxRows=20</gadget>
                        </gadgets>
                    </column>
                </columns>
            </tab>
            <tab>
                <id>myHistory</id>
                <icon>history</icon>
                <label>finesse.container.tabs.agent.myHistoryLabel</label>
                <columns>
                    <column>
                        <!-- The following gadgets are used for viewing the call history and state history of a logged in supervisor. -->
                        <gadgets>
                            <gadget>https://my-cuic-server.com:8444/cuic/gadget/LiveData/LiveDataGadget.jsp?gadgetHeight=280&amp;
                            viewId=5FA44C6F930C4A64A6775B21A17EED6A&amp;filterId=agentTaskLog.id=CL%20teamName</gadget>
                            <gadget>https://my-cuic-server.com:8444/cuic/gadget/LiveData/LiveDataGadget.jsp?gadgetHeight=280&amp;
                            viewId=56BC5CCE8C37467EA4D4EFA8371258BC&amp;filterId=agentStateLog.id=CL%20teamName</gadget>
                        </gadgets>
                    </column>
                </columns>
            </tab>
            <tab>
                <id>teamData</id>
                <icon>team-data</icon>
                <label>finesse.container.tabs.supervisor.teamDataLabel</label>
                <columns>
                    <column>
                        <!-- The following gadget is used by the supervisor to view an agent's queue interval details. -->
                        <gadgets>
                        	<gadget>https://my-cuic-server.com:8444/cuic/gadget/LiveData/LiveDataGadget.jsp?gadgetHeight=310&amp;
                             viewId=0B8D11317ED54A80B64F3AE28C5139E5&amp;filterId=agentStats.id=CL%20teamName</gadget>
                            <gadget>https://my-cuic-server.com:8444/cuic/gadget/Historical/HistoricalGadget.jsp?viewId=BD9A8B7DBE714E7EB758A9D472F0E7DC&amp;
                           linkType=htmlType&amp;viewType=Grid&amp;refreshRate=900&amp;@start_date=RELDATE%20THISWEEK&amp;
                          @end_date=RELDATE%20THISWEEK&amp;@agent_list=CL%20~teams~&amp;gadgetHeight=360</gadget>
                        </gadgets>
                    </column>
                </columns>
            </tab>
            <tab>
                <id>queueData</id>
                <icon>storage</icon>
                <label>finesse.container.tabs.supervisor.queueDataLabel</label>
                <columns>
                    <column>
                        <gadgets>
                            <gadget>/desktop/scripts/js/queueStatistics.js</gadget>
                        </gadgets>
                    </column>
                </columns>
            </tab>

        </tabs>
    </layout>
</finesseLayout>

Drag-and-Drop and Resize Gadget or Component

The administrator can configure the drag-and-drop and resize gadget or component features for agents and supervisors to customize their Finesse desktop.

  • The drag-and-drop feature allows agents and supervisors to drag (and drop) the gadget or the component to the required position on the desktop layout.

  • The resize feature allows the agents and supervisors to shrink or expand the gadget or the component to a custom size on the desktop layout.


Note


By default, the drag-and-drop and resize features are disabled. The administrator must set the enableDragDropAndResizeGadget desktop property value as true to enable these features.


The administrator can customize the desktop property value of these features through the desktop layout:

  • Default layout (Desktop Layout)—In the Text Editor, remove the comment (<!—and -->) from the enableDragDropAndResizeGadget code snippet and enter the value as true to add these features to the desktop layout. For more information, see Customize Desktop Properties.

    The following is the sample code snippet, as displayed in the default Desktop Layout.

    <!-- <config key="enableDragDropAndResizeGadget" value="false"/> -->
  • Team-specific layouts (Manage Team Resources > Desktop Layout)—Select a specific team and then in the Text Editor, remove the comment (<!—and -->) from the enableDragDropAndResizeGadget code snippet and enter the value as true to add these features to the team desktop layout. For more information, see Customize Desktop Properties at Team Level.

    The following is the sample code snippet, as displayed in the team Desktop Layout.

    <!-- <config key="enableDragDropAndResizeGadget" value="false"/> -->

Note


  • For upgraded layouts, the sample configuration for customizing desktop property (enableDragDropAndResizeGadget) doesn’t appear by default in the Desktop Layout. Administrators must copy the XML from the View Default Layout and add to the respective custom layouts.

  • For new layouts, the sample configuration for customizing desktop property (enableDragDropAndResizeGadget) appears by default in the Desktop Layout.

  • The administrator can also use the CLI and set the utils finesse set_propertydesktop enableDragDropAndResizeGadget to true to enable these features. For more information see Desktop Properties.

  • If the property value is defined in the team-specific desktop layout (Manage Team Resources > Desktop Layout), the team-specific desktop layout takes precedence over the property value defined in the Desktop Layout and CLI.

  • These features aren’t applicable for gadgets that don’t have a defined title. For more information, see the Gadget Limitations section in the Cisco Finesse Web Services Developer Guide at https://developer.cisco.com/docs/finesse/#!rest-api-dev-guide.


For more information, see the Cisco Finesse Agent and Supervisor Desktop User Guide at https://www.cisco.com/c/en/us/support/customer-collaboration/finesse/products-user-guide-list.html.

Drop Participants from Conference


Note


To enable this feature in Cisco Finesse, install Finesse 12.5(1) ES3 COP (API and CLI updates) and 12.5(1) ES4 COP (desktop property updates) or higher.

Cisco Finesse now permits an agent or supervisor, who is the participant in a conference call, to drop another participant. The extended capability must be enabled at the Dialog—Drop Participant from Conference API and desktop level. By default, this feature is available only for supervisors.


The administrator can set permission to allow an agent or a supervisor, who is the participant in a conference call using the Finesse desktop, to drop other agents, supervisors, or non-agents from the conference call.

The desktop property to drop participants from a conference call are:

  • enableDropParticipantFor—This property is used to set permissions to allow the agents, supervisors, or both to drop other participants from the conference call.

    The possible values for the enableDropParticipantFor property are:

    • supervisor_only—(default value) Only the supervisor, who is a participant of the conference call, can drop other agents in the conference call.

    • conference_controller_and_supervisor—The supervisor who is a participant of the conference call or an agent who initiated the conference call (conference controller) can drop other participants.

    • all—Any agent or supervisor who is a participant of the conference call can drop other participants.

    For example, if the permission is set to be supervisor_only, when the supervisor barges in to a call between an agent and a customer, the supervisor is the only one who can make a request to drop the agent from the call. This leaves the supervisor on the call with the customer.

  • dropParticipant—This property controls the listing of agents and non-agents in the Drop options list of participants in the Finesse desktop.

    The possible values for the dropParticipant property are:

    • agents—(default value) The agents or supervisors who are participants of the conference call are displayed in the Drop options list of participants in the Finesse desktop.

    • all—The agents, supervisors, CTI Route Point, IVR port, a device to which no agent is signed in, or a caller device in the conference call are displayed in the Drop options list of participants in the Finesse desktop.

For more information, see the Intercept a Call section in the Common Tasks chapter of Cisco Finesse Agent and Supervisor Desktop User Guide at https://www.cisco.com/c/en/us/support/customer-collaboration/finesse/products-user-guide-list.html.


Note


To enable the supervisor or call controller to drop an unmonitored extension in Cisco Unified CCE, in Release 12.0(1) or higher, set the DropAnyPartyEnabled registry key to 1 in the Dynamic Registry of the CTI server. The supervisor cannot drop a CTI Route Point, IVR port, a device to which no agent is signed in, a caller device, or other agents for whom SILENT_MONITOR is not initiated by the supervisor.

For more information, see the Enable Dropping Call Participants from a Conference Call section in Cisco Contact Center Gateway Deployment Guide for Cisco Unified ICM/CCE at https://www.cisco.com/c/en/us/support/customer-collaboration/unified-contact-center-enterprise/products-programming-reference-guides-list.html.


The administrator can customize the desktop property value for this feature through the desktop layout:

  • Default layout (Desktop Layout)—In the Text Editor, remove the comment (<!—and -->) from the enableDropParticipantFor and dropParticipant code snippets. Enter the appropriate value against the code snippet to control the feature using desktop layout. For more information, see Customize Desktop Properties.

    The following is the sample code snippet, as displayed in the default Desktop Layout.

    <!-- <config key="enableDropParticipantFor" value="supervisor_only"/> -->

    <!-- <config key="dropParticipant" value="agents"/> -->

  • Team-specific layouts (Manage Team Resources > Desktop Layout)—Select a specific team layout, and then in the Text Editor, remove the comment (<!—and -->) from the enableDropParticipantFor and dropParticipant code snippets. Enter the appropriate value against the code snippet to control the feature using team desktop layout. For more information, see Customize Desktop Properties at Team Level.

    The following is the sample code snippet, as displayed in the team Desktop Layout.

    <!-- <config key="enableDropParticipantFor" value="supervisor_only"/> -->

    <!-- <config key="dropParticipant" value="agents"/> -->


Note


  • The administrator can also use the CLI utils finesse set_property webservices enableDropParticipantFor and set permission to allow an agent or a supervisor, who is the participant in a conference call to drop other agents, supervisors, or non-agents from the conference call. Enabling this capability at a an API level is a prerequisite for the desktop property changes. For more information, see Service Properties.

  • The Dialog—Drop Participant from Conference API allows an agent or supervisor to make a request to drop other agents, supervisors, or non-agents from a conference based on the permission set by the administrator. By default, this API is only available for supervisors (based on the supervisor_only property); but the administrator can use the Finesse CLI to expand access. For more information, see https://developer.cisco.com/docs/finesse/#!rest-api-dev-guide.

  • The Dialog—Drop Participant from Conference API and the team-specific layout must have the same value to have the expected behavior, as defined by the Finesse desktop property. If the values differ, then the most restrictive value takes precedence. The order is all, conference_controller_and_supervisor, and supervisor_only.

    For example, at the API level, it is restricted to be supervisor_only, and the Finesse desktop level restriction at team-specific layout is all, then the restriction at API level applies, as that is more restrictive than the desktop level.

  • For upgraded layouts, sample configuration for customizing desktop property (enableDropParticipantFor and dropParticipant) does not appear by default in the Desktop Layout. The administrator must copy the respective code snippets of the XML from the View Default Layout and add to the respective custom layouts.

  • For new installations, sample configuration for customizing desktop property (enableDropParticipantFor and dropParticipant) appears by default in the Desktop Layout.


Limitation

Finesse desktop cannot distinguish agents from another peripheral gateway (PG) as agents. So the agents from another PG are displayed using the same icon used for non-agents () in the Finesse desktop.

Customize Desktop Properties

You can customize the Finesse desktop properties.

Procedure


Step 1

Click Desktop Layout.

Step 2

Select from the following editors:

  • Text Editor
  • XML Editor

Step 3

Enter the desktop property name in the config key tag.

Step 4

Enter the possible value of the desktop property in the value tag.

The following are the sample desktop property entries, as displayed in the default Desktop Layout. To change these desktop property entries in Text Editor, remove the comment (<!-- and -->) and set appropriate values.

<!-- <config key="enableDragDropAndResizeGadget" value="false"/> -->
<!-- <config key="wrapUpCountDown" value="true"/> -->
<!-- <config key="desktopChatAttachmentEnabled" value="true"/> -->
<!-- <config key="forceWrapUp" value="true"/> -->

Note


If the property value is defined in the Desktop Layout, then the Desktop Layout value takes precedence over the property value defined using the CLI. For more information on Finesse CLIs, see Desktop Properties.

The following table lists the supported desktop properties:

Config Key

Value

Default Value

enableDragDropAndResizeGadget

true|false

false

enableShortCutKeys

true|false

true

forceWrapUp

true|false

true

wrapUpCountDown

true|false

true

showWrapUpTimer

true|false

true

desktopChatAttachmentEnabled

true|false

true

desktopChatMaxAttachmentSize

Range: 1—10 (MB)

5

desktopChatUnsupportedFileTypes

Unsupported file formats include comma-separated valid file extensions. For example: .exe, .sh

.exe, .msi, .sh, .bat

showAgentHistoryGadgets

true|false

true

showActiveCallDetails

(for Supervisor Only)

true|false

true

pendingDTMFThresholdCount

Range: 1—20

20

dtmfRequestTimeoutInMs

Range: 1000—200000 (1 to 200 seconds)

5000 (5 seconds)

enableDropParticipantFor

supervisor_only|conference_controller_

and_supervisor|all

supervisor_only

dropParticipant

agents|all

agents

Note

 
  • To enable the following Finesse desktop properties in Cisco Finesse, install Cisco Finesse Release 12.5(1) ES1 COP or higher.

    • pendingDTMFThresholdCount

    • dtmfRequestTimeoutInMs

  • To enable the following Finesse desktop properties in Cisco Finesse, install Cisco Finesse Release 12.5(1) ES4 COP or higher.

    • enableDropParticipantFor

    • dropParticipant

For more information on Finesse desktop properties, see Desktop Properties.

Step 5

Click Save.

The change takes effect when the agent or supervisor refreshes the Finesse desktop or sign out and sign in again.

Note


If you clear the Override System Default check box and click Save. The changes are overwritten, and the editing pane reverts to the default desktop layout XML.


Horizontal Header

The Horizontal Header on the Finesse desktop has the following components from left to right. All these components can be removed and replaced with custom gadgets as required.

  • Logo: Default is Cisco logo. Can be customized.

  • Product Name: Default is Cisco Finesse. Can be customized.

  • Agent State for Voice: Displays agent state for voice call.

  • Agent State for Digital Channels: Displays agent state for digital channels.

  • Dialer Component: Agent can make a new call.

  • Identity Component: Displays agent name and signout functionality with reason codes.


Note


The sum of widths set for all gadgets and components in the header (inside right aligned columns and left aligned colums) should not exceed the total header width. If it exceeds the header width, some of the gadgets/components will not be visible.


Customize Title and Logo in the Header

You can customize the title and logo displayed on the Finesse desktop:

Procedure


Step 1

Click Desktop Layout.

Step 2

Select from the following editors:

  • Text Editor
  • XML Editor

Step 3

Enter the product name in the config value tag with title key.

Step 4

Upload the logo file just like any third-party gadget.

For more information, see section Upload Third-Party Gadgets in Cisco Finesse Admin Guide.

Step 5

Enter the URL of the logo file in the config value tag with logo key.

Example:

<configs>
        <!-- The Title for the application which can be customised.-->
<config value="product.full-name" Key="title"/>
     <!-- The logo file for the application-->
     <!--<config key="logo" value="/3rdpartygadgets/<some_sample_image>"/-->
</configs>

The customized logo and product name is displayed on the Finesse desktop.

Note


The file size that can be uploaded for the logo must be kept within 40 pixels. The file types supported are .svg, .png, .gif, and .jpeg/jpg.


alternateHosts Configuration

The <gadget> element in the Finesse Layout XML provides an attribute to specify alternate hosts from which the gadget can be loaded. This allows the Cisco Finesse desktop to load the gadget using a different host if the primary server is unavailable.

The alternateHosts attribute contains a comma-separated list of FQDNs that will be used if the primary-host-FQDN is unavailable.

<gadget alternateHosts="host1,host2,host3,...">
         https://<primary-host-FQDN>/<gadget-URL> 
    </gadget>

The alternateHosts attribute is only applicable for gadgets with an absolute URL. That is URLs containing the FQDN of a host, an optional port, and the complete URL path to the gadget. For example: <gadget alternateHosts="host1,host2">https://primary host/relative_path</gadget>

If loading the gadget from the primary-host fails, the Cisco Finesse container attempts to load the gadget from the alternate hosts in the order specified in the alternateHosts attribute.

The Cisco Finesse desktop may fail to load the gadget even if some of the hosts are reachable. In such cases, refresh the Cisco Finesse desktop.

When the gadget is specified with a relative URL, for example: <gadget >/3rdpartygadgets/relative_path</gadget>, the alternateHosts attribute does not apply and is ignored by the Cisco Finesse desktop.


Note


If the host serving the gadget fails after the Cisco Finesse desktop was successfully loaded, the desktop must be refreshed in order to load the gadget from an alternate host. The gadget does not implement its own failover mechanism.


Headless Gadget Configuration

Headless gadgets are gadgets which do not need a display space, but can be loaded and run like a background task in the browser. The Hidden attribute (optional) is used to support headless gadgets in the layout XML. When an attribute is set to "hidden=true", then the gadget is loaded by the container, but will not be displayed. The default value set for the attribute is "false".

Customize Icons in Left Navigation Bar

You can add icons (both custom and inbuilt) to the collapsible left navigation bar of the Finesse desktop:

Procedure


Step 1

Click Desktop Layout.

Step 2

Select from the following editors:

  • Text Editor
  • XML Editor

Step 3

Enter name of the gadget or component in the id tag.

Step 4

Enter the value of the icon in the icon tag.

Step 5

Upload the icon file just like any third-party gadget.

For more information, see section Upload Third-Party Gadgets in Cisco Finesse Admin Guide.

Note


When adding a custom icon, provide the path in the icon tag and if you are adding an inbuilt icon, provide the icon value in the icon tag

Example:

<tab>
             <id>myHistory</id>
             <icon>/3rdpartygadgets/<some_sample_image>
             <label>finesse.container.tabs.agent.myHistoryLabel</label>
             <columns>
               <column>
                 <!-- The following gadgets are used for viewing the call history and state history of an agent. -->
                     <gadgets>
                       <gadget>https://my-cuic-server:8444/cuic/gadget/LiveData/LiveDataGadget
                          .xml?gadgetHeight=280&amp;viewId=5FA44C6F930C4A64A6775B21A17EED6A&amp;
                             filterId=agentTaskLog.id=CL%20teamName</gadget>
                       <gadget>https://my-cuic-server:8444/cuic/gadget/LiveData/LiveDataGadget
                          .xml?gadgetHeight=280&amp;viewId=56BC5CCE8C37467EA4D4EFA8371258BC&amp;
                             filterId=agentStateLog.id=CL%20teamName</gadget>
                       </gadgets>
                </column>
              </columns>
           </tab>
           

Note


The file size that can be uploaded in the left navigation bar as custom icons is 25 pixels by 25 pixels. The maximum width of the tab title in the left navigation bar must be 80 pixels or less. The file types supported are .svg, .png, .gif, and .jpeg/jpg.


Customize Icons for Gadgets

As part of the Cisco Finesse container, various standard icons are available. Use the following procedure to customize the icons for the gadgets hosted in Finesse desktop.

Procedure


Step 1

Click Desktop Layout.

Step 2

Select from the following editors:

  • Text Editor
  • XML Editor

Step 3

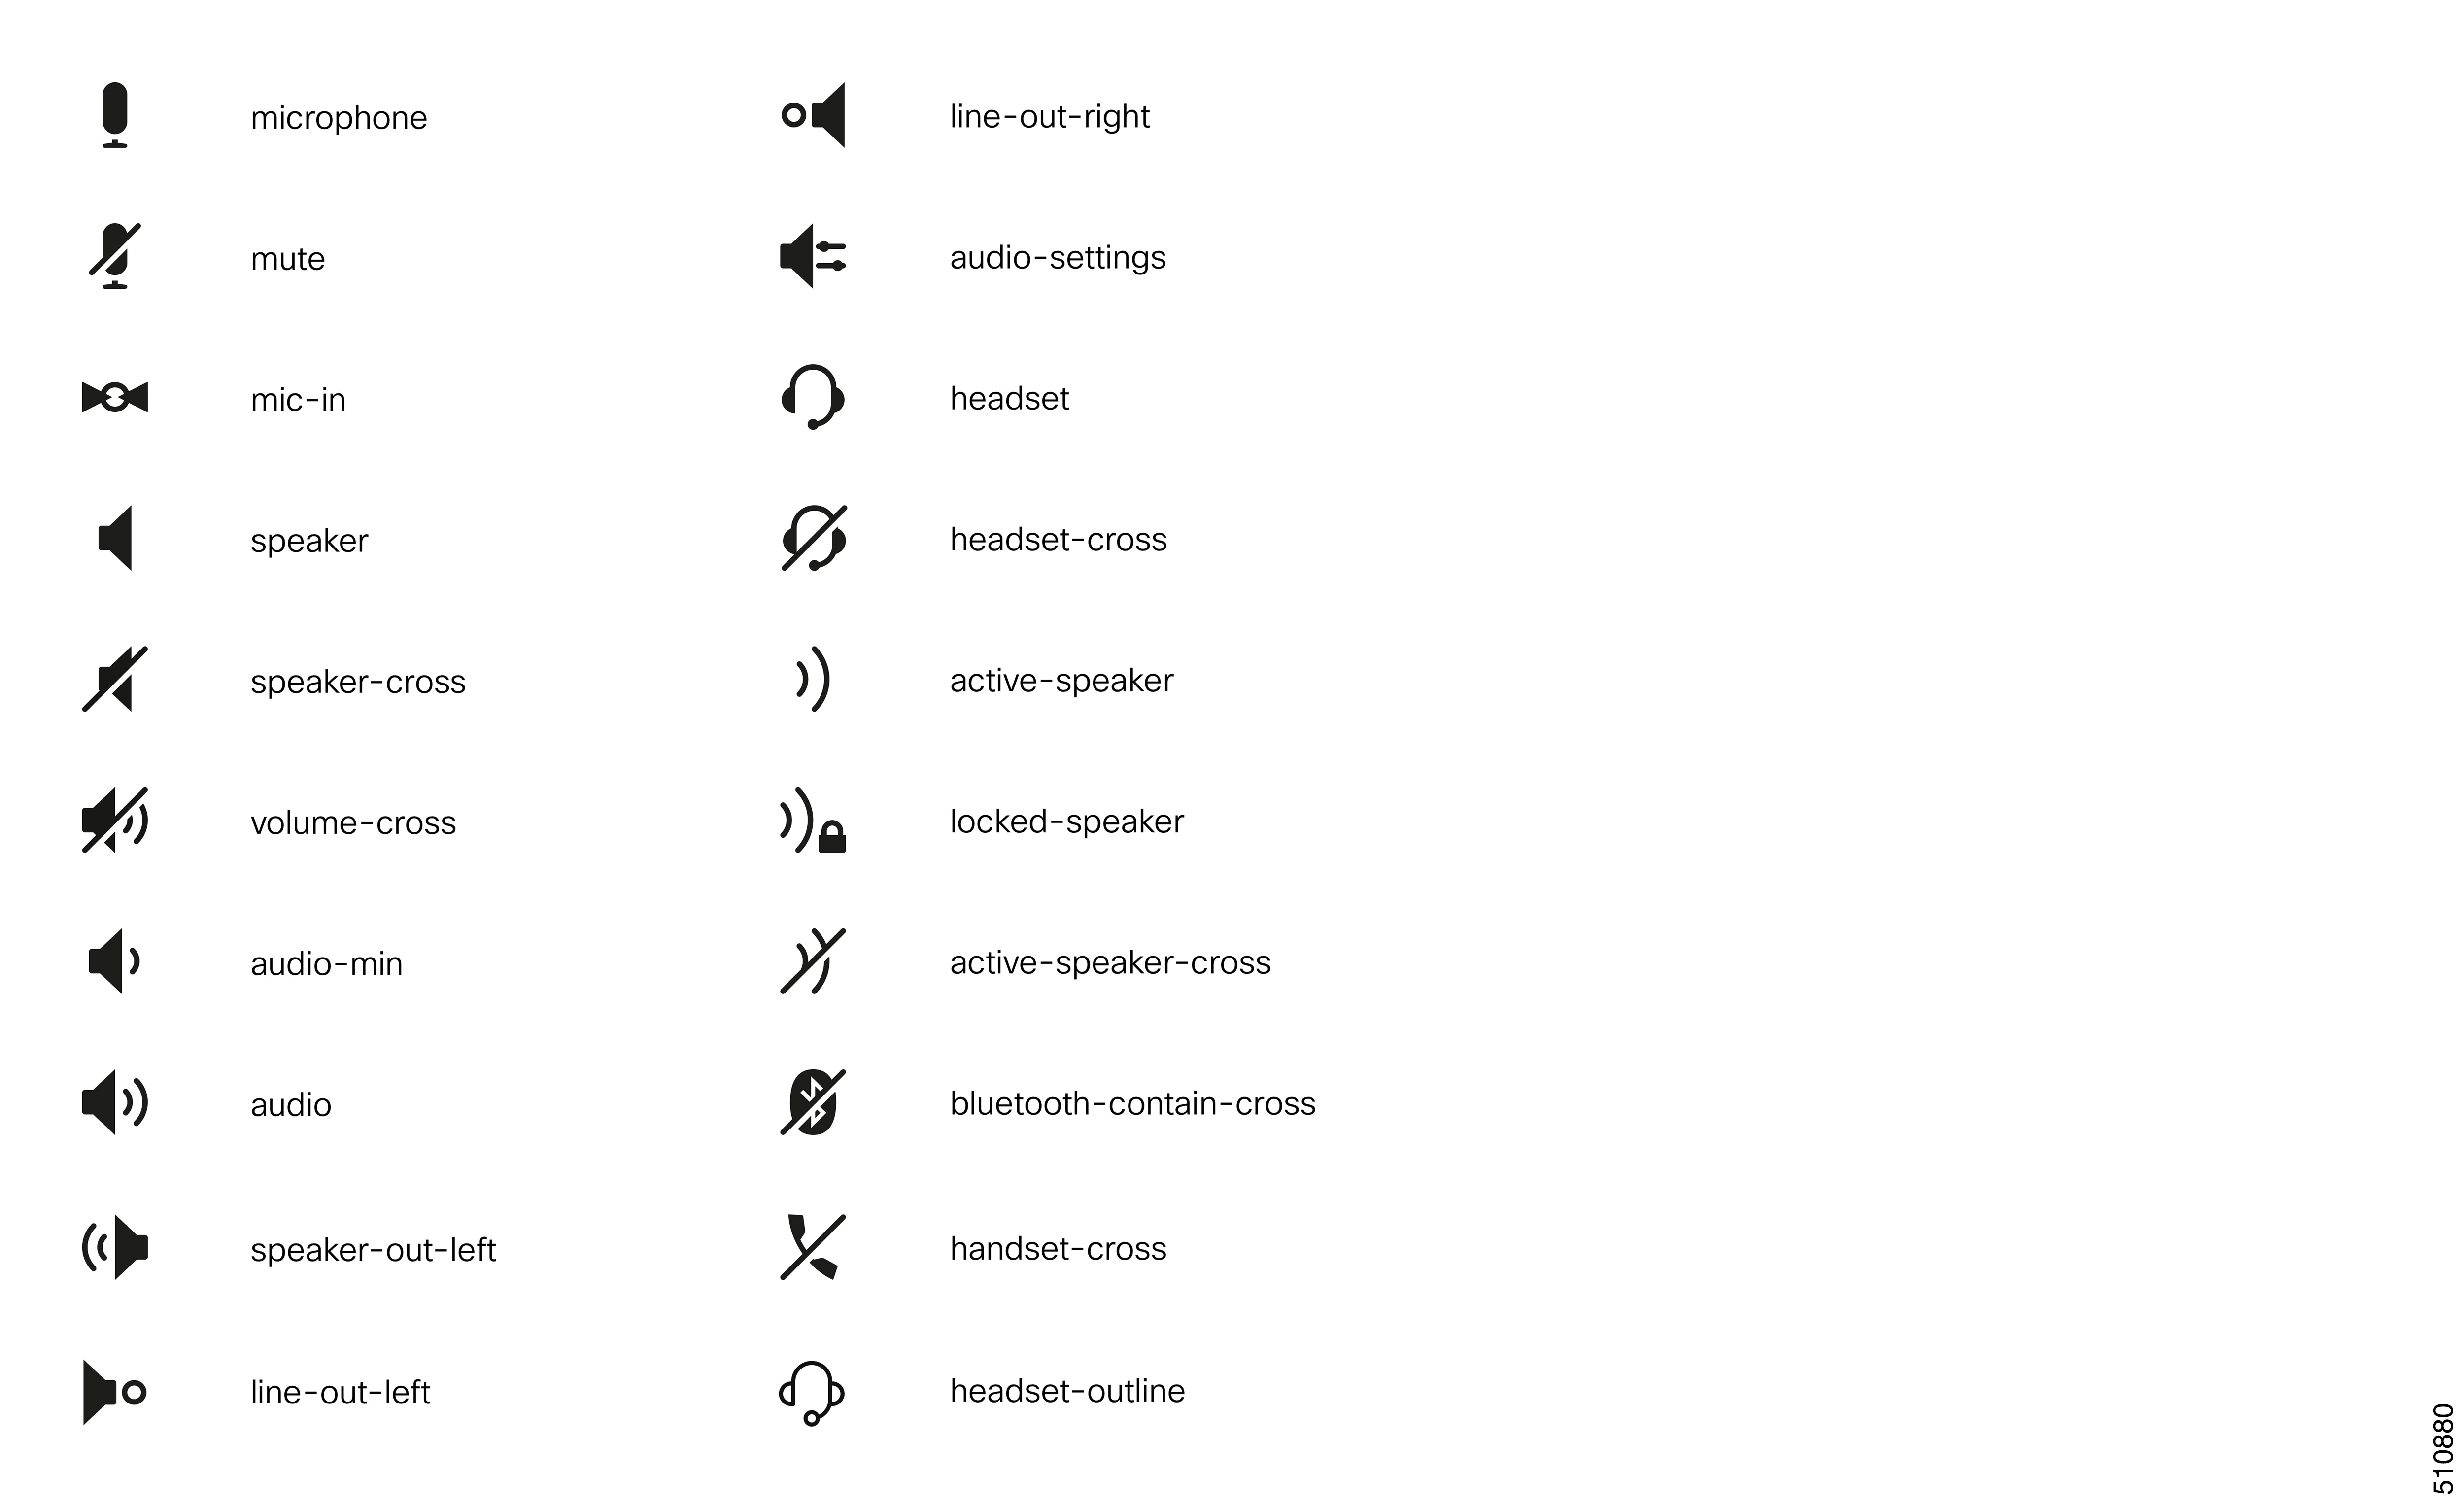
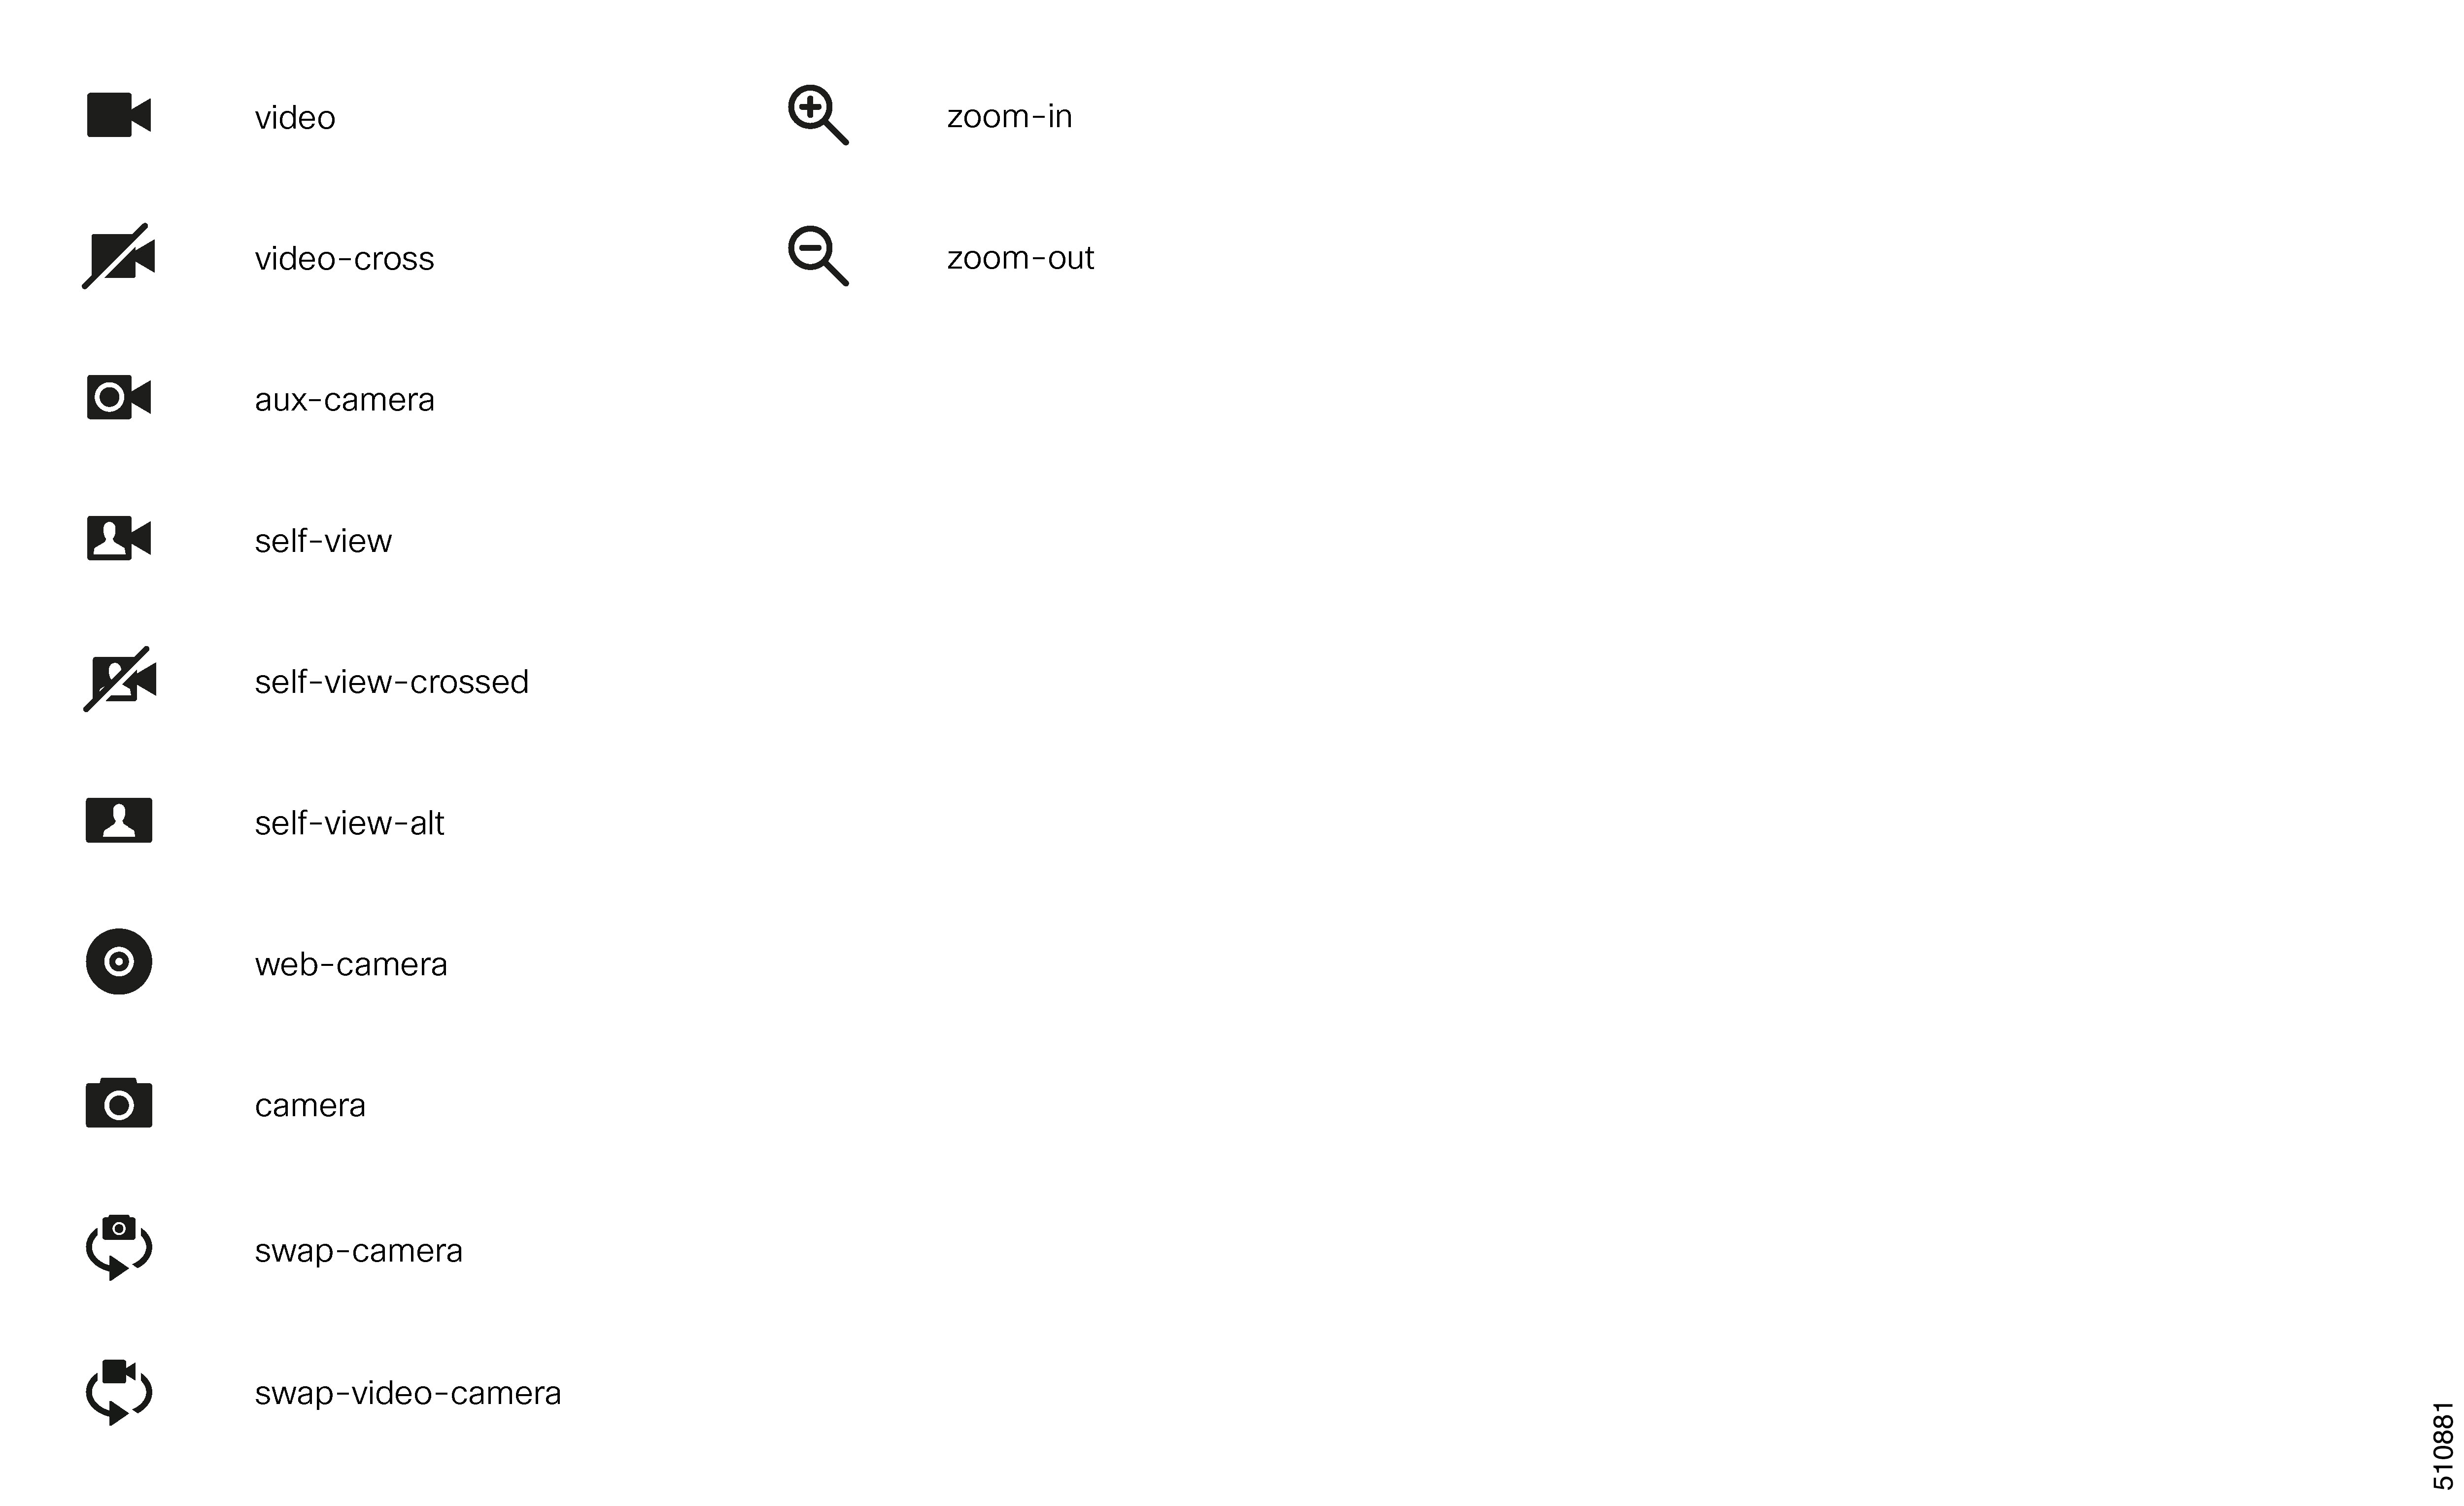
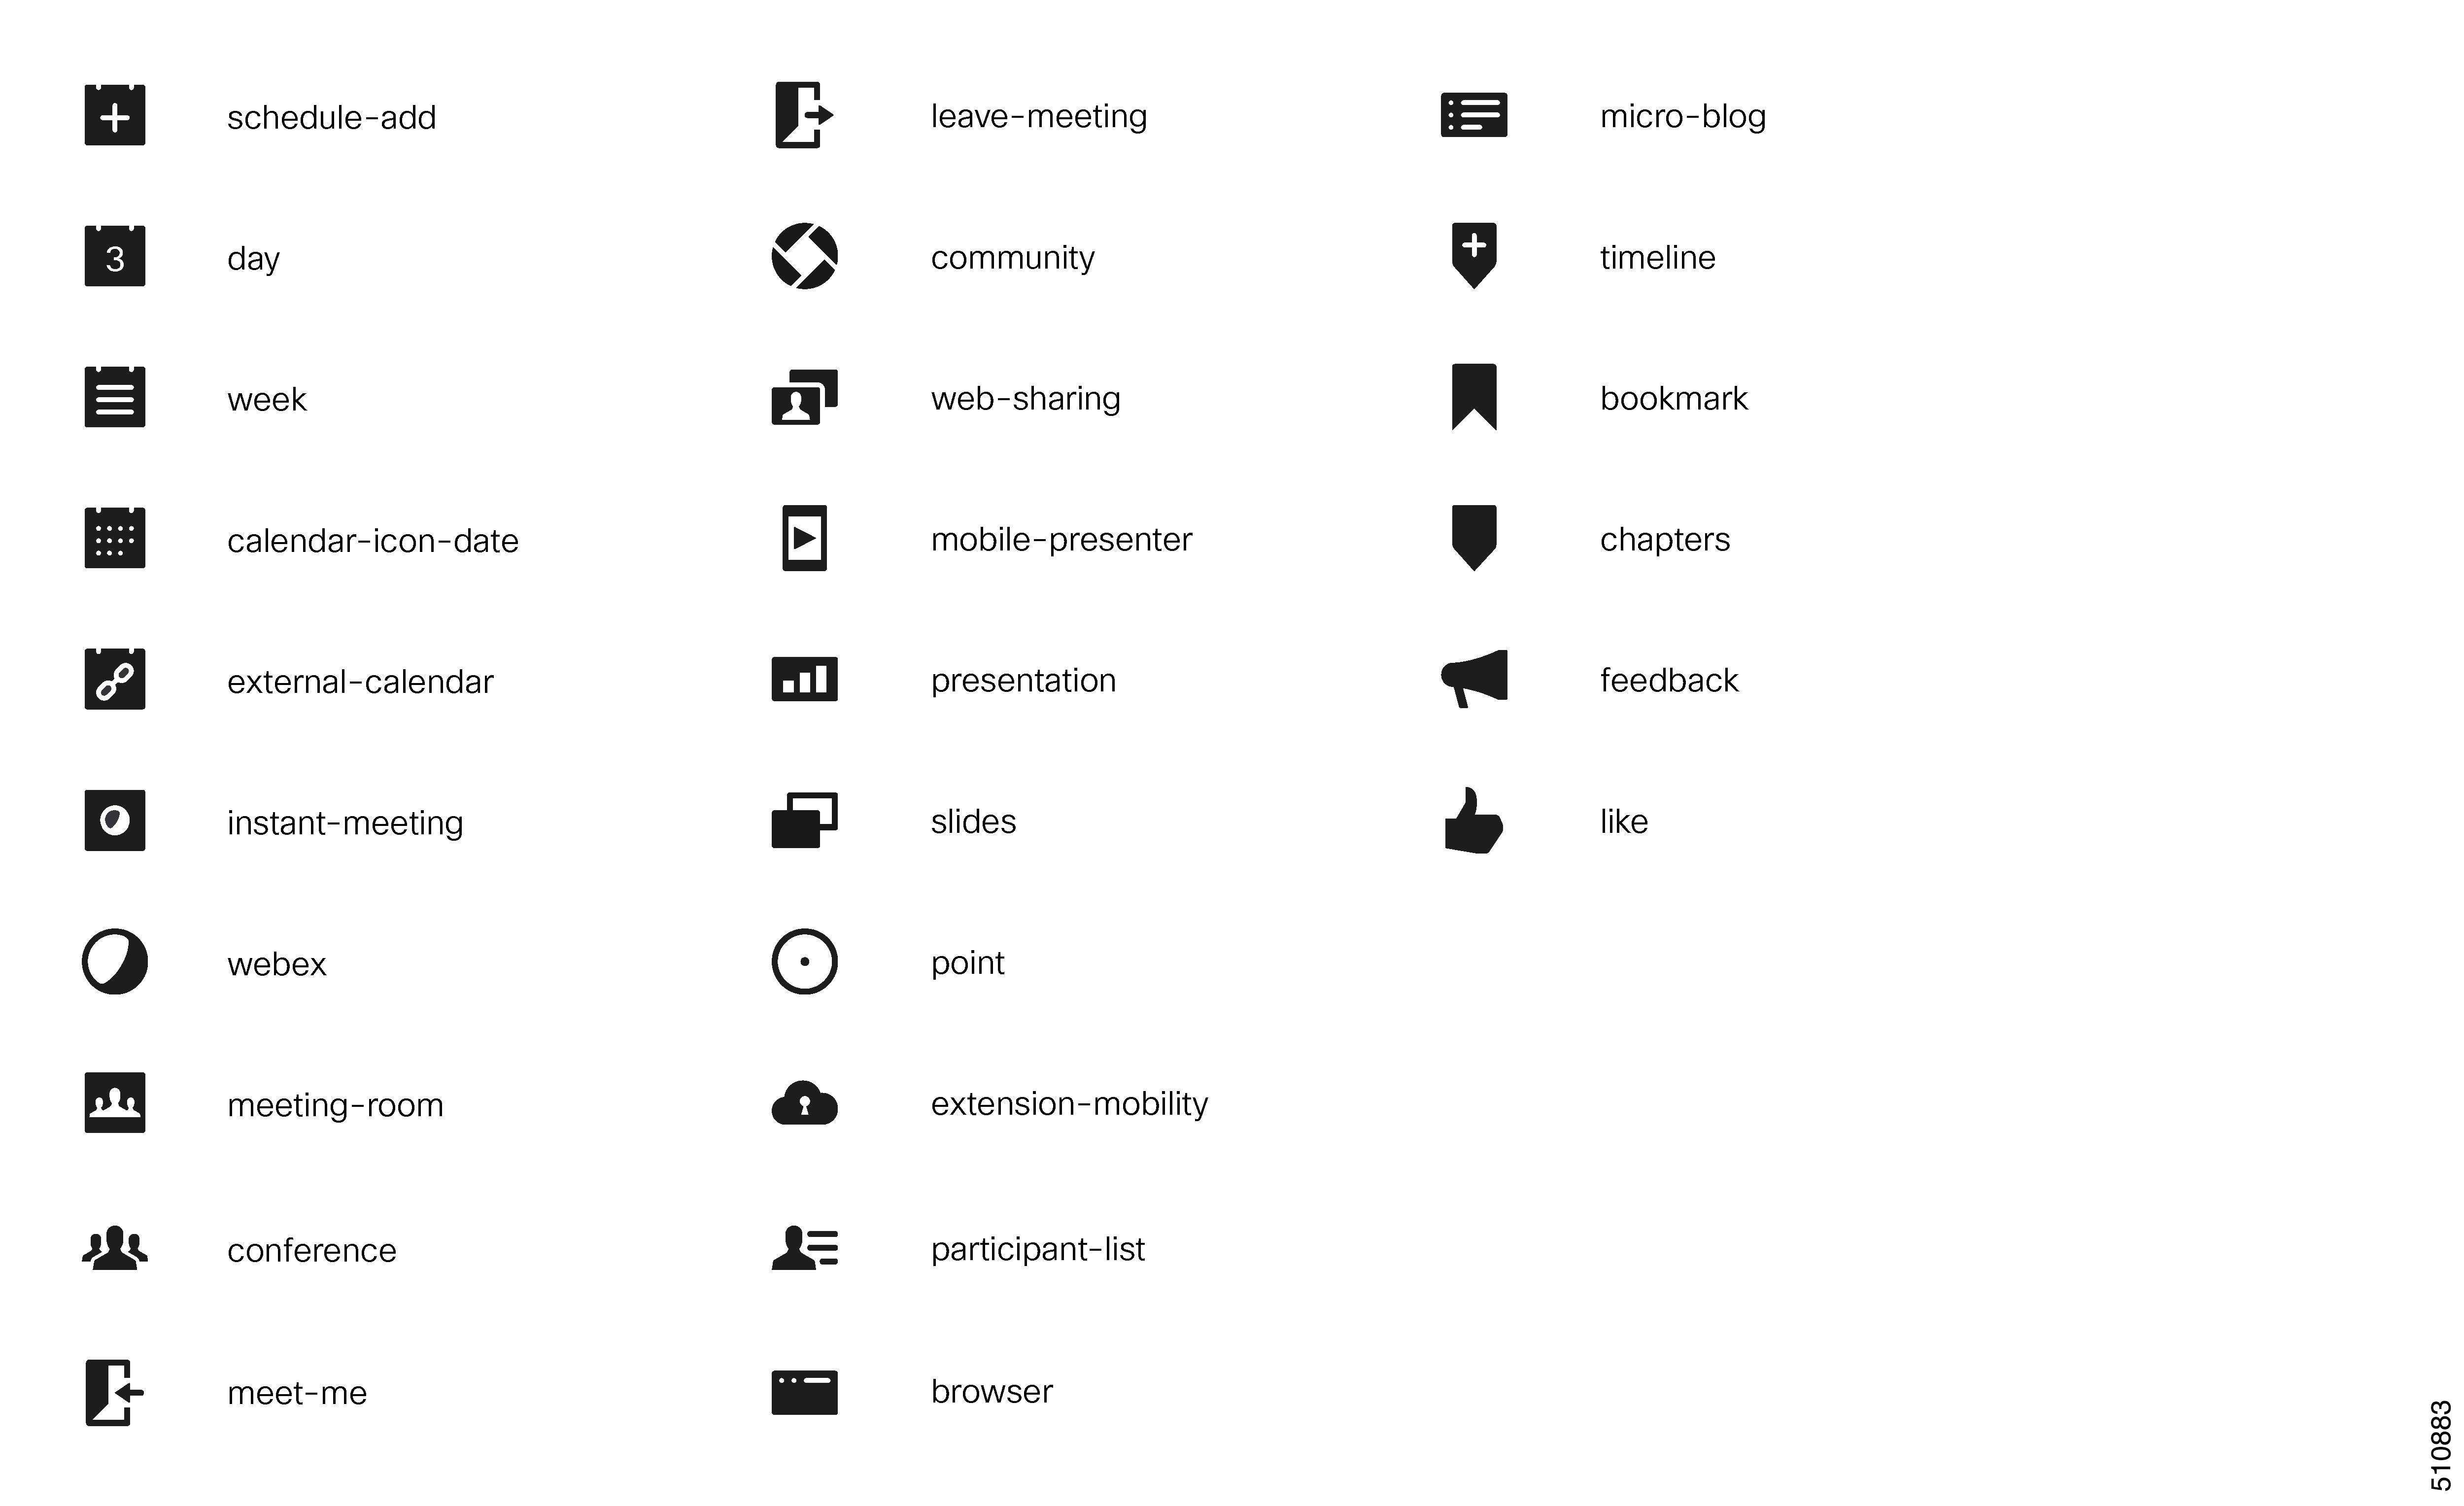
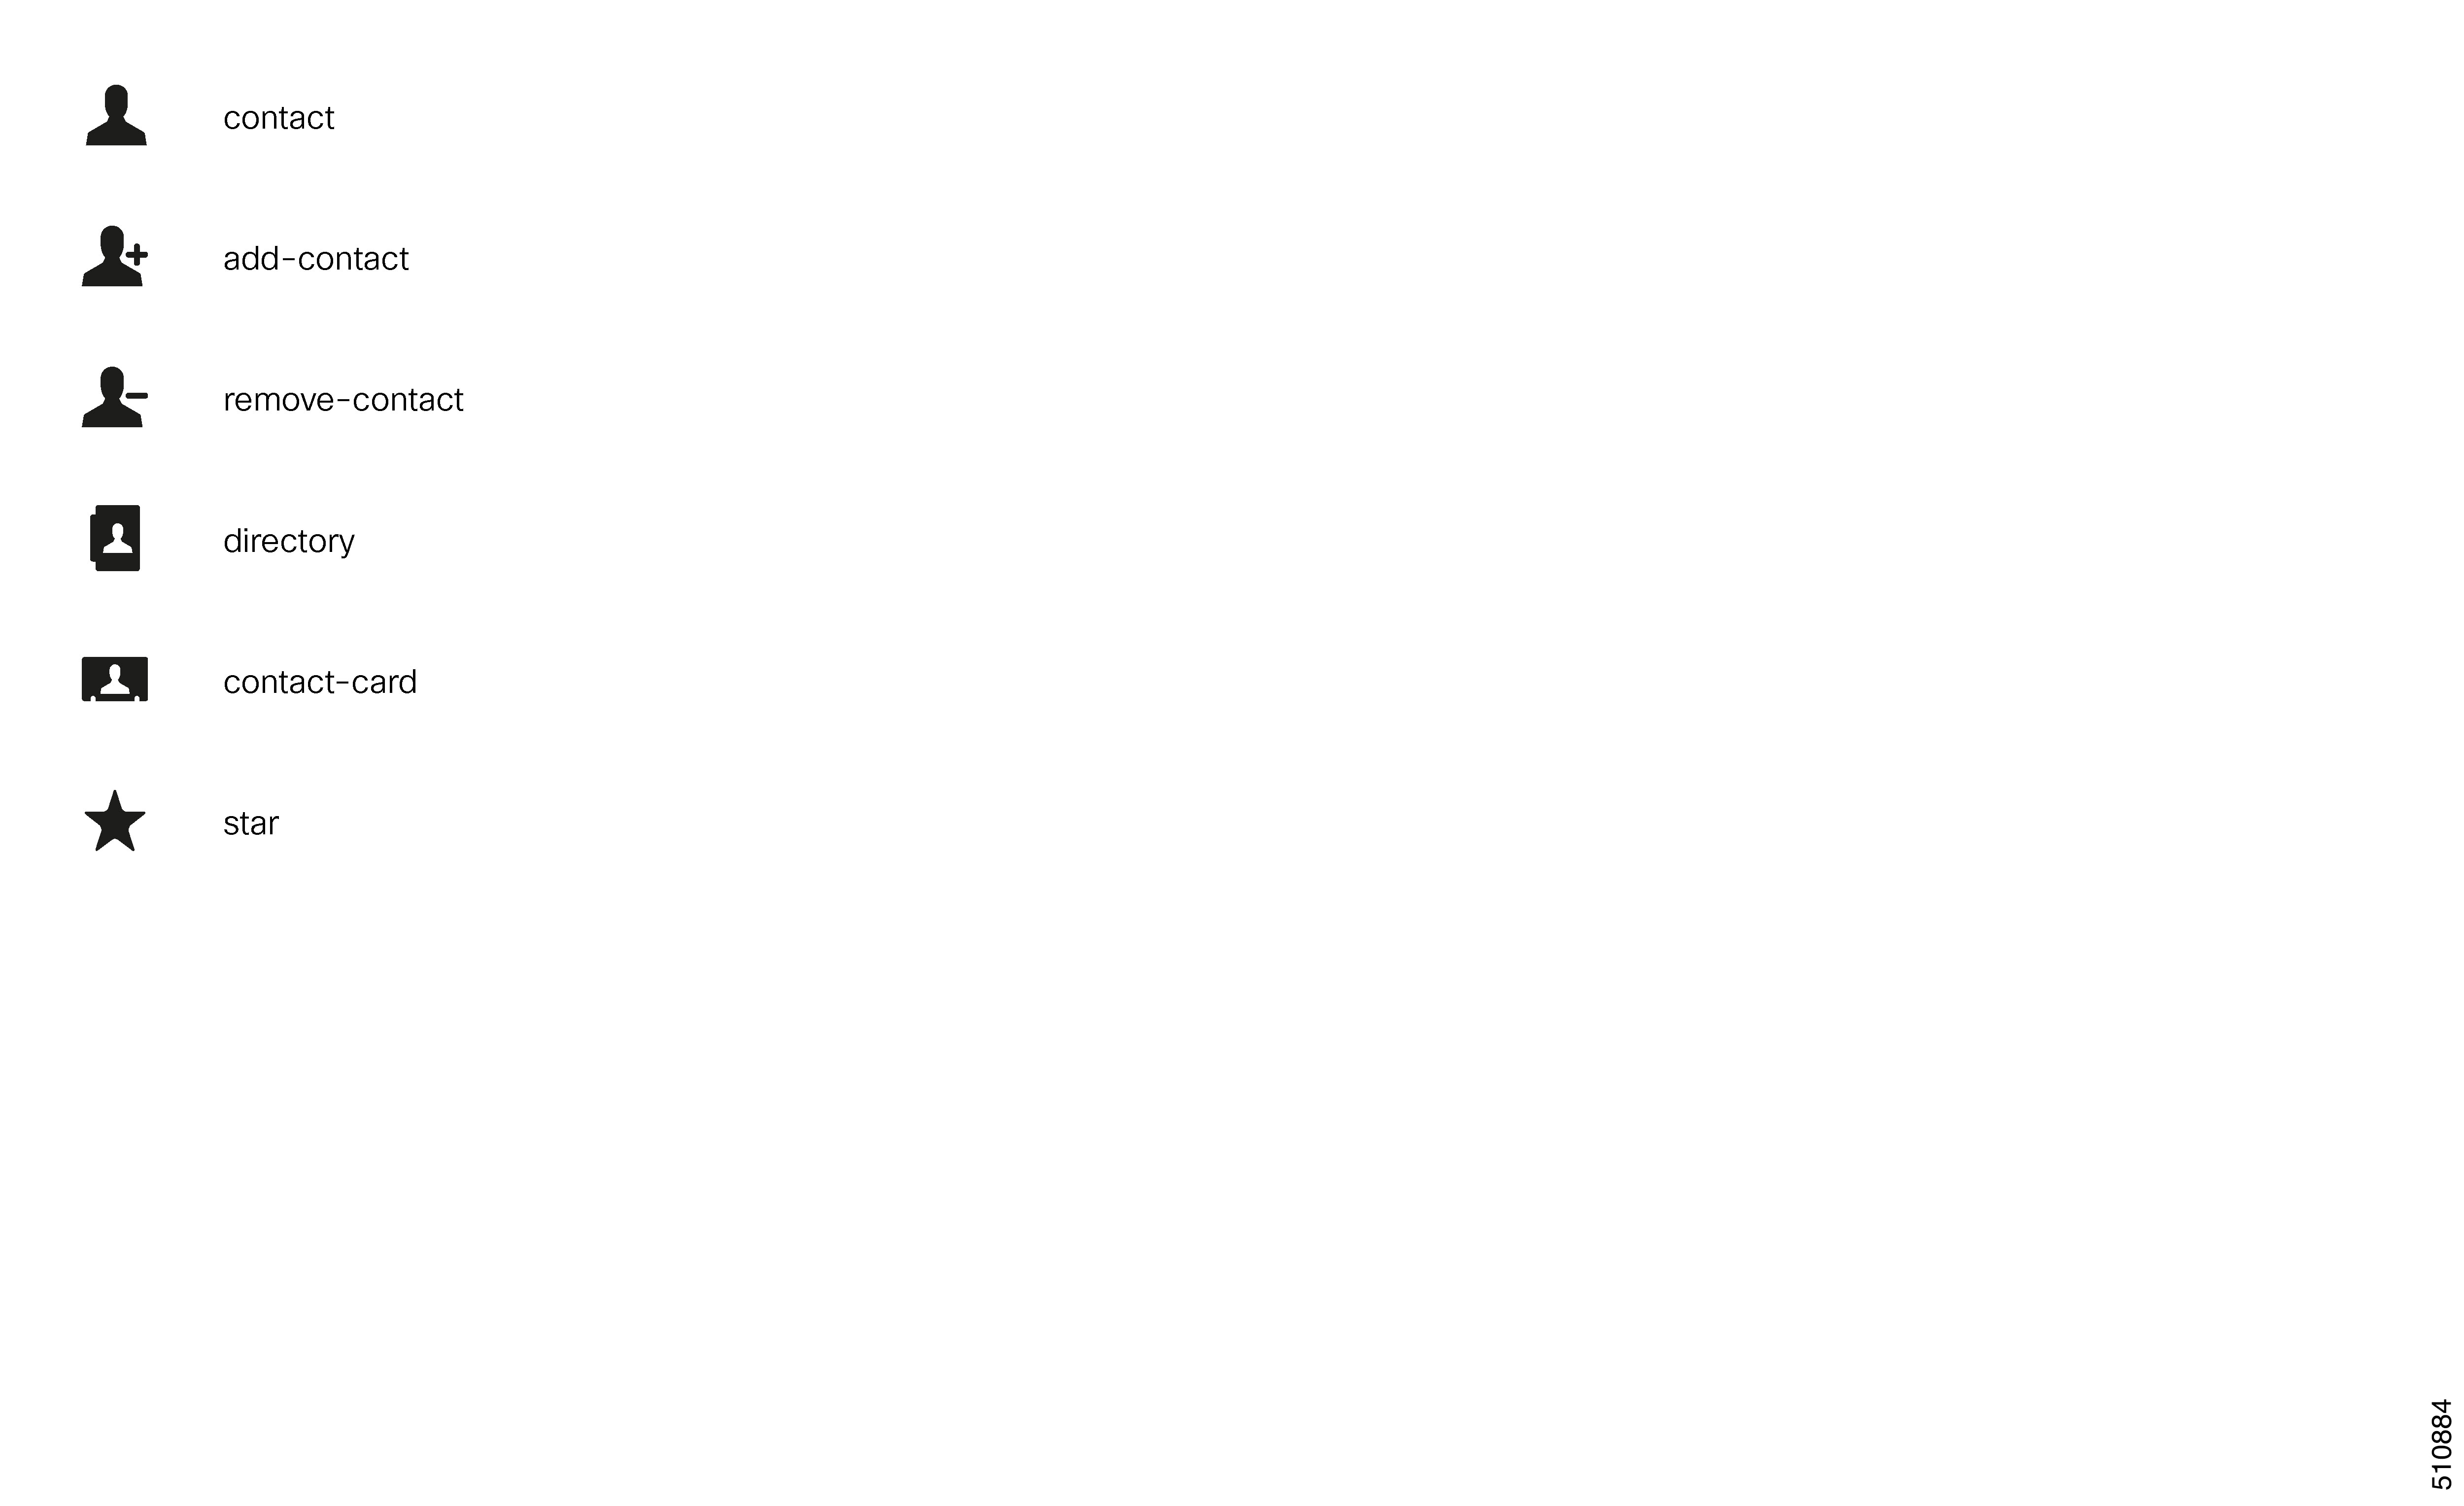
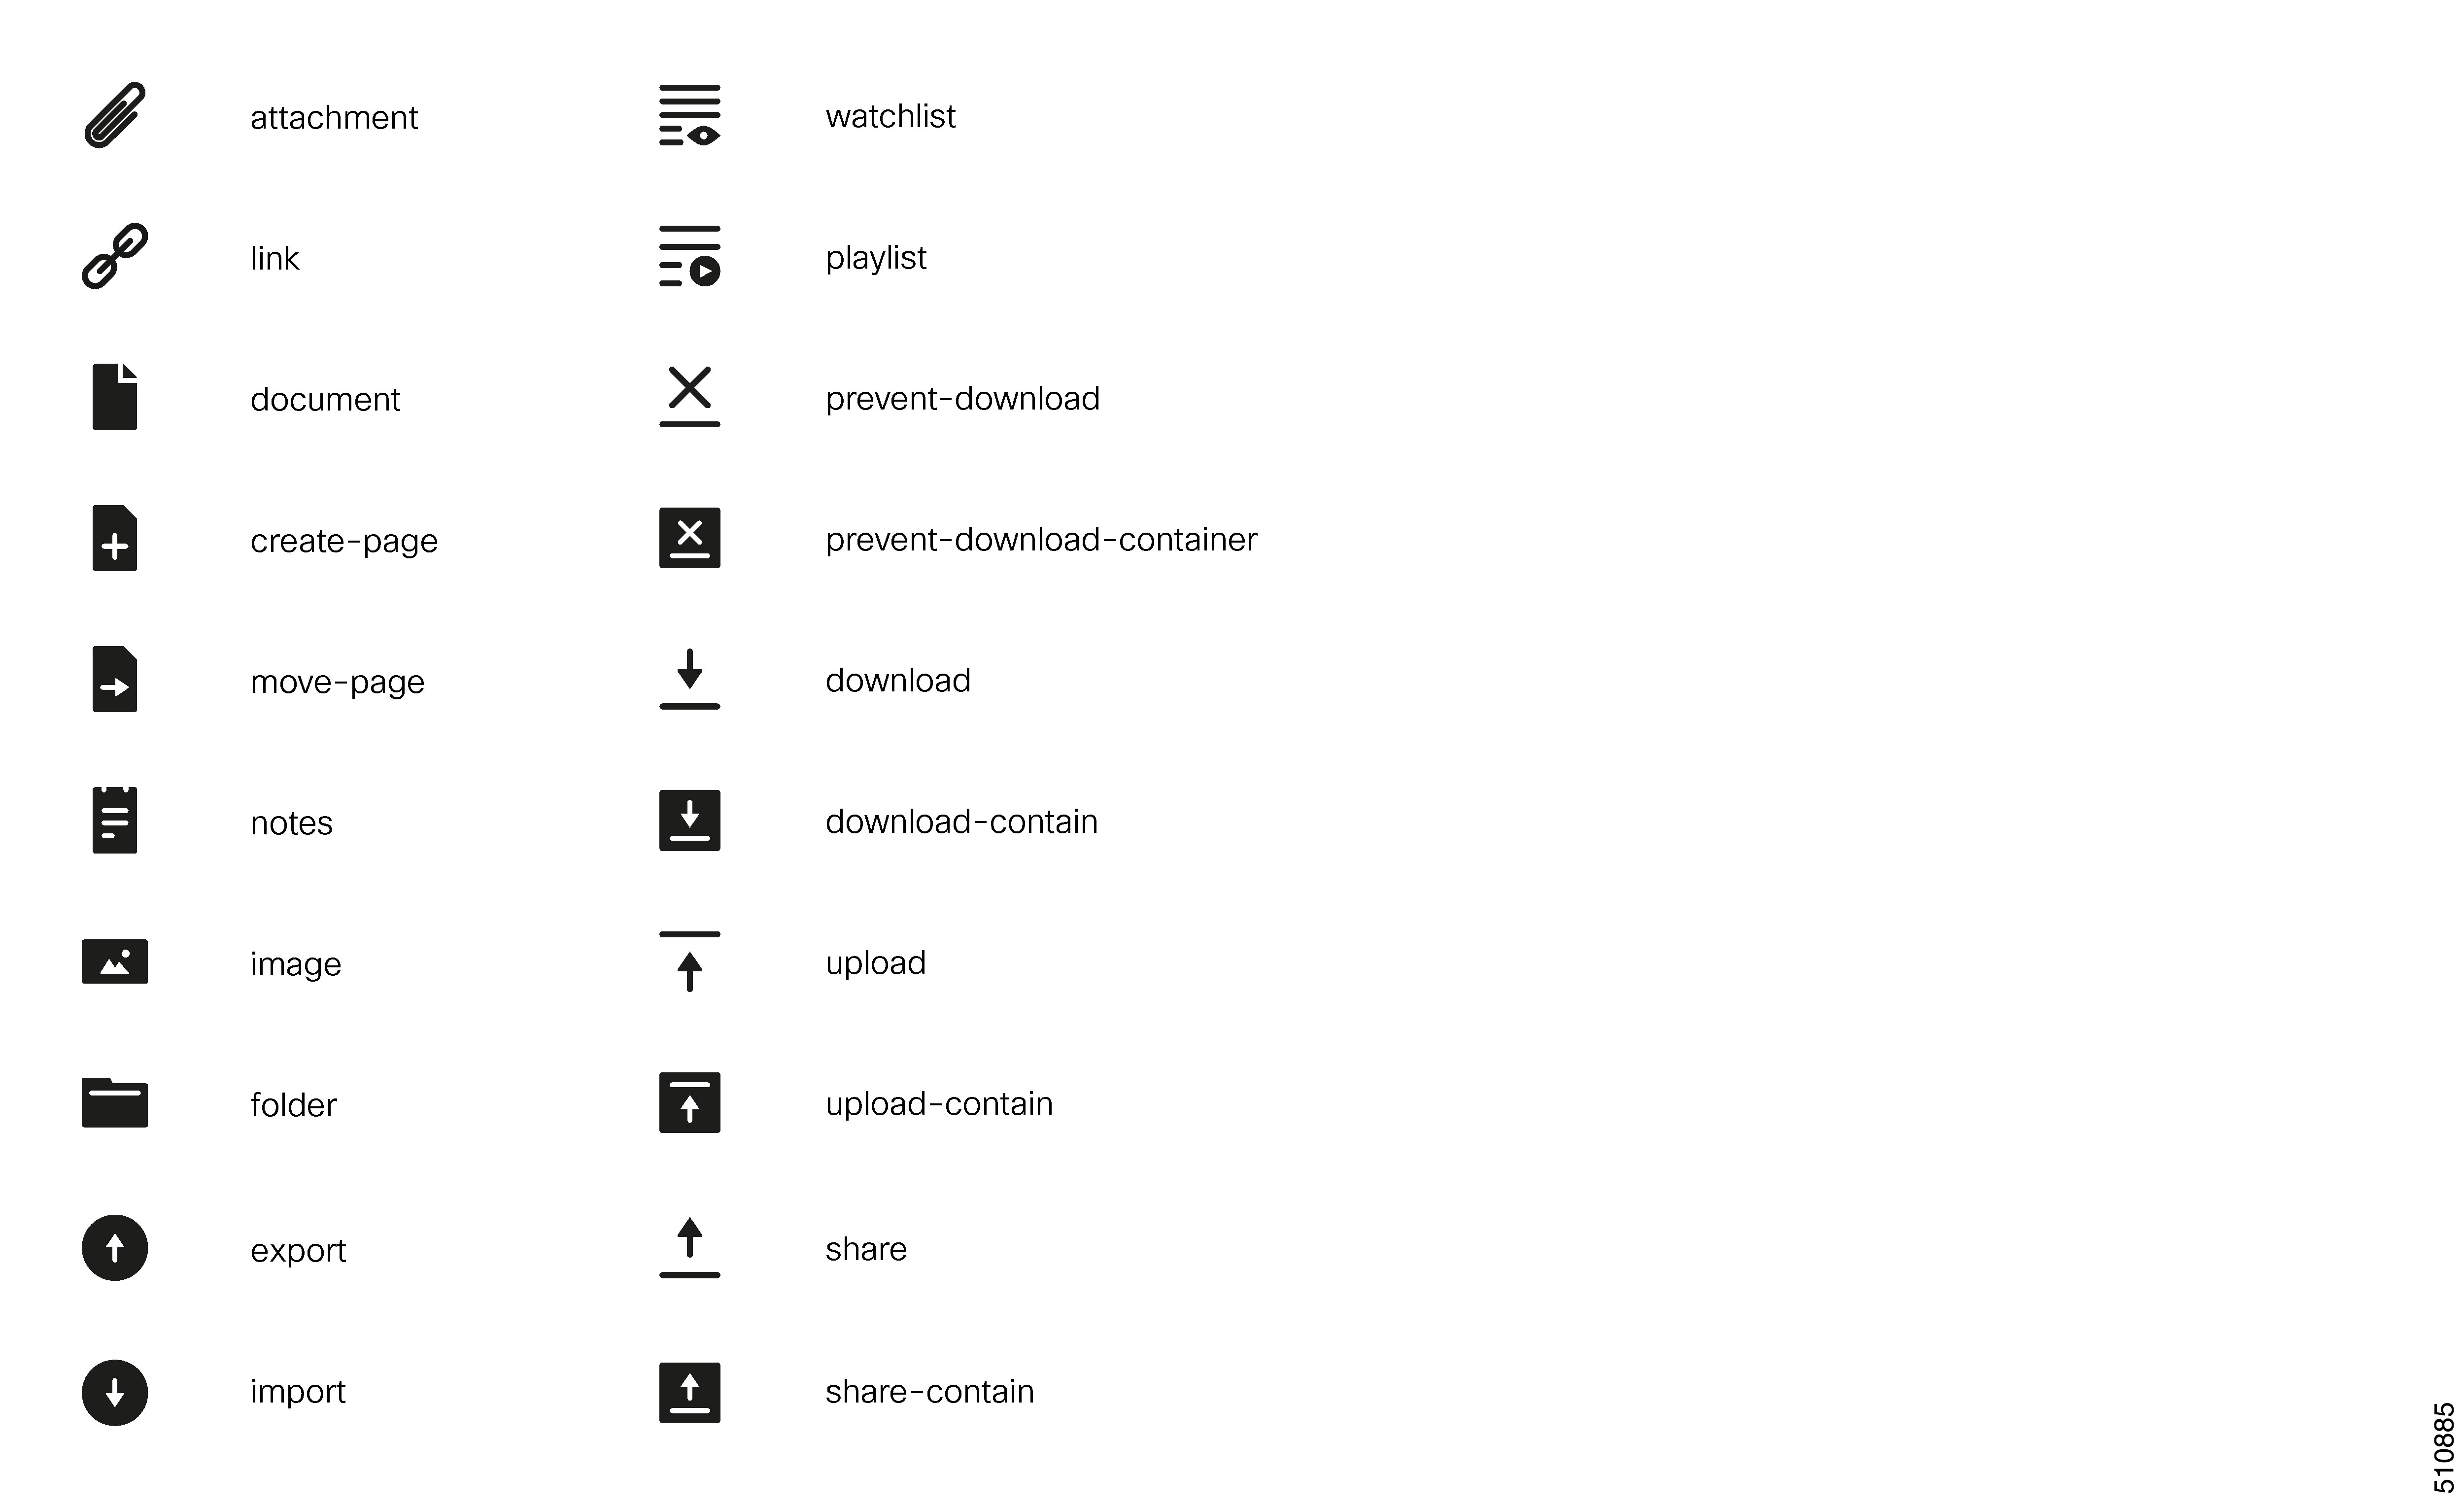
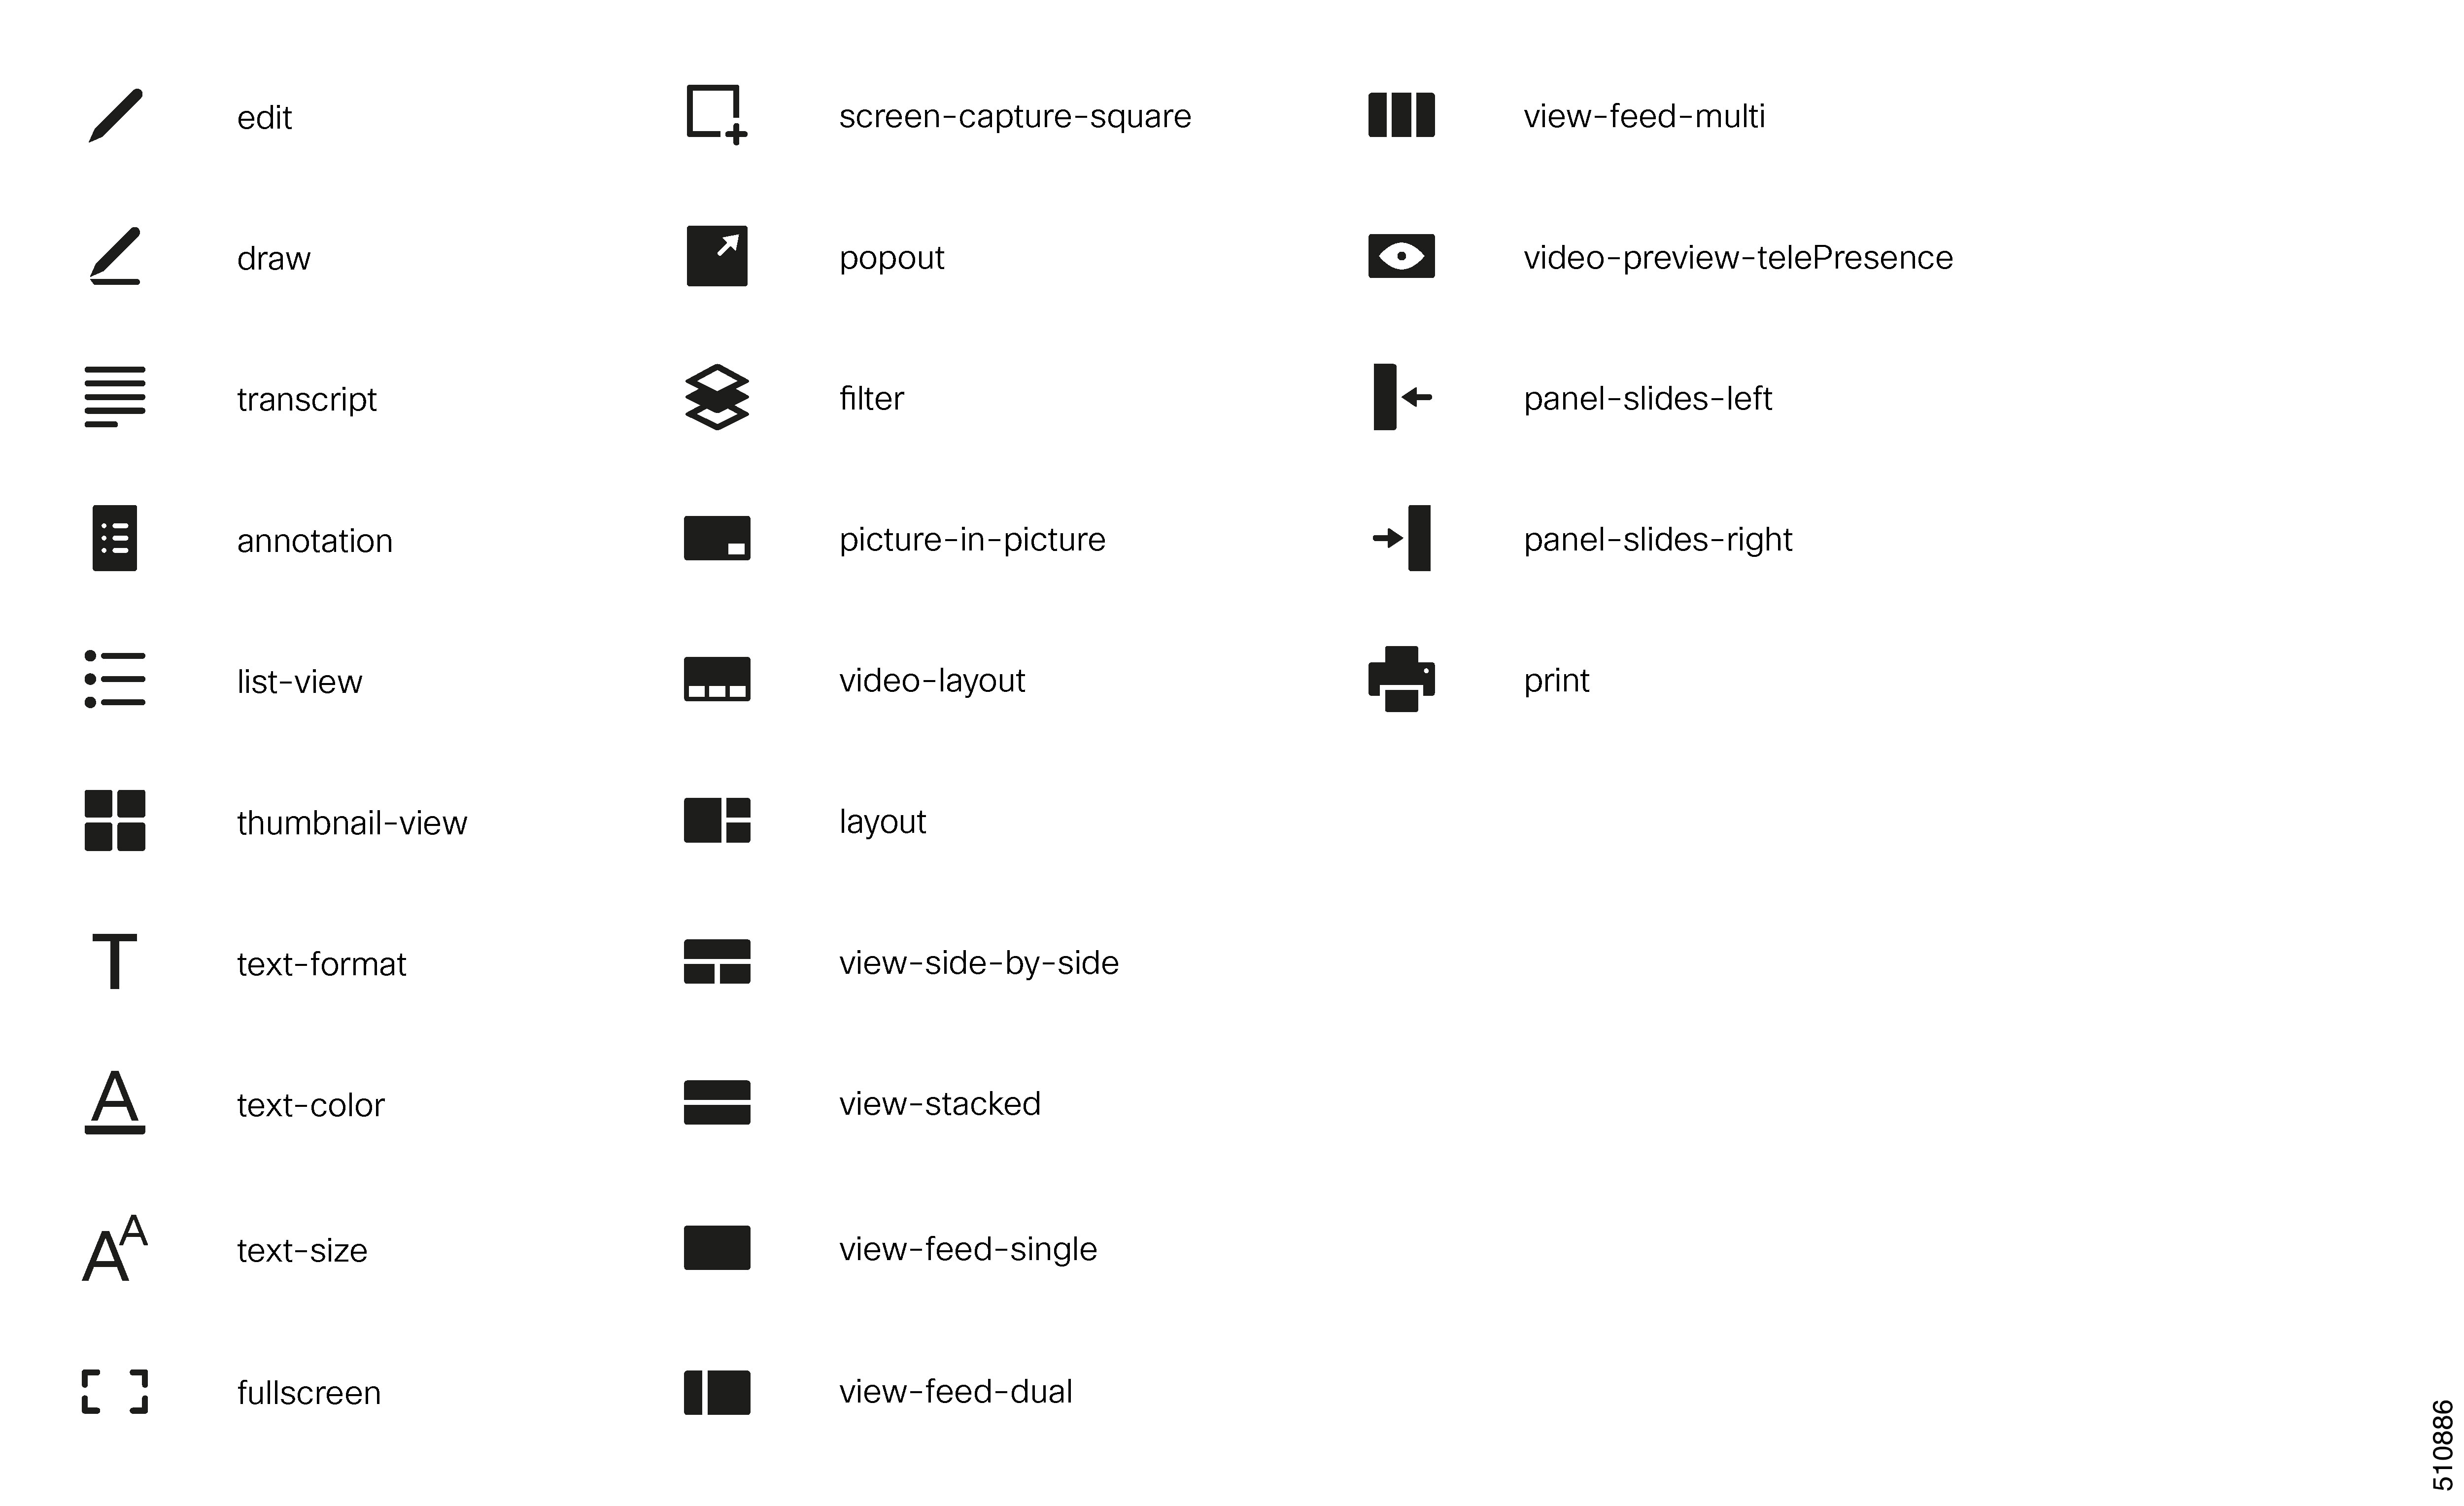
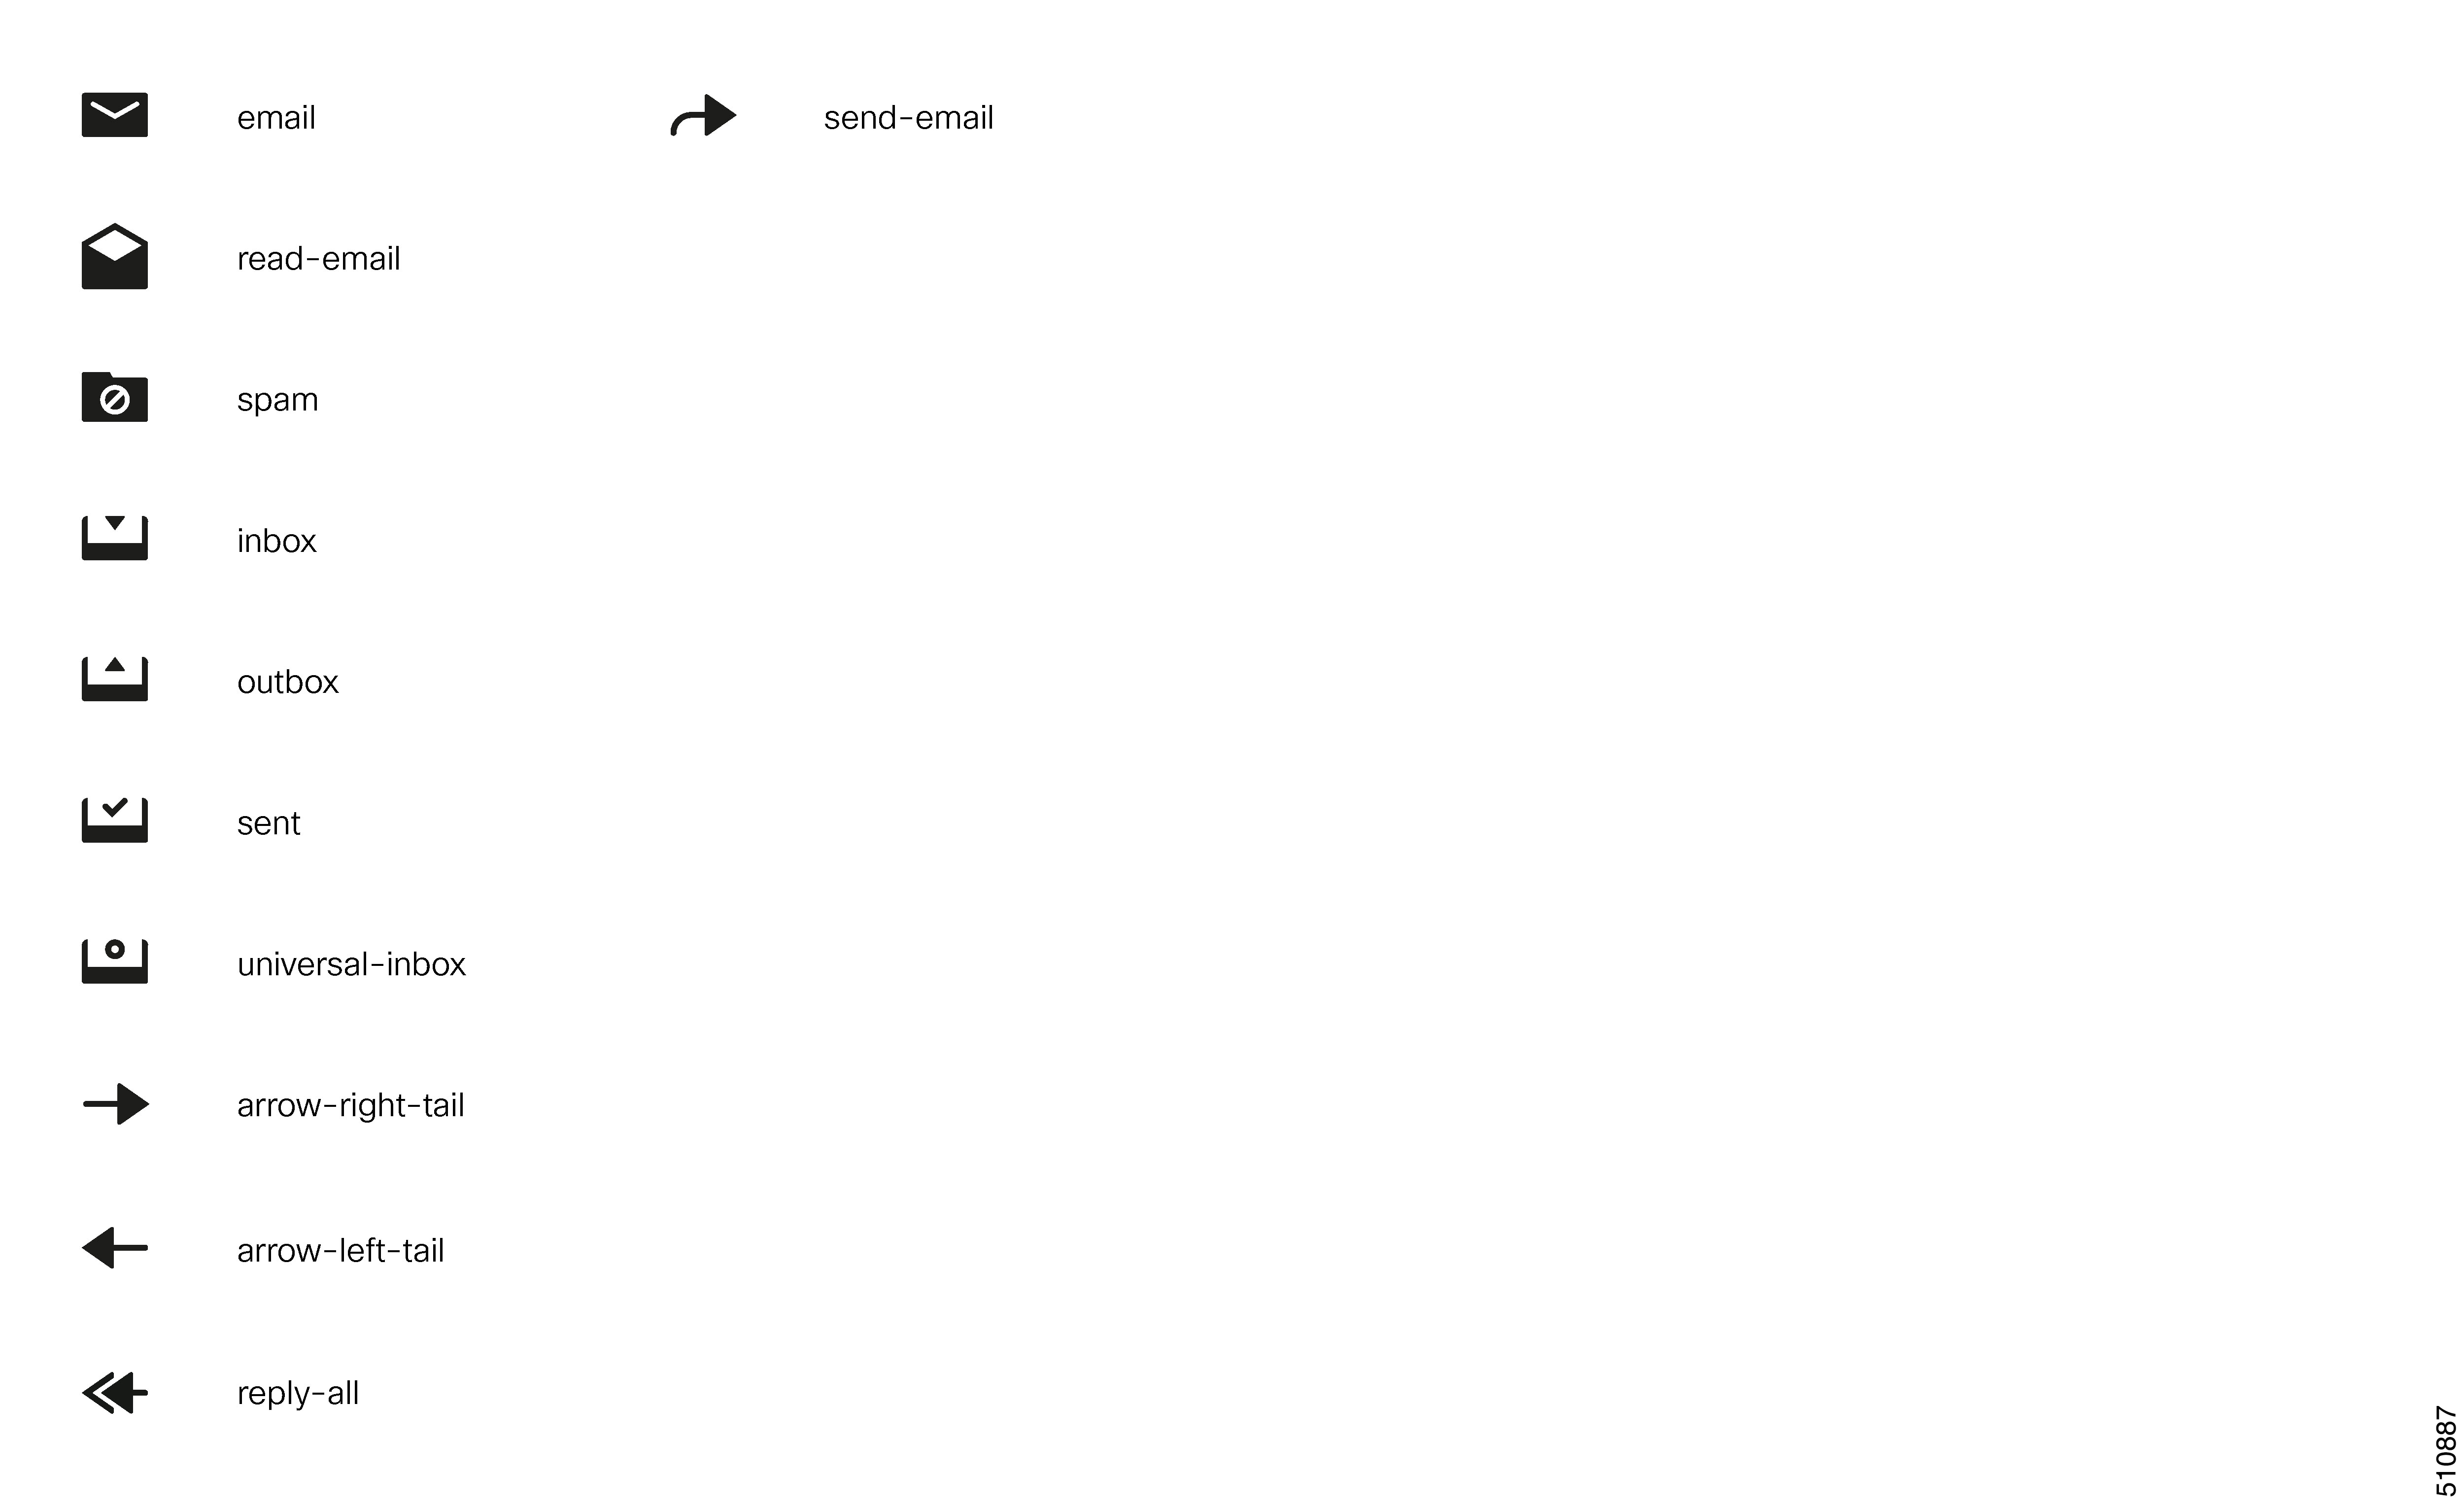
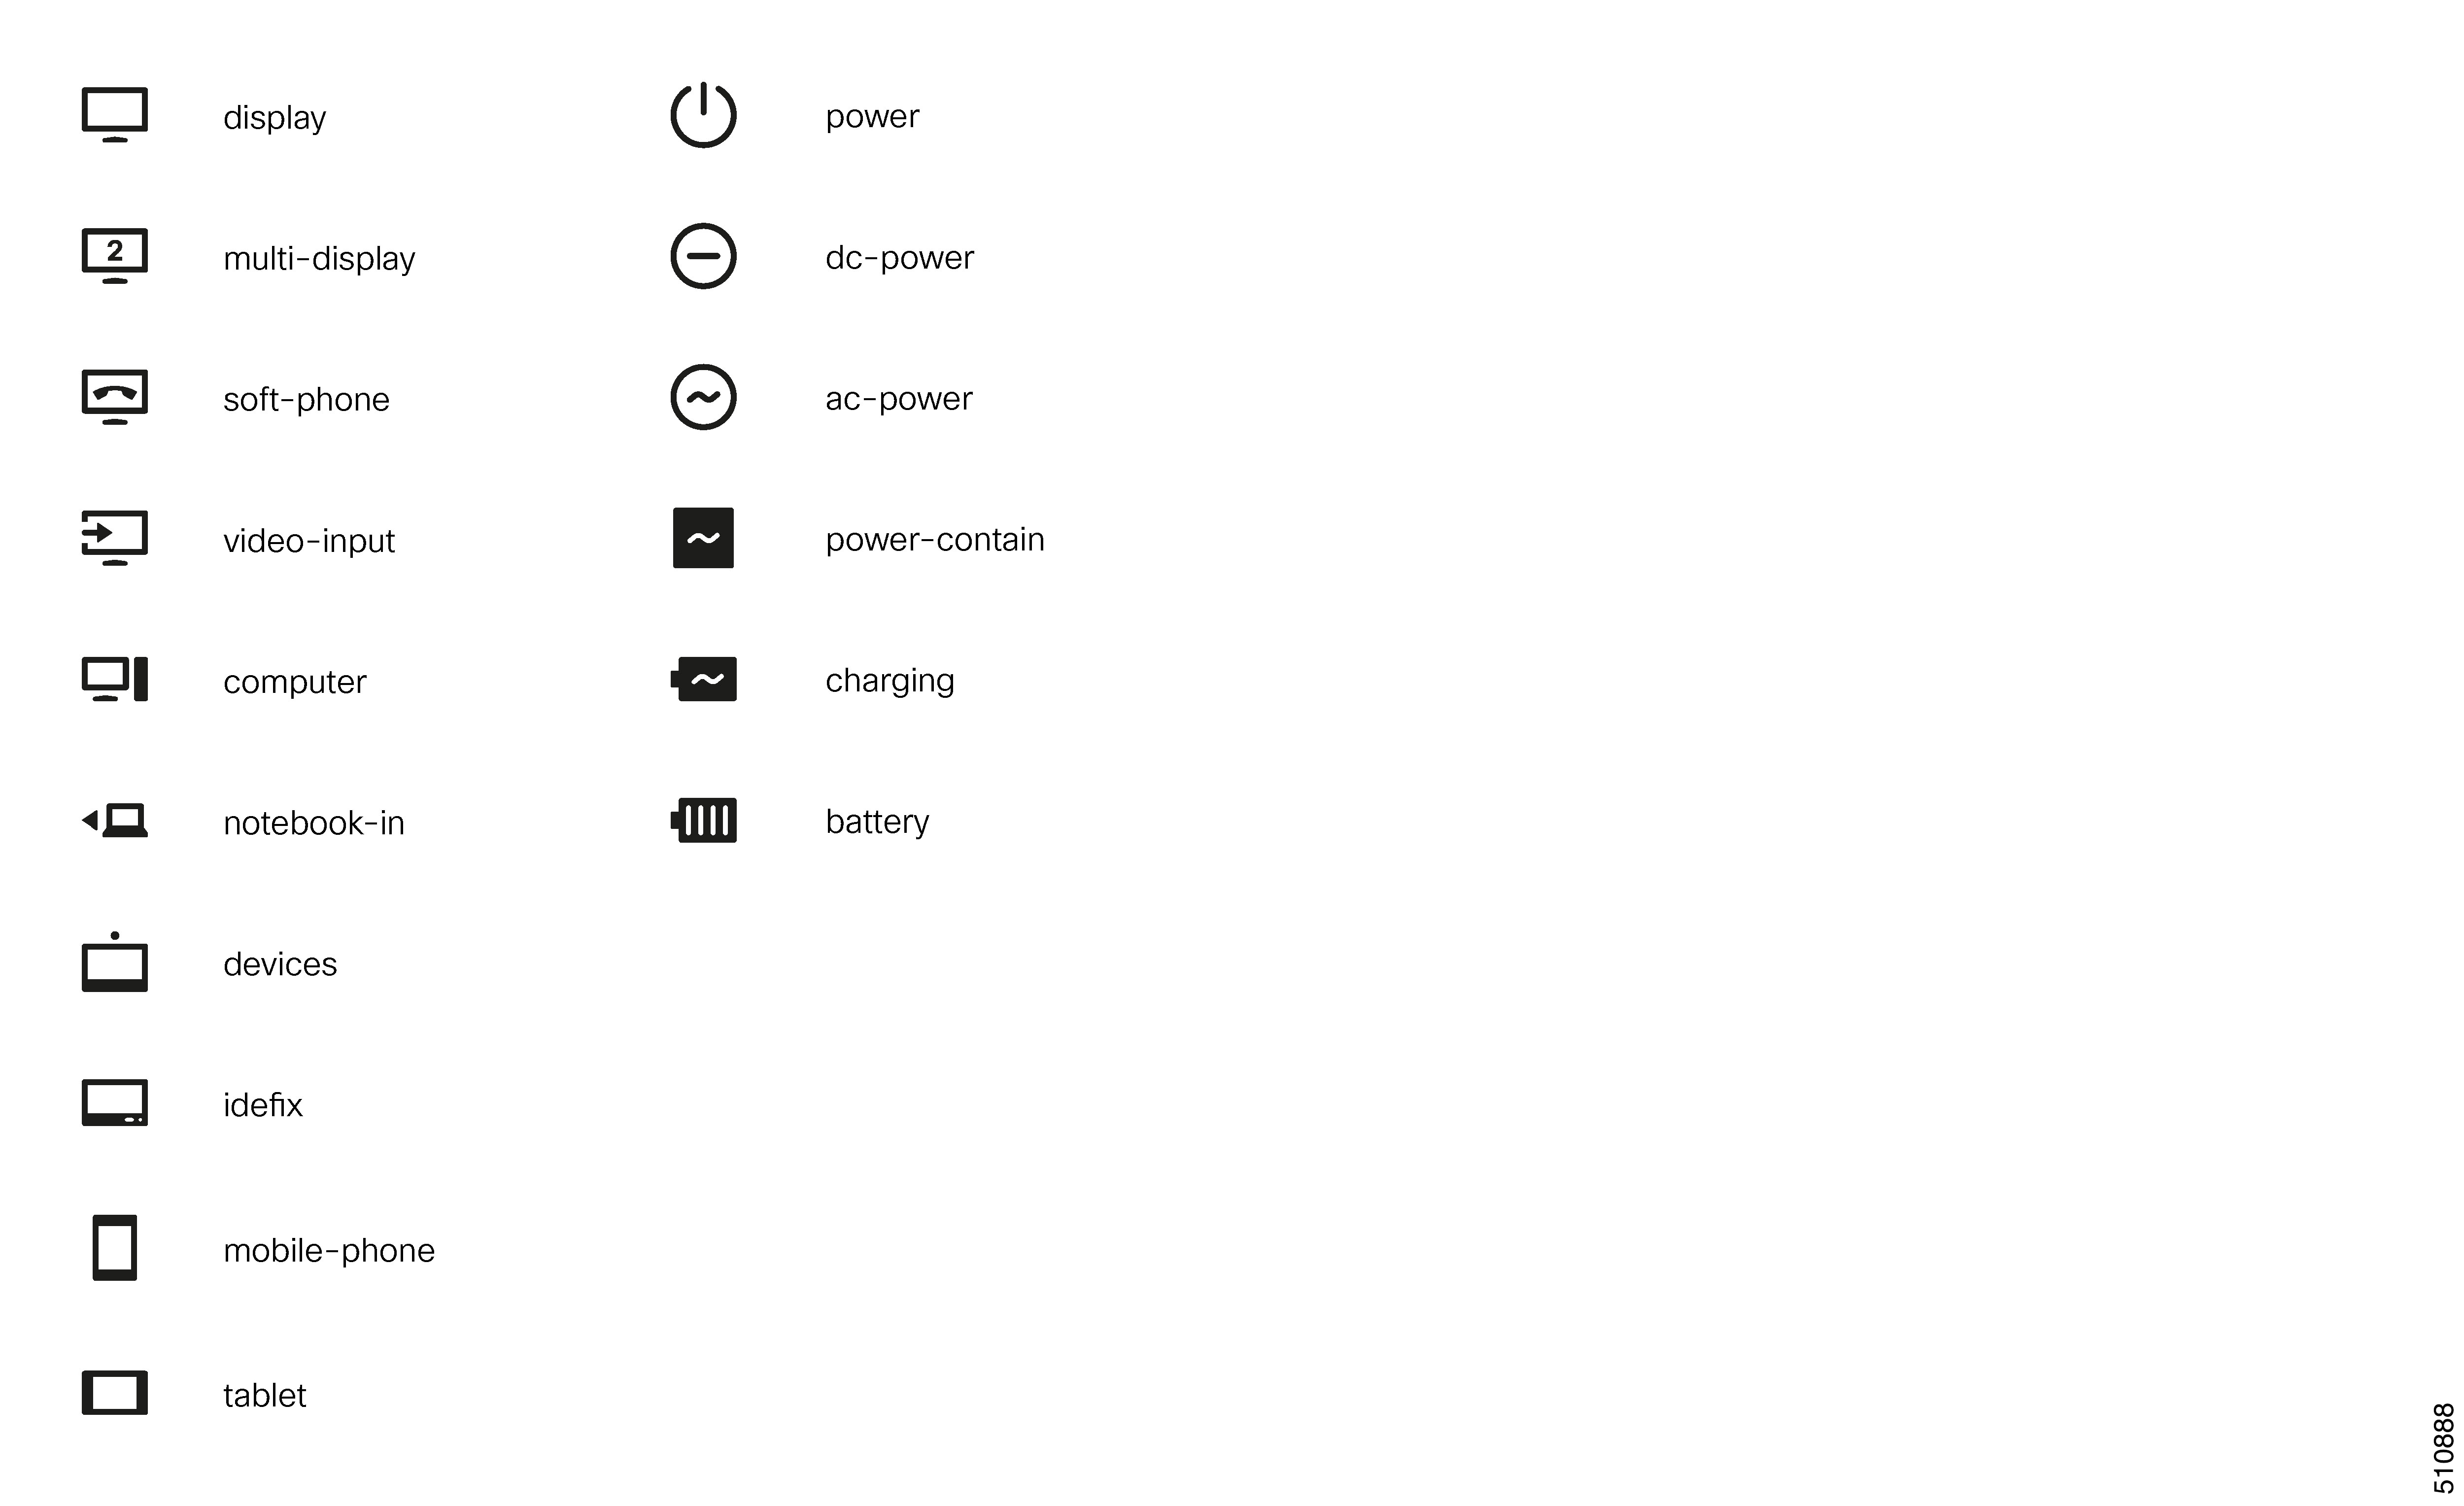
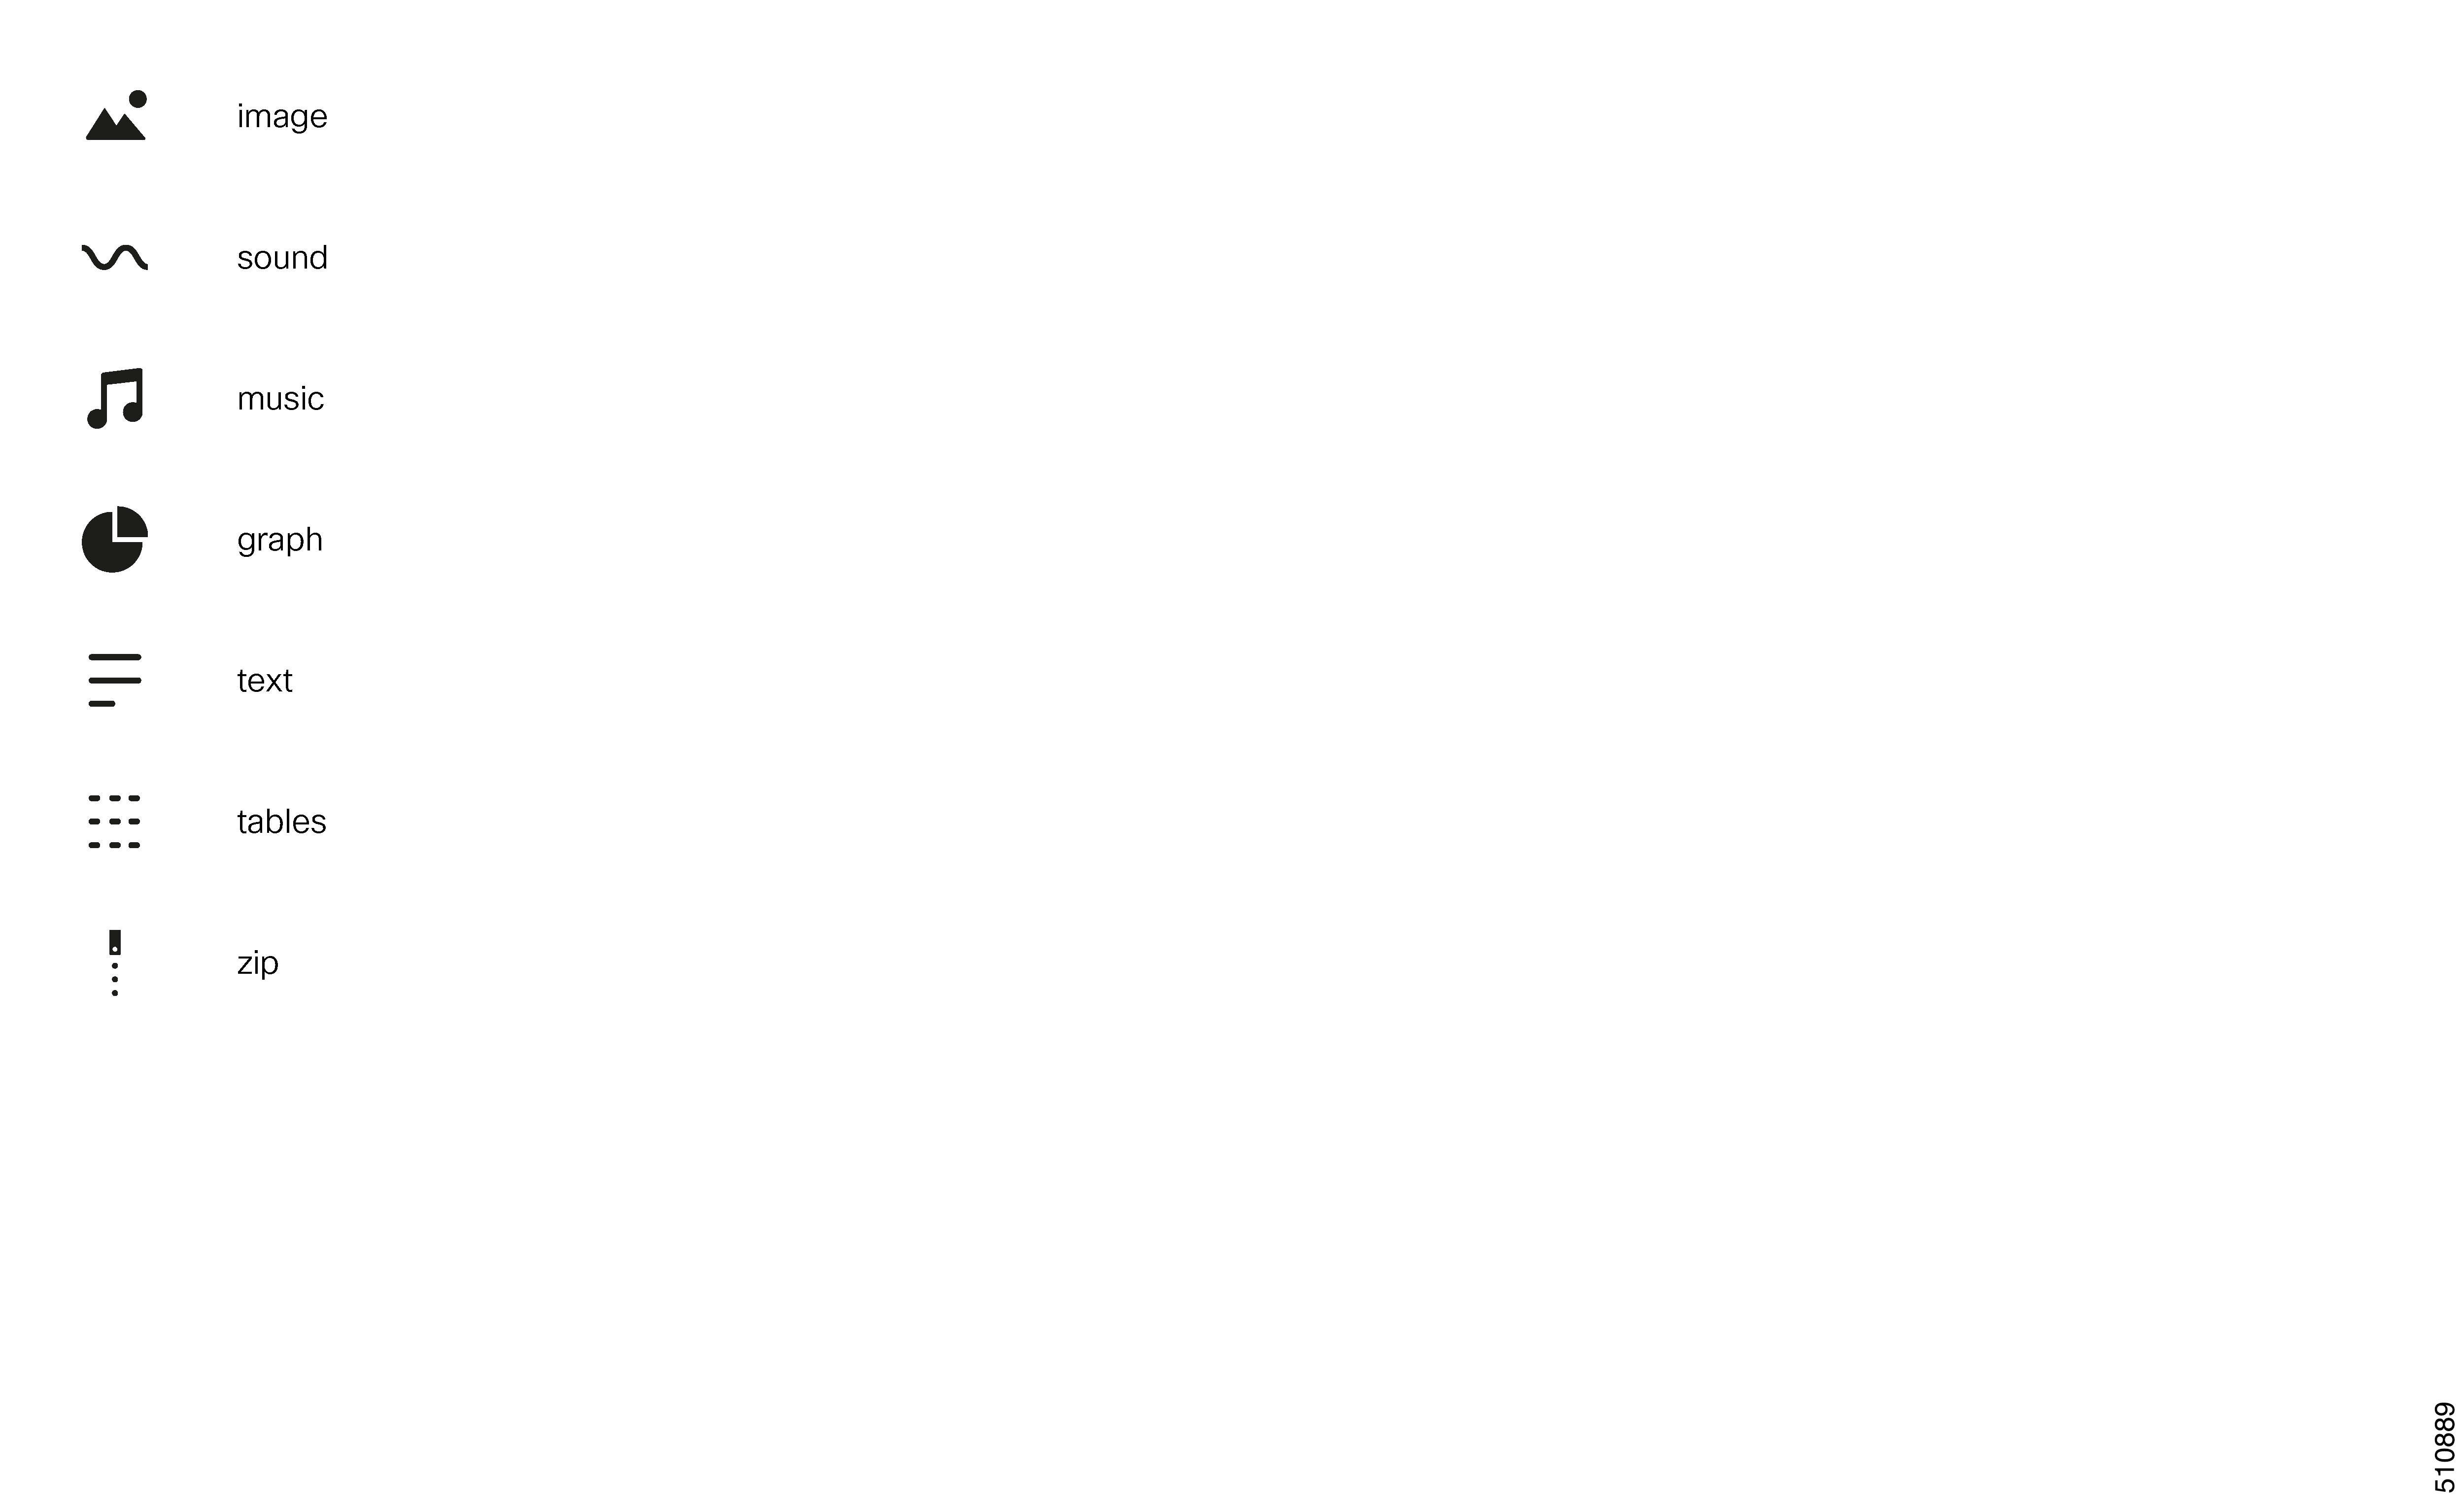
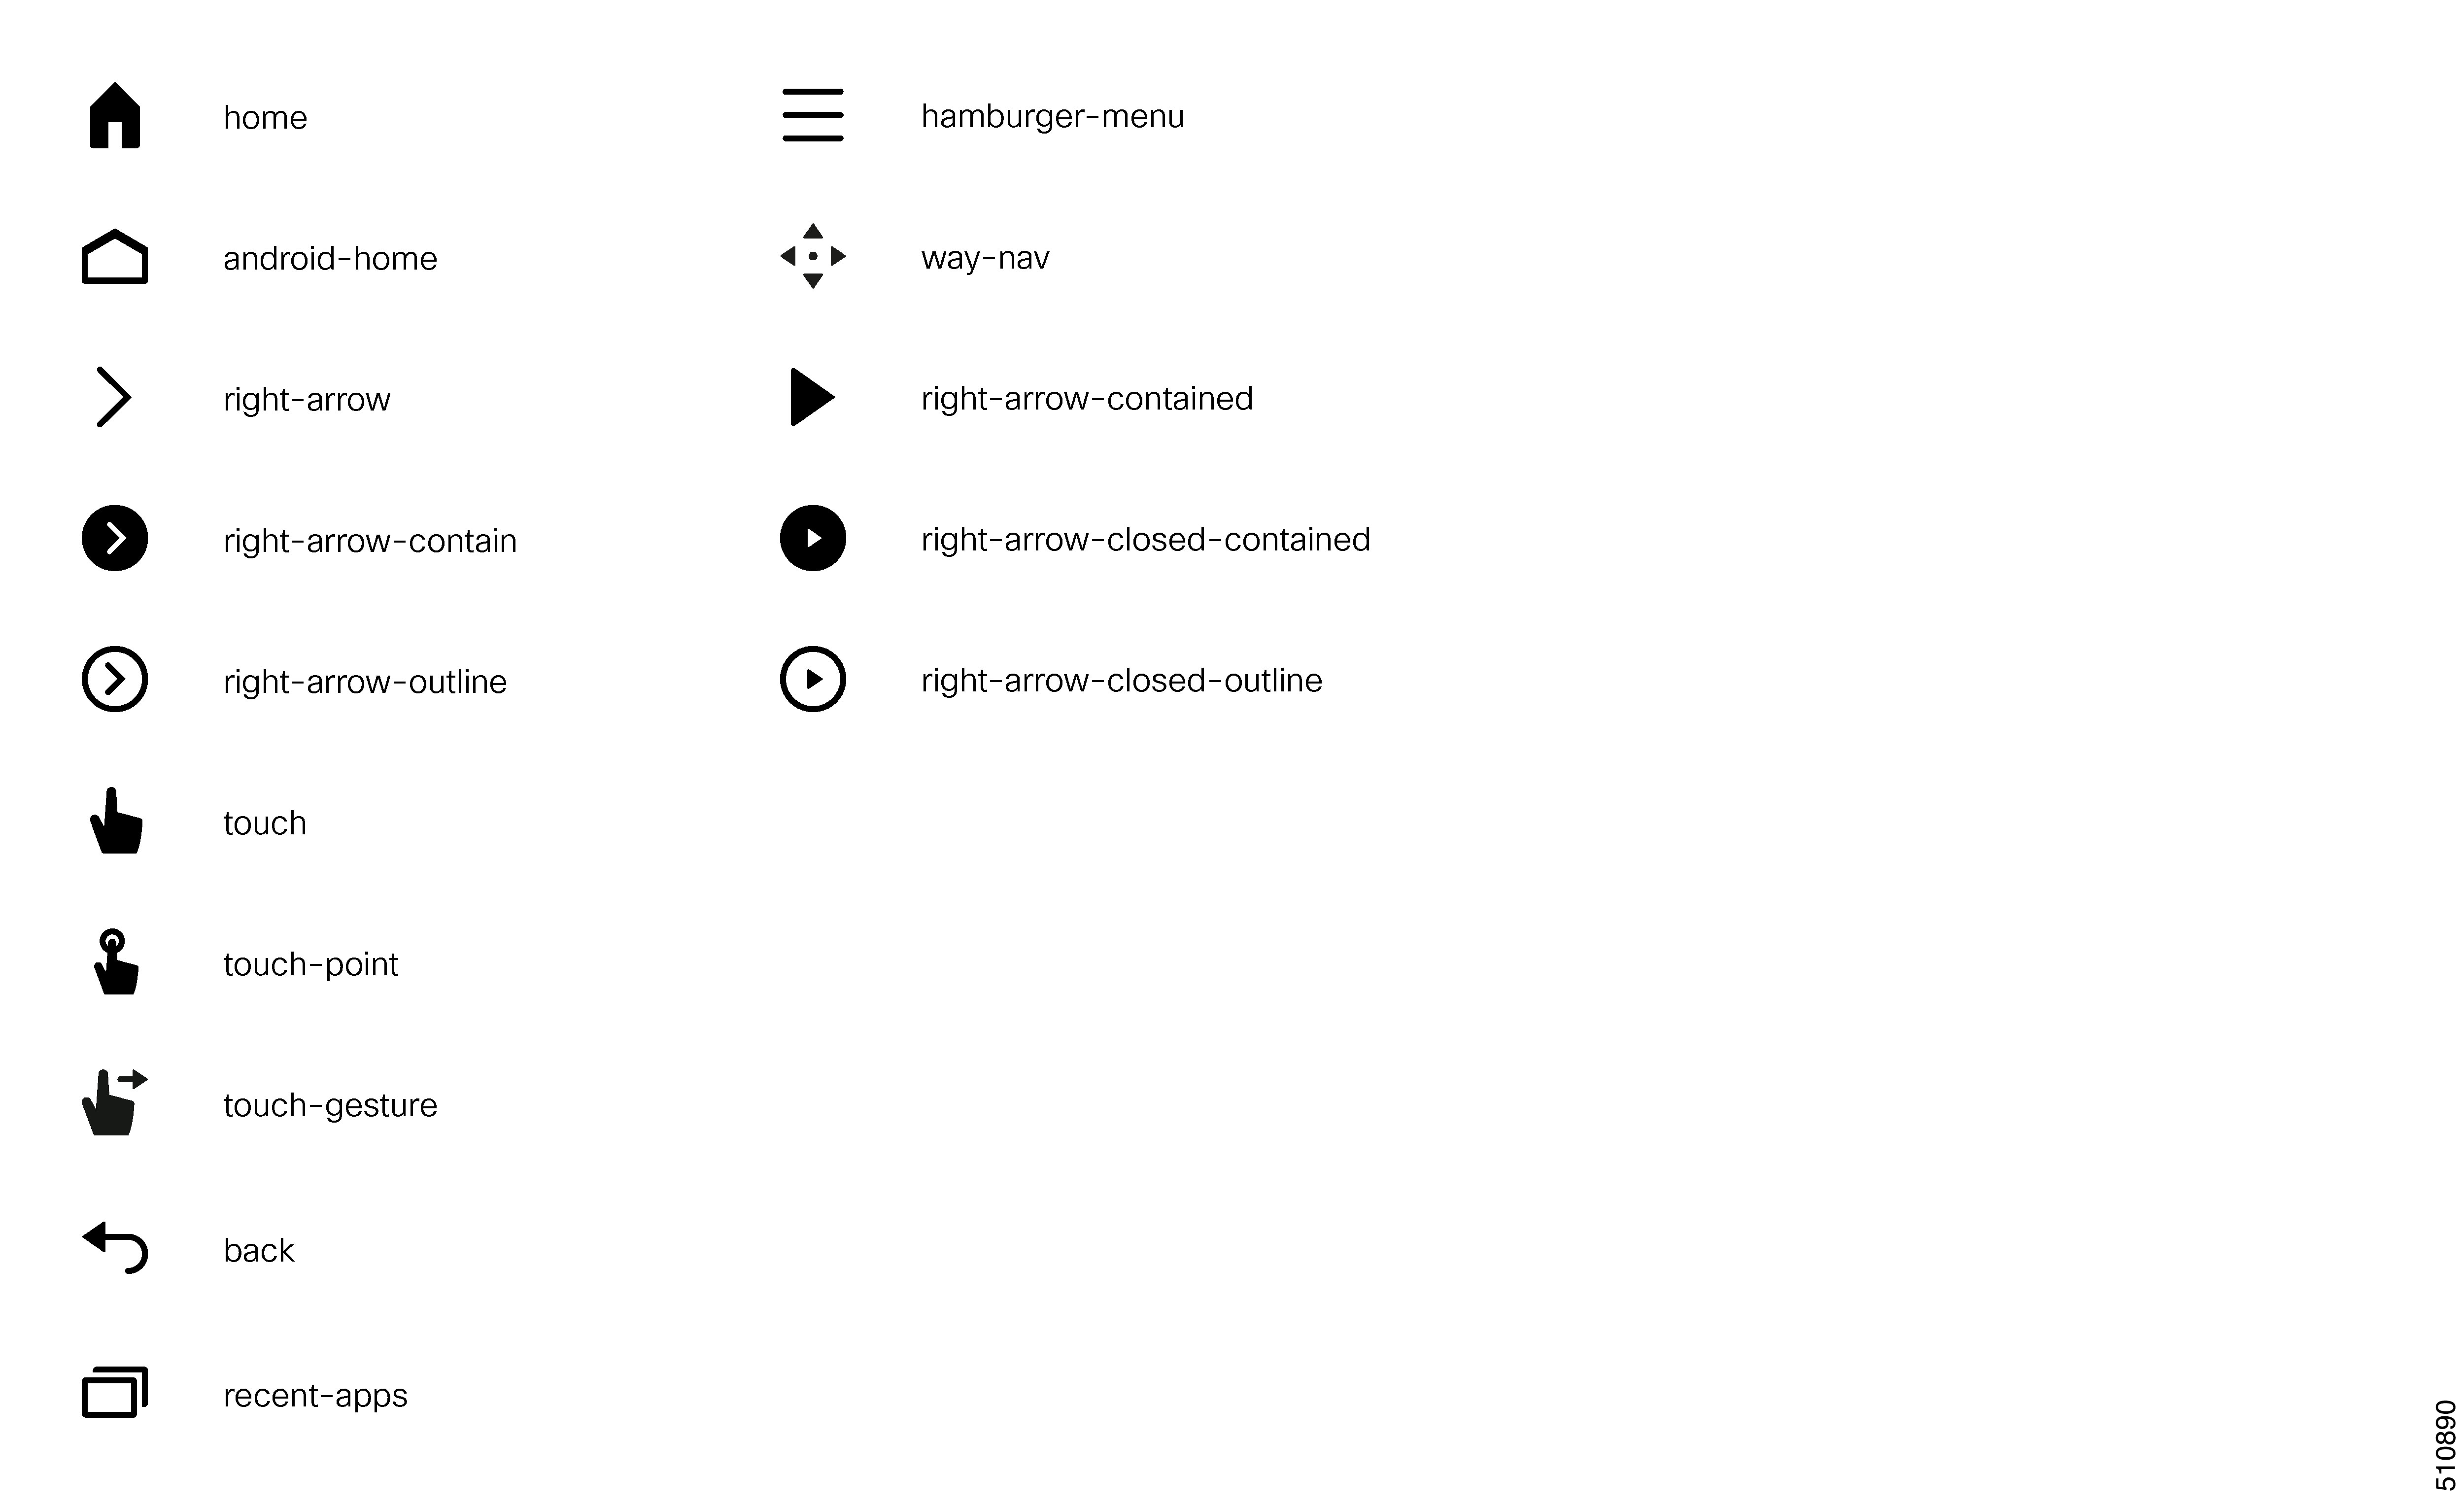
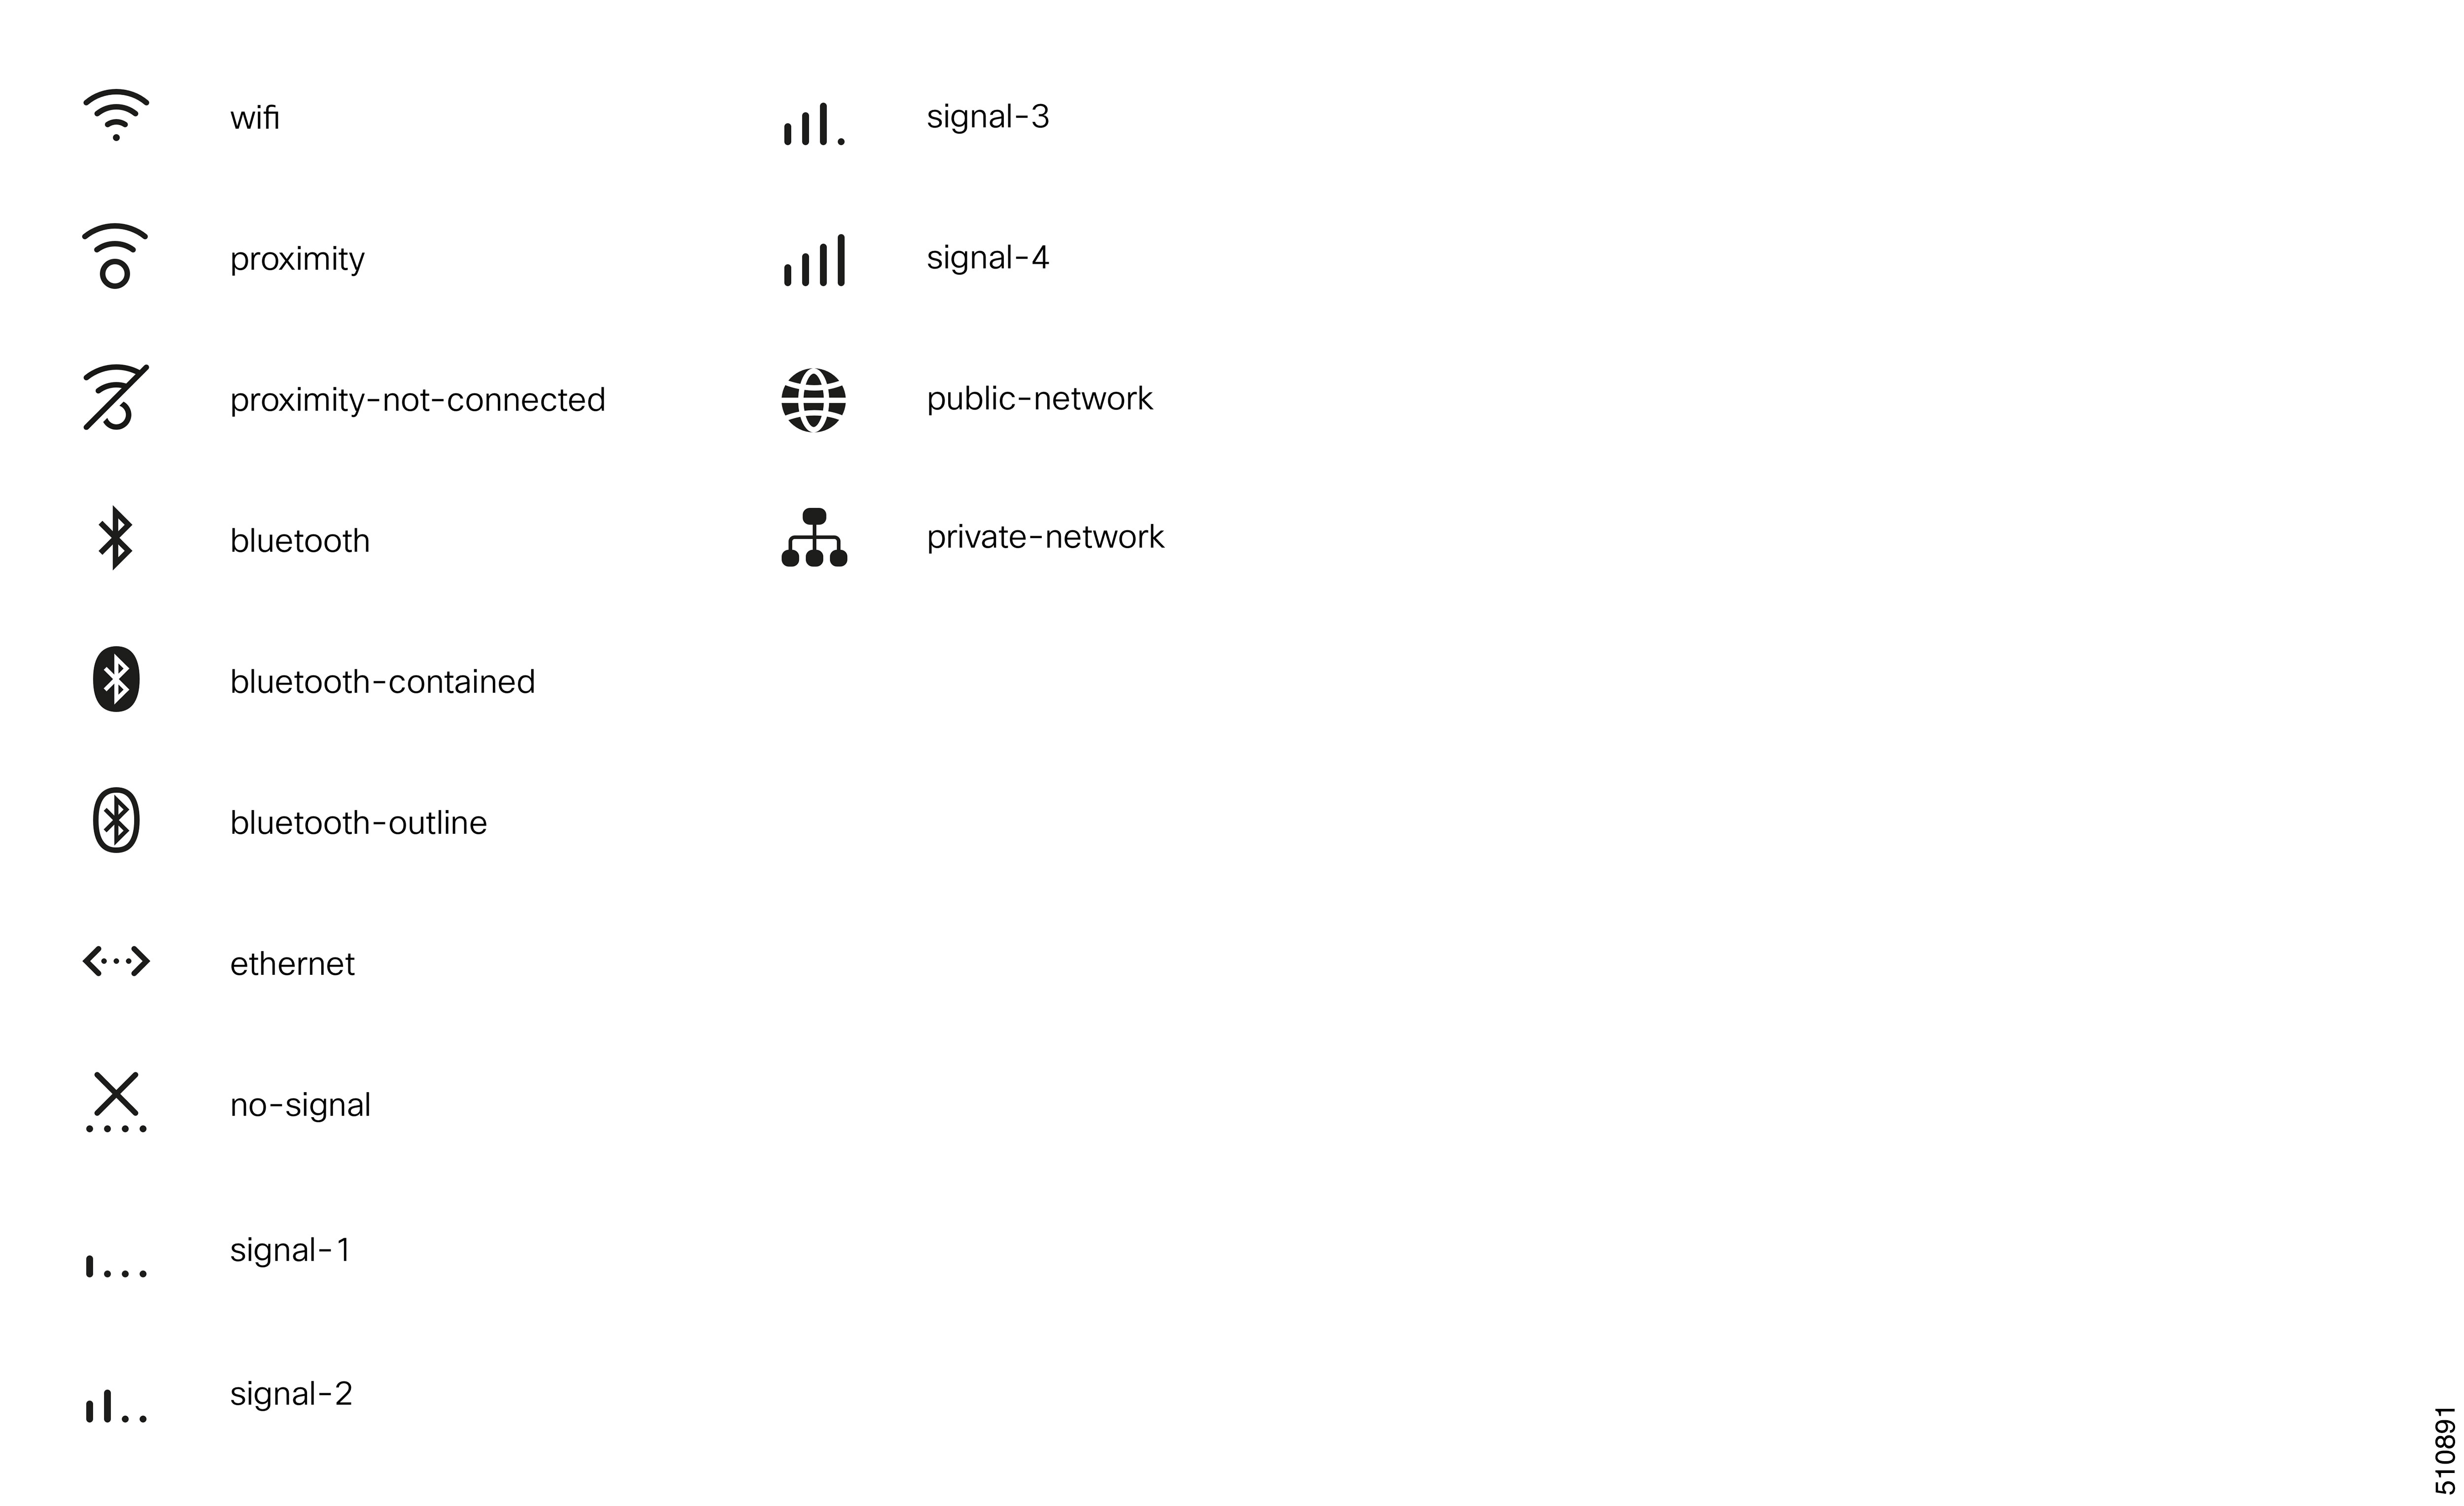
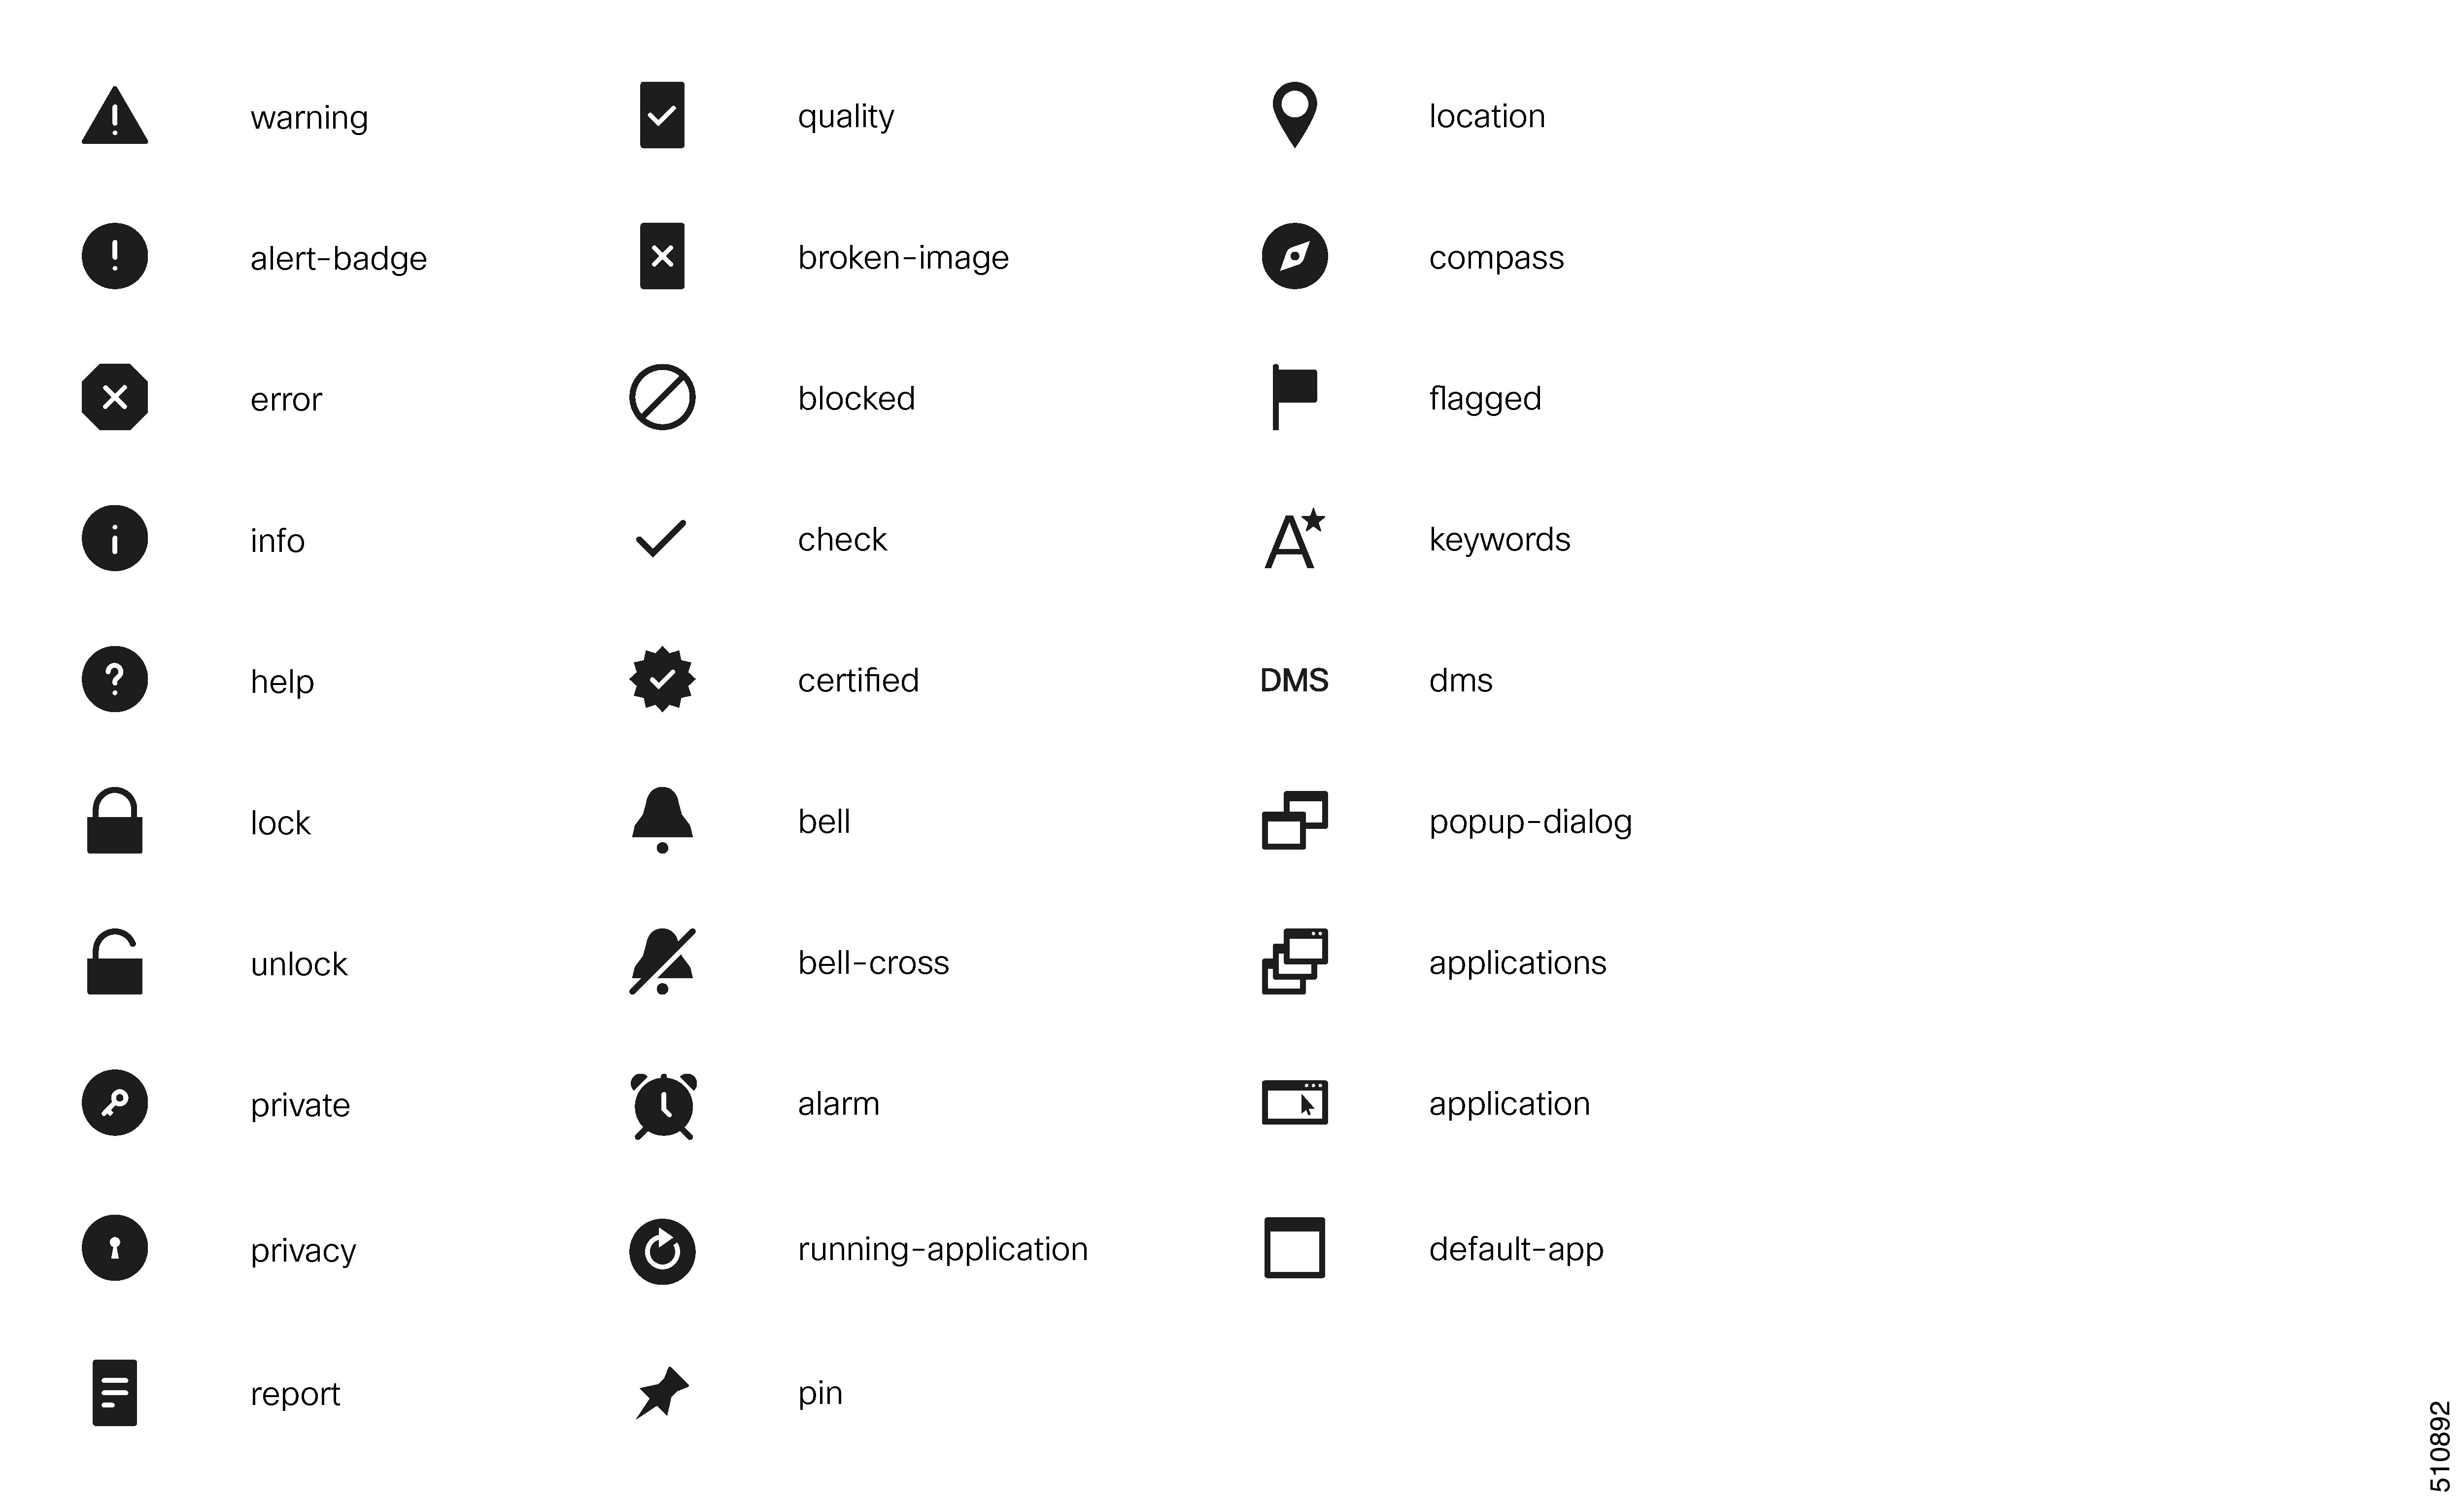
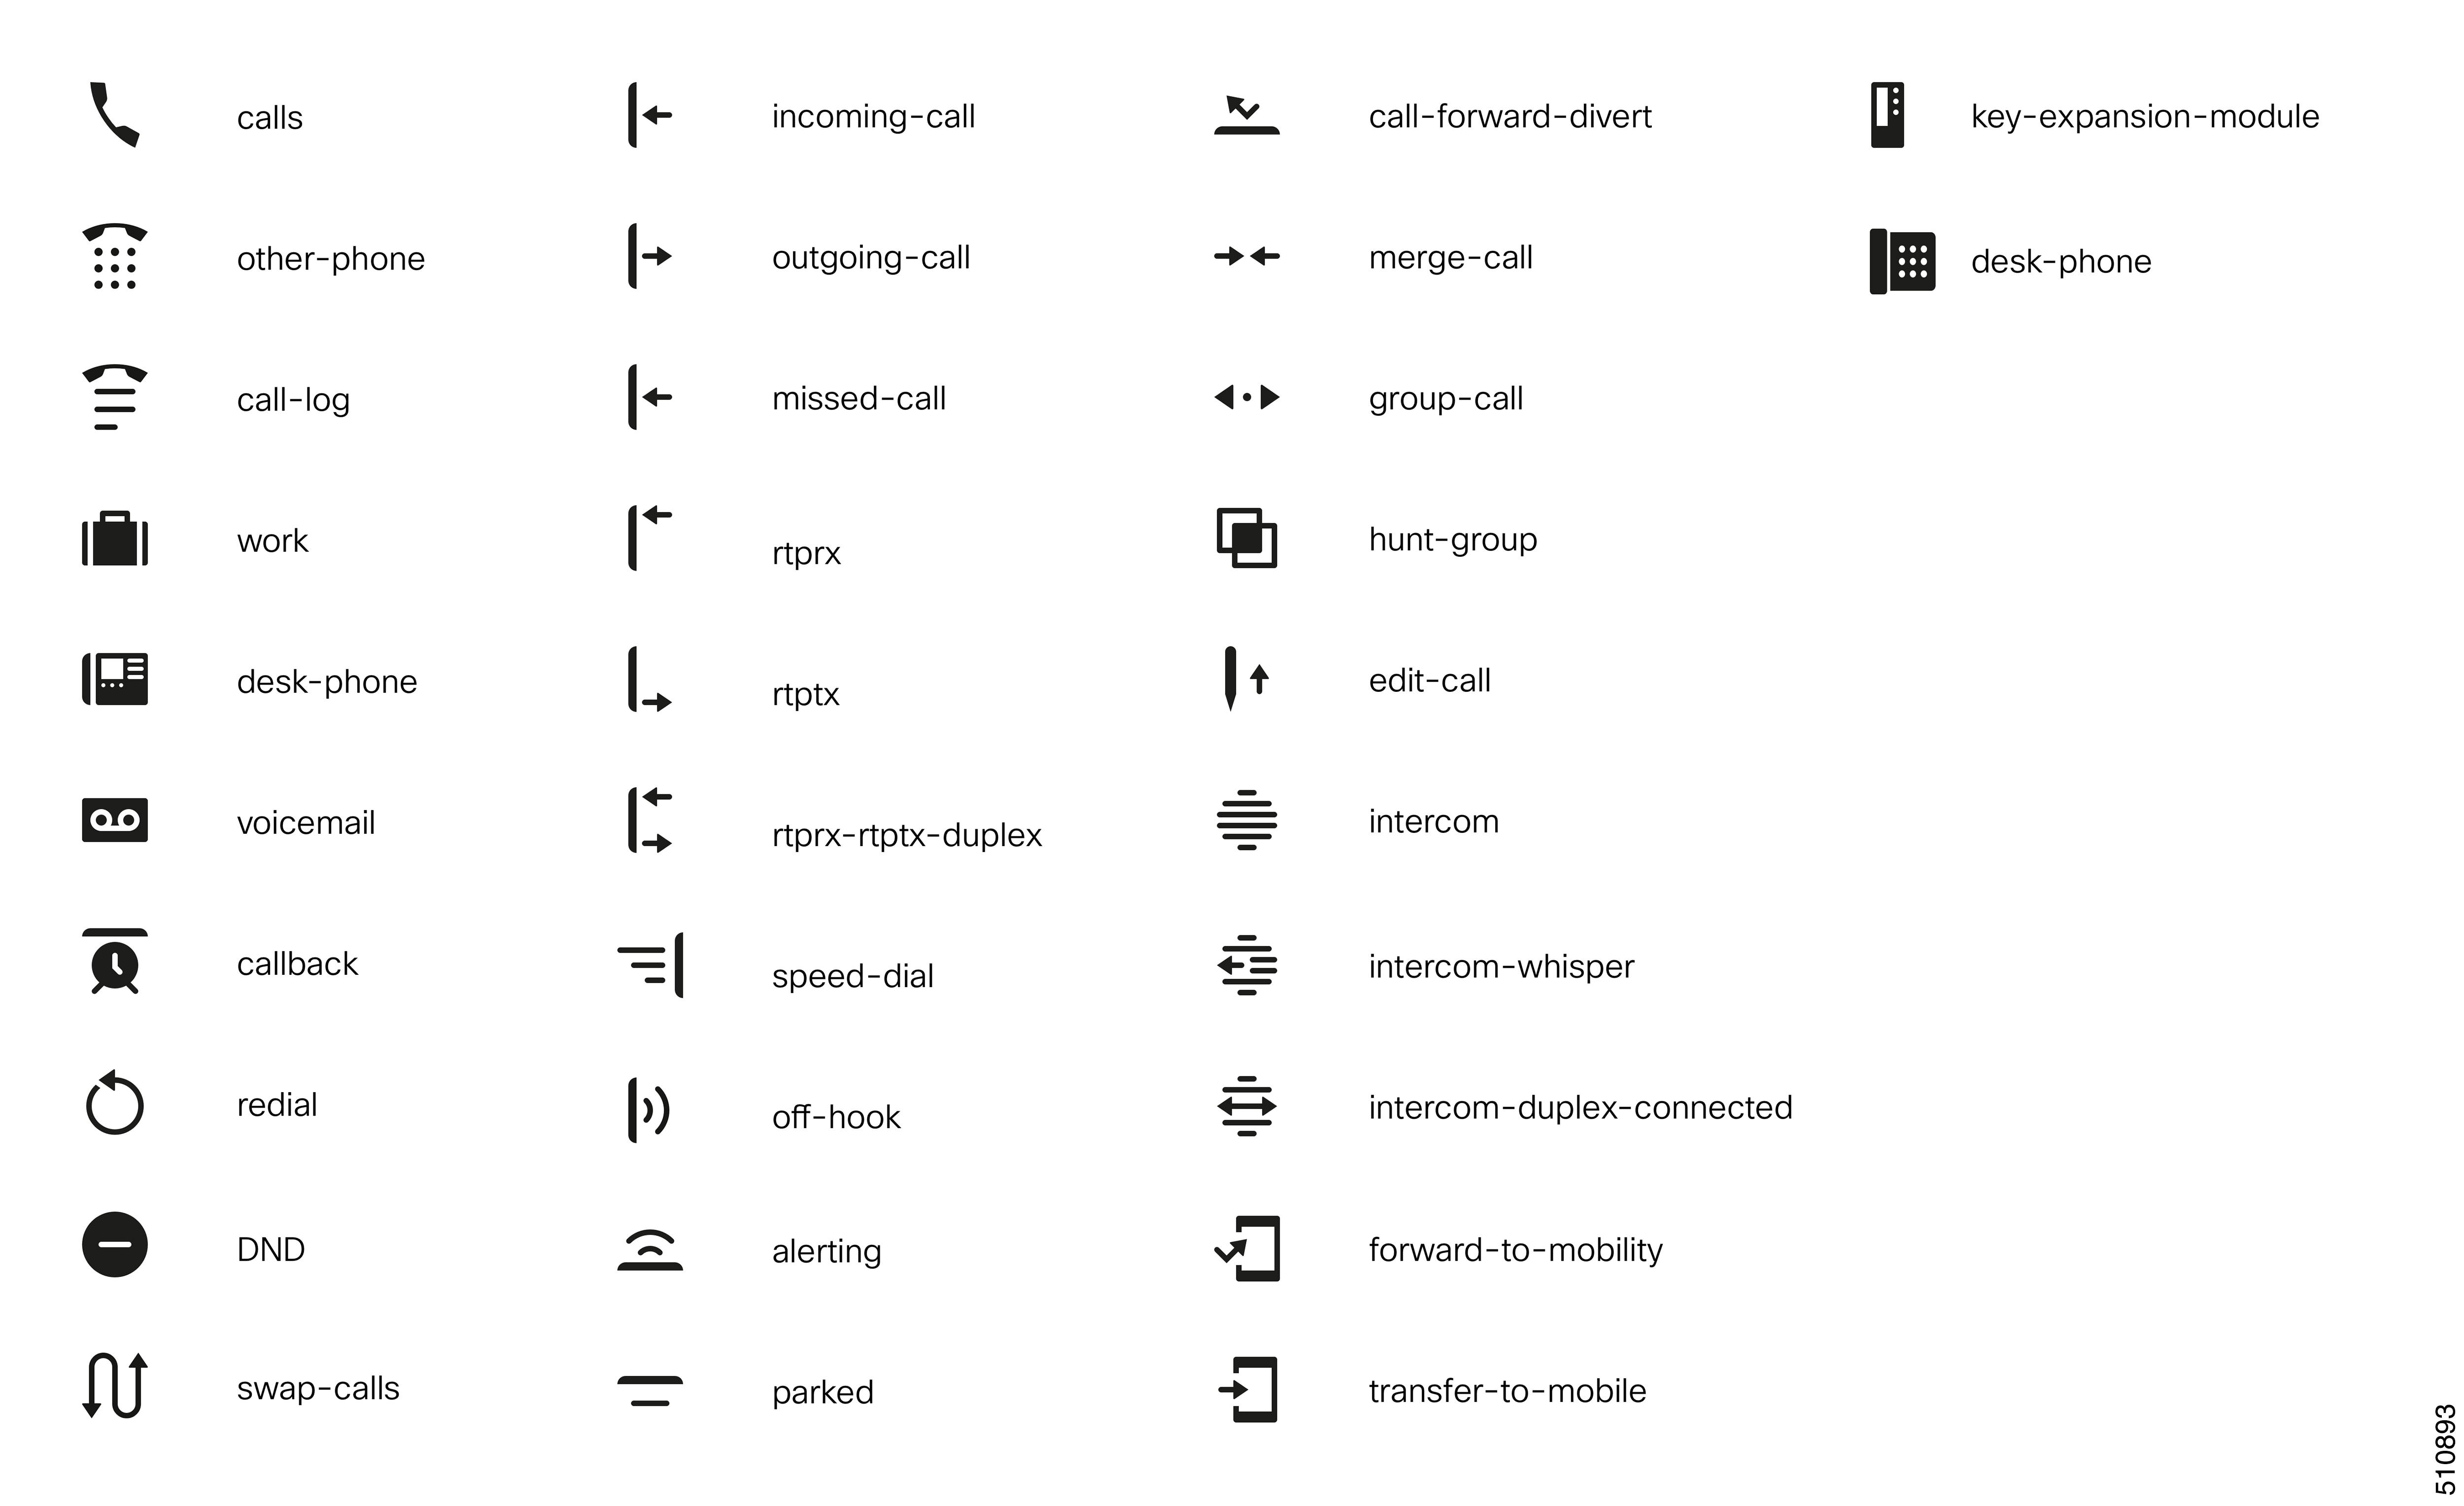
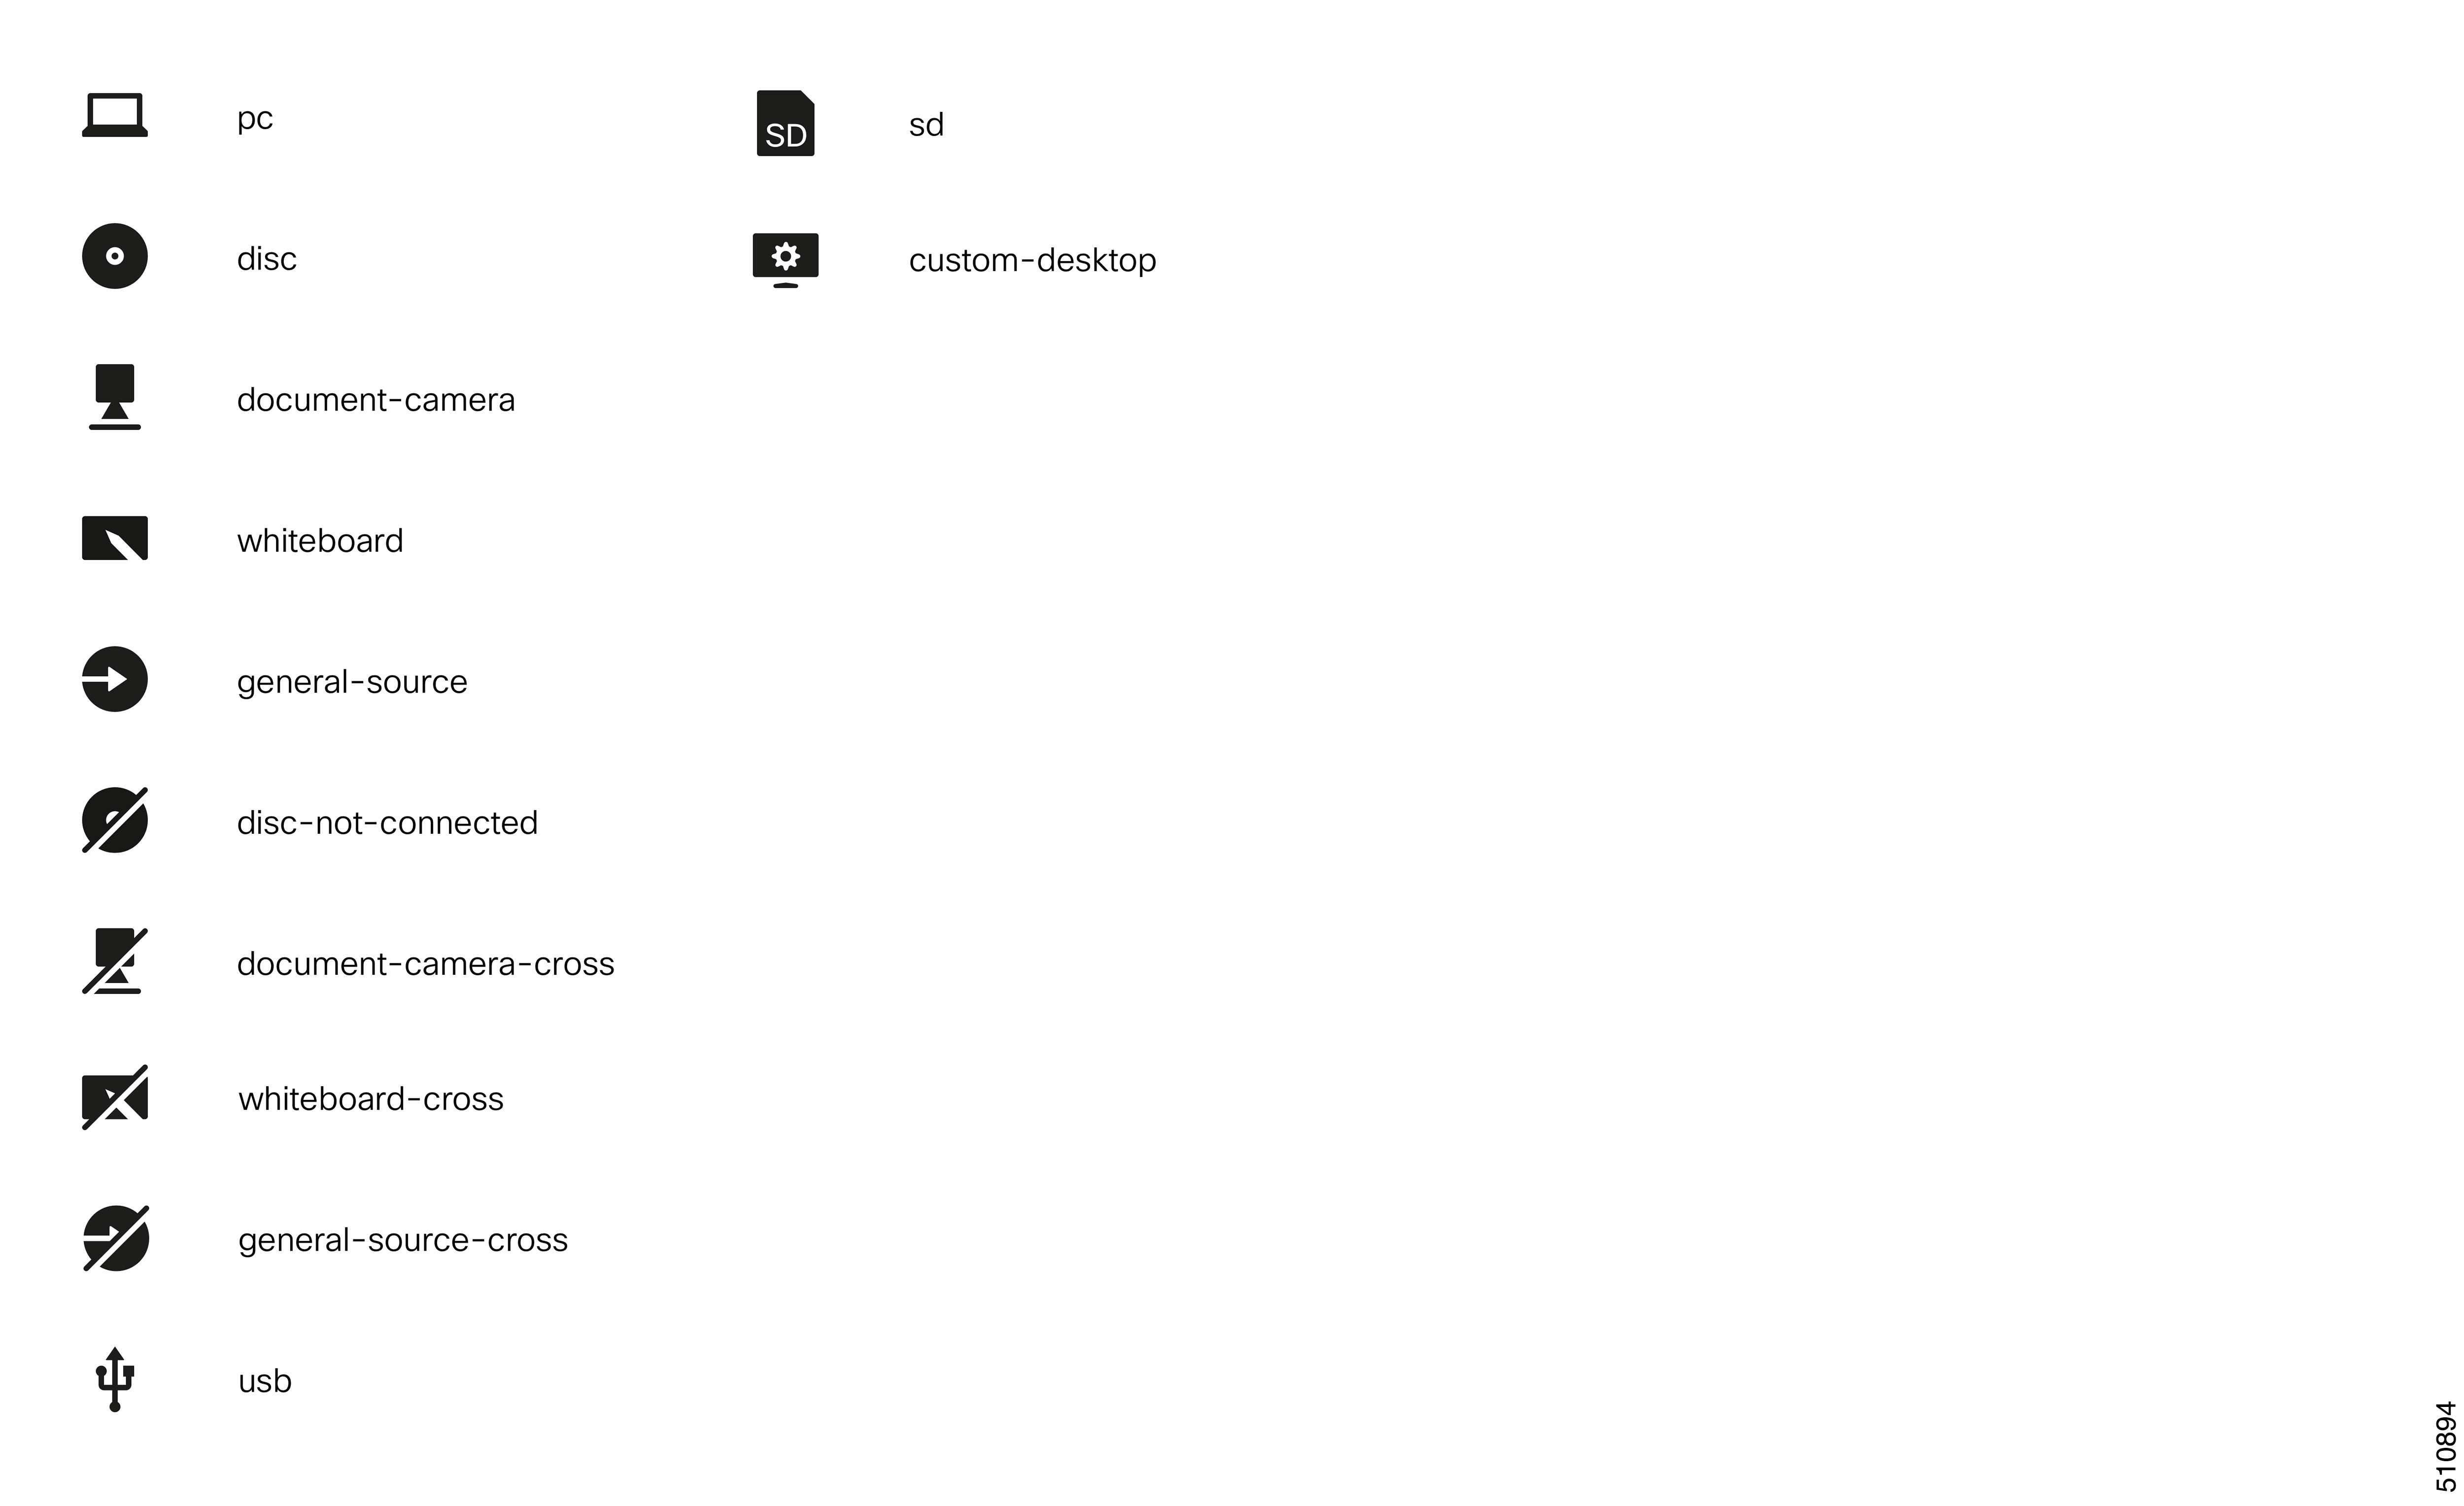
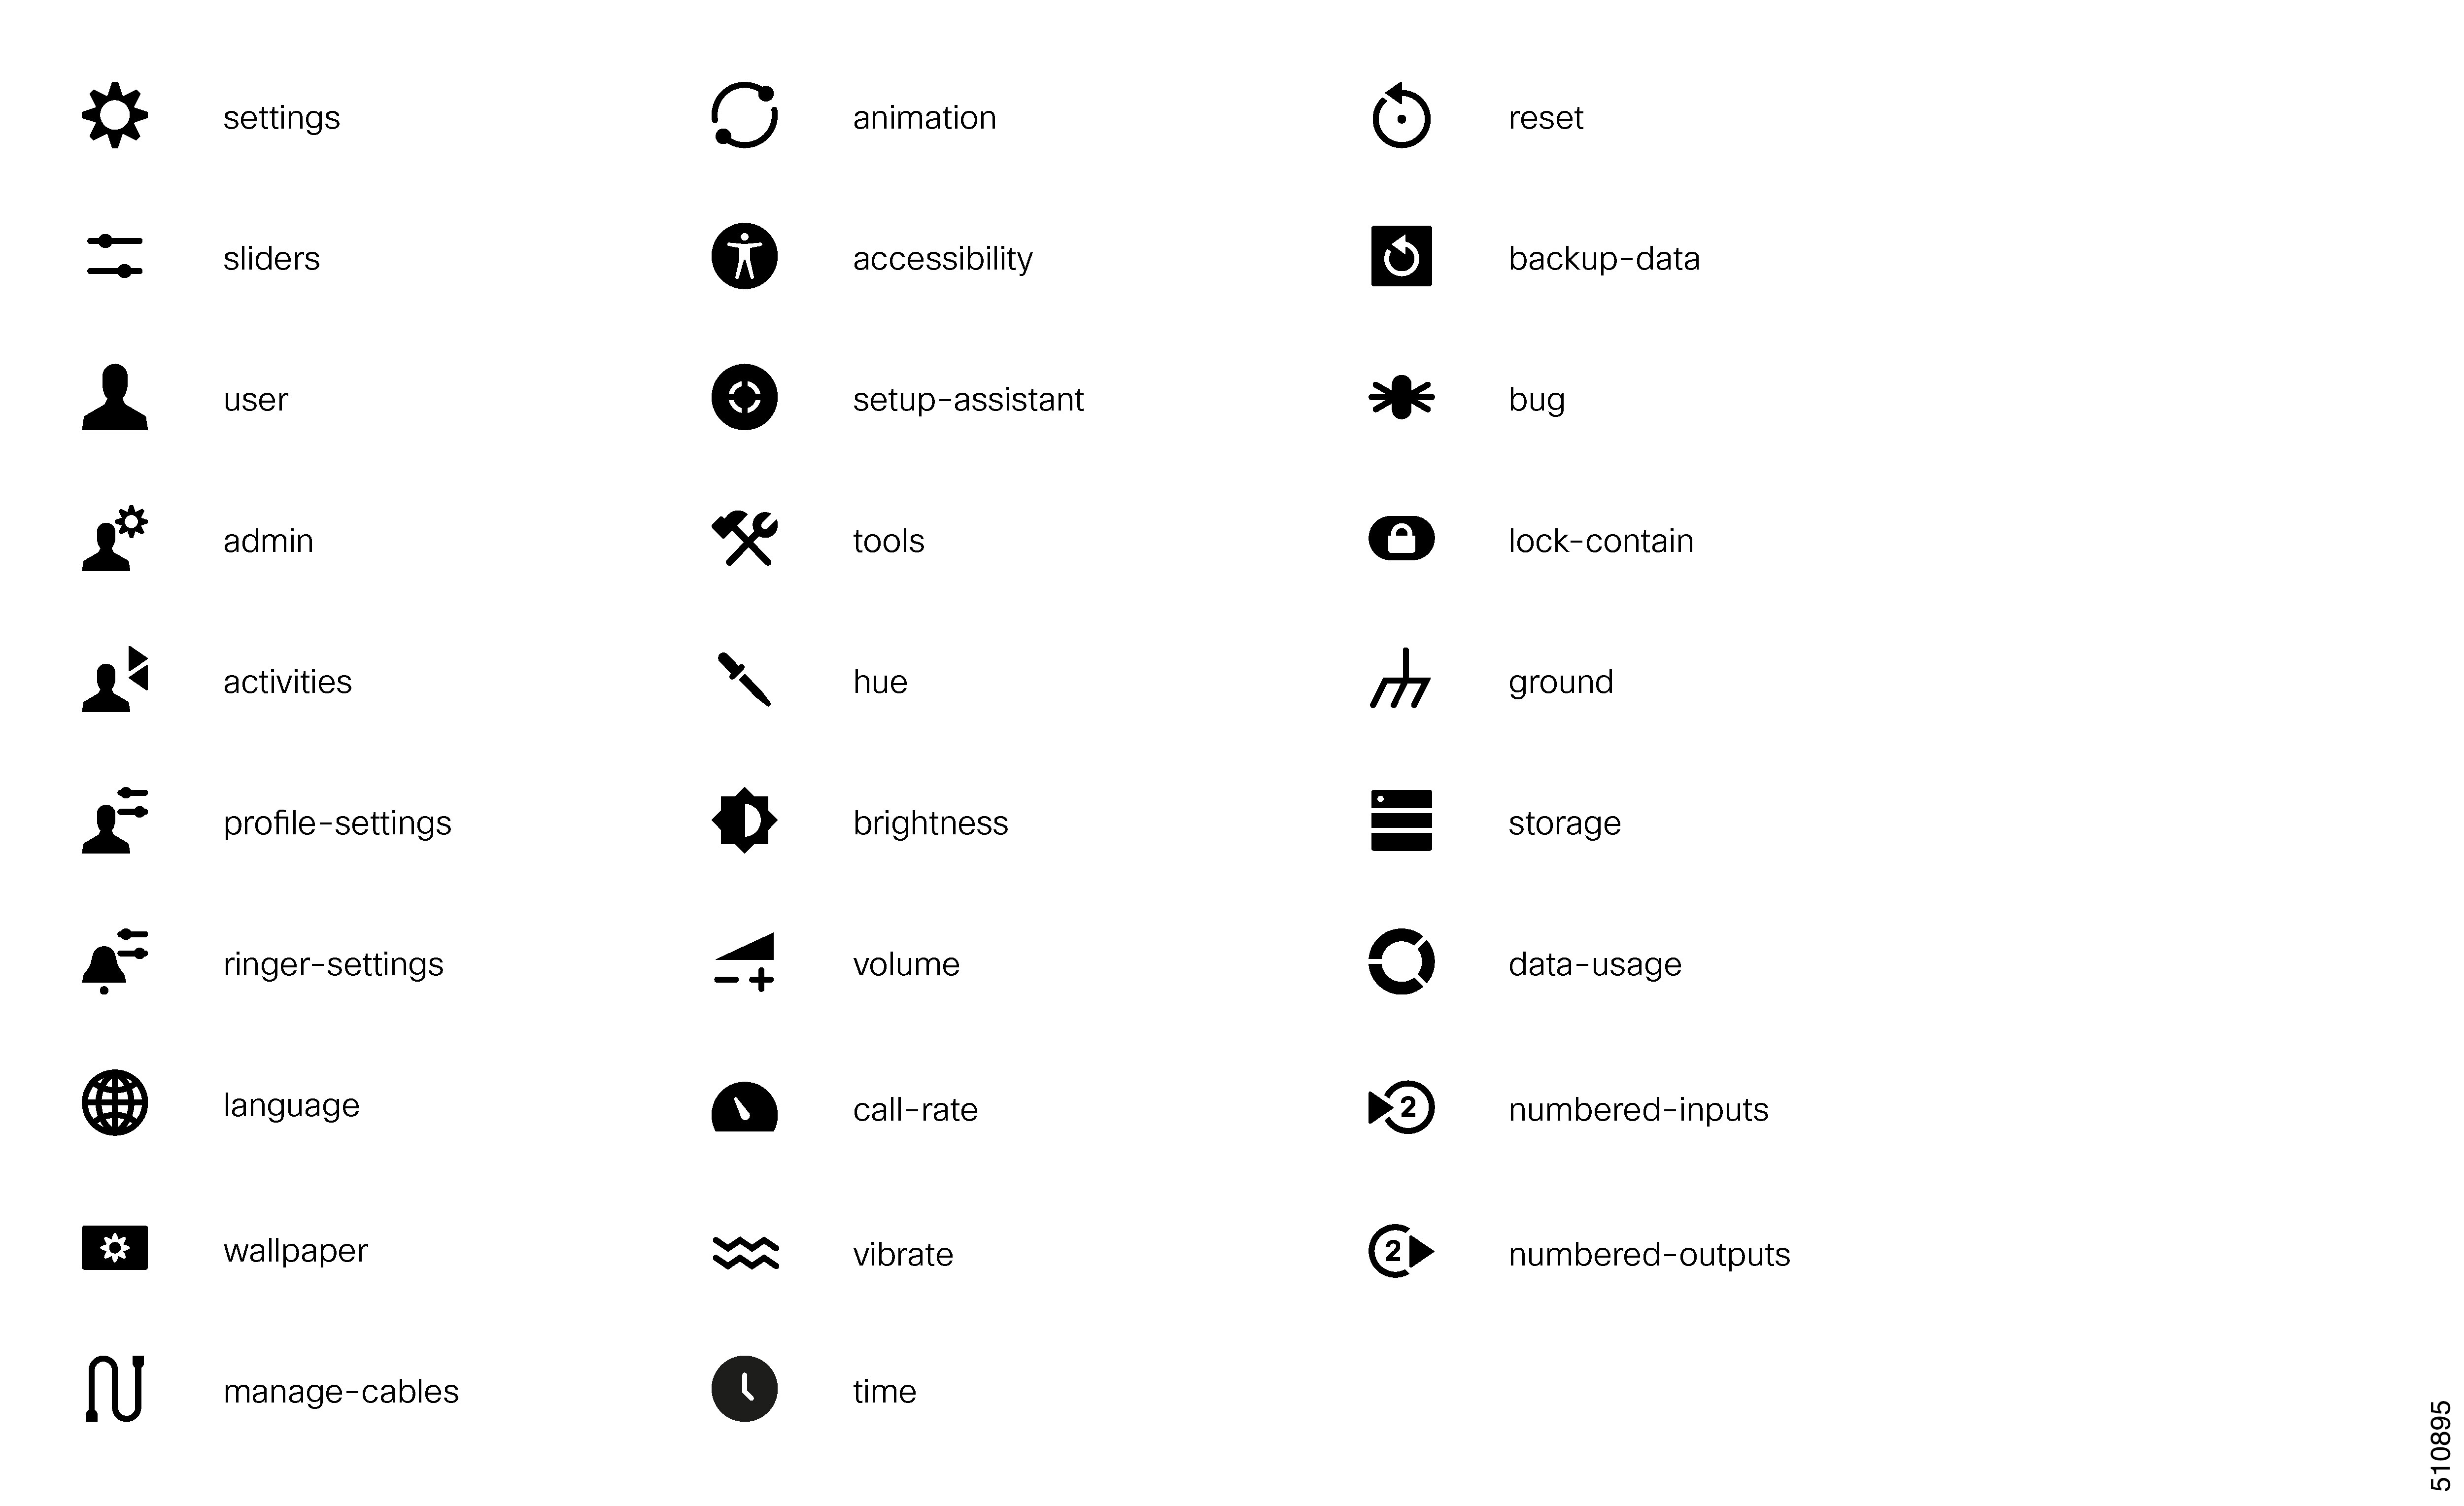
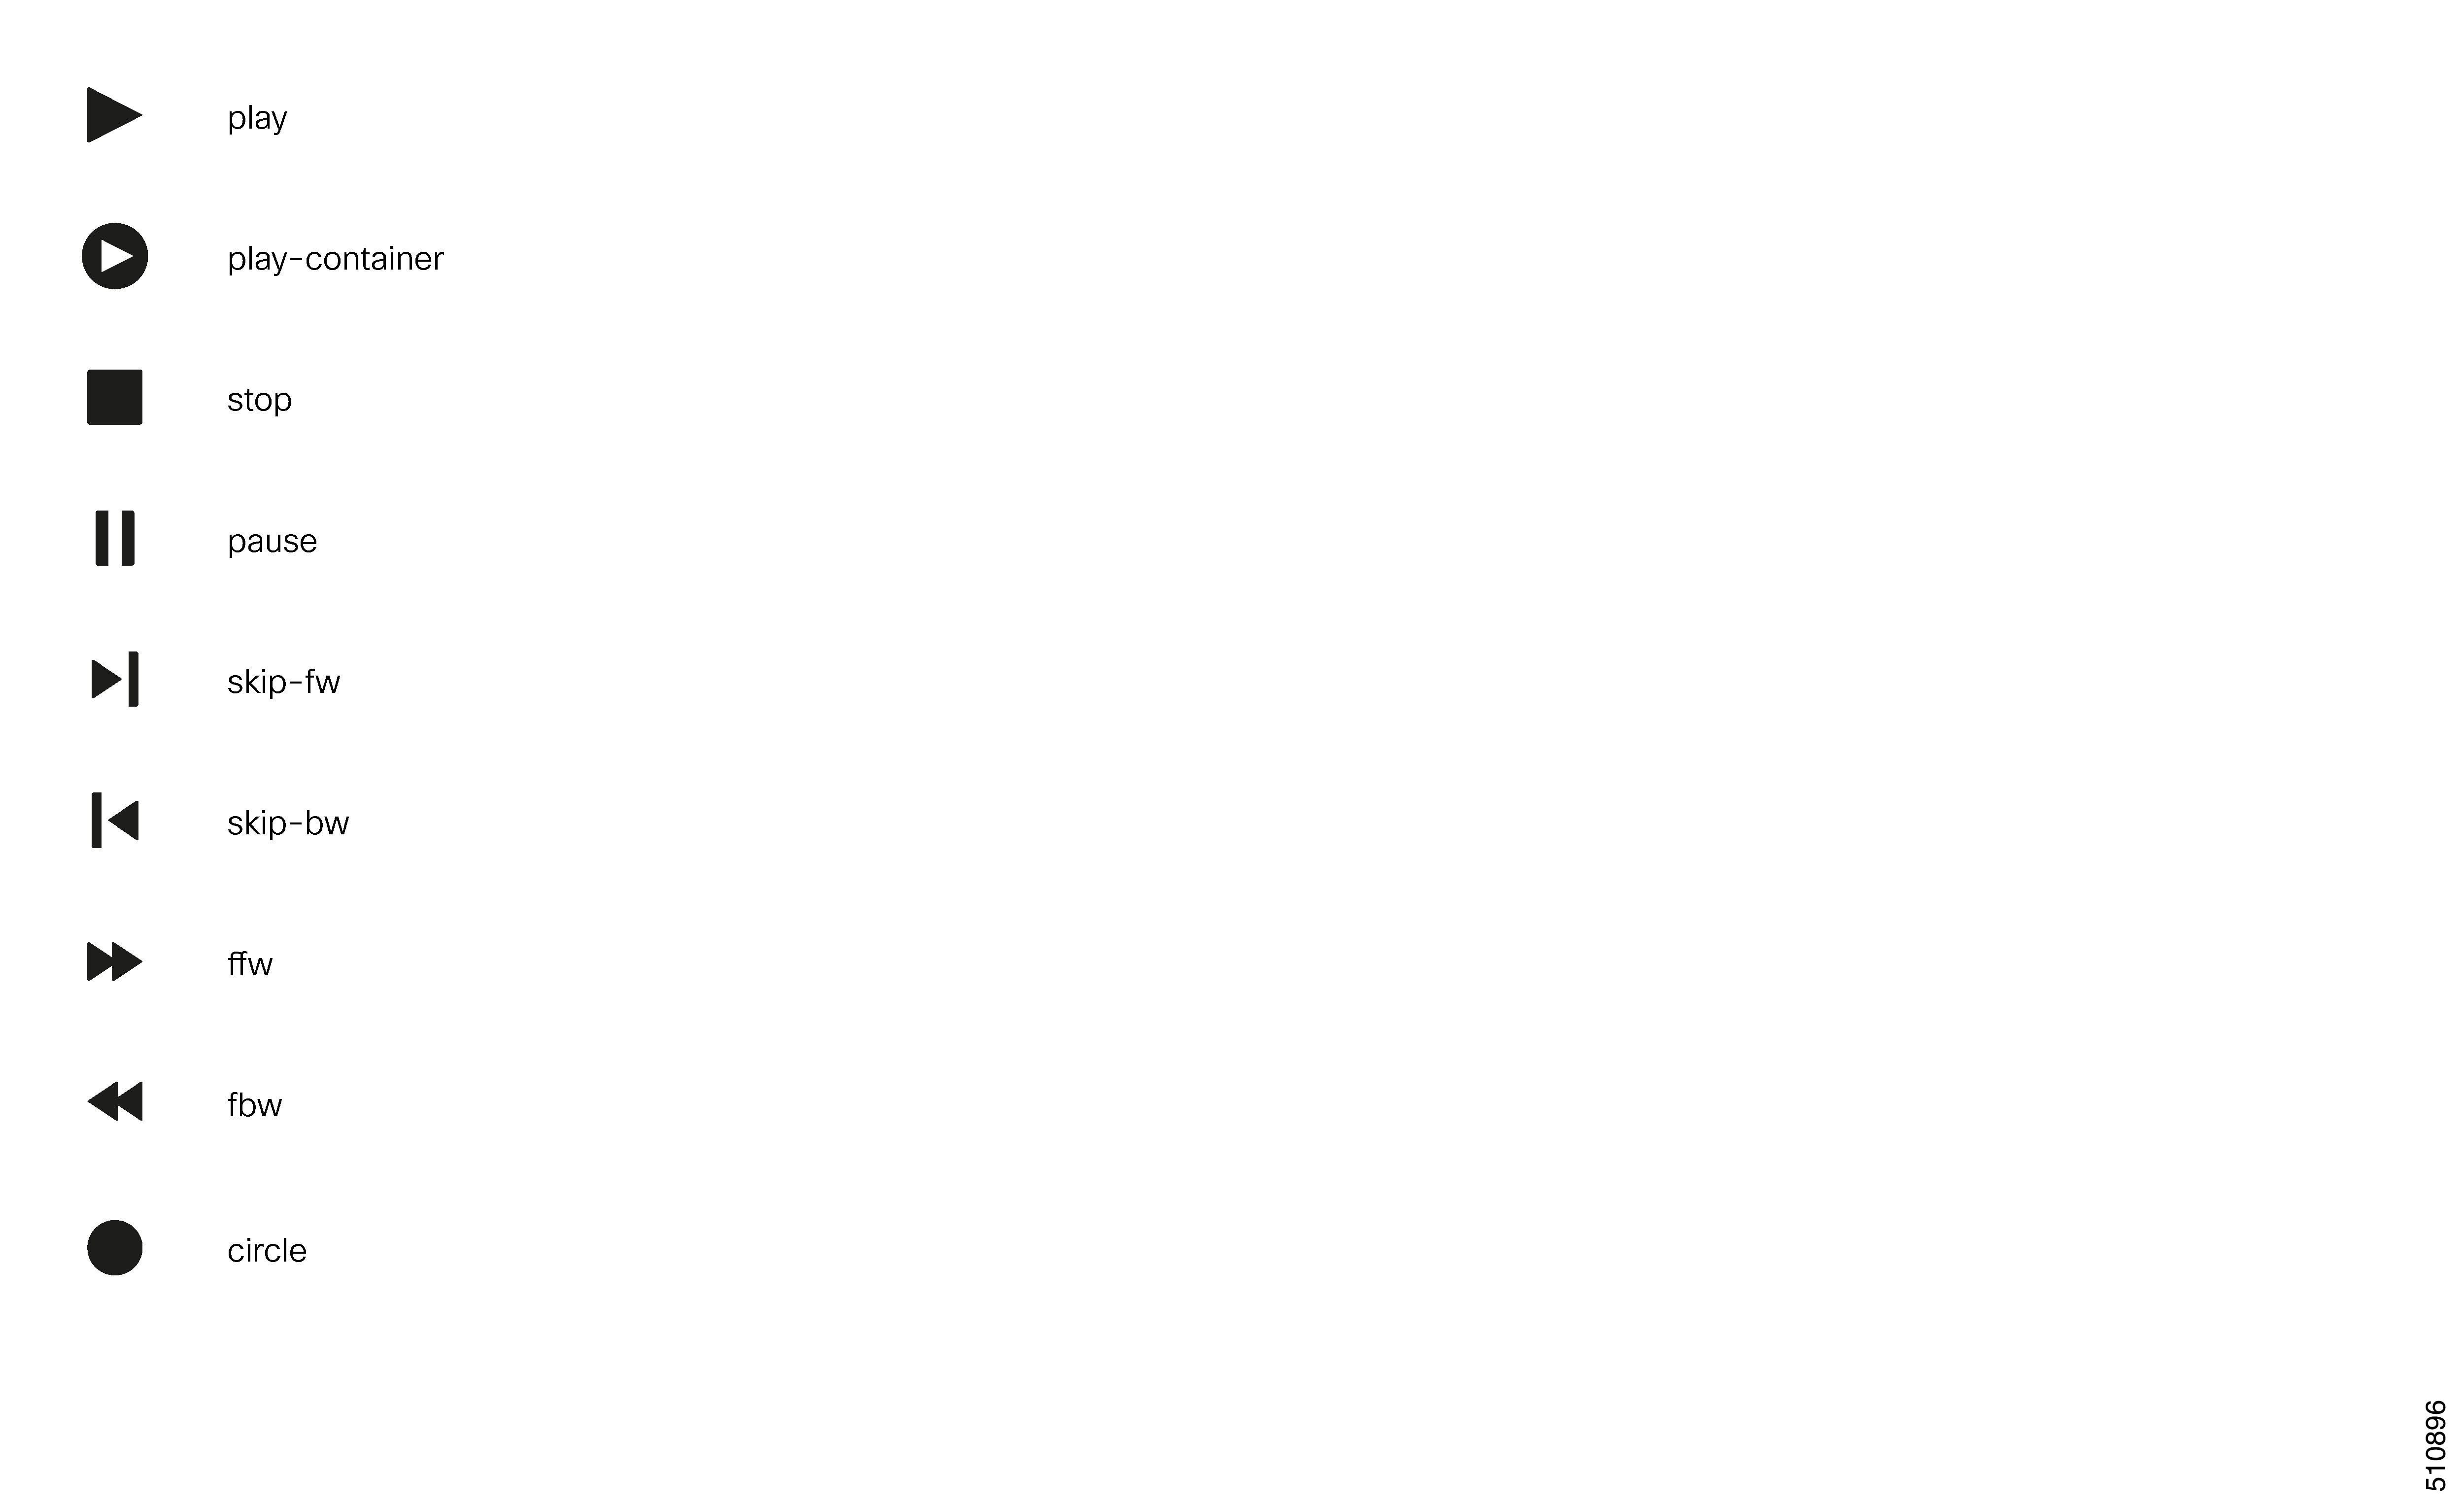
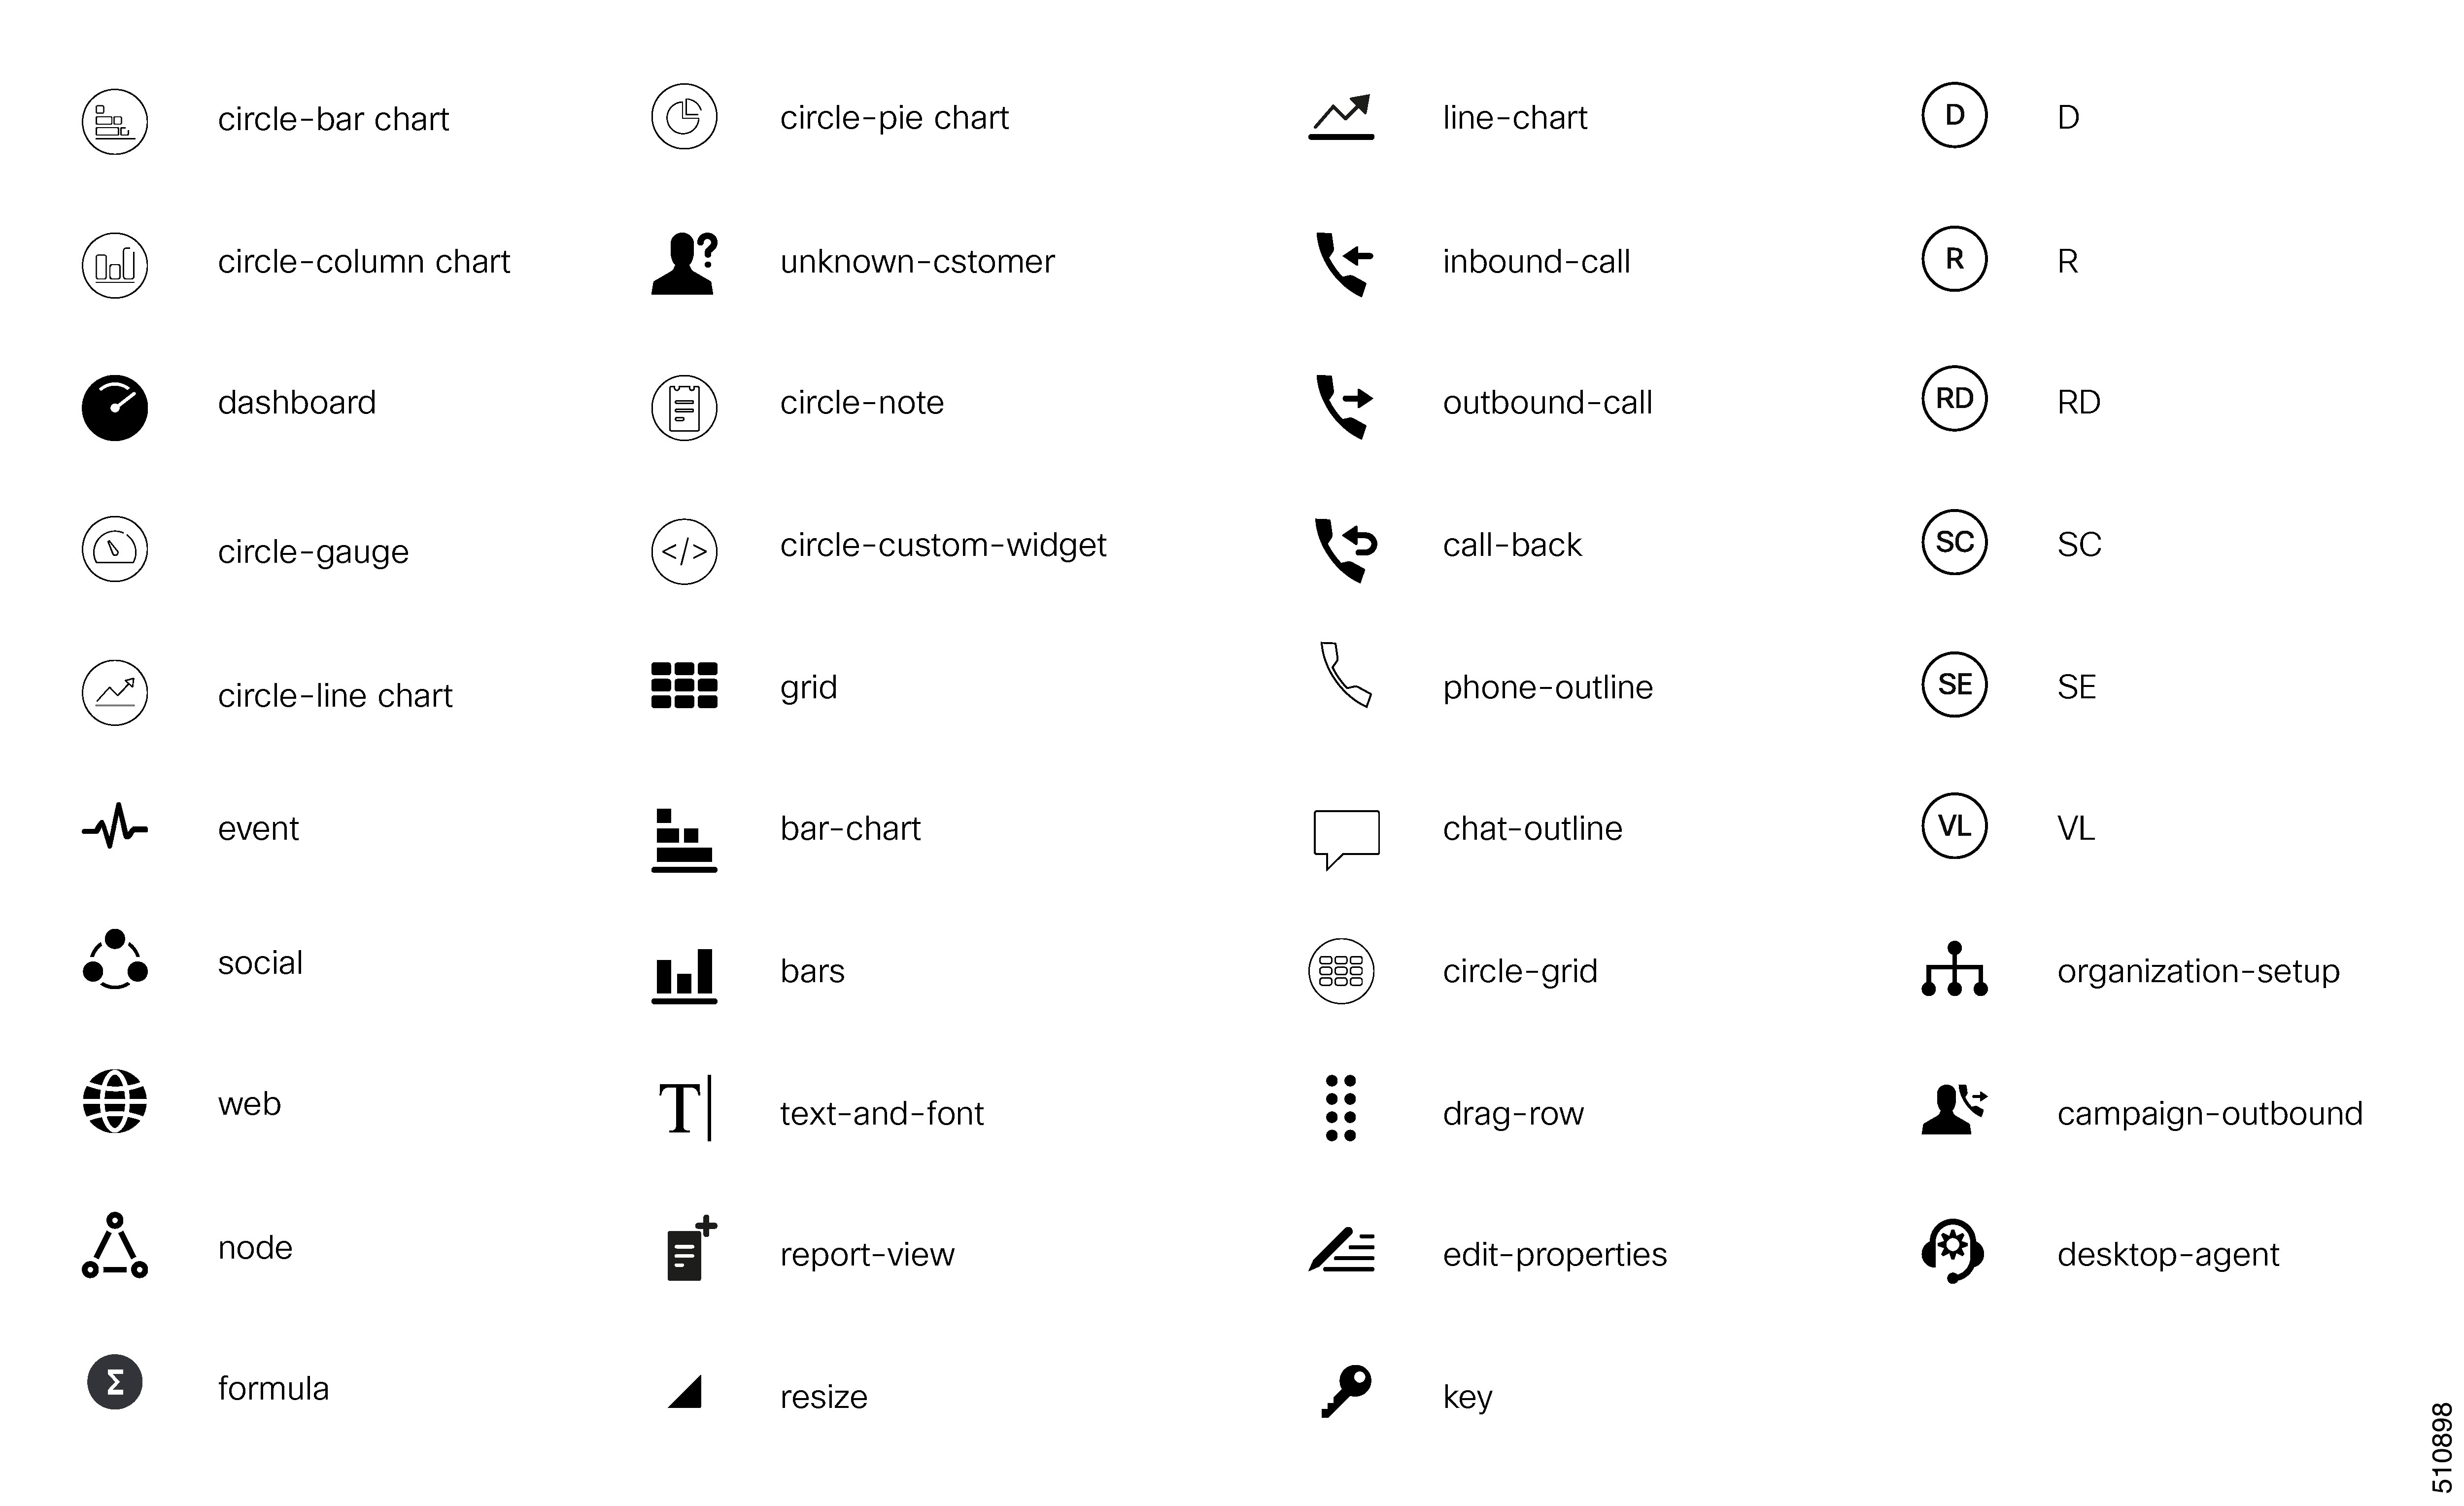
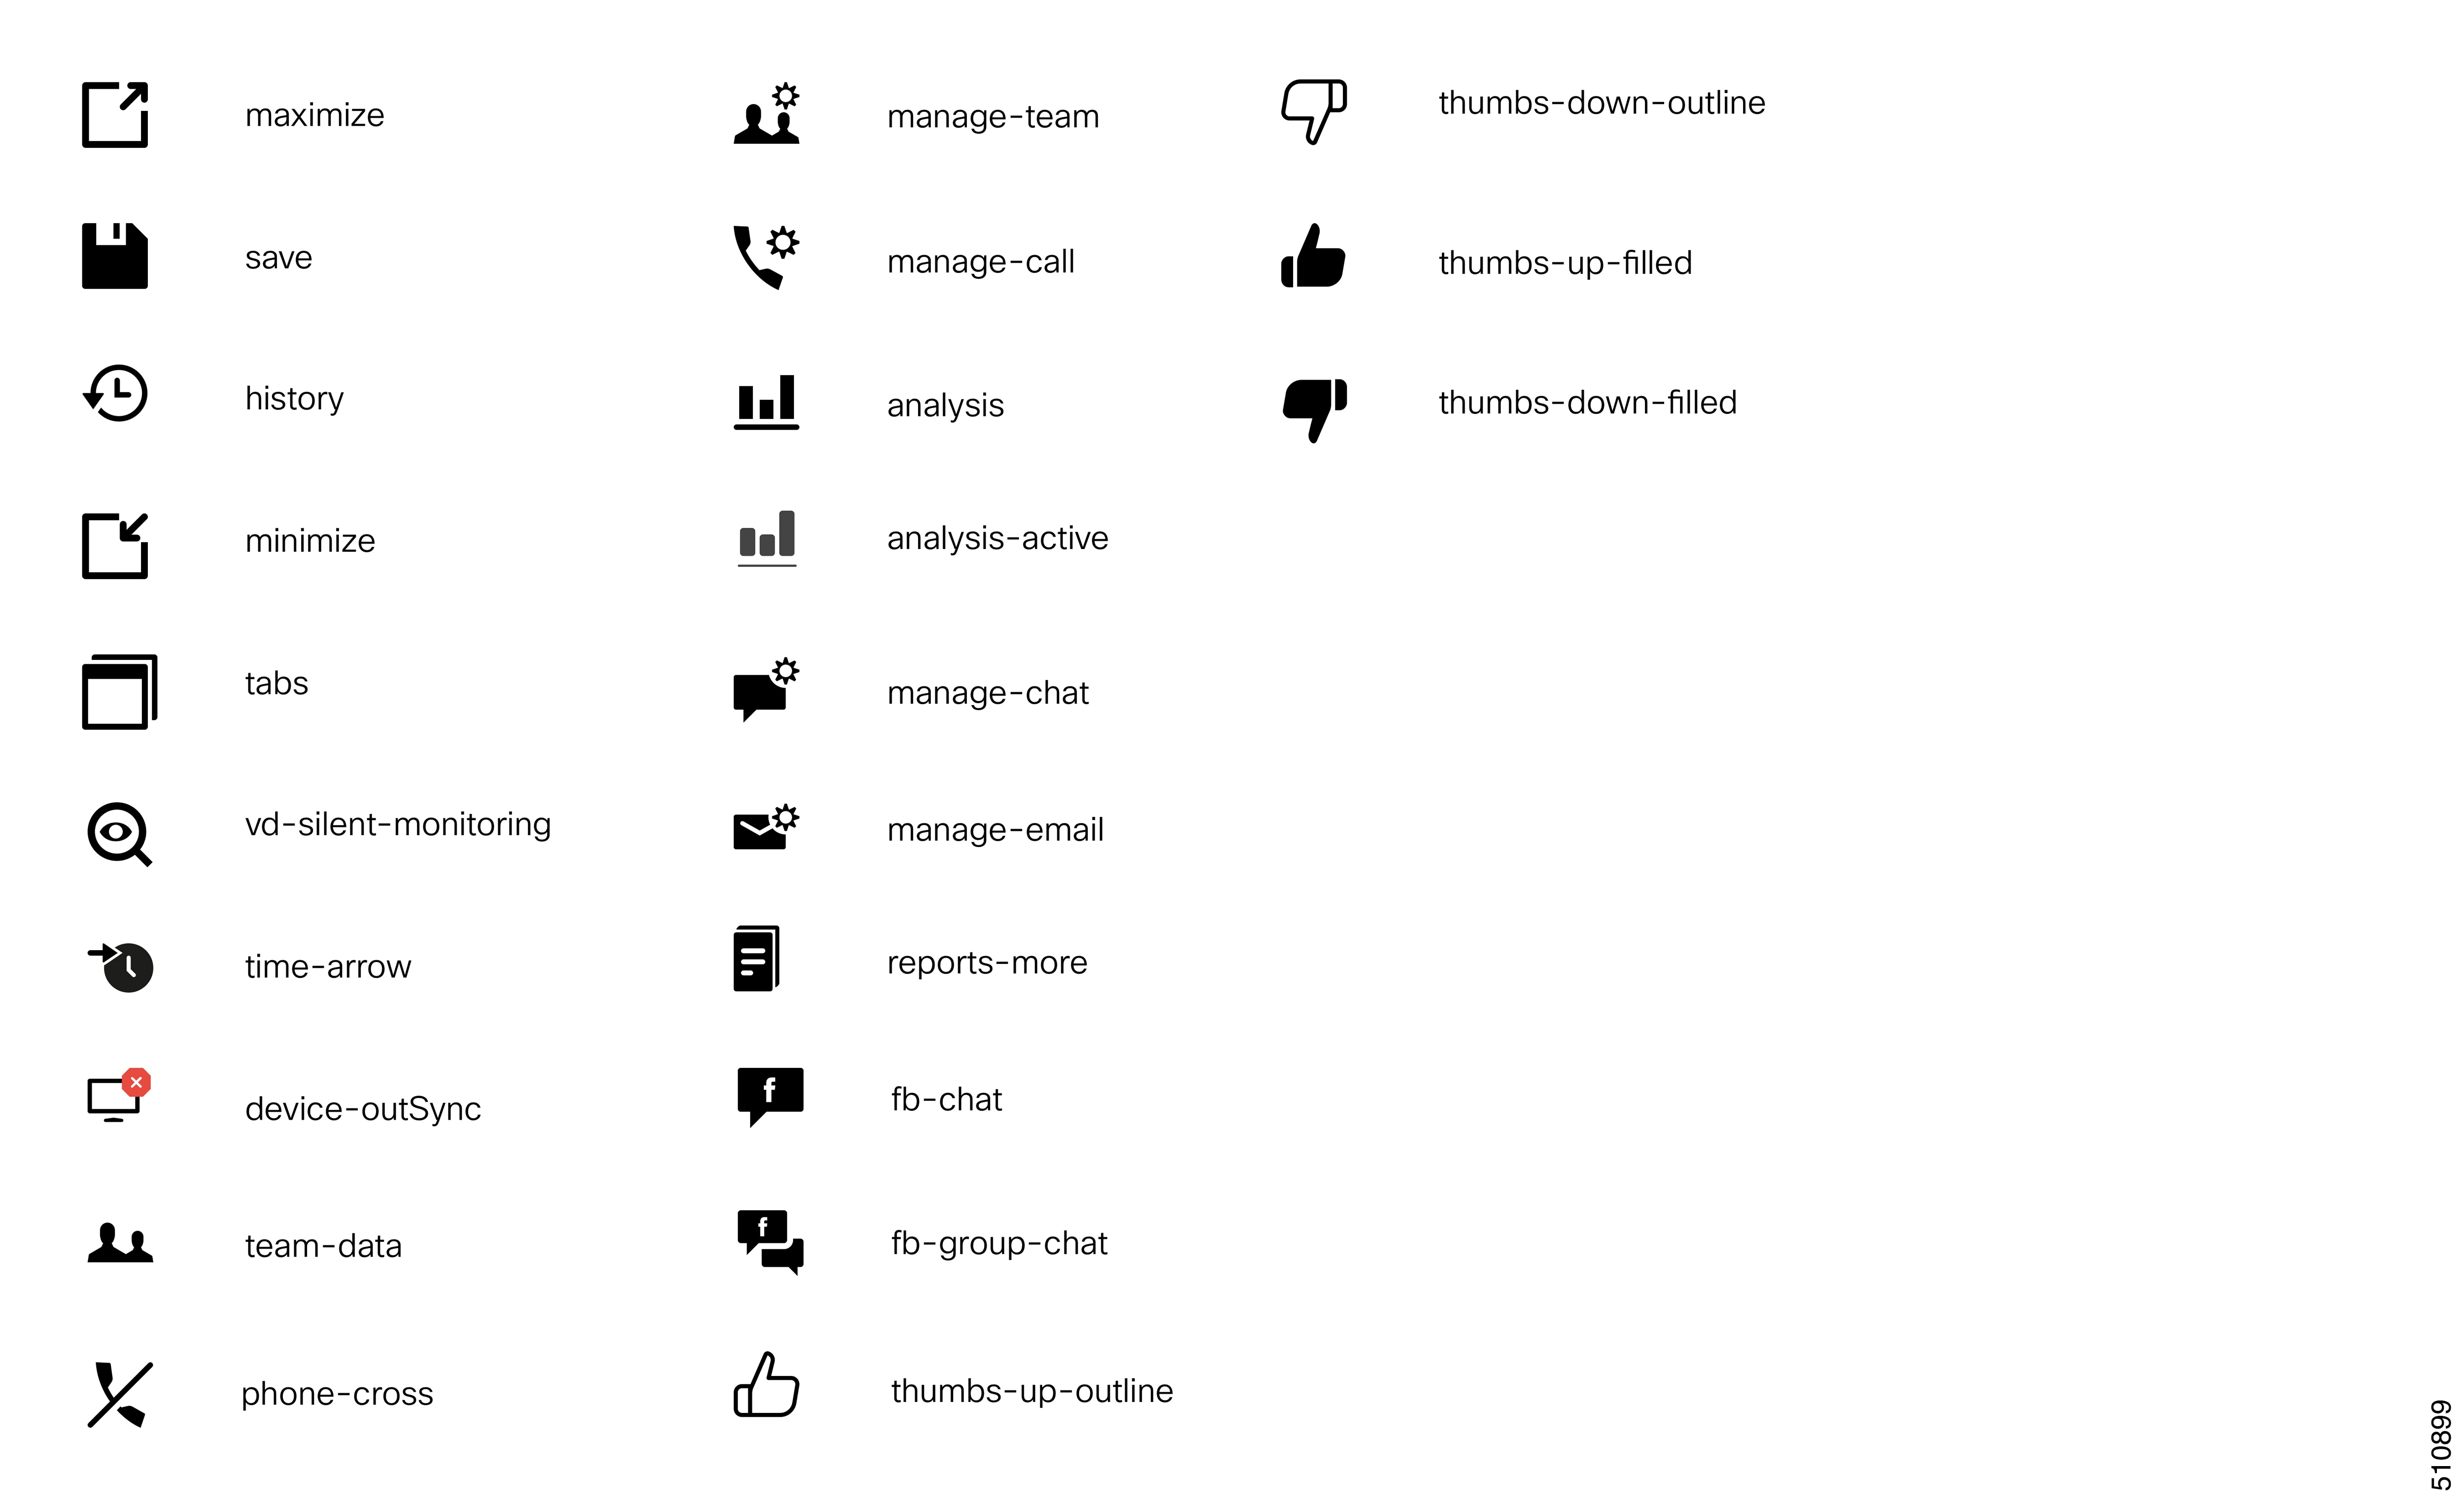
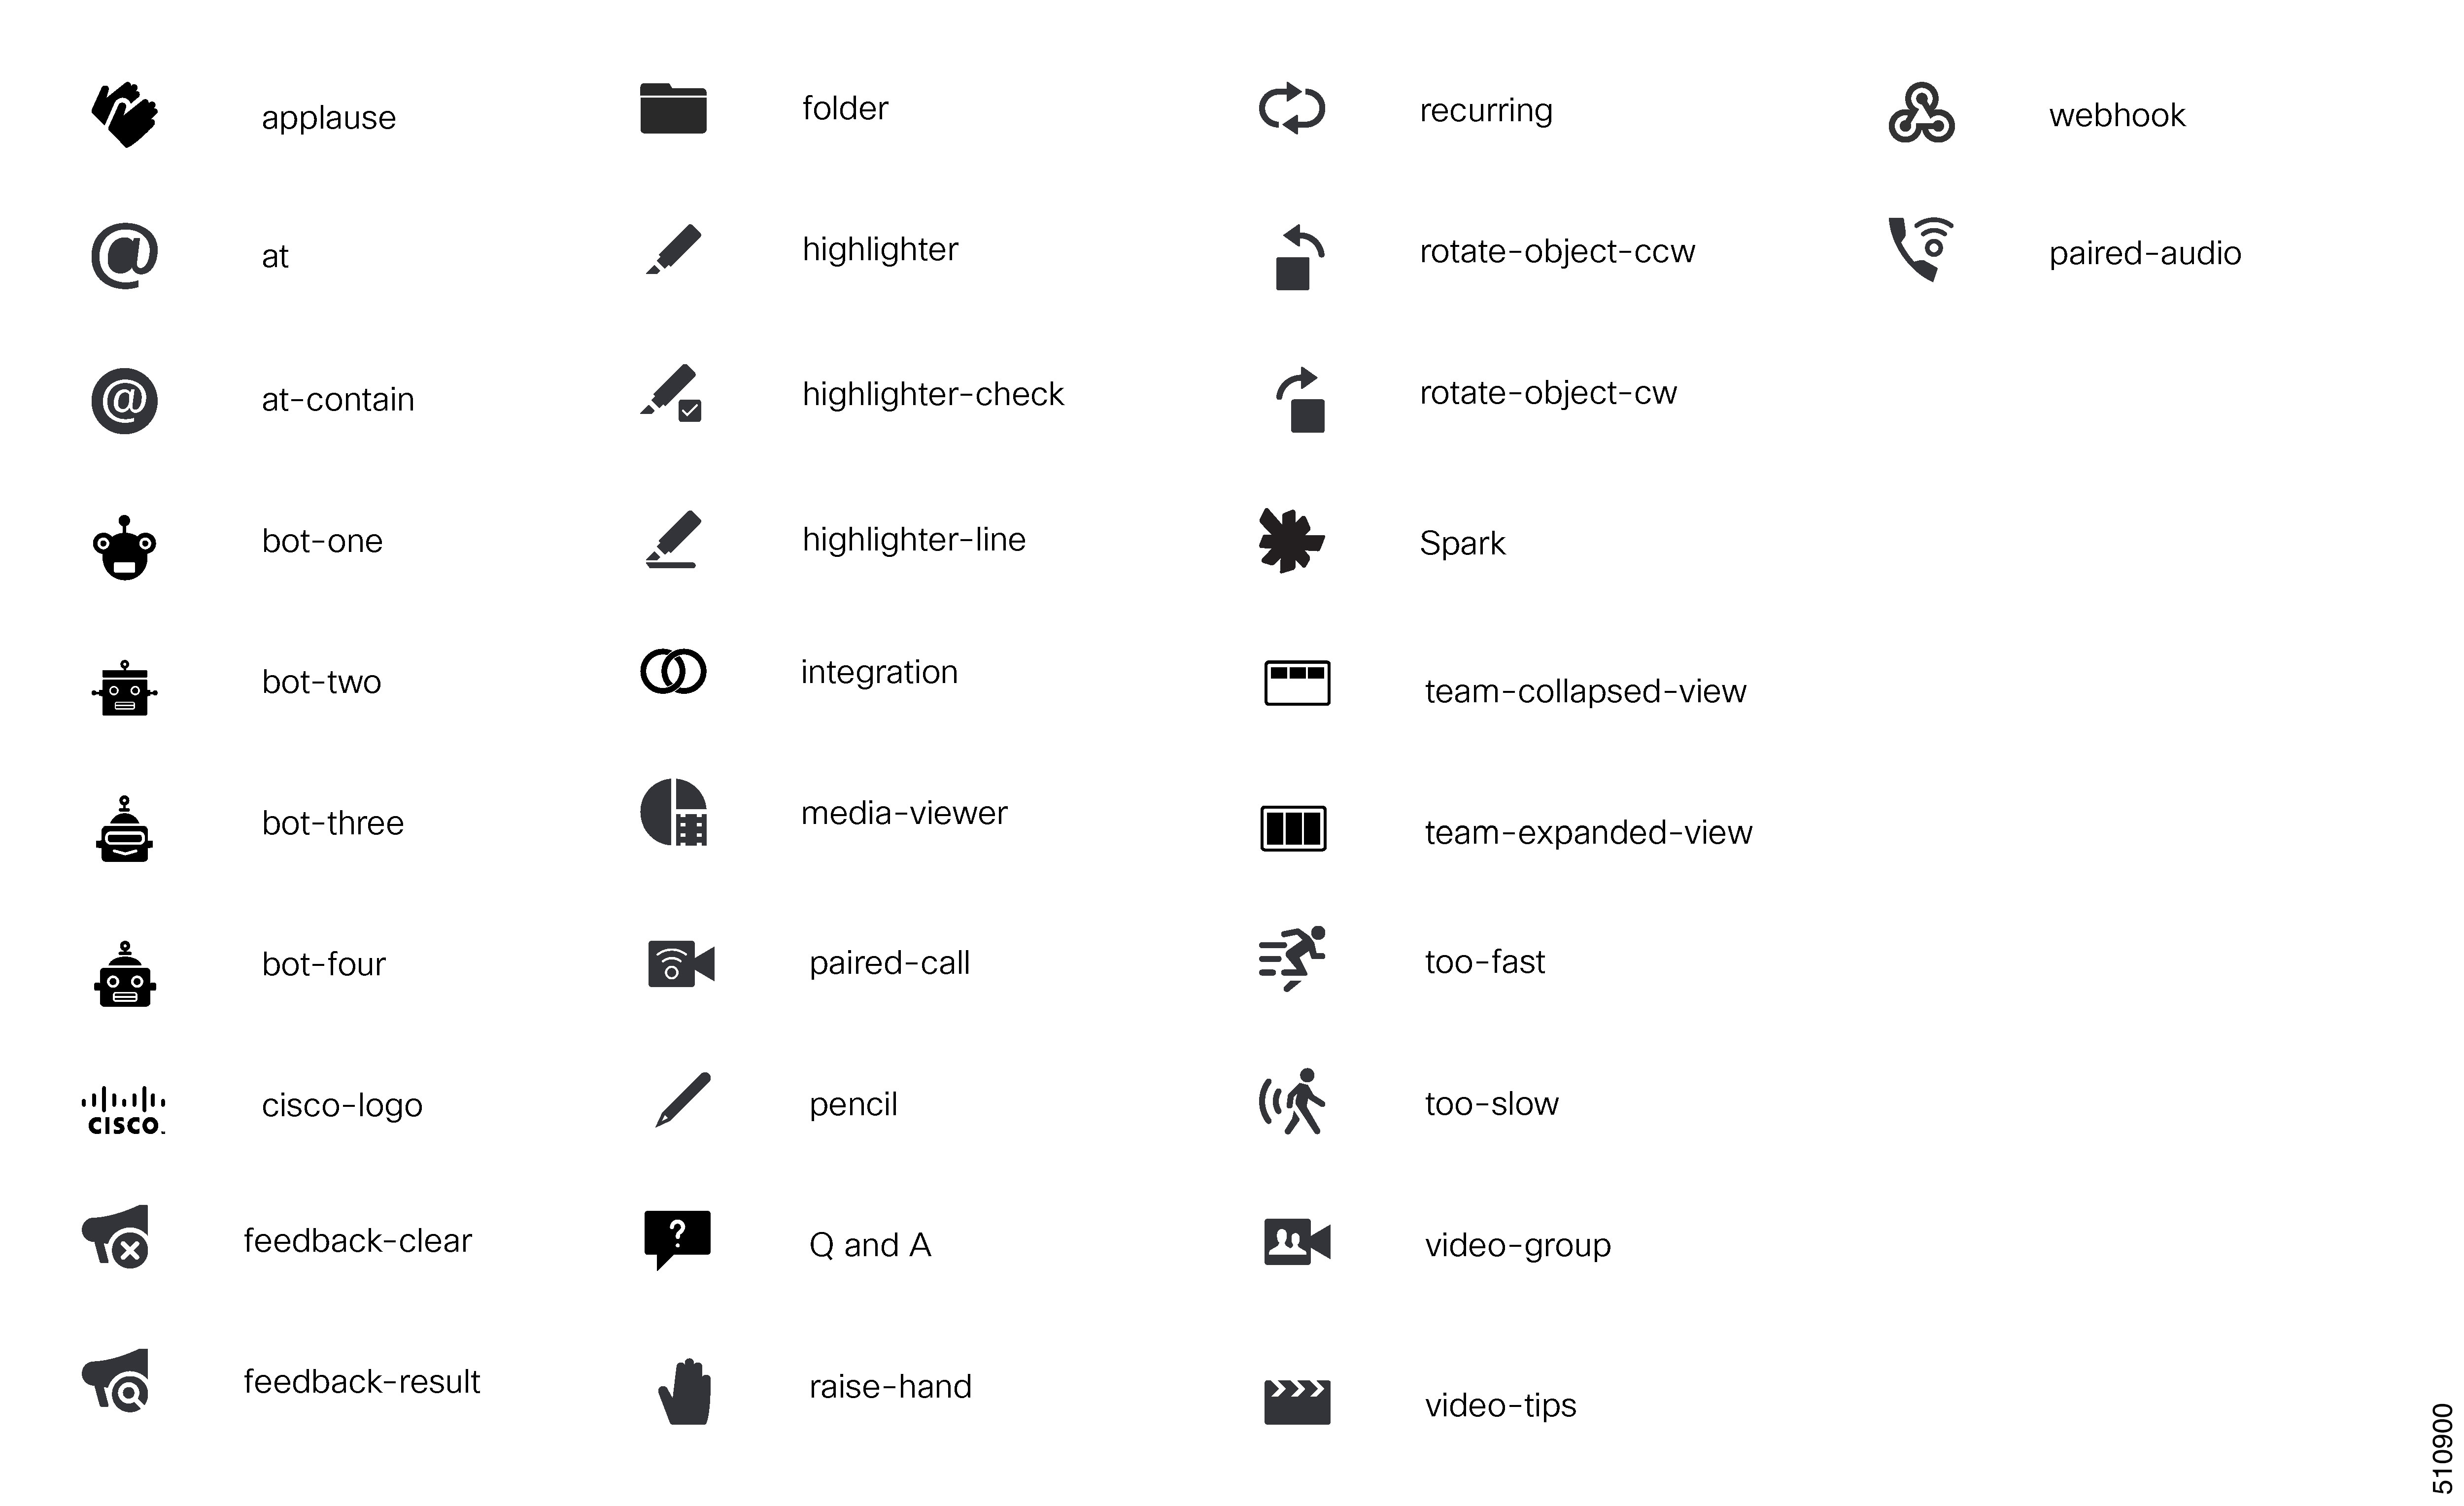
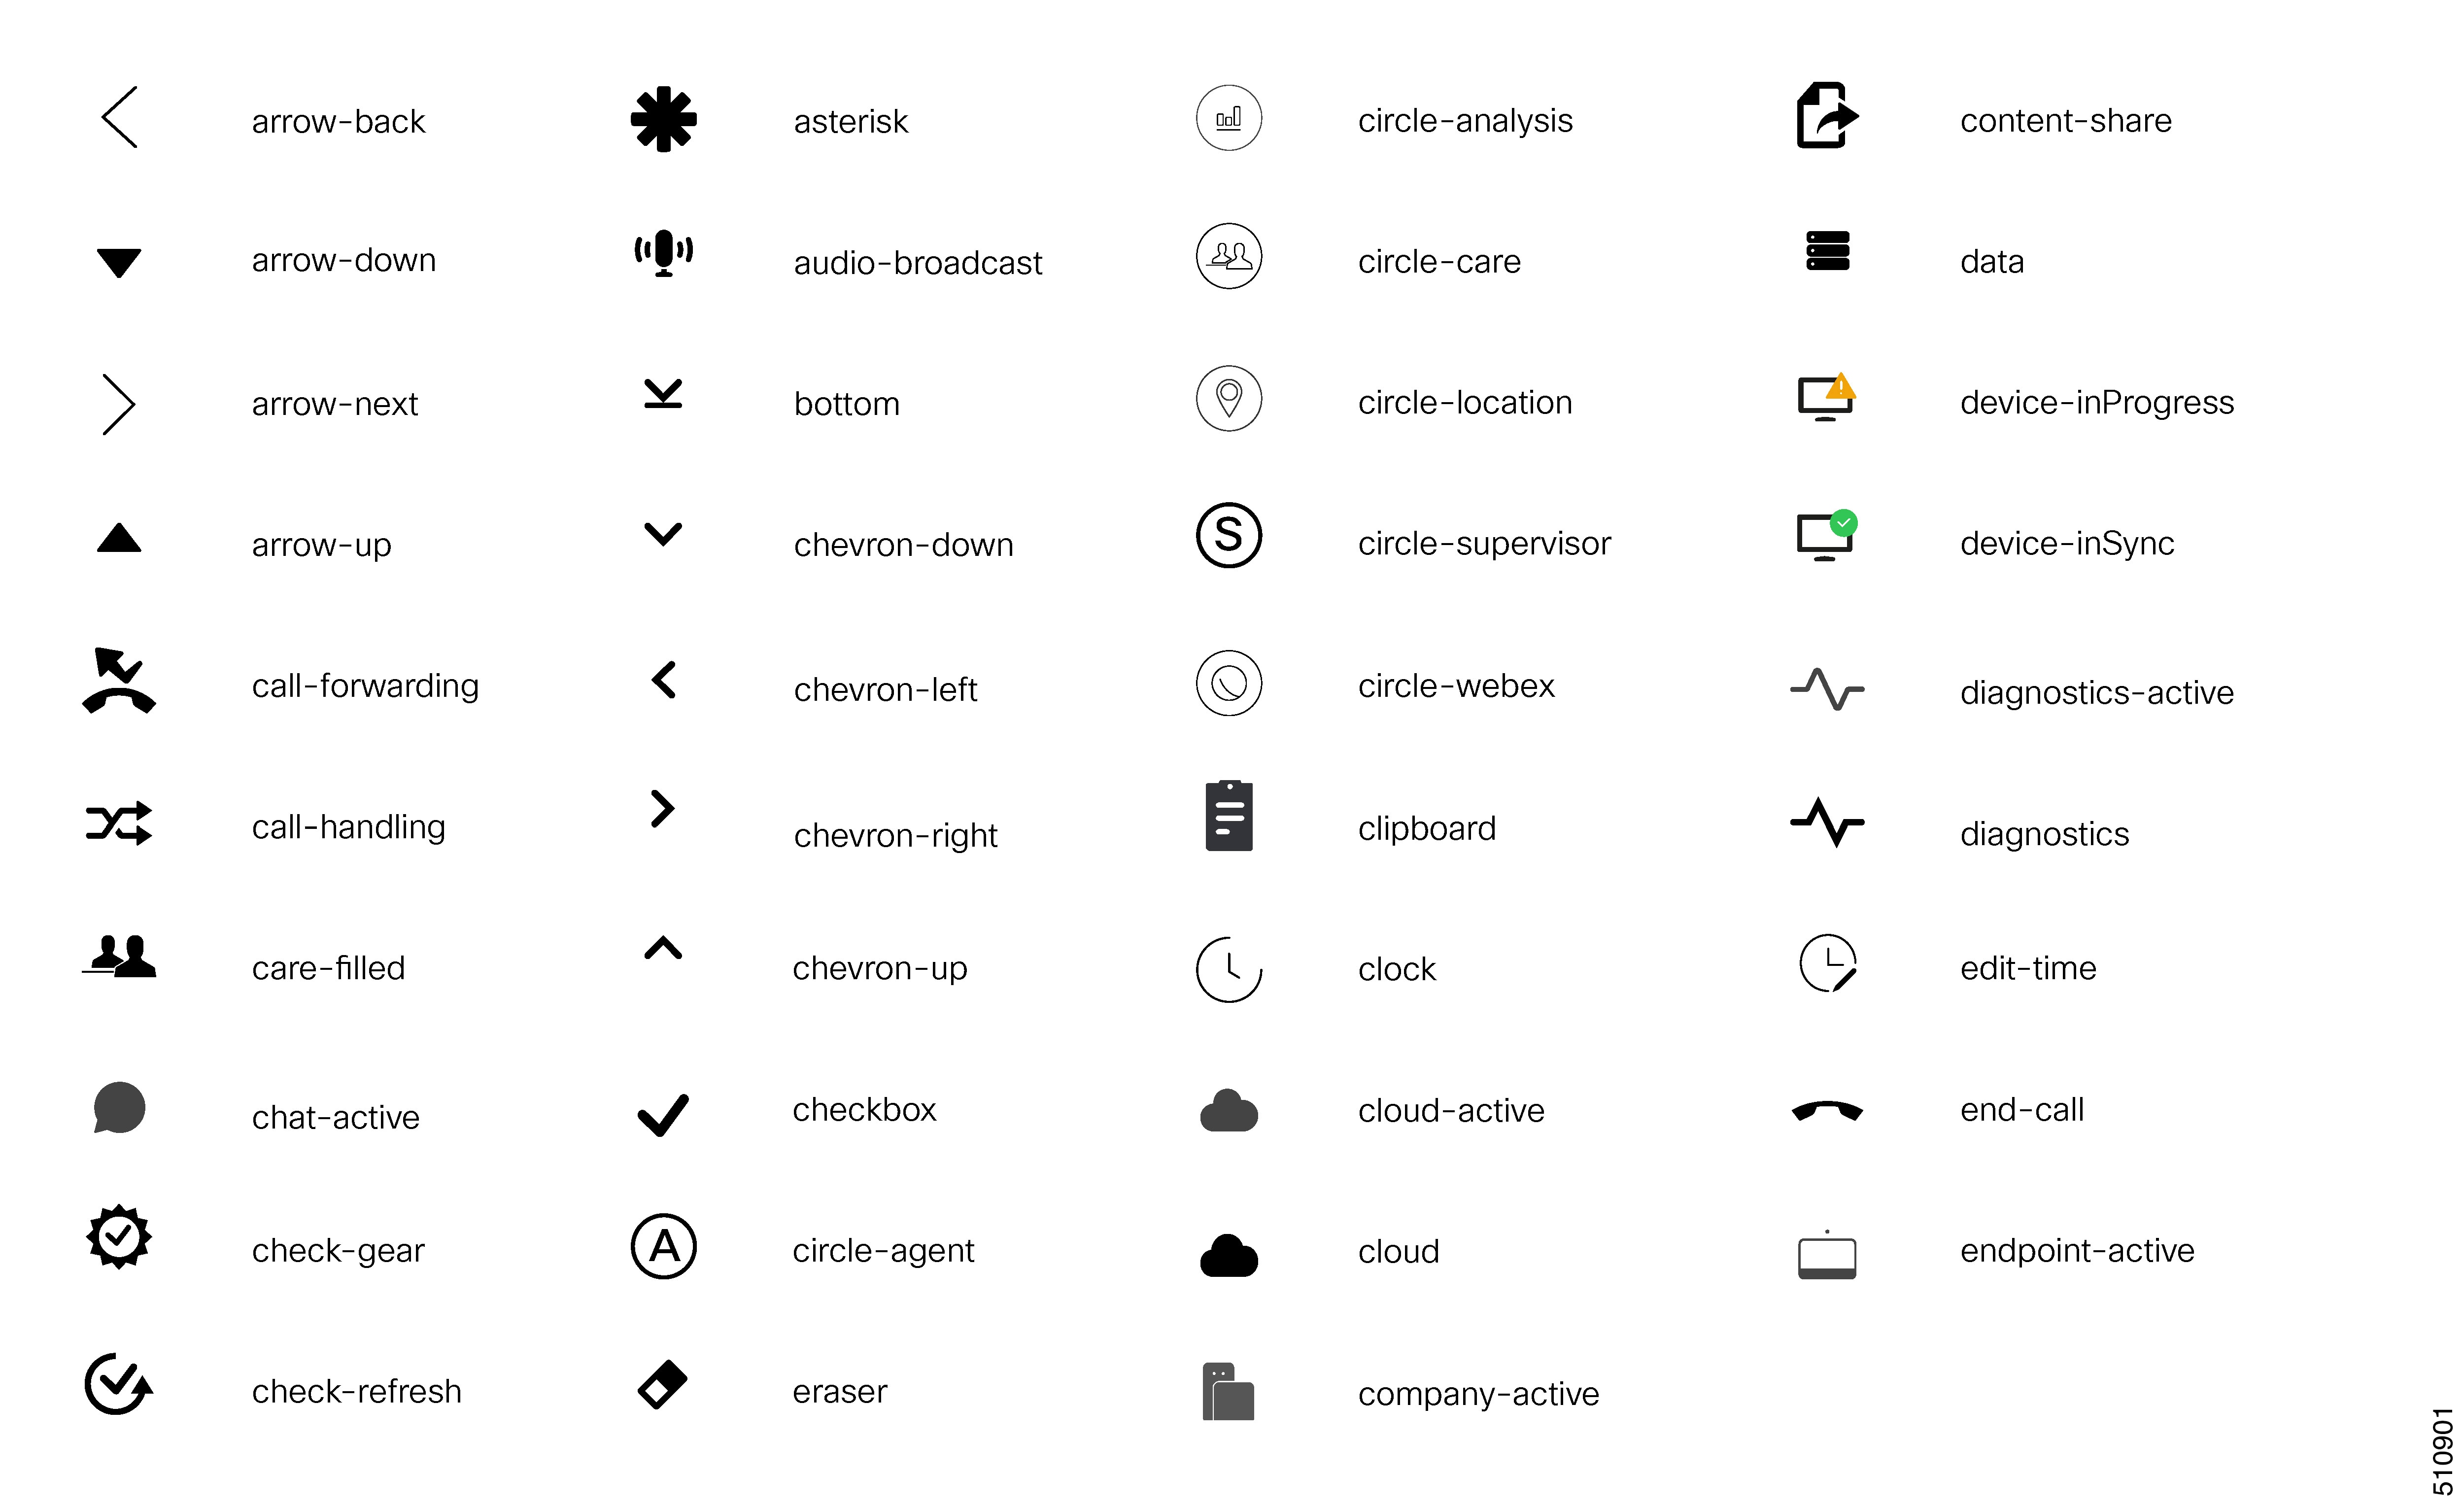
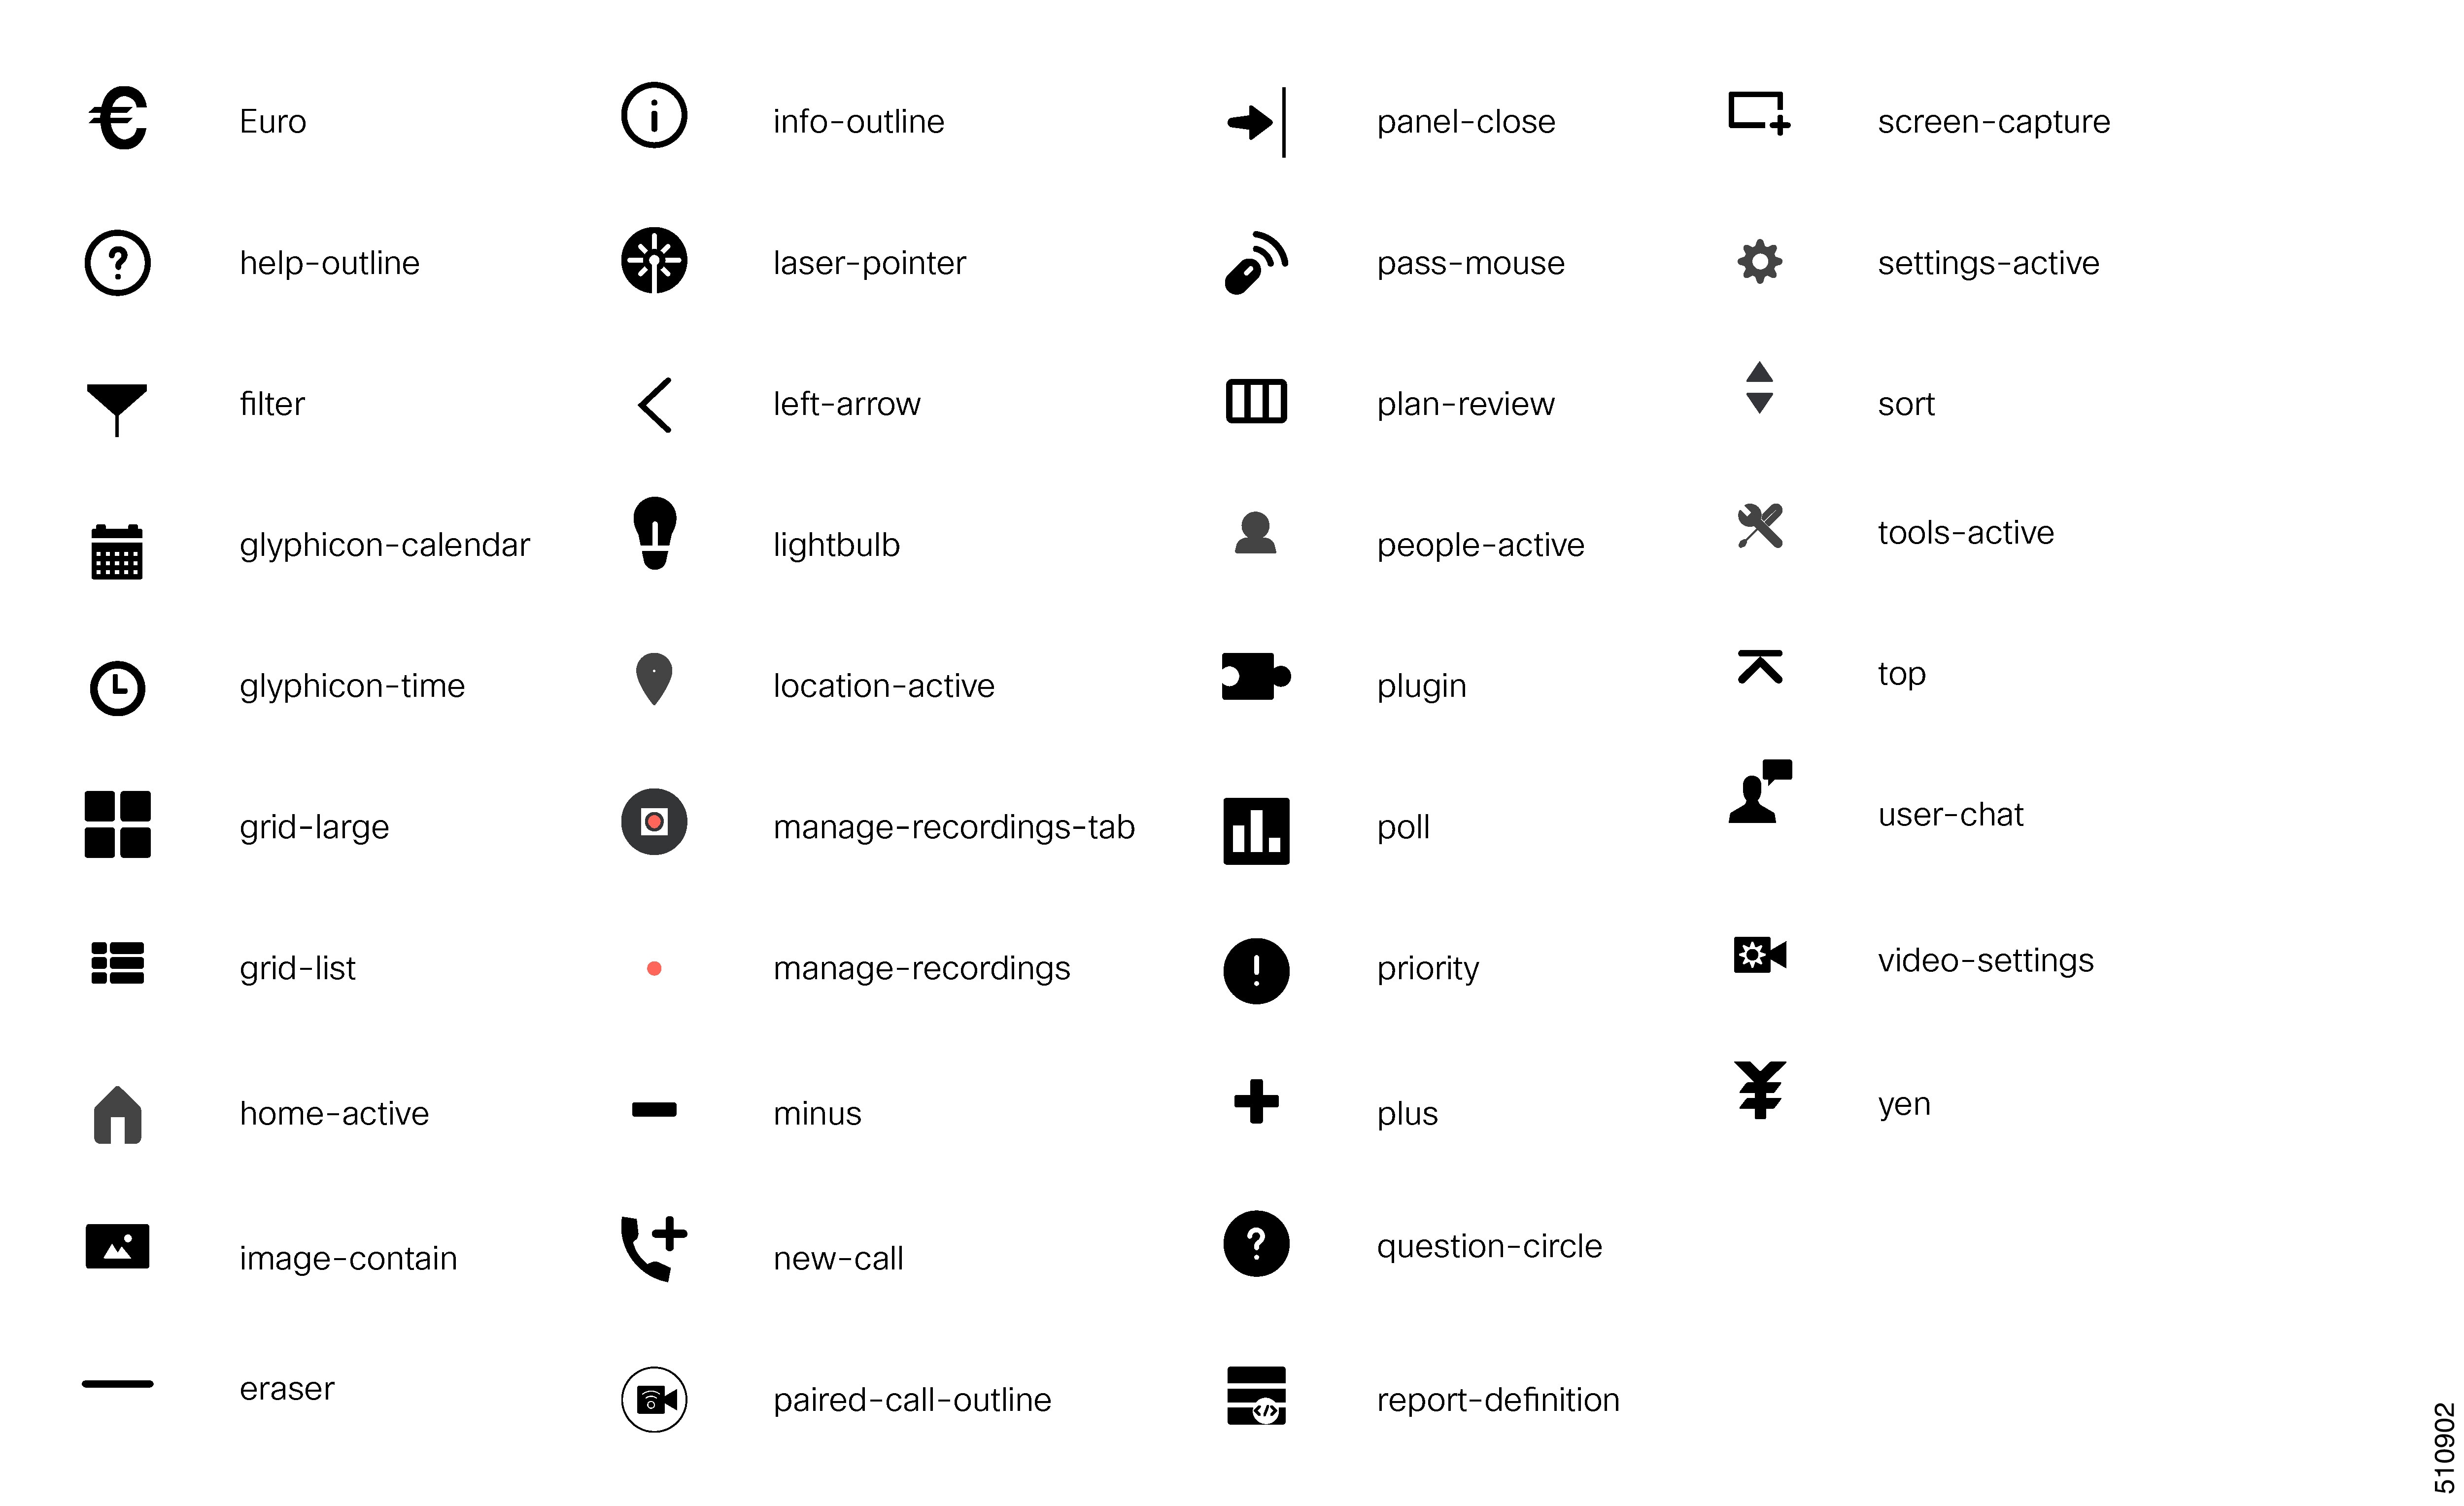
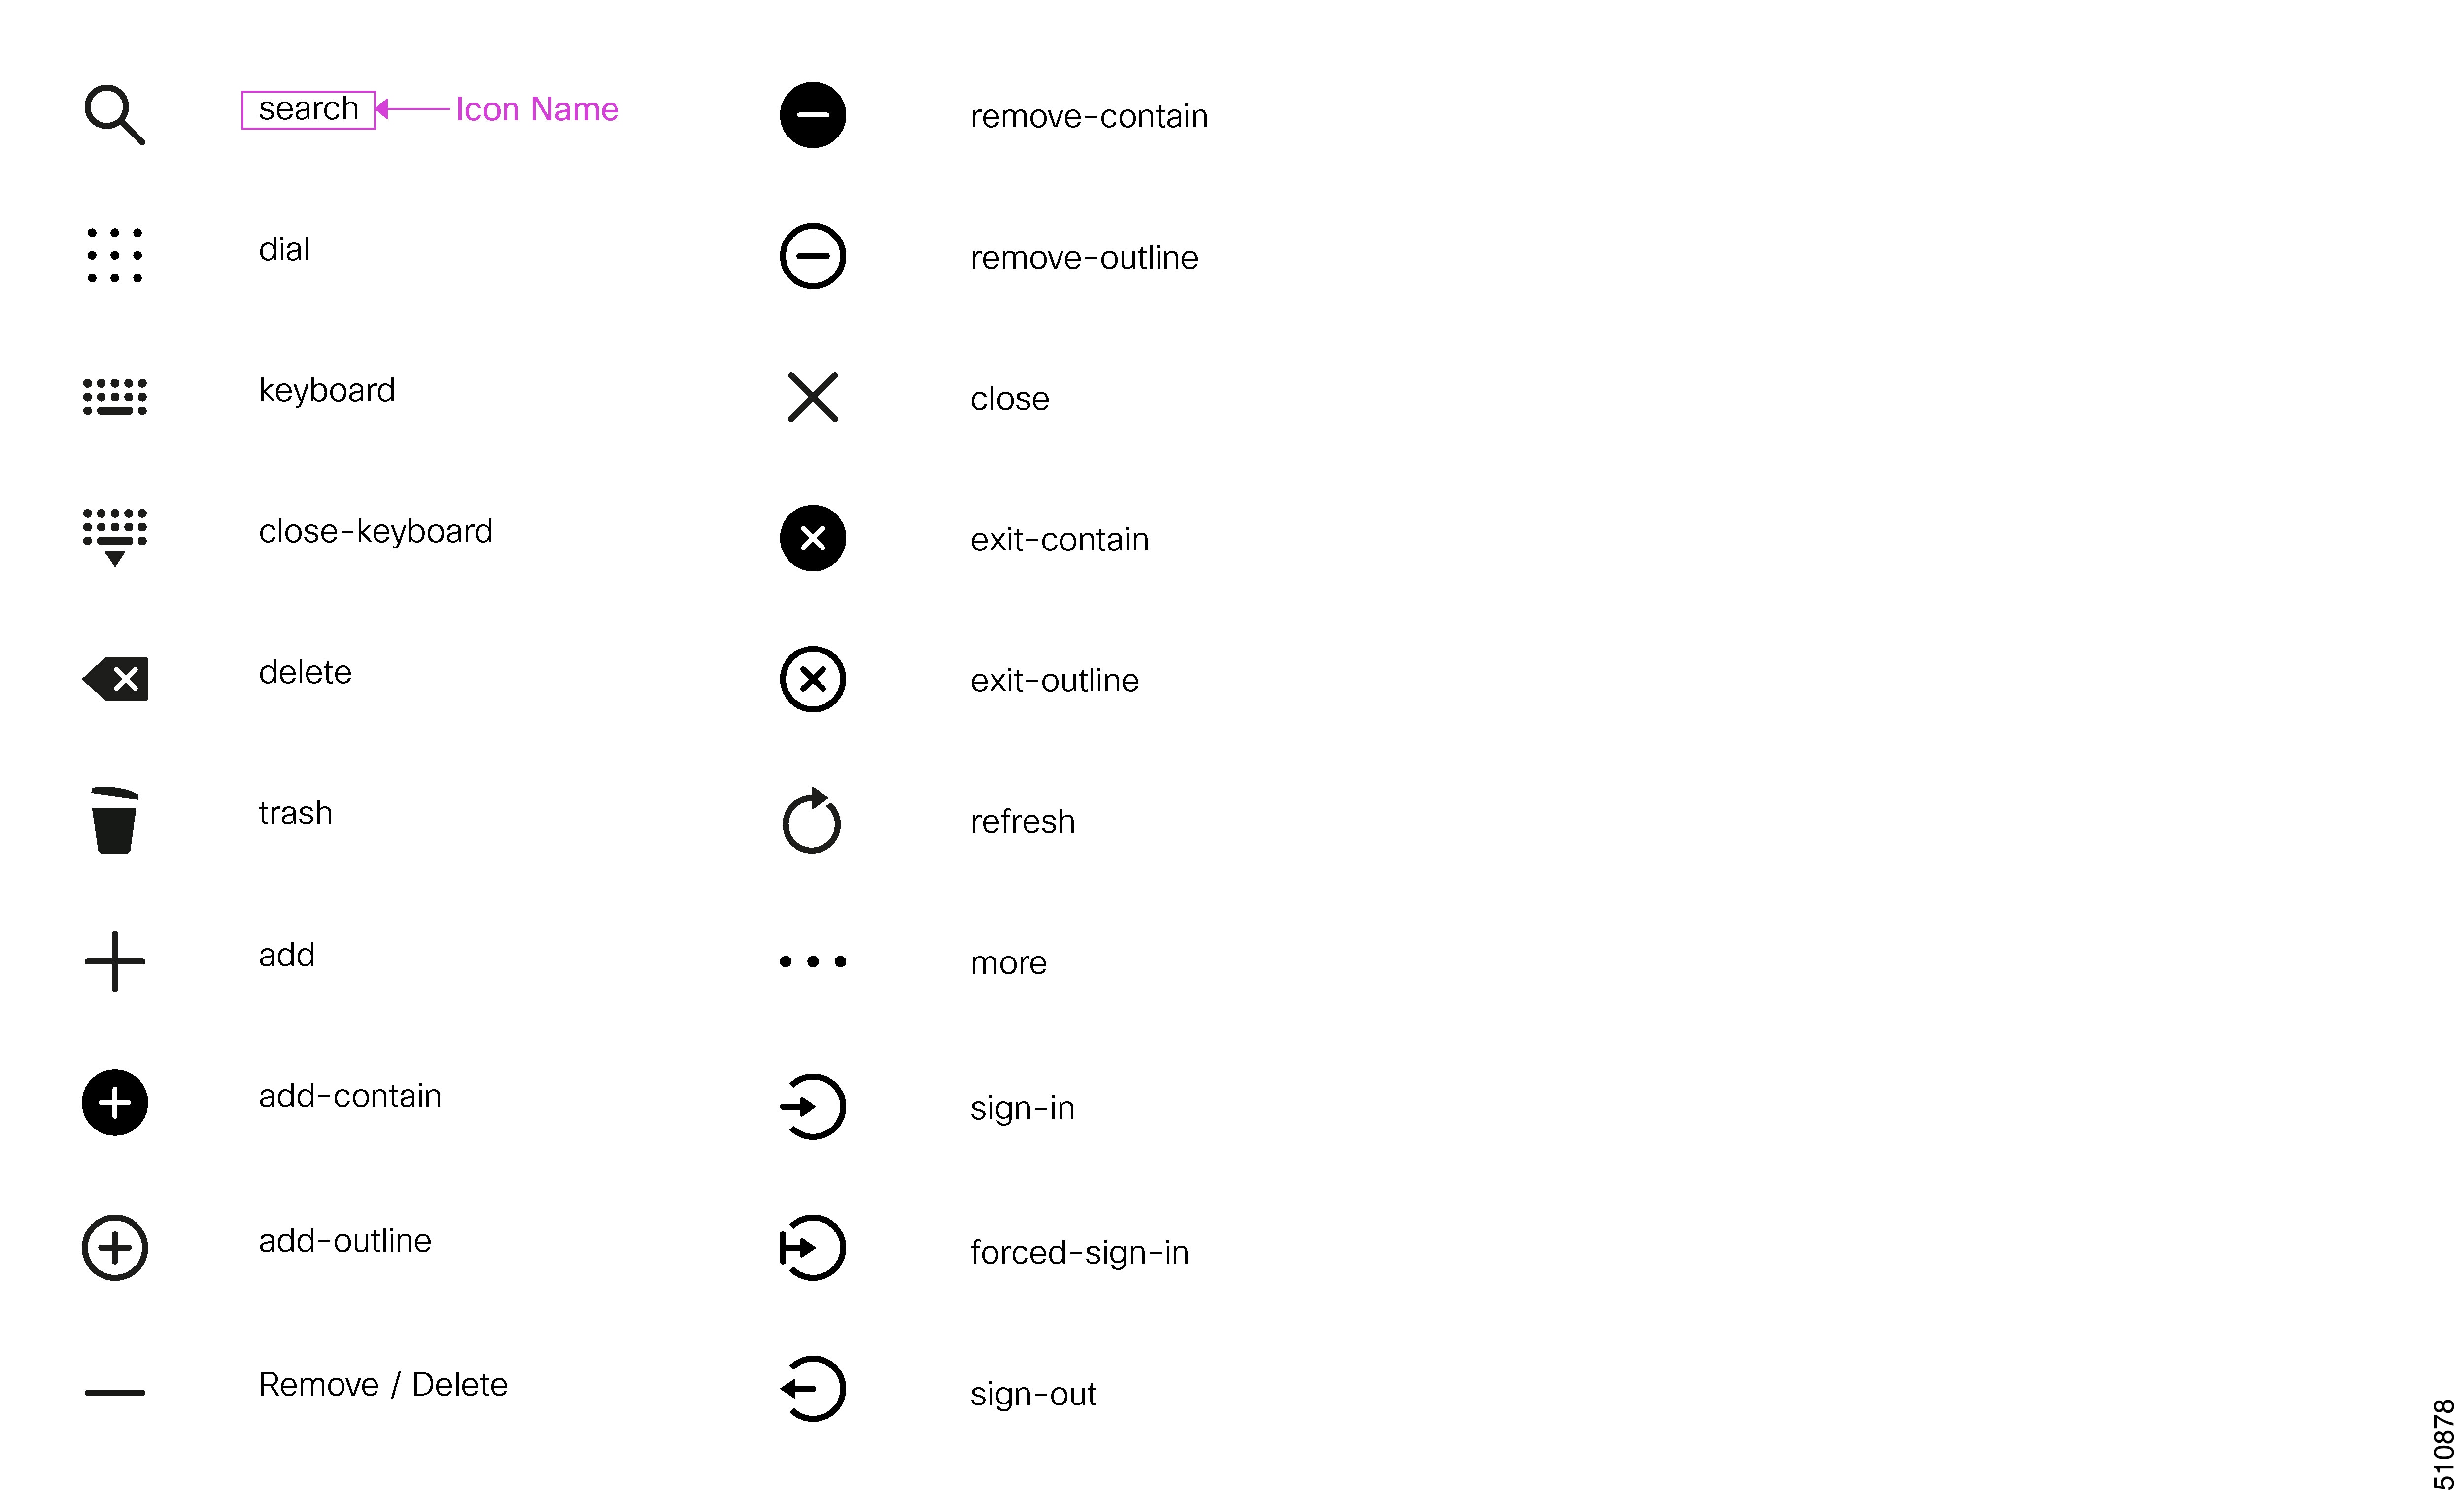
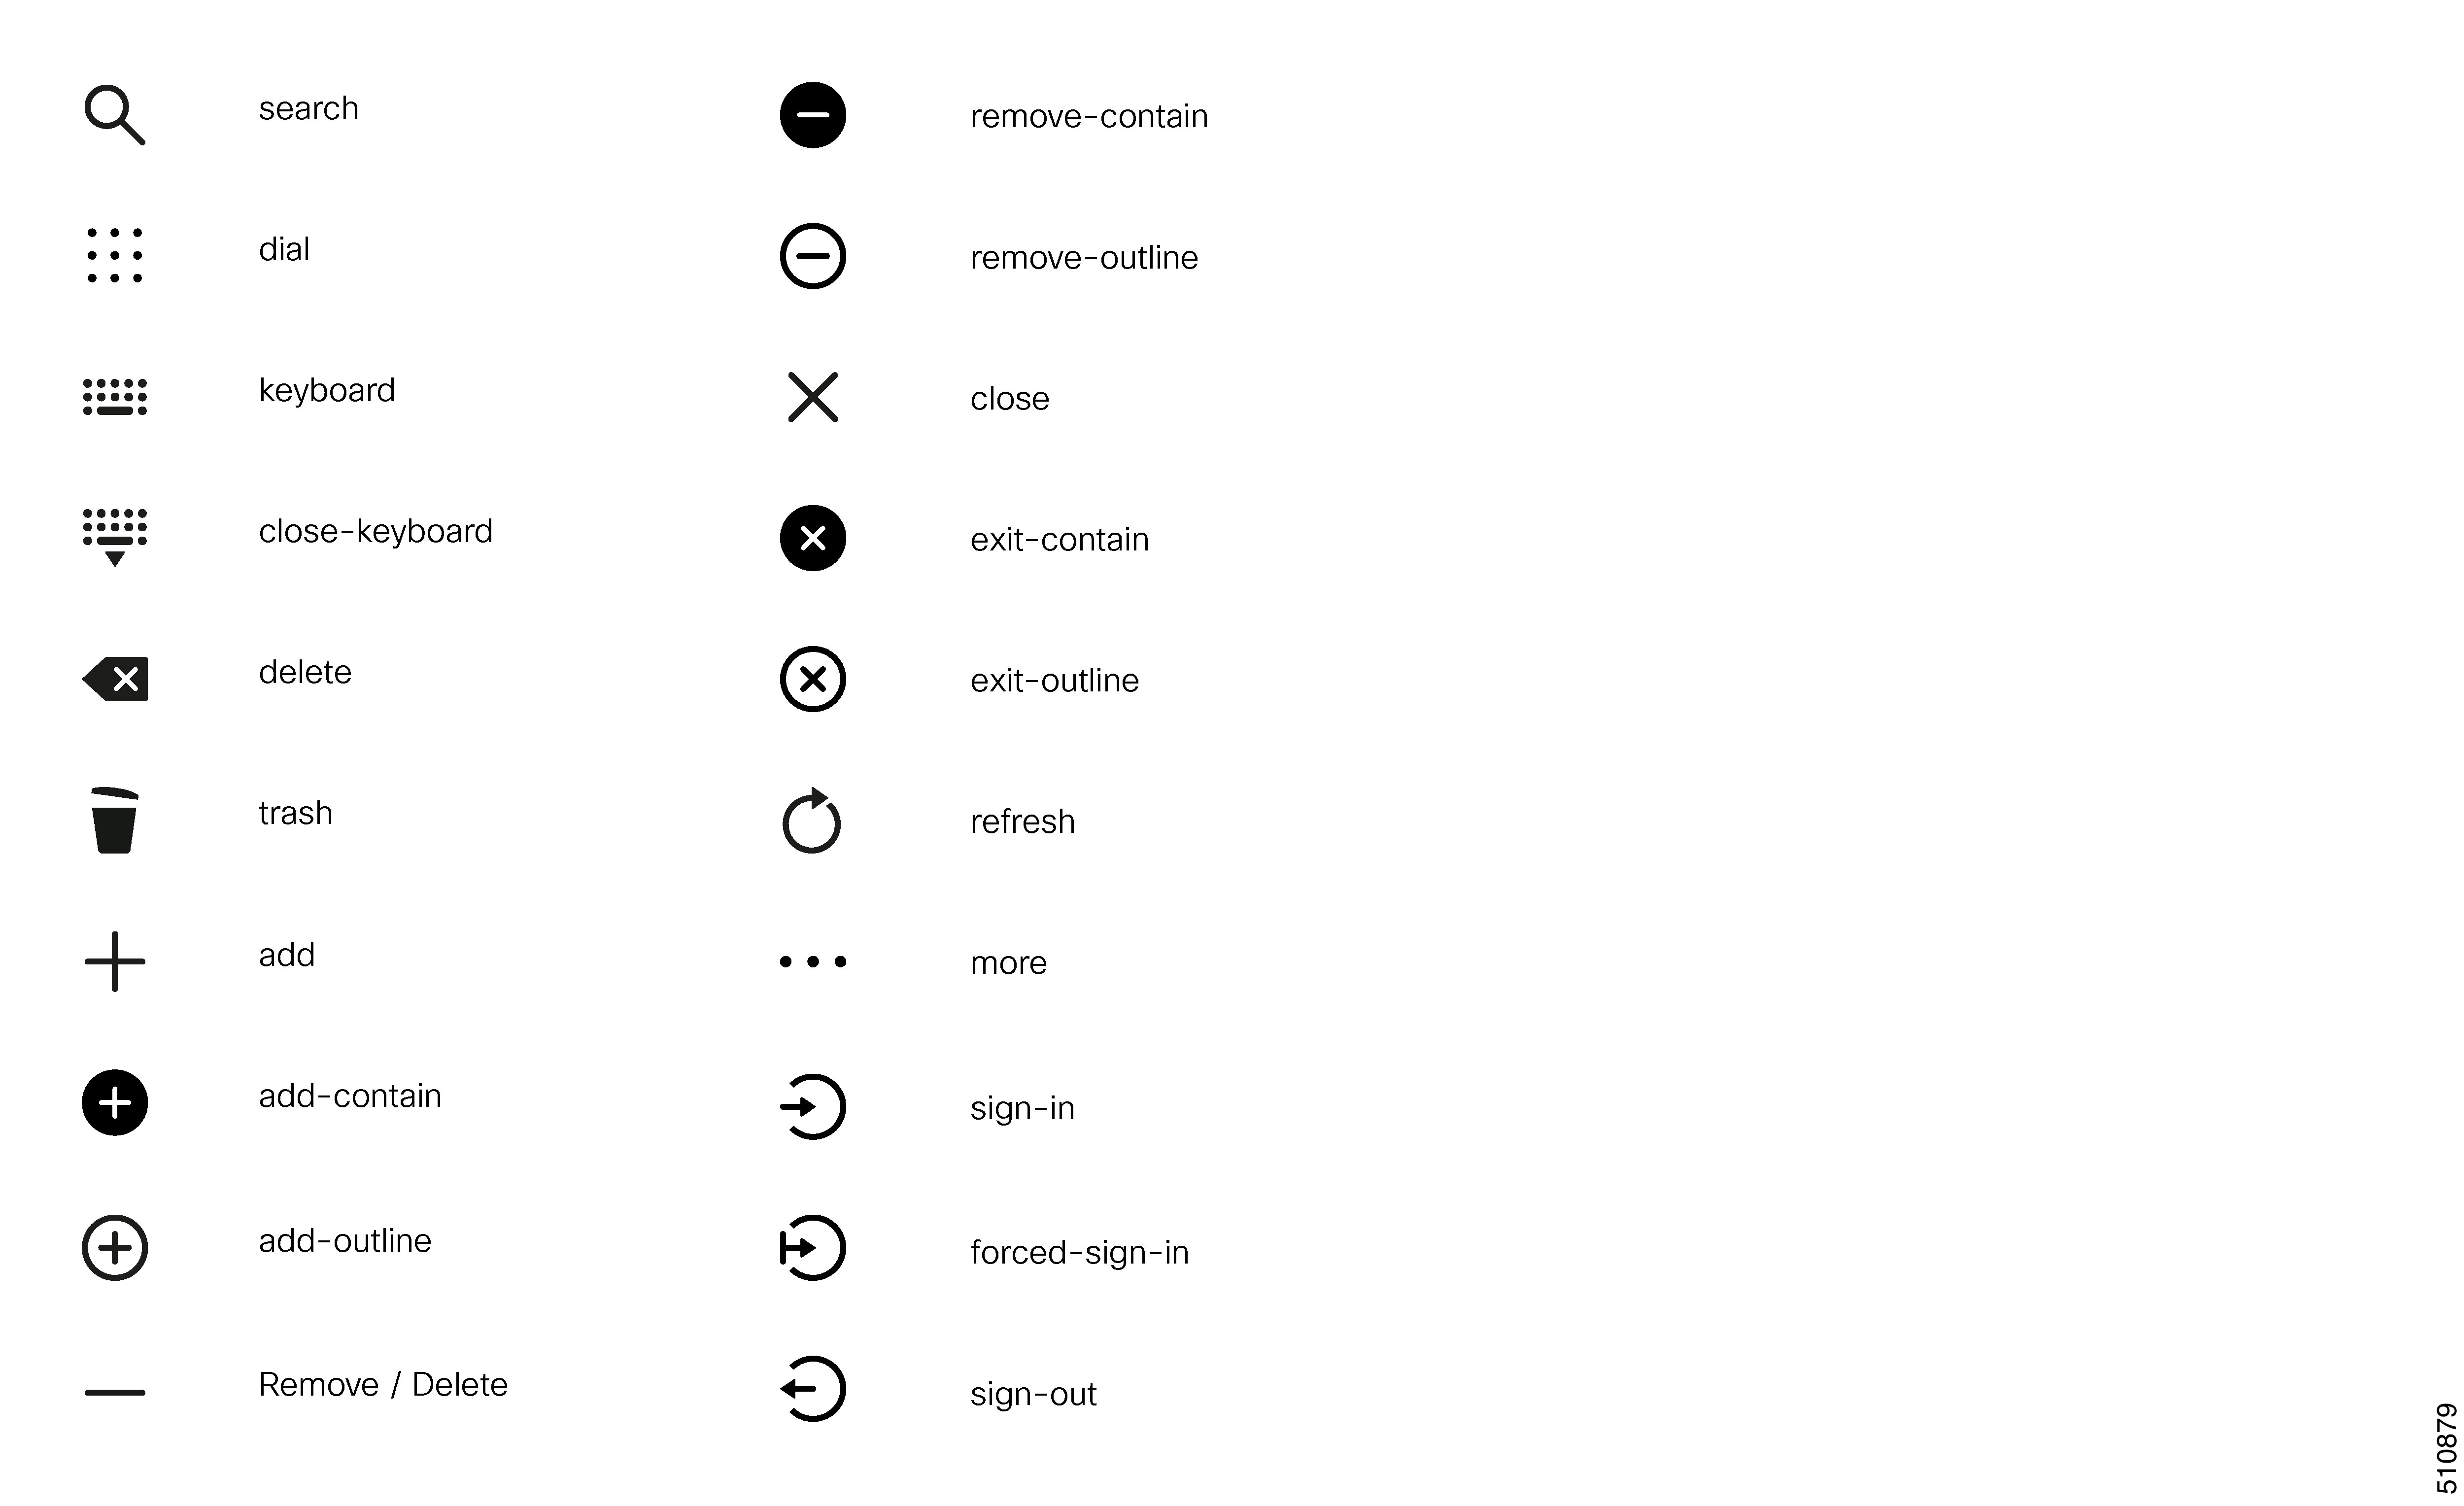
Enter the value of the icon in the icon tag. Get the icon name from the List of Icons. The icon name is located on the right of the icon image. For example, search.

Note


Icon name is case sensitive. Enter the icon name exactly as displayed in the List of Icons.

Example

An example of the desktop layout using the Search and Close-Keyboard icons.

<tab>
    <id>home</id>
    <icon>search</icon>
    <label>finesse.container.tabs.agent.homeLabel</label>
    <columns>
        <column>
            <gadgets>
                <gadget>/desktop/scripts/js/queueStatistics.js</gadget>
            </gadgets>
        </column>
    </columns>
</tab>
<tab>
    <id>sample</id>
    <icon>close-keyboard</icon>
    <label>finesse.container.tabs.agent.homeLabel2</label>
    <columns>
        <column>
            <gadgets>
                <gadget>/desktop/scripts/js/samplequeue.js</gadget>
            </gadgets>
        </column>
    </columns>
</tab>

List of Icons

The following are the icons for Actions.

The following are the icons for Audio.

The following are the icons for Camera.

The following are the icons for Chat.

The following are the icons for Collaboration.

The following are the icons for Contacts.

The following are the icons for Content.

The following are the icons for Editor.

The following are the icons for Email.

The following are the icons for Hardware.

The following are the icons for Media.

The following are the icons for Navigation.

The following are the icons for Network.

The following are the icons for Notifications and Alerts.

The following are the icons for Phone.

The following are the icons for Sources.

The following are the icons for Settings.

The following are the icons for Video Controls.

The following are the icons for Miscellaneous Icons.

For more information on customizing the visual experience, see Visual Design Kit at https://developer.cisco.com/docs/finesse/#!visual-design-guide.

XML Schema Definition

You must ensure that the XML uploaded conforms to the XML schema definition for Finesse. The XML schema definition for Finesse is as follows:

<?xml version="1.0" encoding="UTF-8"?>
<xs:schema xmlns:xs="http://www.w3.org/2001/XMLSchema" xmlns="http://www.cisco.com/vtg/finesse" targetNamespace="http://www.cisco.com/vtg/finesse" elementFormDefault="qualified">
   <!-- definition of version element -->
   <xs:element name="version">
      <xs:simpleType>
         <xs:restriction base="xs:double">
            <xs:pattern value="[0-9\.]+" />
         </xs:restriction>
      </xs:simpleType>
   </xs:element>
   <!--  The below elements are for common desktop header and configs -->
   <!--  Copied from: https://github5.cisco.com/ccbu-shared/common-desktop/blob/master/java/layout-manager/src/main/resources/layoutSchema.xsd -->
   <!--  If the common-desktop XSD changes, this too needs to be updated -->
   <!--  Only difference is that, column has been renamed to headercolumn, since column is alredy there in finesse desktop layout -->
   <xs:complexType name="configs">
      <xs:sequence>
         <xs:element name="config" type="config" minOccurs="0" maxOccurs="unbounded" />
      </xs:sequence>
   </xs:complexType>
   <xs:complexType name="config">
      <xs:attribute name="key">
         <xs:simpleType>
            <xs:restriction base="xs:string">
               <xs:pattern value="[a-zA-Z]*" />
            </xs:restriction>
         </xs:simpleType>
      </xs:attribute>
      <xs:attribute name="value" type="xs:string" />
   </xs:complexType>
   <xs:complexType name="header">
      <xs:choice>
         <xs:sequence>
            <xs:element name="leftAlignedColumns" type="listOfColumns" minOccurs="1" maxOccurs="1" />
            <xs:element name="rightAlignedColumns" type="listOfColumns" minOccurs="0" maxOccurs="1" />
         </xs:sequence>
         <xs:sequence>
            <xs:element name="rightAlignedColumns" type="listOfColumns" minOccurs="1" maxOccurs="1" />
         </xs:sequence>
      </xs:choice>
   </xs:complexType>
   <xs:complexType name="component">
      <xs:sequence>
         <xs:element name="url" type="xs:string" minOccurs="1" maxOccurs="1" />
         <xs:element name="stylesheet" type="xs:string" minOccurs="0" maxOccurs="1" />
      </xs:sequence>
      <xs:attribute name="id" use="required">
         <xs:simpleType>
            <xs:restriction base="xs:string">
               <xs:pattern value=".+" />
            </xs:restriction>
         </xs:simpleType>
      </xs:attribute>
      <xs:attribute name="order">
         <xs:simpleType>
            <xs:restriction base="xs:string">
               <xs:pattern value="[0-9]{0,10}" />
            </xs:restriction>
         </xs:simpleType>
      </xs:attribute>
   </xs:complexType>
   <xs:complexType name="listOfColumns">
      <xs:sequence>
         <xs:element name="headercolumn" type="headercolumn" minOccurs="1" maxOccurs="unbounded" />
      </xs:sequence>
   </xs:complexType>
   <xs:complexType name="headercolumn">
      <xs:choice minOccurs="0" maxOccurs="1">
         <xs:element ref="gadget" />
         <xs:element name="component" type="component" />
      </xs:choice>
      <xs:attribute name="width">
         <xs:simpleType>
            <xs:restriction base="xs:string">
               <xs:pattern value="[0-9]+(px|%)" />
            </xs:restriction>
         </xs:simpleType>
      </xs:attribute>
   </xs:complexType>
   <!--  The above elements are for common desktop header and configs -->
   <!-- definition of role type -->
   <xs:simpleType name="role">
      <xs:restriction base="xs:string">
         <xs:enumeration value="Agent" />
         <xs:enumeration value="Supervisor" />
         <xs:enumeration value="Admin" />
      </xs:restriction>
   </xs:simpleType>
   <!-- definition of simple elements -->
   <xs:element name="id">
      <xs:simpleType>
         <xs:restriction base="xs:string">
            <xs:pattern value="[a-zA-Z]([-_:\.a-zA-Z0-9])*" />
         </xs:restriction>
      </xs:simpleType>
   </xs:element>
   <xs:element name="label">
      <xs:simpleType>
         <xs:restriction base="xs:string">
            <xs:minLength value="1" />
            <xs:pattern value="[^\r\n]+" />
            <!-- This regex restricts the label string from carriage returns or newline characters -->
         </xs:restriction>
      </xs:simpleType>
   </xs:element>
   <xs:element name="icon" type="xs:anyURI" />
   <xs:element name="gadget">
      <xs:complexType>
         <xs:simpleContent>
            <xs:extension base="restrictWhiteSpaces">
               <!-- <xs:attribute name="staticMessage" type="xs:string"/> -->
               <xs:attribute name="id">
                  <xs:simpleType>
                     <xs:restriction base="xs:string">
                        <xs:pattern value="[a-zA-Z]([-_a-zA-Z0-9])*" />
                     </xs:restriction>
                  </xs:simpleType>
               </xs:attribute>
               <xs:attribute name="alternateHosts" type="xs:string" />
               <xs:attribute name="managedBy" type="xs:string" />
               <xs:attribute name="hidden" type="xs:boolean" />
            </xs:extension>
         </xs:simpleContent>
      </xs:complexType>
   </xs:element>
   <xs:element name="role" type="role" />
   <xs:element name="gadgets">
      <!-- Grouping of a set of gadgets -->
      <xs:complexType>
         <xs:sequence minOccurs="0" maxOccurs="unbounded">
            <!-- No limit to number of gadget URIs for now -->
            <xs:element ref="gadget" />
            <!-- URI of the gadget xml -->
         </xs:sequence>
      </xs:complexType>
   </xs:element>
   <xs:simpleType name="restrictWhiteSpaces">
      <xs:restriction base="xs:anyURI">
         <xs:minLength value="1" />
         <xs:pattern value="\S+" />
         <!-- This regex restricts anyURI from containing whitespace within -->
      </xs:restriction>
   </xs:simpleType>
   <xs:element name="column">
      <!-- Grouping of a set of gadgets within a column -->
      <xs:complexType>
         <xs:sequence minOccurs="0" maxOccurs="unbounded">
            <!-- No limit to number of gadget URIs for now -->
            <xs:element ref="gadgets" />
            <!-- URI of the gadget xml -->
         </xs:sequence>
      </xs:complexType>
   </xs:element>
   <xs:element name="columns">
      <!-- Grouping of a set of columns -->
      <xs:complexType>
         <xs:sequence>
            <xs:element ref="column" minOccurs="0" maxOccurs="unbounded" />
         </xs:sequence>
      </xs:complexType>
   </xs:element>
   <xs:element name="page">
      <!-- Grouping of a set of persistent gadgets -->
      <xs:complexType>
         <xs:sequence minOccurs="0" maxOccurs="unbounded">
            <!-- No limit to number of gadget URIs for now -->
            <xs:element ref="gadget" />
            <!-- URI of the gadget xml -->
         </xs:sequence>
      </xs:complexType>
   </xs:element>
   <xs:element name="tab">
      <xs:complexType>
         <xs:sequence>
            <xs:element ref="id" />
            <!-- Id of the tab selector in the desktop -->
            <xs:element ref="icon" minOccurs="0" maxOccurs="1" />
            <xs:element ref="label" />
            <!-- Label of the tab selector -->
            <xs:choice>
               <xs:element ref="gadgets" minOccurs="0" maxOccurs="1" />
               <xs:element ref="columns" minOccurs="0" maxOccurs="1" />
            </xs:choice>
         </xs:sequence>
      </xs:complexType>
   </xs:element>
   <xs:element name="tabs">
      <!-- Grouping of tabs -->
      <xs:complexType>
         <xs:sequence maxOccurs="unbounded">
            <!-- No limit to number of tabs for now -->
            <xs:element ref="tab" />
         </xs:sequence>
      </xs:complexType>
   </xs:element>
   <xs:element name="layout">
      <xs:complexType>
         <xs:sequence>
            <xs:element ref="role" />
            <!-- Type of the role -->
            <xs:element ref="page" />
            <!-- List of page gadgets -->
            <xs:element ref="tabs" />
            <!-- Grouping of tabs for this particular role -->
         </xs:sequence>
      </xs:complexType>
   </xs:element>
   <xs:element name="finesseLayout">
      <!-- Layout of the desktop -->
      <xs:complexType>
         <xs:sequence>
            <xs:element ref="version" />
            <xs:element name="configs" type="configs" minOccurs="0" maxOccurs="1" />
            <xs:element name="header" type="header" minOccurs="1" maxOccurs="1" />
            <xs:sequence maxOccurs="3">
               <!-- only support 3 roles for now -->
               <xs:element ref="layout" />
            </xs:sequence>
         </xs:sequence>
      </xs:complexType>
   </xs:element>
</xs:schema>

Live Data Reports

Prerequisites for Live Data

Before you add Live Data reports to the desktop, you must meet the following prerequisites:

  • Download the Live Data reports from Cisco.com and import them into Cisco Unified Intelligence Center. Verify that the reports are working in Unified Intelligence Center.

  • You must use HTTPS for both Cisco Unified Intelligence Center and Finesse. The default setting for both after a fresh installation is HTTPS.

    For more information, see Administration Console User Guide for Cisco Unified Intelligence Center at https://www.cisco.com/c/en/us/support/customer-collaboration/unified-intelligence-center/products-maintenance-guides-list.html.

  • Ensure that user integration synchronization is enabled for Cisco Unified Intelligence Center.

    For more information, see Administration Console User Guide for Cisco Unified Intelligence Center at https://www.cisco.com/c/en/us/support/customer-collaboration/unified-intelligence-center/products-maintenance-guides-list.html.

  • For HTTPS, you must upload security certificates to the Finesse, Cisco Unified Intelligence Center and Live Data servers. Finesse, Cisco Unified Intelligence Center, and Live Data are installed with self-signed certificates. However, if you use the self-signed certificates, agents and supervisors must accept certificates in the Finesse desktop when they sign in before they can use the Live Data gadget. To avoid this requirement, you can provide a CA certificate instead. You can obtain a CA certificate from a third-party certificate vendor or produce one internal to your organization.

Add Live Data Reports to Finesse

To add Live Data reports to the Finesse desktop. The procedure that you follow depends on several factors, described in the following table.

Procedure

When to use

Add Live Data reports to default desktop layout

After a fresh installation or after an upgrade if you have not customized the default desktop layout.

Add Live Data reports to custom desktop layout

If you have customized the Finesse desktop layout.

Add Live Data reports to team layout

To the desktop layout for specific teams only.


Note


The line breaks and spaces that appear in the example text of the procedures are provided only for readability and must not be included in the actual code.


Note


After you add a gadget, sign in to the Finesse desktop and make sure it appears the way you want. If you use a report with a large number of rows, you may want to adjust the gadget height or the screen resolution on the computer used to access the desktop to make the report easier to read or make more rows appear on the screen without needing to scroll down.

Agents who are signed in when you change the desktop layout must sign out and sign back in to see the change on their desktops.


Add Live Data Reports to Default Desktop Layout

The Finesse default layout XML contains commented XML code for the Live Data report gadgets available for the Finesse desktop.

This procedure explains how to add the Live Data report gadgets to the default desktop layout. Use this procedure after a fresh installation of Finesse. If you upgraded Finesse and do not have a custom desktop layout, click Restore Default Layout on the Manage Desktop Layout gadget and then follow the steps in this procedure.

Procedure

Step 1

Click Desktop Layout.

Step 2

Select from the following editors:

  • Text Editor
  • XML Editor

Step 3

Add the reports to the desktop layout:

  • Text Editor - Remove the comment (<!-- and -->) from each report that you want to add to the desktop layout and then replace "my-cuic-server" with the FQDN of the Cisco Unified Intelligence Center Server.
  • XML Editor - To add a gadget, select <layout > <tabs > <gadgets> Add <gadget> and enter the required parameters such as Id, alternate hosts, managed by, maximum rows, and the hidden details.

Note


You must select the reports that match the protocol (HTTPS) your agents use to access the Cisco Finesse desktop.

Step 4

Optionally, change the gadget height.

Example:

The height that is specified in the Live Data gadget URLs is 310 pixels. If you want to change the height, change the gadgetHeight parameter in the URL to the desired value. For example, if you want the gadget height to be 400 pixels, change the code as follows, replacing 310 with 400:

<gadget>https://my-cuic-server:8444/cuic/gadget/LiveData/LiveDataGadget.xml?
        gadgetHeight=400&viewId_1=99E6C8E210000141000000D80A0006C4&
        filterId_1=agent.id=CL%20teamName&viewId_2=9AB7848B10000141000001C50A0006C4&
        filterId_2=agent.id=CL%20teamName
        </gadget>

To maintain the optimal display of the gadget with scroll bars, set the value for the gadget height to a minimum of 200 pixels. If the report does not require scroll bars, for example a one-row report, you can set a smaller gadget height (for example, 100 pixels). If you do not specify anything for the gadget height (if you remove the 310 from the URL), it defaults to 170 pixels.

Step 5

Click Save.

Note

 
In a dynamic type gadget, multiple viewId parameters is not supported. Check the URL in the error message before proceeding to save the default XML layout. The name value "type=dynamic must be part of the gadget URL.

Note


If you select a TDM agent in the Team Performance Gadget, the recent state history data of the selected agent is not populated.


Add Live Data Reports to Custom Desktop Layout

The Finesse default layout XML contains commented XML code for the Live Data report gadgets available for the Finesse desktop.

To add the Live Data report gadgets to a custom desktop layout.

Procedure

Step 1

Click the Desktop Layout tab.

Step 2

Select from the following editors:

  • Text Editor
  • XML Editor

Step 3

Copy the XML code for the HTTPS report you want to add from the Finesse default layout XML.

Example:

To add the Agent Report for HTTPS, copy the following:

<gadget>https://my-cuic-server:8444/cuic/gadget/LiveData/LiveDataGadget.xml?
        gadgetHeight=310&viewId_1=99E6C8E210000141000000D80A0006C4&
        filterId_1=agent.id=CL%20teamName&
        viewId_2=9AB7848B10000141000001C50A0006C4&
        filterId_2=agent.id=CL%20teamName
</gadget>

Step 4

Paste the XML within the tab tags where you want it to appear.

Example:

To add the report to the home tab of the agent desktop:

<layout>
  <role>Agent</role>
  <page>
    <gadget>/desktop/gadgets/CallControl.xml</gadget>
  </page>
  <tabs>
    <tab>
      <id>home</id>
      <label>finesse.container.tabs.agent.homeLabel</label>
      <gadget>https://my-cuic-server:8444/cuic/gadget/LiveData/LiveDataGadget.xml?
              gadgetHeight=310&viewId_1=99E6C8E210000141000000D80A0006C4&
              filterId_1=agent.id=CL%20teamName&
              viewId_2=9AB7848B10000141000001C50A0006C4&
              filterId_2=agent.id=CL%20teamName
      </gadget> 
    </tab>
    <tab>
      <id>manageCall</id>
      <label>finesse.container.tabs.agent.manageCallLabel</label>
    </tab>
  </tabs>
</layout>

Step 5

Replace my-cuic-server with the FQDN of your Cisco Unified Intelligence Center Server.

Step 6

Optionally, change the gadget height.

Example:

The height specified in the Live Data gadget URLs is 310 pixels. If you want to change the height, change the gadgetHeight parameter in the URL to the desired value. For example, if you want the gadget height to be 400 pixels, change the code as follows:

<gadget>https://my-cuic-server:8444/cuic/gadget/LiveData/LiveDataGadget.xml?
        gadgetHeight=400&viewId_1=99E6C8E210000141000000D80A0006C4&
        filterId_1=agent.id=CL%20teamName&viewId_2=9AB7848B10000141000001C50A0006C4&
        filterId_2=agent.id=CL%20teamName
        </gadget>

To maintain the optimal display of the gadget with scroll bars, set the value for the gadget height to a minimum of 200 pixels. If the report does not require scroll bars, for example a one-row report, you can set a smaller gadget height (for example, 100 pixels). If you do not specify anything for the gadget height (if you remove the 310 from the URL), it defaults to 170 pixels.

Step 7

Click Save.


Add Live Data Reports to Team Layout

The Finesse default layout XML contains commented XML code for the Live Data report gadgets available for the Finesse desktop.

To add the Live Data report gadgets to the desktop layout of a specific team:

Procedure

Step 1

Click the Desktop Layout tab.

Step 2

Select from the following editors:

  • Text Editor
  • XML Editor

Step 3

Copy the XML code for the HTTPS report you want to add from the Finesse default layout XML.

Example:

To add the Agent Report for HTTPS, copy the following:

<gadget>https://my-cuic-server:8444/cuic/gadget/LiveData/LiveDataGadget.xml?
        gadgetHeight=310&viewId_1=99E6C8E210000141000000D80A0006C4&
        filterId_1=agent.id=CL%20teamName&viewId_2=9AB7848B10000141000001C50A0006C4&
        filterId_2=agent.id=CL%20teamName
        </gadget>

Step 4

Click Team Resources.

Step 5

Select the team from the list of teams for which you want to add the report.

Step 6

In the Resources for <team name> area, click the Desktop Layout tab.

Step 7

Check the Override System Default check box.

Step 8

Select from the following editors:

  • Text Editor
  • XML Editor

Step 9

Paste the XML within the tab tags where you want it to appear.

Example:

To add the report to the home tab of the agent desktop:

<layout>
  <role>Agent</role>
  <page>
    <gadget>/desktop/gadgets/CallControl.jsp</gadget>
  </page>
  <tabs>
    <tab>
      <id>home</id>
      <label>finesse.container.tabs.agent.homeLabel</label>
      <gadget>https://my-cuic-server:8444/cuic/gadget/LiveData/LiveDataGadget.xml?
              gadgetHeight=310&viewId_1=99E6C8E210000141000000D80A0006C4&
              filterId_1=agent.id=CL%20teamName&
              viewId_2=9AB7848B10000141000001C50A0006C4&
              filterId_2=agent.id=CL%20teamName
      </gadget> 
    </tab>
    <tab>
      <id>manageCall</id>
      <label>finesse.container.tabs.agent.manageCallLabel</label>
    </tab>
  </tabs>
</layout>

Step 10

Replace "my-cuic-server" with the FQDN of your Cisco Unified Intelligence Center Server.

Step 11

Optionally, change the gadget height.

Example:

The height specified in the Live Data gadget URLs is 310 pixels. If you want to change the height, change the gadgetHeight parameter in the URL to the desired value. For example, if you want the gadget height to be 400 pixels, change the code as follows:

<gadget>https://my-cuic-server:8444/cuic/gadget/LiveData/LiveDataGadget.xml?
        gadgetHeight=400&viewId_1=99E6C8E210000141000000D80A0006C4&
        filterId_1=agent.id=CL%20teamName&viewId_2=9AB7848B10000141000001C50A0006C4&
        filterId_2=agent.id=CL%20teamName
        </gadget>

To maintain the optimal display of the gadget with scroll bars, set the value for the gadget height to a minimum of 200 pixels. If the report does not require scroll bars, for example a one-row report, you can set a smaller gadget height (for example, 100 pixels). If you do not specify anything for the gadget height (if you remove the 310 from the URL), it defaults to 170 pixels.

Step 12

Click Save.


Modify Live Data Stock Reports for Finesse

To modify the Live Data stock reports in Cisco Unified Intelligence Center and add the modified report to the Finesse desktop layout:


Note


To make sure the modified gadget renders in the Finesse desktop, you must give the appropriate permission for that report in Cisco Unified Intelligence Center.


Procedure

Step 1

Click the Desktop Layout.

Step 2

Select from the following editors:

  • Text Editor
  • XML Editor

Step 3

Copy the gadget URL for the report you want to modify from the Finesse default layout XML and paste it into a text editor.

Example:

If you want to modify the Agent Report for HTTPS, copy the following URL and paste it into a text editor:

<gadget>https://my-cuic-server:8444/cuic/gadget/LiveData/LiveDataGadget.xml?
        gadgetHeight=310&viewId_1=99E6C8E210000141000000D80A0006C4&
        filterId_1=agent.id=CL%20teamName&viewId_2=9AB7848B10000141000001C50A0006C4&
        filterId_2=agent.id=CL%20teamName
        </gadget>

Step 4

In Cisco Unified Intelligence Center, in Edit view of the report, select the view for which you want to create a gadget URL and then click Links.

The HTML Link field displays the permalink of the customized report.

Step 5

Copy the permalink of the customized report from the HTML Link field, and paste it in a text editor. Then copy the viewId value from this link into the desired view.

Example:

Copy the viewId, which is underlined in this example, from the permalink for the report.


https://<Server Name>:8444/cuic/permalink/PermalinkViewer.htmx?
viewId=5C90012F10000140000000830A4E5B33&linkType=htmlType&viewType=Grid

Step 6

Replace the desired viewId value in the gadget URL with the viewId value from the permalink of the customized report.

Note


For more information on modifying reports, see Cisco Unified Intelligence Center User Guide at https://www.cisco.com/c/en/us/support/customer-collaboration/unified-intelligence-center/products-user-guide-list.html.

Step 7

Replace my-cuic-server with the FQDN of the Cisco Unified Intelligence Center Server.

Step 8

Add the customized gadget URL to the desktop layout XML in the Manage Desktop Layout gadget and click Save.


Configure Live Data Reports with Multiple Views

Cisco Unified Intelligence Center allows you to display multiple Live Data reports or views on a single gadget. Agents can select the desired view to display from a drop-down list on the gadget toolbar, which lists up to five report views in Report Name - View Name format.

This procedure describes how to add multiple Live Data views to the Finesse desktop layout using the viewId_n and filterId_n keys. You can specify up to five report views to appear in your gadget. The first view among the five is the default view. There is no defined order for how the remaining views are displayed.

Finesse still supports the display of a single gadget using a single viewId. However, if you specify the single viewId along with multiple viewId_n keys, the multiple views are used and the single viewId is ignored.


Note


To make sure the modified gadget renders in the Finesse desktop, you must give the appropriate permission for that report in Unified Intelligence Center.


Procedure

Step 1

For each report or view that you want to include in the gadget, obtain the associated viewId from the permalink for the view:

  1. In Unified Intelligence Center, in Edit view of the report, select the desired view then click Links.

    The HTML Link field displays the permalink of the customized report.

  2. Copy the permalink of the customized report from the HTML Link field, and paste it in a text editor, and then copy the viewID value from the permalink and save it.

    Example:

    Copy the viewId, which is underlined in this example, from the permalink for the report.

    
    https://<Server Name>:8444/cuic/permalink/PermalinkViewer.htmx?
    viewId=5C90012F10000140000000830A4E5B33&linkType=htmlType&viewType=Grid


Step 2

From the Finesse default layout XML, copy the gadget URL for one of the Live Data reports and paste it into a text editor.

Example:

Copy the URL for the Agent Skill Group for HTTPS from the default layout XML and paste it into a text editor:


<gadget>https://my-cuic-server:8444/cuic/gadget/LiveData/LiveDataGadget.xml?gadgetHeight=310&
viewId_1=9AB7848B10000141000001C50A0006C4&filterId_1=agent.id=CL%20teamName</gadget>

Step 3

To update the URL to refer to a different report view, populate the viewId_1 value (after the equal sign) with the desired viewId obtained in step 1.

Example:

The following shows the URL updated with the example viewId copied from step 1.


<gadget>https://my-cuic-server:8444/cuic/gadget/LiveData/LiveDataGadget.xml?gadgetHeight=310&
viewId_1=5C90012F10000140000000830A4E5B33&filterId_1=agent.id=CL%20teamName</gadget>

Step 4

For each additional view you want to include:

  1. At the end of the URL, copy and paste the viewId_1 and agentId_1 strings with a leading ampersand.

    Example:
    
    <gadget>https://my-cuic-server:8444/cuic/gadget/LiveData/LiveDataGadget.xml?gadgetHeight=310&
    viewId_1=5C90012F10000140000000830A4E5B33&filterId_1=agent.id=CL%20teamName&
    viewId_1=5C90012F10000140000000830A4E5B33&filterId_1=agent.id=CL%20teamName</gadget>
    
  2. Update the copied viewId_1 and filterId_1 in the URL to the next available integer (in this example, viewId_2 and filterId_2).

    Example:
    
    <gadget>https://my-cuic-server:8444/cuic/gadget/LiveData/LiveDataGadget.xml?gadgetHeight=310&
    viewId_1=5C90012F10000140000000830A4E5B33&filterId_1=agent.id=CL%20teamName&
    viewId_2=5C90012F10000140000000830A4E5B33&filterId_2=agent.id=CL%20teamName</gadget>
    
  3. Populate the copied viewId value (after the equal sign) with the value defined in the permalink for the desired report (in this example, 99E6C8E210000141000000D80A0006C4).

    Example:
    
    <gadget>https://my-cuic-server:8444/cuic/gadget/LiveData/LiveDataGadget.xml?gadgetHeight=310&
    viewId_1=5C90012F10000140000000830A4E5B33&filterId_1=agent.id=CL%20teamName&
    viewId_2=99E6C8E210000141000000D80A0006C4&filterId_2=agent.id=CL%20teamName</gadget>
    
  4. Make sure that the filterId value matches the type required by the report type, as follows:

    • Agent Reports: filterId_N=agent.id=CL%20teamName

    • Agent Skill Group Reports: filterId_N=agent.id=CL%20teamName

    • Skill Group Reports: filterId_N=skillGroup.id=CL%20teamName

    • Precision Queue Reports: filterId_N=precisionQueue.id=CL%20teamName

Step 5

Replace my-cuic-server with the FQDN of your Cisco Unified Intelligence Center Server.

Step 6

Add the customized gadget URL to the desktop layout XML in the Manage Desktop Layout gadget and click Save.