|
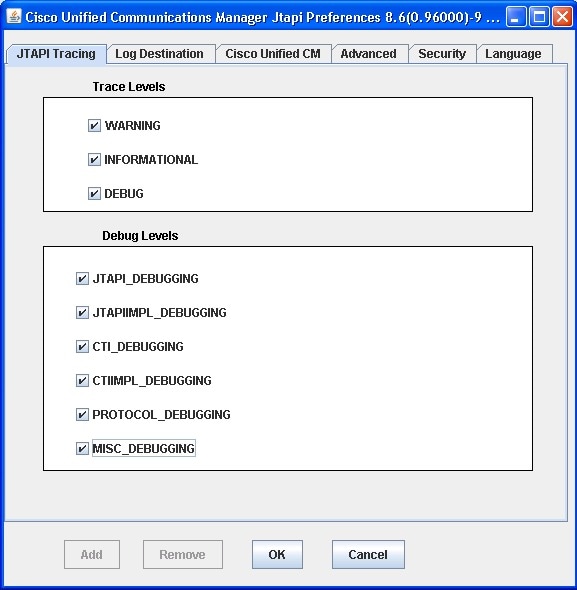
INFORMATIONAL
|
0
|
Not Applicable (NA)
|
NA
|
This field specifies status events
|
|
DEBUG
|
0
|
NA
|
NA
|
This field specifies highest level debugging events
|
|
WARNING
|
0
|
NA
|
NA
|
This field specifies low-level warning events
|
|
JTAPI_DEBUGGING
|
0
|
NA
|
NA
|
This field specifies JTAPI methods and events trace
|
|
JTAPIIMPL_DEBUGGING
|
0
|
NA
|
NA
|
This field specifies internal JTAPI implementation trace
|
|
CTI_DEBUGGING
|
0
|
NA
|
NA
|
This field specifies trace
Cisco Unified
Communications Manager events that are sent to the JTAPI
implementation
|
|
CTIIMPL_DEBUGGING
|
0
|
NA
|
NA
|
This field specifies internal CTICLIENT implementation trace
|
|
PROTOCOL_DEBUGGING
|
0
|
NA
|
NA
|
This field specifies full CTI protocol decoding
|
|
MISC_DEBUGGING
|
0
|
NA
|
NA
|
This field specifies miscellaneous low-level debug trace
|
|
DesiredServerHeartbeatInterval
|
30
|
>0
|
Not Present (NP)
|
This field specifies how often, in seconds, the connection
between JTAPI and the
Cisco Unified
Communications Manager cluster will be verified. If JTAPI fails to
receive heartbeats, it will establish a connection via the second CTIManager
that is specified in the provider open request.
|
|
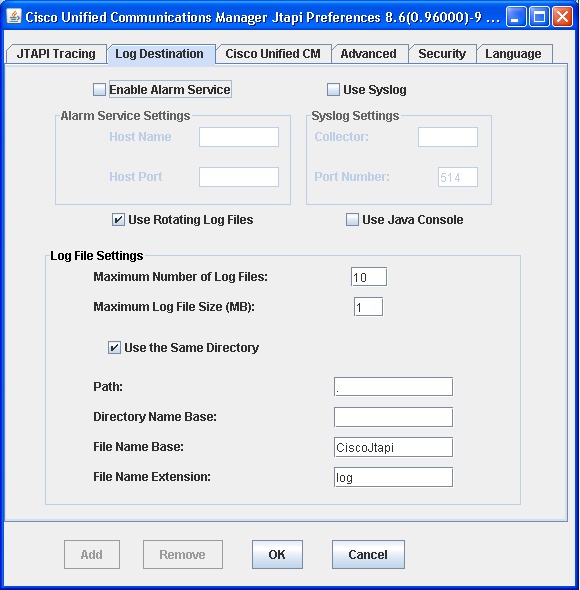
TracePath
|
.
|
NA
|
NA
|
This field specifies the path name to which the trace files are
written. When the path is not specified, JTAPI makes the application path as
the default.
|
|
FileNameExtension
|
log
|
NA
|
NA
|
This field specifies a numerical index that is appended to the
file base name to indicate the order in which the files are created. For
example, if you enter jtapiTrace in the File Name Base field and log in the
File Name Extension field, the trace files would rotate between
jtapiTrace01.log, jtapiTrace02.log, and jtapiTrace10.log. If the File Name Base
and File Name Extension fields are left blank, Cisco Unified JTAPI picks the
trace files names as CiscoJtapi01.log, CiscoJtapi02.log, and so on.
|
|
SyslogCollector
|
FALSE
|
NA
|
NA
|
This field specifies you to direct the traces to a specific path
and folder in the system. No fewer than two log files and no more than 99 files
can exist. Cisco Unified JTAPI rotates through the log files in numerical
order, and returns to the first log file after filling the last. Log files
increase in size in 1-megabyte increments.
|
|
TraceFileSize
|
1048576
|
1048576
|
NP
|
This field allows you to specify the maximum size of log files
to be written.
|
|
UseAlarmService
|
0
|
NA
|
NA
|
When this option is enabled, JTAPI alarms go to an alarm service that is running on the specified machine. Specify the host
name and port number if you enable this option.
|
|
ProviderOpenRequestTimeout
|
200
|
10
|
NP
|
This field specifies the time in seconds that JTAPI will wait
for a response for the Provider Open Request. The default is 10 seconds.
|
|
JtapiPostConditionTimeout
|
15
|
10
|
20
|
JTAPI has post conditions for events, and if the post condition
is not met before a timeout, JTAPI will throw exceptions. Use this field to set
the timeout value of such conditions.
|
|
ApplicationPriority
|
2
|
NA
|
NA
|
This field prioritizes multiple provider open requests.
Currently, JTAPI only sends a default value.
|
|
SecurityTraceEnabled
|
FALSE
|
NA
|
NA
|
This field enables tracing for security-related messages.
You can enable (or disable) tracing for certificate install
operations by selecting this check box and selecting the desired trace level.
|
|
AlarmServicePort
|
1444
|
NP
|
NP
|
This field is used for sending alarms to a different server.
Users can select the alarm server host name and port on which the service is
running, and JTAPI will send the alarms to the specified server and port.
|
|
AlarmServiceHostname
|
null
|
NA
|
NA
|
This field displays the alarm server host name.
|
|
RouteSelectTimeout
|
5000
|
0
|
NP
|
This field specifies the time, in milliseconds, that JTAPI waits
for the application to respond to the Route event. If the application does not
respond in this time, JTAPI ends the route and sends the corresponding RouteEnd
event.
|
|
ProviderRetryInterval
|
30
|
5
|
NP
|
This field specifies the time, in seconds, that JTAPI will retry
opening a connection to the
Cisco Unified
Communications Manager cluster in case of system failure.
|
|
QueueStatsEnabled
|
FALSE
|
NA
|
NA
|
This field is used by JTAPI to log the max queue depth over the
specified number of messages that are queued to JTAPI main event thread. In
other words, for every x messages processed, JTAPI logs a DEBUGGING level trace
that reports the maximum queue depth over that interval, where x represents the
number of messages that are specified in Queue Size Threshold.
|
|
FileNameBase
|
CiscoJtapi
|
NA
|
NA
|
This field specifies a value to create the trace file name.
|
|
PeriodicWakeupEnabled
|
FALSE
|
NA
|
NA
|
This field enables (or disables) a heartbeat in the internal
message queue that JTAPI uses. If JTAPI has not received a message in the time
that is defined in PeriodicWakeupInterval, it causes the thread to wake up and
creates a log event.
|
|
JTAPINotificationPort
|
2789
|
1
|
NP
|
This field specifies the Port through which the JTAPI parameter
changes are communicated to JTAPI applications during runtime.
|
|
PeriodicWakeupInterval
|
50
|
NP
|
NP
|
This field allows you to define a time of inactivity in the
JTAPI internal message thread. If JTAPI does not received a message during this
time, the thread wakes up and logs an event.
|
|
QueueSizeThreshold
|
25
|
10
|
NP
|
This field allows you to specify the number of messages that
define the time over which JTAPI will report the maximum queue depth.
|
|
UseSystemDotOut
|
FALSE
|
NA
|
NA
|
This field is used to display traces on the console.
|
|
UseSameDirectory
|
1
|
NA
|
NA
|
This field allows you to specify whether the same folder name
must be used for each instance of an application.
When this option is enabled, JTAPI traces the log files to the
same directory. In this case, successive instances of a JTAPI application will
restart the log files, starting at index 01.
When this option is disabled, each instance of the application,
whether successive or simultaneous, will cause the trace files to be placed in
a new folder sequential to the last folder that was written. Cisco Unified
JTAPI detects the last folder in the trace path and automatically increments
the numeric index.
|
|
NumTraceFiles
|
10
|
2
|
1000
|
This field allows you to specify the maximum number of log files
to be written.
|
|
UseSyslog
|
FALSE
|
NA
|
NA
|
This field, when enabled, allows the traces go to a UDP port as
specified in the Collector and Port Number fields. Syslog collector service
collects traces and directs them to the Cisco Operations Manager Suite server.
|
|
SecurityTraceLevel
|
0
|
0
|
2
|
This field specifies trace level for security messages 0 =
Error, 1 = debug, 2 = detailed
|
|
UseTraceFile
|
TRUE
|
NA
|
NA
|
This field enables the writing of logs to logFile Trace Writer.
|
|
CMAssignedAppID
|
0
|
NA
|
NA
|
This field specifies the feature ID that is assigned to the
application.
Cisco Unified
Communications Manager preassigns this ID.
|
|
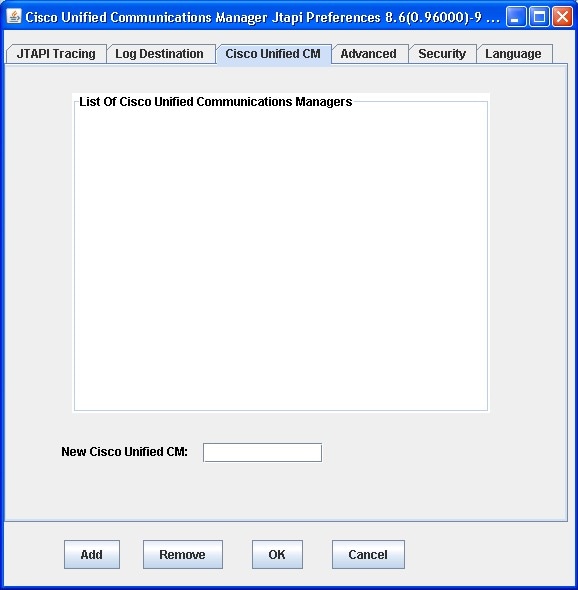
CtiManagers
|
null
|
NA
|
NA
|
This field specifies the list of CTI Managers for which tracing
needs to be collected.
|
|
Directory
|
.
|
NA
|
NA
|
This field allows you to specify a folder name where the trace
files will be contained.
|
|
Security Property
SecurityProperty = username, instanceId, authcode,
tftp ip address, tftp port,
capf ip address, capf port, certificate path, security option,
certificate status, fips compliant
|
NA
|
NA
|
NA
|
This field specifies the users security record (username,
instanceId, authcode, tftp ip address, tftp port, capf ip address, capf port,
certificate path, security option, certificate status, fips compliance), that
will be stored in jtapi.ini files in a comma separated string. A semicolon
separates the records.
SecurityProperty = user, 123, 12345, 172.19.242.37,
3804, 172.19.242.37, 69, .\\, true, false, false; <next record>;…
|
|
Security Property Entries
|
|
Username
|
NA
|
NA
|
NA
|
This field automatically populates the security profile of an
application user who has previously configured a User Name/Instance ID pair and
clicks any of the other edit boxes.
|
|
instanceId
|
NA
|
NA
|
NA
|
This field specifies the application instance identifier. If an
application is connecting to CTIManager with the same user, it needs to define
an Instance ID for each instance of the application to download the certificate
Authorization String.
|
|
authcode
|
NA
|
NA
|
NA
|
This field specifies authorization string that is configured in
the
Cisco Unified
Communications Manager database. This can be used only once for
getting certificate.
|
|
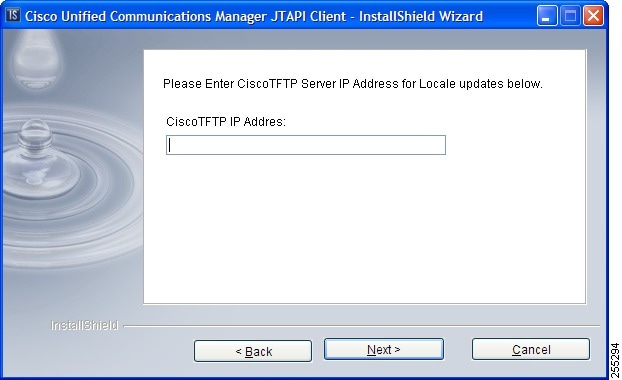
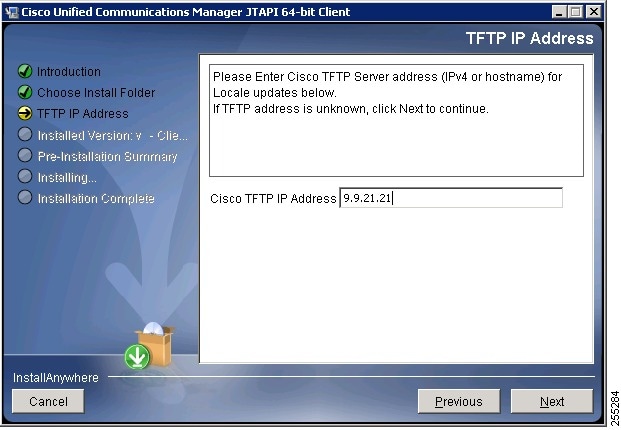
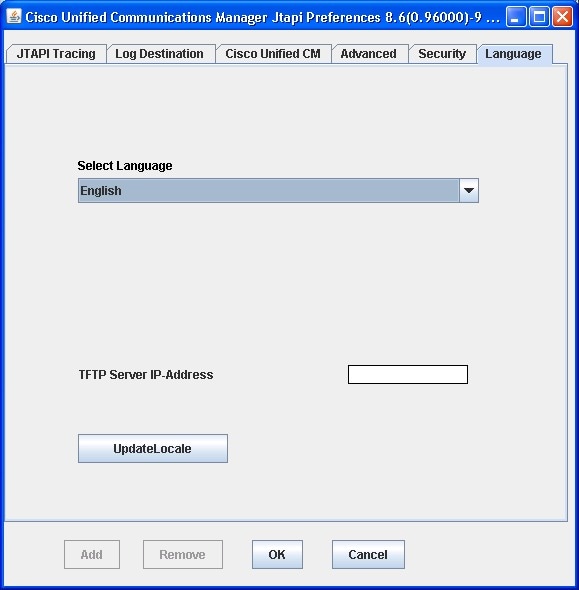
Communications Manager TFTP IP address
|
NA
|
NA
|
NA
|
This field specifies the TFTP Address of
Cisco Unified
Communications Manager (normally, the
Cisco Unified
Communications Manager IP Address)
|
|
CallManager TFTP port
|
69
|
NP
|
NP
|
This field displays the default value of the CallManager TFTP
port.Do not change the default value of 69 unless advised to do so by the
System Administrator.
|
|
Communications Manager CAPF IP server address
|
NA
|
NA
|
NA
|
This field specifies CAPF Server IP Address
|
|
Communications Manager CAPF server port
|
3804
|
NP
|
NP
|
This field displays the default value (3804) for CAPF server
port. Be aware, you can configure this value in
Cisco Unified
Communications Manager Administration service parameters. Ensure that
the value you enter through this interface should match the value configured on
Cisco Unified
Communications Manager Administration window.
|
|
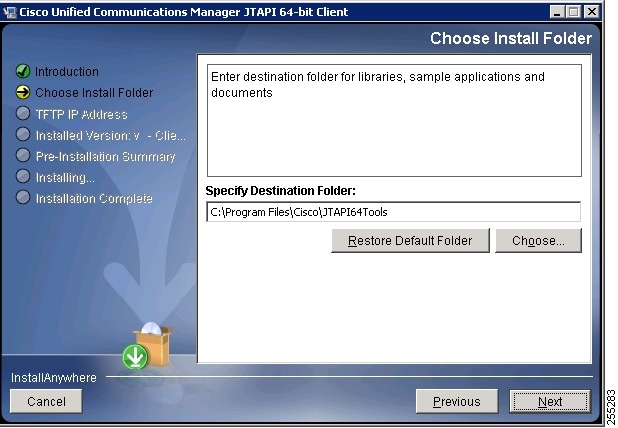
Certificate path
|
JTAPI.jar
location
|
NA
|
NA
|
This field specifies the location where application wants sever
and client certificates to be installed. If this field is left blank, the
system installs certificates in the ClassPath of JTAPI.jar
|
|
Enable secure connection
|
TRUE
|
NA
|
NA
|
This field, if set to TRUE then JTAPI will make a nonsecure
connection to CTI even if certificates are updated/installed.
|
|
Certificate Update Status
|
NA
|
NA
|
NA
|
The JTAPI Preferences dialog box is used to configure the
security profile for one or more User Name/Instance ID pairs.
|
|
FIPS Compliance
|
FALSE
|
NA
|
NA
|
This field, if set to TRUE, will enable the use of FIPS-compliant cryptography algorithms and libraries in JTAPI.
|


 Feedback