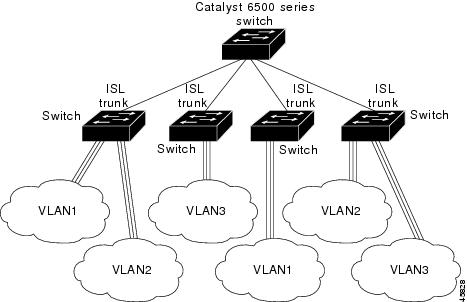
Configuring VLANs

Finding Feature Information

Your software release may not support all the features documented in this module. For the latest caveats and feature information, see Bug Search Tool and the release notes for your platform and software release. To find information about the features documented in this module, and to see a list of the releases in which each feature is supported, see the feature information table at the end of this module.

Use Cisco Feature Navigator to find information about platform support and Cisco software image support. To access Cisco Feature Navigator, go to http://www.cisco.com/go/cfn. An account on Cisco.com is not required.

Prerequisites for VLANs

The following are prerequisites and considerations for configuring VLANs:

  • Before you create VLANs, you must decide whether to use VLAN Trunking Protocol (VTP) to maintain global VLAN configuration for your network.

  • If you plan to configure many VLANs on the switch and to not enable routing, you can set the Switch Database Management (SDM) feature to the VLAN template, which configures system resources to support the maximum number of unicast MAC addresses.

  • Switches running the LAN Base feature set support only static routing on SVIs.

  • A VLAN should be present in the switch to be able to add it to the VLAN group.

Restrictions for VLANs

The following are restrictions for VLANs:

  • The switch supports up to 1005 normal and extended range VLANs when running the IP base or IP services feature set. It supports up to 255 VLANs when running the LAN Base feature set. However, the number of routed ports, switch virtual interfaces (SVIs), and other configured features affects the use of the switch hardware.

  • The switch supports per-VLAN spanning-tree plus (PVST+) or rapid PVST+ with a maximum of 128 spanning-tree instances. One spanning-tree instance is allowed per VLAN.

  • The switch supports both Inter-Switch Link (ISL) and IEEE 802.1Q trunking methods for sending VLAN traffic over Ethernet ports.

  • Configuring an interface VLAN router's MAC address is not supported. The interface VLAN already has an MAC address assigned by default.

  • Private VLANs are not supported on the switch.

Information About VLANs

Logical Networks

A VLAN is a switched network that is logically segmented by function, project team, or application, without regard to the physical locations of the users. VLANs have the same attributes as physical LANs, but you can group end stations even if they are not physically located on the same LAN segment. Any switch port can belong to a VLAN, and unicast, broadcast, and multicast packets are forwarded and flooded only to end stations in the VLAN. Each VLAN is considered a logical network, and packets destined for stations that do not belong to the VLAN must be forwarded through a router or a switch supporting fallback bridging. In a switch stack, VLANs can be formed with ports across the stack. Because a VLAN is considered a separate logical network, it contains its own bridge Management Information Base (MIB) information and can support its own implementation of spanning tree.

VLANs are often associated with IP subnetworks. For example, all the end stations in a particular IP subnet belong to the same VLAN. Interface VLAN membership on the switch is assigned manually on an interface-by-interface basis. When you assign switch interfaces to VLANs by using this method, it is known as interface-based, or static, VLAN membership.

Traffic between VLANs must be routed.

The switch can route traffic between VLANs by using switch virtual interfaces (SVIs). An SVI must be explicitly configured and assigned an IP address to route traffic between VLANs.

Supported VLANs

The switch supports VLANs in VTP client, server, and transparent modes. VLANs are identified by a number from 1 to 4094. VLAN IDs 1002 through 1005 are reserved for Token Ring and FDDI VLANs. VTP version 1 and version 2 support only normal-range VLANs (VLAN IDs 1 to 1005). In these versions, the switch must be in VTP transparent mode when you create VLAN IDs from 1006 to 4094. Cisco IOS Release 12.2(52)SE and later support VTP version 3. VTP version 3 supports the entire VLAN range (VLANs 1 to 4094). Extended range VLANs (VLANs 1006 to 4094) are supported only in VTP version 3. You cannot convert from VTP version 3 to VTP version 2 if extended VLANs are configured in the domain.

The switch or switch stack supports a total of 1005 (normal range and extended range) VLANs and a total of 255 VLANs when running the LAN base feature set. However, the number of routed ports, SVIs, and other configured features affects the use of the switch hardware

The switch supports per-VLAN spanning-tree plus (PVST+) or rapid PVST+ with a maximum of 128 spanning-tree instances. One spanning-tree instance is allowed per VLAN.

The switch supports both Inter-Switch Link (ISL) and IEEE 802.1Q trunking methods for sending VLAN traffic over Ethernet ports.

VLAN Port Membership Modes

You configure a port to belong to a VLAN by assigning a membership mode that specifies the kind of traffic the port carries and the number of VLANs to which it can belong.

When a port belongs to a VLAN, the switch learns and manages the addresses associated with the port on a per-VLAN basis.

Table 1. Port Membership Modes and Characteristics

Membership Mode

VLAN Membership Characteristics

VTP Characteristics

Static-access

A static-access port can belong to one VLAN and is manually assigned to that VLAN.

VTP is not required. If you do not want VTP to globally propagate information, set the VTP mode to transparent. To participate in VTP, there must be at least one trunk port on the switch or the switch stack connected to a trunk port of a second switch or switch stack.

Trunk (ISL or IEEE 802.1Q) :

  • Inter-Switch Link (ISL)—Cisco-proprietary trunking encapsulation.

  • IEEE 802.1Q— Industry-standard trunking encapsulation.

A trunk port is a member of all VLANs by default, including extended-range VLANs, but membership can be limited by configuring the allowed-VLAN list. You can also modify the pruning-eligible list to block flooded traffic to VLANs on trunk ports that are included in the list.

VTP is recommended but not required. VTP maintains VLAN configuration consistency by managing the addition, deletion, and renaming of VLANs on a network-wide basis. VTP exchanges VLAN configuration messages with other switches over trunk links.

Dynamic access

Note 

Dynamic-access ports and VMPS is not supported on the switch.

A dynamic-access port can belong to one VLAN (VLAN ID 1 to 4094) and is dynamically assigned by a VLAN Member Policy Server (VMPS).

The VMPS can be a Catalyst 6500 series switch, for example, but never a Catalyst switch. The Catalyst switch is a VMPS client.

You can have dynamic-access ports and trunk ports on the same switch, but you must connect the dynamic-access port to an end station or hub and not to another switch.

VTP is required.

Configure the VMPS and the client with the same VTP domain name.

To participate in VTP, at least one trunk port on the switch or a switch stack must be connected to a trunk port of a second switch or switch stack.

Voice VLAN

A voice VLAN port is an access port attached to a Cisco IP Phone, configured to use one VLAN for voice traffic and another VLAN for data traffic from a device attached to the phone.

VTP is not required; it has no effect on a voice VLAN.

VLAN Configuration Files

Configurations for VLAN IDs 1 to 1005 are written to the vlan.dat file (VLAN database), and you can display them by entering the show vlan privileged EXEC command. The vlan.dat file is stored in flash memory. If the VTP mode is transparent, they are also saved in the switch running configuration file.

In a switch stack, the whole stack uses the same vlan.dat file and running configuration. On some switches, the vlan.dat file is stored in flash memory on the active switch.

You use the interface configuration mode to define the port membership mode and to add and remove ports from VLANs. The results of these commands are written to the running-configuration file, and you can display the file by entering the show running-config privileged EXEC command.

When you save VLAN and VTP information (including extended-range VLAN configuration information) in the startup configuration file and reboot the switch, the switch configuration is selected as follows:

  • If the VTP mode is transparent in the startup configuration, and the VLAN database and the VTP domain name from the VLAN database matches that in the startup configuration file, the VLAN database is ignored (cleared), and the VTP and VLAN configurations in the startup configuration file are used. The VLAN database revision number remains unchanged in the VLAN database.

  • If the VTP mode or domain name in the startup configuration does not match the VLAN database, the domain name and VTP mode and configuration for the VLAN IDs 1 to 1005 use the VLAN database information.

  • In VTP versions 1 and 2, if VTP mode is server, the domain name and VLAN configuration for VLAN IDs 1 to 1005 use the VLAN database information. VTP version 3 also supports VLANs 1006 to 4094.

  • From image 15.0(02)SE6, on vtp transparent and off modes, vlans get created from startup-config even if they are not applied to the interface.

Note
Note

Ensure that you delete the vlan.dat file along with the configuration files before you reset the switch configuration using write erase command. This ensures that the switch reboots correctly on a reset.


Normal-Range VLAN Configuration Guidelines

Normal-range VLANs are VLANs with IDs from 1 to 1005.

Follow these guidelines when creating and modifying normal-range VLANs in your network:

  • Switches running the IP base or IP services feature set support 1005 VLANs in VTP client, server, and transparent modes. Switches running the LAN Base feature set support 255 VLANs.

  • Normal-range VLANs are identified with a number between 1 and 1001. VLAN numbers 1002 through 1005 are reserved for Token Ring and FDDI VLANs.

  • VLAN configurations for VLANs 1 to 1005 are always saved in the VLAN database. If the VTP mode is transparent, VTP and VLAN configurations are also saved in the switch running configuration file.

  • If the switch is in VTP server or VTP  transparent mode, you can add, modify or remove configurations for VLANs 2 to 1001 in the VLAN database. (VLAN IDs 1 and 1002 to 1005 are automatically created and cannot be removed.)

  • With VTP versions 1 and 2, the switch supports VLAN IDs 1006 through 4094 only in VTP transparent mode (VTP disabled). These are extended-range VLANs and configuration options are limited. Extended-range VLANs created in VTP transparent mode are not saved in the VLAN database and are not propagated. VTP version 3 supports extended range VLAN (VLANs 1006 to 4094) database propagation in VTP server mode. If extended VLANs are configured, you cannot convert from VTP version 3 to version 1 or 2.

  • Before you can create a VLAN, the switch must be in VTP server mode or VTP transparent mode. If the switch is a VTP server, you must define a VTP domain or VTP will not function.

  • The switch does not support Token Ring or FDDI media. The switch does not forward FDDI, FDDI-Net, TrCRF, or TrBRF traffic, but it does propagate the VLAN configuration through  VTP.

  • The switch supports 128 spanning tree instances. If a switch has more active VLANs than supported spanning-tree instances, spanning tree can be enabled on 128 VLANs and is disabled on the remaining VLANs. If you have already used all available spanning-tree instances on a switch, adding another VLAN anywhere in the VTP domain creates a VLAN on that switch that is not running spanning-tree. If you have the default allowed list on the trunk ports of that switch (which is to allow all VLANs), the new VLAN is carried on all trunk ports. Depending on the topology of the network, this could create a loop in the new VLAN that would not be broken, particularly if there are several adjacent switches that all have run out of spanning-tree instances. You can prevent this possibility by setting allowed lists on the trunk ports of switches that have used up their allocation of spanning-tree instances.

    If the number of VLANs on the switch exceeds the number of supported spanning-tree instances, we recommend that you configure the IEEE 802.1s Multiple STP (MSTP) on your switch to map multiple VLANs to a single spanning-tree instance.

  • To avoid warning messages of high CPU utilization, it is recommended to have no more than 256 VLANs. In such cases, approximately 10 access interfaces or 5 trunk interfaces can flap simultaneously with negligible impact to CPU utilization. (If there are more interfaces that flap simultaneously, CPU usage may be excessively high.)

  • When a switch in a stack learns a new VLAN or deletes or modifies an existing VLAN (either through VTP over network ports or through the CLI), the VLAN information is communicated to all stack members.

  • When a switch joins a stack or when stacks merge, VTP information (the vlan.dat file) on the new switches will be consistent with the active switch.

Extended-Range VLAN Configuration Guidelines

Extended-range VLANs are VLANs with IDs from 1006 to 4094.

Follow these guidelines when creating extended-range VLANs:

  • VLAN IDs in the extended range are not saved in the VLAN database and are not recognized by VTP unless the switch is running VTP version 3.

  • You cannot include extended-range VLANs in the pruning eligible range.

  • In VTP version 1 and 2, a switch must be in VTP transparent mode when you create extended-range VLANs. If VTP mode is server or client, an error message is generated, and the extended-range VLAN is rejected. VTP version 3 supports extended VLANs in server and transparent modes.

  • For VTP version 1 or 2, you can set the VTP mode to transparent in global configuration mode. You should save this configuration to the startup configuration so that the switch boots up in VTP transparent mode. Otherwise, you lose the extended-range VLAN configuration if the switch resets. If you create extended-range VLANs in VTP version 3, you cannot convert to VTP version 1 or 2.

  • . When the maximum number of spanning-tree instances are on the switch, spanning tree is disabled on any newly created VLANs. If the number of VLANs on the switch exceeds the maximum number of spanning-tree instances, we recommend that you configure the IEEE 802.1s Multiple STP (MSTP) on your switch to map multiple VLANs to a single spanning-tree instance.

  • Each routed port on the switch creates an internal VLAN for its use. These internal VLANs use extended-range VLAN numbers, and the internal VLAN ID cannot be used for an extended-range VLAN. If you try to create an extended-range VLAN with a VLAN ID that is already allocated as an internal VLAN, an error message is generated, and the command is rejected.
    Note
    Note

    Switchesrunning the LAN Base feature set support only static routing on SVIs.
    • Because internal VLAN IDs are in the lower part of the extended range, we recommend that you create extended-range VLANs beginning from the highest number (4094) and moving to the lowest (1006) to reduce the possibility of using an internal VLAN ID.

    • Before configuring extended-range VLANs, enter the show vlan internal usage privileged EXEC command to see which VLANs have been allocated as internal VLANs.

    • If necessary, you can shut down the routed port assigned to the internal VLAN, which frees up the internal VLAN, and then create the extended-range VLAN and re-enable the port, which then uses another VLAN as its internal VLAN.

  • Although the switch orswitch stack supports a total of 1005 (normal-range and extended-range) VLANs, VLANs with the IP base or IP services feature set and 255 VLANs with the LAN base feature set, the number of routed ports, SVIs, and other configured features affects the use of the switch hardware. If you try to create an extended-range VLAN and there are not enough hardware resources available, an error message is generated, and the extended-range VLAN is rejected.

  • In a switch stack, the whole stack uses the same running configuration and saved configuration, and extended-range VLAN information is shared across the stack.

Default Ethernet VLAN Configuration

The following table displays the default configuration for Ethernet VLANs.

Note
Note

The switch supports Ethernet interfaces exclusively. Because FDDI and Token Ring VLANs are not locally supported, you only configure FDDI and Token Ring media-specific characteristics for VTP global advertisements to other switches.


Table 2. Ethernet VLAN Defaults and Range

Parameter

Default

Range

VLAN ID

1

1 to 4094.

Note 

Extended-range VLANs (VLAN IDs 1006 to 4094) are only saved in the VLAN database in VTP version 3.

VLAN name

VLANxxxx, where xxxx represents four numeric digits (including leading zeros) equal to the VLAN ID number

No range

IEEE 802.10 SAID

100001 (100000 plus the VLAN ID)

1 to 4294967294

IEEE 802.10 SAID

1500

576-18190

MTU Size

0

0 to 1005

Translational bridge 2

0

0 to 1005

VLAN state

active

active, suspend

Remote SPAN

disabled

enabled, disabled

Private VLANs

none configured

2 to 1001, 1006 to 4094

How to Configure VLANs

How to Configure Normal-Range VLANs

You can set these parameters when you create a new normal-range VLAN or modify an existing VLAN in the VLAN database:

  • VLAN ID

  • VLAN name

  • VLAN type

    • Ethernet

    • Fiber Distributed Data Interface [FDDI]

    • FDDI network entity title [NET]

    • TrBRF or TrCRF

    • Token Ring

    • Token Ring-Net

  • VLAN state (active or suspended)

  • Security Association Identifier (SAID)

  • Bridge identification number for TrBRF VLANs

  • Ring number for FDDI and TrCRF VLANs

  • Parent VLAN number for TrCRF VLANs

  • Spanning Tree Protocol (STP) type for TrCRF VLANs

  • VLAN number to use when translating from one VLAN type to another

You can cause inconsistency in the VLAN database if you attempt to manually delete the vlan.dat file. If you want to modify the VLAN configuration, follow the procedures in this section.

Creating or Modifying an Ethernet VLAN

Each Ethernet VLAN in the VLAN database has a unique, 4-digit ID that can be a number from 1 to 1001. VLAN IDs 1002 to 1005 are reserved for Token Ring and FDDI VLANs. To create a normal-range VLAN to be added to the VLAN database, assign a number and name to the VLAN.

Note
Note

With VTP version 1 and 2, if the switch is in VTP transparent mode, you can assign VLAN IDs greater than 1006, but they are not added to the VLAN database.


SUMMARY STEPS

  1. enable
  2. configure terminal
  3. vlan vlan-id
  4. name vlan-name
  5. mtu mtu-size
  6. remote-span
  7. end
  8. show vlan {name vlan-name | id vlan-id}
  9. copy running-config startup-config

DETAILED STEPS

  Command or Action Purpose
Step 1

enable

Example:


Switch> enable

Enables privileged EXEC mode. Enter your password if prompted.

Step 2

configure terminal

Example:


Switch# configure terminal

Enters the global configuration mode.

Step 3

vlan vlan-id

Example:


Switch(config)# vlan 20

Enters a VLAN ID, and enters VLAN configuration mode. Enter a new VLAN ID to create a VLAN, or enter an existing VLAN ID to modify that VLAN.

Note 

The available VLAN ID range for this command is 1 to 4094.

Step 4

name vlan-name

Example:


Switch(config-vlan)# name test20

(Optional) Enters a name for the VLAN. If no name is entered for the VLAN, the default is to append the vlan-id value with leading zeros to the word VLAN. For example, VLAN0004 is a default VLAN name for VLAN 4.

Step 5

mtu mtu-size

Example:


Switch(config-vlan)# mtu 256

(Optional) Changes the MTU size (or other VLAN characteristic).

Step 6

remote-span

Example:


Switch(config-vlan)# remote-span

(Optional) Configures the VLAN as the RSPAN VLAN for a remote SPAN session.

Step 7

end

Example:


Switch(config)# end

Returns to privileged EXEC mode.

Step 8

show vlan {name vlan-name | id vlan-id}

Example:


Switch# show vlan name test20 id 20

Verifies your entries.

Step 9

copy running-config startup-config

Example:


Switch# copy running-config startup-config 

(Optional) Saves your entries in the configuration file.

Deleting a VLAN

When you delete a VLAN from a switch that is in VTP server mode, the VLAN is removed from the VLAN database for all switches in the VTP domain. When you delete a VLAN from a switch that is in VTP transparent mode, the VLAN is deleted only on that specific switch or a switch stack.

You cannot delete the default VLANs for the different media types: Ethernet VLAN 1 and FDDI or Token Ring VLANs 1002 to 1005.

Caution
Caution

When you delete a VLAN, any ports assigned to that VLAN become inactive. They remain associated with the VLAN (and thus inactive) until you assign them to a new VLAN.


SUMMARY STEPS

  1. enable
  2. configure terminal
  3. no vlan vlan-id
  4. end
  5. show vlan brief
  6. copy running-config startup-config

DETAILED STEPS

  Command or Action Purpose
Step 1

enable

Example:


Switch> enable

Enables privileged EXEC mode. Enter your password if prompted.

Step 2

configure terminal

Example:


Switch# configure terminal

Enters the global configuration mode.

Step 3

no vlan vlan-id

Example:


Switch(config)# no vlan 4

Removes the VLAN by entering the VLAN ID.

Step 4

end

Example:


Switch(config)# end

Returns to privileged EXEC mode.

Step 5

show vlan brief

Example:


Switch# show vlan brief

Verifies the VLAN removal.

Step 6

copy running-config startup-config

Example:


Switch# copy running-config startup-config 

(Optional) Saves your entries in the configuration file.

Assigning Static-Access Ports to a VLAN

You can assign a static-access port to a VLAN without having VTP globally propagate VLAN configuration information by disabling VTP (VTP transparent mode).

If you are assigning a port on a cluster member switch to a VLAN, first use the rcommand privileged EXEC command to log in to the cluster member switch.

If you assign an interface to a VLAN that does not exist, the new VLAN is created.

SUMMARY STEPS

  1. enable
  2. configure terminal
  3. interface interface-id
  4. switchport mode access
  5. switchport access vlan vlan-id
  6. end
  7. show running-config interface interface-id
  8. show interfaces interface-id switchport
  9. copy running-config startup-config

DETAILED STEPS

  Command or Action Purpose
Step 1

enable

Example:


Switch> enable

Enables privileged EXEC mode. Enter your password if prompted.

Step 2

configure terminal

Example:


Switch# configure terminal

Enters global configuration mode

Step 3

interface interface-id

Example:


Switch(config)# interface gigabitethernet2/0/1

Enters the interface to be added to the VLAN.

Step 4

switchport mode access

Example:


Switch(config-if)# switchport mode access

Defines the VLAN membership mode for the port (Layer 2 access port).

Step 5

switchport access vlan vlan-id

Example:


Switch(config-if)# switchport access vlan 2

Assigns the port to a VLAN. Valid VLAN IDs are 1 to 4094.

Step 6

end

Example:


Switch(config-if)# end

Returns to privileged EXEC mode.

Step 7

show running-config interface interface-id

Example:


Switch# show running-config interface gigabitethernet2/0/1

Verifies the VLAN membership mode of the interface.

Step 8

show interfaces interface-id switchport

Example:


Switch# show interfaces gigabitethernet2/0/1 switchport

Verifies your entries in the Administrative Mode and the Access Mode VLAN fields of the display.

Step 9

copy running-config startup-config

Example:


Switch# copy running-config startup-config 

(Optional) Saves your entries in the configuration file.

How to Configure Extended-Range VLANs

With VTP version 1 and version 2, when the switch is in VTP transparent mode (VTP disabled), you can create extended-range VLANs (in the range 1006 to 4094). VTP version supports extended-range VLANs in server or transparent move. Extended-range VLANs enable service providers to extend their infrastructure to a greater number of customers. The extended-range VLAN IDs are allowed for any switchport commands that allow VLAN IDs.

With VTP version 1 or 2, extended-range VLAN configurations are not stored in the VLAN database, but because VTP mode is transparent, they are stored in the switch running configuration file, and you can save the configuration in the startup configuration file by using the copy running-config startup-config privileged EXEC command. Extended-range VLANs created in VTP version 3 are stored in the VLAN database.

Creating an Extended-Range VLAN

In VTP version 1 or 2, if you enter an extended-range VLAN ID when the switch is not in VTP transparent mode, an error message is generated when you exit VLAN configuration mode, and the extended-range VLAN is not created.

Before you create an extended-range VLAN, you can verify that the VLAN ID is not used internally by entering the show vlan internal usage privileged EXEC command.

SUMMARY STEPS

  1. enable
  2. configure terminal
  3. vtp mode transparent
  4. vlan vlan-id
  5. remote-span
  6. mtu mtu size
  7. exit
  8. end
  9. show vlan id vlan-id
  10. copy running-config startup-config

DETAILED STEPS

  Command or Action Purpose
Step 1

enable

Example:


Switch> enable

Enables privileged EXEC mode. Enter your password if prompted.

Step 2

configure terminal

Example:


Switch# configure terminal

Enters the global configuration mode.

Step 3

vtp mode transparent

Example:


Switch(config)# vtp mode transparent

Configures the switch for VTP transparent mode, disabling VTP.

Note 

This step is not required for VTP version 3.

Step 4

vlan vlan-id

Example:


Switch(config)# vlan 2000
Switch(config-vlan)#

Enters an extended-range VLAN ID and enters VLAN configuration mode. The range is 1006 to 4094.

Step 5

remote-span

Example:


Switch(config-vlan)# remote-span

(Optional) Configures the VLAN as the RSPAN VLAN.

Step 6

mtu mtu size

Example:

Modifies the VLAN by changing the MTU size.

Step 7

exit

Example:


Switch(config-vlan)# exit
Switch(config)# 

Returns to configuration mode.

Step 8

end

Example:


Switch(config)# end

Returns to privileged EXEC mode.

Step 9

show vlan id vlan-id

Example:


Switch# show vlan id 2000

Verifies that the VLAN has been created.

Step 10

copy running-config startup-config

Example:


Switch# copy running-config startup-config 

(Optional) Saves your entries in the configuration file.

Creating an Extended-Range VLAN with an Internal VLAN ID

If you enter an extended-range VLAN ID that is already assigned to an internal VLAN, an error message is generated, and the extended-range VLAN is rejected. To manually free an internal VLAN ID, you must temporarily shut down the routed port that is using the internal VLAN ID.

Note
Note

Switches running the LAN Base imagesupport only static routing on SVIs.


SUMMARY STEPS

  1. enable
  2. show vlan internal usage
  3. configure terminal
  4. interface interface-id
  5. shutdown
  6. exit
  7. vtp mode transparent
  8. vlan vlan-id
  9. exit
  10. interface interface-id
  11. no shutdown
  12. end
  13. copy running-config startup config

DETAILED STEPS

  Command or Action Purpose
Step 1

enable

Example:


Switch> enable

Enables privileged EXEC mode. Enter your password if prompted.

Step 2

show vlan internal usage

Example:


Switch# show vlan internal usage

Displays the VLAN IDs being used internally by the switch. If the VLAN ID that you want to use is an internal VLAN, the display shows the routed port that is using the VLAN ID. Enter that port number in Step 3.

Step 3

configure terminal

Example:


Switch# configure terminal

Enters global configuration mode.

Step 4

interface interface-id

Example:


Switch(config)# interface gigabitethernet1/0/3

Specifies the interface ID for the routed port that is using the VLAN ID, and enters interface configuration mode.

Step 5

shutdown

Example:


Switch(config-if)# shutdown

Shuts down the port to free the internal VLAN ID.

Step 6

exit

Example:


Switch(config-if)# exit

Returns to global configuration mode.

Step 7

vtp mode transparent

Example:


Switch(config)# vtp mode transparent

Sets the VTP mode to transparent for creating extended-range VLANs.

Note 

This step is not required for VTP version 3.

Step 8

vlan vlan-id

Example:


Switch(config-vlan)# vlan 2000

Enters the new extended-range VLAN ID, and enters VLAN configuration mode.

Step 9

exit

Example:


Switch(config-vlan)# exit

Exits from VLAN configuration mode, and returns to global configuration mode.

Step 10

interface interface-id

Example:


Switch(config)# interface gigabitethernet1/0/3

Specifies the interface ID for the routed port that you shut down in Step 4, and enters interface configuration mode.

Step 11

no shutdown

Example:


Switch(config)# no shutdown

Reenables the routed port. It will be assigned a new internal VLAN ID.

Step 12

end

Example:


Switch(config)# end

Returns to privileged EXEC mode.

Step 13

copy running-config startup config

Example:


Switch# copy running-config startup-config

Saves your entries in the switch startup configuration file. To save an extended-range VLAN configuration, you need to save the VTP transparent mode configuration and the extended-range VLAN configuration in the switch startup configuration file. Otherwise, if the switch resets, it will default to VTP server mode, and the extended-range VLAN IDs will not be saved.

Note 

This step is not required for VTP version 3 because VLANs are saved in the VLAN database.

Where to Go Next

After configuring VLANs, you can configure the following:

  • VLAN Trunking Protocol (VTP)

  • VLAN trunks

  • Private VLANs

  • VLAN Membership Policy Server (VMPS)

  • Tunneling

Additional References

Standards and RFCs

Standard/RFC Title

RFC 1573

Evolution of the Interfaces Group of MIB-II

RFC 1757

Remote Network Monitoring Management

RFC 2021

SNMPv2 Management Information Base for the Transmission Control Protocol using SMIv2

MIBs

MIB MIBs Link

All supported MIBs for this release.

To locate and download MIBs for selected platforms, Cisco IOS releases, and feature sets, use Cisco MIB Locator found at the following URL:

http://www.cisco.com/go/mibs

Technical Assistance

Description Link

The Cisco Support website provides extensive online resources, including documentation and tools for troubleshooting and resolving technical issues with Cisco products and technologies.

To receive security and technical information about your products, you can subscribe to various services, such as the Product Alert Tool (accessed from Field Notices), the Cisco Technical Services Newsletter, and Really Simple Syndication (RSS) Feeds.

Access to most tools on the Cisco Support website requires a Cisco.com user ID and password.

http://www.cisco.com/support

Finding Feature Information

Your software release may not support all the features documented in this module. For the latest caveats and feature information, see Bug Search Tool and the release notes for your platform and software release. To find information about the features documented in this module, and to see a list of the releases in which each feature is supported, see the feature information table at the end of this module.

Use Cisco Feature Navigator to find information about platform support and Cisco software image support. To access Cisco Feature Navigator, go to http://www.cisco.com/go/cfn. An account on Cisco.com is not required.

Prerequisites for VLAN Trunks

The IEEE 802.1Q trunks impose these limitations on the trunking strategy for a network:

  • In a network of Cisco switches connected through IEEE 802.1Q trunks, the switches maintain one spanning-tree instance for each VLAN allowed on the trunks. Non-Cisco devices might support one spanning-tree instance for all VLANs.

    When you connect a Cisco switch to a non-Cisco device through an IEEE 802.1Q trunk, the Cisco switch combines the spanning-tree instance of the VLAN of the trunk with the spanning-tree instance of the non-Cisco IEEE 802.1Q switch. However, spanning-tree information for each VLAN is maintained by Cisco switches separated by a cloud of non-Cisco IEEE 802.1Q switches. The non-Cisco IEEE 802.1Q cloud separating the Cisco switches is treated as a single trunk link between the switches.

  • Make sure the native VLAN for an IEEE 802.1Q trunk is the same on both ends of the trunk link. If the native VLAN on one end of the trunk is different from the native VLAN on the other end, spanning-tree loops might result.

  • Disabling spanning tree on the native VLAN of an IEEE 802.1Q trunk without disabling spanning tree on every VLAN in the network can potentially cause spanning-tree loops. We recommend that you leave spanning tree enabled on the native VLAN of an IEEE 802.1Q trunk or disable spanning tree on every VLAN in the network. Make sure your network is loop-free before disabling spanning tree.

Restrictions for VLAN Trunks

The following are restrictions for VLAN trunks:
  • A trunk port cannot be a secure port.

  • A trunk port cannot be a tunnel port.

  • Trunk ports can be grouped into EtherChannel port groups, but all trunks in the group must have the same configuration. When a group is first created, all ports follow the parameters set for the first port to be added to the group. If you change the configuration of one of these parameters, the switch propagates the setting that you entered to all ports in the group:
    • Allowed-VLAN list.

    • STP port priority for each VLAN.

    • STP Port Fast setting.

    • Trunk status:

      If one port in a port group ceases to be a trunk, all ports cease to be trunks.

  • We recommend that you configure no more than 24 trunk ports in Per VLAN Spanning Tree (PVST) mode and no more than 40 trunk ports in Multiple Spanning Tree (MST) mode.

  • If you try to enable IEEE 802.1x on a trunk port, an error message appears, and IEEE 802.1x is not enabled. If you try to change the mode of an IEEE 802.1x-enabled port to trunk, the port mode is not changed.

  • A port in dynamic mode can negotiate with its neighbor to become a trunk port. If you try to enable IEEE 802.1x on a dynamic port, an error message appears, and IEEE 802.1x is not enabled. If you try to change the mode of an IEEE 802.1x-enabled port to dynamic, the port mode is not changed.

  • Dynamic Trunking Protocol (DTP) is not supported on tunnel ports.

  • The switch does not support Layer 3 trunks; you cannot configure subinterfaces or use the encapsulation keyword on Layer 3 interfaces. The switch does support Layer 2 trunks and Layer 3 VLAN interfaces, which provide equivalent capabilities.

Information About VLAN Trunks

Trunking Overview

A trunk is a point-to-point link between one or more Ethernet switch interfaces and another networking device such as a router or a switch. Ethernet trunks carry the traffic of multiple VLANs over a single link, and you can extend the VLANs across an entire network.

The following trunking encapsulations are available on all Ethernet interfaces:

  • Inter-Switch Link (ISL)—Cisco-proprietary trunking encapsulation.

  • IEEE 802.1Q— Industry-standard trunking encapsulation.

Figure 1. Switches in an ISL Trunking Environment. You can configure a trunk on a single Ethernet interface or on an EtherChannel bundle.


Trunking Modes

Ethernet trunk interfaces support different trunking modes. You can set an interface as trunking or nontrunking or to negotiate trunking with the neighboring interface. To autonegotiate trunking, the interfaces must be in the same VTP domain.

Trunk negotiation is managed by the Dynamic Trunking Protocol (DTP), which is a Point-to-Point Protocol (PPP). However, some internetworking devices might forward DTP frames improperly, which could cause misconfigurations.

To avoid this, you should configure interfaces connected to devices that do not support DTP to not forward DTP frames, that is, to turn off DTP.

  • If you do not intend to trunk across those links, use the switchport mode access interface configuration command to disable trunking.

  • To enable trunking to a device that does not support DTP, use the switchport mode trunk and switchport nonegotiate interface configuration commands to cause the interface to become a trunk but to not generate DTP frames.

    Use the switchport trunk encapsulation isl or switchport trunk encapsulation dot1q interface to select the encapsulation type on the trunk port.

You can also specify on DTP interfaces whether the trunk uses ISL or IEEE 802.1Q encapsulation or if the encapsulation type is autonegotiated. The DTP supports autonegotiation of both ISL and IEEE 802.1Q trunks.

Layer 2 Interface Modes

Table 3. Layer 2 Interface Modes

Mode

Function

switchport mode access

Puts the interface (access port) into permanent nontrunking mode and negotiates to convert the link into a nontrunk link. The interface becomes a nontrunk interface regardless of whether or not the neighboring interface is a trunk interface.

switchport mode dynamic auto

Makes the interface able to convert the link to a trunk link. The interface becomes a trunk interface if the neighboring interface is set to trunk or desirable mode. The default switchport mode for all Ethernet interfaces is dynamic auto .

switchport mode dynamic desirable

Makes the interface actively attempt to convert the link to a trunk link. The interface becomes a trunk interface if the neighboring interface is set to trunk , desirable , or auto mode.

switchport mode trunk

Puts the interface into permanent trunking mode and negotiates to convert the neighboring link into a trunk link. The interface becomes a trunk interface even if the neighboring interface is not a trunk interface.

switchport nonegotiate

Prevents the interface from generating DTP frames. You can use this command only when the interface switchport mode is access or trunk . You must manually configure the neighboring interface as a trunk interface to establish a trunk link.

switchport mode dot1q-tunnel

Configures the interface as a tunnel (nontrunking) port to be connected in an asymmetric link with an IEEE 802.1Q trunk port. The IEEE 802.1Q tunneling is used to maintain customer VLAN integrity across a service provider network.

switchport mode private-vlan

Configures the private VLAN mode.

Note 

The switchport mode private-vlan command option is not supported.

Ethernet Trunk Encapsulation Types

This table lists the Ethernet trunk encapsulation types and keywords.

Table 4. Ethernet Trunk Encapsulation Types and Keywords

Encapsulation

Function

switchport trunk encapsulation isl

Specifies ISL encapsulation on the trunk link.

switchport trunk encapsulation dot1q

Specifies IEEE 802.1Q encapsulation on the trunk link.

switchport trunk encapsulation negotiate

Specifies that the interface negotiate with the neighboring interface to become an ISL (preferred) or IEEE 802.1Q trunk, depending on the configuration and capabilities of the neighboring interface. This is the default for the switch.

The trunking mode, the trunk encapsulation type, and the hardware capabilities of the two connected interfaces decide whether a link becomes an ISL or IEEE 802.1Q trunk.

Allowed VLANs on a Trunk

By default, a trunk port sends traffic to and receives traffic from all VLANs. All VLAN IDs, 1 to 4094, are allowed on each trunk. However, you can remove VLANs from the allowed list, preventing traffic from those VLANs from passing over the trunk.

VLAN 1 is the default VLAN on all trunk ports in all Cisco switches, and it has previously been a requirement that VLAN 1 always be enabled on every trunk link. You can use the VLAN 1 minimization feature to disable VLAN 1 on any individual VLAN trunk link so that no user traffic (including spanning-tree advertisements) is sent or received on VLAN 1.

To reduce the risk of spanning-tree loops or storms, you can disable VLAN 1 on any individual VLAN trunk port by removing VLAN 1 from the allowed list. When you remove VLAN 1 from a trunk port, the interface continues to send and receive management traffic, for example, Cisco Discovery Protocol (CDP), Port Aggregation Protocol (PAgP), Link Aggregation Control Protocol (LACP), DTP, and VTP in VLAN 1.

If a trunk port with VLAN 1 disabled is converted to a nontrunk port, it is added to the access VLAN. If the access VLAN is set to 1, the port will be added to VLAN 1, regardless of the switchport trunk allowed setting. The same is true for any VLAN that has been disabled on the port.

A trunk port can become a member of a VLAN if the VLAN is enabled, if VTP knows of the VLAN, and if the VLAN is in the allowed list for the port. When VTP detects a newly enabled VLAN and the VLAN is in the allowed list for a trunk port, the trunk port automatically becomes a member of the enabled VLAN. When VTP detects a new VLAN and the VLAN is not in the allowed list for a trunk port, the trunk port does not become a member of the new VLAN.

Load Sharing on Trunk Ports

Load sharing divides the bandwidth supplied by parallel trunks connecting switches. To avoid loops, STP normally blocks all but one parallel link between switches. Using load sharing, you divide the traffic between the links according to which VLAN the traffic belongs.

You configure load sharing on trunk ports by using STP port priorities or STP path costs. For load sharing using STP port priorities, both load-sharing links must be connected to the same switch. For load sharing using STP path costs, each load-sharing link can be connected to the same switch or to two different switches.

Network Load Sharing Using STP Priorities

When two ports on the same switch form a loop, the switch uses the STP port priority to decide which port is enabled and which port is in a blocking state. You can set the priorities on a parallel trunk port so that the port carries all the traffic for a given VLAN. The trunk port with the higher priority (lower values) for a VLAN is forwarding traffic for that VLAN. The trunk port with the lower priority (higher values) for the same VLAN remains in a blocking state for that VLAN. One trunk port sends or receives all traffic for the VLAN.

Network Load Sharing Using STP Path Cost

You can configure parallel trunks to share VLAN traffic by setting different path costs on a trunk and associating the path costs with different sets of VLANs, blocking different ports for different VLANs. The VLANs keep the traffic separate and maintain redundancy in the event of a lost link.

Default Layer 2 Ethernet Interface VLAN Configuration

The following table shows the default Layer 2 Ethernet interface VLAN configuration.

Table 5. Default Layer 2 Ethernet Interface VLAN Configuration

Feature

Default Setting

Interface mode

switchport mode dynamic auto

Allowed VLAN range

VLANs 1 to 4094

VLAN range eligible for pruning

VLANs 2 to 1001

Default VLAN (for access ports)

VLAN 1

Native VLAN (for IEEE 802.1Q trunks)

VLAN 1

How to Configure VLAN Trunks

Configuring an Ethernet Interface as a Trunk Port

Configuring a Trunk Port

Because trunk ports send and receive VTP advertisements, to use VTP you must ensure that at least one trunk port is configured on the switch and that this trunk port is connected to the trunk port of a second switch. Otherwise, the switch cannot receive any VTP advertisements.

Before you begin

By default, trunks negotiate encapsulation. If the neighboring interface supports ISL and IEEE 802.1Q encapsulation and both interfaces are set to negotiate the encapsulation type, the trunk uses ISL encapsulation.

SUMMARY STEPS

  1. enable
  2. configure terminal
  3. interface interface-id
  4. switchport trunk encapsulation {isl | dot1q | negotiate }
  5. switchport mode {dynamic {auto | desirable } | trunk }
  6. switchport access vlan vlan-id
  7. switchport trunk native vlan vlan-id
  8. end
  9. show interfaces interface-id switchport
  10. show interfaces interface-id trunk
  11. copy running-config startup-config

DETAILED STEPS

  Command or Action Purpose
Step 1

enable

Example:


Switch> enable

Enables privileged EXEC mode. Enter your password if prompted.

Step 2

configure terminal

Example:


Switch# configure terminal

Enters the global configuration mode.

Step 3

interface interface-id

Example:


Switch(config)# interface gigabitethernet1/0/2

Specifies the port to be configured for trunking, and enters interface configuration mode.

Step 4

switchport trunk encapsulation {isl | dot1q | negotiate }

Example:


Switch(config-if)# switchport trunk encapsulation dot1q

Configures the port to support ISL or IEEE 802.1Q encapsulation or to negotiate (the default) with the neighboring interface for encapsulation type.

You must configure each end of the link with the same encapsulation type.

Step 5

switchport mode {dynamic {auto | desirable } | trunk }

Example:


Switch(config-if)# switchport mode dynamic desirable

Configures the interface as a Layer 2 trunk (required only if the interface is a Layer 2 access port or tunnel port or to specify the trunking mode).

  • dynamic auto —Sets the interface to a trunk link if the neighboring interface is set to trunk or desirable mode. This is the default.

  • dynamic desirable —Sets the interface to a trunk link if the neighboring interface is set to trunk, desirable, or auto mode.

  • trunk —Sets the interface in permanent trunking mode and negotiate to convert the link to a trunk link even if the neighboring interface is not a trunk interface.

Step 6

switchport access vlan vlan-id

Example:


Switch(config-if)# switchport access vlan 200

(Optional) Specifies the default VLAN, which is used if the interface stops trunking.

Step 7

switchport trunk native vlan vlan-id

Example:


Switch(config-if)# switchport trunk native vlan 200

Specifies the native VLAN for IEEE 802.1Q trunks.

Step 8

end

Example:


Switch(config)# end

Returns to privileged EXEC mode.

Step 9

show interfaces interface-id switchport

Example:


Switch# show interfaces gigabitethernet1/0/2 switchport

Displays the switch port configuration of the interface in the Administrative Mode and the Administrative Trunking Encapsulation fields of the display.

Step 10

show interfaces interface-id trunk

Example:


Switch# show interfaces gigabitethernet1/0/2 trunk

Displays the trunk configuration of the interface.

Step 11

copy running-config startup-config

Example:


Switch# copy running-config startup-config

(Optional) Saves your entries in the configuration file.

Defining the Allowed VLANs on a Trunk

VLAN 1 is the default VLAN on all trunk ports in all Cisco switches, and it has previously been a requirement that VLAN 1 always be enabled on every trunk link. You can use the VLAN 1 minimization feature to disable VLAN 1 on any individual VLAN trunk link so that no user traffic (including spanning-tree advertisements) is sent or received on VLAN 1.

SUMMARY STEPS

  1. enable
  2. configure terminal
  3. interface interface-id
  4. switchport mode trunk
  5. switchport trunk allowed vlan {add | all | except | remove } vlan-list
  6. switchport trunk allowed vlan { word | add | all | except | none | remove } vlan-list
  7. end
  8. show interfaces interface-id switchport
  9. copy running-config startup-config

DETAILED STEPS

  Command or Action Purpose
Step 1

enable

Example:


Switch> enable

Enables privileged EXEC mode. Enter your password if prompted.

Step 2

configure terminal

Example:


Switch# configure terminal

Enters the global configuration mode.

Step 3

interface interface-id

Example:


Switch(config)# interface gigabitethernet1/0/1

Specifies the port to be configured, and enters interface configuration mode.

Step 4

switchport mode trunk

Example:


Switch(config-if)# switchport mode trunk

Configures the interface as a VLAN trunk port.

Step 5

switchport trunk allowed vlan {add | all | except | remove } vlan-list

Example:


Switch(config-if)# switchport trunk allowed vlan remove 2

(Optional) Configures the list of VLANs allowed on the trunk.

The vlan-list parameter is either a single VLAN number from 1 to 4094 or a range of VLANs described by two VLAN numbers, the lower one first, separated by a hyphen. Do not enter any spaces between comma-separated VLAN parameters or in hyphen-specified ranges.

All VLANs are allowed by default.

Step 6

switchport trunk allowed vlan { word | add | all | except | none | remove } vlan-list

Example:


Switch(config-if)# switchport trunk allowed vlan remove 2

(Optional) Configures the list of VLANs allowed on the trunk.

The vlan-list parameter is either a single VLAN number from 1 to 4094 or a range of VLANs described by two VLAN numbers, the lower one first, separated by a hyphen. Do not enter any spaces between comma-separated VLAN parameters or in hyphen-specified ranges.

All VLANs are allowed by default.

Step 7

end

Example:


Switch(config)# end

Returns to privileged EXEC mode.

Step 8

show interfaces interface-id switchport

Example:


Switch# show interfaces gigabitethernet1/0/1 switchport

Verifies your entries in the Trunking VLANs Enabled field of the display.

Step 9

copy running-config startup-config

Example:


Switch# copy running-config startup-config

(Optional) Saves your entries in the configuration file.

Changing the Pruning-Eligible List

The pruning-eligible list applies only to trunk ports. Each trunk port has its own eligibility list. VTP pruning must be enabled for this procedure to take effect.

SUMMARY STEPS

  1. enable
  2. configure terminal
  3. interface interface-id
  4. switchport trunk pruning vlan {add | except | none | remove } vlan-list [,vlan [,vlan [,,,]]
  5. end
  6. show interfaces interface-id switchport
  7. copy running-config startup-config

DETAILED STEPS

  Command or Action Purpose
Step 1

enable

Example:


Switch> enable

Enables privileged EXEC mode. Enter your password if prompted.

Step 2

configure terminal

Example:


Switch# configure terminal

Enters the global configuration mode.

Step 3

interface interface-id

Example:


Switch(config)# interface gigabitethernet2/0/1

Selects the trunk port for which VLANs should be pruned, and enters interface configuration mode.

Step 4

switchport trunk pruning vlan {add | except | none | remove } vlan-list [,vlan [,vlan [,,,]]

Configures the list of VLANs allowed to be pruned from the trunk.

For explanations about using the add , except , none , and remove keywords, see the command reference for this release.

Separate non-consecutive VLAN IDs with a comma and no spaces; use a hyphen to designate a range of IDs. Valid IDs are 2 to 1001. Extended-range VLANs (VLAN IDs 1006 to 4094) cannot be pruned.

VLANs that are pruning-ineligible receive flooded traffic.

The default list of VLANs allowed to be pruned contains VLANs 2 to 1001.

Step 5

end

Example:


Switch(config)# end

Returns to privileged EXEC mode.

Step 6

show interfaces interface-id switchport

Example:


Switch# show interfaces gigabitethernet2/0/1 switchport

Verifies your entries in the Pruning VLANs Enabled field of the display.

Step 7

copy running-config startup-config

Example:


Switch# copy running-config startup-config

(Optional) Saves your entries in the configuration file.

Configuring the Native VLAN for Untagged Traffic

A trunk port configured with IEEE 802.1Q tagging can receive both tagged and untagged traffic. By default, the switch forwards untagged traffic in the native VLAN configured for the port. The native VLAN is VLAN 1 by default.

The native VLAN can be assigned any VLAN ID.

If a packet has a VLAN ID that is the same as the outgoing port native VLAN ID, the packet is sent untagged; otherwise, the switch sends the packet with a tag.

SUMMARY STEPS

  1. enable
  2. configure terminal
  3. interface interface-id
  4. switchport trunk native vlan vlan-id
  5. end
  6. show interfaces interface-id switchport
  7. copy running-config startup-config

DETAILED STEPS

  Command or Action Purpose
Step 1

enable

Example:


Switch> enable

Enables privileged EXEC mode. Enter your password if prompted.

Step 2

configure terminal

Example:


Switch# configure terminal

Enters the global configuration mode.

Step 3

interface interface-id

Example:


Switch(config)# interface gigabitethernet1/0/2

Defines the interface that is configured as the IEEE 802.1Q trunk, and enters interface configuration mode.

Step 4

switchport trunk native vlan vlan-id

Example:


Switch(config-if)# switchport trunk native vlan 12

Configures the VLAN that is sending and receiving untagged traffic on the trunk port.

For vlan-id , the range is 1 to 4094.

Note 

To return to the default native VLAN, VLAN 1, use the no switchport trunk native vlan interface configuration command.

Step 5

end

Example:


Switch(config-if)# end

Returns to privileged EXEC mode.

Step 6

show interfaces interface-id switchport

Example:


Switch# show interfaces gigabitethernet1/0/2 switchport

Verifies your entries in the Trunking Native Mode VLAN field.

Step 7

copy running-config startup-config

Example:


Switch# copy running-config startup-config

(Optional) Saves your entries in the configuration file.

Configuring Trunk Ports for Load Sharing

Configuring Load Sharing Using STP Port Priorities

If your switch is a member of a switch stack, you must use the spanning-tree [vlan vlan-id] cost cost interface configuration command instead of the spanning-tree [vlan vlan-id] port-priority priority interface configuration command to select an interface to put in the forwarding state. Assign lower cost values to interfaces that you want selected first and higher cost values that you want selected last.

These steps describe how to configure a network with load sharing using STP port priorities.

SUMMARY STEPS

  1. enable
  2. configure terminal
  3. vtp domain domain-name
  4. vtp mode server
  5. end
  6. show vtp status
  7. show vlan
  8. configure terminal
  9. interface interface-id
  10. switchport trunk encapsulation {isl | dot1q | negotiate }
  11. switchport mode trunk
  12. end
  13. show interfaces interface-id switchport
  14. Repeat the above steps on Switch A for a second port in the switch or switch stack.
  15. Repeat the above steps on Switch B to configure the trunk ports that connect to the trunk ports configured on Switch A.
  16. show vlan
  17. configure terminal
  18. interface interface-id
  19. spanning-tree vlan vlan-range port-priority priority-value
  20. exit
  21. interface interface-id
  22. spanning-tree vlan vlan-range port-priority priority-value
  23. end
  24. show running-config
  25. copy running-config startup-config

DETAILED STEPS

  Command or Action Purpose
Step 1

enable

Example:


Switch> enable

Enables privileged EXEC mode. Enter your password if prompted.

Step 2

configure terminal

Example:


Switch# configure terminal

Enters global configuration mode on Switch A.

Step 3

vtp domain domain-name

Example:


Switch(config)# vtp domain workdomain

Configures a VTP administrative domain.

The domain name can be 1 to 32 characters.

Step 4

vtp mode server

Example:


Switch(config)# vtp mode server

Configures Switch A as the VTP server.

Step 5

end

Example:


Switch(config)# end

Returns to privileged EXEC mode.

Step 6

show vtp status

Example:


Switch# show vtp status

Verifies the VTP configuration on both Switch A and Switch B.

In the display, check the VTP Operating Mode and the VTP Domain Name fields.

Step 7

show vlan

Example:


Switch# show vlan

Verifies that the VLANs exist in the database on Switch A.

Step 8

configure terminal

Example:


Switch# configure terminal

Enters global configuration mode.

Step 9

interface interface-id

Example:


Switch(config)# interface gigabitethernet1/0/1

Defines the interface to be configured as a trunk, and enters interface configuration mode.

Step 10

switchport trunk encapsulation {isl | dot1q | negotiate }

Example:


Switch(config-if)# switchport trunk encapsulation dot1q

Configures the port to support ISL or IEEE 802.1Q encapsulation or to negotiate with the neighboring interface. You must configure each end of the link with the same encapsulation type.

Step 11

switchport mode trunk

Example:


Switch(config-if)# switchport mode trunk

Configures the port as a trunk port.

Step 12

end

Example:


Switch(config-if)# end

Returns to privileged EXEC mode.

Step 13

show interfaces interface-id switchport

Example:


Switch# show interfaces gigabitethernet1/0/1 switchport

Verifies the VLAN configuration.

Step 14

Repeat the above steps on Switch A for a second port in the switch or switch stack.

Step 15

Repeat the above steps on Switch B to configure the trunk ports that connect to the trunk ports configured on Switch A.

Step 16

show vlan

Example:


Switch# show vlan

When the trunk links come up, VTP passes the VTP and VLAN information to Switch B. This command verifies that Switch B has learned the VLAN configuration.

Step 17

configure terminal

Example:


Switch# configure terminal

Enters global configuration mode on Switch A.

Step 18

interface interface-id

Example:


Switch(config)# interface gigabitethernet1/0/1

Defines the interface to set the STP port priority, and enters interface configuration mode.

Step 19

spanning-tree vlan vlan-range port-priority priority-value

Example:


Switch(config-if)# spanning-tree vlan 8-10 port-priority 16

Assigns the port priority for the VLAN range specified. Enter a port priority value from 0 to 240. Port priority values increment by 16.

Step 20

exit

Example:


Switch(config-if)# exit

Returns to global configuration mode.

Step 21

interface interface-id

Example:


Switch(config)# interface gigabitethernet1/0/2

Defines the interface to set the STP port priority, and enters interface configuration mode.

Step 22

spanning-tree vlan vlan-range port-priority priority-value

Example:


Switch(config-if)# spanning-tree vlan 3-6 port-priority 16

Assigns the port priority for the VLAN range specified. Enter a port priority value from 0 to 240. Port priority values increment by 16.

Step 23

end

Example:


Switch(config-if)# end

Returns to privileged EXEC mode.

Step 24

show running-config

Example:


Switch# show running-config

Verifies your entries.

Step 25

copy running-config startup-config

Example:


Switch# copy running-config startup-config

(Optional) Saves your entries in the configuration file.

Configuring Load Sharing Using STP Path Cost

These steps describe how to configure a network with load sharing using STP path costs.

SUMMARY STEPS

  1. enable
  2. configure terminal
  3. interface interface-id
  4. switchport trunk encapsulation {isl | dot1q | negotiate }
  5. switchport mode trunk
  6. exit
  7. Repeat Steps 2 through 45 on a second interface in Switch A or in Switch A stack.
  8. end
  9. show running-config
  10. show vlan
  11. configure terminal
  12. interface interface-id
  13. spanning-tree vlan vlan-range cost cost-value
  14. end
  15. Repeat Steps 9 through 13 on the other configured trunk interface on Switch A, and set the spanning-tree path cost to 30 for VLANs 8, 9, and 10.
  16. exit
  17. show running-config
  18. copy running-config startup-config

DETAILED STEPS

  Command or Action Purpose
Step 1

enable

Example:


Switch> enable

Enables privileged EXEC mode. Enter your password if prompted.

Step 2

configure terminal

Example:


Switch# configure terminal

Enters global configuration mode on Switch A.

Step 3

interface interface-id

Example:


Switch(config)# interface gigabitethernet1/0/1

Defines the interface to be configured as a trunk, and enters interface configuration mode.

Step 4

switchport trunk encapsulation {isl | dot1q | negotiate }

Example:


Switch(config-if)# switchport trunk encapsulation dot1q

Configures the port to support ISL or IEEE 802.1Q encapsulation. You must configure each end of the link with the same encapsulation type.

Step 5

switchport mode trunk

Example:


Switch(config-if)# switchport mode trunk

Configures the port as a trunk port. The trunk defaults to ISL trunking.

Step 6

exit

Example:


Switch(config-if)# exit

Returns to global configuration mode.

Step 7

Repeat Steps 2 through 45 on a second interface in Switch A or in Switch A stack.

Step 8

end

Example:


Switch(config)# end

Returns to privileged EXEC mode.

Step 9

show running-config

Example:


Switch# show running-config

Verifies your entries. In the display, make sure that the interfaces are configured as trunk ports.

Step 10

show vlan

Example:


Switch# show vlan

When the trunk links come up, Switch A receives the VTP information from the other switches. This command verifies that Switch A has learned the VLAN configuration.

Step 11

configure terminal

Example:


Switch# configure terminal

Enters global configuration mode.

Step 12

interface interface-id

Example:


Switch(config)# interface gigabitethernet1/0/1

Defines the interface on which to set the STP cost, and enters interface configuration mode.

Step 13

spanning-tree vlan vlan-range cost cost-value

Example:


Switch(config-if)# spanning-tree vlan 2-4 cost 30

Sets the spanning-tree path cost to 30 for VLANs 2 through 4.

Step 14

end

Example:


Switch(config-if)# end

Returns to global configuration mode.

Step 15

Repeat Steps 9 through 13 on the other configured trunk interface on Switch A, and set the spanning-tree path cost to 30 for VLANs 8, 9, and 10.

Step 16

exit

Example:


Switch(config)# exit

Returns to privileged EXEC mode.

Step 17

show running-config

Example:


Switch# show running-config

Verifies your entries. In the display, verify that the path costs are set correctly for both trunk interfaces.

Step 18

copy running-config startup-config

Example:


Switch# copy running-config startup-config

(Optional) Saves your entries in the configuration file.

Where to Go Next

After configuring VLAN trunks, you can configure the following:

  • VLANs

  • Private VLANs

Additional References

Related Documents

Related Topic Document Title

CLI commands

VLAN Command Reference (Catalyst 3750X Switch)

Standards and RFCs

Standard/RFC Title

RFC 1573

Evolution of the Interfaces Group of MIB-II

RFC 1757

Remote Network Monitoring Management

RFC 2021

SNMPv2 Management Information Base for the Transmission Control Protocol using SMIv2

MIBs

MIB MIBs Link

All supported MIBs for this release.

To locate and download MIBs for selected platforms, Cisco IOS releases, and feature sets, use Cisco MIB Locator found at the following URL:

http://www.cisco.com/go/mibs

Technical Assistance

Description Link

The Cisco Support website provides extensive online resources, including documentation and tools for troubleshooting and resolving technical issues with Cisco products and technologies.

To receive security and technical information about your products, you can subscribe to various services, such as the Product Alert Tool (accessed from Field Notices), the Cisco Technical Services Newsletter, and Really Simple Syndication (RSS) Feeds.

Access to most tools on the Cisco Support website requires a Cisco.com user ID and password.

http://www.cisco.com/support

Finding Feature Information

Your software release may not support all the features documented in this module. For the latest caveats and feature information, see Bug Search Tool and the release notes for your platform and software release. To find information about the features documented in this module, and to see a list of the releases in which each feature is supported, see the feature information table at the end of this module.

Use Cisco Feature Navigator to find information about platform support and Cisco software image support. To access Cisco Feature Navigator, go to http://www.cisco.com/go/cfn. An account on Cisco.com is not required.

Prerequisites for VMPS

You should configure the VLAN Membership Policy Server (VMPS) before you configure ports as dynamic-access ports.

When you configure a port as a dynamic-access port, the spanning-tree Port Fast feature is automatically enabled for that port. The Port Fast mode accelerates the process of bringing the port into the forwarding state.

A dynamic-access port can participate in fallback bridging.

The VTP management domain of the VMPS client and the VMPS server must be the same.

Restrictions for VMPS

The following are restrictions for configuring VMPS:

  • IEEE 802.1x ports cannot be configured as dynamic-access ports. If you try to enable IEEE 802.1x on a dynamic-access (VQP) port, an error message appears, and IEEE 802.1x is not enabled. If you try to change an IEEE 802.1x-enabled port to dynamic VLAN assignment, an error message appears, and the VLAN configuration is not changed.
  • Trunk ports cannot be dynamic-access ports, but you can enter the switchport access vlan dynamic interface configuration command for a trunk port. In this case, the switch retains the setting and applies it if the port is later configured as an access port. You must turn off trunking on the port before the dynamic-access setting takes effect.

  • Dynamic-access ports cannot be monitor ports.

  • Secure ports cannot be dynamic-access ports. You must disable port security on a port before it becomes dynamic.

  • Private VLAN ports cannot be dynamic-access ports

  • Dynamic-access ports cannot be members of an EtherChannel group.

  • Port channels cannot be configured as dynamic-access ports.

  • The VLAN configured on the VMPS server should not be a voice VLAN.

  • Trunk ports cannot be dynamic-access ports, but you can enter the switchport access vlan dynamic interface configuration command for a trunk port. In this case, the switch retains the setting and applies it if the port is later configured as an access port. You must turn off trunking on the port before the dynamic-access setting takes effect.

  • Dynamic-access ports cannot be monitor ports.

  • Secure ports cannot be dynamic-access ports. You must disable port security on a port before it becomes dynamic.

Information About VMPS

Dynamic VLAN Assignments

The VLAN Query Protocol (VQP) is used to support dynamic-access ports, which are not permanently assigned to a VLAN, but give VLAN assignments based on the MAC source addresses seen on the port. Each time an unknown MAC address is seen, the switch sends a VQP query to a remote VLAN Membership Policy Server (VMPS); the query includes the newly seen MAC address and the port on which it was seen. The VMPS responds with a VLAN assignment for the port. The switch cannot be a VMPS server but can act as a client to the VMPS and communicate with it through VQP.

Each time the client switch receives the MAC address of a new host, it sends a VQP query to the VMPS. When the VMPS receives this query, it searches its database for a MAC-address-to-VLAN mapping. The server response is based on this mapping and whether or not the server is in open or secure mode. In secure mode, the server shuts down the port when an illegal host is detected. In open mode, the server denies the host access to the port.

If the port is currently unassigned (that is, it does not yet have a VLAN assignment), the VMPS provides one of these responses:

  • If the host is allowed on the port, the VMPS sends the client a vlan-assignment response containing the assigned VLAN name and allowing access to the host.

  • If the host is not allowed on the port and the VMPS is in open mode, the VMPS sends an access-denied response.

  • If the VLAN is not allowed on the port and the VMPS is in secure mode, the VMPS sends a port-shutdown response.

If the port already has a VLAN assignment, the VMPS provides one of these responses:

  • If the VLAN in the database matches the current VLAN on the port, the VMPS sends an success response, allowing access to the host.

  • If the VLAN in the database does not match the current VLAN on the port and active hosts exist on the port, the VMPS sends an access-denied or a port-shutdown response, depending on the secure mode of the VMPS.

If the switch receives an access-denied response from the VMPS, it continues to block traffic to and from the host MAC address. The switch continues to monitor the packets directed to the port and sends a query to the VMPS when it identifies a new host address. If the switch receives a port-shutdown response from the VMPS, it disables the port. The port must be manually reenabled by using Network Assistant, the CLI, or SNMP.

Dynamic-Access Port VLAN Membership

A dynamic-access port can belong to only one VLAN with an ID from 1 to 4094. When the link comes up, the switch does not forward traffic to or from this port until the VMPS provides the VLAN assignment. The VMPS receives the source MAC address from the first packet of a new host connected to the dynamic-access port and attempts to match the MAC address to a VLAN in the VMPS database.

If there is a match, the VMPS sends the VLAN number for that port. If the client switch was not previously configured, it uses the domain name from the first VTP packet it receives on its trunk port from the VMPS. If the client switch was previously configured, it includes its domain name in the query packet to the VMPS to obtain its VLAN number. The VMPS verifies that the domain name in the packet matches its own domain name before accepting the request and responds to the client with the assigned VLAN number for the client. If there is no match, the VMPS either denies the request or shuts down the port (depending on the VMPS secure mode setting).

Multiple hosts (MAC addresses) can be active on a dynamic-access port if they are all in the same VLAN; however, the VMPS shuts down a dynamic-access port if more than 20 hosts are active on the port.

If the link goes down on a dynamic-access port, the port returns to an isolated state and does not belong to a VLAN. Any hosts that come online through the port are checked again through the VQP with the VMPS before the port is assigned to a VLAN.

Dynamic-access ports can be used for direct host connections, or they can connect to a network. A maximum of 20 MAC addresses are allowed per port on the switch. A dynamic-access port can belong to only one VLAN at a time, but the VLAN can change over time, depending on the MAC addresses seen.

Default VMPS Client Configuration

The following table shows the default VMPS and dynamic-access port configuration on client switches.
Table 6. Default VMPS Client and Dynamic-Access Port Configuration

Feature

Default Setting

VMPS domain server

None

VMPS reconfirm interval

60 minutes

VMPS server retry count

3

Dynamic-access ports

None configured

How to Configure VMPS

Entering the IP Address of the VMPS

Note
Note

If the VMPS is being defined for a cluster of switches, enter the address on the command switch.


Before you begin

You must first enter the IP address of the server to configure the switch as a client.

SUMMARY STEPS

  1. enable
  2. configure terminal
  3. vmps server ipaddress primary
  4. vmps server ipaddress
  5. end
  6. show vmps
  7. copy running-config startup-config

DETAILED STEPS

  Command or Action Purpose
Step 1

enable

Example:


Switch> enable

Enables privileged EXEC mode. Enter your password if prompted.

Step 2

configure terminal

Example:


Switch# configure terminal

Enters the global configuration mode.

Step 3

vmps server ipaddress primary

Example:


Switch(config)# vmps server 10.1.2.3 primary

Enters the IP address of the switch acting as the primary VMPS server.

Step 4

vmps server ipaddress

Example:


Switch(config)# vmps server 10.3.4.5

(Optional) Enters the IP address of the switch acting as a secondary VMPS server.

You can enter up to three secondary server addresses.

Step 5

end

Example:


Switch(config)# end

Returns to privileged EXEC mode.

Step 6

show vmps

Example:


Switch# show vmps

Verifies your entries in the VMPS Domain Server field of the display.

Step 7

copy running-config startup-config

Example:


Switch# copy running-config startup-config 

(Optional) Saves your entries in the configuration file.

Configuring Dynamic-Access Ports on VMPS Clients

Caution
Caution

Dynamic-access port VLAN membership is for end stations or hubs connected to end stations. Connecting dynamic-access ports to other switches can cause a loss of connectivity.


If you are configuring a port on a cluster member switch as a dynamic-access port, first use the rcommand privileged EXEC command to log in to the cluster member switch.

Before you begin

You must have IP connectivity to the VMPS for dynamic-access ports to work. You can test for IP connectivity by pinging the IP address of the VMPS and verifying that you get a response.

Note
Note

To return an interface to its default configuration, use the default interface interface-id interface configuration command. To return an interface to its default switchport mode (dynamic auto), use the no switchport mode interface configuration command. To reset the access mode to the default VLAN for the switch, use the no switchport access vlan interface configuration command.


SUMMARY STEPS

  1. enable
  2. configure terminal
  3. interface interface-id
  4. switchport mode access
  5. switchport access vlan dynamic
  6. end
  7. show interfaces interface-id switchport
  8. copy running-config startup-config

DETAILED STEPS

  Command or Action Purpose
Step 1

enable

Example:


Switch> enable

Enables privileged EXEC mode. Enter your password if prompted.

Step 2

configure terminal

Example:


Switch# configure terminal

Enters the global configuration mode.

Step 3

interface interface-id

Example:


Switch(config)# interface gigabitethernet 1/0/1

Specifies the switch port that is connected to the end station, and enters interface configuration mode.

Step 4

switchport mode access

Example:


Switch(config-if)# switchport mode access

Sets the port to access mode.

Step 5

switchport access vlan dynamic

Example:


Switch(config-if)# switchport access vlan dynamic

Configures the port as eligible for dynamic VLAN membership.

The dynamic-access port must be connected to an end station.

Step 6

end

Example:


Switch(config)# end

Returns to privileged EXEC mode.

Step 7

show interfaces interface-id switchport

Example:


Switch# show interfaces gigabitethernet 1/0/1 switchport

Verifies your entries in the Operational Mode field of the display.

Step 8

copy running-config startup-config

Example:


Switch# copy running-config startup-config 

(Optional) Saves your entries in the configuration file.

Reconfirming VLAN Memberships

This task confirms the dynamic-access port VLAN membership assignments that the switch has received from the VMPS.

SUMMARY STEPS

  1. enable
  2. vmps reconfirm
  3. show vmps

DETAILED STEPS

  Command or Action Purpose
Step 1

enable

Example:


Switch> enable

Enables privileged EXEC mode. Enter your password if prompted.

Step 2

vmps reconfirm

Example:


Switch# vmps reconfirm

Reconfirms dynamic-access port VLAN membership.

Step 3

show vmps

Example:


Switch# show vmps

Verifies the dynamic VLAN reconfirmation status.

Changing the Reconfirmation Interval

VMPS clients periodically reconfirm the VLAN membership information received from the VMPS. You can set the number of minutes after which reconfirmation occurs.

Note
Note

If you are configuring a member switch in a cluster, this parameter must be equal to or greater than the reconfirmation setting on the command switch. You also must first use the rcommand privileged EXEC command to log in to the member switch.


SUMMARY STEPS

  1. enable
  2. configure terminal
  3. vmps reconfirm minutes
  4. end
  5. show vmps
  6. copy running-config startup-config

DETAILED STEPS

  Command or Action Purpose
Step 1

enable

Example:


Switch> enable

Enables privileged EXEC mode. Enter your password if prompted.

Step 2

configure terminal

Example:


Switch# configure terminal

Enters the global configuration mode.

Step 3

vmps reconfirm minutes

Example:


Switch(config)# vmps reconfirm 90

Sets the number of minutes between reconfirmations of the dynamic VLAN membership. The range is 1 to 120. The default is 60 minutes.

Step 4

end

Example:


Switch(config)# end

Returns to privileged EXEC mode.

Step 5

show vmps

Example:


Switch# show vmps

Verifies the dynamic VLAN reconfirmation status in the Reconfirm Interval field of the display.

Step 6

copy running-config startup-config

Example:


Switch# copy running-config startup-config 

(Optional) Saves your entries in the configuration file.

Changing the Retry Count

Follow these steps to change the number of times that the switch attempts to contact the VMPS before querying the next server.

SUMMARY STEPS

  1. enable
  2. configure terminal
  3. vmps retry count
  4. end
  5. show vmps
  6. copy running-config startup-config

DETAILED STEPS

  Command or Action Purpose
Step 1

enable

Example:


Switch> enable

Enables privileged EXEC mode. Enter your password if prompted.

Step 2

configure terminal

Example:


Switch# configure terminal

Enters the global configuration mode.

Step 3

vmps retry count

Example:


Switch(config)# vmps retry 5

Changes the retry count. The retry range is 1 to 10; the default is 3.

Step 4

end

Example:


Switch(config)# end

Returns to privileged EXEC mode.

Step 5

show vmps

Example:


Switch# show vmps

Verifies your entry in the Server Retry Count field of the display.

Step 6

copy running-config startup-config

Example:


Switch# copy running-config startup-config 

(Optional) Saves your entries in the configuration file.

Troubleshooting Dynamic-Access Port VLAN Membership

Problem The VMPS shuts down a dynamic-access port under these conditions:

  • Problem The VMPS is in secure mode, and it does not allow the host to connect to the port. The VMPS shuts down the port to prevent the host from connecting to the network.

  • Problem More than 20 active hosts reside on a dynamic-access port.

Solution To reenable a disabled dynamic-access port, enter the shutdown interface configuration command followed by the no shutdown interface configuration command.

Monitoring the VMPS

You can display information about the VMPS by using the show vmps privileged EXEC command. The switch displays this information about the VMPS:

  • VMPS VQP Version—The version of VQP used to communicate with the VMPS. The switch queries the VMPS that is using VQP Version 1.

  • Reconfirm Interval—The number of minutes the switch waits before reconfirming the VLAN-to-MAC-address assignments.

  • Server Retry Count—The number of times VQP resends a query to the VMPS. If no response is received after this many tries, the switch starts to query the secondary VMPS.

  • VMPS domain server—The IP address of the configured VLAN membership policy servers. The switch sends queries to the one marked current. The one marked primary is the primary server.

  • VMPS Action—The result of the most recent reconfirmation attempt. A reconfirmation attempt can occur automatically when the reconfirmation interval expires, or you can force it by entering the vmps reconfirm privileged EXEC command or its Network Assistant or SNMP equivalent.

This is an example of output for the show vmps privileged EXEC command:


Switch# show vmps
VQP Client Status:
--------------------
VMPS VQP Version:   1
Reconfirm Interval: 60 min
Server Retry Count: 3
VMPS domain server: 172.20.128.86 (primary, current)
                    172.20.128.87 
 
Reconfirmation status
---------------------
VMPS Action:         other

Configuration Example for VMPS

Example: VMPS Configuration

Figure 2. Dynamic Port VLAN Membership Configuration. This network has a VMPS server switch and VMPS client switches with dynamic-access ports with this configuration:
  • The VMPS server and the VMPS client are separate switches.

  • The Catalyst 6500 series Switch A is the primary VMPS server.

  • The Catalyst 6500 series Switch C and Switch J are secondary VMPS servers.

  • End stations are connected to the clients, Switch B and Switch I.

  • The database configuration file is stored on the TFTP server with the IP address 172.20.22.7.


Where to Go Next

You can configure the following:

  • VTP

  • VLANs

  • VLAN Trunking

  • Private VLANs

  • Voice VLANs

Additional References

Related Documents

Related Topic Document Title

For complete syntax and usage information for the commands used in this chapter.

Catalyst 2960-X Switch VLAN Management Command ReferenceVLAN Command Reference (Catalyst 3750X Switch)

MIBs

MIB MIBs Link

All supported MIBs for this release.

To locate and download MIBs for selected platforms, Cisco IOS releases, and feature sets, use Cisco MIB Locator found at the following URL:

http://www.cisco.com/go/mibs

Technical Assistance

Description Link

The Cisco Support website provides extensive online resources, including documentation and tools for troubleshooting and resolving technical issues with Cisco products and technologies.

To receive security and technical information about your products, you can subscribe to various services, such as the Product Alert Tool (accessed from Field Notices), the Cisco Technical Services Newsletter, and Really Simple Syndication (RSS) Feeds.

Access to most tools on the Cisco Support website requires a Cisco.com user ID and password.

http://www.cisco.com/support