Outcome 1: Optimal Path for User Traffic
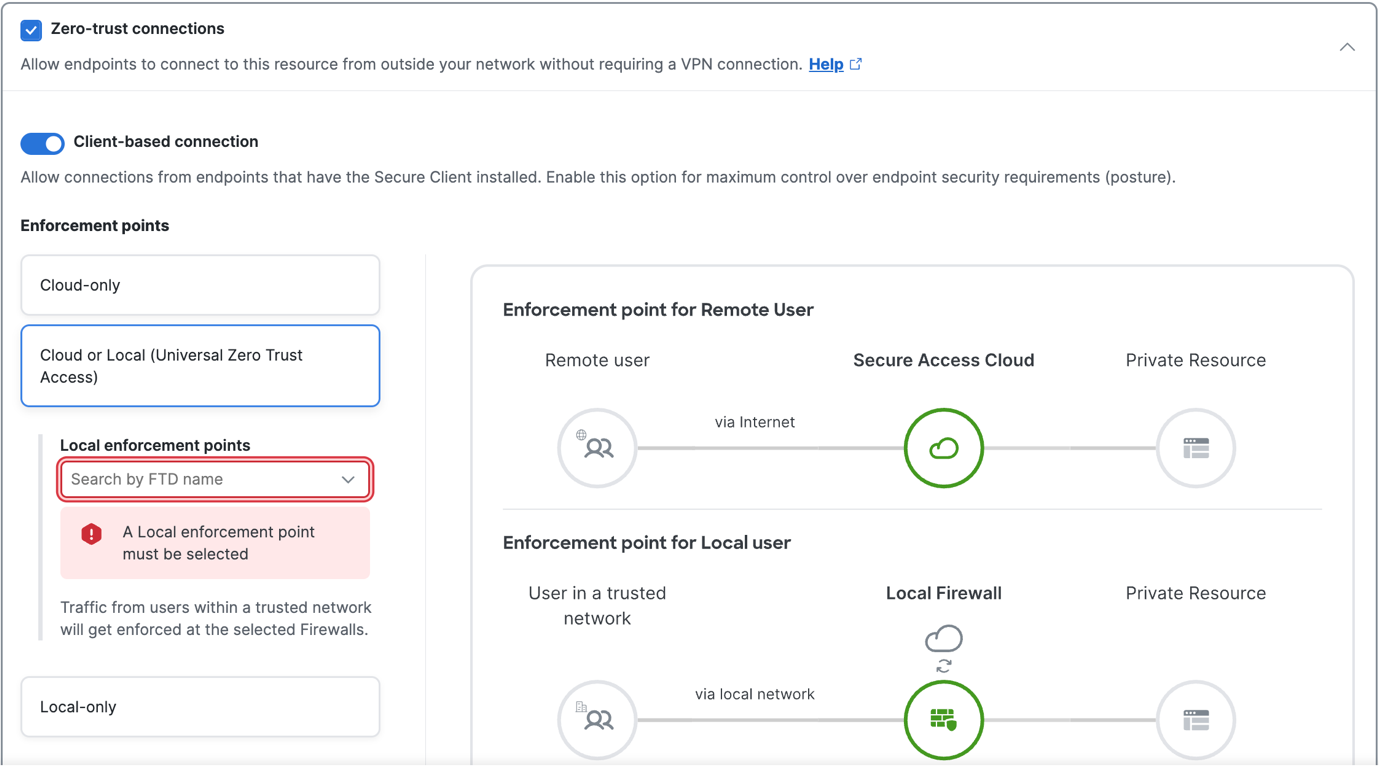
Universal ZTNA uses the trusted network detection (TND) mechanism to detect whether a user is inside a trusted network (on-premises) or in an untrusted network (remote). Based on this location, universal ZTNA dynamically steers user traffic through the nearest enforcement point, ensuring security and optimal performance.
On-premises users: When a user logs in through the office network, user traffic is routed through the local Firewall (Threat Defense device), which acts as the enforcement point. This routing prevents unnecessary traffic through the cloud, avoiding latency and optimizing network performance.
Remote users: When a user is located ouside a trusted network, user traffic is proxied through the cloud-based Secure Access service, which evaluates policies and proxies traffic securely in the cloud.
Trusted Network Detection
Trusted network detection (TND) identifies if a user or device is connected to a trusted internal network, such as a corporate LAN, or to an untrusted external network, such as public Wi-Fi. TND determines the network context of a user or device before granting access to applications or resources.
Secure Access enables you to define a trusted network based on specific criteria, such as DNS server addresses, DNS domains, and trusted servers. These trusted networks are included in TND profiles, which are then updated on the Secure Client.
When a user requests access to network resources, the Secure Client installed on the user's device detects the network context of the user. It includes this network information in the access request to Secure Access. Secure Access evaluates the TND data and determines how to route the user's access request:
-
If the user is on a trusted network and the TND criteria match, the access request is routed through the on-premises firewall.
-
If the TND criteria do not match, Secure Access identifies the user as being on an untrusted network and fulfills the access request through the cloud.
This hybrid approach ensures secure and optimized access to private network resources.
Sample Scenario
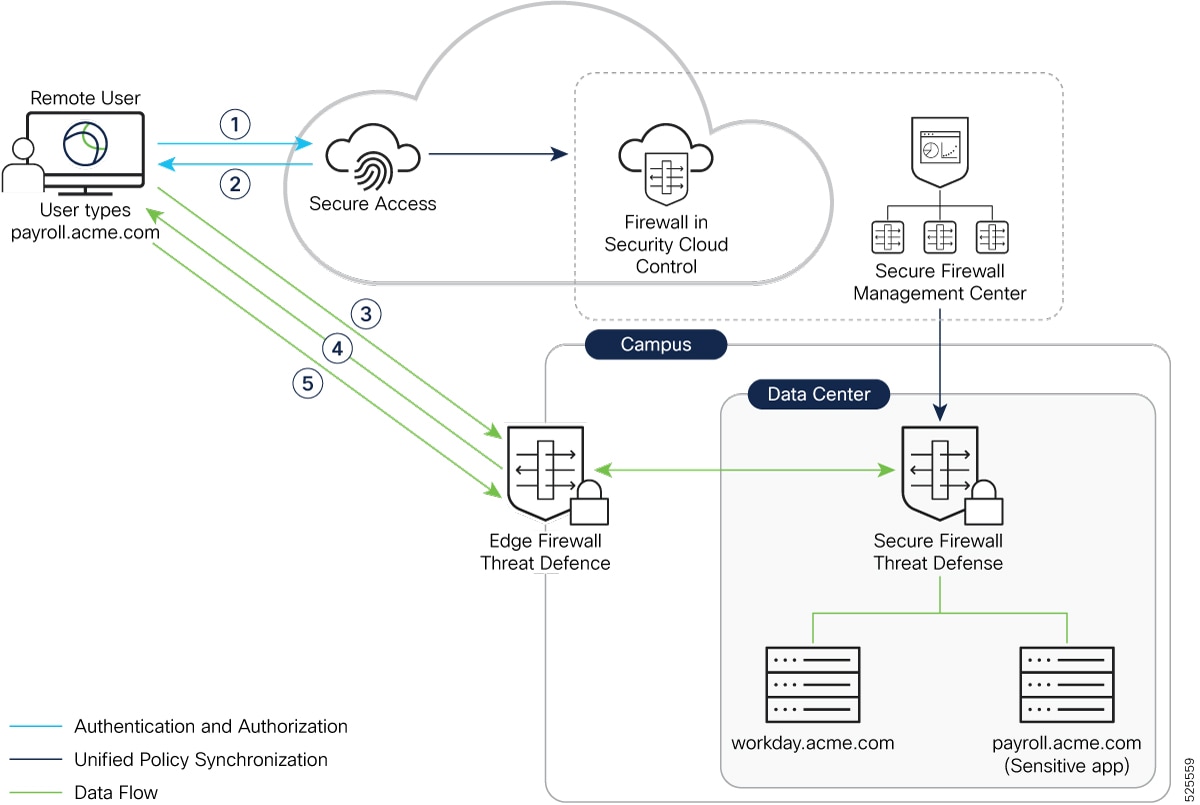
For example, Lee works from the office campus, and John works from home. They intend to access their HR resource, available at https://workday.acme.com.
You will learn how traffic flow is optimized for both Lee and John.
Data Flow for an On-Premises User
For a user operating within the private network, traffic to an internal resource is directed to the on-premises Threat Defense device, rather than being routed through the cloud.
In the sample scenario, Lee is working from the office campus and tries to access the internal resource workday.acme.com through a browser.
Workflow
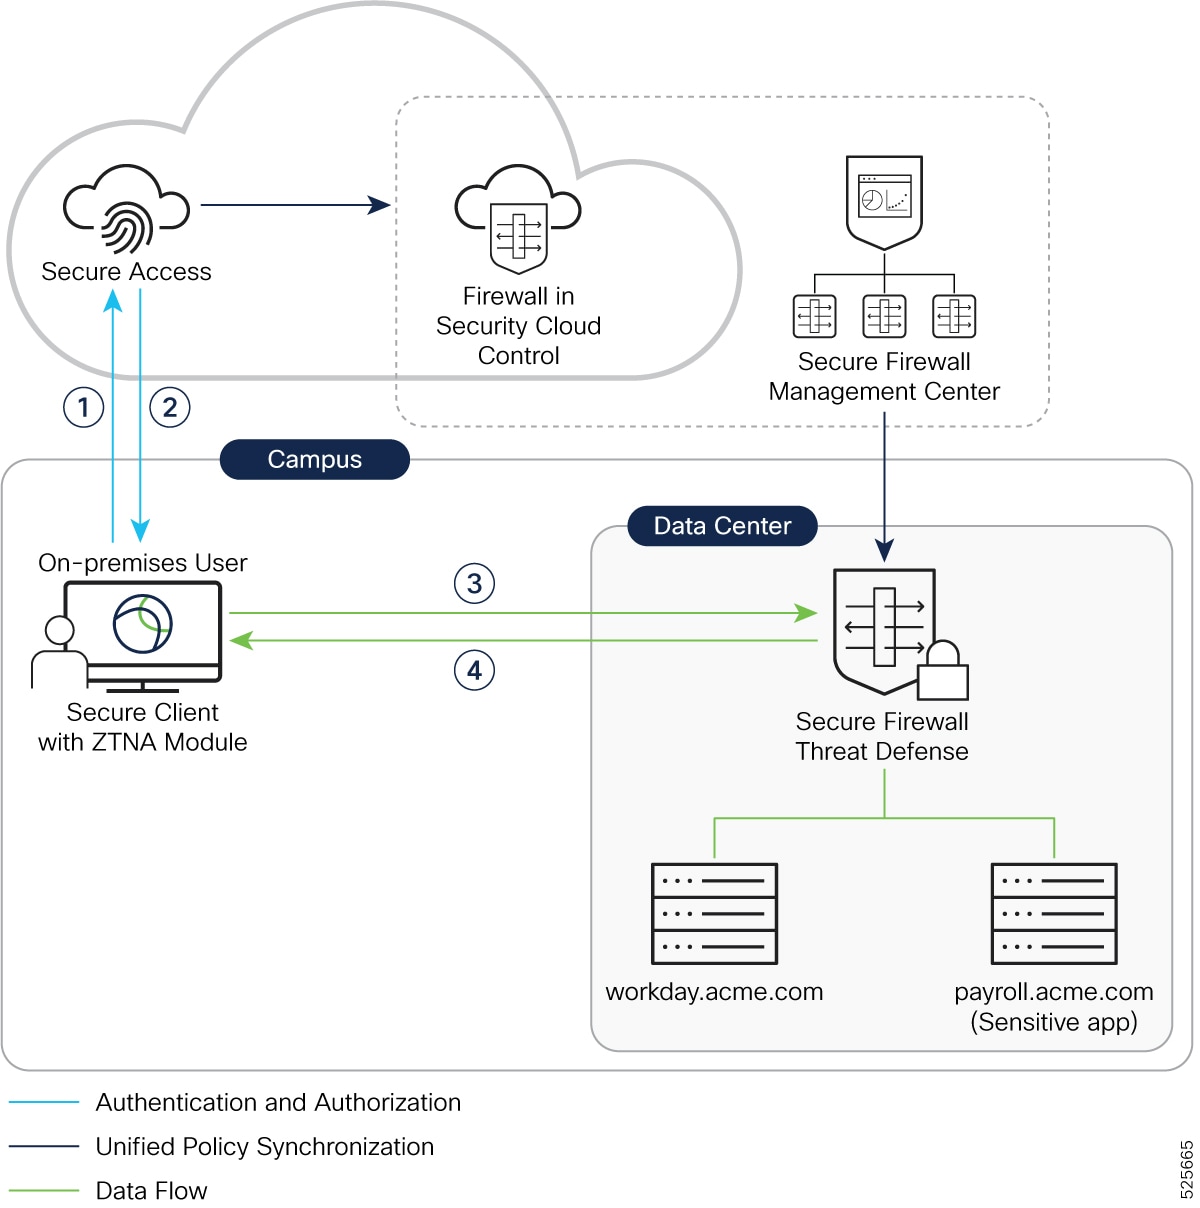
This sequence of events occurs when Lee tries to access the internal resource, https://workday.acme.com, from the office campus (trusted network):
-
Secure Client Request: The secure client installed on Lee’s laptop intercepts the connection and sends a connect request to Secure Access.
-
Secure Access Policy Evaluation and Response: Secure Access evaluates the request based on the configured policies. These policies consider factors such as Lee’s identity, device posture, and the application being requested. Since Lee is entitled to access this application, Secure Access authenticates Lee’s credentials and authorizes the access request. It then sends a redirect message with a token as the response. Since Lee is within a trusted network, Secure Access redirects the Secure Client to the Threat Defense device.
-
Secure Client Sends Access Request to Threat Defense: Secure Client sends a connect request to the Firewall Threat Defense device, providing the token and requesting access to workday.acme.com.
-
Firewall Threat Defense Validates and Enforces Security Profiles: Threat Defense device uses its configured DNS server to resolve the internal resource’s FQDN to an IP address on the internal network. Threat Defense validates the token sent by Secure Client and responds with OK as the response. This establishes a connection between the Secure Client and the Threat Defense device. Threat Defense allows user access to https://workday.acme.com and enforces security policies, such as IPS, file, and malware protection on the user traffic.
Data Flow for a Remote User
For a user operating from outside the private network, traffic to an internal private resource is directed through the cloud.
Summary
In the sample scenario, John is working from home and tries to access the internal resource workday.acme.com through the browser.
Workflow
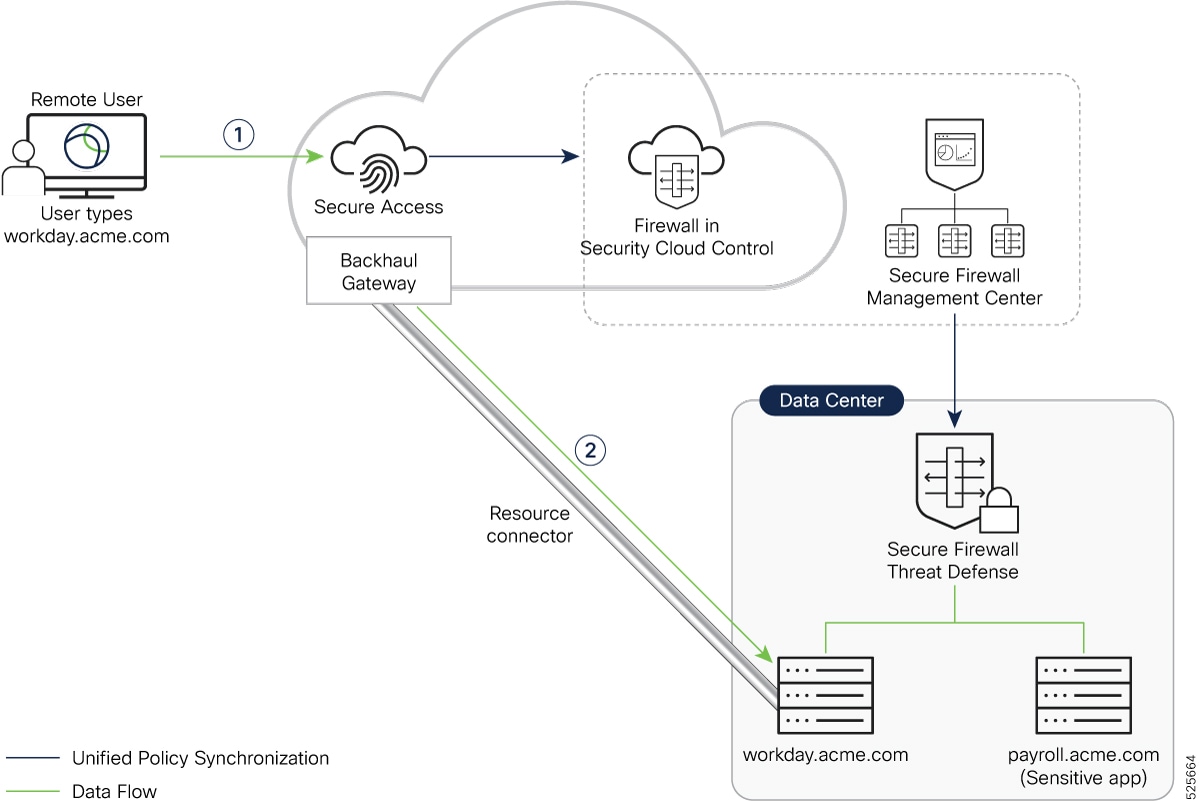
This sequence of events ocurs when John tries to access the internal resource (https://workday.acme.com) from outside the office campus (untrusted network):
-
Secure Client intercepts the request: The Secure Client on John’s laptop checks and finds that https://workday.acme.com is a ZTNA-enabled application. It sends a connect request to Secure Access.
-
Secure Access Policy Evaluation and Response: Secure Access evaluates the policies and the user identity. Trusted Network Detection mechanism recognizes that the request has originated from an untrusted network. Secure Access Gateway establishes a connection to the Resource Connector, which then connects to workday.acme.com residing on the private network.
Traffic from John's laptop to the private resource is routed through the Secure Access cloud.
Data Flow for a Branch User
An enterprise network normally deploys multiple firewalls to enhance security and network segmentation. Consider one such scenario where the private resources in a large enterprise are protected by a firewall at the Data Center. The branch offices are protected by branch firewalls and connect to the main campus through site-to-site virtual private network (VPN).
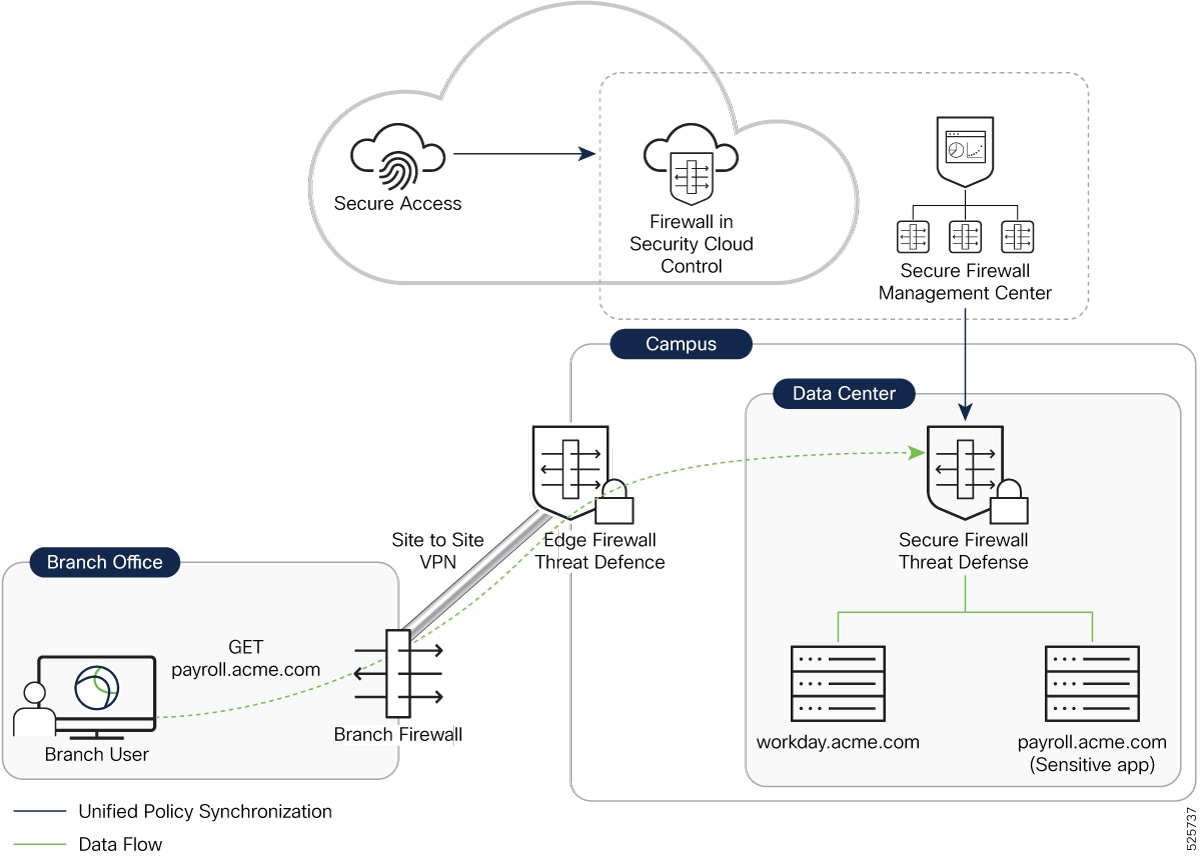
As with any universal ZTNA user, authentication and authorization happen in Secure Access. The Secure Client on the branch user's device obtains the authentication token from Secure Access and redirects the user to the Data Center firewall for access to private resources.
Data traffic from a branch user terminates at the edge firewall, which then establishes a connection with the Data Center firewall to forward the traffic.
Configuration Workflow for Outcome 1
This table describes the key steps for enabling the optimal path for traffic. For detailed instructions, refer to the Universal Zero Trust Access Configuration Guide.
 Note |
Unless specified otherwise, the term Firewall Management Center refers to both the cloud-delivered and on-premises Firewall Management Center. |
|
Configuration Task |
Description |
|---|---|
|
1. Onboard Secure Access and Security Cloud Control Firewall Management to Security Cloud Control |
|
|
2. Prepare and set up Firewall Management Center and Firewall Threat Defense devices |
|
|
3. Configure the Threat Defense devices |
For more information, see "Configure Security Devices" in the Universal Zero Trust Network Access Configuration Guide. |
|
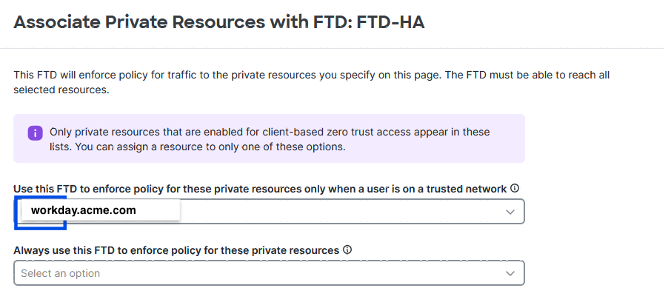
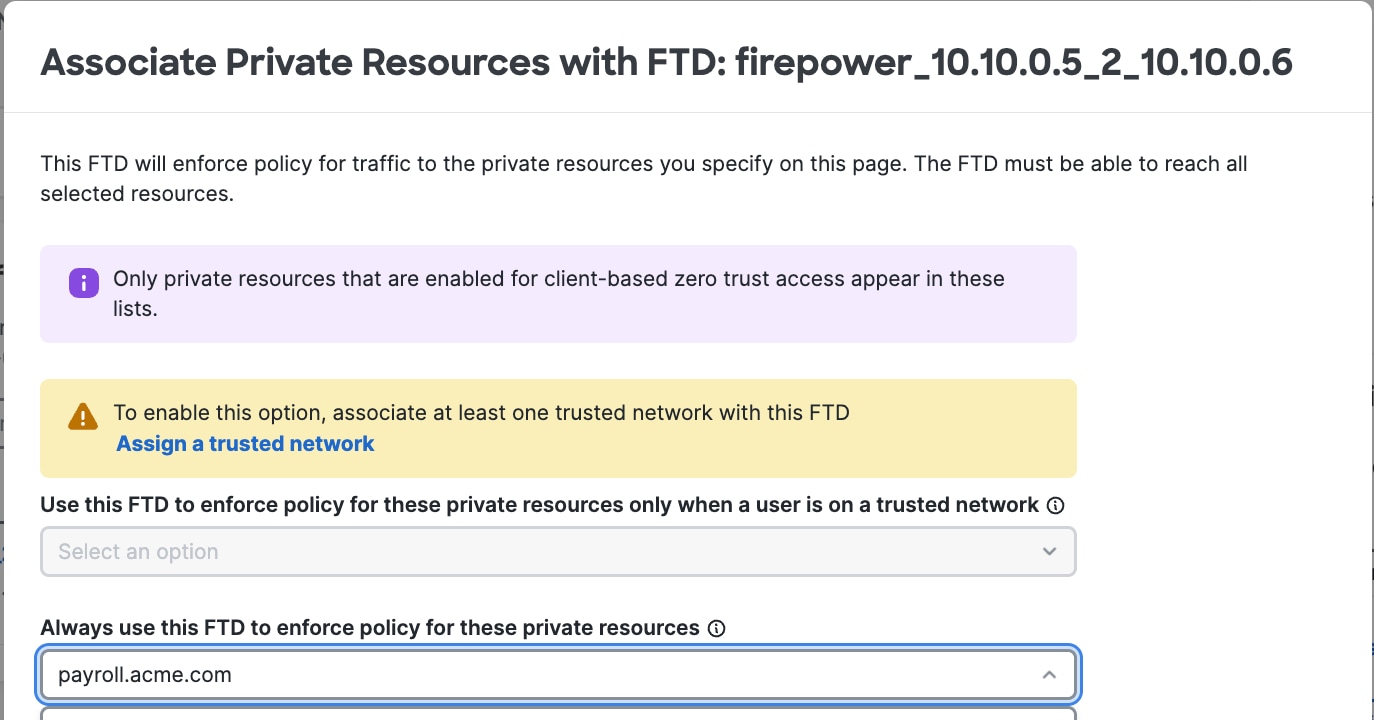
4. Configure a private resource (workday.acme.com ) on Secure Access |
In Security Cloud Control:
For more information about creating a private resource, see "Configure Private Resource" in the Universal Zero Trust Network Access Configuration Guide. |
|
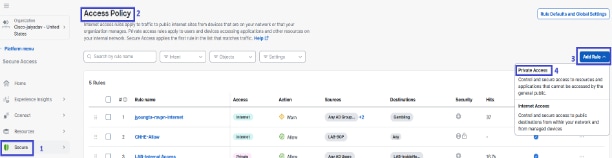
5. Create an access policy to allow users access to the private resource |
In Security Cloud Control:
Next, follow the on-screen prompts to configure security such as Intrusion Prevention (IPS). |
|
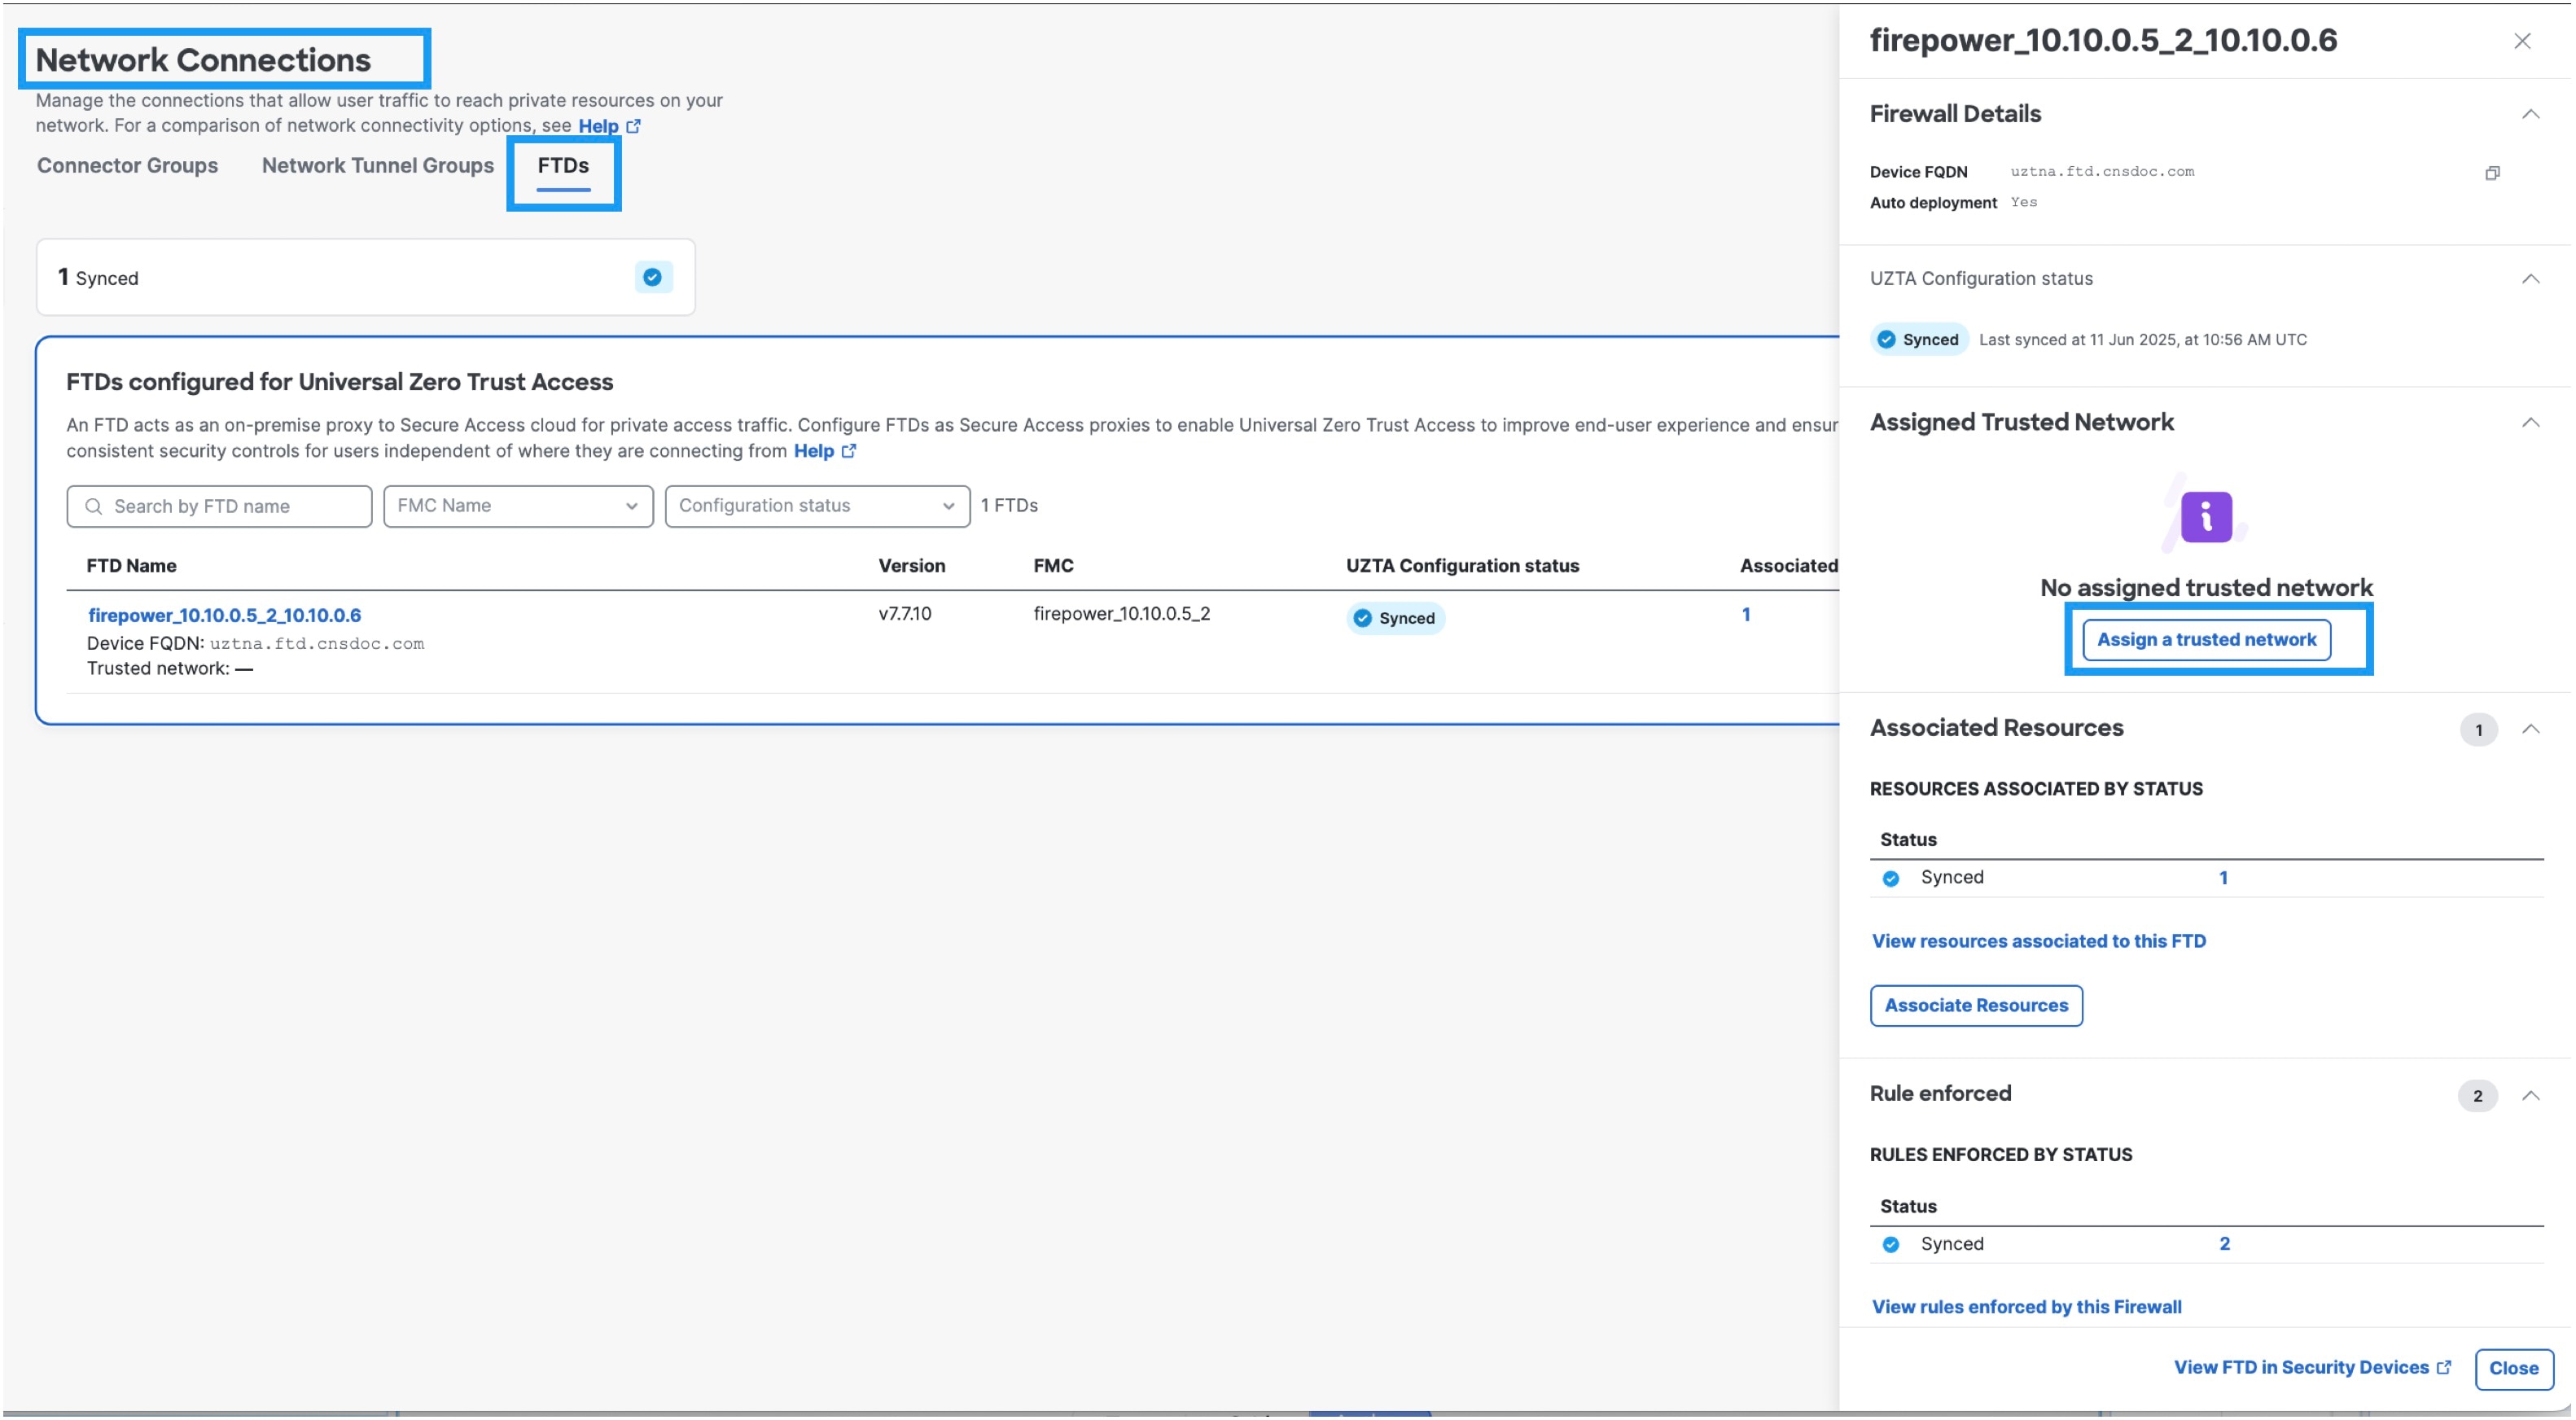
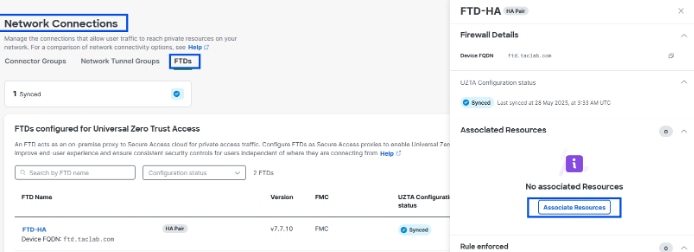
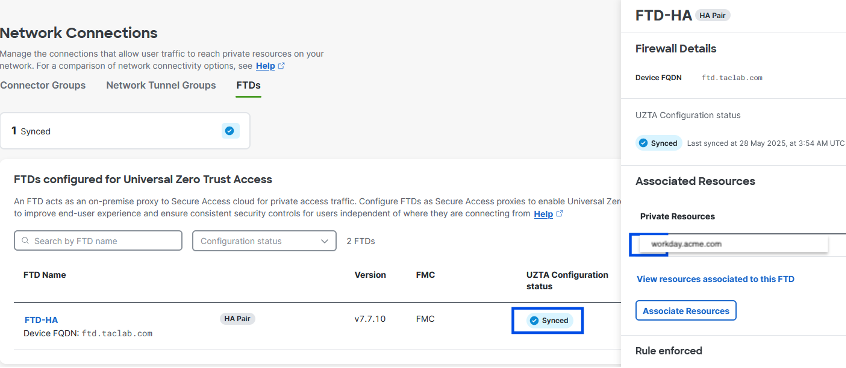
6. Associate the private resource to the Firewall Threat Defense Device |
In Security Cloud Control:
|
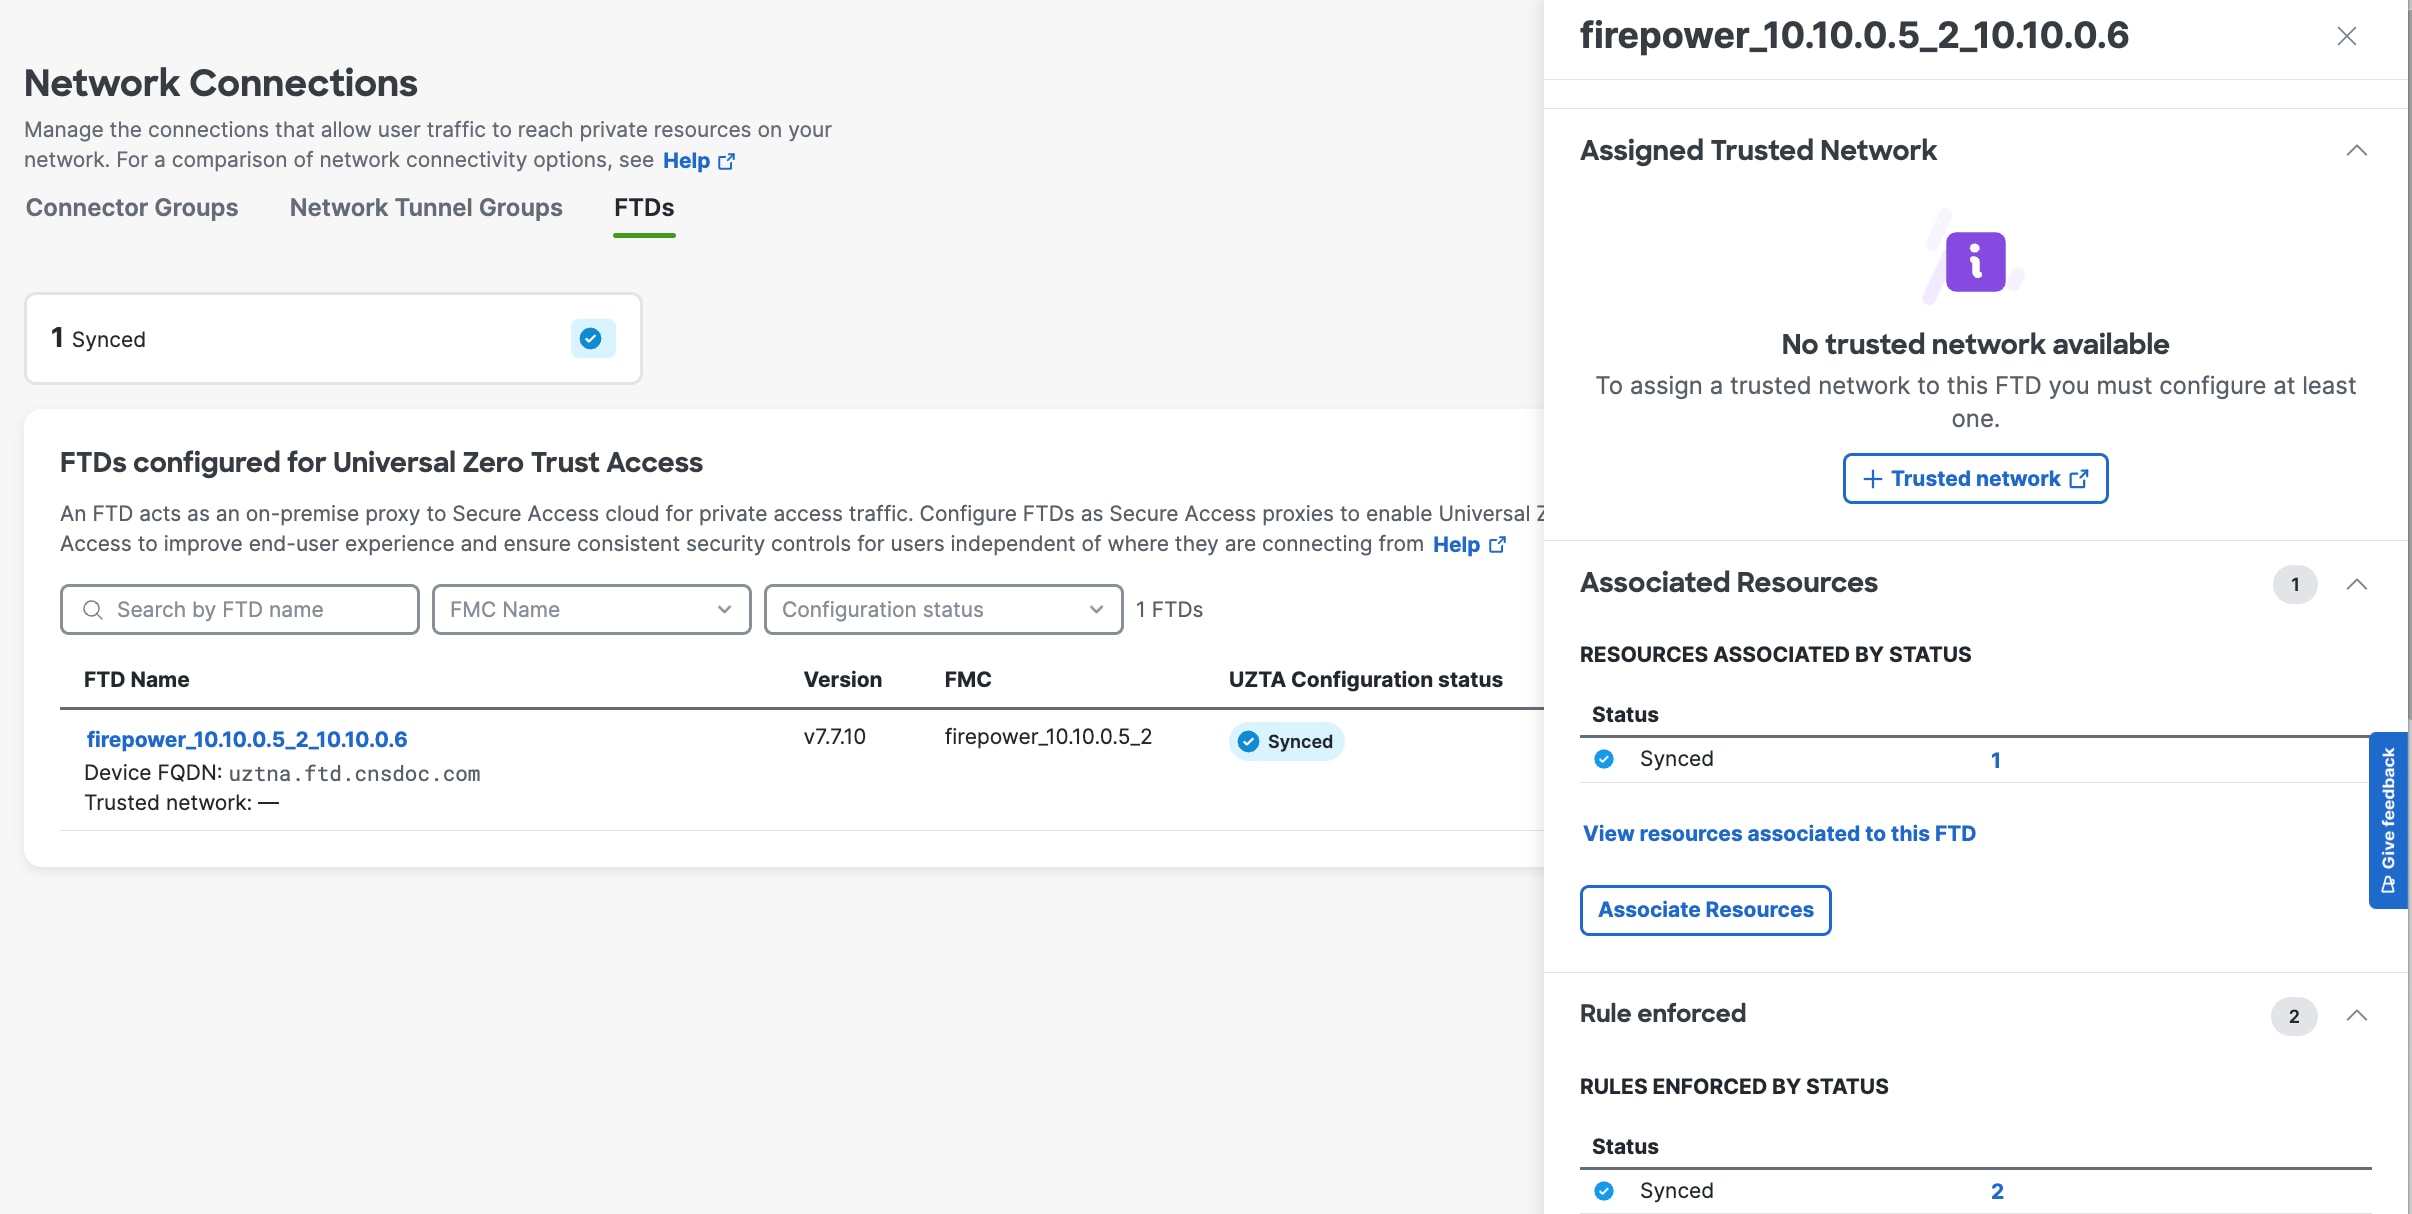
|
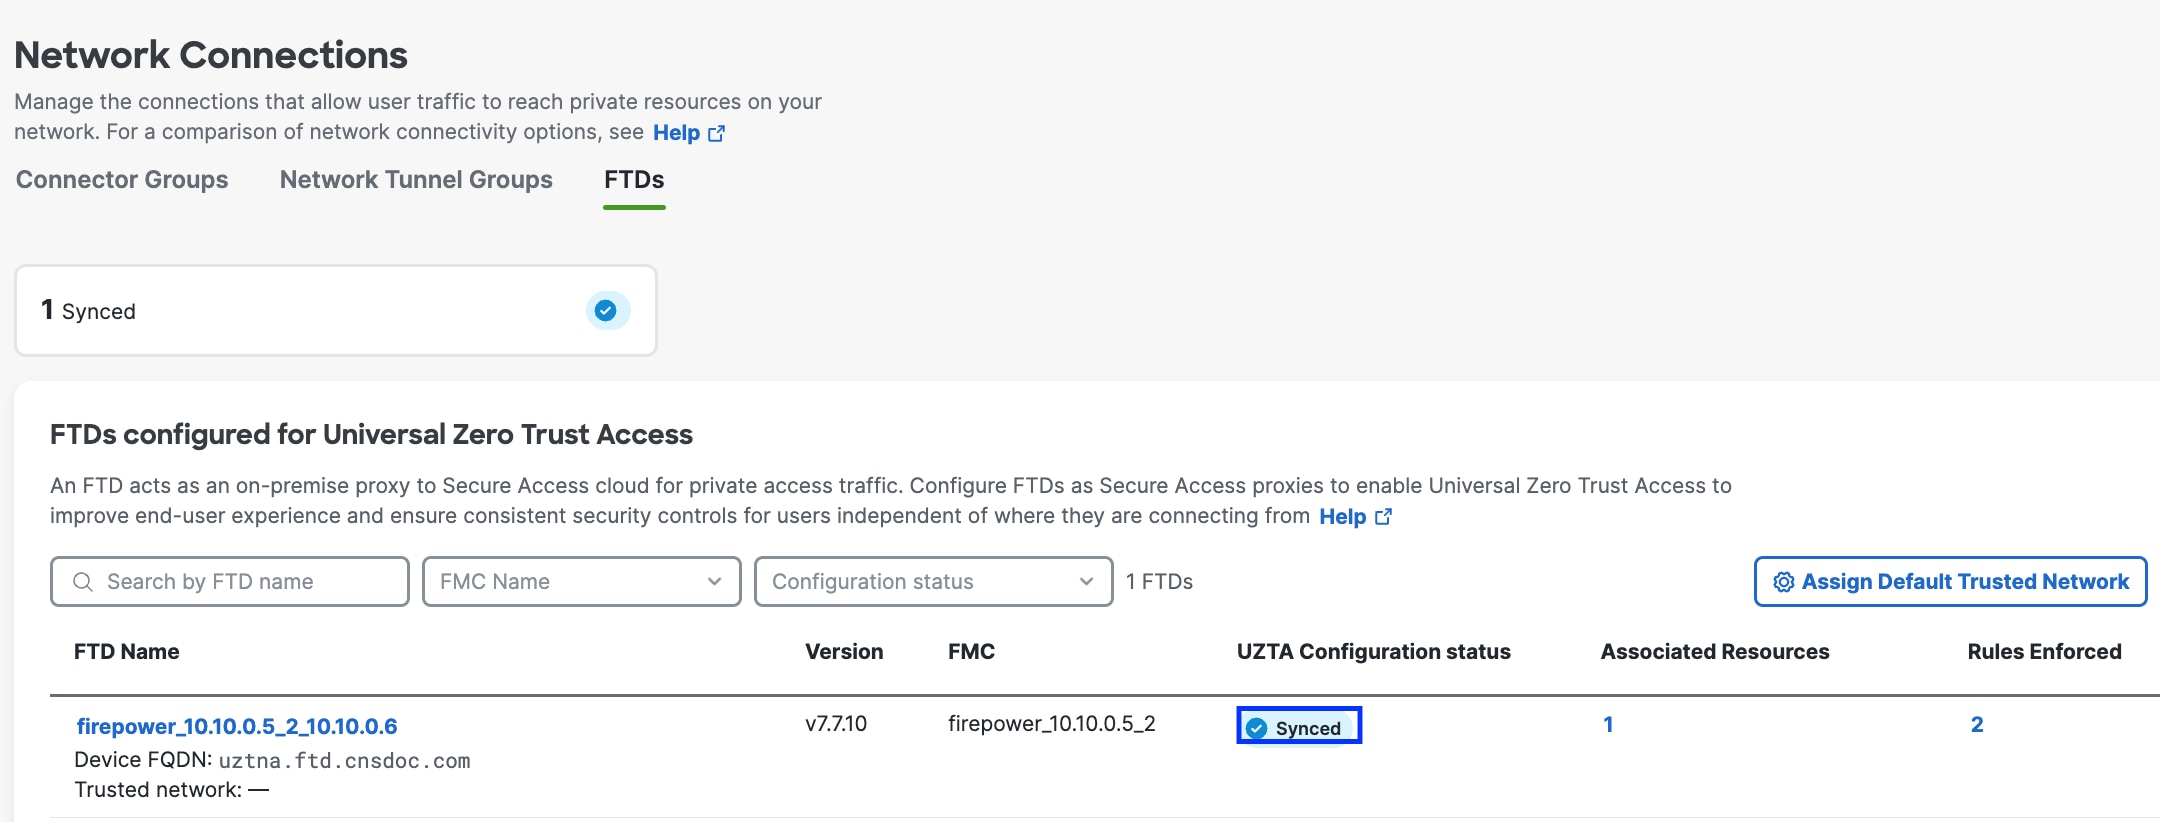
7. Wait for the UZTNA Configuration Status to display “Synced”. |
Secure Access policy and access configurations are automatically deployed to the Firewall Threat Defense device. Successful configuration synchronization displays a "Synced" status.
|
|
8. End User Device Configuration |
For information on setting up Secure Client, see Secure Client Administration Guide. |


 Feedback