Configuration Workflow for Universal ZTNA Solution
As an administrator, set up the infrastructure, configure policies, deploy those policies at the enforcement point, and monitor the solution to ensure it works as expected.
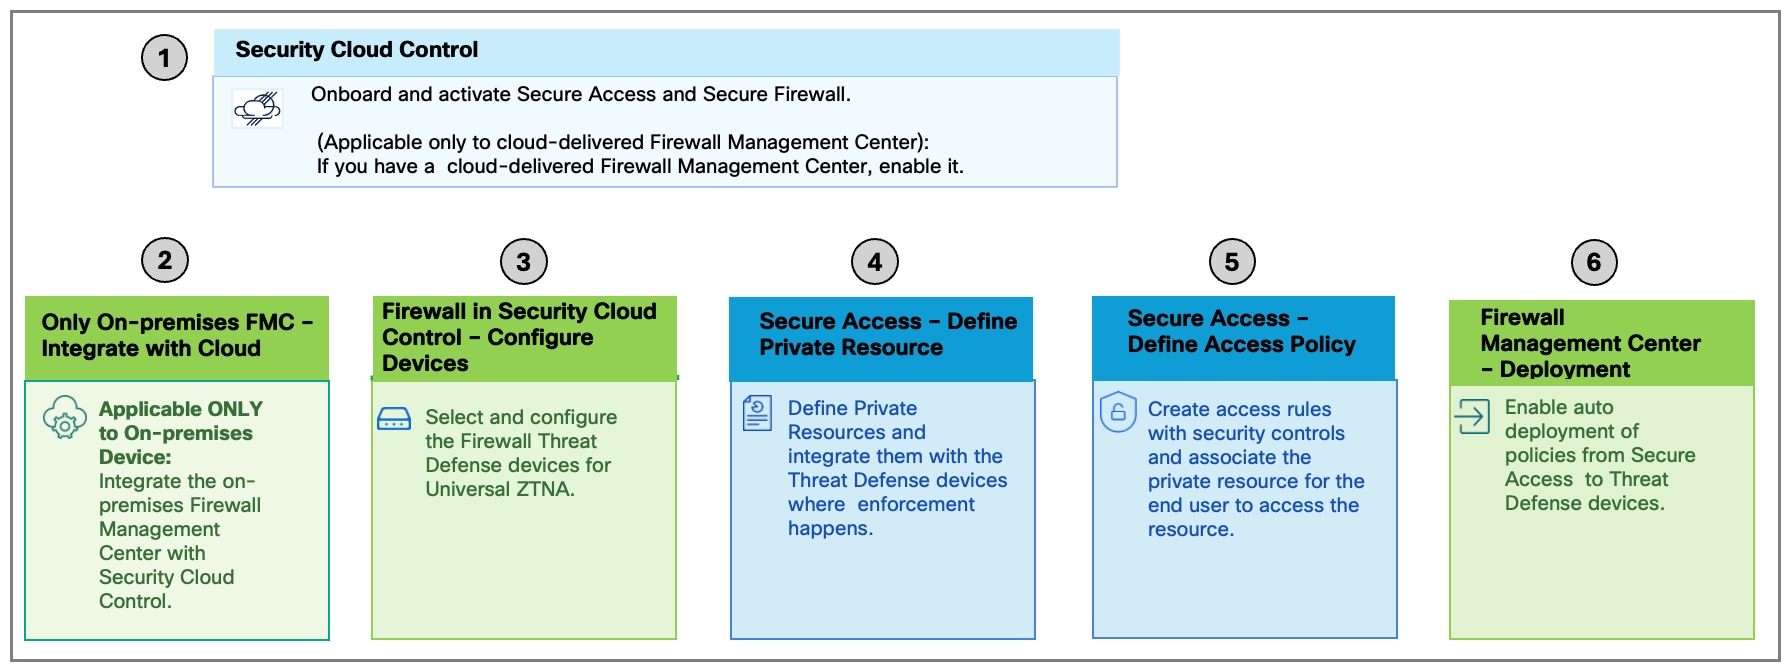
Workflow
This section provides a high-level overview of the universal ZTNA configuration process. For configuration details, refer to the Universal Zero Trust Access Configuration Guide.
-
Onboard Security Cloud Control Firewall Management and Secure Access to the Security Cloud Control platform.
-
In a Security Cloud Control organization, claim a subscription and provision Secure Access and Security Cloud Control Firewall Management. For information on claiming a subscription in Security Cloud Control, refer to the Security Cloud Control Administration Guide.
-
Configure user management in Secure Access by either configuring users and groups manually or integrating an identity provider.
-
Configure one or more trusted networks through Secure Access. We recommend having one default trusted network. A default trusted network is automatically assigned to a universal ZTNA-enabled Firewall Threat Defense device.
-
Update Secure Access with the CA certificate for the ZTNA user.
-
-
Prepare and set up Firewall Management Center and Firewall Threat Defense devices.
-
If you have a cloud-delivered Firewall Management Center, enable it in Security Cloud Control.
-
If you have an on-premises Firewall Management Center onboard it to Security Cloud Control.
-
Ensure that the Firewall Management Center has a smart license registered.
-
Ensure that you have specified the routed interfaces, platform settings, and domain name server (DNS) for the Firewall Threat Defense devices.
-
-
In Security Cloud Control, configure the Threat Defense devices for universal ZTNA.
-
Specify the device FQDN, the inside interface, the outside interface, and the PKCS12 certificate.
Apply access rules to on-premises users using the internal interface (also called the DMZ interface). Use the external interface for remote users.
You can choose multiple internal, external, or both types of interfaces for each security device.
-
Deploy the changes.
The device reboots to reallocate the system resources for universal ZTNA components.

Note
Rebooting takes several minutes. If you deploy a High Availability (HA) pair of devices, both devices reboot simultaneously. During this time, traffic flow through these devices is interrupted.
After the reboot, the Firewall Threat Defense device is connected to Secure Access.
-
-
In Secure Access, configure private resources.
Private resources include applications, networks, or subnets your organization controls. They are not publicly accessible from outside your network.
Define private resources and specify connection information for the resources.
-
In Secure Access, create access policy rules and associate them with the private resources.
Configure access rules to determine which users and devices can access the resource using the enabled connection methods.
-
In Secure Access, associate the private resources with the Threat Defense device.
Verify that all configurations from Secure Access are synchronized with the Threat Defense devices.
After deployment, monitor logs and events on both the Secure Access and Firewall Management Center dashboards to analyze and troubleshoot issues.
Secure Client Configuration for Universal ZTNA
-
Install Secure Client version 5.1.10 or later on the remote user devices.
-
Enroll the user with Secure Access using the device enrollment certificate.
-
Enable zero trust access on Secure Client.
For details on Secure Client configuration, see the Secure Client Administration Guide.
 Feedback