Software Repository
Use the Software Repository screen to download software images to the vManage software repository.
View Software Images
When you open the Software Repository screen, the images in the repository are displayed in the table. To filter the list, search or type a string in the Search box.
The Software Version column lists the version of the software image, and the Controller Version column lists the version of controller software that is equivalent to the software version. The controller version is the minimum supported vManage controller version. The software image can operate with the listed controller version or with a higher controller version. In the following example:

The software version is 16.8.55, and the controller version is 18.1.x. Reading these two columns together tells you that software version 16.8.55 is compatible with vManage controller software versions 18.1.x and later. This means that devices running version 16.8.55 can operate with vManage servers running Releases 18.1, 18.2, and 18.3, and with later software releases, and they cannot operate with vManage servers running Release 17.2 or Release 17.1.
The Software Location column indicates where the software images are stored, either in the repository on the vManage server or in a repository in a remote location.
The Available Files column lists the names of the software image files.
The Update On column shows when the software image was added to the repository.
In the More Actions column, you can delete a software image from the repository.
Add Software Images to the Repository
Before you can upgrade the software on a vEdge router, vSmart controller, or vManage NMS to a new software version, you need to add the software image to the vManage software repository. The repository allows you to store software images on the local vManage server and on a remote file server.
The vManage software repository allows you to store images in three ways:
-
On the local vManage server, to be downloaded over a control plane connection—Here, the software images are stored on the local vManage server, and they are downloaded to the Cisco SD-WAN devices over a control plane connection. The receiving device generally throttles the amount of data traffic it can receive over a control plane connection, so for large files, the vManage server might not be able to monitor the software installation on the device even though it is proceeding correctly.
-
On the local vManage server, to be downloaded over an out-of-band connection—Here, the software images are stored on the local vManage server, and they are downloaded to the Cisco SD-WAN devices over an out-of-band management connection. For this method to work, you specify the IP address of the out-of-band management interface when you copy the images to the software repository. This method is recommended when the software image files are large, because it bypasses any throttling that the device might perform and so the vManage server is able to monitor the software installation.
-
On a remote server—Here, the software images remain on a remote file server that is reachable through an FTP or HTTP URL. As part of the software upgrade process, the vManage server sends this URL to the Cisco SD-WAN device, which then establishes a connection to the file server over which to download the software images.
To add software images to the vManage software repository:
-
In vManage NMS, select the screen
-
Click Add New Software.
-
Select the location to store the software image:
-
To store the software image or on the local vManage server and have it be downloaded to Cisco SD-WAN devices over a control plane connection, select vManage. The Upload Software to vManage dialog box opens.
-
Drag and drop the software image file to the dialog box, or click Browse to select the software image from a directory on the local vManage server.
-
Click Upload to add the image to the software repository. The Software Repository tables display the added software image, and it is available for installing on the devices.

Note
The local vManage server is available for storing NFVIS upgrade images and no other locations are available.
-
-
To store the software image on a remote server, select Remote Server. The Location of Software on Remote Server dialog box opens.
-
In the Version box, enter the version number of the software image.
-
In the URL box, enter the FTP or HTTP URL of the software image.
-
Click Add to add the image to the software repository. The Software Repository tables display the added software image, and it is available for installing on the devices.
-
-
To store the image on a remote vManage server and have it be downloaded to Cisco SD-WAN devices over an out-of-band management connection, select Remote Server - vManage. The Upload Software to Remote Server - vManage dialog box opens.
-
In the vManage Hostname box, enter the IP address of an interface on the vManage server that is in a management VPN (typically, VPN 512).
-
Drag and drop the software image file to the dialog box, or click Browse to select the software image from a directory on the local vManage server.
-
Click Upload to add the image to the software repository. The Software Repository tables display the added software image, and it is available for installing on the devices.
-
-
Upload VNF Images in Software Repository
See Upload VNF Images.
Create Customized VNF Image
View VNF Images
See View VNF Images.
Delete a Software Image from the Repository
To delete a software image from the vManage software repository:
-
In vManage NMS, select the screen.
-
In the software repository table, select the software image.
-
In the More actions icon to the right of the line, click Delete.
If a software image is being download to a router, you cannot delete the image until the download process completes.
Delete VNF Image
See Delete VNF Images.
Upload VNF Images
Procedure
|
In vManage, click . The Maintenance|Software Repository screen appears, and the Add New Software button is highlighted. To upload VNF images, use the Virtual Images tab. In the Maintenance|Software Repository screen, perform the following tasks: |
Create Customized VNF Image
Before you begin
-
Create a custom VM package along with image properties and bootstrap files (if needed) into a TAR archive file.
-
Tokenize custom variables and apply system variables that are passed with the bootstrap configuration files.
Ensure that the following custom packaging requirements are met:
-
Root disk image for a VNF–qcow2
-
Day-0 configuration files–system and tokenized custom variables
-
VM configuration–CPU, memory, disk, NICs
-
HA mode–If a VNF supports HA, specify Day-0 primary and secondary files, NICs for a HA link
-
Additional Storage–If additional storage is required, specify predefined disks (qcow2), storage volumes (NFVIS layer)
Procedure
| Step 1 |
In the screen, click the Add Custom VNF Package button from the Virtual Images tab. |
|||||||||||||||||||||||||||
| Step 2 |
Configure the VNF with the following VNF package properties and click Save.
|
|||||||||||||||||||||||||||
| Step 3 |
To package a VM qcow2 image, click File Upload under Image, and browse to choose a qcow2 image file. |
|||||||||||||||||||||||||||
| Step 4 |
To choose a bootstrap configuration file for VNF, if any, click the Bootstrap Files button under Day 0 Configuration, click File Upload, and then browse to choose a bootstrap file.
|
|||||||||||||||||||||||||||
| Step 5 |
To add a Day-0 configuration, click Add, and then click Save. The Day-0 configuration appears in the Day 0 Config File table. You can tokenize the bootstrap configuration variables with system and custom variables. To tokenize variables of a Day-0 configuration file, click View Configuration File against the configuration file. In the Day 0 configuration file dialog box, perform the following tasks:
|
|||||||||||||||||||||||||||
| Step 6 |
To upload extra VM images, expand Advance Options, click Upload Image, and then browse to choose an additional qcow2 image file. Choose the root disk, Ephemeral disk 1, or Ephemeral disk 2, and click Add. The newly added VM image appears in the Upload Image table.
|
|||||||||||||||||||||||||||
| Step 7 |
To add the storage information, expand Add Storage, and click Add volume. Provide the following storage information and click Add. The added storage details appear in the Add Storage table.
|
|||||||||||||||||||||||||||
| Step 8 |
To add VNF image properties, expand Image Properties and provide the following image information.
|
|||||||||||||||||||||||||||
| Step 9 |
To add VM resource requirements, expand Resource Requirements and provide the following information.
|
|||||||||||||||||||||||||||
| Step 10 |
To add Day-0 configuration drive options, expand Day0 Configuration Drive options and provide the following information.
|
View VNF Images
Procedure
|
In vManage, click . The Maintenance|Software Repository screen appears, and the Add New Software button is highlighted. To view VNF images, use the Virtual Images tab. In the Maintenance|Software Repository screen, perform the following tasks: |
Delete VNF Images
Procedure
|
In vManage, click . The Maintenance|Software Repository screen appears, and the Add New Software button is highlighted. To upload VM images, use the Virtual Images tab. In the Maintenance|Software Repository screen, perform the following tasks: |
 Note |
If the VNF image is referenced by a service chain, it cannot be deleted. |
Upload the Cisco Security Virtual Image to vManage
Each router image supports a specific range of versions for a hosted application. For IPS/IDS and URL-Filtering, you can find the range of supported versions (and the recommended version) for a device on its Device Options page.

Procedure
| Step 1 |
From the Software Download page for your router, locate the image "UTD Engine for IOS XE SD-WAN." |
| Step 2 |
Click the download icon on the right-hand side of the window to download the image file. |
| Step 3 |
From the vManage dashboard, select . |
| Step 4 |
Select Virtual Images from the top options.  |
| Step 5 |
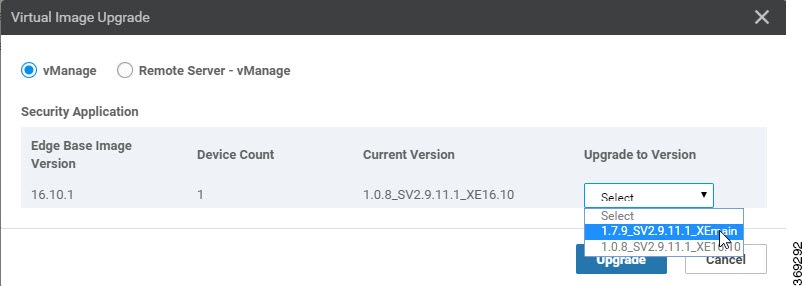
Click Upload Virtual Image, and select either vManage or Remote Server – vManage. The Upload Virtual Image to vManage window opens. |
| Step 6 |
Drag and drop, or browse to the image file and select it. |
| Step 7 |
Click Upload. When the upload completes, a confirmation message displays. The new virtual image displays in the Virtual Images Software Repository. |


 Feedback