Web User Interface

This section contains the following:

Web User Interface Management Overview

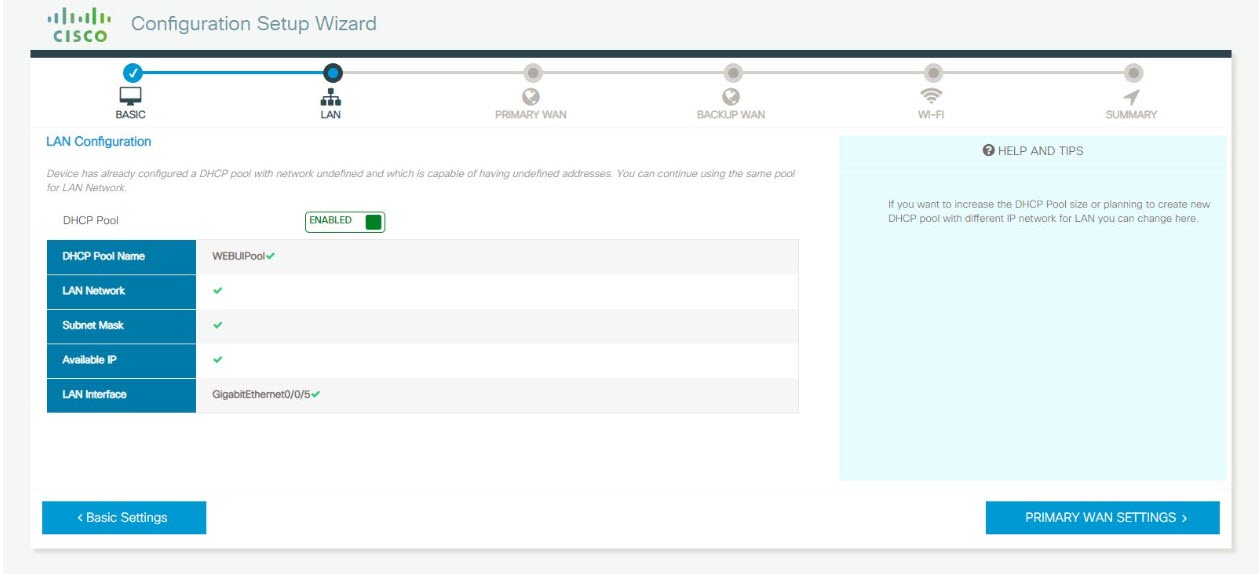
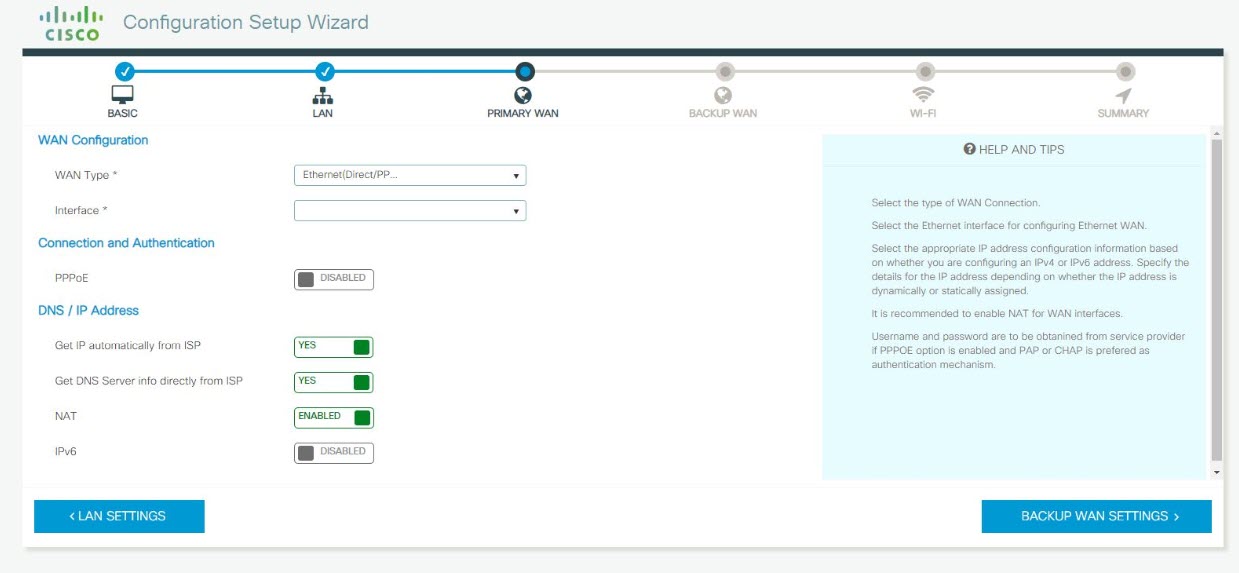
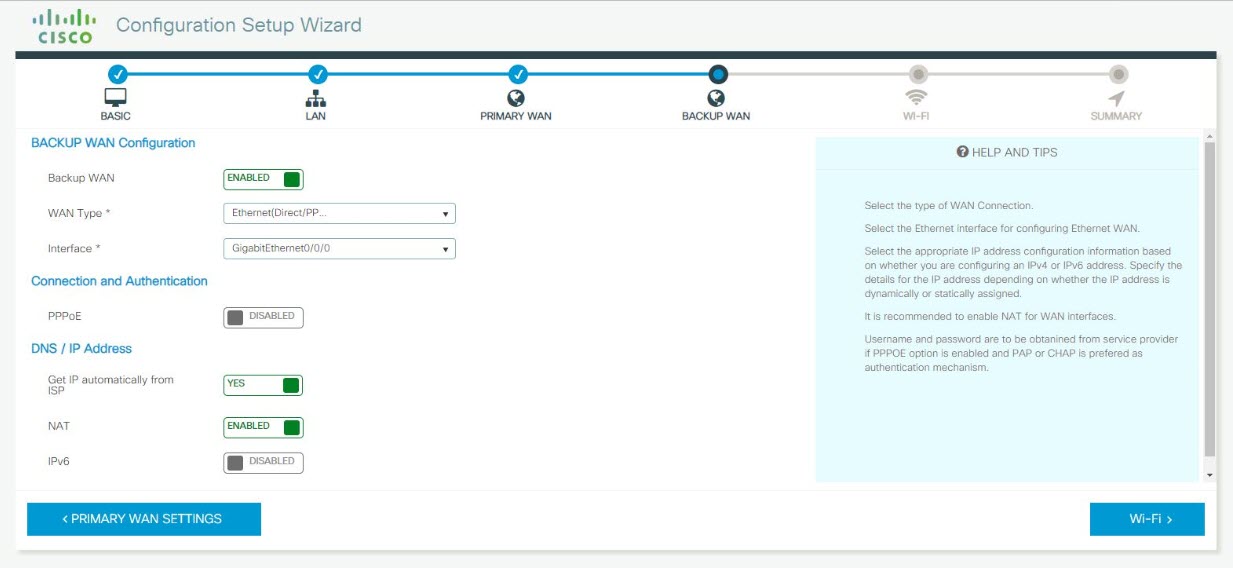
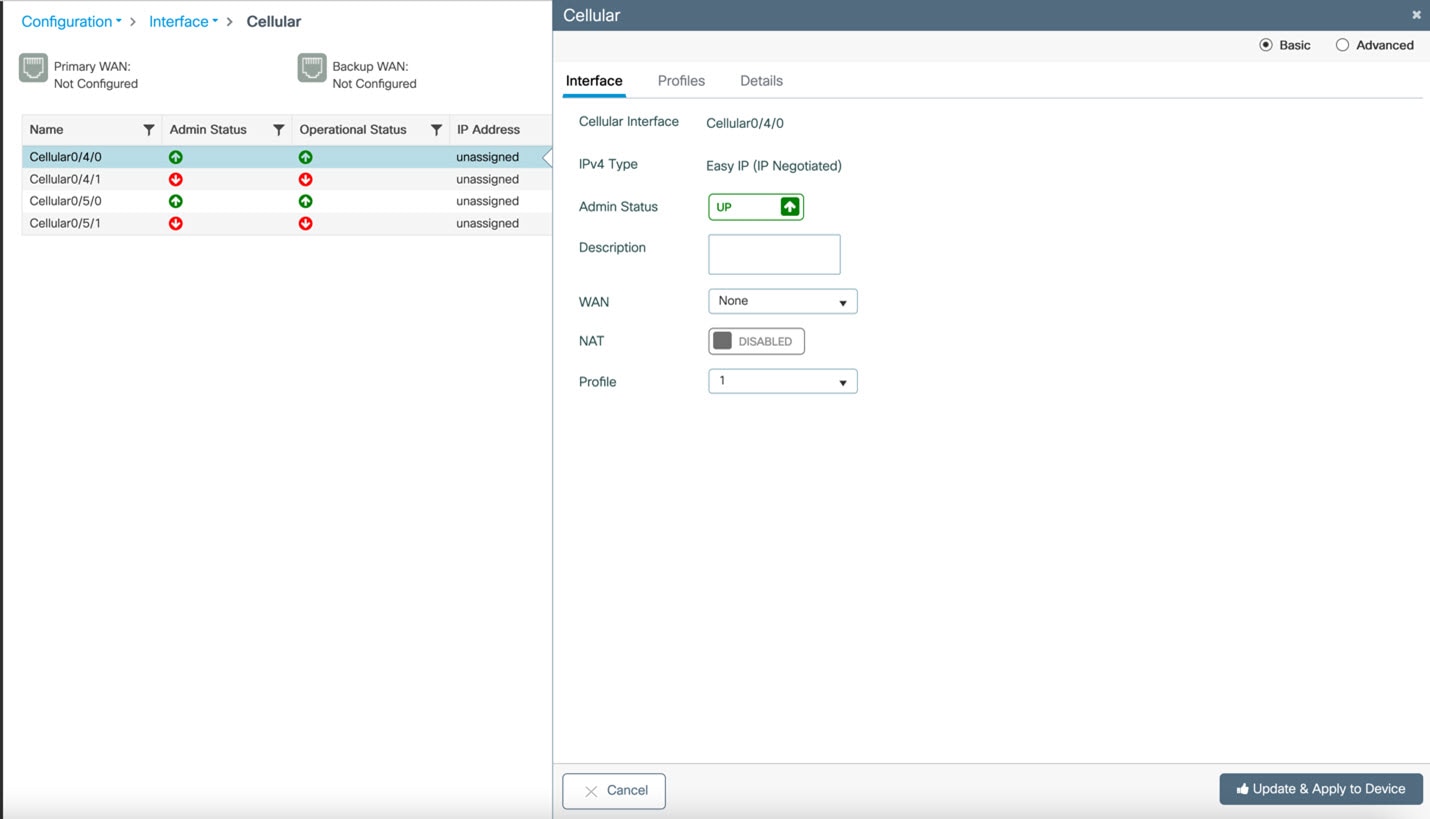
You can access your router using a web user interface. The web user interface allows you to monitor router performance using an easy-to-read graphical interface. Most aspects of your router can be monitored using the web user interface which enables you to perform the following functions:

Using Web User Interface for Day One Setup

To configure the Web user interface:

Procedure


Step 1

Configure the HTTP server. By default, the HTTP server configuration should be present on the device. Ensure the configuration by checking if the ip http server and ip http secure-server commands are present in the running configuration.

Device #configure terminal
Device (config)#ip http server
Device (config)#ip http secure-server

Step 2

Set up the authentication options to log into Web UI. You can use one of these methods to authenticate:

  1. You can authenticate using local database. To use a local database for Web UI authentication, ensure to have the ip http authentication local command in the running configuration. This command is preconfigured on the device. If the command is not present, configure the device as shown in this example:

    Device #configure terminal 
     Device (config)#ip http authentication local

    Note

     
    You need a user with privilege 15 to access the configuration screens on Web UI. If the privilege is less than 15, you can access only the Dashboard and Monitoring screens on Web UI.

    To create a user account, use the username <username> privilege <privilege> password 0 <passwordtext>

    Device #configure terminal
    Device (config)# username <username> privilege <privilege> password 0 <passwordtext>
  2. Authenticate using AAA options. To use AAA authentication for Web UI, ensure to configure ‘ip http authentication aaa’ on the device. Also, ensure that the required AAA server configuration is present on the device.

    Device #configure terminal
    Device (config)#ip http authentication local
     

Step 3

Launch the browser. In the address bar, type the IP address of the device. For a secure connection, type https://<your-ip-address>/webui/#/dayZeroRouting

Step 4

Enter the default username (cisco) and password provided with the device

Step 5

Click Log In.


Configure LAN Settings

Refer to the following image for LAN Settings:

Figure 1. LAN Settings

Procedure


Step 1

Select the interface from the drop-down list.

Step 2

Enter the IP address and subnet mask.

Step 3

Check the Use this as DHCP Server check box, and enter the DHCP pool name and network address. Select the appropriate time zone from the drop-down list.

Note

 
Ensure that you do not use addresses that would conflict with what was previously created in the initial configuration dialog.

Step 4

Check the Configure Management Interface check box, and enter the IP address of the management interface.

Step 5

Click Primary WAN Settings.


Configure Primary WAN Settings

Refer to the following image for WAN Settings:

Procedure


Step 1

Select the primary WAN type for configuring the primary WAN connection. You can configure 3G/4G or Ethernet, as primary WAN depending on the WAN types supported by the router.

Step 2

Select the interface from the drop-down list.

Step 3

Check the Get DNS Server info directly from ISP check box to get the DNS server information directly from the service provider. You can also manually enter the Primary DNS and Secondary DNS.

Step 4

Check the Get IP automatically from ISP check box to get the IP address information directly from the service provider. You can also manually enter the IP address and subnet mask.

Step 5

Check the Enable NAT check box to enable NAT. It is recommended to enable NAT.

Step 6

Enter the user name and password provided by the service provider.

Step 7

Click Security / APP Visibility WAN Settings.


Configure Secondary WAN Settings

For advanced configuration, you should configure the secondary WAN connection. Refer to the following image for Backup WAN:

Figure 2. Backup WAN Settings

Procedure


Step 1

Select the secondary WAN type for configuring the secondary WAN connection. You can configure 3G/4G or Ethernet, as a secondary WAN depending on the WAN types supported by the router.

Step 2

Select the interface from the drop-down list.

Step 3

Check the Get DNS Server info directly from ISP check box to get the DNS server information directly from the service provider. You can also manually enter the Primary DNS and Secondary DNS.

Step 4

Check the Get IP automatically from ISP check box to get the IP address information directly from the service provider. You can also manually enter the IP address and subnet mask.

Step 5

Check the Enable NAT check box to enable NAT. It is recommended to enable NAT.

Step 6

Enter the user name and password provided by the service provider.


Configure Security Settings

Before you begin

This screen only appears when Advanced Mode is selected at first launch.

Procedure


Step 1

Check the Enable Cisco Recommended Security Settings check box to ensure that all passwords are not shown in plain text. The passwords are encrypted.

Step 2

Click Day 0 Config Summary.

Step 3

To preview the configuration, click CLI Preview. After you preview the configuration, click Finish to complete the Day Zero setup.


GPS Mode Enabled By Default

In IOS XE versions prior to 17.9.1, GPS was enabled by defaut, however, GPS Mode was disabled by default. This required that the user perform an additional modem power-cycle after the router came up in order to use GPS.

Starting with IOS XE 17.9.1, GPS Mode will be enabled by default, and will be set to standalone mode. This will help reduce the cellular link up time.


Note


This only applies to the cellular based GPS. This does not apply to the GPS/GNSS module in IR1800 (DR module), IR8140 (native GPS) and IR8340 (Timing module).

Use the following command to check cellular GPS status:

Router# show cellular <slot> gps
auto-reset Enable reset modem automatically after configuring GPS enable or mode

Cisco WebUI Access Point Name (APN)

IOS XE 17.9.1 added the ability to add, edit, or delete the APN from the Cisco WebUI Interface. The following provides an overview of how to perform this function.


Note


This section only describes new functionality and is not a complete overview of the WebUI.

Adding the APN

From the WebUI, navigate to Configuration > Interface > Cellular. Double click on the cellular interface based upon your platform.

On the Cellular window, click on the Profiles tab.

From the Profiles tab, you can Add, Delete, or Edit the APN. Once the profile is modified, click on Update & Apply to Device at the bottom of the window.

Changing the SIM Slot

By default, the APN is attached to SIM slot 0. You can change the APN to SIM slot 1 by using the WebUI.

From the WebUI, navigate to Configuration > Interface > Cellular. Click on the Advanced radio button on the top of the window.

Click on the Controller tab at the top of the window.

Click on the Primary SIM Slot pull-down and select slot 1. Click on Update & Apply to Device on the bottom of the window.

Summary Screen

Refer to the following image for the Router Summary:

Figure 3. Summary Screen

Procedure


Step 1

Review the settings that you have configured so far to verify they are accurate.

Step 2

If you wish to view the command line entries for your settings, you can click on CLI Preview. The following image shows an example:

Figure 4. CLI Settings

Step 3

Close the CLI Preview window.

Step 4

Click Finish to save all of your settings.