Overview of Cisco Optical Network Controller

Cisco Optical Network Controller Overview

Cisco Optical Network Controller (Cisco ONC) is an SDN Domain Controller for Cisco optical networks. Cisco Optical Network Controller behaves as a Provisioning Network Controller (PNC) and performs these functions.

  • Collects information about the inventory and topology of the managed network.

  • Monitors the physical or virtual topology of the network.

  • Notifies of changes in topology and service changes.

  • Supports the creation and deletion of optical paths.

Cisco Optical Network Controller functions

Cisco Optical Network Controller collects data necessary for optical applications. This data is used to provide abstract network information to higher layer controllers. This abstraction enables centralized control of optical network.

Cisco Optical Network Controller supports several functions.

  • Optical Domain Controller

    Cisco Optical Network Controller behaves as a domain controller for Cisco optical products. The domain controller feeds data into hierarchical controllers. Cisco Optical Network Controller has a North Bound Interface (NBI) based on the TAPI standard which enables it to connect to any hierarchical controller which has a TAPI compliant South Bound Interface (SBI) and provides its functions to the controller.

  • Path Compute Engine (PCE)

    PCE service provides optical path computation to ensure optically valid paths are provisioned within the supplied constraints. PCE uses the latest network status.

  • Model Based Network Abstraction

    Cisco Optical Network Controller supports a standardized TAPI model which enables it to abstract the device level details from the hierarchical controller.


Note


  • For more details on Cisco Optical Site Manager (COSM), see COSM Configuration Guide.

  • For more details on Cisco Optical Network Planner (CONP), see CONP Configuration Guide.

  • For further details about Cisco Optical Network Controller, see the Cisco Optical Network Controller (CONC) Data Sheet .

  • TAPI is disabled by default. You must enable it before onboarding devices.

  • You must not enable TAPI after onboarding devices in Cisco Optical Network Controller. It must be enabled only before onboarding any of the devices.

  • You must enable TAPI after de-boarding all the devices.


Software Requirements

Cisco Optical Network Controller, Release 25.1.x supports these software versions.

Table 1. Software Support
Hardware and Software Version
NCS 1001 Cisco IOS XR Release 7.10.1
NCS 1004 Cisco IOS XR Release 24.3.1
NCS 1014 Cisco IOS XR Releases 25.1.1 and 24.3.1
NCS 1010 Cisco IOS XR Releases 25.1.1 and 24.3.1
Cisco Optical Site Manager

NCS 1000

Cisco IOS XR Releases 25.1.1 and 24.3.1

NCS 2000

Release 25.1.1

Log in to Cisco Optical Network Controller

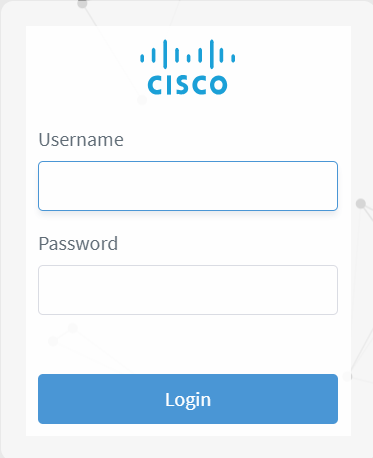
Follow these steps to log into Cisco Optical Network Controller:

Procedure


Step 1

In the browser URL field, enter https://<virtual-ip>:8443/

The browser displays the login page.

Step 2

Enter the username and password.

Step 3

Click Login.

Figure 1. Log into Cisco Optical Network Controller
Screenshot of Log in Page

User access in Cisco Optical Network Controller

Users, Roles, and Permissions

Cisco Optical Network Controller allows you to manage user access and permissions. It adds an additional layer of security and works as a Single Authentication Agent, thus sharing local, Lightweight Directory Access Protocol (LDAP) and Security Assertion Markup Language (SAML) users.

Cisco Optical Network Controller provides different permission levels for user access. See Set up Permission Mapping. To allow access to Cisco Optical Network Controller to a larger group of regular users, set the user authentication through LDAP or SAML Single Sign-On (SSO) protocols. You can use both protocols simultaneously, depending on your environment.

Accessing Settings

The settings button is available on the left navigation bar of Cisco Optical Network Controller.

Figure 2. Settings
Screenshot of Settings

After clicking Settings you see the settings panel.

Figure 3. Settings Options
Screenshot of Settings Options

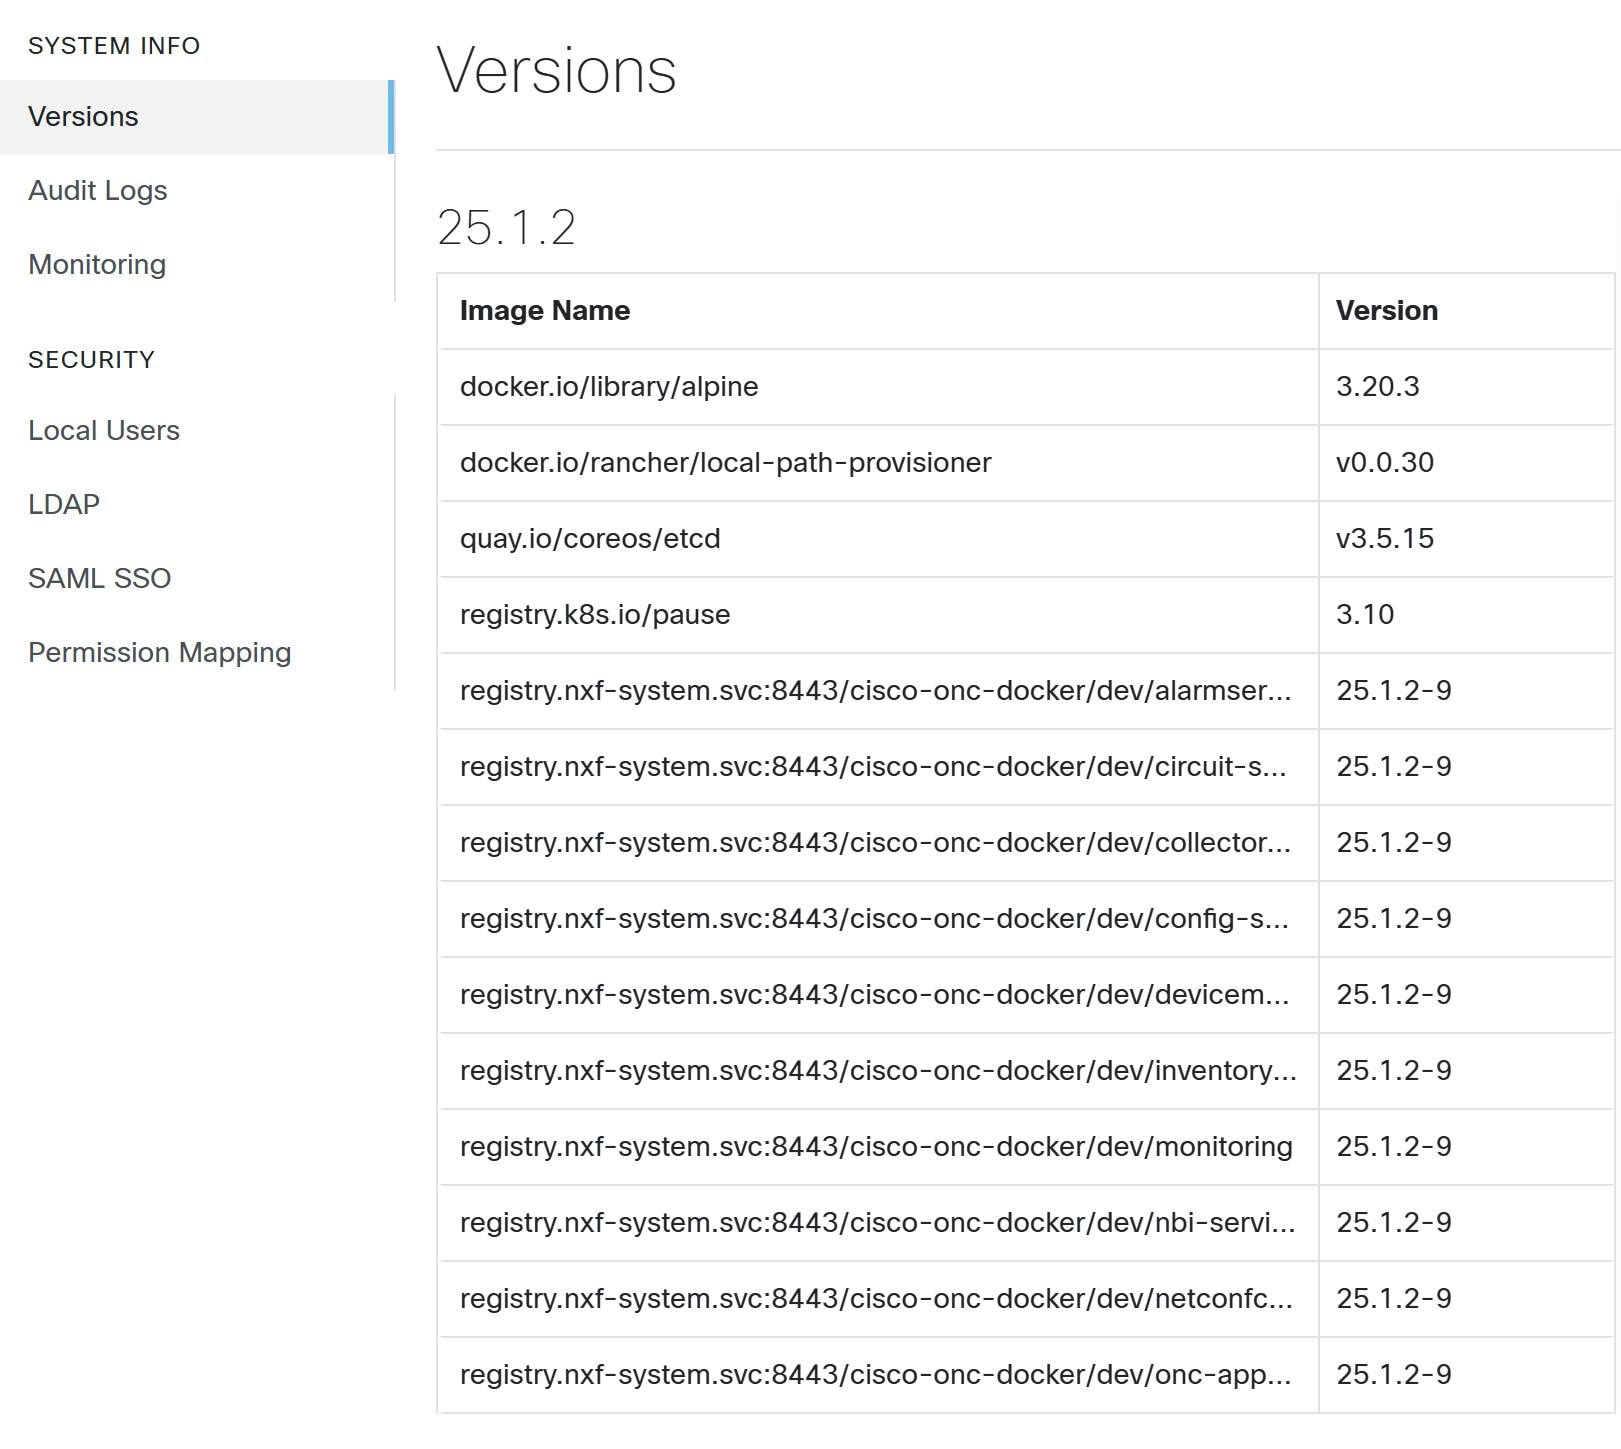
System Info

The System Info section has the information about the latest versions of Cisco Optical Network Controller and the related microservices.

Security

The Security section is for access management and offers several options.

  • Local Users: Display, create, and edit local users through the UI.

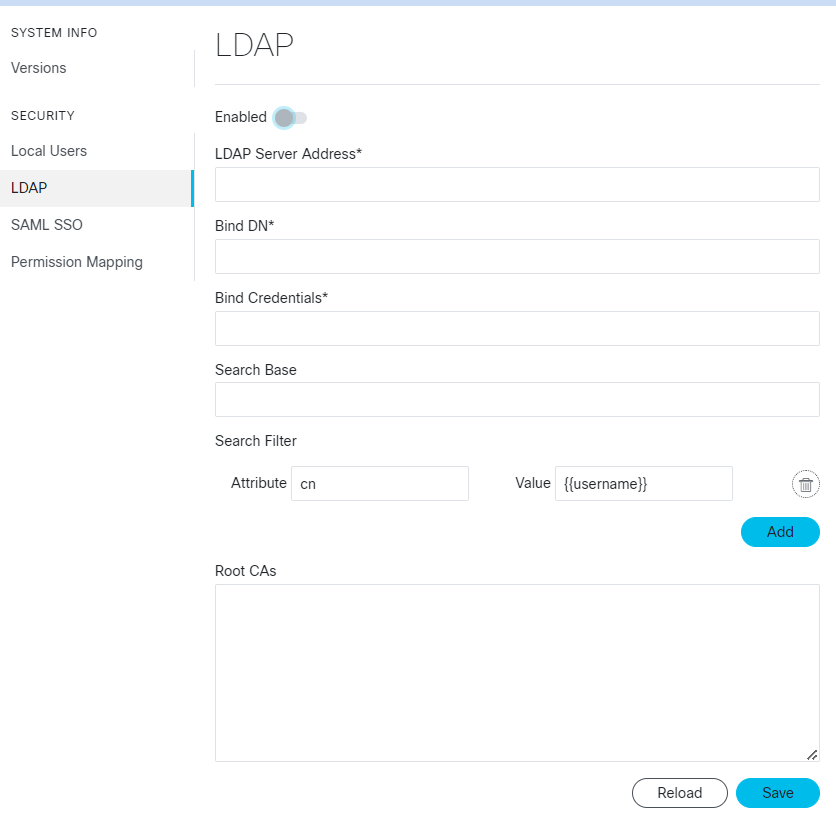
  • LDAP: Set LDAP settings for user authentication.

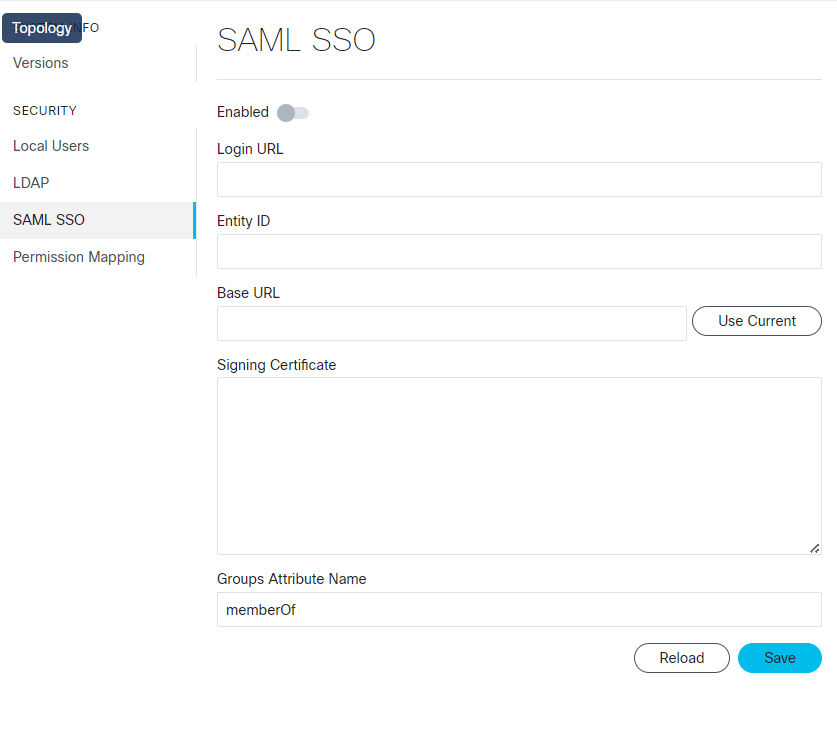
  • SAML SSO: Set SAML Single-Sign-On settings for user authentication.

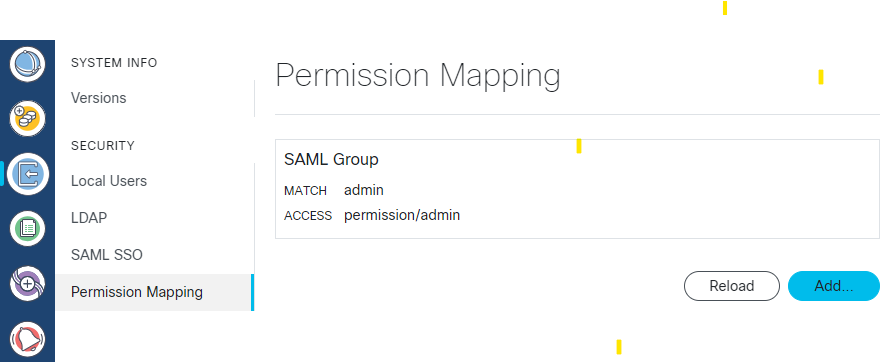
  • Permission Mapping: Handle permission management through the Cisco Policy Management Tool.

Add local users to Cisco Optical Network Controller

Add local user accounts to Cisco Optical Network Controller by completing these steps.

Before you begin

You need administrative user privileges to access Cisco Optical Network Controller.

Procedure


Step 1

From the Cisco Optical Network Controller home page click Settings .

Step 2

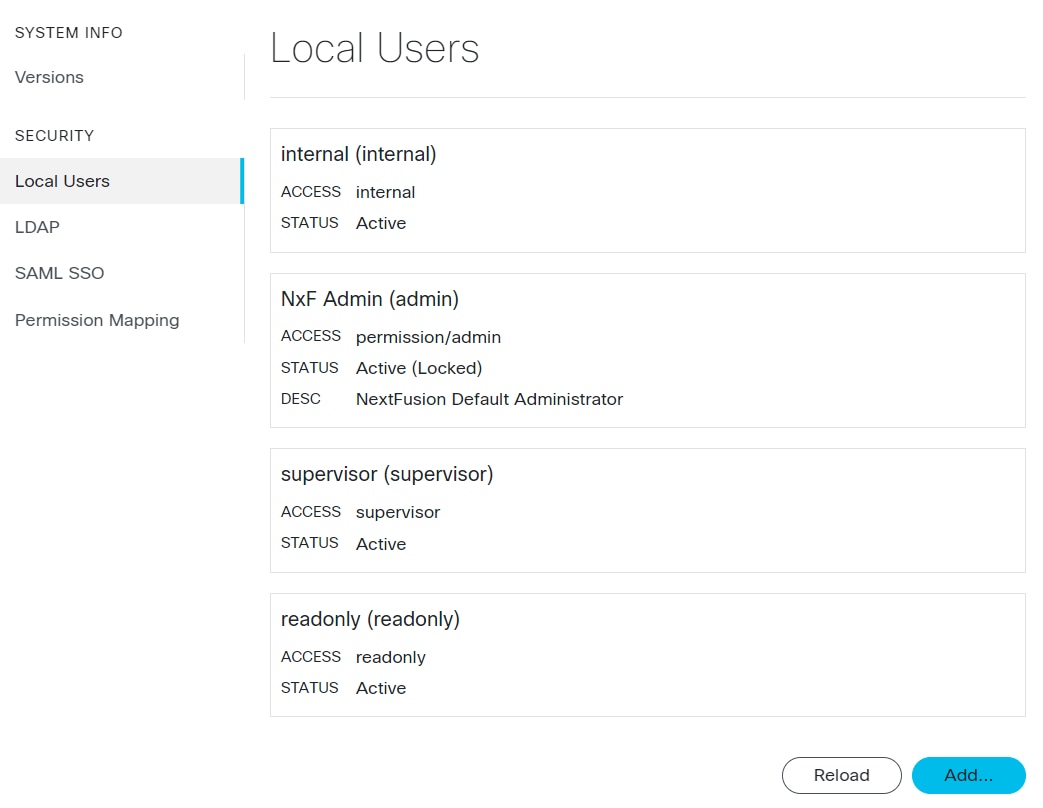
From the panel list, select Local Users and click Add .

Step 3

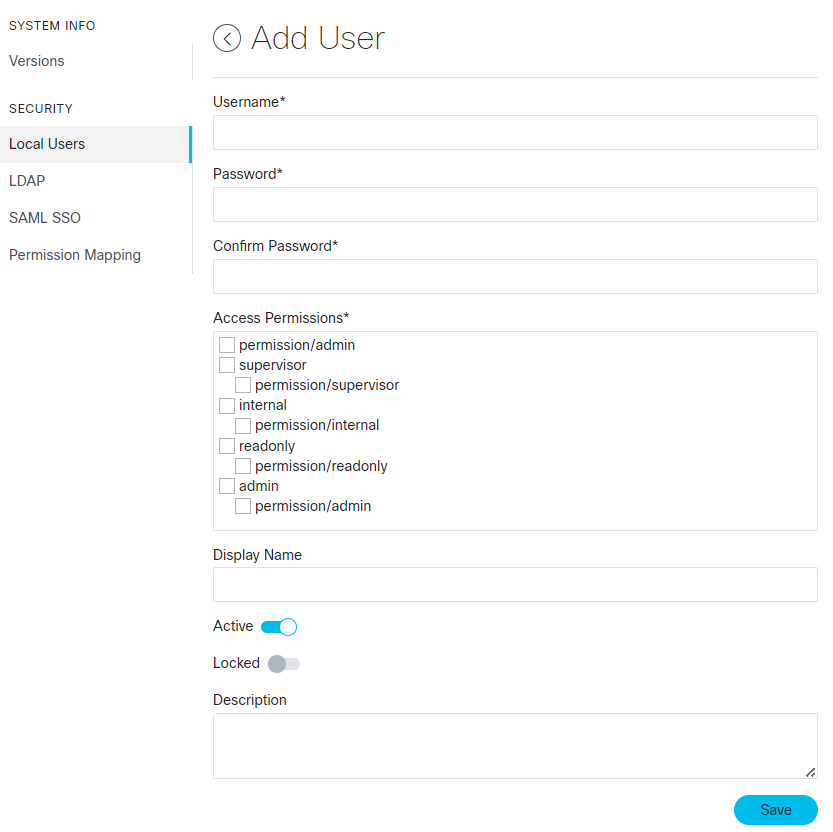
In the Add User screen, enter Username* .

Step 4

Enter and confirm the password.

Step 5

Select the access permissions from the list Access Permissions.

For example permission/<admin>

Description and Display Name are optional fields.

Figure 4. Local Users
Screenshot of Local Users
Figure 5. Add User
Screenshot of Add User

Step 6

Set the user status using radio buttons. The radio buttons are independent of each other, they can both be disabled or enabled at the same time.

  • Active enabled: Allows the user to log into Cisco Optical Network Controller.

  • Active disabled: Forbids the user from logging into Cisco Optical Network Controller.

  • Locked enabled: Prevents deleting the user.

  • Locked disabled: Allows removal of the user

Step 7

Click Save.


Cisco Optical Network Controller successfully saves the new user.

Set up authentication using LDAP

Set up user authentication using the Lightweight Directory Access Protocol (LDAP) on Cisco Optical Network Controller can be performed by following these instructions.

Before you begin

You need administrative user privileges to access Cisco Optical Network Controller.

Procedure


Step 1

From the Cisco Optical Network Controller home page click Settings.

Step 2

Click LDAP.

Figure 6. LDAP
Screenshot of LDAP

Step 3

Click Enabled radio button.

Step 4

Fill in the mandatory fields marked with an asterisk.

LDAP Server Address, Bind DN and Bind Credentialsare mandatory fields. The Search Filter, Search Base and Root CAs are optional fields.

Step 5

Click Save.


You have successfully completed the LDAP authentication setup.

Set up authentication using SAMLv2 SSO

The Security Assertion Markup Language (SAML) SSO allows you to gain single sign-on access based on the SAMLv2 protocol. Only local users can authenticate using SSO user credentials.

Follow these instructions to set up SAML SSO authentication.

Before you begin

Ensure you have administrative user privileges to access Cisco Optical Network Controller.

To set up authentication using SAMLv2 SSO, ensure your SSO server is installed and configured for the application.

Procedure


Step 1

From the Cisco Optical Network Controller UI click Settings and select SAML SSO.

Figure 7. SAML SSO
Screenshot of SAML SSO

Step 2

Click the Enabled radio button.

Step 3

Fill in the fields.

The fields are Login URL, Entity ID, Base URL, Signing Certificate, and Groups Attribute Name.

Step 4

Click Save.


You successfully completed the SAMLv2 SSO authentication setup.

Set up Permission Mapping

Cisco Optical Network Controller offers different permission levels for user access. Specific permissions can be granted to a user or group of users using this option. Follow these steps to set up permission mapping.

Before you begin

You need administrative user privileges to access Cisco Optical Network Controller.

Procedure


Step 1

From the Cisco Optical Network Controller home page click Settings.

Step 2

Select Permission Mapping.

Step 3

Click Add.

Step 4

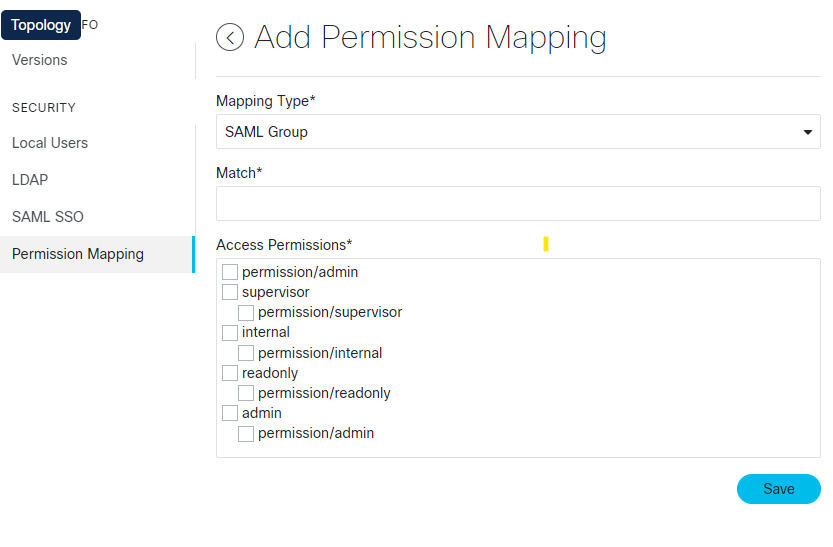
In the Add Permission Mapping panel, choose one Mapping Type from the dropdown menu: SAML User, SAML Group, LDAP User, or LDAP Group.

Step 5

Fill the Match field.

Step 6

Select the appropriate Access Permission.

Step 7

Click Save.

Figure 8. Permission Mapping
Screenshot of Permission Mapping
Figure 9. Add Permission Mapping
Screenshot of Add Permission Mapping

Note


Cisco Optical Network Controller offers different levels of permissions to map.

  • Admin: No restrictions.

  • Supervisor: Supervisors are similar to admin, but have restrictions on user management and log checks.

  • Readonly: Users can check data, but they cannot provision.

  • Internal: To be used in case of any triage or troubleshooting to collect debug logs. We recommend using it only under supervision of the Cisco Technical Assistance Center (TAC).


Manage Certificates in Cisco Optical Network Controller

When a Cisco Optical Network Controller cluster is created, unique self-signed EC/RSA certificates are generated for incoming HTTPS connections to the ingress-proxy. These certificates are intended for initial configuration only. From Cisco Optical Network Controller Release 24.3.1, you can create a Certificate Signing Request (CSR) and upload a signed certificate bundle using the sedo CLI administration tool.

Procedure


Step 1

Create a Certificate Signing Request (CSR) using the sedo CLI tool. You can choose between RSA and EC certificates.

Example:

For RSA:

sedo security certs request rsa --country <Country Name> --organization <Organization Name> <Domain Name or IP>

Example:

For EC:

sedo security certs request ec --country <Country Name> --organization <Organization Name> <Domain Name or IP>

Step 2

Get the CSR Signed by a Certificate Authority (CA).

Submit the generated CSR to a Certificate Authority to obtain a signed certificate.

Step 3

If your CA provides individual certificates instead of certificate chain, create a certificate chain. You must follow the exact order to create the chain. Copy the signed certificate to the CONC virtual machine location /data and create a chain of certificates in output.crt:

Example:

cat /data/signed_certificate.crt /path/to/issuing_ca_certificate.crt /path/to/root_ca_certificate.crt > /data/output.crt

Example:

Replace the paths with the actual paths to your Issuing CA and Root CA certificates. Ensure that the paths are accessible from the VM, and adjust the command as needed based on your specific environment and file paths.

Step 4

Upload the prepared certificate chain to the system:

Example:

sedo security certs upload output.crt

Step 5

Verify the uploaded certificates:

Example:

 sedo security certs list

┌────────────────────────────────────────────────────────────────────────────────────────────────────────────────────────────────────────────────────────────────────────────────────────────────────────────────────────────────────┐

│ Installed Certificates                                                                                                                                                                                                             │

├──────┬──────────────────────────────────────────┬──────────────────────────────────────────┬──────────────────────────────┬──────────────────────────────┬───────────┬─────────┬───────────────────────────────────────────────────┤

│ TYPE │ SUBJECT                                  │ ISSUER                                   │ ISSUED                       │ EXPIRES                      │ DNS SANS  │ IP SANS │ SERIAL NUMBER                                     │

├──────┼──────────────────────────────────────────┼──────────────────────────────────────────┼──────────────────────────────┼──────────────────────────────┼───────────┼─────────┼───────────────────────────────────────────────────┤

│ EC   │ CN=NextFusion,O=Cisco,ST=California,C=US │ CN=NextFusion,O=Cisco,ST=California,C=US │ Mon Nov 18 22:46:18 GMT 2024 │ Thu Nov 18 22:46:18 GMT 2027 │ nxf.local │         │ 1445557328950165706858003484413381754985522282604 │

│ RSA  │ CN=NextFusion,O=Cisco,ST=California,C=US │ CN=NextFusion,O=Cisco,ST=California,C=US │ Mon Nov 18 22:46:18 GMT 2024 │ Thu Nov 18 22:46:18 GMT 2027 │ nxf.local │         │ 1232594841637394522581611101986931324866857045143 │

└──────┴──────────────────────────────────────────┴──────────────────────────────────────────┴──────────────────────────────┴──────────────────────────────┴───────────┴─────────┴───────────────────────────────────────────────────┘

If you are replacing the self-signed certificate with the active output.crt (CA-signed chain certificate), ensure to delete any other certificates if only one certificate is being replaced.

sedo security certs delete ec