Cisco Prime Collaboration Assurance Guide - Standard, 11.x
Bias-Free Language
The documentation set for this product strives to use bias-free language. For the purposes of this documentation set, bias-free is defined as language that does not imply discrimination based on age, disability, gender, racial identity, ethnic identity, sexual orientation, socioeconomic status, and intersectionality. Exceptions may be present in the documentation due to language that is hardcoded in the user interfaces of the product software, language used based on RFP documentation, or language that is used by a referenced third-party product. Learn more about how Cisco is using Inclusive Language.
- Updated:
- January 16, 2017
Chapter: Manage Users
Manage Users
Cisco Prime Collaboration supports creation of user roles. A user can be assigned the Super Administrator role. A Super Administrator can perform tasks that both system administrator and network administrator can perform.
Cisco Prime Collaboration is preconfigured with a default web client administrator user called globaladmin; globaladmin is a superuser who can access both the Cisco Prime Collaboration Assurance user interfaces.
Specify a password for globaladmin when you configure your virtual appliance. You need to use these credentials when you launch the Cisco Prime Collaboration web client for the first time.
Cisco Prime Collaboration Assurance servers support these CLI users: admin and root.
You cannot create CLI users using the web client user interface. CLI users are created during OVA configuration. By default, the username is admin; the password is specified during OVA configuration and is used to log into the CLI to check the application status and perform backup and restore.
 Caution |
Globaladmin and root follow same set of password validation rules, but the rules for admin are different. See the Cisco Prime Collaboration Quick Start Guide for password validation rules for these users.
Globaladmin follows same set of password validation rules, but the rules for admin are different. See the Cisco Prime Collaboration Assurance Install and Upgrade Guide.
- Add, Edit, and Delete a User
- Configure an LDAP Server
- Reset Cisco Prime Collaboration Assurance Passwords
- Change Passwords
- Single Sign-On for Cisco Prime Collaboration
Add, Edit, and Delete a User
You can add a user and assign the predefined static role. The user will have access to the Cisco Prime Collaboration web client only.
If you are logging in for the first time to the Cisco Prime Collaboration Assurance, log in as globaladmin.
You, as a globaladmin, must create other administrators using real user-IDs.
Caution | You must not create a user with the name: globaladmin, pmadmin and admin. |
Configure an LDAP Server
You can configure Cisco Prime Collaboration to connect to a Lightweight Directory Access Protocol (LDAP) server, to access user information stored in the LDAP server.
You must create an LDAP user from the User Management page to enable the user to log in using LDAP credentials To add, edit or delete a user, see Add, Edit, and Delete a User.
Cisco Prime Collaboration supports one primary LDAP server and one backup LDAP server.
| Step 1 | Choose . | ||
| Step 2 | In the LDAP Settings page,
enter values for all the fields. See
Table
LDAP Server Configuration for the field descriptions.
| ||
| Step 3 | Click Test Connection to check the connectivity to the LDAP server. | ||
| Step 4 | Upon successful connection,
click
Apply Settings
and restart Cisco Prime Collaboration Assurance server to log in using LDAP.
To restart Cisco Prime Collaboration Assurance Server, log in as admin user and execute the following commands: application stop cpcm application start cpcm The application stop cpcm command takes 10 minutes to complete execution and application start cpcm takes 10 to 15 minutes to complete execution. |
LDAP Configuration Parameters
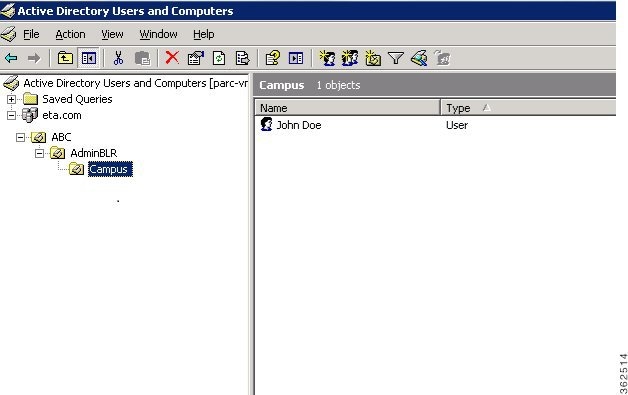
For example, Consider Microsoft Active Directory.
 Note | For a list of LDAP servers supported by Cisco Prime Collaboration 11.6, see Supported Devices for Prime Collaboration Assurance. |
Reset Cisco Prime Collaboration Assurance Passwords
As a super administrator, system administrator or network operator, you can reset the password for other Cisco Prime Collaboration users.
You can reset the Cisco Prime Collaboration Assurance web client globaladmin password using the following procedure.
To reset the Cisco Prime Collaboration Assurance globaladmin password:
| Step 1 | Log in as a root user. |
| Step 2 | Execute the following:
#cd /opt/emms/emsam/bin/
        # ./resetGlobalAdminPassword.sh
|
| Step 3 | Enter a new password for the globaladmin when prompted, and also confirm the new password, when prompted. A message notifies that the globaladmin passwords has been successfully reset. |
Change Passwords
To change your own password, go to , click Change Password, and make necessary changes.
Single Sign-On for Cisco Prime Collaboration
Cisco Prime Collaboration provides users with admin privileges to enable Single Sign-On (SSO) in Cisco Prime Collaboration Assurance using Security Assertion Markup Language (SAML).
Ensure that the following prerequisites are met before you enable SSO:
- Prime Collaboration Provisioning is configured to use Secure
Socket Layer (SSL). SSL needs to be enabled before you enable SSO for
Provisioning. For the steps to enable SSL in Prime Collaboration Provisioning,
see section "Enabling
SSL for Prime Collaboration Provisioning" in the
Cisco Prime Collaboration
Provisioning Guide.
Note
By default, SSL is enabled in Prime Collaboration Assurance application. - At least one LDAP Administrative user exists in the system—by manually creating an LDAP administrative user in Cisco Prime Collaboration Assurance.
- An Identity Provider (IdP)
server that enables you to use SSO to access many other applications from a
single hosted application and a Service Provider. The Service Provider is a
website that hosts the applications.
Following are the supported third-party IdP servers: For the steps to setup an IdP server, see the SAML SSO Deployment Guide for Cisco Unified Communication Applications, Release 11.0(1).
- Download the Identity Provider metadata file from the IdP server and save it in your local system.
To enable Single Sign-On:
| Step 1 | Choose . | ||
| Step 2 | Click
Enable
SSO.
A warning message is displayed stating, Enabling SSO redirects you to the IdP server for authentication from the next login. To access the application, you will need to be authenticated successfully.
| ||
| Step 3 | Click Continue. | ||
| Step 4 | Follow the
steps provided in the SSO wizard to enable Single Sign-On.
|
Troubleshooting and Logs for SSO
- When you are logged out of the Cisco Prime Collaboration server while enabling SSO, we recommend you to close the browser and re-launch the Cisco Prime Collaboration application. Because, though your conference expires in Cisco Prime Collaboration server, the IdP server conference might still be active.
- While enabling SSO, ensure that the hostname for Cisco Prime Collaboration is set and is part of DNS.
- Use the recovery URL- https://<PCserver IP address or host name that is part of DNS>/ssosp/local/login.
- Disable Single Sign-On from CMD Utility.
| Operations can be .. | Values can be .. | ||
| 1-To get the Single Sign-On status | Not applicable | ||
| 2-To get the recovery URL status | Not applicable | ||
| 3-To set the Single Sign-On status | False
|
||
| 4-To set the recovery URL status | True or False |
cpcmconfigsso.sh 3 false
Note | By default, the recovery URL is enabled. If you want to disable it for security reasons, set it as False. |
 Feedback