Getting Started with Cisco MSX SD-WAN Services

This chapter provides information about how to get started with SD-WAN services (Cisco SD-WAN and Meraki SD-WAN) in Cisco MSX.

This chapter contains the following topics:

Logging In to the MSX Portal

You can access the SD-WAN service pack on the MSX Portal, only after installing the MSX platform along with the required service pack. For more information on MSX platform and service pack installation, see Cisco MSX Installation Guide.

To log into the MSX portal, enter the following URL in your web browser address field:

https://<server-ip> or https://<your_portal_fqdn>

In this URL:

< server-ip> is the IP address or fully qualified domain name (FQDN) name of the MSX server:

Depending on your network configuration, the first time your browser connects to the Cisco MSX web server, you may have to update your client browser to trust the security certificate of the server. This ensures the security of the connection between your client and the Cisco MSX web server.

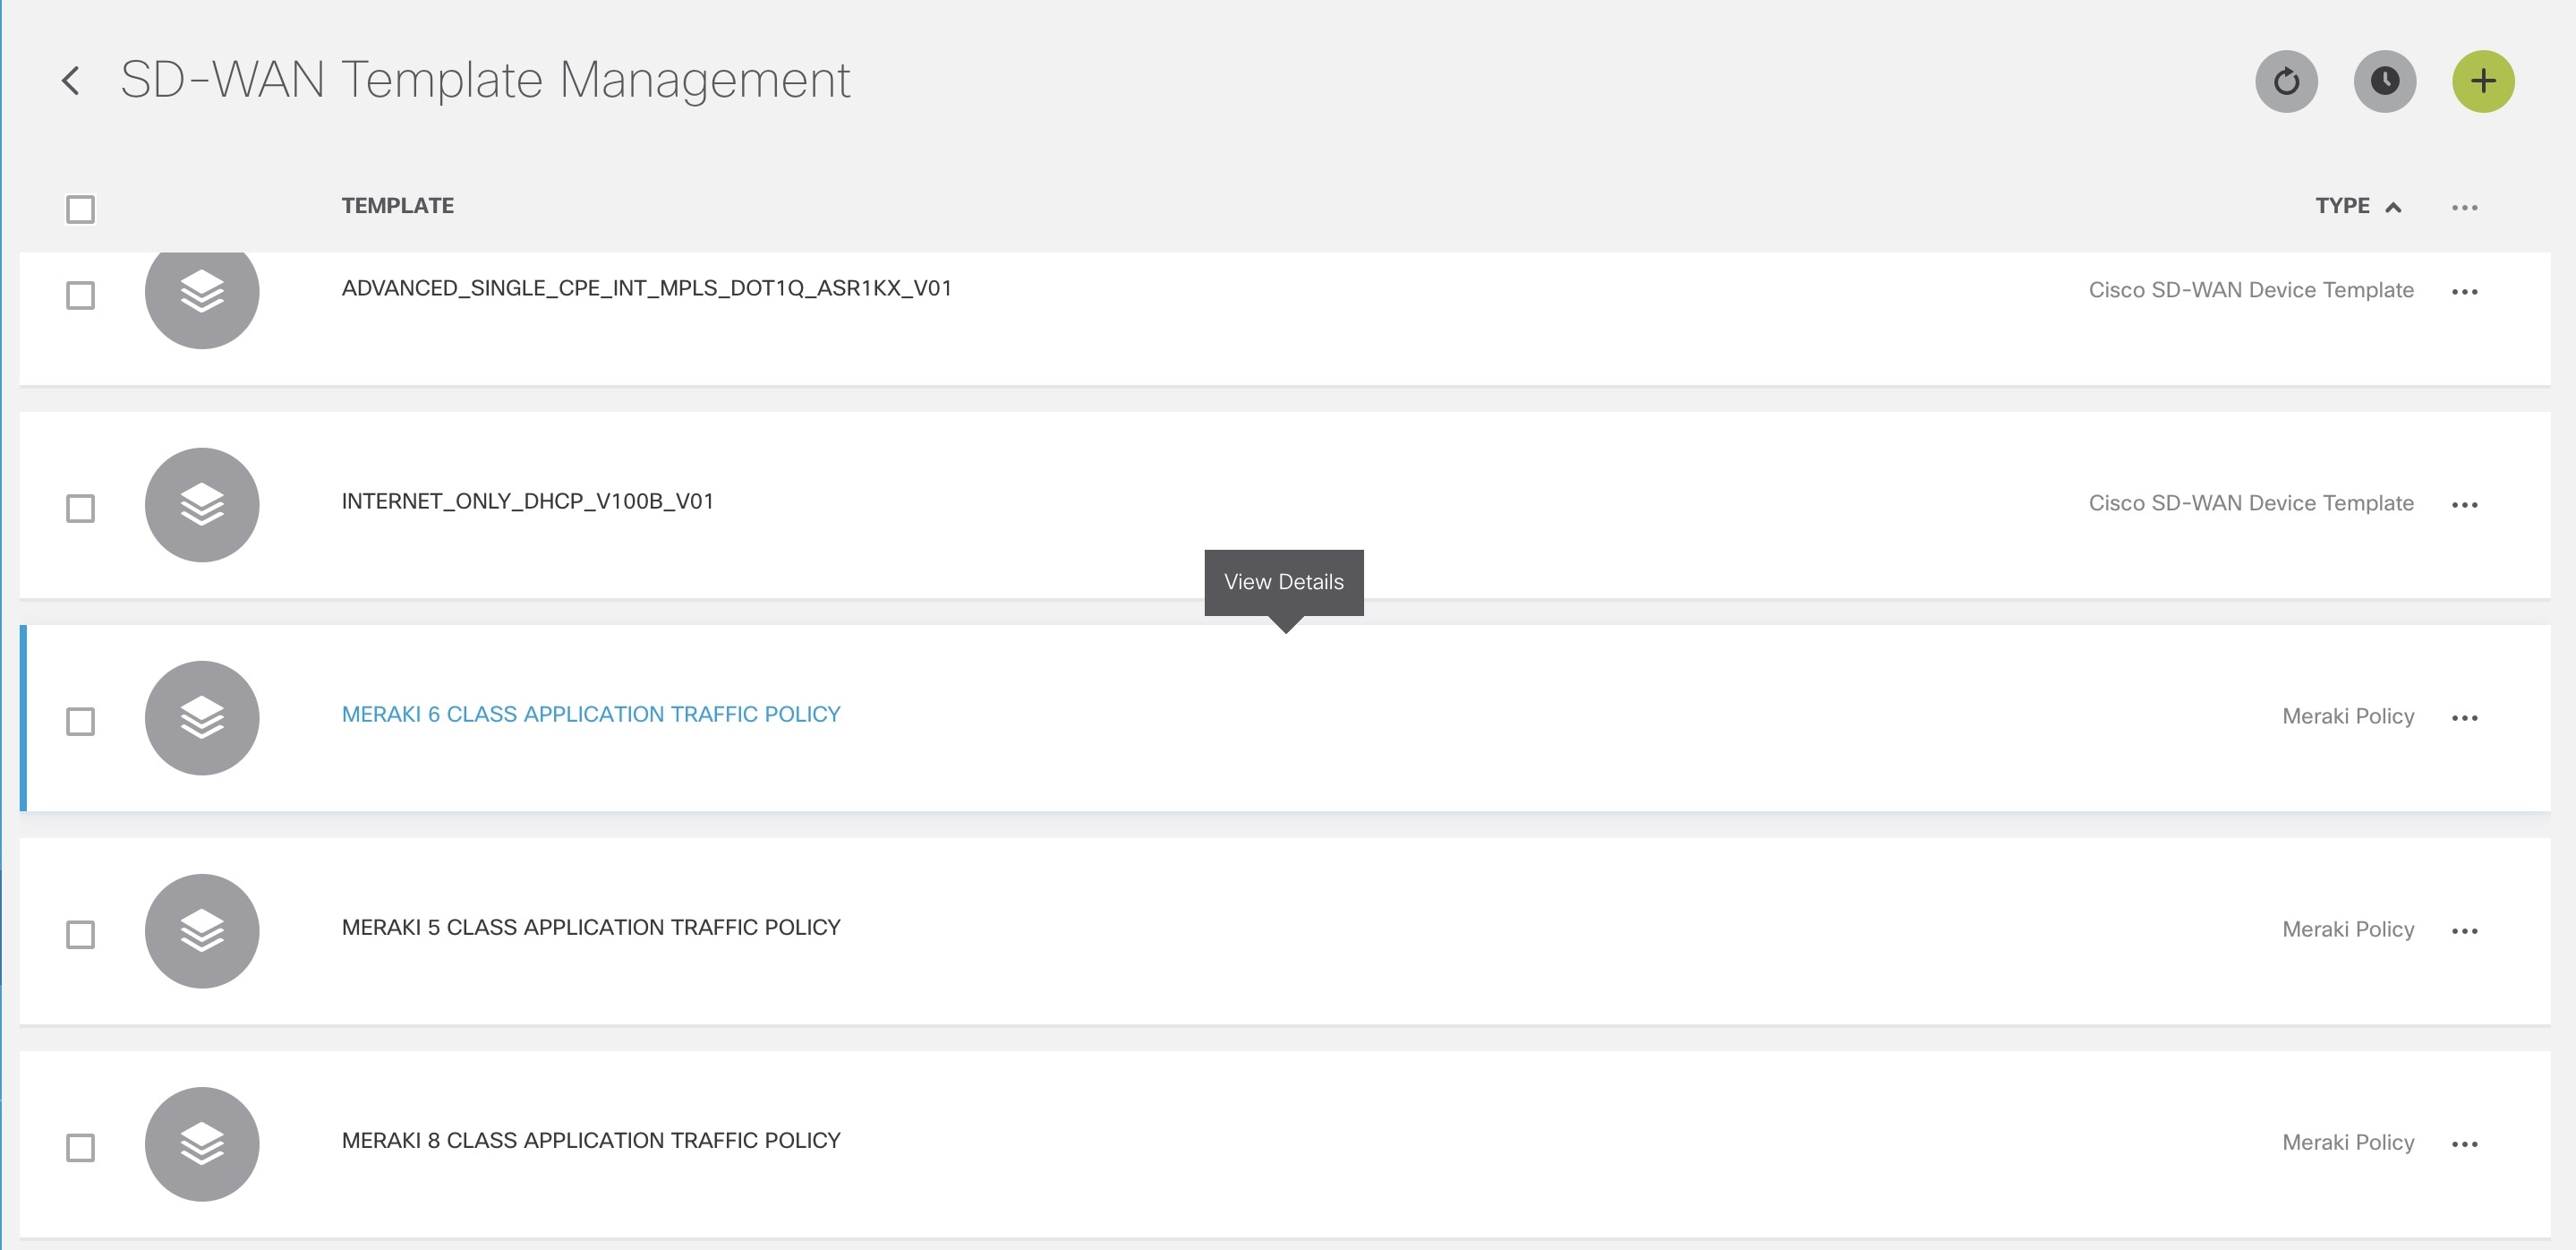
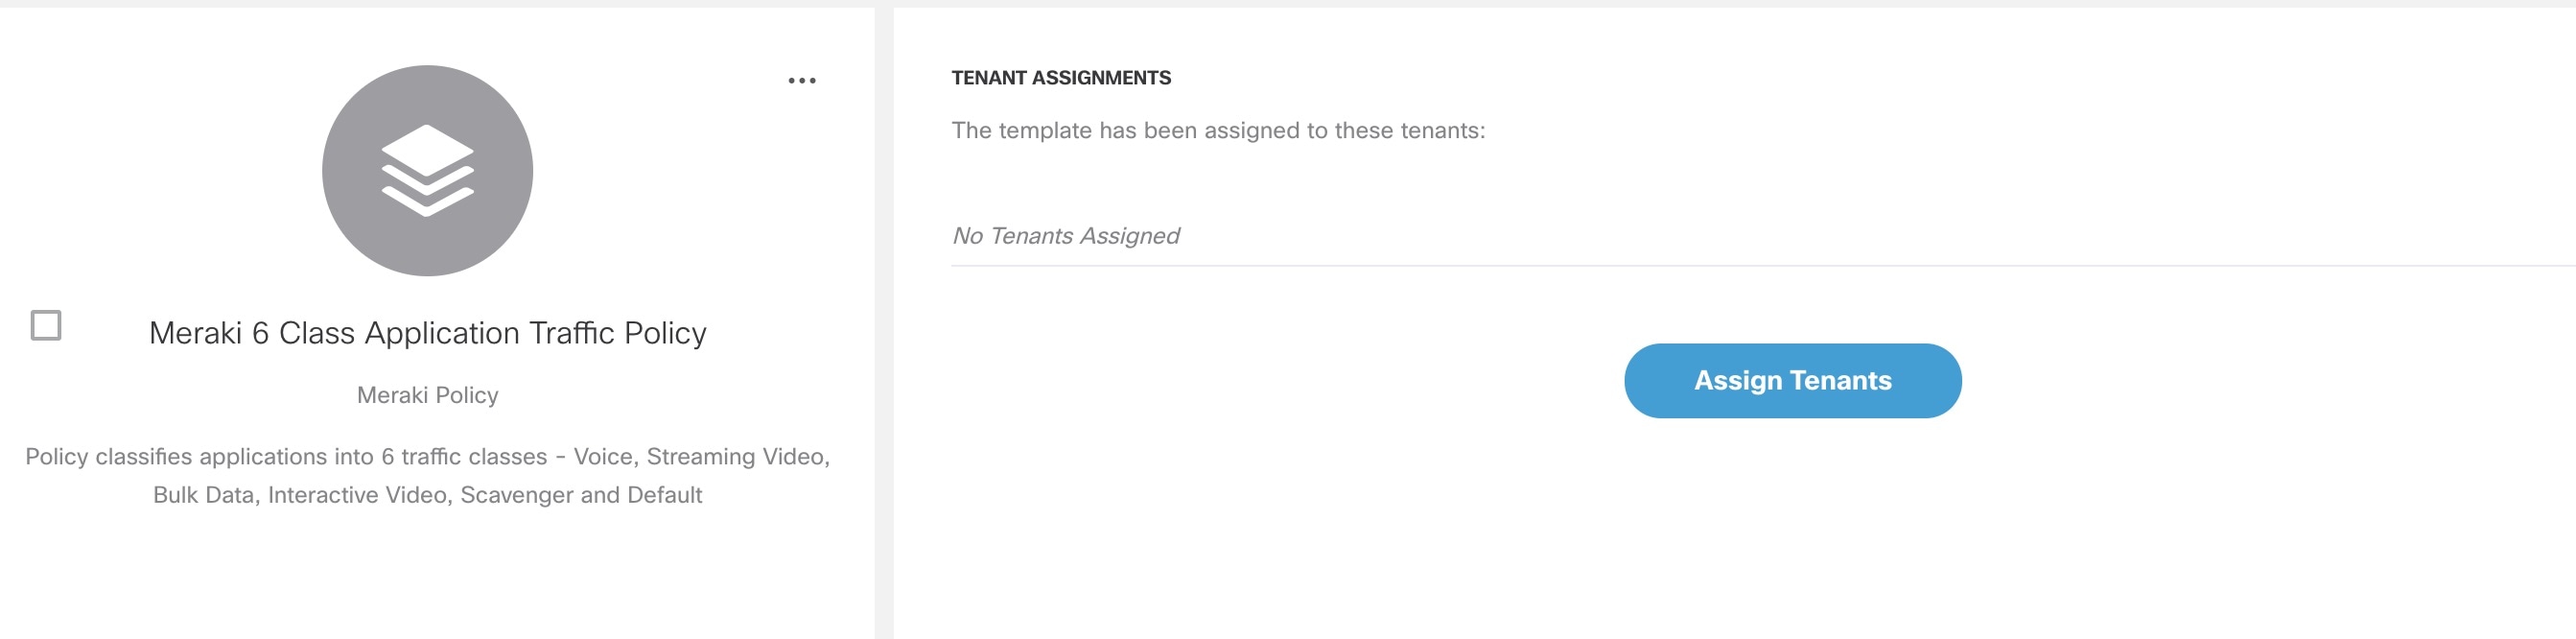
What you can see and do in the user interface is determined by your user account privileges. For information on Cisco MSX users and the actions they can perform, see Managing Roles in Cisco MSX.

Log in to the MSX portal and ensure all Microservices and Service UI information in the Settings main menu > Component Versions displays the latest MSX version.

Configuring Single Sign-On Between MSX and Cisco SD-WAN

Use the procedure below to configure the SSO between MSX and Cisco SD-WAN. Only a user with an administrator role can configure the SSO.

Procedure


Step 1

Upload the MSX metadata to the SD-WAN control plane.

  1. Download the MSX metadata from the following link: https://msx-fqdn/idm/metadata.

  2. Upload the metadata file to the SD-WAN control plane by choosing Settings > Identity Provider Settings. For information on logging in to the Control Plane, see Logging in to the Cisco SD-WAN Control Plane.

  3. Click Edit and then select Enable Identity Provider option.

  4. Copy the contents of the metadata file to the Upload Identity Provider Metadata field.

  5. Click Save.

Step 2

Download the Cisco SD-WAN SAML metadata file:

  1. From the Cisco SD-WAN control plane, choose Administration> Settings >Identify Provider Settings .

  2. Navigate to Click here to download the SAML metadata and save the contents in a file, for example, vmanage_metadata.xml.

Step 3

Save the Cisco SD-WAN metadata file in the following location Kubernetes location:

/data/vms/heapdumps/usermanagementservice/vmanage_metadata.xml

Note 

MSX usermanagement service map the Kubernetes location to the following file:

/data/conf/vmanage_metadata.xml

Step 4

Configure the SSO client (Cisco SD-WAN control plane) details in the MSX portal.

  1. Log in to the Cisco MSX portal.

  2. In the main menu, choose Settings > SSO Configuration.

  3. Expand the Add SSO Client window and click Add . In the Add SSO Client window, specify the following details:

    • Associate Tenants: Specify the tenant for whom the SSO client is configured. If no tenants are specified, MSX assumes that the SSO client configuration is for all the tenants.

      Note 

      Superuser, Tenant Administrator, and Service Provider operator can access the control plane without configuring SSO.

    • Grant Types: From the drop-down, choose the option 'urn:ietf:params:oauth:grant-type:saml2-bearer'.

    • Metadata Source : “file:/data/conf/vmanage_metadata.xml” . Specify the Cisco SD-WAN metadata file location (from step 3) in the Metadata Source field. The metadata source field takes an url or a file path.

      Note 
      Metadata field is displayed only if you have specified a SAML service provider client ID in the Client ID field.
    • Authorities : From the drop-down, choose the option 'ROLE_USER'.

    • Use Session Timeout: Select the option 'No'.

    • Access Token Validity Seconds: Enter the time in seconds for when the token is valid. Enter this value as '1'.

    • Max Tokens Per User: From the drop-down, choose the number of tokens allowed per user.

    • Refresh Token Validity Seconds : Enter the time in seconds.

    • Client ID: Specify the SAML service provider's client ID (Cisco SD-WAN control plane IP address in this case).

    • Client Secret: Specify a string that can be used to guess the password.

      Note 
      This string can be used later for MSX access token.
    • Scopes: From the drop-down, choose 'read'.

    • Auto Approve Scopes: From the drop-down, choose 'read'.

  4. Click Save.

    A new SSO client configuration is added and displayed in the SSO Clients table.

    A green success banner indicates that the above settings are correct. If a red banner is displayed, verify the SAML metadata file location in the Kubernetes location and all the values.

Step 5

Create user roles in the MSX portal. These roles should map to the SD-WAN control plane user roles (Basic, Netadmin, and Operator).

Step 6

(Optional) Disable the SAML security settings.

Perform this step if the SSO configuration is not successful and is not working as expected.

By default, the following SAML security parameters in MSX are set.

  • security.auth.saml.want-authn-request-signed

  • security.auth.saml.encrypt-assertion

For SAML service provider integration with MSX, if the above security parameters are set to True, the auth request from the service provider must be signed, and the assertion sent back by MSX is encrypted.

To turn off this default setting, do the following:

  1. Log in to the Inception VM and access the Kubernetes location:
    ssh -i id_rsa centos@_INCEPTION_FLOATING_IP_ADDRESS_ -t ssh _kubernetes-master-1_IP_ADDRESS
  2. Run the following curl commands:

    • curl --request PUT -g -k -v -H "X-Consul-Token: {consul_acl_master_token}" --data 'false' https://consul.service.consul:8500/v1/kv/userviceconfiguration/defaultapplication/security.auth.saml.want-authn-request-signed
      
    • curl --request PUT -g -k -v -H "X-Consul-Token: {consul_acl_master_token}" --data 'false' https://consul.service.consul:8500/v1/kv/userviceconfiguration/defaultapplication/security.auth.saml.encrypt-assertion
      
    Note 
    Replace <consul_acl_master_token> with your consul acl token value from the passwords.yml file.
  3. Save the consul entries by restarting the usermanagement microservices from the Kubernetes location using the following commands:

    • kubectl -n vms delete -f /etc/kube-manifests/usermanagementservice-3.9.0-dep.yml
      
    • kubectl -n vms create -f /etc/kube-manifests/usermanagementservice-3.9.0-dep.yml
      

Configuring Integrations

Using this procedure, you can enter the configuration details for the Business Support Set (BSS), Representational State Transfer (REST), and outbound API calls.

To configure BSS integrations, do the following:

Procedure


Step 1

Log in to the Cisco MSX portal.

Step 2

From the left hand pane, click Settings.

Step 3

Click the BSS Integrations tile. The BSS Integration page is displayed.

Step 4

Click the Global tab and configure the following fields:

  • Read only User View: Check this option to allow your users to only view the details.

  • Show Profile: Check this option to enable the show profile option for your tenants.

  • Read only Tenant View: Check this option to allow your tenants to only view the details.

Step 5

Click the REST Configuration tab to set the authentication mode details for the integrations system.

  1. Select the Basic or OAuth2 radio button, based on your requirement.

    • If you select the Basic radio button, enter the User ID and Password of the integrations system.

    • If you select the OAuth2 radio button, enter the details such as the Token Request URL, Client ID, Client Secret, HTTP Method, Token Validation Header, Token Header Format, and so on.

  2. Click Save to save the authentication details.

Step 6

Click the Outbound API tab and specify the APIs used for business integrations. Click on the edit button to modify the Allowed Values, Pricing Options, Accessible Services, Service Cancellation, and Notification URL for the APIs.

Step 7

Click Update to save the changes.


Managing SD-WAN Notifications

Before You Begin

You can configure integrations for enabling support for BSS, REST, and outbound API calls. For more information, see Configuring Integrations .

Perform this procedure to enable notifications:

Procedure


Step 1

Log in to the Cisco MSX portal.

Step 2

From the left hand pane, choose Settings > Service Configurations > SD-WAN > Notifications.

The Provider and End Users tab displays the events that are related to service provider and end users. Using the Category drop-down list, you can further categorize events as End Users, Services, and Devices.

Step 3

To edit the notification settings, click the Edit icon adjacent to the Category column.

For an event, you can edit the template name, the communication mode, and enable or disable notifications for a specific event.

Step 4

Click Save.

The following table lists the Cisco MSX notifications and the corresponding recipients for events:

Table 1. Notifications and Recipients

Notifications

Recipients

SD-WAN control plane status changed

REST clients

SD-WAN control plane operation notifies user

End users

SD-WAN control plane operation notifies tenant

Tenants

SD-WAN control plane operation notifies provider

Provider

SD-WAN site deletion notifies user

End users

SD-WAN site deletion notifies tenant

Tenants

SD-WAN site deletion notifies provider

Provider

SD-WAN site creation notifies user

End users

SD-WAN site creation notifies tenant

Tenants

SD-WAN site creation notifies provider

Provider

SD-WAN site status changed

REST clients

The following are examples of control plane and data plane notifications:

  • Control Plane Message

    • Dear customer, the requested changes on your SD-WAN service have been applied.

    • <Control plane URL>

    • <Control plane Org>

    • <User ID>

    • <User name>

    • Best regards, Managed Services Accelerator powered by Cisco

  • Data Plane Message

    • Dear customer, the requested changes on your service have been applied.

    • <Site ID>

    • <Site Name>

    • <Chassis Number>

    • <User id>

    • <User name>

    • <Tenant id>

    • <Tenant name>

    • <Tenant email>

    • Best regards, Managed Services Accelerator powered by Cisco


Defining Terms and Conditions

Cisco MSX allows you to define and maintain the terms of a service for acceptance by a consumer while purchasing a service.

Procedure


Step 1

Log in to the Cisco MSX portal using your credentials.

Step 2

From the left hand pane, choose Settings > Service Configurations > SD-WAN > Terms & Conditions.

Step 3

Enter the details. This information will be displayed while a consumer is placing an order for a service. The terms and conditions are specifically defined specific to an offer in a service.

The Offers drop-down list displays the service pack offer selected in step 2.

Step 4

Click Save.


Configuring Password Policies

In MSX, as an administrator user, you can define various settings for the password policies, such as password strength, password minimum/maximum length, password history, and password aging.

By default, there are two default policies available on MSX. An Administrator user can modify these existing policies or create new policies. The default policies that are created at the deployment time are:

  • ppolicy_default - Applicable for a consumer user

  • ppolicy_strong - Applicable for administrator accounts

For more information on the password policies and to modify the default password policies, see Cisco Managed Services Accelerator (MSX) Platform User Guide.

Setting Up Cisco SD-WAN Specific Configurations in MSX

Configure the following for Cisco SD-WAN setup:

Disabling MSX-Managed Proxy

MSX allows you to connect to the control plane using an MSX-managed proxy, in which case you do not have to add the tenant's IP addresses to the allowed list. This functionality is enabled by default and can be disabled using an API.

To disable this functionality, set the enableVmanageProxy metadata to false using the PUT /sdwanservice/v1/featureflag/enable/vmanageproxy in the SDWAN Service API.

For more information on this API, refer the Swagger documentation that can be accessed from Account Settings > Swagger > SDWAN Microservice > feature-flag-controller section.


Note

Note: Only users with the following permissions can execute the vmanageproxy API.

  • Integration Configuration (Manage) permission. This permission can be found under the Integrations, Settings, and Logs category.

  • SD-WAN Control Plane (View) permission. This permission can be found under the SD-WAN Service category.


Configuring Cisco SD-WAN Orchestrator Settings

Before creating a control plane for a tenant, you must first provide the SD-WAN Orchestration settings in the MSX Portal.

To configure orchestrator settings for Cisco SD-WAN:

Before you begin

Request for the SD-WAN Orchestration stack URL from your Cisco account representative using your Service Provider's Smart Account details.

Procedure


Step 1

Log in to the MSX Portal .

Step 2

From the main menu, click Settings > Service Configurations > SD-WAN > Settings > Cisco SD-WAN Orchestration Settings tile, to access the orchestrator settings for Cisco SD-WAN.

Step 3

Specify the details of the SD-WAN orchestration stack, such as orchestrator URL, username, password, and status tag.

The Status Tag field accepts two values—Proof-of-concept (POC), and production. So, you can add the status tag with one of these values. This status tag applies the relevant label within the vOrchestrator.

Note 

By default, the vOrch tagged as POC expires in 90 days. So, you can extend this timeline from the vOrchestrator.

Step 4

Click Save.

Figure 1. SD-WAN Orchestrator Settings

Configuring Serial Number Format for an ENCS Device

Cisco SD-WAN coordinates with the SD-Branch service pack to deploy virtual vEdge on ENCS. To configure the ENCS device serial number format for the vEdge cloud deployments, do the following:

Procedure


Step 1

Log in to the Cisco MSX portal using your credentials.

Step 2

From the left hand pane, choose Settings > Service Configurations > SD-Branch > Settings > SD-Branch Settings.

Step 3

Choose device serial number format. Specify device serial number format to be used during the Add Site flow:

  • Cisco: Applies Cisco format for device serial number

  • Custom: Preloads Cisco’s regex. You can edit this regex or replace with a new one

  • None: Applies no specific format

Step 4

Specify the Site Contact Information and Terms and Conditions for the service.

Step 5

Click Submit.


Configuring Subnet Pools

Use the following procedure for the vEdge Cloud to configure subnet pool for IPSec Tunnel for secure communication between MSX and NFVIS.

Procedure


Step 1

Log in to the Cisco MSX portal using your credentials.

Step 2

From the left hand pane, choose Settings > Service Configurations > SD-Branch > Settings > SD-Branch > Settings > Subnet Pools.

Step 3

Specify the following for the IPsec tunnel:

  • Specify the time for which the IP Subnet Allocation is reserved.

  • Add IP subnet pool for ENCS NFVIS internal management to allow users to assign IP for the ENCS from this pool.

Step 4

Click Submit.


Setting Up Meraki SD-WAN-Specific Configurations in MSX

Use this section to configure initial settings in the MSX Portal after installing the Meraki SD-WAN.

Generating API Access Key for Meraki

After you get access to Meraki, use the following procedure to get API access key for Meraki.

Before you begin

  • Enable Meraki Service: Meraki service is not available in Cisco MSX by default. To enable Meraki in Cisco MSX, contact your Cisco account representative.

  • Obtain the Meraki Organization ID: When the Meraki organization is setup for the Tenant, the ID for organization is shared.

Procedure


Step 1

Log in to Meraki Dashboard with your user name and password .

Step 2

Choose User > My Profile.

Step 3

Click Generate New API Access Key button to generate a new key.

Note 
  • Only two access keys are permitted.

  • If you do not see the Generate New API Access button, it means you already have an API access key. Revoke the existing key and then generate a new key. Before you revoke an existing key, get the consent of the user who had generated the previous key.

Figure 2. Revoking API Access Key

Adding MSX IP Address to the Meraki Allowed List

To ensure seamless connectivity between Meraki and MSX, ensure MSX IP address are added to the allowed list in Meraki. Do the following

Procedure


Step 1

Log in to the Cisco Meraki Dashboard.

Step 2

Go to the Organization Settings.

Step 3

In the Login IP ranges section:

  1. Enable the option to add IP addresses to the allowed list.

  2. Enter the address ranges.


Managing Meraki Traffic Class Access for Tenants

Use this procedure to assign Meraki application relevancy templates to tenant users. While defining traffic policies for Meraki SD-WAN, the tenant users will see only the templates that they were given access to.

Procedure


Step 1

Log in to the Cisco MSX Portal using your credentials.

Step 2

From the left hand pane, choose Settings > Template Management.

Step 3

Select the SD-WAN tile to see the list of available templates on the Template Management screen. The SD-WAN Template Management screen lists templates that are currently available in the MSX library.

Figure 3.
Step 4

Select one or more Meraki Policy based template type and click (…) > Assign Tenants option to display the wizard. You can also expand the template, and click Assign Tenants option to display the wizard.

Figure 4. Assign Tenants Option After Expanding the Template
Step 5

Choose one or more tenants from the drop-down list and click > to start the export process.

Step 6

Click Confirm Assignment to save and apply the changes.

Step 7

Click View Template Activity option to track the progress in the Template Activity screen.