- Preface
- Product Overview
- Graphical User Interface
- Device and Subdevice Manager
- User Account Manager
- Configuration and Image Update Jobs Manager
- Groups
- Namespace Manager
- Query Manager
- Data Manager
- Directory Manager
- Parameter Manager
- Templates
- Security Manager
- Log Manager
- Service Manager
- Bulk Data Manager
- Email Manager
- Image Service
- Upgrade or Downgrade Cisco IOS Image
- Backup and Restore
- PIX Firewall Device Support
- IMGW Device Module Development Toolkit
- Troubleshooting
- Software Licenses and Acknowledgements
Log Manager
To access Log management tasks, log into the system (see "Logging In" section on page 2-1). Then, from the Home page, click the Tools tab. The Tools page appears.
From the Tools Page, click Log Manager. The Log Manager page appears showing:
•![]() View Logs
View Logs
•![]() Clear Logs
Clear Logs
•![]() Export Logs
Export Logs
•![]() Change Log Level
Change Log Level
Viewing Log Files
Step 1 ![]() From the Log Manager page, click View Logs.
From the Log Manager page, click View Logs.
The View Log Files dialog box appears (see Figure 14-1).
Figure 14-1 Selecting Log File to View

Step 2 ![]() Select the log file you want to view.
Select the log file you want to view.
Table 14-1 shows valid values for these fields.
Step 3 ![]() For additional attributes related to viewing Event Logs, click Advanced.
For additional attributes related to viewing Event Logs, click Advanced.
The View Event Log window appears (see Figure 14-2).
Figure 14-2 Event Log Attributes
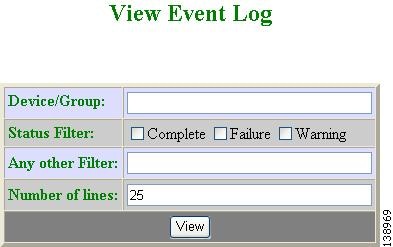
Step 4 ![]() Enter the attributes you want to view a specific Event Log, then click View.
Enter the attributes you want to view a specific Event Log, then click View.
Step 5 ![]() In the main View Log Files window (see Figure 14-1), set the number lines you want to display.
In the main View Log Files window (see Figure 14-1), set the number lines you want to display.
Step 6 ![]() To limit the report to display only specific entries, set a case-sensitive keyword filter, or leave blank.
To limit the report to display only specific entries, set a case-sensitive keyword filter, or leave blank.
Step 7 ![]() Click View.
Click View.
A report displays.
Clearing Logs
Step 1 ![]() From the Log Manager page, click Clear Logs.
From the Log Manager page, click Clear Logs.
The Clear Log Files dialog box appears (see Figure 14-1).
Figure 14-3 Clear Logs
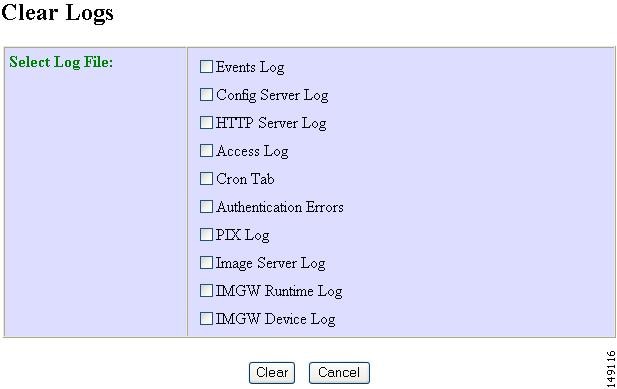
Step 2 ![]() Check the log files you want to clear.
Check the log files you want to clear.
Step 3 ![]() To cancel this task, click Cancel.
To cancel this task, click Cancel.
Step 4 ![]() To clear the selected log files, click Clear.
To clear the selected log files, click Clear.
Exporting Logs
Step 1 ![]() From the Log Manager page, click Export Logs.
From the Log Manager page, click Export Logs.
The Export Log Files dialog box appears (see Figure 14-4).
Figure 14-4 Export Logs
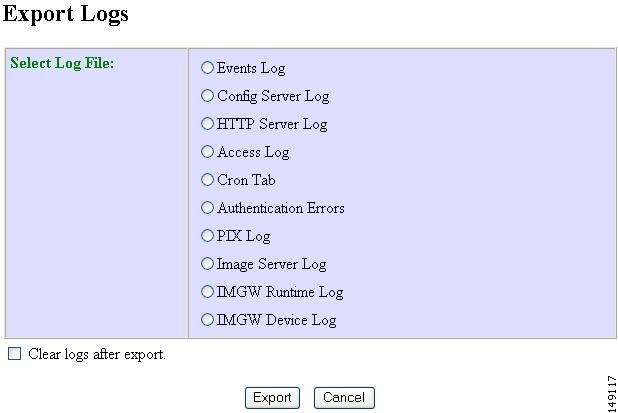
Step 2 ![]() Check the log files you want to export.
Check the log files you want to export.
Step 3 ![]() To clear logs after export, check the check box.
To clear logs after export, check the check box.
Step 4 ![]() To cancel this task, click Cancel.
To cancel this task, click Cancel.
Step 5 ![]() To export the selected log files, click Export.
To export the selected log files, click Export.
Changing Log Level
Step 1 ![]() From the Log Manager page, click Change Log Level.
From the Log Manager page, click Change Log Level.
The Change Log Level dialog box appears (see Figure 14-5):
Figure 14-5 Selecting Log Level
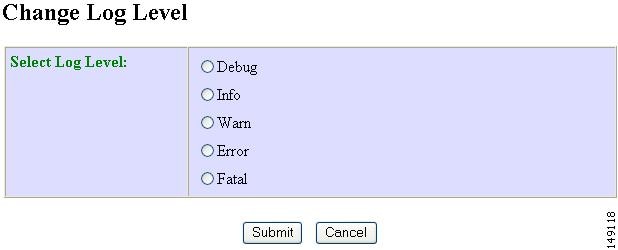
Step 2 ![]() Select the desired log level by clicking the appropriate radio button, then click Submit.
Select the desired log level by clicking the appropriate radio button, then click Submit.
 Feedback