Install and access Cisco Edge Intelligence agents

Download Cisco Edge Intelligence software

Two Cisco Edge Intelligence software packages are available on software.cisco.com, based on how you want to install the agent on your devices:

  • Using the IOx Local Manager.

  • Using the Cisco Catalyst SD-WAN Manager.

Install the Cisco Edge Intelligence agent using IOx Local Manager

Before you begin

Download the Cisco Edge Intelligence software package.

Procedure


Step 1

Log in to the network device Web UI.

Step 2

From the menu, choose Configuration > Services > IOx.

Step 3

Log in to the Cisco IOx Local Manager.

Step 4

In the Applications tab, click Add New.

Step 5

In the Deploy Application dialog box:

  1. In the Application Id field, add a name for the Cisco Edge Intelligence application. This field supports only alphanumeric characters and the underscore character, and accepts up to 40 characters.

  2. Click Choose File, and select the downloaded software package.

After the upload is complete, the Applications tab displays the Cisco Edge Intelligence application listing.

Step 6

On the Cisco Edge Intelligence listing, click Activate.

Step 7

The Resources page is displayed because a peripheral configuration is required for application activation.

  1. To edit the peripheral configuration in the Peripheral Configuration area, click Edit.

  2. The following details are automatically populated:

    1. Device Type: Serial (non-editable)

    2. Name: A name is auto-populated, and you can edit the value.

    3. Label: A label is auto-populated, and you can edit the value.

  3. Click OK. The Peripheral Configuration area now displays the status Present.

    Note


    Make sure to check Network and Resource Profile configuration details are available under Resources tab.

Step 8

To activate the Cisco Edge Intelligence application, click Activate App at the top of the Resources page.


Static NAT configuration

To allow inbound traffic to reach the Cisco Edge Intelligence UI or API, you must configure static NAT for a TCP service.

Configuring static NAT offers the following advantages:

  • Control access to internal resources by allowing only designated services to be exposed to the outside network.

  • The service is always accessible through the same public IP address and port, ensuring consistency and simplified access.

Static NAT configuration includes the following steps:

  1. Get the inside IP address of the Cisco Edge Intelligence application. This is an IPv4 address.

  2. Configure static NAT using the network device's GUI or CLI.

Get Cisco Edge Intelligence (container service) IP address for NAT configuration

Before you begin

The Cisco Edge Intelligence application must be active.

Procedure

Step 1

From the device GUI menu, choose Configuration > Services > IOx.

Step 2

In the Applications page, on the Cisco Edge Intelligence Local Manager listing, click Manage.

Step 3

In the App-info tab, in the Network information area, click eth0.

Step 4

The details of the interface configuration are displayed, including the IPv4 address. Copy the IPv4 address for static NAT configuration.


Configure static NAT using device GUI

Procedure

Step 1

From the menu, choose Configuration > Security > NAT.

Step 2

Click Add.

Step 3

From the Static Mode drop-down menu, choose TCP.

Step 4

For NAT direction, choose Inside.

Step 5

Enter the local IP.

Step 6

In the Local Port field, enter 8008.

Step 7

In the Global IP field, enter the external IP address that you want to use.

Step 8

In the Global Port field, enter 8008.

Step 9

Click Apply to Device.


Configure static NAT using device CLI

To configure static NAT for a TCP service, use the following command:
ip nat inside source static tcp inside-local-ip-address inside-port-number inside-global-ip-address outside-port-number extendable

The components of the command are:

  • inside-local-ip-address: IPv4 address of the Cisco Edge Intelligence application.

  • inside-port-number: Cisco Edge Intelligence application uses port 8008.

  • inside-global-ip-address: Translated (public or external-facing) IP address.

  • outside-port-number: The external port that maps to internal service.

  • extendable: Defines that multiple NAT entries can be created for same internal IP.

Procedure

Step 1

Define an interface with an IP address and as a NAT inside interface, using the ip nat inside command.


Router#configure terminal
Router(config)#eth0 <number> 
Router(config-if)#ip address <inside-local-IP-address>
Router(config-if)#ip nat inside 
Router(config-if)#exit

Step 2

Define an interface with an IP address and as a NAT outside interface, using the ip nat outside command.


Router#configure terminal
Router(config)##eth0 <number> 
Router(config-if)#ip address <outside-global-IP-address>
Router(config-if)#ip nat outside
Router(config-if)#exit

Step 3

Configure static NAT for a TCP service with the following command.

Router#configure terminal
Router(config)#ip nat inside source static tcp <inside-local-ip-address> <inside-port-number> <inside-global-ip-address> <outside-port-number> extendable

Note


Make sure to enter enable command before you configure terminal.


Secure remote access to assets using Cisco Secure Endpoint Access

With Secure Equipment Access (SEA), Cisco is solving the challenges of deploying secure remote access to operational assets at scale. It embeds the Zero Trust Network Access (ZTNA) gateway function into Cisco industrial switches and routers, making secure remote access capabilities very simple to deploy at scale.

Cisco Secure Equipment Access comes with a cloud portal that centralizes gateway management and configuration of remote access policies.

To know more about how to get access to a remote session, see the Request access to a remote session.


Note


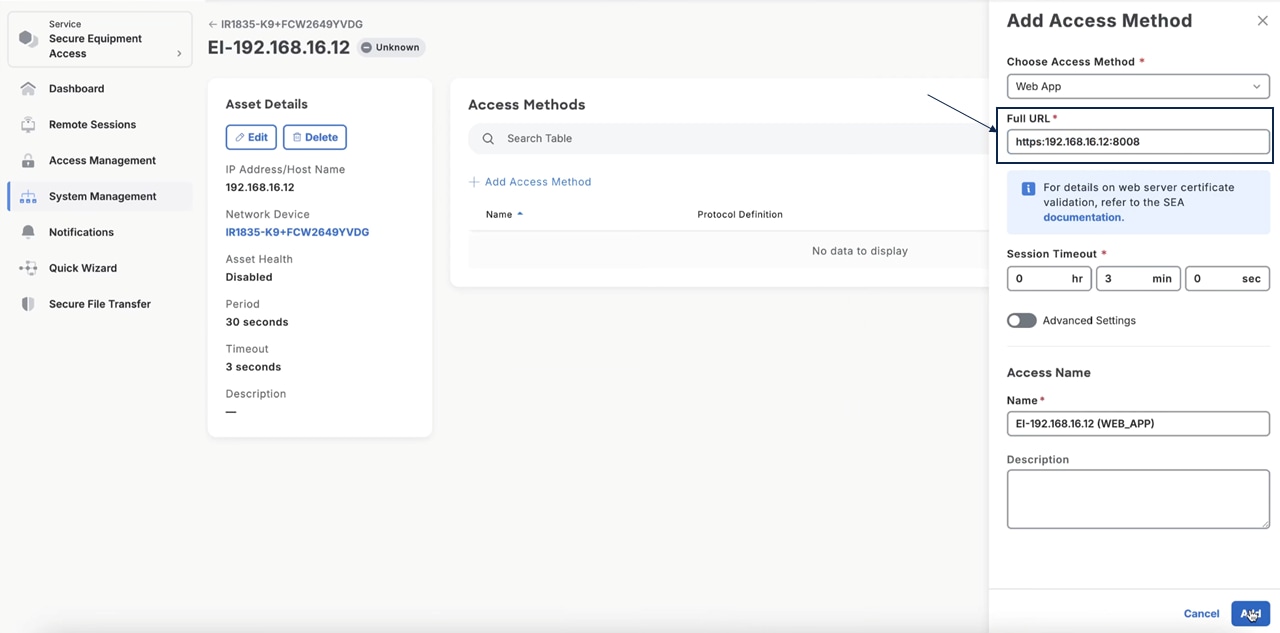
While creating Access Method, make sure to enter the appropriate IP address with 8008-port number on Full URL field.


Log in to Cisco Edge Intelligence Local Manager

Procedure


Step 1

From the network device menu, choose Configuration > Services > IOx.

Step 2

On the Cisco Edge Intelligence application listing, click Start.

Note


Make sure that all field values are available and highlighted with green.

Step 3

From a different browser, launch the Cisco Edge Intelligence Local Manager, using port 8008. The login url is https://<device ip>:8008/login

Step 4

At first login, the login credentials are:

  • Username: admin

  • Password: eiUser@123

Note


All Cisco Edge Intelligence login passwords, default or otherwise, expire in 30 days and must be updated.

Step 5

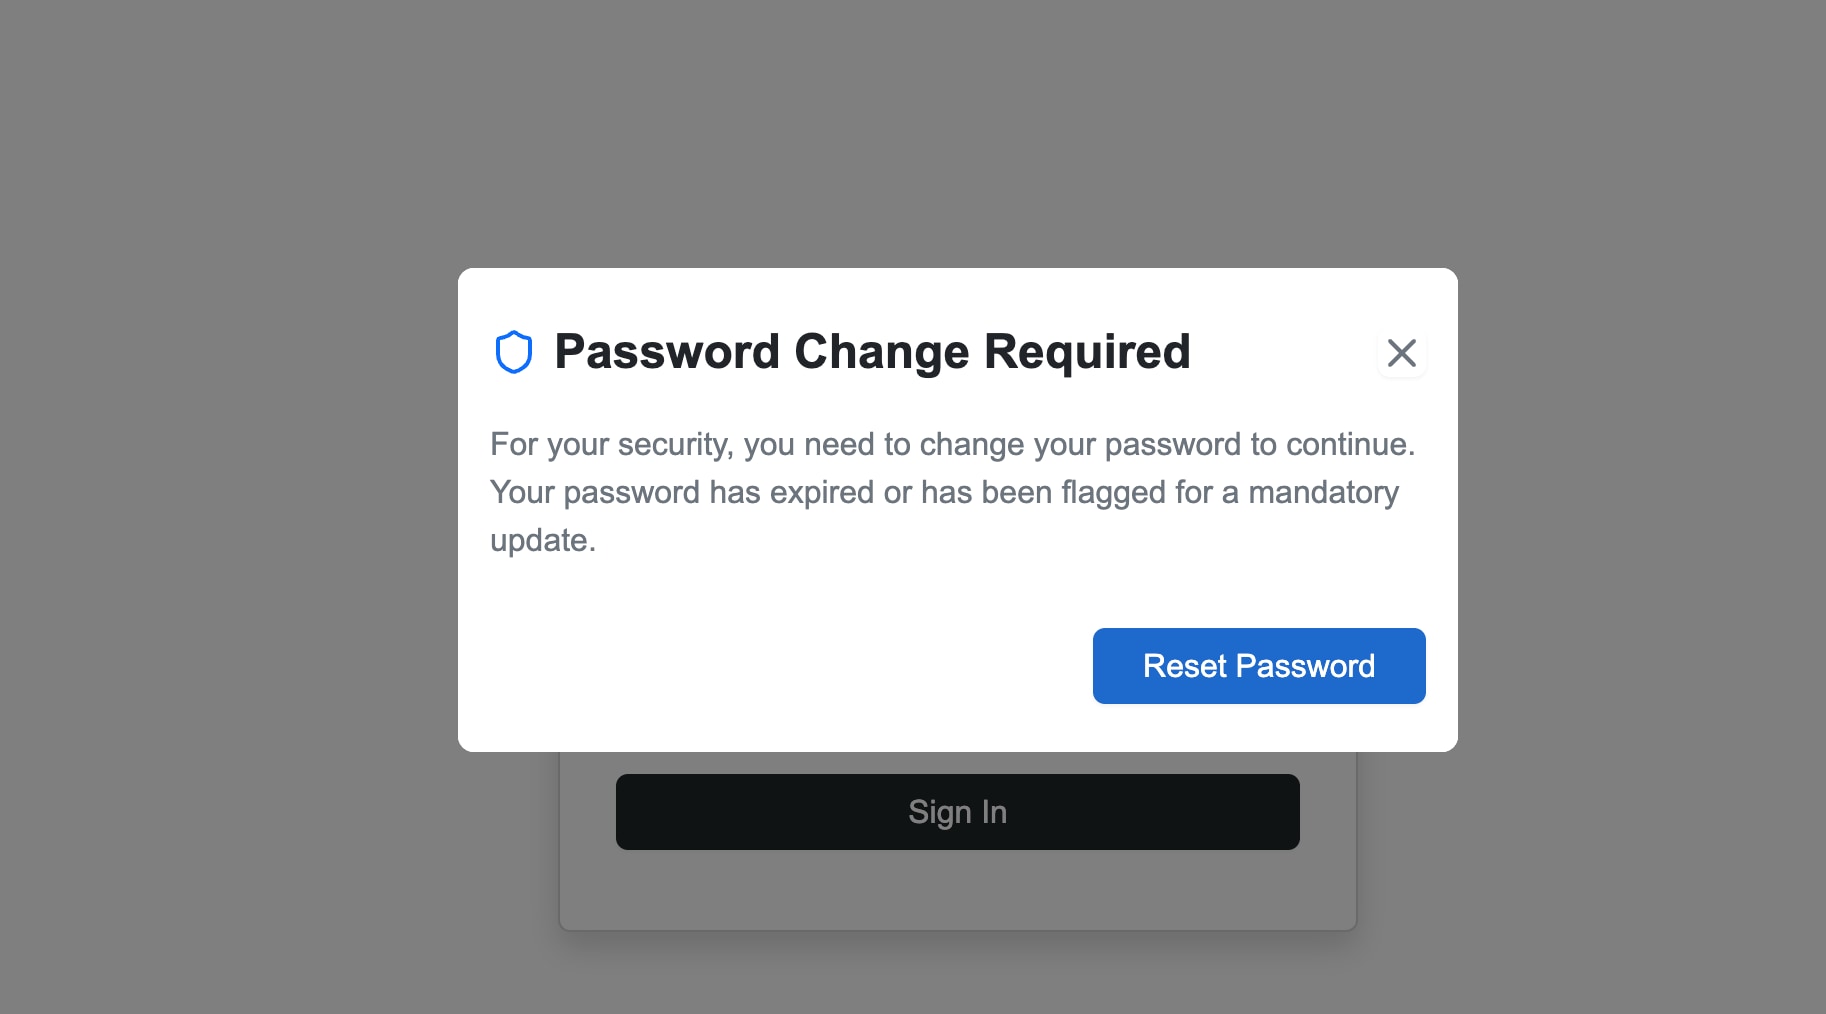
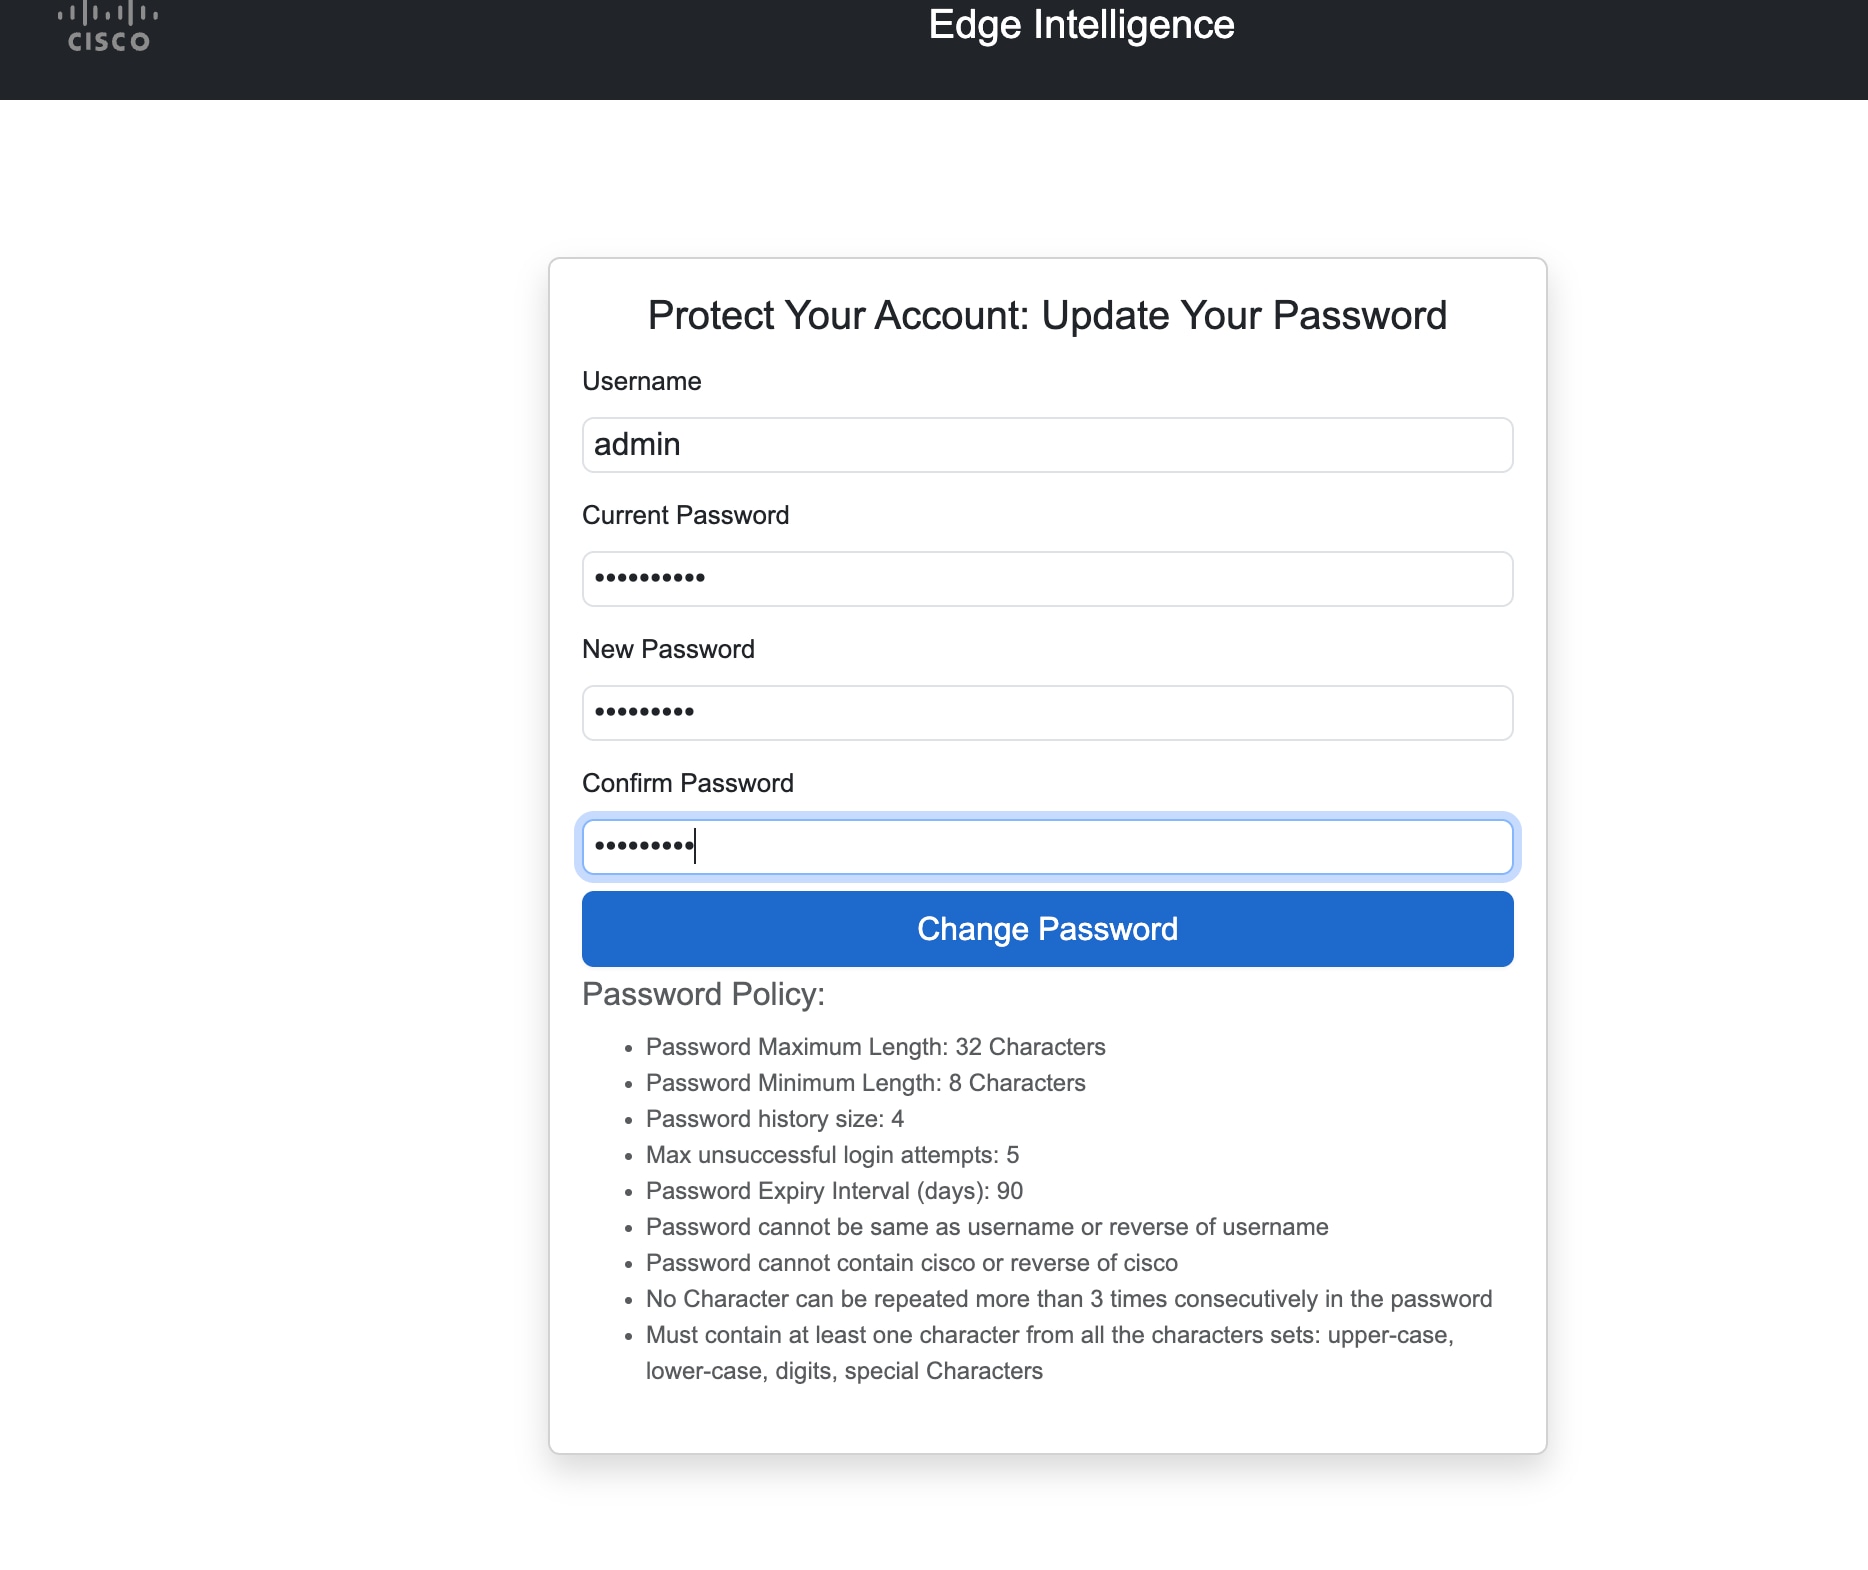
After you log in, you are prompted to immediately reset your password.

Step 6

You must reset your password at first login for security.


Reset password

You can reset your password for any security reasons or reset it if you forget it.

If you do multiple wrong attempts or forgot the password, then you can proceed to reset the password to the default password.


Note


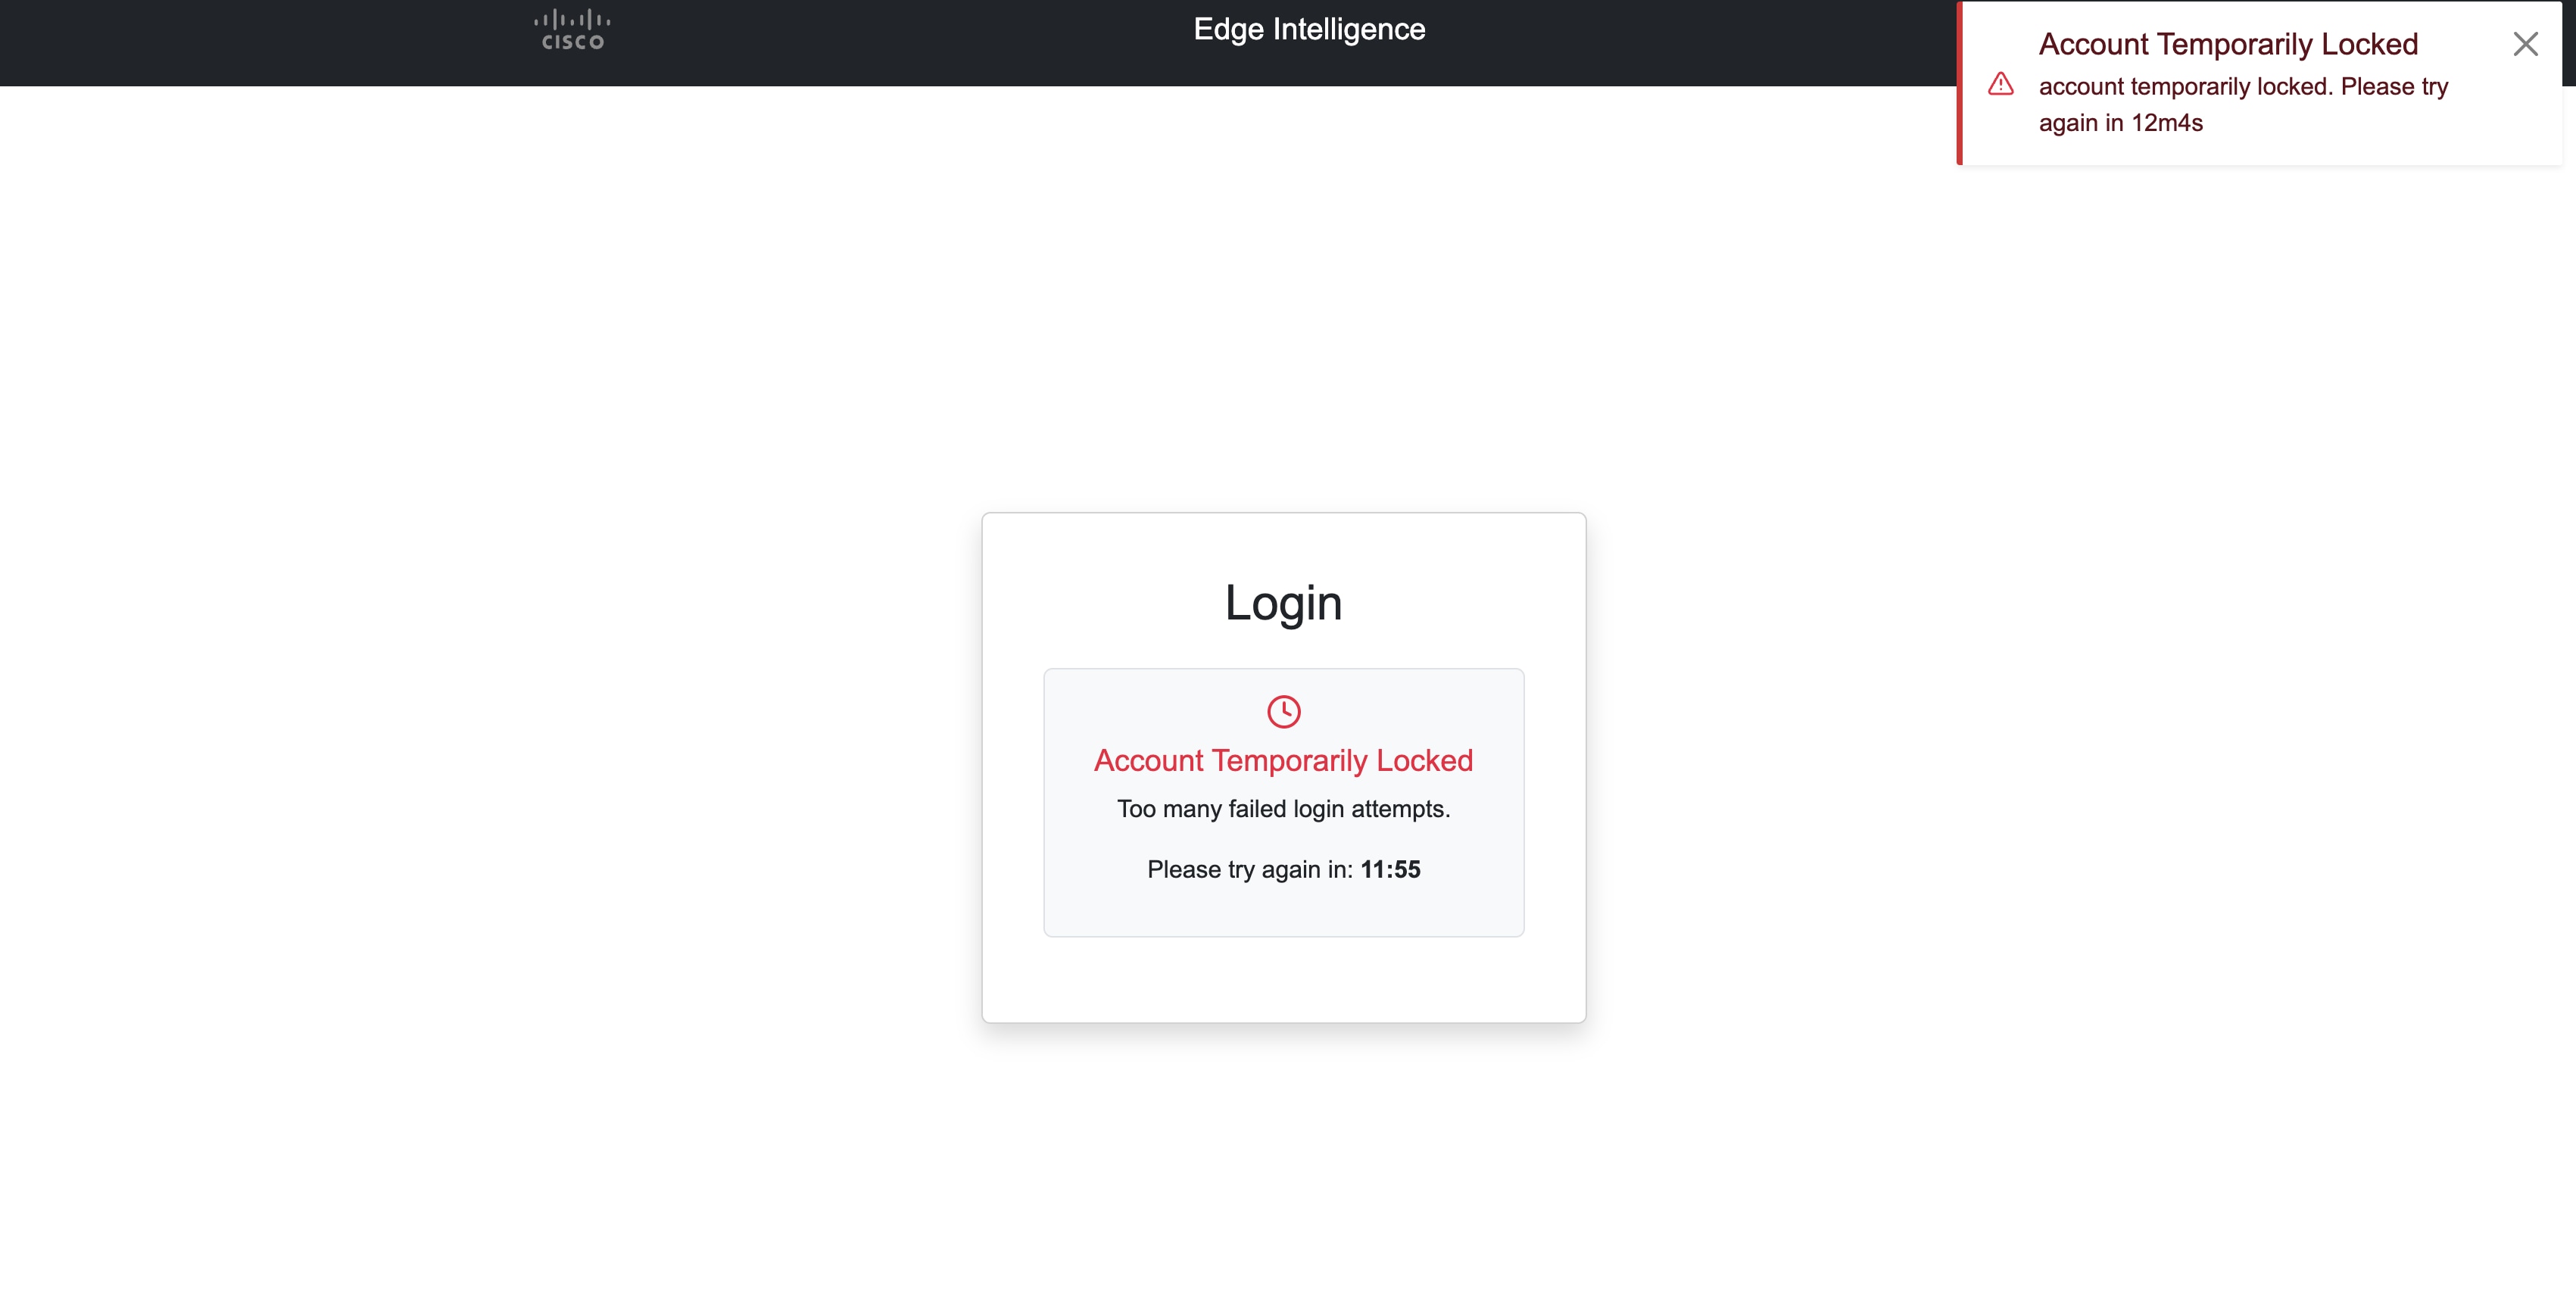
If you do 5 consecutive attempts, then the account will be locked temporarily.

For every unsuccessful attempt, the account locks for some time duration. After that time the login window reappears.


Procedure

Step 1

To reset the password, connect to the IOx application session using the application ID.

Step 2

Navigate to the Local Manager configuration directory.

Step 3

Reset the credentials by replacing the current credentials file with the factory default version.

app-hosting connect appid <appid> session
cd /opt/cisco/config/dslinks/go-localmgr
cp credentials.factory.json credentials.json
pkill localmgr

Step 4

Terminate the Local Manager process to force it to restart with the default credentials.

Step 5

Password is reset to the default password.

Note


For a default password and to set up a new password, refer to the chapter Log in to Cisco Edge Intelligence Local Manager.


Install Cisco Edge Intelligence application using Cisco Catalyst SDWAN Manager

Cisco Edge Intelligence is enabled by installing the EI Agent software on your Cisco network devices. The EI Agent is a Cisco IOx app that runs on Cisco network devices such as IR829, IR1101, IR1800, IE3400, and IC3000.

Get the Cisco Edge Intelligence image

Procedure


Step 1

From Cisco Software, download the Cisco Edge Intelligence image file for SDWAN-managed devices.

Step 2

Upload the image file to a remote file server.


Cisco Catalyst SDWAN Manager process overview

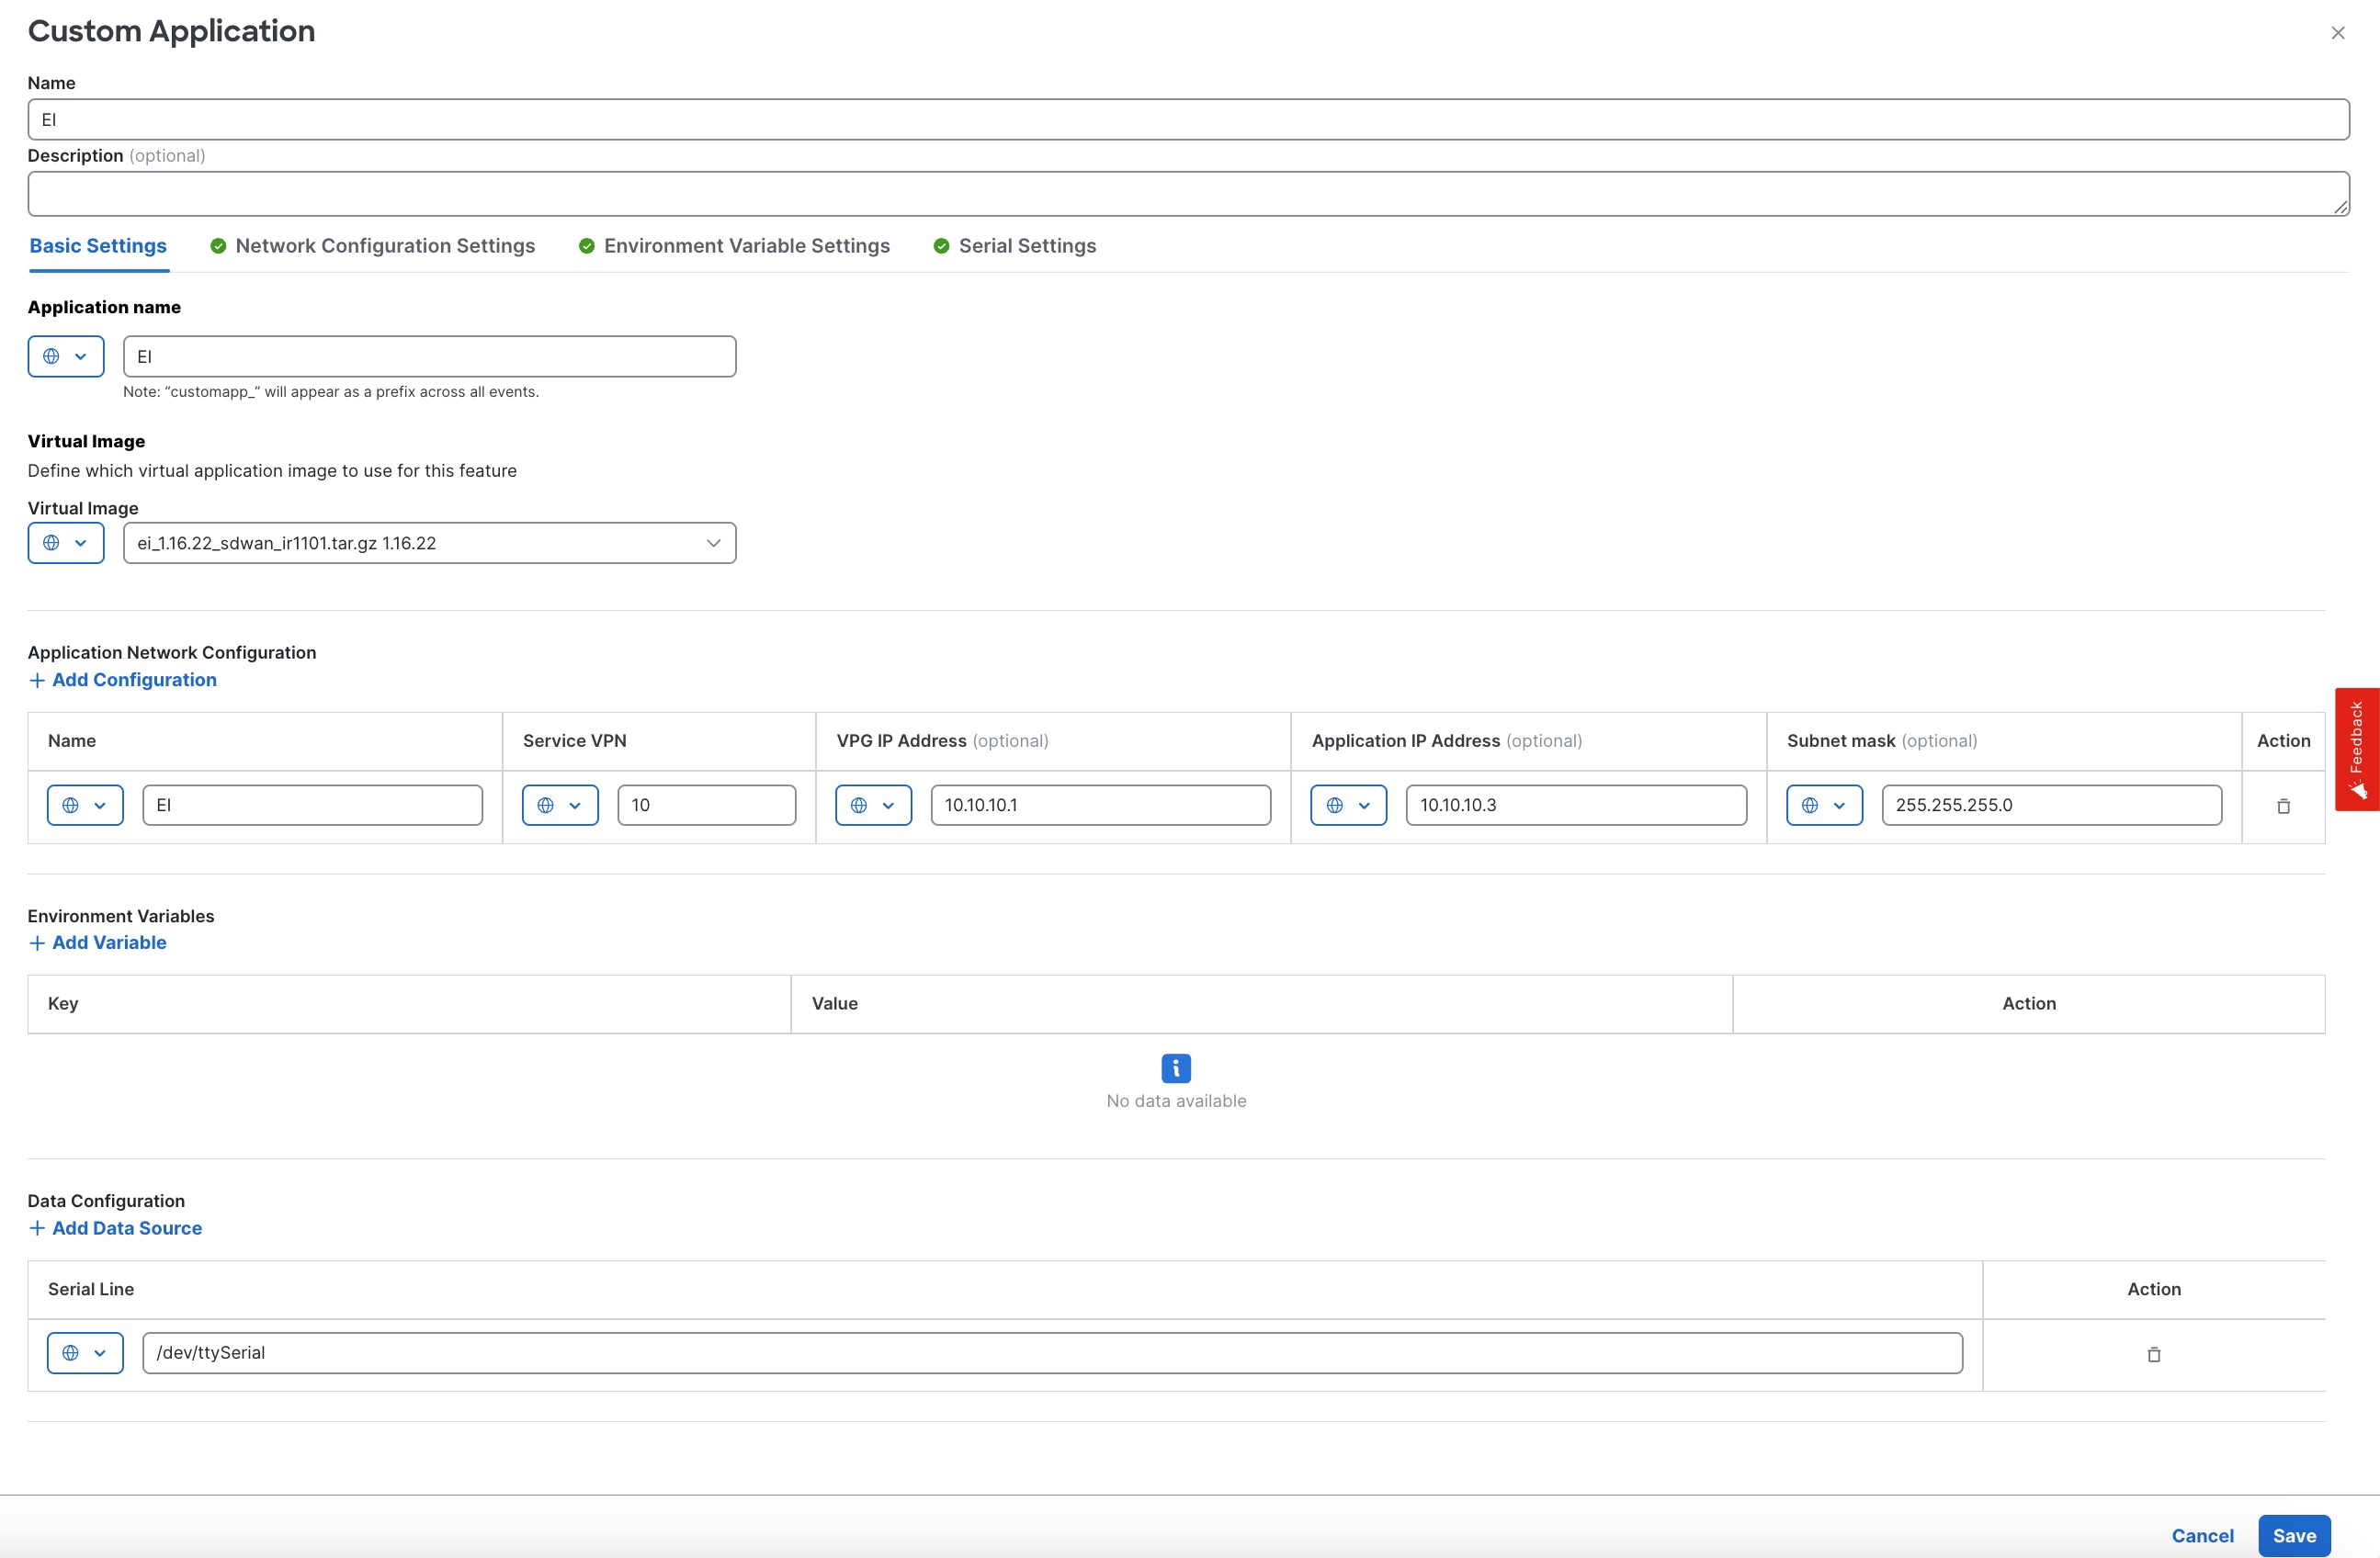
Here, we assume your familiarity with Cisco Catalyst SDWAN Manager. The Cisco Edge Intelligence application is installed on network devices as a custom application using configuration groups.

For information on onboarding network devices and Day 0 configurations, see the Cisco Catalyst SD-WAN Getting Started Guide.


Note


Ensure that the Cisco Edge Intelligence application and the assets that the application must reach are in the same VPN.


Task 1: Register the remote file server

Task 2: Add a software image to the repository using the remote server method

Task 3: Add a custom application profile to a configuration group

  1. In Network Configuration Settings, define the VPG IP Address and Application IP Address as device-specific configurations instead of global configurations.

  2. Configure serial interface. Here’s an example of a serial interface configuration:

    iox
    !
    !
    interface Async0/2/0
    no shutdown
    encapsulation relay-line
    vrf forwarding 10
    !
    relay line 0/2/0 0/0/0
    !
    !
    ip http authentication local
    ip http server
    !
    

Task 4: Deploy a configuration group with a custom application


Note


To access the Cisco Edge Intelligence GUI, you must use the application IP address.

After you deploy Cisco Edge Intelligence as a custom application to the target network devices, use the url: <Application IP address>:8008/login.


Remove a Cisco Edge Intelligence Agent


Note


Removing a Cisco Edge Intelligence Agent deletes all the existing data that are related to the Cisco Edge Intelligence Agent and cannot be undone.


You might want to remove a Cisco Edge Intelligence Agent that was used for testing, or to decommission a running instance. A Cisco Edge Intelligence Agent can be removed from the system only when its status is Not Reachable.

Remove the Cisco Edge Intelligence Agent from the network device. When the decommissioned Cisco Edge Intelligence Agent's status is updated to Not Reachable.

You can also disconnect the network device from the network by choosing the IOx Local Manager and clicking Delete.

Port opening mechanism for gateways

Certain NTCIP and RSU functions require for the opening of specific ports.

  • Port 5001 is designated for RSU

  • Port 5002 for NTCIP (streaming modes like J2735 or trafficware)

  • Port 1162 for trap notifications (For example, wrong way detection)

Procedure


Step 1

Use the console access to open the ports for IR1101.

Step 2

Connect to the device via ssh or telnet.

Step 3

Use the command show app-hosting detail to find the internal IP of the device:

Network interfaces


eth0:

   MAC address         : 52:54:dd:81:2e:49

   IPv4 address        : 172.16.16.3 - Internal IP

   IPv6 address        : ::

   Network name        : VPG0

   Multicast           : No

   Mirroring           : No

Step 4

Use the command config t

Step 5

Open a required port with below given command:

ip nat inside source static udp 192.168.1.100 5002 interface GigabitEthernet0/1 5002

where 5002 - can be any port which you must open;

  • Internal IP - you can find using the command command show app-hosting detail

  • Global IP - IP of gateway (IOx Local Manager access IP)

Note

 
Above command is used for dynamic global IP. If you required a static global IP, use the command
ip nat inside source static udp 192.168.1.100 5001 interface GigabitEthernet0/1 5001
.

Step 6

Use the command exit

Step 7

Verify that new rules are added with show ip nat translations command.

Step 8

Open ports for other gateways with IOx Local Manager.

Step 9

Connect to IOx Local Manager.

Step 10

Click Activate.

Step 11

Select the network which configuration you want to change, then click edit and it navigates you to Port Mapping page.

Step 12

Add all required TCP Port Mappings and UDP Port Mappings and click OK.

Step 13

Click OK on main page.