Cisco Nexus Hyperfabric — Recover a Cisco 6000 Series Switch Using a USB Drive
Recover a Cisco 6000 series switch using a USB drive
This article provides the procedure to recover Cisco 6000 series switches using a USB drive. If a switch encounters issues, such as becoming unresponsive and remaining stuck at the login screen, recovery is essential to restore its functionality. This process involves reloading the switch with a Cisco Nexus Hyperfabric OS image that includes an updated agent.
Supported hardware and software versions
USB recovery is available only on select BIOS versions. To confirm compatibility, check the BIOS version displayed in the banner after the system reboots.
|
Hardware model |
Minimum BIOS version |
|---|---|
|
HF6100-32D |
15.03 |
|
HF6100-60L4D |
5.08 |
Prerequisites for preparing the USB recovery drive and recovering the switch
Prerequisites for preparing the USB drive
Ensure you have these items for USB drive preparation.
- Third-party software that enables you to create a bootable image on a USB drive. Free, open-source utilities, such as Rufus and balenaEtcher, are available for Windows, Mac, and Linux, and can be downloaded from the internet.
- USB drive with at least 32GB of capacity and support for USB 3.0.
-
Download the specific Cisco 6000 series switch recovery image (.tar) from the Cisco Software Download site and extract these files:
-
Cisco 6000 series switch model recovery file:
- SONiC.202405c.2.1.1-0.HF6100-32D.img
- SONiC.202405c.2.1.1-0.HF6100-60L4D.img
- readme.txt (contains the MD5 checksum for verifying file integrity)
-
Cisco 6000 series switch model recovery file:
Prerequisite for recovering the switch
Before you recover the switch using the prepared USB drive, make sure all switches in the same fabric are running version 20250828 or later. If the fabric is not running 20250828 or later, then you must upgrade the fabric (see Software lifecycle management).
Prepare the USB recovery drive
Follow these steps to create a bootable USB drive.
Step 1 | Attach the USB drive to your computer and confirm the device is connected. |
Step 2 | Use the third-party utility to create a bootable USB drive from the .img recovery image for the platform that you are recovering. Available recovery images for supported platforms include:
|
Step 3 | Safely eject the USB drive from your computer. |
The USB drive is now ready to be used to recover a Cisco 6000 series switch.
Recover the switch using the prepared USB drive
Follow these steps to recover a Cisco 6000 series switch using the USB drive.
Step 1 | Make sure that the fabric where you plan to recover the switch is running software version 20250828 or later. You can identify the running software version in Nexus Hyperfabric by selecting the fabric and selecting Software management. If the fabric is not running 20250828 or later, upgrade the fabric (see Software lifecycle management). 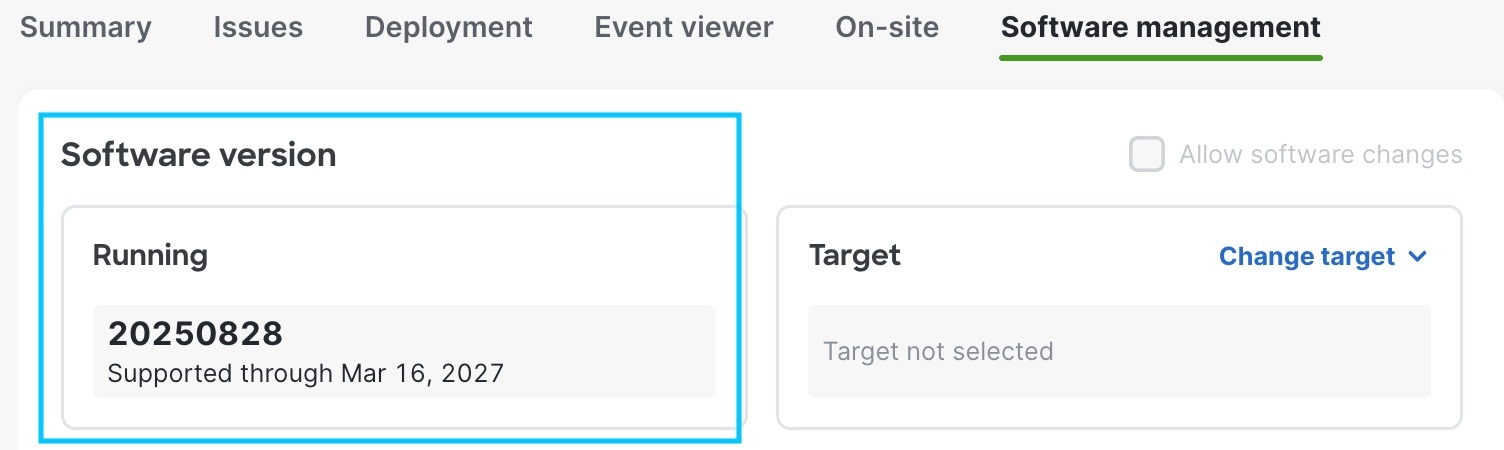 |
Step 2 | Insert the prepared USB drive into the switch. See the specific Cisco 6000 series switch model documentation to locate the USB port. Supported switch models include: |
Step 3 | Power cycle the switch to initiate the recovery process.
|
Step 4 | If the recovered switch has an internet connection through its out-of-band (OOB) management ethernet interface, use the Change Configuration option in the main console to restore the lost internet access configuration. |
Step 5 | Remove the USB drive from the switch after recovery.  Note NoteIf you forget to remove the USB drive, the switch will continue to boot from the USB drive and go through the recovery procedure again after each reboot. |