The main menu along the left side of the window provides access to all features and functionality in Cisco Crosswork Network
Controller, as well as to device management and administrative tasks. The Home, Topology, Services & Traffic Engineering,
Device Management and Administration menu options are available when all native components of Cisco Crosswork Network Controller
are installed. Additional menu options are available in the main menu depending on which Cisco Crosswork add-on applications
are installed.
Home
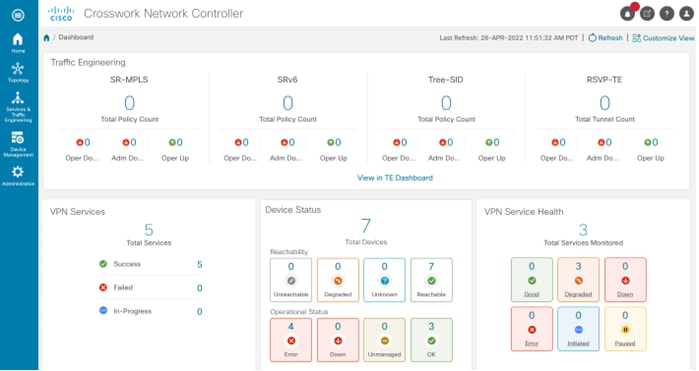
The home page contains the dashboard, as described in the Dashboard topic.
Topology
Users can display the network device and link topology on a logical map or a geographical (geo) map. The logical map shows
devices and their links, positioned according to an automatic layout algorithm. The geo map shows single devices, device groups,
device clusters, links, and tunnels, superimposed on a map of the world. Each device location on the map reflects the device's
GPS coordinates (longitude and latitude). Operators supply this location information in CSV or KML files uploaded using the
Crosswork UI.
The Topology page consists of a map showing managed devices and the links between them, along with a device table listing
managed devices. In the map you can see the status and health of the devices at a glance. Clicking on a device in the table
highlights the device on the map and shows details of the device and its associated links. Use the toggle buttons to switch
between the geographical map (shown below) and the logical map. Clicking on the question mark in the map provides a detailed
legend of the various symbols and their meaning.

Services & Traffic Engineering

The Services & Traffic Engineering menu provides access to VPN and transport provisioning and visualization functionality,
bandwidth management functionality, as well as access to the configuration pages used to enable Feature Packs. For more information,
click here to see the Crosswork Optimization Engine 5.0 User Guide.
Choose VPN services or Traffic Engineering to see managed VPN services, SRv6 policies, or SR-TE policies/RSVP-TE tunnels within the context of a logical or geographical
map.
Choose Provisioning (NSO) to access the provisioning UI rendered from the Cisco Network Services Orchestrator models. Here you can create L2VPN and
L3VPN services, SR-TE policies, SRv6 policies, SR ODN templates, and RSVP-TE tunnels. You can also create the resources required
for these services and policies, such as resource pools, route policies for L2VPN and L3VPN services, and SID lists for SR-TE
policies. SR-TE policies and RSVP-TE tunnels can be attached to VPN services to define and maintain SLAs by tracking network
changes and automatically reacting to optimize the network.
Device Management
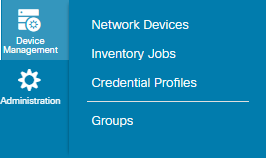
The Device Management menu provides access to device-related functionality, including adding, managing, and grouping devices,
creating and managing credential profiles, and viewing a history of device-related jobs.
Administration

The Administration menu provides access to all system management functions, data gateway management, Crosswork cluster and
application health, backup and restore, smart licensing and other setup and maintenance functions that are typically performed
by an administrator.
Click here to see the Crosswork Network Controller 5.0 Administration Guide for information about these functions.

 Feedback