Configure SNMP Notification Recipients on a Switch through the CLI
Available Languages
Objective
Simple Network Management Protocol (SNMP) is a network management protocol for IP networks which helps to record, store, and share information about the devices in the network. It is an application-layer protocol composed of an SNMP Manager, an SNMP Agent, and a Management Information Base (MIB) .
- SNMP Manager — The SNMP Manager is actually an administrative computer that may be part of a Network Management System (NMS). It runs the SNMP monitoring applications, and receives the notifications sent by the Agent software. The SNMP manager uses the most processing and memory required for network management.
- SNMP Agent — SNMP Agent devices may be a switch, a router, or another computer among many others. This is where the MIB resides. SNMP Agent devices translate information into a format that can be interpreted by the SNMP manager. The notifications are to the SNMP manager, and are called Trap notifications or Inform requests. Trap notifications are sent by the SNMP agent device when a specific parameter is reached by the device. Trap messages can be improper user authentication, CPU usage, link status, and other significant events. This helps the administrator address network issues. Traps are merely notifications, and not acknowledged by the notification server. Inform request is acknowledged by the notification server. Inform is only available on SNMPv2c and v3.
- MIB — An MIB is a virtual information storage area for network management information. It is composed of a collection of managed objects.
SNMP has three significant versions.
- SNMPv1 — This is the initial version of SNMP.
- SNMPv2c — This version uses a community-based form of security, just like SNMPv1, replacing the Party-based Administrative and Security Framework of SNMPv2.
- SNMPv3 — This is an interoperable standards-based protocol defined in RFC2273, 2274, and 2275. It provides secure access to devices by authenticating and encrypting packets over the network. Due to the security vulnerabilities of other versions of SNMP, it is recommended to use SNMPv3.
This document aims to show you how to configure the host with IP address 192.168.100.139 as the SNMP notification recipient of SNMPv2c traps using the Command Line Interface (CLI) of a switch.
This article assumes that you have already installed and configured the SNMP manager. It also assumes that you have already added the switch to the SNMP manager for monitoring.
Applicable Devices
- Sx250 Series
- Sx300 Series
- Sx350 Series
- SG350X Series
- Sx500 Series
- Sx550X Series
Software Version
- 1.4.7.05 — Sx300, Sx500
- 2.2.8.04 — Sx250, Sx350, SG350X, Sx550X
Configure SNMP Community String on a Switch
SNMP community strings act as embedded passwords authenticating access to MIB objects. It is only defined in SNMPv1 and SNMPv2 since SNMPv3 works with users instead of communities. The users belong to groups that have access rights assigned to them. Use the community string as a password or group name when adding the switch to the SNMP Manager. A community string has to be configured when setting up SNMP so that the SNMP host and the SNMP manager would be able to connect.
A community string can have one of these properties:
- Read-only (RO) — This option allows read access to authorized management devices to all objects in the MIB, but does not allow write access.
- Read-write (RW) — This option allows read and write access to authorized management devices to all objects in the MIB, however, it does not allow access to the community strings.
To configure an SNMP community string, follow these steps:
Step 1. Log in to the switch.
Step 2. Switch to global configuration mode.

Step 3. In global configuration mode, configure the community string by entering the following command.

- word — This will act like a password and permit access to the SNMP protocol.
- view — (Optional) Specify the view record accessible to the community.
- ro|rw — (Optional) Specify either read-only (ro) if you want authorized management stations to retrieve MIB objects. Specify read-write (rw) if you want authorized management stations to retrieve and modify MIB objects. The default value is ready-only access to all objects.
- access-list-number — (Optional) Enter a standard IP access list number from 1 to 99 and 1300 to 1999.
Note: In this example, SNMPCommunity will act as the password. This will be used when adding the switch to the SNMP Manager.

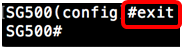
Step 4. Switch to the Privileged EXEC mode by entering exit command.
Step 5. Verify the configuration by running the command:

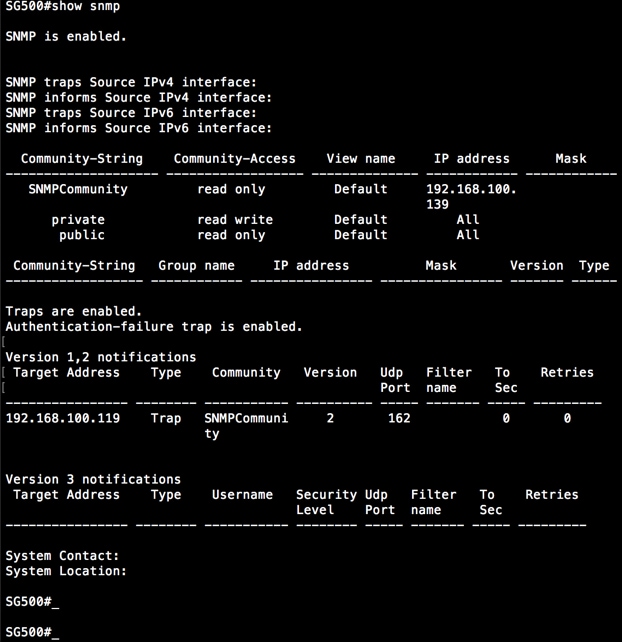
Step 6. (Optional) Save the settings in the configuration file.


Step 7. Press Y to proceed.

Configure SNMP Notification Recipients on a Switch through the CLI
SNMP allows the switch to send notifications to SNMP managers when events occur. SNMP notifications can be traps or inform requests. A Trap is an SNMP message meant to notify the SNMP manager about the event that occurred. Traps are unreliable because the receiver does not send an acknowledgment when a Trap is received. An SNMP Inform operates on the same principle as a Trap. The main difference between a Trap and an Inform is that the remote application acknowledges the receipt of the Inform. Also, a Trap is discarded as soon as it is sent, while an Inform request is held in memory until a request is received, else it times out. SNMP Inform is not supported by SNMPv1.
This section, although optional, will guide you in setting up SNMP Notification Recipients through the CLI of the Switch.
Step 1. Log in to the switch.
Step 2. Switch to the global configuration mode.

Step 3. On global configuration mode, specify the notification recipient by running the following command:


- snmp-server — This command allows the device to be managed by SNMP
- host — This command lets you specify the IP address of the recipient of the notification.
Note: In this example, the IP address is 192.168.100.139.
- notification type — This is the type of notification that the network manager would receive.
- Note: In this example, the notification is set to traps instead of informs.
- version — This would use the specified SNMP version of the notifications.
Note: In this example, version 2 is used.
- SNMP Community — This is the name of the SNMP community.
Note: In this example, SNMPCommunity is entered.
Step 4. Switch to the Privileged EXEC mode by entering the exit command.

Step 5. (Optional) Save the settings in the configuration file.

Step 6. Press Y to confirm the action.

You should now have added an SNMP notification recipient.
Revision History
| Revision | Publish Date | Comments |
|---|---|---|
1.0 |
13-Dec-2018
|
Initial Release |
 Feedback