Introduction
This document describes how to manually upgrade Apache Tomcat on CCE.
Prerequisites
Requirements
Cisco recommends that you have knowledge of these topics:
- Contact Center Enterprise (CCE) 12.6
- Apache Tomcat
Components Used
The information in this document is based on these software and hardware versions:
- CCE 12.6
- Apache Tomcat 9.x
The information in this document was created from the devices in a specific lab environment. All of the devices used in this document started with a cleared (default) configuration. If your network is live, ensure that you understand the potential impact of any command.
Upgrade
In most instances, updating Tomcat using Cisco Upgrade Tomcat Utility resolves vulnerabilities. There are times when upgrading Tomcat fails, configuration is corrupt, or a new person updates Tomcat using the files they find Online.

Caution: Please take a VM snapshot before starting this procedure. Contact TAC for any assistance.
Before Upgrade
-
Download the Tomcat installer (apache-tomcat-version.exe) from the Tomcat website: http://archive.apache.org/dist/tomcat/tomcat-9/.
-
Copy the installer onto the Unified CCE component VMs. In this upgrade, I used tomcat version 9.0.89.

In this lab, an AW server was used to upgrade Tomcat.
Uninstall the Current Tomcat
Step 1. Stop the distributor service:

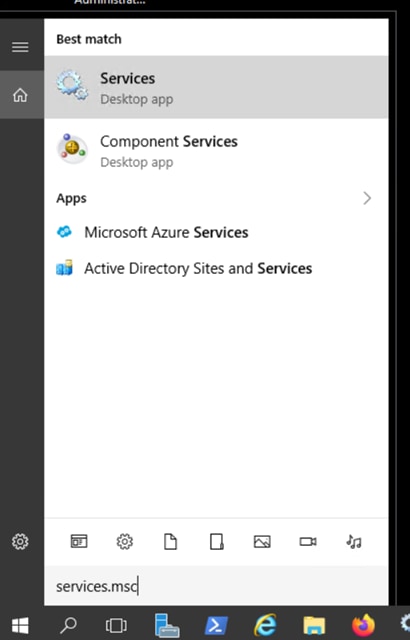
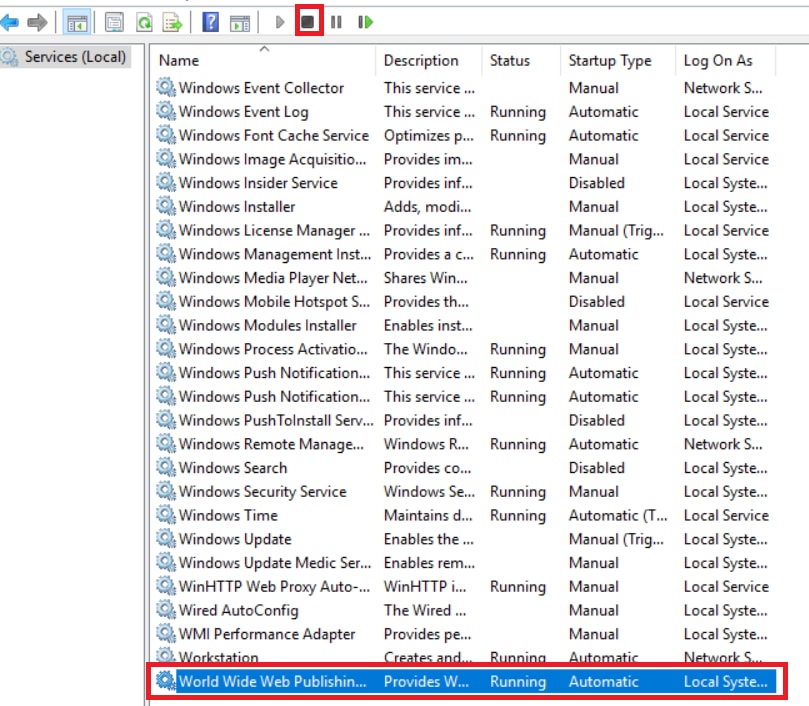
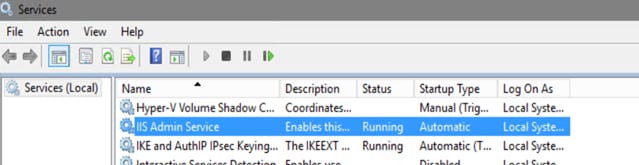
Step 2. Stop the Tomcat, IIS admin and World wide web service from windows services.msc.
Open Services.msc:


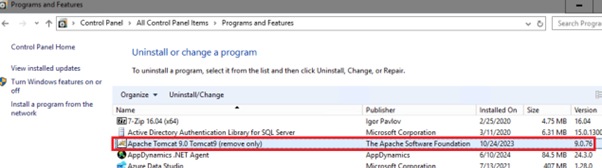
Step 3. Uninstall Existing Tomcat Version from Add/Remove programs.
1. Open Control Panel > Program and Features > Select Tomcat:
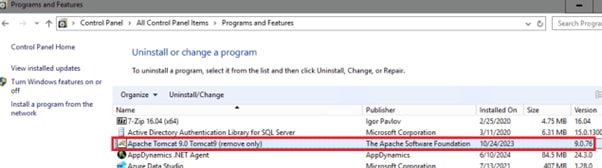
2. Click Uninstall/Change:


Install Tomcat
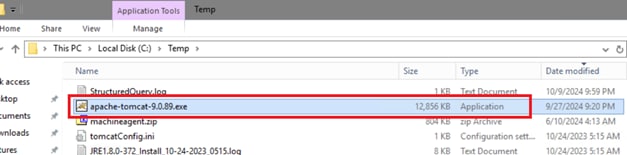
Step 1. Copy the Apache Tomcat installer (the EXE file) to c:\Temp:
Step 2. From CMD as administrator run the installer using this command:

Note: Your version can be different: C:\temp\apache-tomcat-9.0.89.exe /s /D=C:\icm\tomcat.

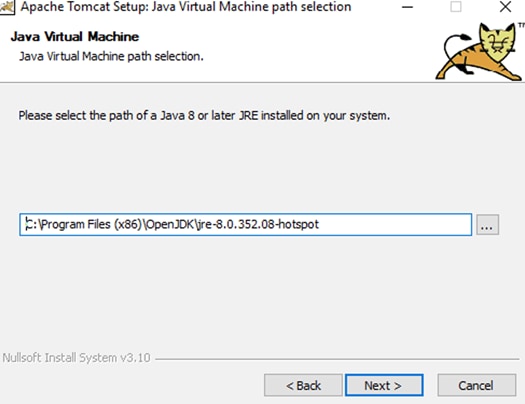
Step 3. Proceed with the prompts to install. There is only one option you need to modify or search, and that is for the JRE folder.
Backup Tomcat Folder to Delete Tomcat Directories
Once the install is complete, prior to beginning work the Tomcat Folder needs to be backed up in case the need to start over.
Step 1. Backup the Tomcat folder created:
c:\icm\tomcat
Step 2. Delete the directory, 'C:\icm\tomcat\webapps\docs’
Step 3. Delete the directory, 'C:\icm\tomcat\webapps\manager’
Step 4. Delete the directory,'C:\icm\tomcat\webapps\ROOT'
Copy Tomcat Files
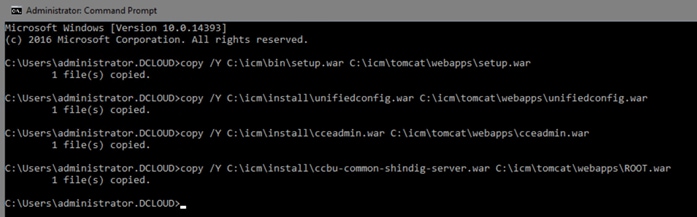
Step 1. Open CMD as administrator and run these 4 queries :
- copy /Y C:\icm\bin\setup.war C:\icm\tomcat\webapps\setup.war
- copy /Y C:\icm\install\unifiedconfig.war C:\icm\tomcat\webapps\unifiedconfig.war
- copy /Y C:\icm\install\cceadmin.war C:\icm\tomcat\webapps\cceadmin.war
- copy /Y C:\icm\install\ccbu-common-shindig-server.war C:\icm\tomcat\webapps\ROOT.war
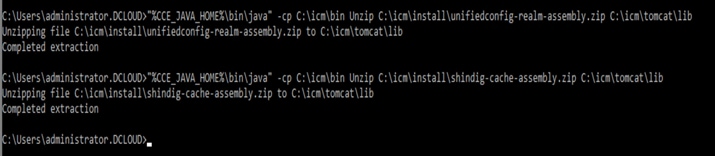
Step 2. From the command prompt, execute these steps:
- "%CCE_JAVA_HOME%\bin\java" -cp C:\icm\bin Unzip C:\icm\install\unifiedconfig-realm-assembly.zip C:\icm\tomcat\lib
- "%CCE_JAVA_HOME%\bin\java" -cp C:\icm\bin Unzip C:\icm\install\shindig-cache-assembly.zip C:\icm\tomcat\lib
Step 3. From the command prompt, execute these steps to copy the jar files from ICM to tomcat directory:
- copy /Y C:\icm\bin\catalina.properties C:\icm\tomcat\conf\catalina.properties
- copy /Y C:\icm\bin\icm-websetup-shared.jar C:\icm\tomcat\lib\icm-websetup-shared.jar
- copy /Y C:\icm\bin\registry.jar C:\icm\tomcat\lib\registry.jar
- copy /Y C:\icm\bin\jntservices.jar C:\icm\tomcat\lib\jntservices.jar
- md C:\icm\tomcat\bin\i386 (Make Directory)
- copy /Y C:\icm\bin\isapi_redirect.dll C:\icm\tomcat\bin\i386\isapi_redirect.dll
- copy /Y C:\icm\bin\web.xml C:\icm\tomcat\conf\web.xml
- copy /Y C:\icm\bin\catalina-jmx-remote.jar C:\icm\tomcat\lib\catalina-jmx-remote.jar
- copy /Y C:\icm\install\web.config C:\icm\tomcat\bin\i386\web.config
- copy /Y C:\icm\bin\server.xml.IIS.custom C:\icm\tomcat\conf\server.xml

Add Missing Files
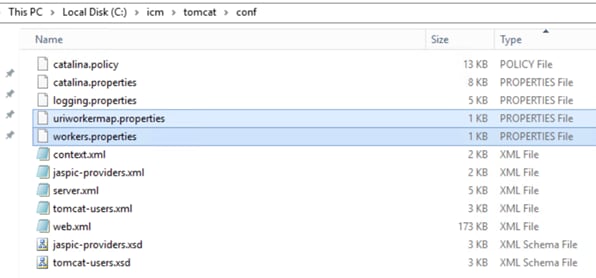
Step 1. In the next step, move over two files: uriworkermap.properties and workers.properties from a working server, where the Tomcat install is working correctly.
1. Notice the two files are missing.
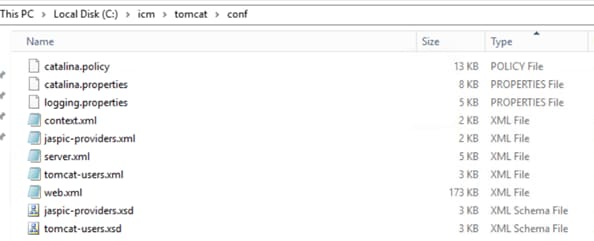 2. Copy the missing files from a working server.
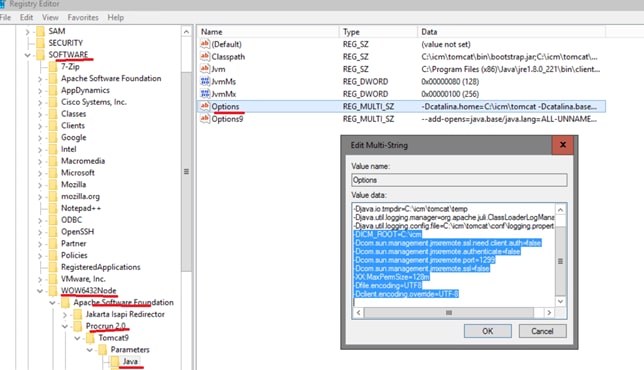
Step 2. Add missing registry information for options in Apache tomcat Registry key.
This information is Specific for ICM and is not added by default:
Computer\HKEY_LOCAL_MACHINE\SOFTWARE\WOW6432Node\Apache Software Foundation\Procrun 2.0\Tomcat9\Parameters\Java
Information added to options Key subsequent to the last line in Options. The subsequent string must be add including the hyphens present:
-DICM_ROOT=C:\icm
-Dcom.sun.management.jmxremote.ssl.need.client.auth=false
-Dcom.sun.management.jmxremote.authenticate=false
-Dcom.sun.management.jmxremote.port=1299
-Dcom.sun.management.jmxremote.ssl=false
-XX:MaxPermSize=128m
-Dfile.encoding=UTF8
-Dclient.encoding.override=UTF-8
Enable Inheritance and Start the Tomcat Service
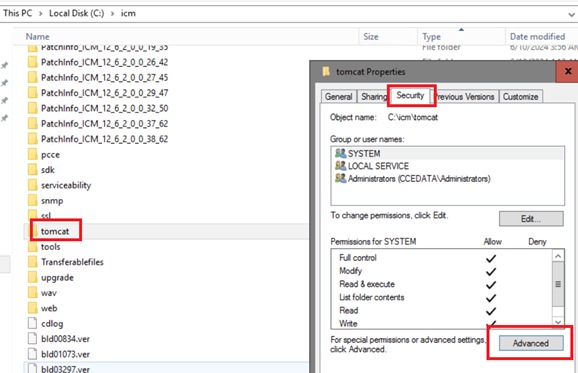
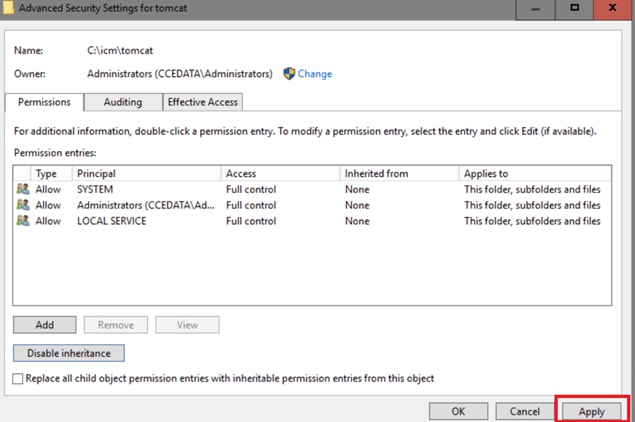
Step 1. Last step before starting tomcat and IIS service is to validate inheritance for the folder. If you miss this step, a 500 internal server error is returned when IIS attempts to use the redirect isapi.dll file.
As IIS no longer has permissions for the Tomcat Folder:
- Navigate to c:\icm\
- Find the folder Tomcat.
- Right click and select properties.
- Choose Security > Advanced.
- Click Enable Inheritance.
- Click Apply.
The user rights inherited are from c:\icm.
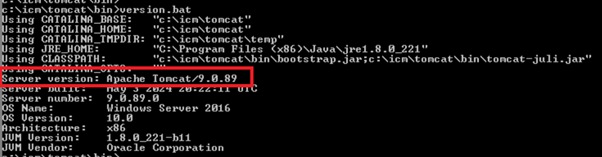
Step 2. Verify the updated version is installed by running the version command:
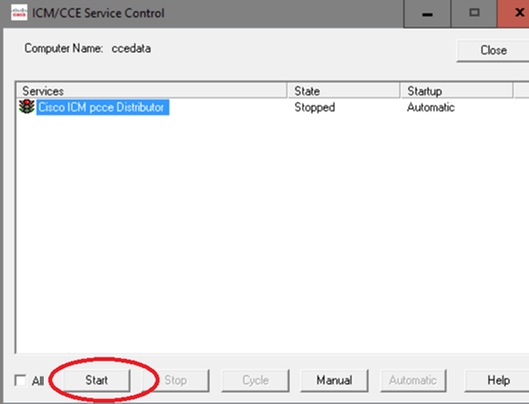
Step 3. Start the distributor service.
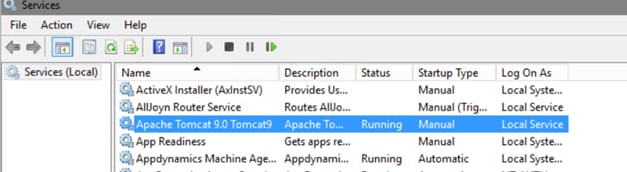
Step 4. Start Apache Tomcat, IIS, and World wide web service from services.msc:

Verify
Validate if the cceadmin page loads without issues and able to log in:

 Feedback