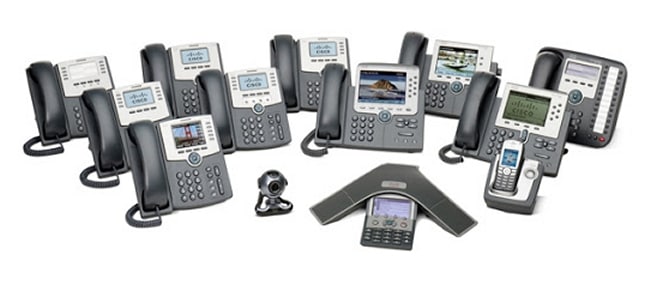
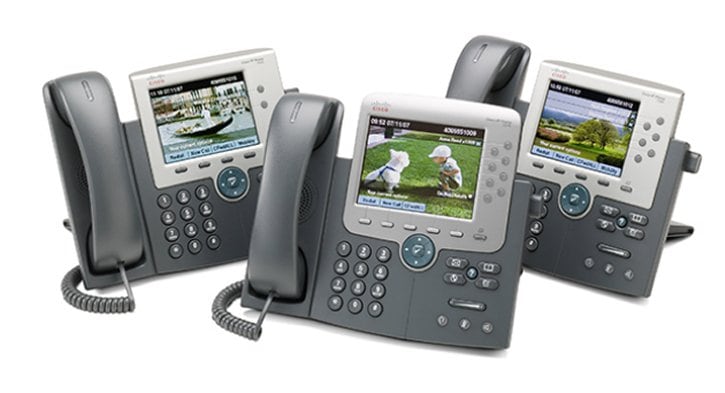
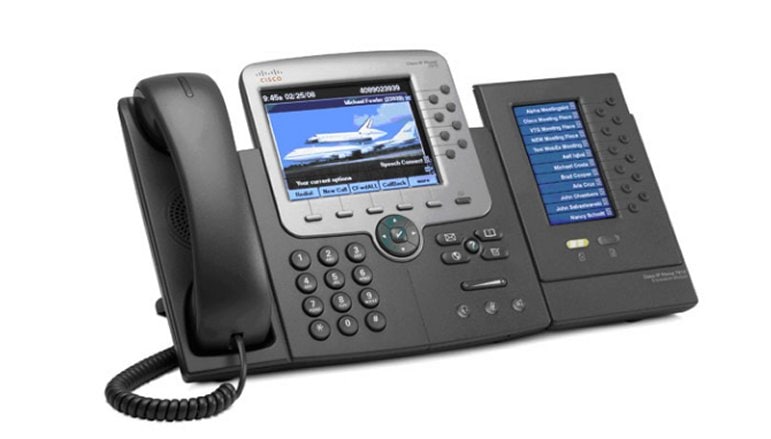
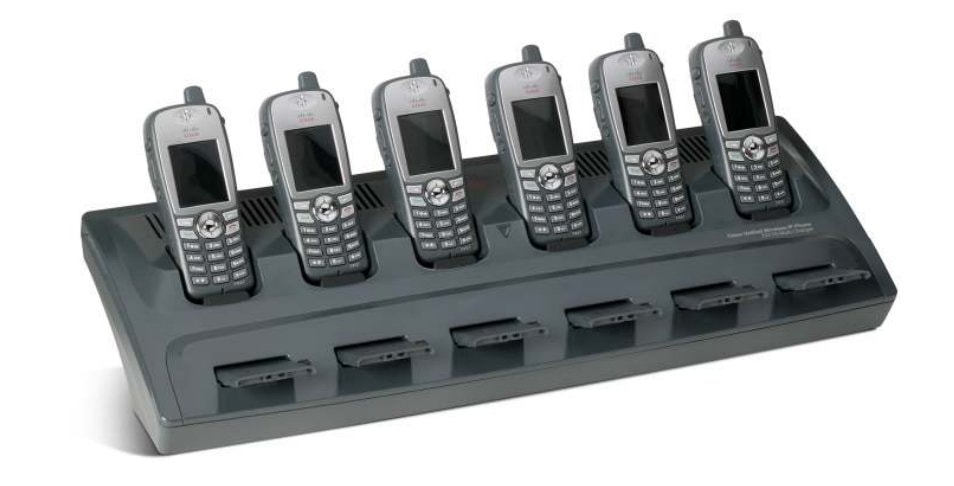
Table Of Contents
Configuring the Cisco Unified IP Conference Station 7936
Administrator Options
Verifying System Settings
Accessing Network Configuration Settings
Changing DHCP Settings
Enabling DHCP
Disabling DHCP
Configuring IP Settings
Assigning a Static IP Address
Assigning a Subnet Mask
Assigning a Default Gateway
Assigning a Domain Name
Assigning DNS Servers
Configuring VLAN Options
Configuring Alternate TFTP Options
Using an Alternate TFTP Server
Assigning a TFTP Server Address
Assigning an Ethernet Port Configuration
Configuring the HTTP Port
Verifying Firmware Version Information
Resetting the Cisco Unified IP Conference Station
Erasing the Local Configuration
Default Settings
Upgrading the Application Load
Changing the Administrator Password
Using the Diagnostics Menu
Changing the Settings Menu
Changing the Contrast Setting
Changing the Backlight Setting
Changing the Ring Type Setting
Changing the Time Format Setting
Changing the Date Format Setting
Configuring a Corporate Directory
Configuring Cisco Unified CallManager
Using the Corporate Directory
Configuring a Local Directory
Using the Phone Book
Additional Features
Cisco Unified IP Conference Station 7936 Web Interface
Description of the Web Interface
Using the Web Interface
Information Available on All Web Pages
Administrator Settings
System Information
Network Setup
Phone Book
Sounds
Time & Date
Diagnostics
Passwords/HTTP Port Change
Restore Factory Defaults
Configuring the Cisco Unified IP Conference Station 7936
The Cisco Unified IP Conference Station 7936 is a network device and includes configurable network settings. You must configure many of these settings before the Cisco Unified IP Conference Station is accessible and usable for your users.
Refer to the following topics in this chapter for information about configuring your Cisco Unified IP Conference Station 7936.
•
Administrator Options
•
Verifying System Settings
•
Accessing Network Configuration Settings
•
Verifying Firmware Version Information
•
Resetting the Cisco Unified IP Conference Station
•
Erasing the Local Configuration
•
Upgrading the Application Load
•
Changing the Administrator Password
•
Changing the Administrator Password
•
Using the Diagnostics Menu
•
Changing the Settings Menu
•
Configuring a Corporate Directory
•
Configuring a Local Directory
•
Additional Features
•
Cisco Unified IP Conference Station 7936 Web Interface
Administrator Options
Table 3-1 describes administrator options that are available via the LCD menu. These configuration options are also available via the Cisco Unified IP Conference Station 7936 web interface. See the "Cisco Unified IP Conference Station 7936 Web Interface" section for additional information.
Note
Administrator options are password-protected.
Table 3-1 Administrator Option Setup for the Cisco Unified IP Conference Station
LCD Menu Item
|
Description
|
Admin Setup—Access this menu as follows:
1. Press the Menu button.
2. Press the Up or Down scroll button to select the Admin Setup menu.
3. Press the Select button.
4. Enter the administrator password (the default administrator password is **#).
|
The Admin Setup menu provides access to administrator menus. Administrator options are password-protected.
|
Network Setup—Access the Network Setup menu parameters by following the procedure above and selecting Network Setup.
Tip  Press the Menu button to return to the Admin Setup menu options, if desired.
|
The Network Setup menu allows you to configure certain network parameters, such as DHCP, domain names, static IP addressing and more.
See the "Accessing Network Configuration Settings" section for additional information.
|
Diagnostics—Access the Diagnostics menu by following the procedure above and selecting Diagnostics.
|
The Diagnostics menu allows you to test connectivity and to check network statistics.
|
Restore Defaults—Access the Restore Defaults menu by following the procedure above and selecting Restore Defaults. Alternatively, you can restore the default configuration by pressing **1 from the phone's resting display menu.
|
The Restore Defaults menu allows you to restore the configuration of the IP Conference Station to the original factory settings.
See the "Default Settings" section for additional information.
|
Change Passcode—Access the Change Passcode menu by following the procedure above and selecting Change Passcode.
|
The Change Passcode menu allows you to change the administrator password used on the phone.
See the "Changing the Administrator Password" section for additional information.
|
HTTP Port Change—Access the HTTP Port Change menu by following the procedure above and selecting HTTP Port Change.
|
The HTTP Port Change menu allows you to change the HTTP port. The default HTTP port is 80.
See the "Configuring the HTTP Port" section for additional information.
|
System Info—Access the System Information menu by following the procedure above and selecting System Information.
|
The System Information menu allows you to view configuration information. See the "Verifying System Settings" section for additional information.
|
Verifying System Settings
The Cisco Unified IP Conference Station contains detailed information about its current system settings. This information is useful when troubleshooting or when making changes to any system settings.
Note
You can also use the Cisco Unified IP Conference Station 7936 web interface to view system settings. See the "Cisco Unified IP Conference Station 7936 Web Interface" section.
To verify system settings, follow these steps:
Procedure
Step 1
Press the Menu button.
Step 2
Press the Up or Down scroll button to select the Admin Setup menu.
Step 3
Press the Select button.
Step 4
Enter the administrator password. (The default administrator password is **#.)
Step 5
Press the Enter softkey.
Step 6
Press the Up or Down scroll button to select System Info and then press the Select button.
Step 7
Press the Up or Down scroll button to scroll through the system information described in Table 3-2.
Table 3-2 System Verification Steps on the Cisco Unified Conference Station
System Setting
|
Description
|
Usage Notes
|
Language
|
Displays the language selection for the Cisco Unified IP Conference Station.
|
English is the default language.
|
Local number
|
This is the local phone number or extension that is assigned to the Cisco Unified IP Conference Station.
|
Conference calls are initiated using this number.
|
DHCP
|
Indicates whether Dynamic Host Configuration Protocol (DHCP) is enabled or disabled.
|
DHCP is enabled by default; it can be disabled through the Admin Setup > Network Setup configuration menus.
|
MAC Address
|
Indicates the unique Media Access Control (MAC) address of the Cisco Unified IP Conference Station.
|
This address is the hardware address associated with the phone. It cannot be configured.
|
IP Address
|
This is the IP address assigned to the Cisco Unified IP Conference Station.
|
The IP address identifies the Cisco Unified IP Conference Station on the network. This address is set automatically if DHCP is enabled.
|
IP Mask
|
Indicates the subnet mask used by the IP Conference Station.
|
This IP address is set automatically if DHCP is enabled.
|
Router 1
|
Identifies the default gateway used by the IP Conference Station.
|
This IP address is set automatically if DHCP is enabled.
|
Host Name
|
Identifies the unique host name assigned to the IP Conference Station.
|
This address is assigned through Cisco Unified CallManager.
|
Domain
|
Identifies the domain in which the Cisco Unified IP Conference Station resides.
|
This domain name may be assigned through the DHCP server.
|
DNS Address
|
Identifies the Domain Name System (DNS) server address for the Cisco Unified IP Conference Station.
|
This IP address may be assigned through the DHCP server.
|
Op VLAN ID
|
Indicates the Virtual Local Area Network (VLAN) in which the Cisco Unified IP Conference Station is a member.
|
The VLAN ID is assigned to the Cisco Unified IP Conference Station via Cisco Discovery Protocol (CDP).
|
Adm VLAN ID
|
Indicates the administrative VLAN in which the Cisco Unified IP Conference Station is a member.
|
The administrative VLAN ID is assigned to the Cisco Unified IP Conference Station by the system administrator. See the "Configuring VLAN Options" section.
Note This setting is ignored, if the VLAN ID is assigned via CDP.
|
CallManager 1 (CM1) Address, CallManager 2 (CM2) Address, CallManager 3 (CM3) Address, CallManager 4 (CM4) Address, CallManager5 (CM5) Address
|
Identifies the Cisco Unified CallManager systems that are available for processing calls from this Cisco Unified IP Conference Station.
One of the Cisco Unified CallManager addresses will be displayed on the screen as active (A) and the other will be displayed as standby (S).
|
These IP addresses are set automatically by Cisco Unified CallManager.
The source of the address is indicated by Addr, TFTP or SRST. "Addr" indicates the address is from the phone configuration. "TFTP" indicates a tftp address. "SRST" indicates an srst server from the phone configuration.
|
TFTP Server 1, TFTP Server 2, TFTP Server 3
|
Indicates the Trivial File Transfer Protocol (TFTP) Server IP addresses used by the IP Conference Station to obtain configuration files and the conference station's firmware.
|
The IP addresses are set automatically if DHCP is enabled.
TFTP Server 1 must be manually configured if Alternate TFTP Usage is enabled or if DHCP is disabled. TFTP Server 2 and 3 may be manually configured if Alternate TFTP Usage is enabled or if DHCP is disabled.
|
DSP Version
|
Indicates the DSP version loaded on the Cisco Unified IP Conference Station.
|
This number is automatically set by the IP Cisco Unified IP Conference Station.
|
Alt TFTP
|
Indicates whether or not an Alternate TFTP Server is enabled (yes/no).
|
This configuration must be manually set.
|
Boot Load ID
|
Indicates the current load ID of the phone's firmware.
|
This is set automatically by the IP Conference Station.
|
App Load ID
|
Indicates the current load ID of the phone's software.
|
This is set automatically by the IP Conference Station.
|
HW (hardware) Revision
|
Indicates the hardware revision level.
|
This number is set automatically by the IP Conference Station.
|
SW (software) Version
|
Indicates the firmware version loaded on the IP Conference Station.
|
This number is set automatically by the IP Conference Station.
|
Dial Tone
|
Indicates the dial tone setting on the IP Conference Station.
|
The default is Tone 1.
|
Ringer
|
Indicates the ringer sound setting on the IP Conference Station.
|
There are five ringer sounds. You can also shut off the ringer sound, in which case Ring Off would display on the LCD screen. The default ringer is Pro Ring.
|
Time
|
Indicates the time setting on the IP Conference Station.
|
There are two time format settings—12 hour and 24 hour.
|
Date
|
Indicates the date setting on the IP Conference Station.
|
There are two date format settings—MM/DD/YY and DD/MM/YY.
|
Codec
|
Indicates the compression setting on the IP Conference Station.
|
This is set automatically by the IP Conference Station.
|
Net Config
|
Indicates the Ethernet port configuration on the IP Conference Station.
|
This setting may be configured for full- or half-duplex (FDX or HDX).
|
Net Speed
|
Indicates the Ethernet port speed configuration on the IP Conference Station.
|
This configuration may be set to 10 Mbps, 100 Mbps, or Auto. The default is set to Auto.
|
HTTP Port
|
Indicates the HTTP port through which users access the web interface.
|
The default HTTP port is 80. This port number may be set to any number. If you change the default value, users will have to append the port number as a suffix to the IP address of the IP Conference Station when they access the web interface.
|
Elapsed Time
|
Indicates the elapsed time since the last reboot.
|
This value is automatically updated by the Cisco Unified IP Conference Station.
|
DSCP Call Ctl
|
Indicates the DSCP classification for protocol interfaces that are used in Cisco Unified CallManager-to-device communications.
|
This parameter is assigned through Cisco Unified CallManager.
|
DSCP Config
|
Interfaces the DSCP classification for any SCCP-based phone configuration, including any TFTP, DNS or DHCP access that is necessary for phone configuration.
|
This parameter is assigned through Cisco Unified CallManager.
|
DSCP Services
|
Indicates the DSCP classification for IP phone services on SCCP-based phones, including any HTTP traffic.
|
This parameter is assigned through Cisco Unified CallManager.
|
Accessing Network Configuration Settings
You must log in through the Admin Setup menu in order to access the IP Conference Station network settings.
To access the network settings, follow these steps:
Procedure
Step 1
Press the Menu button.
Step 2
Press the Up or Down scroll button to select the Admin Setup menu.
Step 3
Press the Select button.
Step 4
Enter the administrator password. (The default administrator password is **#.)
Step 5
Press the Enter softkey.
Step 6
Press the Up or Down scroll button to select Network Setup, and then press the Select button.
You can now access and change certain network parameters, including DHCP, static IP addressing, IP mask, DNS, Administrative VLAN, and Alternate TFTP.
After all changes are complete, you will be prompted to save the changes. If you select "YES", the phone will save the changes and reboot. If you select "NO", all changes will be discarded.
Note
You can also use the Cisco Unified IP Conference Station 7936 web interface to change network options. See the "Cisco Unified IP Conference Station 7936 Web Interface" section.
Changing DHCP Settings
DHCP automatically assigns IP addresses to devices when you connect them to the network. Follow the appropriate procedures in this section to enable or disable DHCP.
Enabling DHCP
DHCP is enabled by default.
To reset DHCP if it becomes disabled, follow these steps:
Procedure
Step 1
From the Network Setup menu, press the Up or Down scroll button to select DHCP.
If DHCP is disabled, the option displays as:
Step 2
Press the Enable softkey to enable DHCP.
Step 3
Press the Save softkey.
Disabling DHCP
If you are not using DHCP in your network, you can disable DHCP.
Disabling DHCP will enable configuration of a static IP address and Router IP address.
To disable DHCP before you manually assign an IP address to a Cisco Unified IP Conference Station, follow these steps:
Procedure
Step 1
From the Network Setup menu, press the Up or Down scroll button to select DHCP.
If DHCP is enabled, the option displays as:
Step 2
Press the Disable softkey to disable DHCP.
Step 3
Press the Save softkey.
Step 4
Press the Yes softkey to save your changes, or press No to cancel.
Step 5
Press the Exit button to return to the resting display menu.
Configuring IP Settings
Use these guidelines, along with the information in the following sections, to manually configure the IP settings on your Cisco Unified IP Conference Station.
•
You can use 0.0.0.0 for the subnet mask only if the default gateway is also 0.0.0.0.
•
Ensure the TFTP server has an IP address.
•
Ensure the default gateway IP address is on the same subnet as the host IP address.
Assigning a Static IP Address
Note
You can only manually assign an IP address if DHCP is disabled.
The IP address is the unique logical address identifying each host computer, or node, on a TCP/IP network. An IP address is a 32-bit number expressed as four decimal numbers from 0 to 255 separated by periods.
Each IP address has two parts:
•
Network ID—identifies all hosts that are on the same physical network.
•
Host ID—identifies a specific host on a network.
To manually configure an IP address, follow these steps:
Procedure
Step 1
Press the Up or Down scroll button to select IP address.
The current IP address is displayed.
Step 2
Use the < softkey to delete the current IP address.
Step 3
Use the dialing pad to enter a new IP address.
Use the . softkey to enter periods (.) and the < softkey to correct any mistakes.
Step 4
Press the Validate softkey to check the IP address, mask and router. Press the Save softkey to save your changes.
Assigning a Subnet Mask
Note
You can only manually assign a subnet mask if DHCP is disabled.
The subnet mask is used to partition the IP address into a network and a host identifier. The subnet mask is used to mask a portion of the IP address so that TCP/IP can distinguish the network ID from the host ID.
To manually configure a subnet mask, follow these steps:
Procedure
Step 1
Press the Up or Down scroll button to select IP Mask.
The current IP Mask is displayed.
Step 2
Use the < softkey to delete the current subnet mask.
Step 3
Use the dialing pad to enter a new subnet mask.
Use the . softkey to enter periods (.) and the < softkey to correct any mistakes.
Step 4
Press the Validate softkey to check the IP address, mask and router. Press the Save softkey to save your changes.
Assigning a Default Gateway
Note
You can only manually assign a default gateway if DHCP is disabled.
When you manually assign an IP address to an Cisco Unified IP Conference Station, you can assign the default gateway to be used.
To manually configure a default gateway, follow these steps:
Procedure
Step 1
Press the Up or Down scroll button to select Router 1.
The current router IP address is displayed.
Step 2
Use the < softkey to delete the current IP address.
Step 3
Use the dialing pad to enter a new IP address.
Use the . softkey to enter periods (.) and the < softkey to correct any mistakes.
Step 4
Press the Validate softkey to check the IP address, mask and router. Press the Save softkey to save your changes.
Assigning a Domain Name
The domain name is the name of the Domain Name System (DNS) domain in which the IP Conference Station is located.
DNS is used on the Internet for translating names of network nodes into addresses. For detailed information about DNS, refer to Understanding the Domain Name System.
To manually configure a domain name, follow these steps:
Procedure
Step 1
Press the Up or Down scroll button to select Domain.
The current domain is displayed.
Step 2
Use the dialing pad to enter a new domain name.
To enter letters, use the numbers associated with a particular letter.
For example, the 2 key has the letters ABC. For a lower case "a," press 2 twice. Press the 2 key repeatedly to scroll through the available letters and numbers. Pause after the selected letter appears on the display.
Press the < softkey to correct any mistakes. Press the .sp-_ softkey to use a period (.), space, dash (-), or underscore (_) character.
Step 3
Press the Validate softkey to check the name format.
Step 4
Press the Save softkey to save your changes.
Assigning DNS Servers
DNS allows users to specify remote computers by host names, which are character strings with a mnemonic value, rather than by IP addresses, which are strings of numbers.
The Cisco Unified IP Conference Station uses DNS servers to resolve the host name of TFTP servers, Cisco Unified CallManager systems, and web server host names when the system is configured to use names rather than IP addresses.
To manually configure a DNS server, follow these steps:
Procedure
Step 1
Press the Up or Down scroll button to select DNS.
Step 2
Use the dialing pad to enter a new DNS server address.
Use the . softkey to enter periods (.). Use the < softkey to correct any mistakes.
Step 3
Press the Validate softkey to check the DNS IP Address.
Step 4
Press the Save softkey to save your changes.
Configuring VLAN Options
You can change the administrative VLAN used by the Cisco Unified IP Conference Station. However, if you have an auxiliary VLAN assigned on the Cisco Catalyst switch, that setting overrides any changes made on the Cisco Unified IP Conference Station.
To manually configure the administrative VLAN ID on the Cisco Unified IP Conference Station, follow these steps:
Procedure
Step 1
Press the Up or Down scroll button to select Adm VLAN.
Step 2
Press the < softkey to erase the current VLAN ID.
Step 3
Use the dialing pad to enter a new VLAN ID (0 - 4094).
Step 4
Press the Validate softkey to check the VLAN ID. Press the Save softkey to save your changes.
Configuring Alternate TFTP Options
If DHCP is enabled in your network, the IP address of the TFTP Server that is to be used by the Cisco Unified IP Conference Station is automatically assigned. This setting cannot be changed; however, you can override the TFTP Server setting by manually configuring an alternate TFTP Server that is to be used by the Cisco Unified IP Conference Station to obtain configuration files and firmware.
If DHCP is disabled in your network, you must manually configure TFTP Server 1 to be used by the Cisco Unified IP Conference Station. You may optionally configure TFTP Server 2 and 3.
To configure an alternate TFTP Server, see the "Using an Alternate TFTP Server" section.
Using an Alternate TFTP Server
If you want to override the TFTP Server setting that the Cisco Unified IP Conference Station received through DHCP, you must manually enable an alternate TFTP Server. (Use this option if you want to point your Cisco Unified IP Conference Station to a specific TFTP Server.)
To enable an alternate TFTP Server, follow these steps:
Procedure
Step 1
Press the Up or Down scroll button to select Alt TFTP.
If the Cisco Unified IP Conference Station is not using an alternate TFTP Server, the option displays as:
Step 2
Press the Yes softkey.
The Alternate TFTP option reads Yes.
Step 3
Press the Down scroll button to select Alt TFTP Addr.
Use the dialing pad to enter a new Alternate TFTP Server address.
Use the . softkey to enter periods (.), and the < softkey to correct any mistakes.
Step 4
Press the Save softkey to save your changes.
Step 5
Assign a TFTP Server address in the TFTP Server 1 field.
Assigning a TFTP Server Address
If DHCP is disabled in your network or if DHCP is enabled and Alternate TFTP Usage is YES, you must manually configure TFTP Server 1 to be used by the Cisco Unified IP Conference Station. You may optionally configure TFTP Server 2 and 3.
To assign a TFTP Server Address, follow these steps:
Procedure
Step 1
Press the Up or Down scroll button to select IP address.
The current IP address is displayed.
Step 2
Use the < softkey to delete the current IP address.
Step 3
Use the dialing pad to enter a new IP address.
Use the . softkey to enter periods (.) and the < softkey to correct any mistakes.
Step 4
Press the Validate softkey to check the IP address, mask and router. Press the Save softkey to save your changes.
Assigning an Ethernet Port Configuration
To assign an ethernet port configuration, follow these steps:
Procedure
Step 1
Press the Up or Down scroll button to select Port Config. The current Ethernet port config is displayed.
Step 2
Press the Next Mode softkey until the desired mode is displayed.
Step 3
Press the Save softkey to save your changes.
Configuring the HTTP Port
For increased security, you might want to change the HTTP Port number.
To set the HTTP Port number, follow these steps:
Procedure
Step 1
Press the Menu button.
Step 2
Press the Up or Down scroll button to select the Admin Setup menu.
Step 3
Press the Select button.
Step 4
Enter the administrator password. (The default administrator password is **#.)
Step 5
Press the Enter softkey.
Step 6
Press the Up or Down scroll button to select HTTP Port Change, and then press the Select button.
Step 7
In the HTTP Port field, enter a new HTTP port number.
Note
The default value is 80. You can enter any number. Users will have to use this number suffixed to the IP address of the Cisco Unified IP Conference Station when they access the web interface.
Step 8
Press the Save softkey to save your changes.
Verifying Firmware Version Information
You can obtain information about the firmware version installed on the Cisco Unified IP Conference Station.
To verify the firmware version on an Cisco Unified IP Conference Station, follow these steps:
Procedure
Step 1
Press the Menu button.
Step 2
Press the Up or Down scroll button to select the Admin Setup menu.
Step 3
Press the Select button.
Step 4
Enter the administrator password. (The default administrator password is **#.)
Step 5
Press the Enter softkey.
Step 6
Press the Up or Down scroll button to select System Information.
Step 7
Press the Select button.
Step 8
Press the Up or Down scroll button to select SW Version.
The firmware version number is displayed.
Resetting the Cisco Unified IP Conference Station
To reset the Cisco Unified IP Conference Station, press * * # * * on the dialing pad while the phone is in menu screens. The following message appears: Restarting.
The Cisco Unified IP Conference Station re-starts and goes through the startup process.
Caution 
If you reset the Cisco Unified IP Conference Station, any changes made that have not been saved are lost and set back to the previous settings.
Erasing the Local Configuration
If you want to erase all locally-stored configuration options, you can do so by restoring all settings to their factory default values, including enabling DHCP.
Caution 
Erasing the local configuration removes all user-defined changes made locally on the Cisco Unified IP Conference Station, including the Phone Book. If you choose this option, these settings are set back to their original, default values.
To restore the default settings, follow these steps:
Procedure
Step 1
Press the Menu button.
Step 2
Press the Up or Down scroll button to select the Admin Setup menu.
Step 3
Press the Select button.
Step 4
Enter the administrator password (the default administrator password is **#), and press the Enter softkey.
Step 5
Press the Down scroll button to select Restore Defaults.
Step 6
Press the Select button.
The following message appears:
All settings and data will be lost, including the Phone Book entries.
Press Yes to confirm or No to exit.
Step 7
Press the Yes softkey to confirm the restore, or press the No softkey to exit.
A message appears confirming that the settings have been restored to the defaults and the Cisco Unified IP Conference Station will restart.
Note
You must hang up all calls before you can restart the Cisco Unified IP Conference Station.
Default Settings
Table 3-3 provides the Cisco Unified IP Conference Station default settings.
Table 3-3 Cisco Unified IP Conference Station Default Settings
Setting (Default Value)
|
Valid Options
|
Administrator- controlled
|
User- controlled
|
Notes
|
Administrator password (**#)
|
-
|
Y
|
N
|
|
End-user password (7936)
|
-
|
Y
|
N
|
|
CM1 address (no default)
|
-
|
N
|
N
|
Set by Cisco Unified CallManager (via the .cnf.xml file)
|
CM2 address (no default)
|
-
|
N
|
N
|
Set by Cisco Unified CallManager (via the .cnf.xml file)
|
CM3 address (no default)
|
-
|
N
|
N
|
Set by Cisco Unified CallManager (via the .cnf.xml file)
|
CM4 address (no default)
|
-
|
N
|
N
|
Set by Cisco Unified CallManager (via the .cnf.xml file)
|
CM5 address (no default)
|
-
|
N
|
N
|
Set by Cisco Unified CallManager (via the .cnf.xml file)
|
TFTP Server 1address (no default)
|
-
|
N
|
N
|
Set by DHCP server. Must be set by user if Alternate TFTP Usage is set to yes or if DHCP is disabled
|
TFTP Server 2 address (no default)
|
-
|
N
|
N
|
Set by DHCP server. May be set by user if Alternate TFTP Usage is set to yes or if DHCP is disabled
|
TFTP Server 3 address (no default)
|
-
|
N
|
N
|
Set by DHCP server. May be set by user if Alternate TFTP Usage is set to yes or if DHCP is disable
|
Alternate TFTP Server (No)
|
Yes/No
|
Y
|
N
|
Selectable
|
DHCP (Enable)
|
Enable/Disable
|
Y
|
N
|
|
Ethernet port configuration (Auto)
|
Autosensing
100-Mbps FDX
100-Mbps HDX
10-Mbps FDX
10-Mbps HDX
|
Y
|
N
|
Selectable
|
HTTP Port (port number 80)
|
1 - 442
|
Y
|
N
|
Selectable
|
IP Address (no default)
|
-
|
Y
|
N
|
Can be statically assigned or DHCP
|
IP Subnet Mask (no default)
|
-
|
Y
|
N
|
|
Router 1 (no default)
|
-
|
Y
|
N
|
This IP address is set automatically if DHCP is enabled
|
Domain name (no default)
|
-
|
Y
|
N
|
Assigned by the DHCP server
|
DNS address (no default)
|
IP address of the DNS server
|
Y
|
N
|
Assigned by the DHCP server
|
Admin VLAN ID (blank)1
|
0 - 4094
|
Y
|
N
|
Configurable VLAN ID
|
Op VLAN ID (no default)
|
-
|
N
|
N
|
Assigned by CDP
|
Language (English)
|
English
|
Y
|
Y
|
In the current release, English is the only available option
|
Compression (no default)
|
G.711 a-law/u-law;
G.729a
|
N
|
N
|
Set by Cisco Unified CallManager
|
LCD screen contrast (level 6)
|
Levels 1 - 15
|
Y
|
Y
|
User selectable
|
Backlight (on)
|
On/Off
|
Y
|
Y
|
User selectable
|
Local number (no default)
|
-
|
N
|
N
|
Set by Unified Cisco CallManager
|
Phone Book (no default)
|
Maximum of 20 entries
|
Y
|
Y
|
|
Ringer (Pro Ring)
|
Pro, Biz, Euro, Chirp, Bell, Ringer Off
|
Y
|
Y
|
User selectable
|
Dial tone (Tone 1)
|
Tone 1
|
Y
|
Y
|
In the current release, Tone 1 is the only available option
|
Volume (level 21)
|
Levels 1- 29
|
Y
|
Y
|
User selectable
|
Time of day (no default)
|
-
|
N
|
N
|
Set by Cisco Unified CallManager
|
Time of day format (12-hour)
|
12-hour
24-hour
|
Y
|
Y
|
User selectable
|
Date (no default)
|
-
|
N
|
N
|
Set by Cisco Unified CallManager
|
Date format (MM/DD/YY)
|
MM/DD/YY or
DD/MM/YY
|
Y
|
Y
|
User selectable
|
Boot load ID
|
-
|
N
|
N
|
Embedded in the Application load, and set by the Cisco Unified IP Conference Station
|
Application load ID
|
-
|
|
|
Set by Cisco Unified CallManager
|
Upgrading the Application Load
You can upgrade the application load on the Cisco Unified IP Conference Station only from Cisco Unified CallManager.
To upgrade the application load, follow these steps:
Procedure
Step 1
Download the new application load from the Software Download Center at http://www.cisco.com/pcgi-bin/tablebuild.pl/ip-7900se.
An example of the format used for the application load ID is:
Step 2
Copy the new load to the C:\Program Files\Cisco\TFTPPath directory.
Step 3
Start Cisco Unified CallManager Administration.
Step 4
Choose System > Device Defaults.
Step 5
In the Device Defaults Configuration window, scroll down to the Cisco 7936 Device Type.
Step 6
Change the Load Information to the new load that you downloaded.
Step 7
Click Update.
Step 8
Reset all of the Cisco Unified IP Conference Stations so that they receive the new load.
When the application load is being updated, messages similar to the following appear on the Cisco Unified IP Conference Station LCD screen.
Message Text for Successful Upgrade
|
Message Text for Unsuccessful Upgrade
|
|
(when reset through Cisco Unified CallManager), or
(when reset by pressing **#**)
Press Menu to Reconfigure
Contacting: (TFTP Server)
Upgrading...(percentage) done
Press Menu to Reconfigure
Contacting: (TFTP Server)
Opening: CM IP address; Registering
|
(when reset through Cisco Unified CallManager), or
(when reset by pressing **#**)
Press Menu to Reconfigure
Contacting: (TFTP Server)
Upgrading...(percentage) done
File not found in TFTP Server
Error in upgrade file format
Bad Checksum in upgrade file
|
Changing the Administrator Password
To change the administrator password, follow these steps:
Note
The Cisco Unified IP Conference Station 7936 web interface can be used to change administrator options. See the "Cisco Unified IP Conference Station 7936 Web Interface" section.
Procedure
Step 1
Press the Menu button.
Step 2
Press the Up or Down scroll button to select the Admin Setup menu.
Step 3
Press the Select button.
Step 4
Enter the administrator password. (The default administrator password is **#.)
Step 5
Press the Enter softkey.
Step 6
Press the Up or Down scroll button to select Change Passcode and then press the Select button.
a.
Use the dialing pad to enter the new password in the Passcode field.
Use the < softkey to correct any mistakes.
b.
Re-enter the new password in the Confirm field.
Step 7
Press the Save softkey to save the new password, or press the Cancel softkey to exit without saving.
Using the Diagnostics Menu
You can use the Diagnostics menu to view network statistics on the Cisco Unified IP Conference Station and to ping another device's IP address.
For detailed information about viewing network statistics on the Cisco Unified IP Conference Station, see the "Viewing Network Statistics" section.
For detailed information about using the Diagnostics menu to ping another device from the Cisco Unified IP Conference Station, see the "Using Ping" section.
See "Troubleshooting the Cisco Unified IP Conference Station 7936" for additional troubleshooting information.
Changing the Settings Menu
You can change settings on the Cisco Unified IP Conference Station by using the Settings Menu,
Changing the Contrast Setting
To change the contrast setting on the Cisco Unified IP Conference Station, follow these steps:
Procedure
Step 1
Press the Menu button.
Step 2
Select Settings and then press the Select button.
Step 3
Press the Up or Down scroll button to select Contrast.
Step 4
Press the "+" or the "-" softkey to lighten or darken the contrast on the LCD screen.
Step 5
Press the Exit button to exit this menu.
Changing the Backlight Setting
To change the backlight setting on the Cisco Unified IP Conference Station, follow these steps:
Procedure
Step 1
Press the Menu button.
Step 2
Select Settings and then press the Select button.
Step 3
Press the Up or Down scroll button to select Backlight.
Step 4
Press the On or Off softkey to turn the backlight on or off on the LCD screen.
Step 5
Press the Exit button to exit this menu.
Changing the Ring Type Setting
To change the ring type setting on the Cisco Unified IP Conference Station, follow these steps:
Procedure
Step 1
Press the Menu button.
Step 2
Select Settings and then press the Select button.
Step 3
Press the Up or Down scroll button to select Ringer.
Step 4
Press the Change softkey.
Step 5
Press the Up or Down scroll button to select a ring type entry, and then press the Listen softkey to hear your selection.
There are five ringer sounds. You can also shut off the ringer sound, in which case Ring Off would display on the LCD screen. The default ringer is Pro Ring.
If you want to select a different ringer type, repeat Step 5.
Step 6
Press the Save softkey to save the ringer type.
Step 7
Press the Exit button to exit this menu.
Changing the Time Format Setting
To change the time format setting on the Cisco Unified IP Conference Station, follow these steps:
Procedure
Step 1
Press the Menu button.
Step 2
Select Settings and then press the Select button.
Step 3
Press the Up or Down scroll button to select Time Format.
Step 4
Select the time format you want to use.
There are two time format settings—12 hour and 24 hour.
Step 5
Press the Exit button to exit this menu.
Changing the Date Format Setting
To change the date format setting on the Cisco Unified IP Conference Station, follow these steps:
Procedure
Step 1
Press the Menu button.
Step 2
Select Settings and then press the Select button.
Step 3
Press the Up or Down scroll button to select Date Format.
Step 4
Select the date format you want to use.
There are two date format settings—MM/DD/YY and DD/MM/YY.
Step 5
Press the Exit button to exit this menu.
Configuring a Corporate Directory
You can access a directory of employee names and phone numbers on the Cisco Unified IP Conference Station by using a Lightweight Directory Access Protocol 3 (LDAP3) enterprise directory such as the default Cisco Unified CallManager Corporate Directory. Before users can access the directory, you must configure the directory on Cisco Unified CallManager.
Note
If you use a custom enterprise directory, you must use the same XML format, script flow, HTML method and action that the default Cisco Unified CallManager Corporate Directory uses. The Cisco Unified IP Conference Station 7936 does not support all the XML tags, URLs, and action tags that are listed in the Cisco IP Phone Services Software Developer Kit (SDK).
Configuring Cisco Unified CallManager
To use the corporate directory, you must have users entered into a Lightweight Directory Access Protocol (LDAP) directory configured with Cisco Unified CallManager.
To configure the directory, follow these steps:
Procedure
Step 1
Open Cisco Unified CallManager
Step 2
Select User > Global Directory.
Search for users in the system.
Step 3
To add a new user, click Add a New User.
Add any desired users.
Refer to the online help in the Cisco Unified CallManager Administration application for details, or refer to the Cisco Unified CallManager Administration Guide and the Cisco Unified CallManager System Guide.
Using the Corporate Directory
After the corporate directory is configured in Cisco Unified CallManager, you can search the corporate directory by name or phone number.
Searching by Name
To search the corporate directory by name, follow these steps:
Procedure
Step 1
Press the Corp Dir softkey.
The search screen displays. You can search by First Name or Last Name, or both.
Step 2
Using the keypad, enter the search criteria, namely First Name and Last Name. Press the Up or Down scroll button to select a field.
When searching by name, you can enter one or more characters to broaden or narrow your search.
When entering letters, select the appropriate number key for the letter you want, and press that key the equivalent number of times for the correct letter. For example, to enter a B, press the 2 key two times, and to enter a C, press the 2 key three times.
Use the < softkey to go backward while entering search data.
To cancel a search, press the Cancel softkey.
Step 3
Press the Search softkey to start the search.
The message "Searching..." flashes on the LCD screen display.
Step 4
After the search results display, use the Up or Down scroll button to select an entry.
If the search results include more than 32 entries, you can press the more >> softkey followed by the Next softkey to display the next group of entries.
To go back to the previous group entries, press the more >> softkey followed by the Back softkey.
To return to the Search screen, press the more >> softkey followed by the NewSearch softkey.
Step 5
Press the Dial softkey to call the number. To edit the number before calling, press the EditDial softkey.
Step 6
To exit the directory, press the Cancel softkey or the Exit button.
Searching by Phone Number
To search the corporate directory by phone number, follow these steps:
Procedure
Step 1
Press the Corp Dir softkey.
The search screen displays.
Step 2
Press the Up or Down scroll button to select the Number field.
Using the keypad, enter the number. When searching by number, you can enter one or more digits to broaden or narrow your search.
Use the < softkey to go backward while entering search data.
To cancel a search, press the Cancel softkey.
Step 3
Press the Search softkey to start the search.
The message "Searching..." flashes on the LCD screen display.
Step 4
After the search results display, use the Up or Down scroll button to select an entry.
If the search results include more than 32 entries, you can press the more >> softkey followed by the Next softkey to display the next group of entries.
To go back to the previous group entries, press the more >> softkey followed by the Back softkey.
To return to the Search screen, press the more >> softkey followed by the NewSearch softkey.
Step 5
Press the Dial softkey to call the number. To edit the number before calling, press the EditDial softkey.
Step 6
To exit the directory, press the Cancel softkey or the Exit button.
Configuring a Local Directory
The Phone Book is a convenient way to store frequently dialed conference call numbers.
Note
You can also use the Cisco Unified IP Conference Station 7936 web interface to access the Phone Book. See the "Cisco Unified IP Conference Station 7936 Web Interface" section.
Using the Phone Book
You can use the phone book as a directory for your frequently called conference numbers.
Opening the Phone Book
To open the phone book, press the Ph Book softkey.
Adding an Entry
To add an entry in the phone book, follow these steps:
Procedure
Step 1
To add an entry in the phone book, press the New Entry softkey.
Step 2
Using the Dialing pad, enter the last name, first name, and phone number for the new entry. Press the Up or Down scroll button to select the Last, First, or Number fields.
When entering letters, select the appropriate number key for the letter you want, and press that key the equivalent number of times for the correct letter. For example, to enter a B, press the 2 key two times, and to enter a C, press the 2 key three times.
Use the < softkey to go backward while entering data.
Step 3
Press the Save softkey to save the new entry, or press the Exit softkey to exit without saving.
Note
You can add a maximum of 20 entries to the phone book.
Editing an Entry
To edit an entry in the phone book, follow these steps:
Procedure
Step 1
To edit an entry in the phone book, press the Up or Down scroll button to select an entry. Press the View/Edit softkey.
You can change or clear the selected entry using the Change or Clr Entry softkeys respectively. Press the < softkey to go backward when changing an entry.
Step 2
Press the Save softkey to save your changes, or press the Exit softkey to exit without saving.
Step 3
Press the Menu button to return to the main menu, or press the Exit button to return to the resting display.
Additional Features
These additional features are supported on the Cisco Unified IP Conference Station:
Note
Refer to the Cisco Unified CallManager Administration documentation or online help in the Cisco Unified CallManager Administration application for information about configuring these additional features.
Refer to the Cisco Unified IP Conference Station 7936 Phone Guide for detailed steps on how to use these features.
•
Meet-me Conference—The Cisco Unified IP Conference Station supports Meet-me conferences. A Meet-me conference allows other callers to dial into the conference call. A Meet-me conference requires a special conference number.
•
Call Park—The Cisco Unified IP Conference Station allows you to store or "park" a call at a specified number and then use any other phone in the Cisco Unified CallManager system (for example, a phone in someone else's office or in a conference room) to retrieve the call. Call Park numbers need to be configured.
•
Call Transfer—The Cisco Unified IP Conference Station supports the use of call transfer. This feature allows you to transfer the current call to another phone number.
•
Call Forwarding—The Cisco Unified IP Conference Station supports call forwarding to redirect all of your incoming calls to another number. You can set up this feature on your Cisco Unified IP Conference Station by using the CFwdAll softkey. Or, you can log in to the Cisco Unified CallManager User Options web page to set up call forwarding when you are away from the Cisco Unified IP Conference Station. Refer to the Cisco Unified IP Conference Station 7936 Phone Guide for additional information.
•
Call Pickup and Group Pickup—The Cisco Unified IP Conference Station allows you to answer a call that comes in on a telephone extension other than on your Cisco Unified IP Conference Station. When you hear an incoming call ringing on another phone, you can redirect the call to your Cisco Unified IP Conference Station by using the call pickup feature.There are two types of call pickup available on the Cisco Unified IP Conference Station. Call Pickup and Group Pickup are optional features that you can configure; the Cisco Unified IP Conference Station does not support these features by default.
•
Call Pickup—pick up incoming calls within your own group. The appropriate call pickup group number is dialed automatically when you choose this feature.
•
Group Pickup—pick up incoming calls within your own group or in other groups. You must dial the appropriate call pickup group number when using this feature.
•
Remove Last Participant—The Cisco Unified IP Conference Station supports Remove Last Participant. This feature allows you to remove the last participant in a conference call.
•
Join—The Cisco Unified IP Conference Station supports Join. This feature allows you to join 2 calls into a conference.
Cisco Unified IP Conference Station 7936 Web Interface
Some of the features and functions of the Cisco Unified IP Conference Station can be configured through the Cisco Unified IP Conference Station 7936 web interface.
Description of the Web Interface
The Cisco Unified IP Conference Station 7936 web interface appears in your web browser as a tri-pane window. The browser menu and toolbar appear at the top of the window, the table of contents links appear in the left navigation pane, and the linked information and configuration fields appear in the right pane. A banner also appears in the top right corner of the right pane and remains persistent through all the pages in the web interface. The banner information includes: software version, protocol type, boot load ID, application load ID, IP address, MAC address, and local number.
Note
The content of the web interface is different for administrators and end-users. Both the administrator and end-user views require login passwords.
Using the Web Interface
To access the Cisco Unified IP Conference Station 7936 web interface, follow these steps:
Procedure
Step 1
Open your web browser.
Step 2
In the address field enter:
http://IP address of the Cisco Unified IP Conference Station:<HTTP port number>
Configuration information applies to the specific Cisco Unified IP Conference Station associated with the IP address you enter.
Note
If you changed the HTTP port number, you need to use that number as a suffix to the IP address. If you did not change the HTTP port number, then you do not need to enter a suffix.
The web interface appears, and the initial login page is displayed.
Step 3
To log in as the administrator, enter the administrator password and click Login.
The default administrator password is **#.
Note
When logged in to the IP Conference Station web pages, the web pages will time out after approximately 20 minutes of inactivity. You will then have to log back in.
Step 4
To log off, click Administrator Logout.
Information Available on All Web Pages
The top right portion of the Cisco Unified IP Conference Station 7936 web interface includes a separate section that displays consistent information for all of the web pages.
This section contains the following information; example text appears next to each item in the list:
•
Software Version: 3.3(10.00.0004)
•
Protocol Type: SCCP
•
Boot Load ID: PC0503031418
•
Application Load ID: CMTERM_7936.3-3-2-0
•
IP Address: 10.1.1.11
•
MAC Address: 00c742655892
•
Local Number: 2022
Administrator Settings
The Administrator Settings include the following web pages:
•
System Information
•
Network Setup
•
Phone Book
•
Sounds
•
Time & Date
•
Diagnostics
•
Passwords/HTTP Port Change
•
Restore Factory Defaults
Each page is described in the sections that follow.
System Information
The System Information web page is the default page and provides the following read-only configuration information.
General settings, including:
•
Language
•
Local number
•
DHCP
•
IP Address
•
IP Mask
•
Router 1 Address
•
Host Name
•
Domain Name
•
DNS Address
•
Operational VLAN ID
•
Admin VLAN ID
•
CallManager 1 Address
•
CallManager 2 Address
•
CallManager 3 Address
•
CallManager 4 Address
•
CallManager 5 Address
•
DSCP Call Control
•
DSCP Configuration
•
DSCP Services
•
TFTP Server 1
•
TFTP Server 2
•
TFTP Server 3
•
Alternate TFTP
•
Hardware Revision
•
Software Version
•
DSP Revision
•
HTTP Port
•
DSCP Call Control
•
DSCP Configuration
•
DSCP Services
Sound settings, including:
•
Dial Tone
•
Ringer
Time/Date settings, including:
•
Time
•
Date
Compression information, including:
•
Supported Codecs
•
Current Call
•
Dynamic Jitter Buffer
•
Silence Suppression
Network Configuration settings, including
•
Ethernet Port Configuration Mode
•
Ethernet Port Configuration Speed
Network Setup
The Network Setup web page lets you change the following settings.
•
DHCP—You can enable or disable DHCP for the IP Conference Station. When DHCP is enabled, the network dynamically assigns the IP address to the IP Conference Station.
Note
If you disable DHCP, you must manually set the IP address, IP mask, and Router for each IP Conference Station.
•
Domain Name and DNS Server IP Address—You can set the Domain Name and the DNS Server IP Address for the Cisco Unified IP Conference Station.
•
Administrative VLAN ID—You can set the Administrative VLAN ID for the Cisco Unified IP Conference Station. The VLAN ID should be a number between 0 and 4094.
•
TFTP Servers—You can set the alternate TFTP Server for the Cisco Unified IP Conference Station.
•
Ethernet Configuration—You can set Ethernet port configuration and the Ethernet port speed for the Cisco Unified IP Conference Station.
Phone Book
The Phone Book web page lets you quickly add, delete, and edit entries. You can also dial numbers from the Phone Book.
On the Phone Book web page, you can view entries by alphabetical sequence or by numbers only.
Opening the Phone Book and Viewing Entries
To open the Phone Book web page, click Phone Book in the navigation pane.
To view the entries:
•
By alphabetic sequence: Click one of the letter combinations, for example to view entries beginning with the letter "D", click DEF.
•
By phone number, click Dial Numbers Only.
Adding an Entry
To add an entry in the phone book, follow these steps:
Procedure
Step 1
Click the Add button.
Step 2
Enter the phone number, last and first name, and company name.
Note
The Phone number and last name are required entries.
Step 3
Click Add New Entry.
Repeat these steps to add other entries to the phone book. You can add a maximum of 20 entries in the phone book.
Deleting an Entry
To delete an entry in the phone book follow these steps:
Procedure
Step 1
Select the entry you want to delete.
Step 2
Click the Delete button.
Step 3
Confirm the deletion by clicking the Delete button again.
Editing an Entry
To edit an entry in the phone book, follow these steps:
Procedure
Step 1
Select the entry you want to change.
Step 2
Click the Edit button.
Make any changes to the entry.
Step 3
Click the Update button to save your changes.
Dialing a Number in the Phone Book
To dial a number in the phone book, select the entry you want and click Dial. The following message appears on the web page:
Your call attempt from the web is successful!
Note
You can only dial one call from the Phone Book web page at a time. Multiple calls from the Phone Book web page are not supported.
Sounds
The Sounds web page lets you select the ringer sound and the dial tone.
Opening the Sounds Web Page
To open the Sounds web page, select the entry you want and click Sounds in the navigation pane.
Changing the Ringer Sound
To change the ringer sound, follow these steps:
Procedure
Step 1
Select a ringer sound from the drop-down list.
There are five ringer sounds: Pro, Biz, Euro, Chirp, Bell, and also Ringer Off.
Note
Selecting Ringer Off shuts off the ringer sound on the Cisco Unified IP Conference Station.
Step 2
Click Set Ringer.
Step 3
Click Test Ringer to hear the Sound you selected.
Time & Date
Normally, the time and date is automatically set from the Cisco Unified CallManager.
The Time & Date web page lets you manually change the time and date formats that appear on the LCD screen on the Cisco Unified IP Conference Station. Table 3-4 describes how to set the Time & Date from the web page.
Table 3-4 Time and Date Set From The Web Page
If you want to...
|
Do this...
|
Open the Time & Date web page
|
Click Time & Date in the navigation pane.
|
Change the time format
|
1. Select the 12-hour clock option button for 12-hour time format, or select the 24-hour clock option button for 24-hour time format.
2. Click Change to save your changes.
|
Change the date format
|
1. Select the MM/DD/YY option button for a month/date/year format, select the DD/MM/YY option button for a day/month/year format, or select the YY/MM/DD option button for a year/month/date format.
2. Click Change to save your changes.
|
Diagnostics
The Diagnostics web page lets you test network connectivity to another device. Table 3-5 describes how to use the Diagnostics web page.
Table 3-5 Diagnostics
If you want to...
|
Do this...
|
Open the Diagnostics web page
|
Click Diagnostics in the navigation pane.
|
Ping another device to test connectivity
|
1. Enter the IP address or name of the device you want to ping.
2. Click Ping.
If connectivity has been established, you should receive a reply back from the device. If the ping request times out, there is no connectivity between the devices. To resolve this problem, start by checking the physical connections on the devices.
|
Passwords/HTTP Port Change
The Passwords/HTTP Port Change web page lets you change the administrator and user login passwords Table 3-6 describes how to use the Passwords/HTTP Port Change web page.
Table 3-6 Passwords/HTTP Port Change
If you want to...
|
Do this...
|
Open the Password Web Page
|
1. Click Passwords/HTTP Port Change in the navigation pane.
|
Change the Administrator Password
|
1. In the Old Admin Password field, enter the current administrator password.
2. In the New Admin Password field, enter the new administrator password.
3. In the Confirm Admin Password field, enter the new administrator password again.
4. Click Change.
|
Change the End User Password
|
1. Click Change User Password.
2. In the Old User Password field, enter the current user password.
3. In the New User Password field, enter the new user password.
4. In the Confirm User Password field, enter the new user password again.
5. Click Change.
|
Change the HTTP Port
|
1. Click Change HTTP Port.
2. In the New HTTP Port field, enter a new HTTP Port number.
For example:
http://IP address of Cisco Unified IP Conference Station:<HTTP port number>
The default value is 80. When you change the HTTP Port number, a user must add the HTTP port number following the IP address of a Cisco Unified IP Conference Station when accessing the web interface.
3. Click Change.
|
Restore Factory Defaults
The Restore Factory Defaults web page lets you restore the factory default settings on the Cisco Unified IP Conference Station.
If you want to...
|
Do this...
|
Open the Restore Factory Defaults Web Page
|
Caution  When you restore the factory defaults, all current settings, configuration, and data, including the phone book entries, are lost.
Click Restore Factory Defaults.
Note For a list of default settings, refer to the "Default Settings" section.
|