-
Cisco MeetingPlace for Outlook Release 4.3.0 System Manager's Guide
-
Preface
-
Concepts and Functions
-
Installing Cisco MeetingPlace for Outlook
-
Configuring and Managing Cisco MeetingPlace for Outlook
-
Customizing Meeting Notifications
-
Using Cisco MeetingPlace for Outlook
-
Troubleshooting
-
Notification Items
-
Customizing the Cisco MeetingPlace for Outlook Scheduling Form
-
Upgrading Cisco MeetingPlace for Outlook
-
 Feedback
Table Of Contents
Using Cisco MeetingPlace for Outlook
Setting up Outlook to Schedule MeetingPlace Meetings
Scheduling a MeetingPlace Meeting from Outlook
Scheduling a Recurring Meeting
Scheduling a Reservationless Meeting
Scheduling a Continuous Meeting
Rescheduling Meetings and Changing Meeting Details
Using the Click-To-Attend Link
Saving Meeting Invitations in the E-Mail Inbox
Working Offline in Microsoft Outlook
Upgrading MeetingPlace for Outlook Client Software
Using Cisco MeetingPlace for Outlook
Users can schedule and attend MeetingPlace meetings from their Microsoft Outlook calendar.
The topics covered in this chapter include:
•
Saving Meeting Invitations in the E-Mail Inbox
•
•
In this chapter, most information is directed at the end-user. This information is also available in online Help, which is accessible via the MeetingPlace scheduling and notification forms. In either form, click the MeetingPlace tab to see the Help link. Also, a printable Quick Start Guide for end users is available by following the appropriate link from http://www.cisco.com/univercd/cc/td/doc/product/conf/mtgplace/index.htm.
Information in this chapter that is specifically for the system manager is identified as such.
Scheduling Meetings
Schedule Cisco MeetingPlace meetings from Outlook using the same form that you use to schedule other appointments, events, and meetings.
In order to complete the scheduling process, your Outlook client must be connected via your company network to the Microsoft Exchange e-mail server. Refer to Microsoft Outlook help for information about connecting to the e-mail server. To set up meetings while working offline, then complete the scheduling process when you connect, see Working Offline in Microsoft Outlook.
Setting up Outlook to Schedule MeetingPlace Meetings
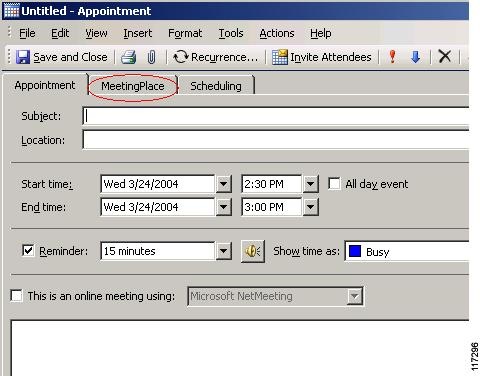
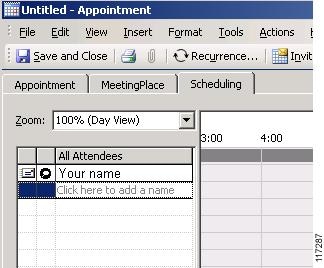
In order to schedule MeetingPlace meetings from Outlook, the MeetingPlace for Outlook client software must be installed on your computer and the MeetingPlace tab must appear when you create a new meeting request. This tab gives access to the MeetingPlace scheduling form.
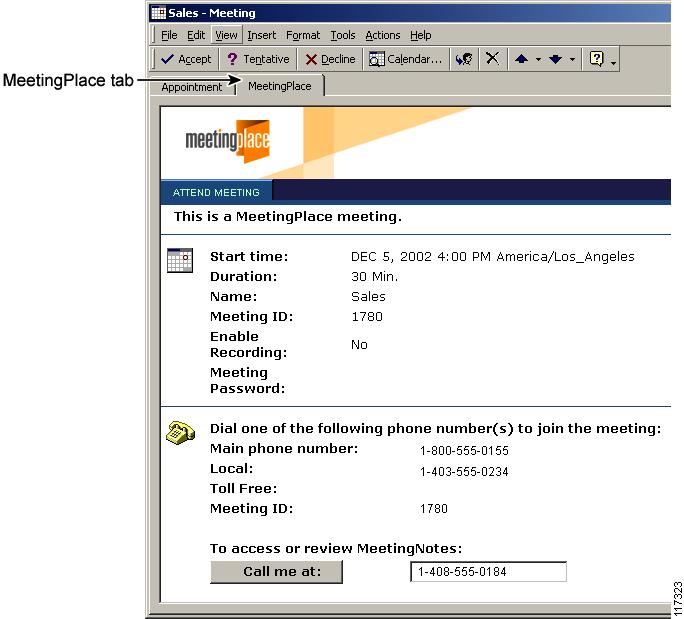
Figure 5-1 MeetingPlace Tab in the Scheduling Form
For system managers: If the MeetingPlace tab is not visible, see Distributing and Installing the MeetingPlace for Outlook Client.
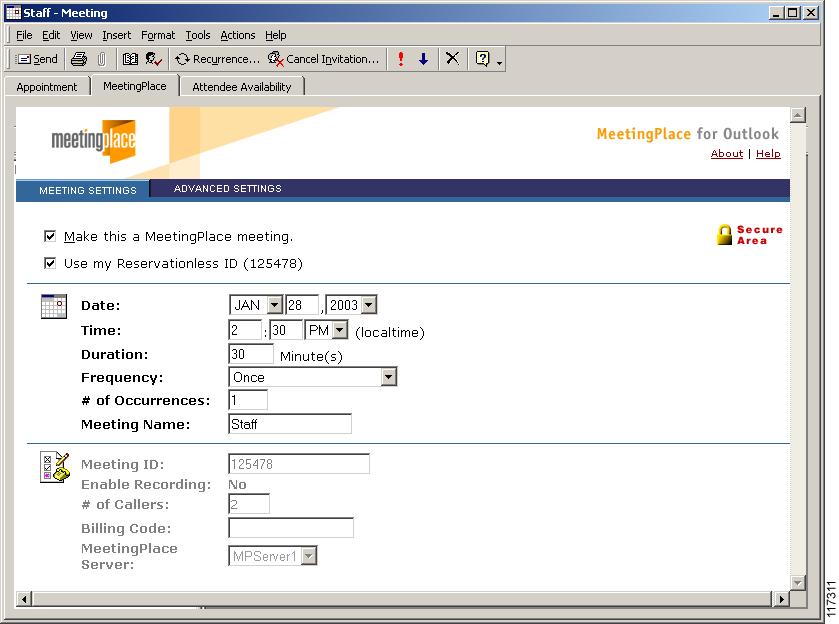
Scheduling a MeetingPlace Meeting from Outlook
When you schedule a MeetingPlace meeting, MeetingPlace may prompt you for your user ID and password.
To schedule a meeting:
Step 1
Step 2
Step 3
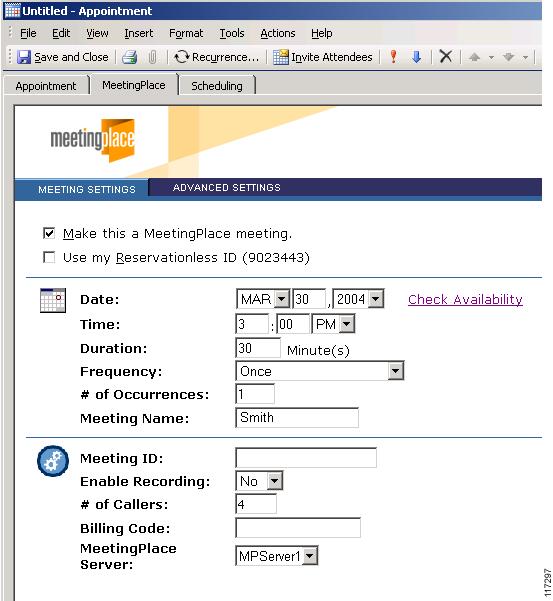
Date
Enter the date of the meeting.
Time
Enter the meeting start time.
Duration
Enter the number of minutes the meeting will last.
Frequency
Enter how often the meeting will occur: once, daily, weekly, biweekly, monthly by date, monthly by day of week, weekdays, or continuous.
If you choose an option other than Once or Continuous, see Scheduling a Recurring Meeting.
Only system managers can schedule Continuous meetings.
# of Occurrences
If you chose a Frequency option other than Once or Continuous, enter the number of times the meeting will recur. For example, if the Frequency parameter is set to Weekly, how many weeks will this meeting occur?
Meeting Name
Enter the name of the meeting. If a meeting name is not entered, MeetingPlace automatically enters the last name of the scheduler.
Meeting ID
(Optional) Enter an easy to remember meeting ID. This can include letters or numbers. However, only numbers will appear in meeting notifications, based on the letter-to-number correlations on a telephone keypad.
For system managers: If Allow Vanity ID is disabled on the MeetingPlace server, this option is dimmed.
If you do not enter a meeting ID, MeetingPlace generates one automatically.
# of Callers
Enter the number of callers you expect to attend this meeting.
For system managers: This determines the number of ports MeetingPlace will reserve for this meeting.
Billing Code
Enter a billing code if you have one. If not, leave blank.
MeetingPlace Server
The meeting will be hosted on this MeetingPlace Audio Server.
For system managers:
•
•
Step 4
•
•
Step 5
Step 6
Step 7
Step 8
Step 9
Step 10
The meeting is scheduled on MeetingPlace, meeting invitations are sent to the invitees, and the meeting details automatically populate your Outlook calendar.
If you decide later that you do not require MeetingPlace resources for this meeting, see Disassociating Meetings.
Scheduling a Recurring Meeting
MeetingPlace meetings can be scheduled to recur daily, weekly, biweekly, monthly by date, monthly by day of week, or every weekday.
For step-by-step instructions to schedule a recurring meeting, see Scheduling a MeetingPlace Meeting from Outlook.
Points to remember about recurring meetings:
•
•
•
Scheduling a Reservationless Meeting
A reservationless meeting starts as soon as it is scheduled, and any user can schedule a reservationless meeting at any time. For any reservationless meeting, the meeting ID is the scheduler's profile number.
Reservationless meetings are not available on all systems. For system managers: Reservationless meetings are not available on MeetingPlace Audio Server versions previous to version 5.0. See Configuring MeetingPlace for Outlook for Reservationless Meetings.
To schedule a reservationless meeting:
Step 1
Step 2
Step 3
Step 4
Step 5
Step 6
Step 7
Scheduling a Continuous Meeting
A continuous meeting is always in session and available to attendees. Resources are reserved 24 hours a day, 7 days a week. This is useful if, for example, an all-day meeting is planned and users will leave the meeting to take breaks. For information about continuous meetings, refer to the Cisco MeetingPlace Audio Server System Manager's Guide.
Only users with MeetingPlace system manager permissions can schedule or delete continuous meetings.
To schedule a continuous meeting:
Step 1
Step 2
Step 3
Step 4
Step 5
Step 6
Step 7
Rescheduling Meetings and Changing Meeting Details
You can reschedule and modify parameters for single-occurrence and recurring meetings. You cannot reschedule continuous meetings.
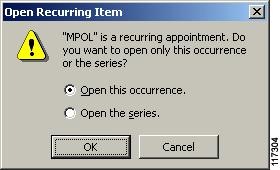
If you need to change or reschedule a recurring meeting:
•
•
If you need to change or reschedule a reservationless meeting:
•
•
•
To reschedule or modify parameters for a meeting:
Step 1
•
•
Step 2
Step 3
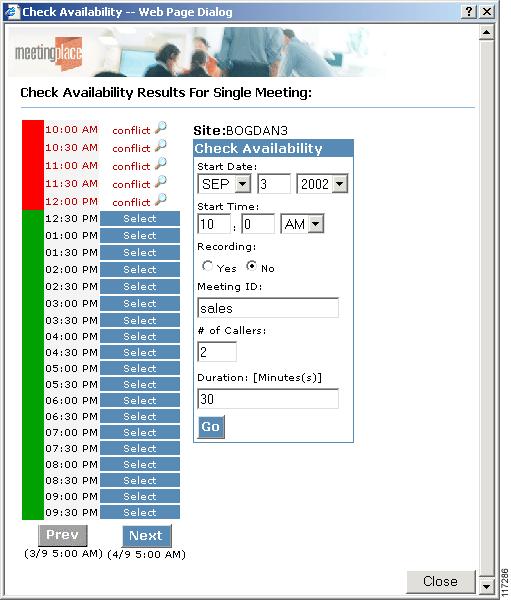
Step 4
Check Availability is not available when rescheduling a recurring meeting.
Step 5
Canceling Meetings
To cancel a meeting:
Step 1
Step 2
Disassociating Meetings
If you no longer require MeetingPlace resources for a meeting you have scheduled, you can disassociate MeetingPlace from that meeting.
An entire series of recurring meetings cannot be disassociated from MeetingPlace in a single operation, but individual meetings in the series can be disassociated in separate operations. Disassociate one or more instances of the meeting, or cancel and reschedule the meeting as a non-MeetingPlace meeting.
To disassociate MeetingPlace resources from a single meeting or occurrence:
Step 1
Step 2
Step 3
Step 4
Attending Meetings
Meeting invitations arrive in your e-mail Inbox. After you accept an invitation, the meeting notification appears in your Microsoft Outlook calendar. To keep a copy of the meeting in your inbox, see Saving Meeting Invitations in the E-Mail Inbox.
You can click a link or button in this e-mail message to join the meeting.
For reservationless meetings scheduled from other MeetingPlace interfaces (for example, MeetingPlace Web or MeetingTime), you will not receive an e-mail notification.
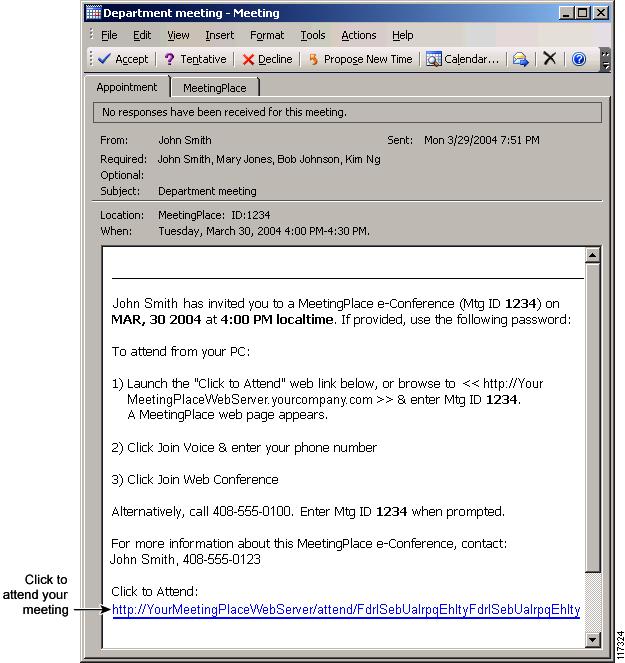
Using the Click-To-Attend Link
One way to attend a MeetingPlace meeting via Outlook is to click a hypertext meeting link. Users can attend meetings via click-to-attend links sent from MeetingPlace for Outlook versions 4.2.5, 4.2.7, and 4.3.
For system administrators—For multiserver meetings, the web conference is hosted from the primary server, and local (secondary server) participants are redirected to the web conference on the primary server. The click to attend link in meeting notifications takes users to their local web servers. Then, when they click the button to join the Web conference, they enter enter the web conference hosted on the primary MeetingPlace Web server.
To attend the meeting via a click-to-attend link:
Step 1
Step 2
Step 3
Your web browser opens and brings you to the MeetingPlace Web sign in page.
Do not try to attend a meeting before its scheduled time. If you join the meeting early, you may have to wait in a waiting room until the meeting scheduler arrives.
Step 4
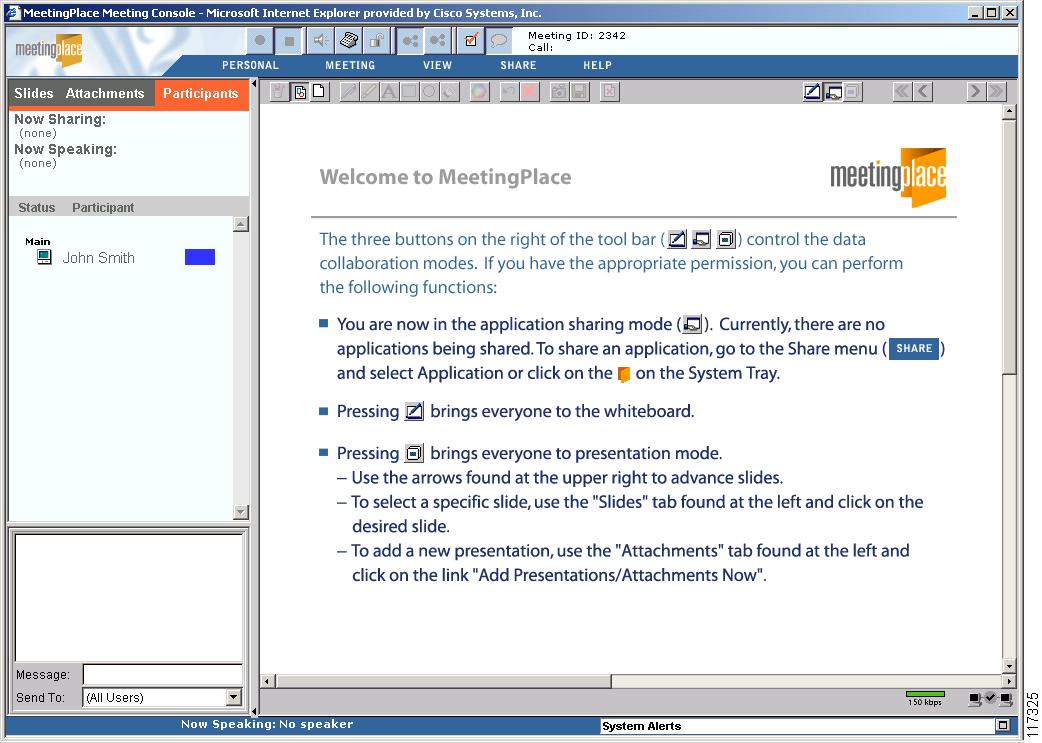
Figure 5-2 MeetingPlace Meeting Room
Step 5
Step 6
For complete information about attending meetings via MeetingPlace Web, refer to the documentation for MeetingPlace Web.
Using the MeetingPlace Tab
MeetingPlace invitations include an attached MeetingPlace tab.
To attend a meeting:
Step 1
Step 2
Step 3
For system managers: Users who do not have the MeetingPlace for Outlook client software installed, but receive a MeetingPlace invitation in Microsoft Outlook, can download the MeetingPlace for Outlook client from the MeetingPlace tab in the meeting notification. See Upgrading MeetingPlace for Outlook Client Software.
Saving Meeting Invitations in the E-Mail Inbox
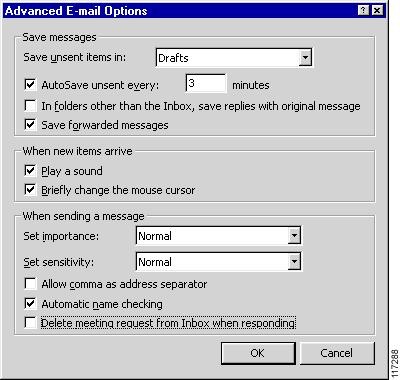
By default, a meeting invitation is deleted from your e-mail Inbox after you accept or decline the meeting. If you accept the meeting, meeting information that was in the invitation appears in your Outlook calendar. If you do not use your Outlook calendar, you may wish to save meeting invitations in your e-mail Inbox.
To save meeting invitations in your e-mail Inbox:
Step 1
Step 2
Step 3
Step 4
Step 5
Working Offline in Microsoft Outlook
You can schedule MeetingPlace meetings from Outlook while working offline (not connected to your Exchange Server). However, you must be connected to the company network and have Microsoft Outlook set up for offline access. To set Microsoft Outlook to work offline, refer to the Microsoft Outlook documentation.
When you schedule a meeting while you are working offline, the meeting invitation remains in your Outbox until you reconnect to your Exchange Server. After you reconnect, notifications are sent to the people you have invited.
Upgrading MeetingPlace for Outlook Client Software
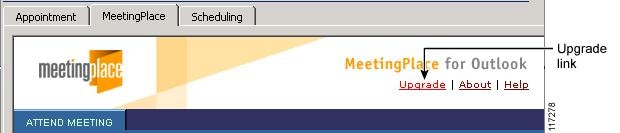
After MeetingPlace for Outlook client software is installed on your computer, MeetingPlace automatically detects when a newer version of the software is available and alerts you with an upgrade link or an upgrade prompt. For system managers: see Distributing and Installing the MeetingPlace for Outlook Client and Configure Client Setup Utility for information about client upgrades.
You must be logged onto your computer with a Windows account that has Administrator privileges in order to download and install the MeetingPlace for Outlook client.
For system managers: Depending on the configuration of IIS on the MeetingPlace for Outlook server, users may not be able to run the upgrade from the File Download window by clicking Open. Users can click Save and then run the upgrade.exe installer from their hard drive, or you can turn off http compression in IIS for .exe files. Refer to documentation for IIS or the Microsoft knowledge base for instructions.
To download the client software:
Step 1
Step 2
Step 3
Step 4
Step 5
Step 6
Step 7
Step 8
Step 9
If you do not see the MeetingPlace tab after you restart Microsoft Outlook, exit Outlook again and check the task manager to make sure the Outlook process ended. If necessary, end the Outlook task, then restart Outlook.