Logging Into Cloud APIC Through SSH

Normally, you will log into your Cloud APIC through a browser, as described in Configuring Cisco Cloud APIC Using the Setup Wizard. If you need to log into your Cloud APIC through SSH for any reason, however, the following sections describe how to log into the Cloud APIC using the SSH keys that you generated in the previous sections or using SSH password authentication.

Log Into Cloud APIC Using SSH Keys

Procedure


Step 1

Log into your Azure account for the Cloud APIC infra tenant and go to the Azure management portal, if you are not there already:

https://portal.azure.com/#home

Step 2

From the main Azure management portal page, click the All services link in the left nav bar, then click the Virtual Machines link.

Step 3

Locate the Cloud APIC system in the Virtual Machines page, then locate the IP address shown in the Public IP address column.

Step 4

Log into your Cloud APIC using the SSH keys.

  • For Linux systems, enter the following to log into your Cloud APIC:

    # ssh -i private-key-file admin@public-IP-address

    where the private-key-file is the private key file that you created in Generating an SSH Key Pair in Linux or MacOS.

    For example:

    # ssh -i azure_key admin@192.0.2.1
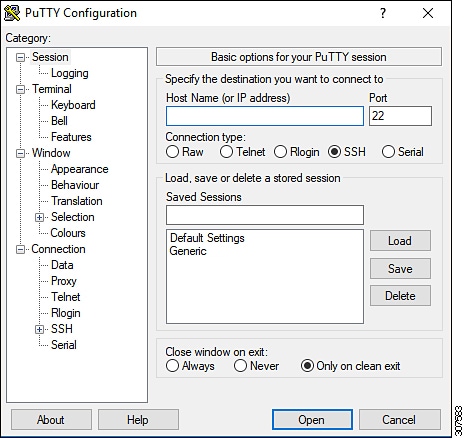
  • For Windows systems, use PuTTY to log into your Cloud APIC:

    1. Run the PuTTY Configuration program by navigating to Windows > Start Menu > All Programs > PuTTY > PuTTY.

    2. In the left nav bar, click Session, then enter the public IP address for the Cloud APIC.

    3. In the left nav bar, click Connection > SSH > Auth.

    4. In the Authentication parameters area, locate the Private key file for authentication field and click the Browse... button.

    5. Navigate to the private key file that you created in Generating an SSH Key Pair in Windows and click Open.

    6. In the main PuTTY window, click Open to log into the Cloud APIC. A login prompt appears.

    7. Log into the Cloud APIC as admin.


Log Into Cloud APIC Using SSH Password Authentication

Unlike SSH using a public key, SSH Password Authentication is disabled by default. Use these procedures to enable SSH Password Authentication so that you can SSH into your Cloud APIC with a username and password.

Procedure


Step 1

Open a browser window and, using the secure version of HTTP (https://), paste the IP address into the URL field, then press Return to access this Cloud APIC.

For example, https://192.0.2.1.

Step 2

Enter the following information in the login page for the Cloud APIC:

  • Username: Enter admin for this field.

  • Password: Enter the password that you provided to log into the Cloud APIC.

  • Domain: If you see the Domain field, leave the default Domain entry as-is.

Step 3

Click Login at the bottom of the page.

Step 4

Navigate to Infrastructure > System Configuration, then click the Management Access tab in the System Configuration page.

Step 5

Click the pencil icon in the upper right corner of the screen to edit the SSH settings.

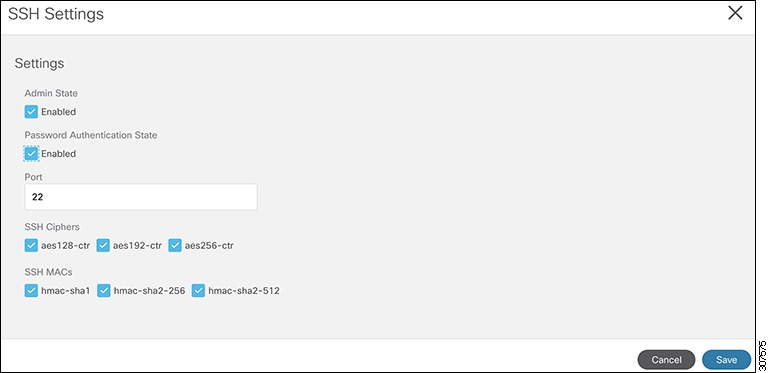
The Settings page appears for SSH.

Step 6

In the Password Authentication State field, select Enabled.

Step 7

Click Save.

You can now SSH into your Cloud APIC without having to access the public and private key files:

# ssh admin@192.0.2.1