Getting Started with the Cisco Catalyst Wireless Mobile Application

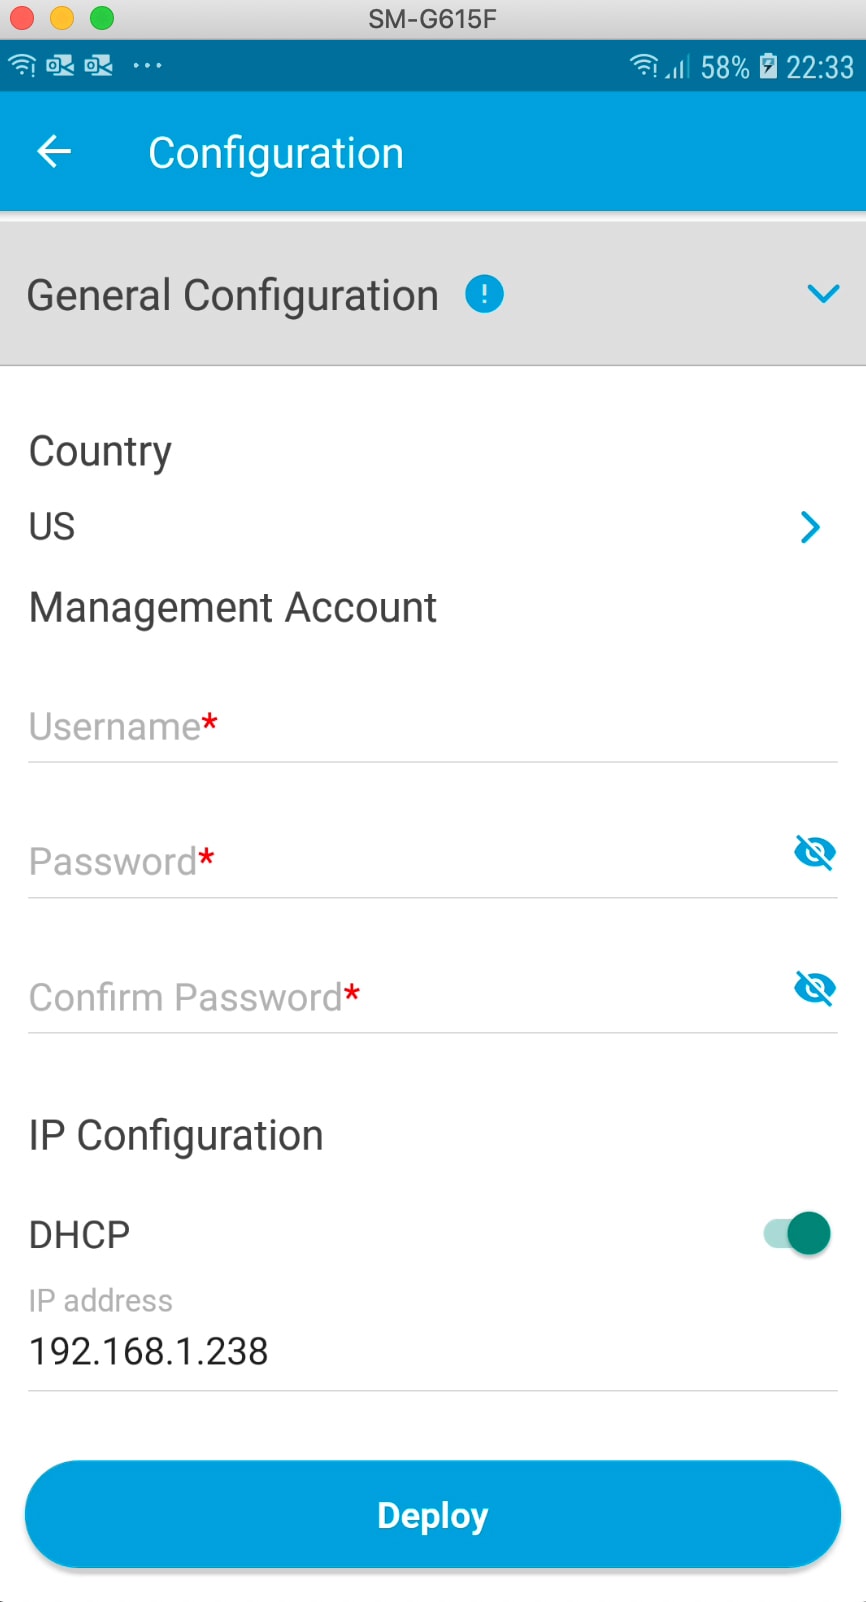
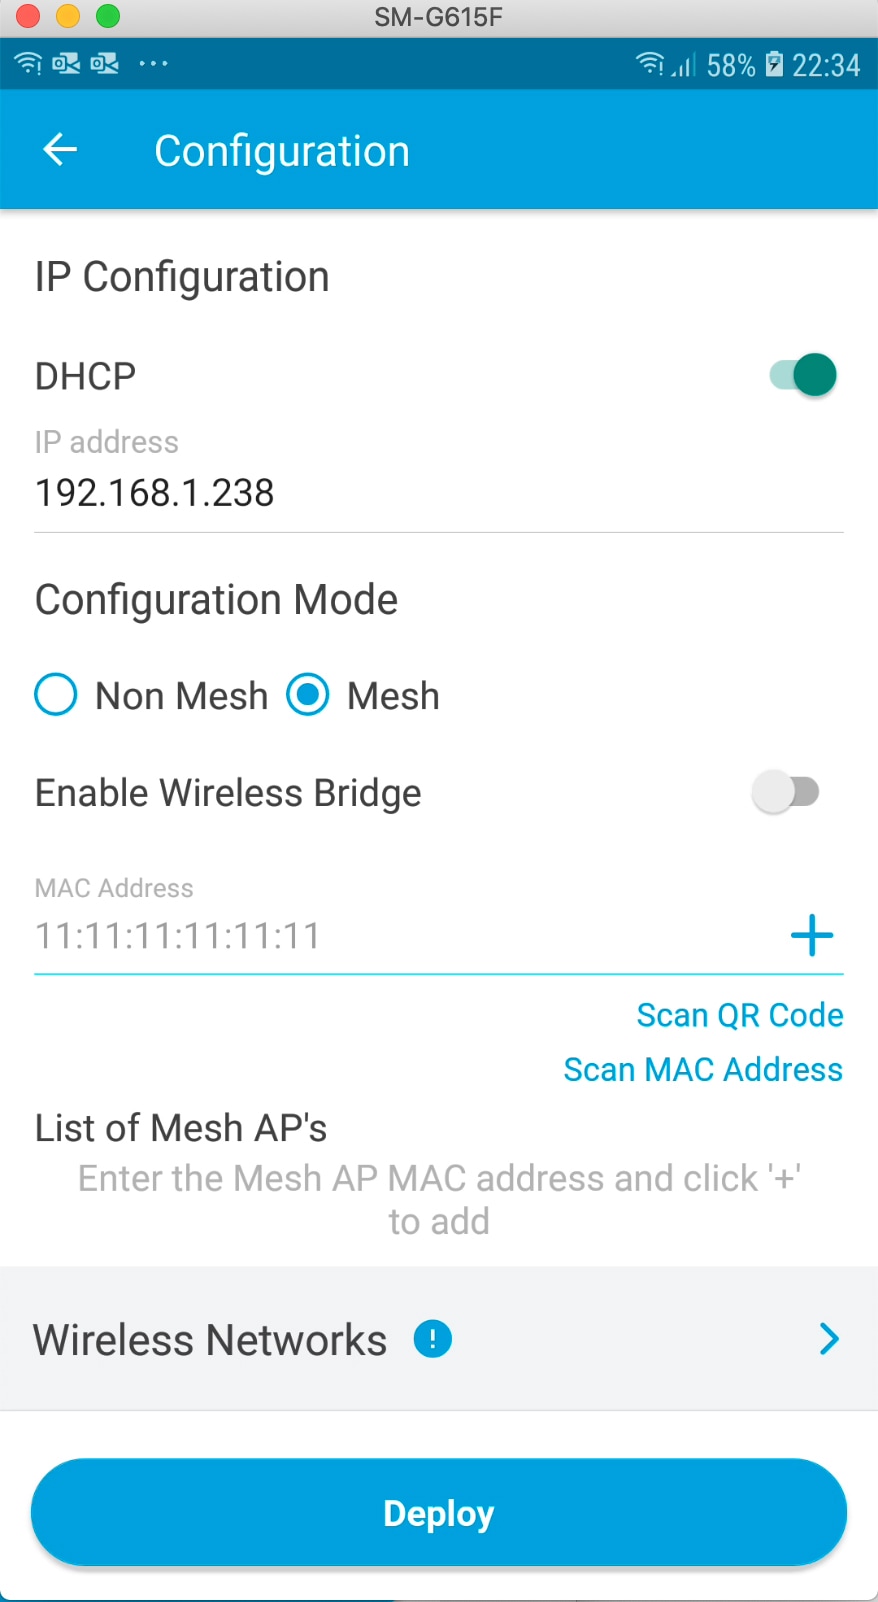
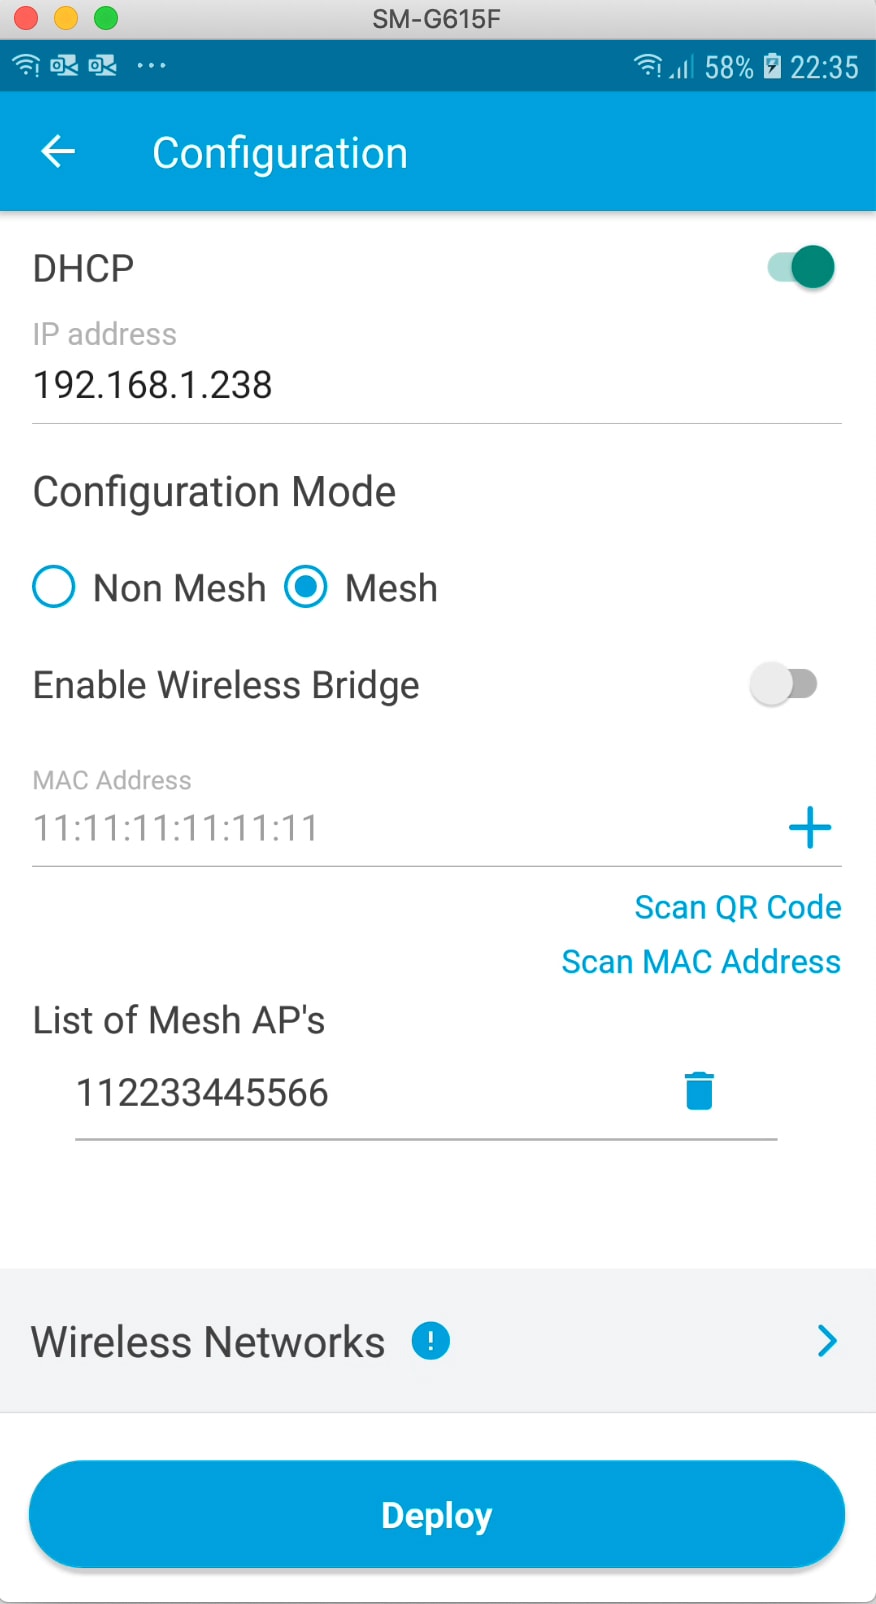
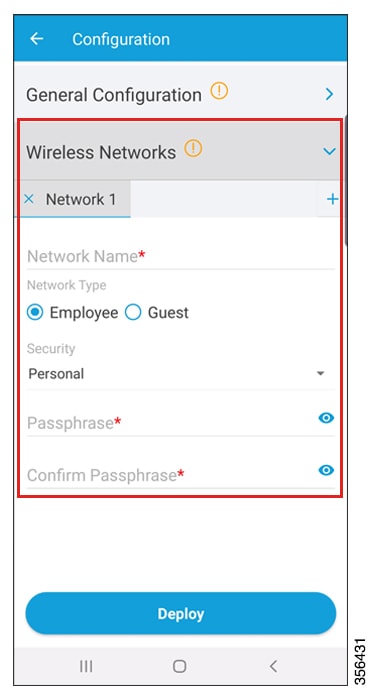
Prerequisites for App Usage

To enable convenient usage and proper functioning of the Cisco Catalyst Wireless mobile app, ensure that the app is granted the following permissions on your mobile device:

  • Location permission on your mobile device (all Android devices and Apple devices with iOS Version 13 and later).

  • Permission to access the mobile device camera to enable auto provisioning through QR code scanning.

Setting Up a Wi-Fi Network

Use the Cisco Catalyst Wireless Mobile App to set up the Wi-Fi network for your Cisco Embedded Wireless Controller deployment by performing the procedures provided here, in the same order. The following sections also provide information about connecting to the provisioning SSID:

Connecting to the Provisioning SSID

Figure 1. Landing Screen and Provisioning Screen of the Cisco Catalyst Wireless Mobile App

To connect to the provisioning SSID, use either of the following methods.

Scanning the QR code

  1. You can locate the QR code at the back of your Cisco Catalyst Series access point.

    Figure 2. Back view of Cisco Catalyst 9120AX Series AP

    1

    Location of the QR code at the back of the Cisco Catalyst 9120AX Series AP

  2. If the access point is capable of becoming a Cisco Embedded Wireless Controller, you can use the Cisco Catalyst Wireless mobile app to scan this QR code and automatically provision the AP to set up your Wi-Fi network.

    Figure 3. Scanning the QR code on the AP using the Cisco Catalyst Wireless mobile app
  3. To initiate day zero configuration, follow the instructions in the Logging in to the Day 0 Wizard from Step 3.

Manually Connecting to the Provisioning SSID

Figure 4. Manually Connecting to the Provisioning SSID Using the Cisco Catalyst Wireless Mobile App
Procedure

Step 1

In your mobile device, under Settings, go to Wi-Fi.

Step 2

Under Choose A Network, tap CiscoAirProvision-xxxx from the list of available SSIDs.

Step 3

In the Password field, enter the default password for the CiscoAirProvision-xxxx SSID.

Step 4

Tap Join.

Your mobile device is now connected to the CiscoAirProvision-xxxx SSID.


What to do next

To initiate day zero configuration, return to the Landing screen of the app, and follow the instructions provided in Logging in to the Day 0 Wizard.

Troubleshooting the Task of Connecting to the Provisioning SSID

Problem During SSID provisioning on your Android device, the login screen is repeatedly displayed in the mobile device browser.

Solution Manually navigate to the Cisco Catalyst Wireless mobile app to continue using it.

Problem Your mobile device is connected to the corresponding SSID, but the error message "Please check your Wi-Fi connection and try again" is displayed. This error might also appear during the Day 1 setup.

Solution Switch off your mobile data and connect to the provisioning SSID.

Problem In Android 6.0 (Marshmallow) or later versions, you may see the error message "Connection to SSID ssid-name failed" even after repeated attempts to reconnect to the corresponding SSID. For more details, see https://developer.android.com/about/versions/marshmallow/android-6.0-changes#behavior-network. This error might also appear during Day 1 setup.

Figure 5. Error Message in Android 6.0 and Later Versions While Connecting to the SSID

Solution Navigate to Settings > Wi-Fi > Choose A Network and do one of the following:

  • Solution Navigate to the corresponding SSID, and tap Forget. Wait for a couple of minutes and then return to the Cisco Catalyst Wireless mobile app to continue usage.

  • Solution Manually connect to the corresponding SSID and return to the Cisco Catalyst Wireless mobile app.

Provisioning the Network

The following sections provide information about the tasks involved in provisioning the network.

Logging in to the Day 0 Wizard

Before you begin
Your mobile device must be connected to the CiscoAirProvision-xxxx SSID.
Procedure

Step 1

In your mobile device, under Setup a Wi-Fi Network, tap Setup.

The Provisioning screen is displayed.

Step 2

Tap Continue to proceed with the configuration.

The Device Login screen for your Cisco Embedded Wireless Controller network is displayed.

Figure 6. Logging in to the Day Zero Wizard
Step 3

In the Device Login screen, enter the default admin credentials. The default Username is webui and Password is cisco.

Step 4

Tap Login.


Overview of the Day Zero Wizard

The day zero wizard of the Cisco Catalyst Wireless mobile app helps in the initial setup of your Cisco Embedded Wireless Controller network. You can configure certain basic parameters on the controller and network parameters to get your Cisco Embedded Wireless Controller network running.

Initial Network Configuration

After you log in to the day zero wizard of the Cisco Catalyst Wireless mobile application, perform the following steps to configure the basic settings for your Cisco Embedded Wireless Controller network:

Procedure


Step 1

In the Configuration screen, under General Configuration, tap the Country drop-down list and select a country.

Step 2

Tap Management Account and enter the required management credentials.

Figure 7. Day Zero Wizard - General Configuration
Step 3

Under IP Configuration, do one of the following:

  • DHCP: Enable the DHCP option to get a dynamic management IP address.

  • IP Address: Enter the static management IP address for the controller interface.

Step 4

Under the Configuration Mode, do one of the following:

  1. Non Mesh: Enable the nonmesh configuration mode.

  2. Mesh: Enable the mesh configuration mode and provide the following:

    1. Enable Wireless Bridge: Slide the toggle button to enable or disable the wireless bridge.

    2. MAC Address: Enter the MAC address of the mesh AP MAC address. Tap + to add a MAC address to the list of mesh AP MAC addresses.

      Additionally, you can enter MAC addresses by tapping the Scan QR Code link and scanning the MAC addresses, and by scanning the image to read the MAC addresses.

      List of Mesh APs: Tap the delete icon to clear the list of MAC addresses on the mesh APs.

    Figure 8. Day Zero Wizard - Configuration Mode
    Figure 9. List of Mesh APs
Step 5

Under Wireless Networks, tap the + icon to add a network SSID.

Figure 10. Day Zero Wizard – Wireless Network Configuration
Step 6

In the Network Name field, enter a name.

Step 7

Under the Network Type, tap either the Employee or the Guest radio button.

Step 8

From the Security drop-down list, choose the required security type.

  • If you selected Employee in the previous step, the available options are Personal or Enterprise.

    The default security type is Personal. For more information about configuring Enterprise security, see the Configure AAA Server section.

  • If you selected Guest in the previous step, the security type is fixed as Consent. Go to Step 11.

  • If you selected Employee in the previous step, then continue from Step 9.

Step 9

In the Passphrase field, enter a passcode.

Step 10

In the Confirm Passphrase field, re-enter the passcode.

Step 11

Tap Deploy.

A confirmation message is displayed.

Step 12

(Optional) Tap Review to review the configured network settings.

The Summary screen is displayed. Here, you can view and edit the General Configuration and Wireless Network settings.

Step 13

Tap Deploy.

A confirmation screen is displayed. Here, you can enter the site name and opt to Remember the configured site.

Figure 11. Day Zero Wizard – Confirmation Screen