Virtualization Experience Media Engine
Cisco Unified Communications and the Virtual Environment
In a virtual environment, your Cisco Unified Communications application (such as Cisco Jabber) runs on your hosted virtual desktop. The hosted virtual desktop is a form of desktop computing. Your hosted virtual desktop looks and functions like a regular desktop; however, your Windows desktop, other software, and your data reside in a central location called a data center. You access your hosted virtual desktop over a secure Citrix or VMware connection.
In a virtual environment, Cisco Virtualization Experience Media Engine is required to support audio and video calls with your Cisco Unified Communications application. Cisco Virtualization Experience Media Engine also provides support for the following accessories:
 Note | If you use supported accessories other than those that are designed for Cisco, the function of these devices may be different from the function of the devices that are described in this document. |
For a complete listing of supported audio and video accessories, see Unified Communications Endpoint and Client Accessories at http://www.cisco.com/en/US/prod/voicesw/uc_endpoints_accessories.html.
For information about Cisco Virtualization Experience Client and the designed for Cisco Accessories, see User Guide for Cisco Virtualization Experience Client 6215.
Device Management
Cisco Virtualization Experience Media Engine (VXME) includes a component called Device Selector. Device Selector is a menu that you can use to manage your cameras, speaker devices, microphones, and ring alerts. You can view your currently active devices or change them. A list of speaker devices appears first in the menu, followed by the lists of microphones, ring devices, and cameras.
After you connect a new device, a "New device found" message appears in the notification area and the new device becomes active.
 Note | With some wireless headsets, you may not hear the ringtone for incoming calls, because the wireless link that connects device is not open. To open the wireless link, press the call answer button on the headset. Some headsets play their own internal tone. |
When you disconnect a device, a "Device disconnected message" appears in the notification area and the next device in your Preference list () becomes active.
The Device Selector icon ( ) appears in the notification area (system tray), in the bottom right corner of the screen. Some icons, including the Device Selector, can be hidden. Click the up arrow in the notification area to show hidden icons.
Use Device Selector
Use the Device Selector menu to view your active device selections, or to select a different active camera, speaker device, microphone, or ring alert. You must have multiple devices connected.
Adjust Settings for Jabra Bluetooth Devices
Jabra PC Suite must be installed.
Screen Lock Call Control
While your hosted virtual desktop is in screen lock, you cannot make calls, but you can receive them. If you have an incoming call while your hosted virtual desktop is in screen lock, you can use one of your accessories to answer the call. With supported accessories, the following call control features are available during screen lock:
Answer call
End call
Hold call
Resume call
Change active device (Logitech UC Keyboard feature)
Toggle audio mute
Toggle video start and stop (Logitech UC Keyboard feature)
Adjust audio volume
 Note | Cisco Virtualization Experience Media Engine for Windows Release 10.5 or later supports the call control features of your supported Plantronics device. |
Cisco Approved Audio and Video Accessories
For a complete listing of supported audio and video accessories, see the Cisco Approved Audio and Video Accessories Data Sheet, at http://www.cisco.com/c/en/us/products/collateral/collaboration-endpoints/virtualization-experience-media-engine/data_sheet_c78-702849.html.
 Note | Cisco does not provide technical support for these accessories. For more information about, or technical assistance with your
|
Logitech UC Keyboard K725-C
Logitech Mouse M525-C
Logitech Webcam C920-C
Jabra Handset 450 for Cisco
 Note | If you use supported accessories other than those made for Cisco, the behavior of these devices may be different than described in this document. |
Logitech UC Keyboard K725-C
The Logitech UC Keyboard K725-C is designed for Cisco for use in Cisco Unified Communications (UC) environments. The Logitech UC Keyboard features Cisco UC integration with Cisco Jabber.
Logitech UC Keyboard Features

 Note | Enhanced functions (items 2 through 11) are available only in Cisco Unified Communications environments. To use these functions, you must be signed in to your Unified Communications program (for example, Cisco Jabber.) |
1 |
See the table Function Keys, which follows this legend. |
||
| 2 |
Call your voicemail service. Follow the audio prompts. The key lights up red when you have a new voice message.
|
||
3 |
Press to use your default handset for audio. The name of your default handset device appears briefly on the LCD display. |
||
4 |
Press to use your default headset for audio. The name of your default headset device appears briefly on the LCD display. |
||
5 |
Press to use your default hands-free (speakerphone) device for audio. The name of your default hands-free device appears briefly on the LCD display. |
||
6 |
See the LCD display for status information. If your phone is registered, your user name and number appear. If your phone is not registered, the message "Phone is not registered" appears. For active calls, the display shows the same information available from the Cisco Jabber call window, such as caller ID and call timer. The icons that appear depend on the status of the call: active, on hold, or microphone muted. You can adjust the brightness and the contrast for the LCD display. Press FN and the Volume + or Volume - key to adjust the brightness for the LCD display. Press FN, Alt, and the Volume + or Volume - key to adjust the contrast for the LCD display. |
||
7 |
Press to place a call on hold, or to resume a held call. |
||
8 |
Press to answer an incoming call or to end your current active call. If you do not have any incoming, active, or held calls, you can press this key to bring make Cisco Jabber the active window. Your active device plays a beep to indicate that it is ready. Cisco Jabber must be running. |
||
9 |
Press to toggle your video: add or remove video for a call in progress. |
||
10 |
Press to toggle audio: mute and unmute audio for a call in progress. |
||
11 |
Press the Volume + or Volume - key to increase or decrease Cisco Jabber audio volume. |
F1 |
Start your default web browser. |
F2 |
Start your default e-mail application. |
F3 |
Search for files and folders (desktop search). |
F4 |
Start the calculator. |
F5 |
Switch between open applications. |
F6 |
Bring the file browser to the front. |
F7 |
Lock your Microsoft Windows desktop session. |
F8 |
Toggle system audio: mute and unmute. |
F9 |
Start your default media player application. |
F10 |
Play the previous track (Media control). |
F11 |
Toggle playback: play and pause (Media control). |
F12 |
Play the next track (Media control). |
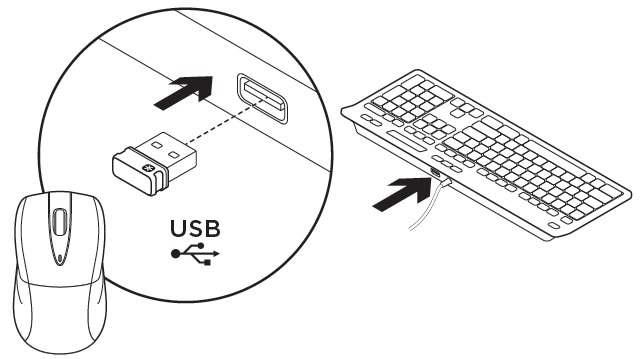
Set Up Your Keyboard
Use the USB port on the back side of the Logitech UC Keyboard K725-C only for the Logitech Mouse M525-C unifying receiver.
Logitech Mouse M525-C
The wireless Logitech Mouse M525-C is designed for use with your Logitech UC Keyboard K725-C in Cisco Unified Communications environments.
Logitech Wireless Mouse Features

1 |
Left and right mouse buttons. |
2 |
Scroll wheel. |
3 |
Battery LED: Flashes green when mouse is powered on, and flashes red when the battery power is low. |
4 |
Middle button: The function of this button depends on your operating system and the application being used. For example, if you browse the Internet in Microsoft Windows and use the Middle button to click a link, typically the link opens in a new tab. |
5 |
Internet back and forward: Tilt the scroll wheel right to move forward one page. Tilt the scroll wheel left to move back one page. |
6 |
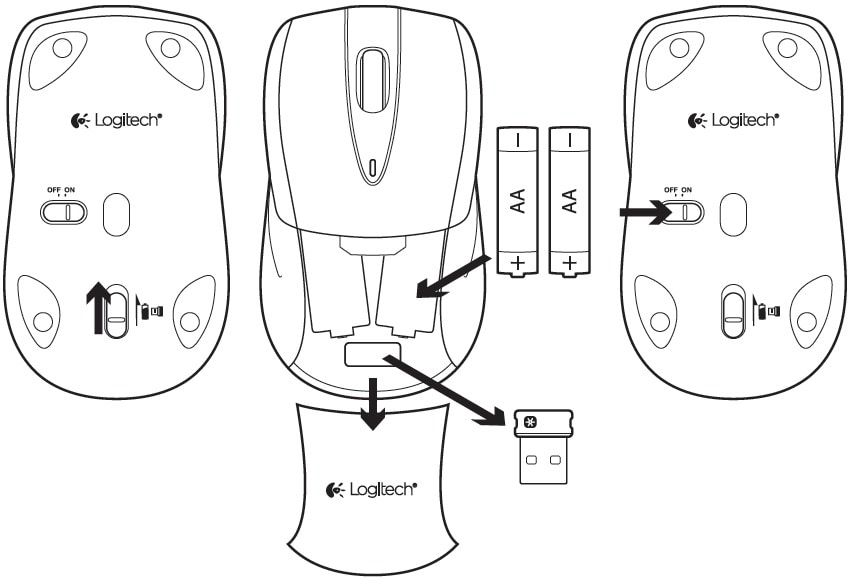
OFF ON slider switch. |
7 |
Lid release for the storage and battery compartment lid. |
8 |
Unifying receiver storage—When the mouse is not in use, you can store the Unifying receiver inside the mouse. |
Set Up Your Mouse
Logitech WebCam C920-C
The Logitech WebCam C920-C is designed for Cisco for use in Cisco Unified Communications environments. With the Logitech WebCam C920-C, Cisco Jabber, with Cisco Virtualization Experience Media Engine can support video resolutions up to 720p (720 horizontal lines and an aspect ratio of 16:9) at 30 frames per second, in the virtual environment.
 Note | Other variables, such as network traffic or far-endpoint video capability can affect video quality. |
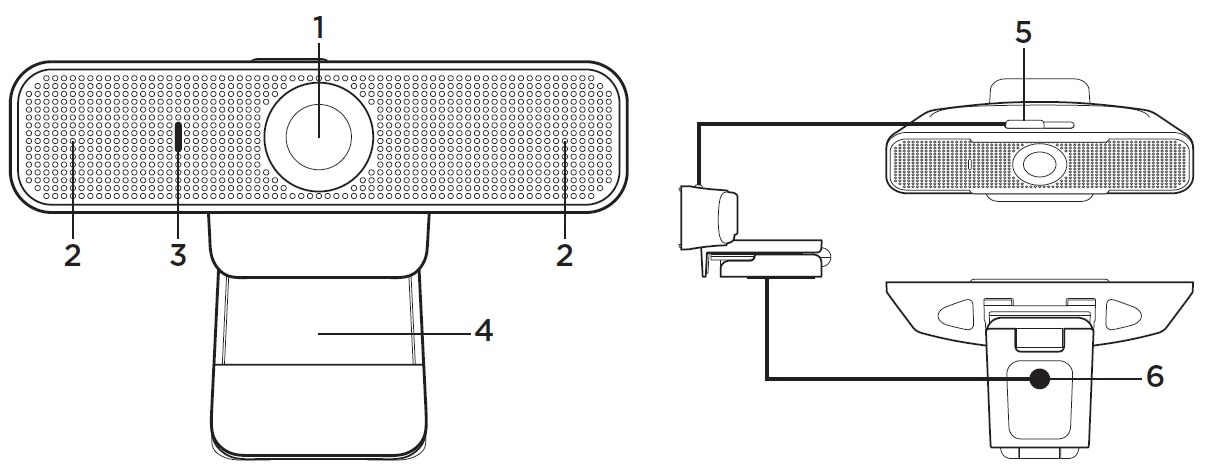
Logitech Webcam Features
1 |
Autofocus HD 1080p lens |
||
2 |
Omni directional microphones
|
||
3 |
Activity light |
||
4 |
Flexible clip/base |
||
5 |
Privacy shutter |
||
6 |
Tripod attachment |
Set Up Your Webcam
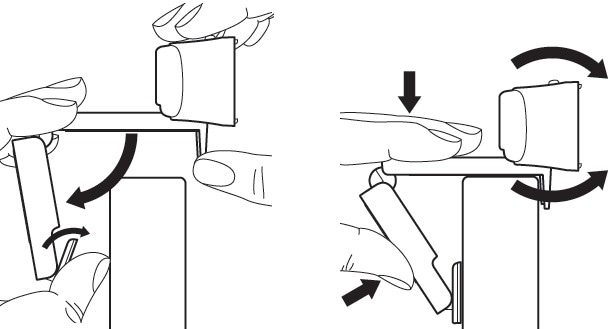
Mount Your Webcam on a Monitor
Jabra Handset 450 for Cisco
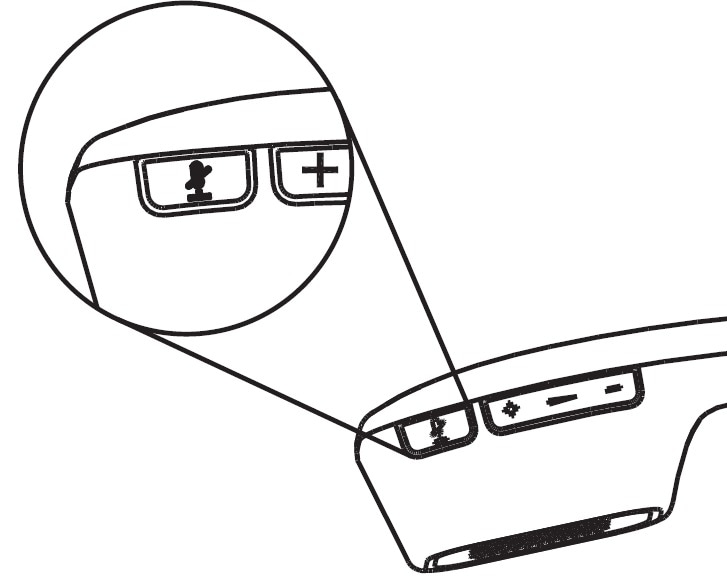
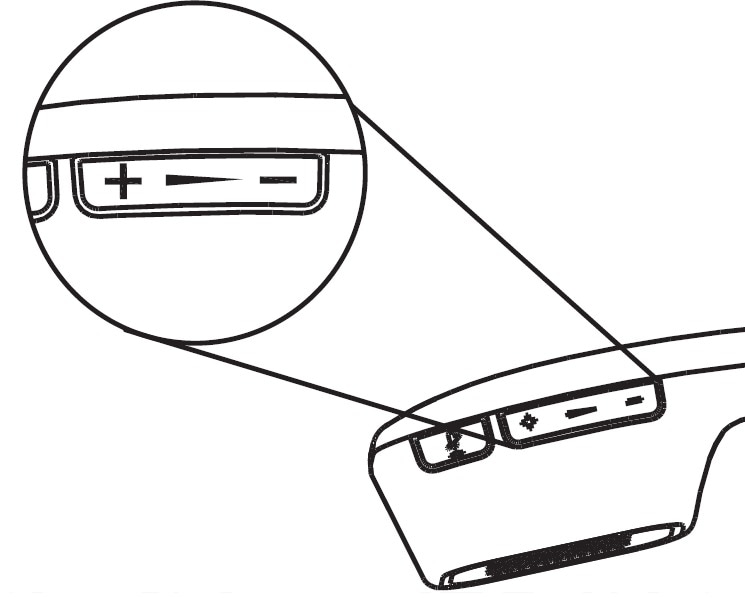
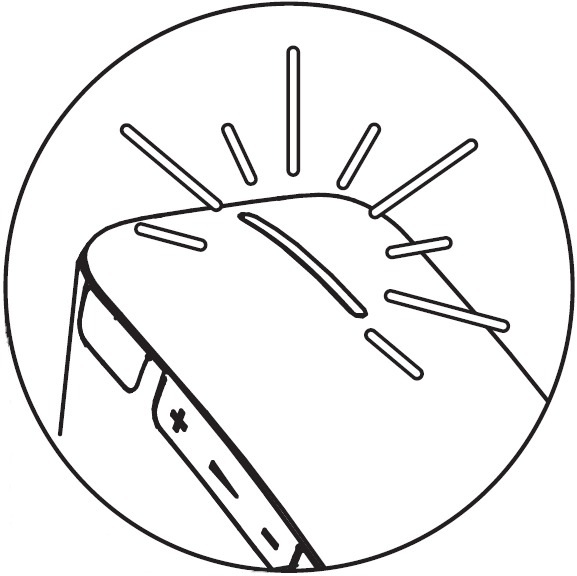
The Jabra Handset 450 for Cisco was designed for Cisco, for use in Cisco Unified Communications environments.
Jabra Handset 450 Features
Set Up Your Handset
The Jabra Handset 450 for Cisco and the handset cradle are factory paired.
 Note | You can pair only one handset with the cradle at a time. |
Power Your Handset Off and On
The Jabra Handset 450 for Cisco is always powered on when it is in the handset cradle.
 Note | The handset powers off automatically if it is out of range of the cradle, for four minutes or longer. |
 Feedback