On-Premises Deployments
An on-premises deployment is one in which you set up, manage, and maintain all services on your corporate network.
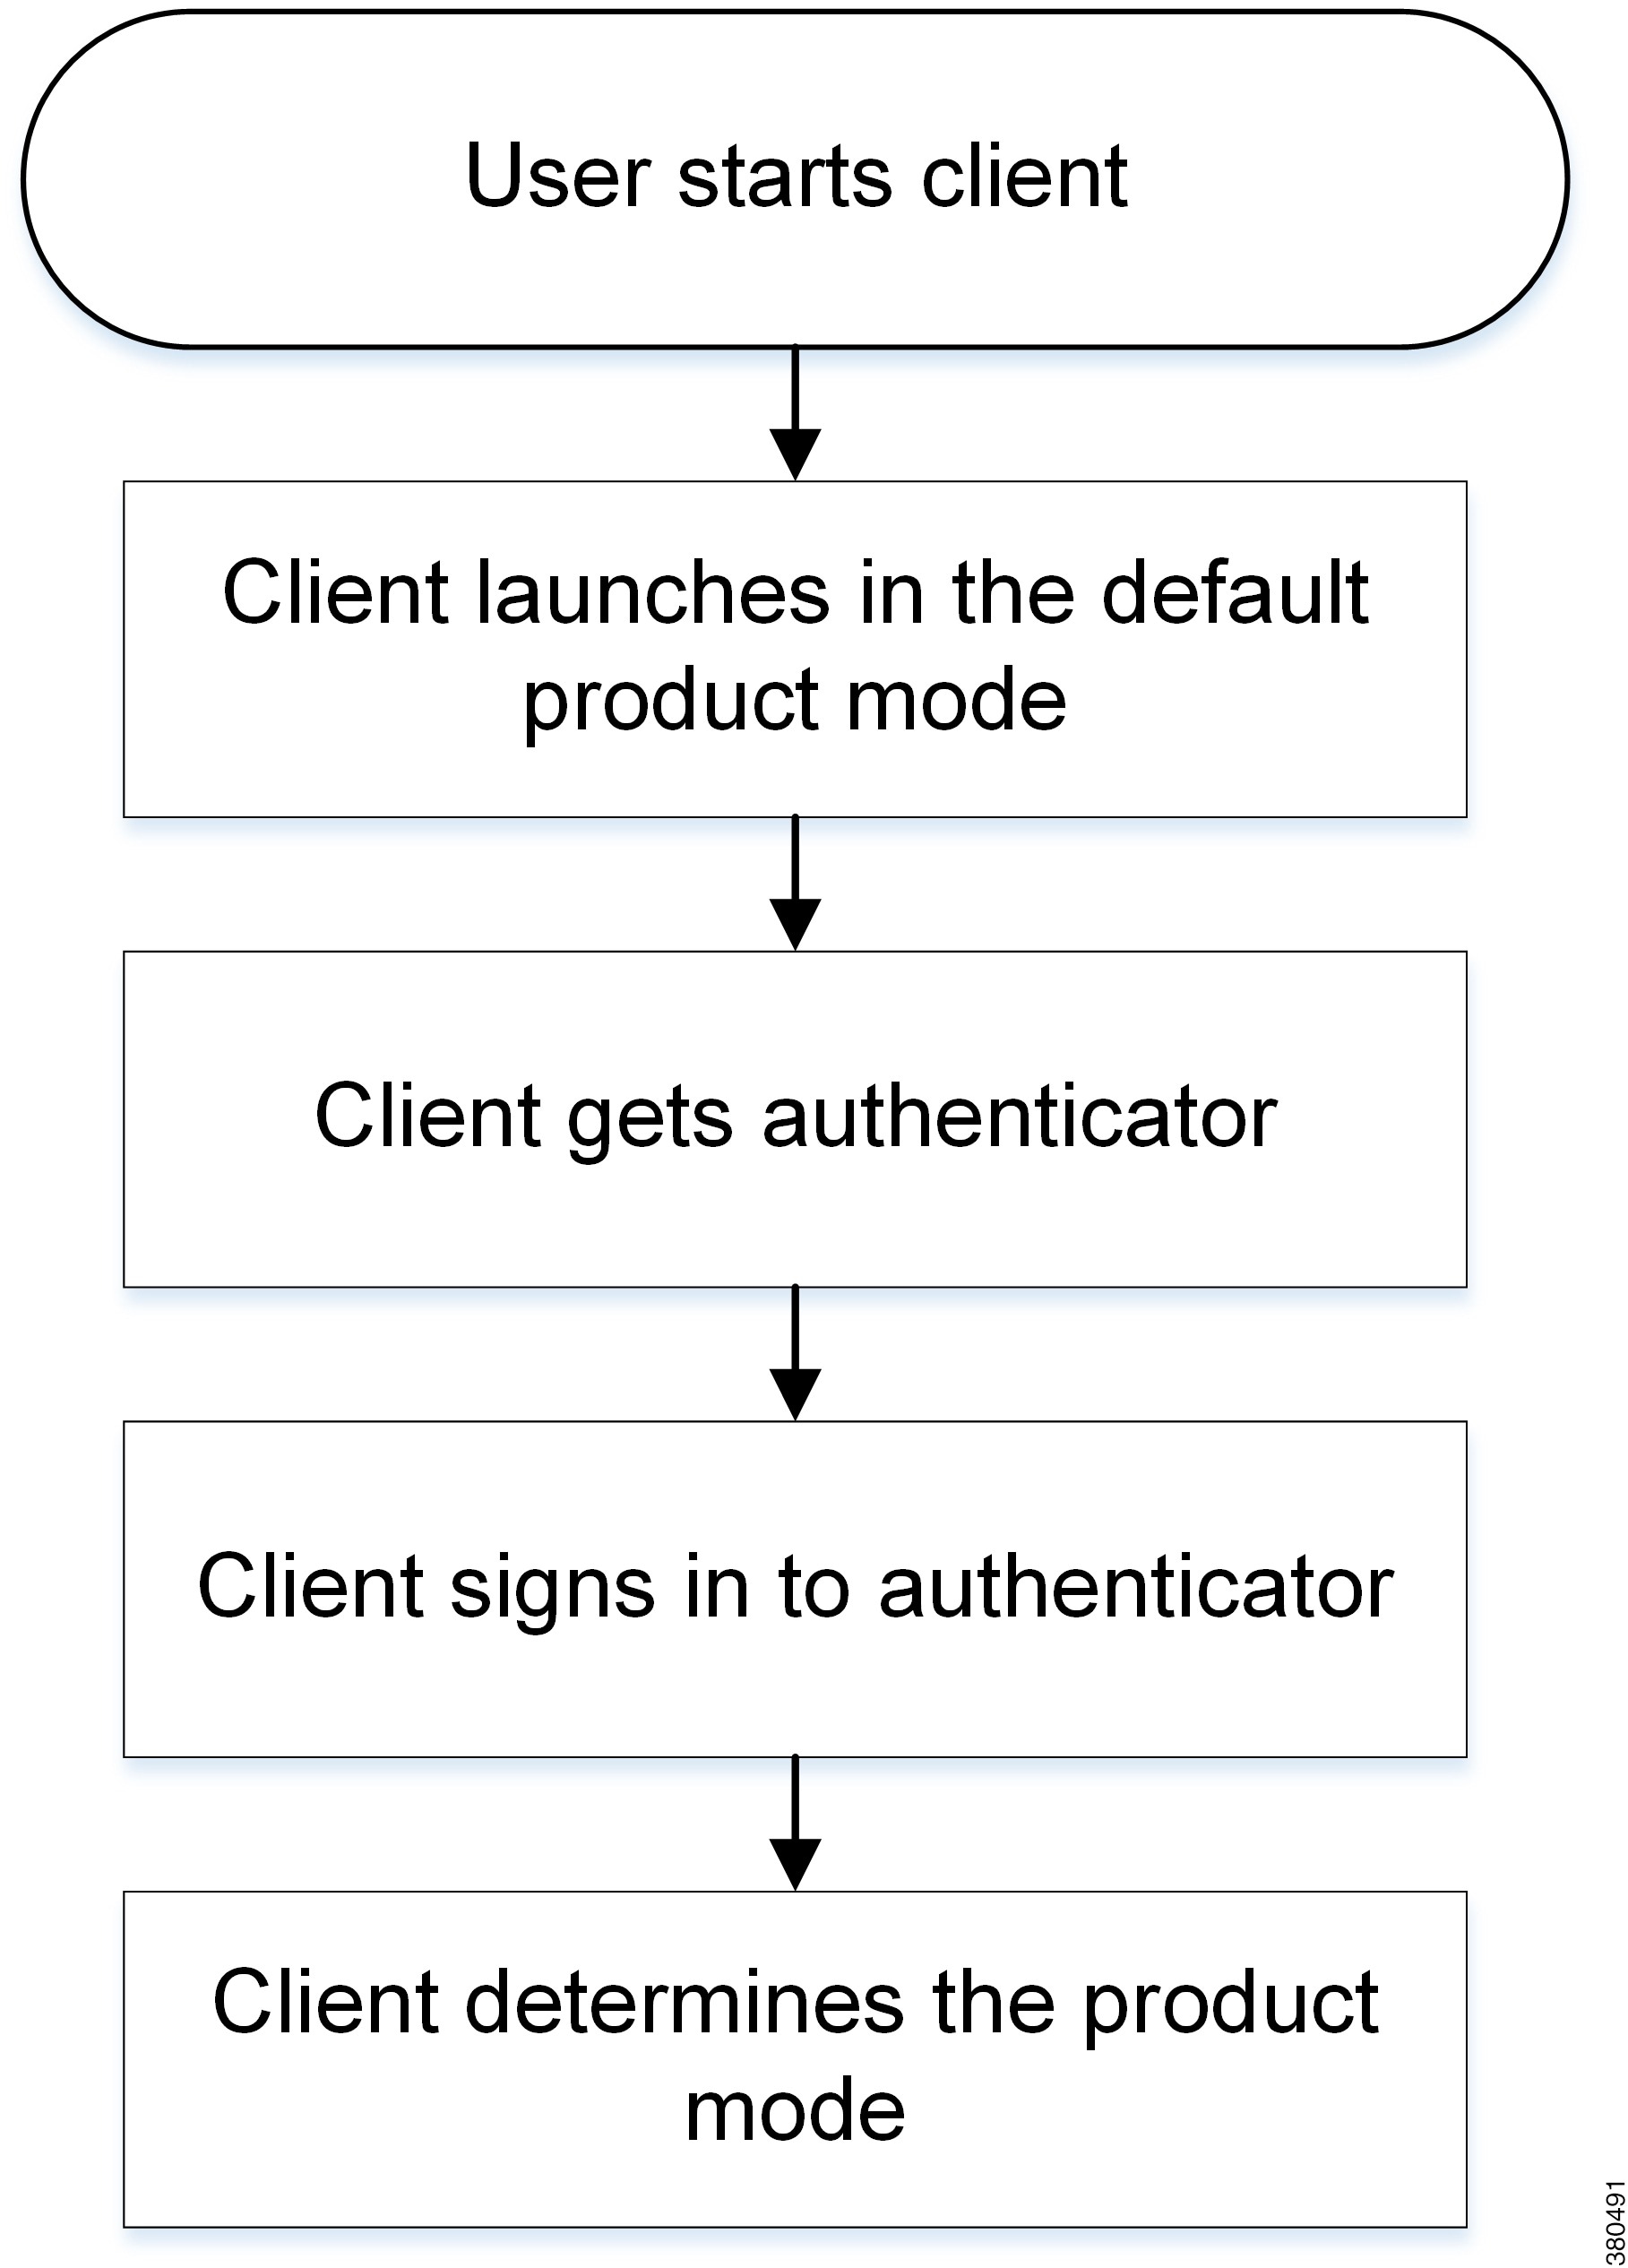
Product Modes
- Full UC and Cisco Jabber for Everyone (IM Only)
-
The default product mode is one in which the user's primary authentication is to a presence server. At a minimum, users have instant messaging and presence capabilities.
Both full UC and Cisco Jabber for Everyone deployments use the default product mode. - To deploy full UC, you enable instant messaging and presence capabilities. You then provision users with devices for audio and video in addition to voicemail and conferencing capabilities.
- To deploy Cisco Jabber for Everyone, you enable instant messaging and presence capabilities. You can optionally provision users with desk phone devices that they can control with the client.
- Phone Mode
-
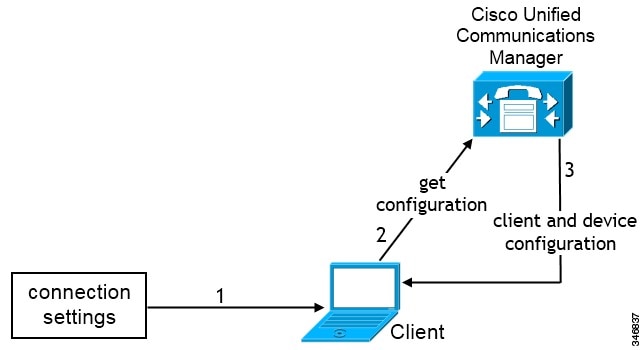
In phone mode, the user's primary authentication is to Cisco Unified Communications Manager.
To deploy phone mode, you provision users with devices for audio and video capabilities. You can also provision users with additional services such as voicemail.
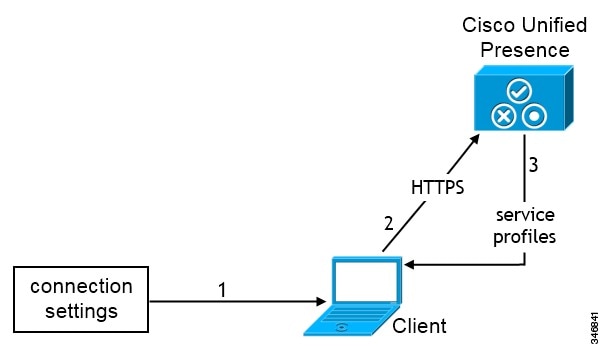
Default Mode Diagrams
Review architecture diagrams for on-premises deployments in the default product mode.
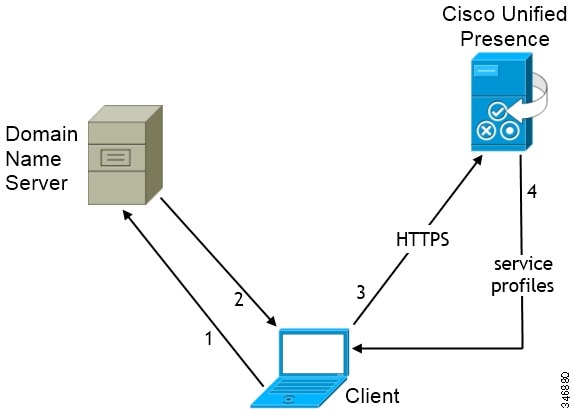
Diagram with Cisco Unified Presence
The following diagram illustrates the architecture of an on-premises deployment that includes Cisco Unified Presence:
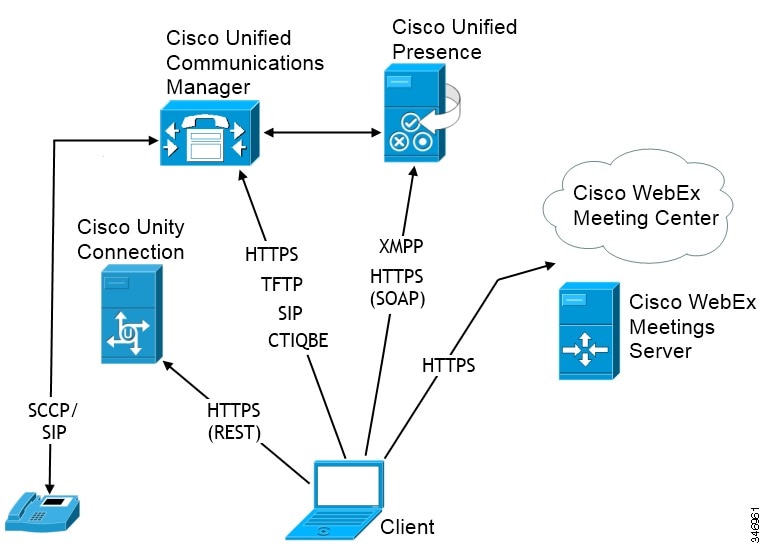
- Presence
-
Users can publish their availability and subscribe to other users' availability through Cisco Unified Presence.
- Instant Messaging
-
Users send and receive instant messages through Cisco Unified Presence.
- Audio Calls
-
Users place audio calls through desk phone devices or on their computers through Cisco Unified Communications Manager.
- Video
-
Users share their screens and place video calls through Cisco Unified Communications Manager.
- Voicemail
-
Users send and receive voice messages through Cisco Unity Connection.
- Conferencing
-
Integrate with one of the following: - Cisco WebEx Meeting Center
-
Provides hosted meeting capabilities.
- Cisco WebEx Meeting Server
-
Provides on-premises meeting capabilities.
Diagram with Cisco Unified Communications IM and Presence
The following diagram illustrates the architecture of an on-premise deployment that includes Cisco Unified Communications IM and Presence:
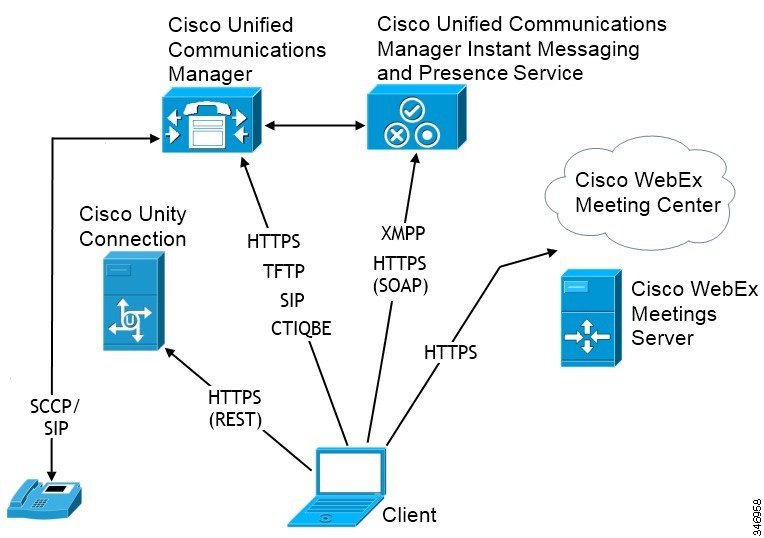
- Presence
-
Users can publish their availability and subscribe to other users' availability through Cisco Unified Communications IM and Presence.
- Instant Messaging
-
Users send and receive instant messages through Cisco Unified Communications IM and Presence.
- Audio Calls
-
Users place audio calls through desk phone devices or on their computers through Cisco Unified Communications Manager.
- Video
-
Users share their screens and place video calls through Cisco Unified Communications Manager.
- Voicemail
-
Users send and receive voice messages through Cisco Unity Connection.
- Conferencing
-
Integrate with one of the following: - Cisco WebEx Meeting Center
-
Provides hosted meeting capabilities.
- Cisco WebEx Meetings Server
-
Provides on-premise meeting capabilities.
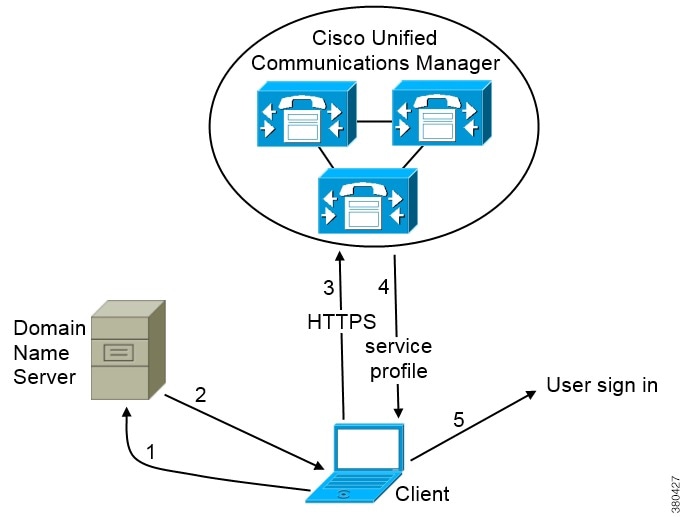
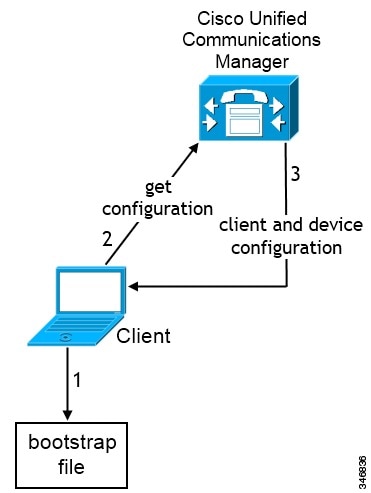
Phone Mode Diagram
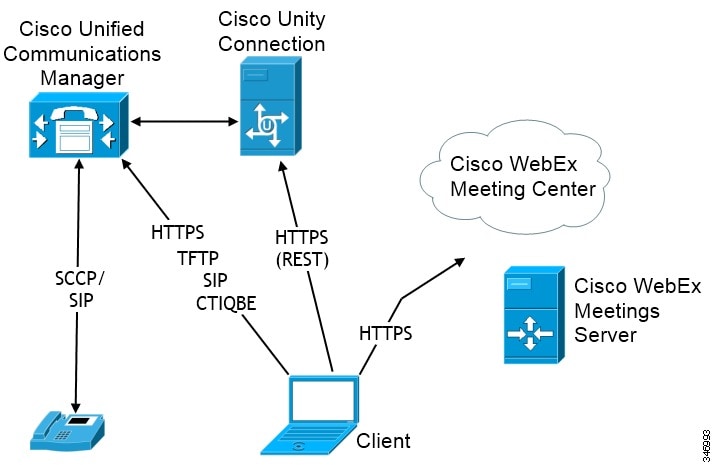
- Audio Calls
-
Users place audio calls through desk phone devices or on their computers through Cisco Unified Communications Manager.
- Video
-
Users share their screens and place video calls through Cisco Unified Communications Manager.
- Voicemail
-
Users send and receive voice messages through Cisco Unity Connection.
- Conferencing
-
Integrate with one of the following: - Cisco WebEx Meeting Center
-
Provides hosted meeting capabilities.
- Cisco WebEx Meetings Server
-
Provides on-premise meeting capabilities.


 Feedback