Installing and Configuring the TV CDS 3.2 Software
This chapter covers the installation of the new Release 3.2 systems in either a Content Delivery System (CDS) or a Virtual Video Infrastructure (VVI). This chapter includes the following topics:
•![]() Preparing the CDEs for Initial Configuration
Preparing the CDEs for Initial Configuration
•![]() Initial Configuration Sequence of the CDEs
Initial Configuration Sequence of the CDEs
•![]() Initially Configuring the CDE110
Initially Configuring the CDE110
•![]() Initially Configuring the CDE220, CDE250 and CDE420
Initially Configuring the CDE220, CDE250 and CDE420
A CDS consists of Vaults, Streamers, and a Content Delivery System Manager (CDSM). A CDS can also consist of Integrated Streamer-Vaults (ISVs) and a CDSM. A VVI consists of Vaults, Caching Nodes, Streamers, Virtual Video Infrastructure Manager (VVIM), and Stream Manager (also called CDSM). For more information about the different system architectures and network designs, see the "Product Overview" and "Network Design" chapters in the Cisco TV CDS 3.2 ISA Software Configuration Guide and the Cisco TV CDS 3.2 RTSP Software Configuration Guide.
Preparing the CDEs for Initial Configuration
Before performing the software installation and initial configuration, you must correctly install the Content Delivery Engines (CDEs) and connect the cables as described in the Cisco Content Delivery Engine 110 Hardware Installation Guide and the Cisco Content Delivery Engine 205/220/250/420/460 Hardware Installation Guide.

Note ![]() As part of the hardware installation of the CDEs, ensure that all I/O cards are properly and firmly seated, and all cables are firmly connected.
As part of the hardware installation of the CDEs, ensure that all I/O cards are properly and firmly seated, and all cables are firmly connected.
Connecting to the Serial Port on the CDE
The RJ-45 serial ports on the front and back panels of the Cisco CDEs can be used for administrative access to the CDEs through a terminal server. Terminal emulation software must be configured as follows:
•![]() Bits per second: 115200
Bits per second: 115200
•![]() Data bits: 8
Data bits: 8
•![]() Parity: none
Parity: none
•![]() Stop bits: 1
Stop bits: 1
•![]() Hardware flow control: ON
Hardware flow control: ON
After installing the CDEs and connecting the cables, the software must be upgraded before initial configuration can occur.
Upgrading the New CDEs with Release 3.2.1 TV CDS Software
A new CDE ships with Release 3.2. Download the software files for Release 3.2.1, and upgrade the operating system (OS) and software on the CDE models to be configured as CDS servers (Vaults, Caching Nodes, Streamers, and ISVs), and upgrade the software on the CDE110s, which are used for the CDSMs and VVIMs. The CDE110s ship with the OS already upgraded.
Note ![]() Before you upgrade the CDEs, download the TV CDS Release 3.2.1 software image files from the Cisco software download website. See the "Getting the Cisco TV CDS Software Files for Release 3.2.1" section for information on downloading these files.
Before you upgrade the CDEs, download the TV CDS Release 3.2.1 software image files from the Cisco software download website. See the "Getting the Cisco TV CDS Software Files for Release 3.2.1" section for information on downloading these files.
The following upgrade procedures are for the CDEs used in a Release 3.2.1 CDS or VVI:
•![]() Upgrading the Software on a CDE110
Upgrading the Software on a CDE110
•![]() Upgrading the Software on a CDE220 or CDE420
Upgrading the Software on a CDE220 or CDE420
Upgrading the Software on a CDE110
The Cisco CDE110 is used for a CDSM or VVIM in a CDS or VVI. The CDE110 ships with a 64-bit OS, and therefore, requires only a software image upgrade.
To upgrade the software image on a CDE110, do the following:
Step 1 ![]() If the Cisco CDE110 is not powered on, press the front panel power switch on the server.
If the Cisco CDE110 is not powered on, press the front panel power switch on the server.
The operating system boots.
Step 2 ![]() Log in as root with the password rootroot.
Log in as root with the password rootroot.
Note ![]() To change the default password, use the passwd command.
To change the default password, use the passwd command.
Step 3 ![]() To copy the CDS-TV-3.2.1 .iso and cdsinstall software files on the CDE110, configure the management interface.
To copy the CDS-TV-3.2.1 .iso and cdsinstall software files on the CDE110, configure the management interface.
a. ![]() To configure the Ethernet interface (eth0), which is used to connect to the management network, use a text editor to modify the file /etc/sysconfig/network-scripts/ifcfg-eth0, and add the following lines:
To configure the Ethernet interface (eth0), which is used to connect to the management network, use a text editor to modify the file /etc/sysconfig/network-scripts/ifcfg-eth0, and add the following lines:
–![]() DEVICE=eth0
DEVICE=eth0
–![]() BOOTPROTO=static
BOOTPROTO=static
–![]() ONBOOT=yes
ONBOOT=yes
–![]() IPADDR=ip_address_for_eth0
IPADDR=ip_address_for_eth0
–![]() NETMASK=netmask_for_eth0
NETMASK=netmask_for_eth0
For example:
DEVICE=eth0
BOOTPROTO=static
ONBOOT=yes
IPADDR=172.22.97.162
NETMASK=255.255.255.128
b. ![]() Save and close the ifcfg-eth0 file.
Save and close the ifcfg-eth0 file.
c. ![]() To configure the network characteristics, use a text editor to modify the file /etc/sysconfig/network, and add the following lines:
To configure the network characteristics, use a text editor to modify the file /etc/sysconfig/network, and add the following lines:
–![]() NETWORKING=yes
NETWORKING=yes
–![]() NETWORKING_IPV6=no
NETWORKING_IPV6=no
–![]() HOSTNAME=name
HOSTNAME=name
–![]() GATEWAY=gateway_ip_address
GATEWAY=gateway_ip_address
For example:
NETWORKING=yes
NETWORKING_IPV6=no
HOSTNAME=cdsm162
GATEWAY=172.22.97.129
The gateway_ip_address is the default gateway IP address, the address of the interface on the router that is directly attached to the CDE110 eth0 interface.
d. ![]() Save and close the network file.
Save and close the network file.
e. ![]() To restart the network, issue the following command:
To restart the network, issue the following command:
[root]# /etc/init.d/network restart
Shutting down interface eth0: [ OK ]
Shutting down loopback interface: [ OK ]
Bringing up loopback interface: [ OK ]
Bringing up interface eth0: [ OK ]
[root]#
Step 4 ![]() Use the scp command to copy the CDS-TV-3.2.1.iso and cdsinstall software files. For example, if the remote server that you downloaded the software files to has the IP address 172.22.97.109, and the files are stored in the CDSdownloads directory, the following commands are used:
Use the scp command to copy the CDS-TV-3.2.1.iso and cdsinstall software files. For example, if the remote server that you downloaded the software files to has the IP address 172.22.97.109, and the files are stored in the CDSdownloads directory, the following commands are used:
# scp -p 172.22.97.109:/CDSdownloads/CDS-TV.3.2.1.iso /
# scp -p 172.22.97.109:/CDSdownloads/cdsinstall /root
Step 5 ![]() Run the cdsinstall script to upgrade the ISO image to Release 3.2.1.
Run the cdsinstall script to upgrade the ISO image to Release 3.2.1.
# cd/root
# ./cdsinstall /CDS-TV-3.2.1.iso
Select Deployment Type (ctrl-c to quit):
1) CDSM
1
CDSM Selected
Mounting CDS-TV-3.2.1.iso at /mnt/cdrom
Running inst.sh for isa
Killing running processes: statsd
Un-taring isa-base.tgz
Calling forprod.sh
Removing RTSP-specific files
Installing ISA-specific files (existing files backed up to .file)
ISA installation complete
Starting fixperms.sh
Loading File List
Processing File List
Ending fixperms.sh
Calling inst.sh for cdsm
Killing running processes: statsd
Starting cdsupgrade.sh
Current SW version to backup is cdstv-3.2-es4-b4
Processing File Lists
/arroyo/image/backup/cdstv-3.2-es4-b4/files/common-files: does not exist
/arroyo/image/backup/cdstv-3.2-es4-b4/files/isa-files: does not exist
/arroyo/image/backup/cdstv-3.2-es4-b4/files/rtsp-files: does not exist
Processing /arroyo/image/backup/cdstv-3.2-es4-b4/files/cdsm-files
Ending cdsupgrade.sh
Un-taring cdsm-base.tgz
Calling forprod.sh
Installing CDSM-specific files (existing files backed up to .file)
Upgrading CmdTool2 if necessary
[output omitted]
CDSM installation complete
Starting fixperms.sh
Loading File List
Processing File List
Ending fixperms.sh
Unmounting /mnt/cdrom
cdsinstall completed. Please reboot the device.
Step 6 ![]() Reboot the CDE.
Reboot the CDE.
reboot
The CDE110 now has the Release 3.2.1 TV CDS software installed. The next step is to initially configure the CDE110, which requires you to run the cdsconfig script and answer the prompts appropriately for your deployment. See the "Preparing to Initially Configure the CDEs" section for more information.
Upgrading the Software on a CDE220 or CDE420
The Cisco CDE220 can be used as a Streamer, ISV, or dense Vault, and the Cisco CDE420 can be used as a Vault or Caching Node. For more information about the upgrade kit, see the "Upgrade and Downgrade Kits for CDS Servers" section.
To upgrade the OS and software image on a CDE220 or CDE420, do the following:
Step 1 ![]() If the Cisco CDE is not powered on, press the front panel power switch on the server.
If the Cisco CDE is not powered on, press the front panel power switch on the server.
The operating system boots.
Step 2 ![]() Log in as root with the password rootroot.
Log in as root with the password rootroot.
Note ![]() To change the default password, use the passwd command.
To change the default password, use the passwd command.
Step 3 ![]() To copy the cdstv-3.2.1-b169-x86_64-os-kit.sh OS upgrade kit to the CDE, configure the management interface.
To copy the cdstv-3.2.1-b169-x86_64-os-kit.sh OS upgrade kit to the CDE, configure the management interface.
a. ![]() To configure the Ethernet interface (eth0), which is used to connect to the management network, use a text editor to modify the file /etc/sysconfig/network-scripts/ifcfg-eth0 and add the following lines:
To configure the Ethernet interface (eth0), which is used to connect to the management network, use a text editor to modify the file /etc/sysconfig/network-scripts/ifcfg-eth0 and add the following lines:
–![]() DEVICE=eth0
DEVICE=eth0
–![]() BOOTPROTO=static
BOOTPROTO=static
–![]() ONBOOT=yes
ONBOOT=yes
–![]() IPADDR=ip_address_for_eth0
IPADDR=ip_address_for_eth0
–![]() NETMASK=netmask_for_eth0
NETMASK=netmask_for_eth0
For example:
DEVICE=eth0
BOOTPROTO=static
ONBOOT=yes
IPADDR=172.22.97.162
NETMASK=255.255.255.128
b. ![]() Save and close the ifcfg-eth0 file.
Save and close the ifcfg-eth0 file.
c. ![]() To configure the network characteristics, use a text editor to modify the file /etc/sysconfig/network and add the following lines:
To configure the network characteristics, use a text editor to modify the file /etc/sysconfig/network and add the following lines:
–![]() NETWORKING=yes
NETWORKING=yes
–![]() NETWORKING_IPV6=no
NETWORKING_IPV6=no
–![]() HOSTNAME=name
HOSTNAME=name
–![]() GATEWAY=gateway_ip_address
GATEWAY=gateway_ip_address
For example:
NETWORKING=yes
NETWORKING_IPV6=no
HOSTNAME=cdsm162
GATEWAY=172.22.97.129
The gateway_ip_address is the default gateway IP address,the address of the interface on the router that is directly attached to the CDE110 eth0 interface.
d. ![]() Save and close the network file.
Save and close the network file.
e. ![]() To restart the network, issue the following command:
To restart the network, issue the following command:
[root]# /etc/init.d/network restart
Shutting down interface eth0: [ OK ]
Shutting down loopback interface: [ OK ]
Bringing up loopback interface: [ OK ]
Bringing up interface eth0: [ OK ]
[root]#
Step 4 ![]() Use the scp command to copy the cdstv-3.2.1-b169-x86_64-os-kit.sh file. For example, if the remote server that you downloaded the software files to has the IP address 172.22.97.109, and the files are stored in the CDSdownloads directory, the following command is used:
Use the scp command to copy the cdstv-3.2.1-b169-x86_64-os-kit.sh file. For example, if the remote server that you downloaded the software files to has the IP address 172.22.97.109, and the files are stored in the CDSdownloads directory, the following command is used:
# scp -p 172.22.97.109:/CDSdownloads/cdstv-3.2.1-b169-x86_64-os-kit.sh /root
Step 5 ![]() Verify the MD5 checksum value.
Verify the MD5 checksum value.
# md5sum /root/cdstv-3.2.1-b169-x86_64-os-kit.sh
The value provided should be compared with the value shown on the Cisco software download website. If they do not match, remove the file and download it again.
Step 6 ![]() Change permissions assigned to the upgrade kit to allow the file to be executed.
Change permissions assigned to the upgrade kit to allow the file to be executed.
# chmod+x cdstv-3.2.1-b169-x86_64-os-kit.sh
Step 7 ![]() Run the self-extracting file to extract the contents.
Run the self-extracting file to extract the contents.
# cd cds_remote_upgrade
# cd /root
There should be no errors during the extraction of the files in the kit. After extracting the kit, verify that there are no errors before proceeding. If an error message is displayed or "cdstv-os-5.1-x86_64.iso: OK" is not displayed as the last line, an error may have occurred when downloading the kit. Download and extract the kit again. See the "Upgrade Kit Content" section for information on the content of the kit.
Step 8 ![]() Change directory to the cds_remote_upgrade directory and use the cds_remote_iso_install script with the --upgrade option, and vnc-listener suboption if being used.
Change directory to the cds_remote_upgrade directory and use the cds_remote_iso_install script with the --upgrade option, and vnc-listener suboption if being used.
# cd cds_remote_upgrade
# ./cds_remote_iso_install --upgrade
The cds_remote_iso_install script performs some checks, and prompts you for information about the remote server where a backup should be stored. These checks and prompts are for the CDS servers that have been in service. If this is the first time this CDE is being configured, you can press Enter to continue. To see an example of the script output, see the "Manually Upgrading a TV CDS Server to Release 3.2.1" section.

Step 9 ![]() Use the scp command to copy the CDS-TV-3.2.1.iso file. For example, if the remote server that you downloaded the software files to has the IP address 172.22.97.109, and the files are stored in the CDSdownloads directory, the following command is used:
Use the scp command to copy the CDS-TV-3.2.1.iso file. For example, if the remote server that you downloaded the software files to has the IP address 172.22.97.109, and the files are stored in the CDSdownloads directory, the following command is used:
# scp -p 172.22.97.108:/CDSdownloads/CDS-TV-3.2.1.iso /root
Step 10 ![]() Run the cdsinstall script to upgrade the ISO image to Release 3.2.1. When prompted, select the deployment type of the server, choose 1 for an Interactive Services Architecture (ISA) deployment, and 2 for an RTSP/FSI deployment.
Run the cdsinstall script to upgrade the ISO image to Release 3.2.1. When prompted, select the deployment type of the server, choose 1 for an Interactive Services Architecture (ISA) deployment, and 2 for an RTSP/FSI deployment.
Note ![]() If you are installing CDS in an RTSP environment and using the Real-Time Capture feature with call signs and home IDs, you must seed the database with the HomeID field for Real-Time Capture (non-Media Scheduler) by running run the cv-account-add-homeid0 script as user isa in the /home/isa directory on the Vault (or ISV).
If you are installing CDS in an RTSP environment and using the Real-Time Capture feature with call signs and home IDs, you must seed the database with the HomeID field for Real-Time Capture (non-Media Scheduler) by running run the cv-account-add-homeid0 script as user isa in the /home/isa directory on the Vault (or ISV).
The following example shows the cdsconfig output for an Real Time Streaming Protocol (RTSP) deployment:
# cd /root
# ./cdsinstall /CDS-TV-3.2.1.iso
Select Deployment Type (ctrl-c to quit):
1) ISA
2) RTSP/FSI
3) PEG/BARKER
2
RTSP Selected
Mounting /CDS-TV.iso at /mnt/cdrom
Calling inst.sh for common files
Killing running processes: statsd
Starting cdsupgrade.sh
WARNING: No existing version found on this server. Cannot backup existing files
Un-taring common-base.tgz
Fixing modprobe.conf
Loading File List
...done
Processing File List
...done
Moving modprobe.conf into place
...done
Installing kernel rpm
Installing cserver production rpm
Disabled various startup scripts in /etc/init.d
Installing busybox
warning: /home/packages/busybox-1.2.0-4.el5.i386.rpm: Header V3 DSA signature: NOKEY, key
ID 37017186
Installing kdump
warning: /home/packages/kexec-tools-1.101-194.4.el5.x86_64.rpm: Header V3 DSA signature:
NOKEY, key ID 37017186
Configuring kdump...
Starting kdump service...
No kdump initial ramdisk found.[WARNING]
Rebuilding /boot/initrd-2.6.18-53.el5kdump.img
kernel-debuginfo-2.6.18-53.el5 is not installed. You need this to use makedumpfile!
please install it and restart the kdump service
Failed to run mkdumprd
Installing logrotate
warning: /home/packages/logrotate-3.7.4-8.i386.rpm: Header V3 DSA signature: NOKEY, key ID
37017186
Installing CmdTool2
Set Write Policy to WriteBack on Adapter 0, VD 0 (target id: 0) success
Set Write Cache OK if bad BBU on Adapter 0, VD 0 (target id: 0) success
Set Disk Cache Policy to Enabled on Adapter 0, VD 0 (target id: 0) success
Starting fixperms.sh
Loading File List
Processing File List
Ending fixperms.sh
Calling inst.sh for rtsp
Killing running processes: statsd
Un-taring rtsp-base.tgz
Calling forprod.sh
Removing ISA-specific files
Installing RTSP-specific files (existing files backed up to .file)
mv: `/home/isa/bss/database/avsdb' and `/arroyo/db/avsdb' are the same file
mv: `/home/isa/bss/database/AVSDBUtil' and `/arroyo/db/AVSDBUtil' are the same file
mv: `/home/isa/bss/database/DATADIR' and `/arroyo/db/DATADIR' are the same file
mv: `/home/isa/bss/database/lost+found' and `/arroyo/db/lost+found' are the same file
RTSP installation complete
Starting fixperms.sh
Loading File List
Processing File List
Ending fixperms.sh
Unmounting /mnt/cdrom
cdsinstall completed. Please reboot the device.
Note ![]() The warning, "Failed to run," and the move messages are known, benign errors ,and can be ignored.
The warning, "Failed to run," and the move messages are known, benign errors ,and can be ignored.
Step 11 ![]() Reboot the CDE.
Reboot the CDE.
reboot
The CDE now has the 64-bit OS, and the Release 3.2.1 TV CDS software installed. The next step is to initially configure the CDE, which requires you to run the cdsconfig script, and answer the prompts appropriately for your deployment. See the "Preparing to Initially Configure the CDEs" section for more information.
Initial Configuration Sequence of the CDEs
This section describes the initial configuration sequence for a VVI and a CDS. A VVI includes of Caching Nodes, and possibly split-domain management. A CDS consists of Streamers and Vaults, or ISVs.
VVI Initial Configuration Sequence
The order in which you initially configure the CDEs for VVI is very important. The CDSM (VVIM for Vaults and Caching Node) and all the Vaults and Caching Nodes in the VVIM domain must be configured first and brought online before the Stream Domain is configured. Following is a high-level view of the initial configuration order:
1. ![]() VVIM—See the "Initially Configuring the CDE110" section for more information.
VVIM—See the "Initially Configuring the CDE110" section for more information.
Log in to the VVIM GUI as a user with Engineering access and configure the VVIM Setup page.
2. ![]() Vaults and Caching Nodes
Vaults and Caching Nodes
Log in to the VVIM GUI and configure each Vault and Caching Node.
3. ![]() Stream Manager (CDSM)—See the "Initially Configuring the CDE110" section for more information.
Stream Manager (CDSM)—See the "Initially Configuring the CDE110" section for more information.
Log in to the CDSM GUI as a user with Engineering access and configure the CDSM Setup page.
4. ![]() Streamers—See the "Initially Configuring the CDE220, CDE250 and CDE420" section for more information. Make sure a Streamer is configured completely and is displayed in the Stream Manager System Health Monitor page before moving on to the next Streamer.
Streamers—See the "Initially Configuring the CDE220, CDE250 and CDE420" section for more information. Make sure a Streamer is configured completely and is displayed in the Stream Manager System Health Monitor page before moving on to the next Streamer.
Log in to the Stream Manager GUI and configure each Streamer.
5. ![]() Repeat 3 and 4 for each Stream Domain in the VVI.
Repeat 3 and 4 for each Stream Domain in the VVI.
6. ![]() Redundant VVIM and Stream Manager—See the "Initially Configuring the CDE110" section for more information
Redundant VVIM and Stream Manager—See the "Initially Configuring the CDE110" section for more information
For more information about the CDSM (or VVIM) GUI, see the "Getting Started" chapter in either the Cisco TV CDS ISA 3.2 Software Configuration Guide or the Cisco TV CDS RTSP 3.2 Software Configuration Guide.
Note ![]() In an ISA environment, the ISA services cannot be started until the Stream Manager is up and at least one Streamer in a Stream Domain has the VHO Setup and VHO ISA Setup settings configured.
In an ISA environment, the ISA services cannot be started until the Stream Manager is up and at least one Streamer in a Stream Domain has the VHO Setup and VHO ISA Setup settings configured.
CDS Initial Configuration Sequence
The only requirement with regard to the order in which you initially configure the CDEs for a CDS is that the CDSM must be configured first. The Vaults and Streamers are initialized next, followed by a second CDSM for redundancy. If the CDS consists of ISVs and CDSMs, initialize the primary CDSM first, followed by the ISVs, then the secondary CDSM.
Preparing to Initially Configure the CDEs
Before you run the initial configuration script, gather the following information:
•![]() IP address and subnet mask of the CDE management interface—Typically, the eth0 interface is used for the management interface.
IP address and subnet mask of the CDE management interface—Typically, the eth0 interface is used for the management interface.
•![]() IP address of the default gateway interface—This is the address of the interface on the router that is directly attached to the CDE management (eth0) interface.
IP address of the default gateway interface—This is the address of the interface on the router that is directly attached to the CDE management (eth0) interface.
•![]() Hostname for the CDE—Name of the device host.
Hostname for the CDE—Name of the device host.
•![]() Group ID—A unique user-defined value. All the CDS servers (ssv [ISV], Vault, Streamer, controller [CDSM]) that are part of the same system (managed by one CDSM) have the same group ID. This group ID should be unique across an enterprise. All the CDS servers that are part of a VVI have different group IDs depending on the number of managers (CDSMs and VVIMs).
Group ID—A unique user-defined value. All the CDS servers (ssv [ISV], Vault, Streamer, controller [CDSM]) that are part of the same system (managed by one CDSM) have the same group ID. This group ID should be unique across an enterprise. All the CDS servers that are part of a VVI have different group IDs depending on the number of managers (CDSMs and VVIMs).
•![]() Server ID—A unique user-defined value. The ID must be unique for each CDS device.
Server ID—A unique user-defined value. The ID must be unique for each CDS device.
Note ![]() If you are installing a VVI system with split-domain management, the server ID for Streamers in a Stream Domain is generated by the Stream Manager.
If you are installing a VVI system with split-domain management, the server ID for Streamers in a Stream Domain is generated by the Stream Manager.
•![]() Replication group members—The CDS servers that are replication group members and the IP address of each member. The servers to include in a replication group depends on the network design for the CDS.
Replication group members—The CDS servers that are replication group members and the IP address of each member. The servers to include in a replication group depends on the network design for the CDS.
Note ![]() With the exception of the CDS server you are configuring, all the CDS servers (VVIMs, Stream Managers, ISVs, Caching Nodes, Vaults, and Streamers) that are members of the replication group should be configured at this time. The server you are configuring is not configured as a replication group member.
With the exception of the CDS server you are configuring, all the CDS servers (VVIMs, Stream Managers, ISVs, Caching Nodes, Vaults, and Streamers) that are members of the replication group should be configured at this time. The server you are configuring is not configured as a replication group member.
–![]() In simple cases, because all the CDS servers share information with each other, all the servers are in each other's replication group.
In simple cases, because all the CDS servers share information with each other, all the servers are in each other's replication group.
–![]() In more complex cases, only a subset of the servers are included in a replication group. As an example, if Streamers talk only to the CDSM, Vaults, and Streamers within a specific Streamer group, the Streamers replication group includes only these servers.
In more complex cases, only a subset of the servers are included in a replication group. As an example, if Streamers talk only to the CDSM, Vaults, and Streamers within a specific Streamer group, the Streamers replication group includes only these servers.
In both the CDS and VVI, all the Vaults, Caching Nodes, and Streamers (or ISVs) are identified by an array ID, a group ID, and a server ID. In the CDSM GUI, the array ID identifies servers that are part of the same system, the group ID identifies servers that are part of the same group (Vault Group or Stream Group), and the server ID is a unique number that identifies the server.
Table 1-1 lists the CDSM GUI ID names and maps them to the CServer names in the setupfile and .arroyorc files.
Note ![]() During the initialization process of a CDS server or after recovering a CDS server that has been down for less than an hour, the CDS database performs a complete synchronization. The database synchronization takes about five minutes before the server becomes ready for service. If the CDS server is down for a much longer time than an hour, the database synchronization takes longer than five minutes. The netstat command does not show the interfaces as being up until the synchronization has completed.
During the initialization process of a CDS server or after recovering a CDS server that has been down for less than an hour, the CDS database performs a complete synchronization. The database synchronization takes about five minutes before the server becomes ready for service. If the CDS server is down for a much longer time than an hour, the database synchronization takes longer than five minutes. The netstat command does not show the interfaces as being up until the synchronization has completed.
Initially Configuring the CDE110
To initially configure the CDE110, do the following:
Step 1 ![]() Log in to the CDE110 as root.
Log in to the CDE110 as root.
Step 2 ![]() Run the cdsconfig script. The script displays prompts with the default values in brackets. If a default value is correct, press Enter to accept the value; otherwise, enter the correct value and press Enter.
Run the cdsconfig script. The script displays prompts with the default values in brackets. If a default value is correct, press Enter to accept the value; otherwise, enter the correct value and press Enter.
[root]# cdsconfig
ATTENTION!!!
If a new image is installed on this server, a reboot is required before running cdsconfig.
If a reboot is already performed, please continue.
Otherwise, please exit and execute cdsconfig after rebooting the server
Do you want to continue? (yes/no) [y]: y
Please ensure an IP address and netmask are configured for management interface eth0:
Select an option or an interface to re-configure/disable:
1. eth0 ip:172.22.97.162 mask:255.255.255.128 bcast:172.22.97.255
2. Configure another interface
3. Done
Choice [3]: 3
Backing up old scripts in /etc/sysconfig/network-scripts
Writing new ifcfg-ethX scripts
Enter a hostname [cdsm162]: Enter
Enter the number of the eth interface that connects to the gateway [0]: Enter
Enter the default gateway IP address [172.22.97.129]: Enter
Backing up /etc/sysconfig/network
Writing new /etc/sysconfig/network
Backing up /etc/hosts
Writing new /etc/hosts
Restarting network services, this may take a minute:
Shutting down interface eth0: [ OK ]
Shutting down loopback interface: [ OK ]
Bringing up loopback interface: [ OK ]
Bringing up interface eth0: [ OK ]
Network services restarted; may take a few seconds to establish connectivity
Reboot for hostname changes to take effect
Network configuration complete
Please choose your platform from the following list of valid platforms:
1. 2U-SCSI-1
2. 3U-SCSI-1
3. 3U-SCSI-10
.........
15. CDE100-2C-1
16. CDE110-2C-1
17. CDE205-1C1-C
18. CDE220-2A-C
.........
Choice [16]: Enter
Please select a device role:
1. cdsm
Choice: 1
Please select a role for this CDSM:
1. CDS Manager (single domain)
2. VVI Manager (split domain for Vault and Caching node)
3. CDS Manager (split domain for Streamers)
Choice: 2
Please enter a group ID: 12345
Please enter a server ID [62]: 162
Note ![]() If this is the Stream Manager, choose option 3. The cdsconfig script displays the following questions:
If this is the Stream Manager, choose option 3. The cdsconfig script displays the following questions:
Is this Streaming Domain going to use CCP as Cache Fill Protocol? (yes/no) [y]: Y
Is this the first CDS Manager getting added to this domain? (yes/no) [y]: Enter
Enter the name of this Stream Domain: StreamDomain1
Enter the IP address of the VVIM: 172.22.99.109
Retrieved Server ID '1001' from '172.22.99.109'
Please enter a group ID: 12345
For a VVI, the group ID for the VVIM and Stream Manager should be the same. This group ID is the ID of the array. The VVIM assigns the server ID to the Stream Manager. For a VVI in a split domain, when using CCP as the Cache Fill Protocol, the group ID for the VVIM and Streamer Manager must be same; however, when using HTTP as the Cache Fill Protocol, the group ID can be different in two domains.
During the running of the cdsconfig script, the Stream Manager communicates with the VVIM to get a range of group IDs and server IDs to use in the Stream Domain. If the Stream Manager is unable to connect to the VVIM, the VVIM administrator can manually generate the IDs and send the information to the Stream Manager installer for manual entry. For more information, see the "Identifying Server IDs and Group IDs for VVI with Split-Domain Management" section in the Cisco TV CDS ISA 3.2 Software Configuration Guide or the Cisco TV CDS RTSP 3.2 Software Configuration Guide.
Writing new configuration to /home/isa/.arroyorc
No existing replication group information found
Do you want to configure replication group members now? (yes/no) [y]: y
There are currently no replication group members.
Do you want to add another replication group member? (yes/no) [y]: y
Note ![]() With the exception of the server you are configuring, all the CDS servers (VVIMs, Stream Managers, ISVs, Vaults, Caching Nodes, and Streamers) that are members of the replication group should be configured at this time. The server you are configuring is not configured as a replication group member.
With the exception of the server you are configuring, all the CDS servers (VVIMs, Stream Managers, ISVs, Vaults, Caching Nodes, and Streamers) that are members of the replication group should be configured at this time. The server you are configuring is not configured as a replication group member.
In the following example, the configuration of the CDS servers shows generalized input values. Option 4, cdsmgw, is the Stream Manager. Add the Stream Manager and the VVIM (option vvimgw, when listed) as replication group members.
Select a role for the new replication group member:
1. ssv
2. vault
3. cache
4. cdsmgw
5. controller
Choice: device_role
Enter an IP address for new CDS_device: IP_Address
Current replication group members: device_role IP_Address
Do you want to add another replication group member? (yes/no) [n]: n
Is this node getting added to an existing deployment? (yes/no) [y]: n
Database is running.
[output omitted]
Do you want to enable Exporter? (yes/no) [y]: n
Do you want to enable CDSM Redundancy? (yes/no) [y]: y
CDSM Virtual IP [172.22.98.86]:
Subnet Mask [255.255.254.0]:
Writing rc.local
CDSM configuration finished
cdsconfig finished, please use CDSM to complete configuration
Step 3 ![]() When the cdsconfig script completes, edit the rc.local file and uncomment all the command lines. The su - isa -c "cd /home/isa/RTScehduler/Exporter..." command is used only when the MediaX feature needs to send notifications to a catalog server or similar type of server. Following is an example with all the lines uncommented:
When the cdsconfig script completes, edit the rc.local file and uncomment all the command lines. The su - isa -c "cd /home/isa/RTScehduler/Exporter..." command is used only when the MediaX feature needs to send notifications to a catalog server or similar type of server. Following is an example with all the lines uncommented:
# vi /etc/rc.local
#!/bin/sh
#
# This script will be executed *after* all the other init scripts.
# You can put your own initialization stuff in here if you don't
# want to do the full Sys V style init stuff.
touch /var/lock/subsys/local
# Lines below this one modified by cdsflavconfig (ISA):
su - isa -c "cd /home/isa/IntegrationTest"
sleep 30
/arroyo/www/bin/apachectl start
sleep 30
#su - isa -c "cd /home/isa/RTScheduler/Exporter; ./ExporterServer >&
/home/isa/RTScheduler/Exporter/ExporterServer.log&"
/home/stats/statsd -i 172.11.99.100 -s 255.255.255.0 -d eth0
sleep 30
Step 4 ![]() Reboot the CDSM.
Reboot the CDSM.
# reboot
Step 5 ![]() To verify that the CDS manager (VVIM, Stream Manager or CDSM) is operational, using your web browser, enter the IP address of your CDS manager.
To verify that the CDS manager (VVIM, Stream Manager or CDSM) is operational, using your web browser, enter the IP address of your CDS manager.
For example, if the IP address of your CDSM is 192.168.0.236, you can access it by entering http://192.168.0.236 in the address or location text box of your browser program.
The System Login page is displayed (see Figure 1-1).
Figure 1-1 CDSM Login Page
Step 6 ![]() Log in to the CDS manager GUI. Enter arroyo as the user name and admin as the password, and click Log In.
Log in to the CDS manager GUI. Enter arroyo as the user name and admin as the password, and click Log In.
If you are unable to log in with the user name arroyo and the password admin, log in to the CDE110 Linux command line, run the /home/stats/resetpw command, and log in to the CDS manager GUI again.
The VVIM Setup page or the CDSM Setup page is displayed.
Step 7 ![]() Select 3.X as the CServer Version.
Select 3.X as the CServer Version.
Step 8 ![]() Verify all the other configurations in the page and click Submit.
Verify all the other configurations in the page and click Submit.
Step 9 ![]() Use the VVIM GUI or CDSM GUI to complete the configuration.
Use the VVIM GUI or CDSM GUI to complete the configuration.
For more information, see one of the following:
•![]() For information about an ISA deployment, see the "Getting Started" chapter in the Cisco TV CDS 3.2 ISA Software Configuration Guide.
For information about an ISA deployment, see the "Getting Started" chapter in the Cisco TV CDS 3.2 ISA Software Configuration Guide.
•![]() For information about an RTSP deployment, see the "Getting Started" chapter in the Cisco TV CDS 3.2 RTSP Software Configuration Guide.
For information about an RTSP deployment, see the "Getting Started" chapter in the Cisco TV CDS 3.2 RTSP Software Configuration Guide.
Initially Configuring the CDE220, CDE250 and CDE420
To install the TV CDS software and initially configure the CDE220, CDE250 or CDE420 as a Vault, Caching Node, or Streamer, do the following:
Step 1 ![]() Log in to the CDE as root.
Log in to the CDE as root.
Step 2 ![]() Run the cdsconfig script. The script displays prompts with the default values in brackets. If a default value is correct, press Enter to accept the value; otherwise, enter the correct value and press Enter.
Run the cdsconfig script. The script displays prompts with the default values in brackets. If a default value is correct, press Enter to accept the value; otherwise, enter the correct value and press Enter.
[root]# cdsconfig
ATTENTION!!!
If a new image is installed on this server, a reboot is required before running cdsconfig.
If a reboot is already performed, please continue.
Otherwise, please exit and execute cdsconfig after rebooting the server
Do you want to continue ? (yes/no) [y]: y
Enter management interface [eth0]: Enter
Please ensure an IP address and netmask are configured for management interface eth0:
Select an option or an interface to re-configure/disable:
1. eth0 ip:172.22.99.237 mask:255.255.254.0 bcast:172.22.99.255
2. Configure another interface
3. Done
Choice [3]: 1
Do you want to disable interface eth0? (yes/no) [y]: n
Enter the IP address for eth0 [172.22.99.238]: Enter
Enter the netmask for eth0 [255.255.254.0]: Enter
Enter the broadcast address for eth0[172.22.99.255]: Enter
Select an option or an interface to re-configure/disable:
1. eth0 ip:172.22.99.238 mask:255.255.254.0 bcast:172.22.99.255
2. Configure another interface
3. Done
Choice [3]: 3
Backing up old scripts in /etc/sysconfig/network-scripts
Writing new ifcfg-ethX scripts
Enter a hostname [cdsm162]: Enter
Enter the number of the eth interface that connects to the gateway [0]: Enter
Enter the default gateway IP address [172.22.97.129]: Enter
Backing up /etc/sysconfig/network
Writing new /etc/sysconfig/network
Backing up /etc/hosts
Writing new /etc/hosts
Shutting down interface eth0: [ OK ]
Shutting down loopback interface: [ OK ]
PCI: Enabling device 0000:0e:00.0 (0000 -> 0003)
PCI: Enabling device 0000:0e:00.1 (0000 -> 0003)
Restarting network services, this may take a minute:
Shutting down loopback interface: [ OK ]
Bringing up loopback interface: [ OK ]
Bringing up interface eth0: [ OK ]
Network services restarted; may take a few seconds to establish connectivity
Reboot for hostname changes to take effect
Network configuration complete
Please choose your platform from the following list of valid platforms:
1. 2U-SCSI-1
2. 3U-SCSI-1
3. 3U-SCSI-10
.........
15. CDE100-2C-1
16. CDE110-2C-1
17. CDE205-1C1-C
18. CDE220-2A-C
.........
Choice [16]: Enter
Please select a device role:
1. ssv
2. vault
3. streamer
4. cache
5. controller
Choice: device_role
Please enter a group ID: 12345
Please enter a server ID [62]: 162
Note ![]() If the device role selected is a option 3 (Streamer), the cdsconfig script displays the following questions:
If the device role selected is a option 3 (Streamer), the cdsconfig script displays the following questions:
Is this server going to get added to a Stream Domain in a CDN Split Domain Management
Environment? (yes/no) [y]: y
Is this Stream Domain going to use CCP as Cache Fill Protocol? (yes/no) [y]: y
Enter the IP address of the Stream Manager:
For Streamers in a VVI using CCP, the Streamer communicates with the Stream Manager to get a server ID. If the Streamer is unable to connect to the Stream Manager, the Stream Manager administrator can manually generate the server ID and send the information to the Streamer installer for manual entry.
For more information, see the "Identifying Server IDs and Group IDs for VVI with Split-Domain Management" section in the Cisco TV CDS ISA 3.2 Software Configuration Guide or the Cisco TV CDS RTSP 3.2 Software Configuration Guide.
Note ![]() If the device role is a Streamer, you have the option to enter the Stream Control interface using the cdsconfig script, or later through the CDSM GUI.
If the device role is a Streamer, you have the option to enter the Stream Control interface using the cdsconfig script, or later through the CDSM GUI.
Writing new configuration to /home/isa/.arroyorc
No existing replication group information found
Do you want to configure replication group members now? (yes/no) [y]: y
There are currently no replication group members.
Do you want to add another replication group member? (yes/no) [y]: y
Select a role for the new replication group member:
1. ssv
2. vault
3. streamer
4. cdsm
5. cache
Choice: device_role
Enter an IP address for new CDS_device: IP_Address
Current replication group members: device_role IP_Address
Do you want to add another replication group member? (yes/no) [n]: n
Note ![]() For RTSP deployments, the cdsconfig script displays the following questions:
For RTSP deployments, the cdsconfig script displays the following questions:
Is this an NGOD deployment (yes/no):
Choose NPT Syntax:
1. NGOD
2. NGOD_SC
3. Standard
Choice [NGOD]:3
Writing /home/isa/bss/scripts/arroyo-env.sh
Writing /home/isa/bss/scripts/arroyo-site-env.sh
Setting attributes for AVSRTSPServer
Do you want to enable Redirect Server ? (yes/no) [y]: n
Do you want to enable Authentication Server ? (yes/no) [y]: n
Is this node getting added to an existing deployment? (yes/no) [y]: n
Started avsdb, verify with "arroyo status"
Starting statsd
Run svrinit to seed database? (yes/no) [n]: y
Running svrinit
Note ![]() Always select yes because you must seed the database whenever you add a new CDE to a network. You are asked to enter the IP address, netmask, hostname, and gateway for the CDE you are configuring. These are the same parameters you entered when you started running this script.
Always select yes because you must seed the database whenever you add a new CDE to a network. You are asked to enter the IP address, netmask, hostname, and gateway for the CDE you are configuring. These are the same parameters you entered when you started running this script.
Please enter an IP address for svrinit: mgmt_ip_address
Please enter a netmask for svrinit: mgmt_netmask
Please enter a hostname for svrinit: hostname
Please enter a gateway for svrinit gateway
Note ![]() If you receive an error message indicating the database is unavailable and cannot be set up, enter the following commands to initialize the database tables for a CDS server in an ISA environment:
If you receive an error message indicating the database is unavailable and cannot be set up, enter the following commands to initialize the database tables for a CDS server in an ISA environment:
[root]# su - isa
[isa]# exit
[root]# /home/stats/svrinit_15 -h <hostname> -i <ip address> -s <mask-ip address> -g
<gateway>
Enter the following commands to initialize the database tables for a CDS server in an RTSP environment:
[root]# su - isa
[isa]# arroyo start avsdb
[isa]# exit
[root]# /home/stats/svrinit_15 -h <hostname> -i <ip address> -s <mask-ip address> -g
<gateway>
Note ![]() For ISA deployments, the cdsconfig script displays the following question:
For ISA deployments, the cdsconfig script displays the following question:
Is this an IPTV deployment with Dual CAS? (yes/no) [n]:Enter
Writing rc.local
ISA ecosystem configuration finished
cdsconfig finished, please use CDSM to complete configuration
[root@v238 ~]#
Step 3 ![]() Verify connectivity to the CDSM by logging in to the CDSM GUI.
Verify connectivity to the CDSM by logging in to the CDSM GUI.
The System Health Monitor page is displayed, showing the devices and their IP address (see Figure 1-2).
Figure 1-2 System Health Monitor Page
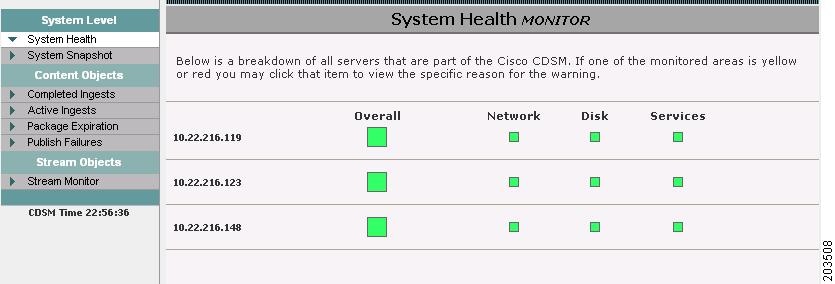
The TV CDS installation is complete.
Step 4 ![]() To complete the server configuration, log in to the CDSM GUI and go through the Configure > Server Level pages for the new server.
To complete the server configuration, log in to the CDSM GUI and go through the Configure > Server Level pages for the new server.
Note ![]() In RTSP deployments, if you need to enable the Redirect Server in Release 3.2.1, run the cdsconfig script and answer yes (Y) at the following prompt:
In RTSP deployments, if you need to enable the Redirect Server in Release 3.2.1, run the cdsconfig script and answer yes (Y) at the following prompt:
Do you want to enable Redirect Server ? (yes/no) [y]
 Feedback