- Preface
- Information About the Cisco WebEx Enabled TelePresence Feature
- First-Time Configuration Checklist
- Configuring Cisco MCU and TelePresence Server
- Configuring Call Control
- Configuring Certificates on Cisco VCS Expressway
- Configuring Cisco TelePresence Management Suite
- Configuring Cisco TelePresence Management Suite Extension for Microsoft Exchange
- Configuring Cisco TelePresence Management Suite Provisioning Extension
- Configuring Audio
- Integrating Cisco TelePresence with Your Cisco WebEx Site Administration Account
- Scheduling Cisco WebEx Enabled TelePresence Meetings
- Troubleshooting
Configuring Cisco TelePresence Management Suite Extension for Microsoft Exchange
Contents
This chapter describes how to configure Cisco TelePresence Management Suite Extension for Microsoft Exchange (Cisco TMSXE) for scheduling of Cisco WebEx Enabled TelePresence meetings using the WebEx and TelePresence Integration to Outlook and WebEx Scheduling Mailbox. It contains the following sections:
Prerequisites
- Cisco TMSXE software release 3.1 or later is required.
- Cisco TMS software release 14.2 or later is required.
- Endpoints that are available as mailboxes for booking in a Cisco WebEx Enabled TelePresence meeting must be set to AutoAccept in Exchange.
- If a meeting organizer is scheduling a meeting in a different domain than the domain in which the TMSXE is hosted, The domain in which the TMSXE resides must be added to the list of sites in the ‘Local intranet' zone on the meeting organizer’s computer, so that it trusts the TMSXE server. If the TMSXE is hosted in a domain that is outside of the domain of many or all users, this can be done most efficiently by your company’s IT group for all users via a group policy or logon script. If this is not done, each time a user tries to schedule a meeting, they will be required to enter their TMSXE username and password.
- A signed certificate that is trusted in the organization is required for TMSXE. To do this, you must generate a certificate signing request (CSR) from IIS to provide to the certificate authority (CA). The certificate can be a self-signed certificate or come from a trusted internal certificate authority or public certificate authority.
Deployment Best Practices
Cisco recommends installing Cisco TMSXE on a standalone server.
Cisco TMSXE may be co-located with Cisco TMS in smaller deployments, with the following prerequisites:
- The server must have a minimum of 4GB RAM.
- A maximum of 50 telepresence endpoints are available for booking in Cisco TMS and Cisco TMSXE.
- For details on installation and configuration of TMSXE, refer to the Cisco TelePresence Management Suite Extension for Microsoft Exchange Installation Guide - Version 3.1.2
Scheduling Options with TMSXE
With TMSXE, there are two options for scheduling:
–![]() Using the WebEx Productivity Tools Plug-In for Microsoft Outlook
Using the WebEx Productivity Tools Plug-In for Microsoft Outlook
You add WebEx to your meeting using WebEx Meeting Options panel in Microsoft Outlook.
–![]() Using WebEx Scheduling Mailbox
Using WebEx Scheduling Mailbox
You add WebEx to your meeting invitation directly from your email client by including a special invitee; the WebEx mailbox.
Configuring Cisco TMSXE for the WebEx and TelePresence Integration to Outlook
To configure Cisco TMSXE for scheduling using the WebEx and TelePresence Integration to Outlook, you must perform the following tasks:
Installing the Cisco TMS Booking Service
To allow WebEx Productivity Tools with TelePresence to communicate with Cisco TMSXE you must have Booking Service installed.
If you did not include the proxy during initial installation, do the following:
Step 1![]() On the Cisco TMSXE server, go to the Control Panel.
On the Cisco TMSXE server, go to the Control Panel.
Step 2![]() Right-click Cisco TelePresence Management Suite Extension for Microsoft Exchange and select Change.
Right-click Cisco TelePresence Management Suite Extension for Microsoft Exchange and select Change.
This starts the installer and allows you to change your installation.
Step 3![]() Follow all instructions provided by the installer and opt to include Cisco TMS Booking Service.
Follow all instructions provided by the installer and opt to include Cisco TMS Booking Service.

Note![]() Installing the Booking Service forces a restart of IIS.
Installing the Booking Service forces a restart of IIS.
Configuring IIS for HTTPS
Booking Service requires HTTPS to be configured for DefaultSite in IIS.
If IIS is not present on the server prior to installation of Cisco TMSXE, it will be automatically installed with Booking Service. HTTPS must then be configured after installation to allow Booking Service to operate.
For more information, refer to the Microsoft Support article: How To Set Up an HTTPS Service in IIS.

Warning![]() In the IIS configuration detailed in the link above, you must make the following setting for users to schedule meetings with the WebEx and TelePresence Integration to Outlook plug-in for Microsoft Outlook: In the “SSL Settings” configuration for “Client certificates”, you must select “Ignore”. If you do not, users will receive a “hit a glitch” message when scheduling meetings using the WebEx and TelePresence Integration to Outlook Plug-In for Microsoft Outlook.
In the IIS configuration detailed in the link above, you must make the following setting for users to schedule meetings with the WebEx and TelePresence Integration to Outlook plug-in for Microsoft Outlook: In the “SSL Settings” configuration for “Client certificates”, you must select “Ignore”. If you do not, users will receive a “hit a glitch” message when scheduling meetings using the WebEx and TelePresence Integration to Outlook Plug-In for Microsoft Outlook.
Configure Server Certificate
On the windows server on which TMSXE is running, you must load a server certificate within IIS.
The process involves generating a certificate signing request (CSR), which is sent to a certificate authority (CA), and then installing the signed certificate you receive from the CA.
Generating a CSR for IIS 7 (Windows Server 2008):
Step 1![]() Open the Server Manager console (Start > All Programs > Administrative Tools > Server Manager).
Open the Server Manager console (Start > All Programs > Administrative Tools > Server Manager).
Step 2![]() In the Role View, select IIS Manager (Server Manager > Roles > Web Server > IIS Manager).
In the Role View, select IIS Manager (Server Manager > Roles > Web Server > IIS Manager).
Step 3![]() Double-click Server Certificates.
Double-click Server Certificates.
Step 4![]() In the Actions pane on the right, click Create Certificate Request.
In the Actions pane on the right, click Create Certificate Request.
Step 5![]() (Important) In the “Common Name:” field, enter the Fully Qualified Domain Name (FQDN) of the DNS name which users will type into the address bar in their browser to reach your website (site.cisco.com NOT site). If you have a different physical hostname than what users will type into their browsers to get to your site, make sure to put in the name users will use.
(Important) In the “Common Name:” field, enter the Fully Qualified Domain Name (FQDN) of the DNS name which users will type into the address bar in their browser to reach your website (site.cisco.com NOT site). If you have a different physical hostname than what users will type into their browsers to get to your site, make sure to put in the name users will use.
Step 6![]() In the “Organization” field, type your organization name.
In the “Organization” field, type your organization name.
Step 7![]() In the “Organizational Unit” field, type the name of your organization and click Next.
In the “Organizational Unit” field, type the name of your organization and click Next.
Step 8![]() In the “City/locality” field, type the city where the server resides and click Next.
In the “City/locality” field, type the city where the server resides and click Next.
Step 9![]() In the “State/province” field, type the state where the server resides.
In the “State/province” field, type the state where the server resides.
Step 10![]() In the “Country/Region” field, select US (United States) and click Next.
In the “Country/Region” field, select US (United States) and click Next.
Step 11![]() Leave the CSP at the default value.
Leave the CSP at the default value.
Step 12![]() For the “Bit Length”, select 2048.
For the “Bit Length”, select 2048.
Step 13![]() Enter (or Browse to) a filename to save the certificate request (CSR), click Finish.
Enter (or Browse to) a filename to save the certificate request (CSR), click Finish.
Step 14![]() Copy and paste the entire contents of the CSR file you just saved.
Copy and paste the entire contents of the CSR file you just saved.
The default save location is C:\.
Step 15![]() Provide the CSR file to your CA and wait for them to send a signed certificate back to you.
Provide the CSR file to your CA and wait for them to send a signed certificate back to you.
Installing the Public Root Certificate in IIS7 (Windows Server 2008):
Step 1![]() Double-click the Root CA certificate file and click Install Certificate.
Double-click the Root CA certificate file and click Install Certificate.
Step 2![]() Click Next, place the radio button in Place all certificates in the following store and then click Browse.
Click Next, place the radio button in Place all certificates in the following store and then click Browse.
Step 3![]() Place a check in Show Physical Stores .
Place a check in Show Physical Stores .
Step 4![]() Expand the Trusted
Expand the Trusted![]() Root Certification Authorities folder, select the Local Computer folder, and click OK.
Root Certification Authorities folder, select the Local Computer folder, and click OK.
Step 5![]() Click Next and then Finish. You will receive the message: “The import was successful”.
Click Next and then Finish. You will receive the message: “The import was successful”.
Installing the Intermediate CA certificate (if applicable):
Step 1![]() Double-click the Intermediate CA certificate file and click Install Certificate.
Double-click the Intermediate CA certificate file and click Install Certificate.
Step 2![]() Click Next, place the radio button in Place all certificates in the following store and then click Browse.
Click Next, place the radio button in Place all certificates in the following store and then click Browse.
Step 3![]() Place a check in Show Physical Stores.
Place a check in Show Physical Stores.
Step 4![]() Expand the Intermediate Certification Authorities folder, select the Local Computer folder, and click OK.
Expand the Intermediate Certification Authorities folder, select the Local Computer folder, and click OK.
Step 5![]() Click Next and then Finish. You will receive the message: “The import was successful”.
Click Next and then Finish. You will receive the message: “The import was successful”.
Installing your SSL server certificate:
Step 1![]() In the IIS Manager console, go to the Server Certificates action pane, and click Complete Certificate Request. The Complete Certificate Request Wizard appears.
In the IIS Manager console, go to the Server Certificates action pane, and click Complete Certificate Request. The Complete Certificate Request Wizard appears.
Step 2![]() Browse to the location where you saved your SSL server certificate, select it, then click Open.
Browse to the location where you saved your SSL server certificate, select it, then click Open.
Step 3![]() Enter a friendly name for your certificate (use the certificate's hostname if you're unsure). Then click OK.
Enter a friendly name for your certificate (use the certificate's hostname if you're unsure). Then click OK.
At this point SSL is available for TMSXE. You will still need to configure the TMSXE or individual directories to use SSL.Select your IIS Site.
Step 4![]() In the action pane on the right, under Edit Site, click Bindings.
In the action pane on the right, under Edit Site, click Bindings.
Step 6![]() In the Type menu, select https.
In the Type menu, select https.
Step 7![]() In the SSL certificate menu, select your SSL certificate.
In the SSL certificate menu, select your SSL certificate.
Setting Up Communication Between Your WebEx Site and TMSXE
Follow the steps described in Cisco TelePresence Cisco WebEx Integration Options
Configuring the Location Displayed for TelePresence Rooms in Outlook
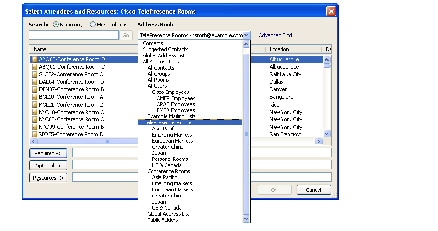
When selecting telepresence rooms while scheduling a WebEx Enabled TelePresence meeting in Outlook, the location of the room is displayed in the both the Select Attendees and Resources Address Book window (Figure 7-1), which is a standard part of Outlook, and the Select Telepresence Rooms window (Figure 7-2), which is displayed when using the WebEx and TelePresence Integration to Outlook.
- To display the Select Attendees and Resources Address Book window, click the To... button in the Meeting window.
Figure 7-1 Select Attendees and Resources - Address Book
- To display the Add Telepresence Rooms window, click the Add Telepresence Rooms button the Meeting Options pane.
Figure 7-2 Select TelePresence Rooms
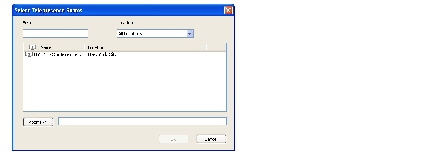
Location in the “Select Telepresence Rooms” window is read from Active Directory upon startup of TMSXE for the Active Directory accounts of the enabled mailboxes and is provided to the WebEx and TelePresence Integration to Outlook. It is a simple text field, and not structured data. The location information is the same as what is displayed in the “Location” column in the Microsoft Exchange Address Book, shown in Figure 7-1.
The structure and hierarchy displayed in the drop-down menu in the Exchange Address Book (Figure 7-1) is manually created by the Exchange administrator. This can be done by creating nodes, giving them a name and a search filter. A common use (besides geographical) is to structure the list using departments, groups or business units. For more information, refer to the documentation for Microsoft Exchange.
Installing the WebEx and TelePresence Integration to Outlook
Meeting organizers who want to schedule meetings using the WebEx and TelePresence Integration to Outlook plug-in, must download and install the WebEx Productivity Tools with TelePresence from your WebEx site. For details, refer to: Installing the WebEx and TelePresence Integration to Outlook of Chapter 10, “Integrating Cisco TelePresence with Your Cisco WebEx Site Administration Account”.
Configuring Cisco TMSXE for the WebEx Scheduling Mailbox
To configure Cisco TMSXE for scheduling using the WebEx Scheduling Mailbox, you must do the following procedures:
1.![]() Configure the WebEx mailbox in Microsoft Exchange.
Configure the WebEx mailbox in Microsoft Exchange.
2.![]() Add the WebEx mailbox to Cisco TMSXE.
Add the WebEx mailbox to Cisco TMSXE.
Configuring the WebEx Scheduling Mailbox in Microsoft Exchange
To configure the WebEx mailbox in Microsoft Exchange, use either Exchange Management Console or Powershell:
Step 1![]() Create a new user mailbox for your WebEx Scheduling Mailbox (example: webex@example.com).
Create a new user mailbox for your WebEx Scheduling Mailbox (example: webex@example.com).
For more information, refer to: Create a Mailbox (Exchange 2010 Help) or How to Create a Mailbox for a New User (Exchange 2007 Help).
Step 2![]() Give the EWS Service Account Full Mailbox Access to this mailbox.
Give the EWS Service Account Full Mailbox Access to this mailbox.
For more information, refer to: Allow Mailbox Access (Exchange 2010 Help) or How to Allow Mailbox Access (Exchange 2007 Help).
Step 3![]() Modify mailbox properties:
Modify mailbox properties:
a.![]() Turn off the Calendar Attendant for the mailbox.
Turn off the Calendar Attendant for the mailbox.
For more information, refer to: Configure User and Resource Mailbox Properties (Exchange 2010 Help) or How to Disable the Auto-Processing of Meeting Messages (Exchange 2007 Help).
b.![]() Make sure new requests are not automatically marked as tentative by disabling AddNewRequestsTentatively (Mark new meeting requests as Tentative) if using the Calendar Settings tab) for the mailbox.
Make sure new requests are not automatically marked as tentative by disabling AddNewRequestsTentatively (Mark new meeting requests as Tentative) if using the Calendar Settings tab) for the mailbox.
Adding the WebEx Mailbox to Cisco TMSXE
To add the WebEx Mailbox to Cisco TMSXE, do the following:
Step 1![]() Log in to the server on which TMSXE is installed.
Log in to the server on which TMSXE is installed.
Step 2![]() From the Windows task bar, select Start > All Programs > Cisco > TMSXE Configuration.
From the Windows task bar, select Start > All Programs > Cisco > TMSXE Configuration.
Step 3![]() If Cisco TMSXE is already running, a message appears indicating you must stop the Cisco TMSXE service to start the configuration tool. Click Stop Service.
If Cisco TMSXE is already running, a message appears indicating you must stop the Cisco TMSXE service to start the configuration tool. Click Stop Service.
The Cisco TMSXE Configuration window appears.
Step 4![]() Click the Exchange Web Services tab.
Click the Exchange Web Services tab.
Step 5![]() In the WebEx Scheduling Mailbox field at the bottom of the window, enter the email address of the WebEx mailbox you created in Microsoft Exchange.
In the WebEx Scheduling Mailbox field at the bottom of the window, enter the email address of the WebEx mailbox you created in Microsoft Exchange.
TMSXE validates the email address you provided and a message appears indicating your settings have been saved.
Additional Recommendations
Cisco also recommends using the following configurations for WebEx Scheduling Mailbox:
- Using Exchange Management Console Mail Flow Settings or Powershell, stricten the message delivery restrictions as needed.
For example, require senders to be authenticated, only allow from people in a specific group or similar.
For more information, refer to: Configure Message Delivery Restrictions (Exchange 2010 Help) or How to Configure Message Delivery Restrictions (Exchange 2007 Help).
See Disable or Enable a User Account for instructions.
 Feedback